28.05.2025
2 хв
1019

У цій частині серії про STM32 ми розглянемо налаштування CMake для Embedded-проєктів, що використовують мікроконтролери STM32. Цей підхід дозволяє розробникам обійти стандартні інструменти, як STM32CubeIDE, і створювати легкі, гнучкі збірки, що легко інтегруються у CI/CD-пайплайни та кросплатформенні середовища.
Раніше ми розглядали три найбільш поширені середовища розробки, з якими зазвичай стикаються новачки при роботі з мікроконтролерами STM32. Ці середовища не лише дозволяють писати програмний код у вікні редактора, але й забезпечують автоматичну збірку програми за допомогою однієї кнопки на панелі.
Усе, що відбувається всередині — автоматизовано: середовище саме підключає заголовкові файли, обробляє залежності, задає параметри компіляції, створює файл прошивки та навіть може одразу записати його в мікроконтролер. Цього разу ми звернемо увагу на те, як у реальній розробці в індустрії відбувається процес компіляції та збирання проєктів — без посередництва IDE та автоматичних налаштувань.
У жодній ІТ-компанії процес збирання програмного забезпечення не виконується вручну в IDE на комп’ютері найкращого розробника місяця. Замість цього використовується спеціальна система безперервної інтеграції, яка працює або у хмарному середовищі, або на внутрішніх серверах компанії.
Такі системи можуть запускати процес збирання (build) програм вручну або автоматично – наприклад, коли виявляють нові зміни в кодовій базі. Окрім цього, вони здатні виконувати інші дії до або після збирання, але саме процес збірки залишається їх основною функцією.
Зазвичай подібні системи мають веб-інтерфейс для зручного керування, проте насправді в основі вони просто запускають зовнішні утиліти, які вже безпосередньо виконують збірку прошивки.
У процесі збирання зазвичай використовуються такі інструменти, як CMake — генератор сценаріїв збірки, і, наприклад, Ninja — безпосередній білдер. Програми, написані на C або C++, спочатку проходять стадію компіляції, а потім з отриманих об’єктних файлів формується фінальний бінарний файл за допомогою лінкера (або компонувальника).
Якщо вам доводилося виконувати ці дії вручну на проєкті з понад десятьма файлами, то ви, ймовірно, бачили наскільки громіздкими є команди для компіляції та компонування (їх часто об’єднують під назвою “toolchain”). До того ж, навіть невеликі зміни в одному з файлів можуть призвести до тривалого повторного збирання всього проєкту.
Саме ці труднощі покликані вирішити CMake і Ninja. CMake — це інструмент, який дозволяє описати структуру проєкту, способи його збирання та використовувані інструменти. Адже просто наявності вихідного коду недостатньо, щоб визначити, яку програму потрібно зібрати. Наприклад, одна й та ж програма може бути призначена як для Windows, так і для мікроконтролера — проте процес її збирання буде зовсім іншим через відмінності в апаратній архітектурі.
CMake дозволяє задати, яку саме програму потрібно зібрати, якими засобами і з якими параметрами. Ninja ж, базуючись на цих інструкціях, виконує саму збірку. Існують також інші інструменти збирання, сумісні з CMake, але саме Ninja вважається найшвидшим серед них — саме тому він був обраний.
Нижче наведена блок-схема, яка демонструє повний процес збирання у контексті CI/CD.
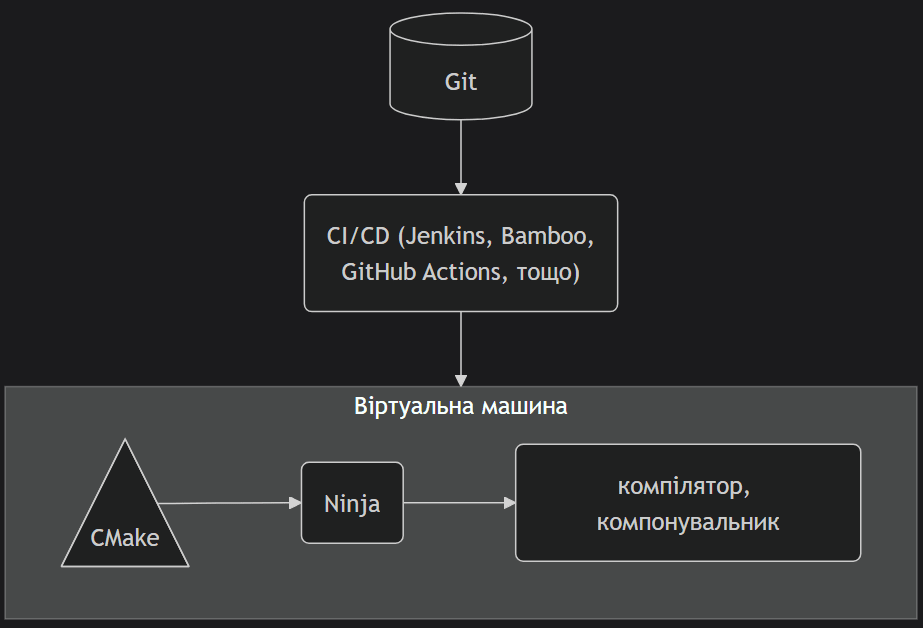
На перший погляд процес вище виглядає невиправдано ускладненим, але натомість надає гнучкості та автоматизації до процесу збірки. Кожен інструмент на блок-схемі виконує окрему функцію:
Git вміє автоматично сповіщати CI/CD систему про нові зміни в коді.
CI/CD запускає потужності (віртуальні машини), на яких далі буде відбуватися процес збірки.
CMake генерує файл-сценарій, за яким далі білдер буде виконувати збірку.
Білдер Ninja запускає компілятор і компонувальник за цим сценарієм.
Розглянемо лише 2 останні етапи, які можна спробувати в себе локально на комп’ютері. Візьмемо для прикладу мікроконтролер STM32G030F6P6 та просту blink програму. Отже, проєкт має 3 основні файли:
CMakeLists.txt – основний файл CMake
main.cpp – власне сама програма
STM32G0_toolchain.cmake – допоміжний файл CMake
cmake_minimum_required(VERSION 3.15)

set(CMAKE_TOOLCHAIN_FILE "STM32G0_toolchain.cmake")
set(CMAKE_EXPORT_COMPILE_COMMANDS ON)

project(blink LANGUAGES C CXX ASM)

# Source files
add_executable(${PROJECT_NAME}
  src/main.cpp
  stm32_g0_hal/Drivers/STM32G0xx_HAL_Driver/Src/stm32g0xx_hal.c
  stm32_g0_hal/Drivers/STM32G0xx_HAL_Driver/Src/stm32g0xx_hal_gpio.c
  stm32_g0_hal/Drivers/STM32G0xx_HAL_Driver/Src/stm32g0xx_hal_cortex.c
  stm32_g0_hal/Drivers/CMSIS/Device/ST/STM32G0xx/Source/Templates/system_stm32g0xx.c
  stm32_g0_hal/Drivers/CMSIS/Device/ST/STM32G0xx/Source/Templates/gcc/startup_stm32g030xx.s
)

# Directories with headers
target_include_directories(${PROJECT_NAME} PRIVATE
  include
  stm32_g0_hal/Drivers/CMSIS/Include
  stm32_g0_hal/Drivers/STM32G0xx_HAL_Driver/Inc
  stm32_g0_hal/Drivers/CMSIS/Device/ST/STM32G0xx/Include)

# Linker options
target_link_options(${PROJECT_NAME} PRIVATE
  -Wl,--start-group
  -Wl,--end-group
  -mcpu=cortex-m0
  -mthumb
  -static)

# Define compile options
target_compile_options(${PROJECT_NAME} PRIVATE
  -mcpu=cortex-m0
  -mthumb
  -Os
  -ffunction-sections # Place functions in separate sections
  -fdata-sections # Place data in separate sections
  -fno-exceptions # Disable exceptions for bare-metal code
)

# Define defines here
target_compile_definitions(${PROJECT_NAME} PRIVATE
  STM32G030xx # Define your G0 series MCU
)

# Convert .elf firmware to .bin after build
add_custom_command(TARGET ${PROJECT_NAME} POST_BUILD
  COMMAND ${CMAKE_OBJCOPY} -O binary ${PROJECT_NAME} ${PROJECT_NAME}.bin
)

# Print firmware Flash and RAM usage
add_custom_command(TARGET ${PROJECT_NAME} POST_BUILD
  COMMAND ${CMAKE_SIZE} ${PROJECT_NAME}
)
#include "stm32g0xx_hal.h"

extern "C" void SysTick_Handler(void);
void GPIO_PA4_Init();

int main() {
  HAL_Init();
  GPIO_PA4_Init();

  while (1) {
    HAL_GPIO_TogglePin(GPIOA, GPIO_PIN_4);
    HAL_Delay(100);
  }
  return 0;
}

void SysTick_Handler(void) { HAL_IncTick(); }

void GPIO_PA4_Init() {
  __HAL_RCC_GPIOA_CLK_ENABLE();
  GPIO_InitTypeDef GPIO_InitStruct = {0};
  GPIO_InitStruct.Pin = GPIO_PIN_4;
  GPIO_InitStruct.Mode = GPIO_MODE_OUTPUT_PP;
  GPIO_InitStruct.Pull = GPIO_NOPULL;
  GPIO_InitStruct.Speed = GPIO_SPEED_FREQ_LOW;
  HAL_GPIO_Init(GPIOA, &GPIO_InitStruct);
}
# Set the C and C++ standards
set(CMAKE_C_STANDARD 11)
set(CMAKE_CXX_STANDARD 17)

set(CMAKE_SYSTEM arm-cortex-m0plus)
set(CMAKE_SYSTEM_NAME Generic)
set(CMAKE_SYSTEM_PROCESSOR cortex-m0plus)

set(CMAKE_ASM_COMPILER arm-none-eabi-gcc)
set(CMAKE_C_COMPILER arm-none-eabi-gcc)
set(CMAKE_CXX_COMPILER arm-none-eabi-g++)
set(CMAKE_OBJCOPY arm-none-eabi-objcopy)
set(CMAKE_SIZE arm-none-eabi-size)

set(CMAKE_FIND_ROOT_PATH_MODE_PROGRAM NEVER)
set(CMAKE_FIND_ROOT_PATH_MODE_LIBRARY ONLY)
set(CMAKE_FIND_ROOT_PATH_MODE_INCLUDE ONLY)
set(CMAKE_FIND_ROOT_PATH_MODE_PACKAGE ONLY)

set(CMAKE_EXE_LINKER_FLAGS
  "-T ${CMAKE_CURRENT_SOURCE_DIR}/STM32G030F6PX_FLASH.ld -Wl,--gc-sections --specs=nano.specs"
  CACHE INTERNAL ""
)
Давайте коротко розглянемо деякі інструкції, використані в CMakeLists.txt файлі вище:
project – поверхнево описує проєкт – назва проєкту, використані мови програмування.
set – просто записує якесь значення в змінну, яка потім буде використана пізніше.
add_executable – оголошує назву бінарного файлу, який ми хочемо отримати і його c/cpp файлів.
target_include_directories – тут перечислюємо теки з хедерами.
target_link_options – перечислюємо потрібні нам параметри для лінкера.
target_compile_options – перечислюємо параметри для компілятора, наприклад для якої платформи компілювати.
target_compile_definitions – можна задати дефайни прямо тут, які будуть видимі в коді.
add_custom_command – можна викликати будь-яку іншу утиліту на різних етапах збірки.
Тестовий проєкт опублікований на GitHub. Структура файлів проєкту має такий вигляд:
blink                         - рут-тека проєкту
├── include                   - тека з власними хедерами
│   └── stm32g0xx_hal_conf.h  - хедер скопійований з stm32_g0_hal з налаштуваннями МК
├── src                       - основні сорс-файли тут
│   └── main.cpp              - сама блінк програма
├── stm32_g0_hal              - CMSIS та HAL драйвера
├── CMakeLists.txt            - власне головний файл CMake
├── STM32G030F6PX_FLASH.ld    - лінкер скрипт
└── STM32G0_toolchain.cmake   - додатковий файл CMake з описом тулчейну
Каталог stm32_g0_hal включає в себе CMSIS та HAL і підключений до проєкту у вигляді git-підмодуля, що посилається на офіційний репозиторій STMicroelectronics. Інформацію про використовуваний toolchain винесено до окремого файлу STM32G0_toolchain.cmake замість того, щоб розміщувати її безпосередньо в CMakeLists.txt, що зроблено для зручності.
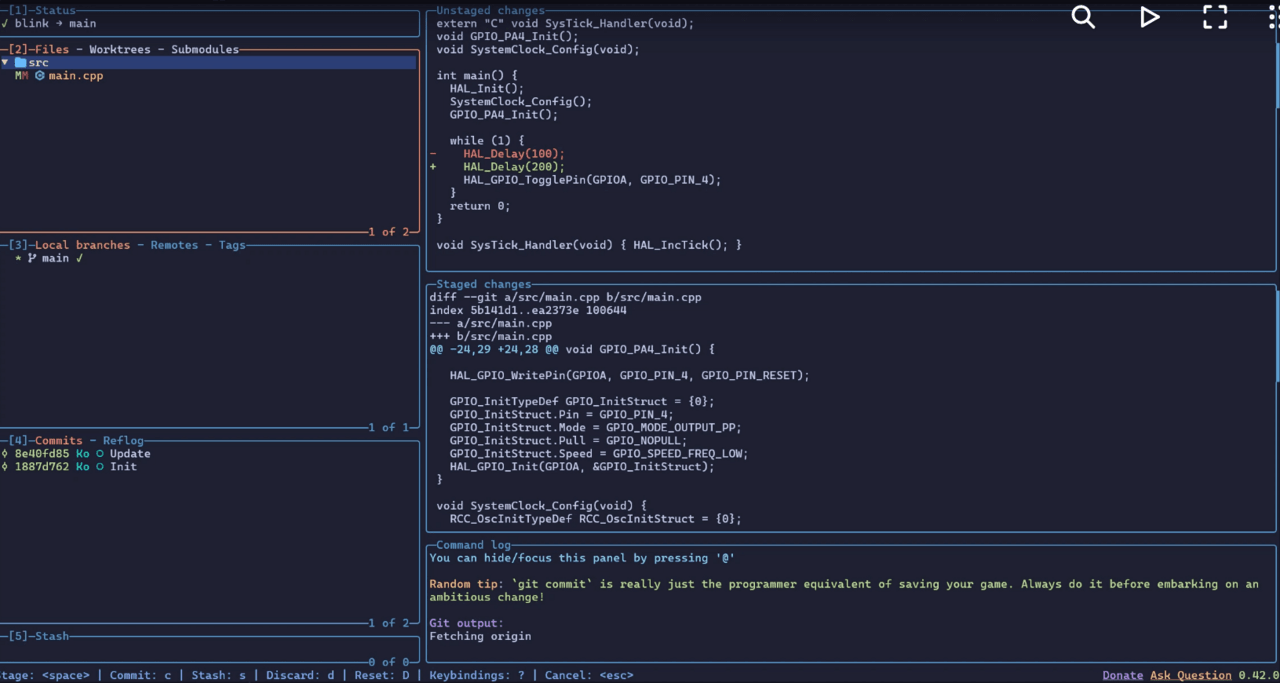
Як видно з відео, можна власноруч зібрати програму і завантажити її на мікроконтролер, не використовуючи графічну IDE. Причому для прикладу я спеціально обрав nvim в якості IDE, щоб продемонструвати як можна розробляти повністю в терміналі: редагувати код, збирати і завантажувати прошивку на МК.
Neovim є відгалуженням відомого консольного редактора vim, але вирізняється розширеною підтримкою плагінів, яких уже створено велику кількість завдяки активній спільноті. Завдяки цим плагінам базовий текстовий редактор набуває функціональності повноцінної IDE.
Для реалізації підсвічування синтаксису та зручної навігації в коді застосовується той самий підхід, що і в редакторі VS Code — протокол LSP (Language Server Protocol), який забезпечує взаємодію між середовищем розробки та окремим сервером аналізу коду. Цей протокол був створений Microsoft спеціально для VS Code, але завдяки вдалій архітектурі набув популярності і поза межами цього редактора.
Почати роботу з Neovim може бути навіть простіше, ніж із класичним vim, адже вже існують готові конфігурації з попередньо встановленими плагінами. Серед найвідоміших таких збірок — LazyVim і LunarVim, які надають користувачеві великий набір можливостей, подібних до тих, що пропонують традиційні графічні IDE.
Отже, ми з’ясували, що існують спеціальні інструменти, які спрощують процес збирання прошивки порівняно з прямим використанням тулчейну. Хоча для їх застосування потрібно краще розуміти, як саме працює процес компіляції та лінкування, натомість вони забезпечують високу гнучкість і швидкість.
Саме такі інструменти лежать в основі білд-систем, які застосовуються в ІТ-компаніях. Варто зазначити, що навіть середовища розробки також можуть використовувати подібні механізми збірки у фоновому режимі, а якщо цього не відбувається автоматично, то зазвичай є можливість вручну активувати таку опцію. Наприклад, у STM32CubeIDE є можливість створення проєкту з використанням CMake замість стандартного шаблону.
Посилання на першоджерело: https://solderkid-blog.netlify.app/stm32/neopixel