26.08.2024
2 min
1066

The article details the components required for the project, such as the HC-SR04 ultrasonic sensor, Arduino Nano, and LCD display. The principle of operation, the process of connecting components and firmware settings are described. Important tips for safe use of the equipment are also provided. The perfect project for Arduino beginners who want to build their own measuring tool.
Required components:
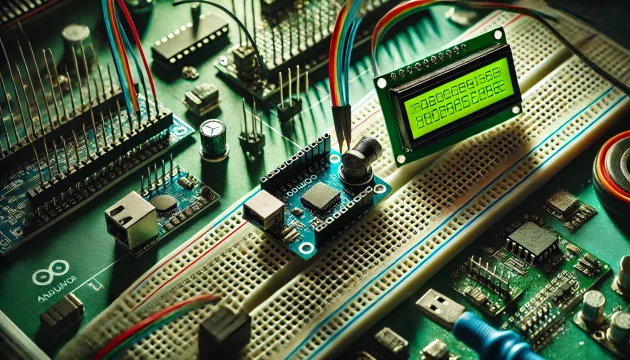
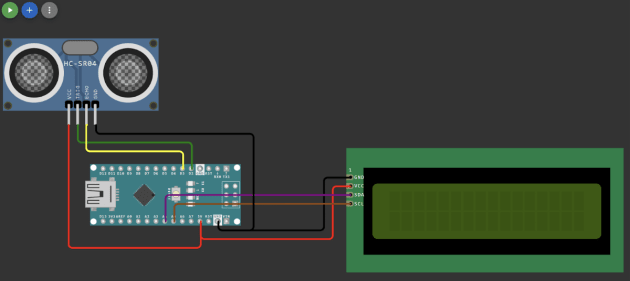
Схема підключення
Ultrasonic distance sensor HC-SR04
LCD 1602 I2C character display 16×2
Connect the Arduino via a USB cable to a computer or any other 5V source.
**If you do not have the Arduino IDE installed, I advise you to watch the video tutorial, which shows how to install and configure it. At this link you will find information on how to install the driver on the Arduino board.**
Download the firmware from this link and upload it to the Arduino according to the instructions above.
You need to flash the Arduino before connecting all the components. If batteries or other parts are connected to it during the firmware, you risk burning (literally) your computer and Arduino.
We hope that everything worked out for you! The sensor measures temperature and humidity, transmits this data to the Arduino, which in turn displays it on the display.
Disclaimer. This article is created for informational purposes only. All advice and instructions are provided for educational purposes and we are not responsible for any possible consequences related to the implementation of this project. Always use safety precautions when working with electronic components.
If you have any problems, you can contact us at [email protected].