
20.11.2024
4 min
978

Home Assistant on Raspberry Pi is a convenient and affordable solution for creating a smart home, but it often suffers from unstable operation due to microSD limitations, log accumulation, and system fatigue. In this article, we analyze the best practices for increasing the fault tolerance of Home Assistant: from switching to SSD and using an external database to configuring backups, temperature monitoring, and automatic reboots. Learn how to ensure a stable network, preserve data in the event of failures, and build a system that works 24/7 without failures. Real advice from the DOU forum — in a convenient format from an automation expert.

The most common problem that occurs with all single-board computers is a poor-quality power supply. The power supply should produce 5v and 2A, better 3. However, not all of them produce them.
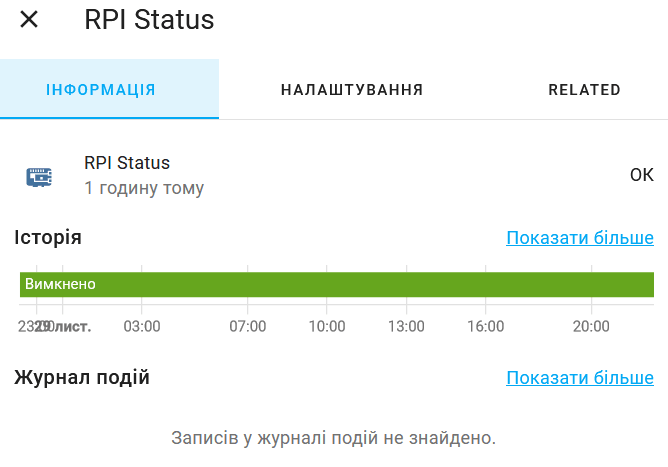
To detect poor-quality blocks on the Raspberry Pi, there is a separate element that works with the Raspberry Pi Power Supply Checker integration. If everything is fine with the block, the line in the history will be green, if there is a problem with the voltage, it will be red. If there is no power, after restarting the Raspberry will not show the red line.
Any unexpected power outage damages memory. This is also true for planned and emergency power outages. To solve this problem, you can use computer UPSs (some of them support monitoring);
Raspberry Pi UPS HAT, UPSHAT expansion boards or build your own
power bank with simultaneous charging and discharging (two-way);
5v modules from aliexpress for 18650;
Mini UPS 5/9/12v;
12v battery for UPS + UPS module + 5v converter, or HAT from 12 to 5v.
The last two options allow you to additionally power the router. Share in the comments what you use as a backup power source.
In single-payer devices, the disk is a MicroSD. Home Assistant constantly writes and reads data from the history, logbook, and recorder. Not all cards are designed for such a load. Such work leads to its wear, the server may not load. There are several ways to improve.
If possible, use an SSD instead of a MicroSD. It is faster, has greater write resistance, and is less likely to be damaged. Migration instructions.
You can also use a durable memory card optimized for frequent writing and reading:
Samsung PRO Endurance;
SanDisk MAX ENDURANCE;
cards of class A2;
As for capacity, it makes sense to get 32 GB or more. If performance problems already arise, it will not be superfluous to format the card, for example, using SD Memory Card Formatter. Don’t forget to make a backup copy and save it in another location.
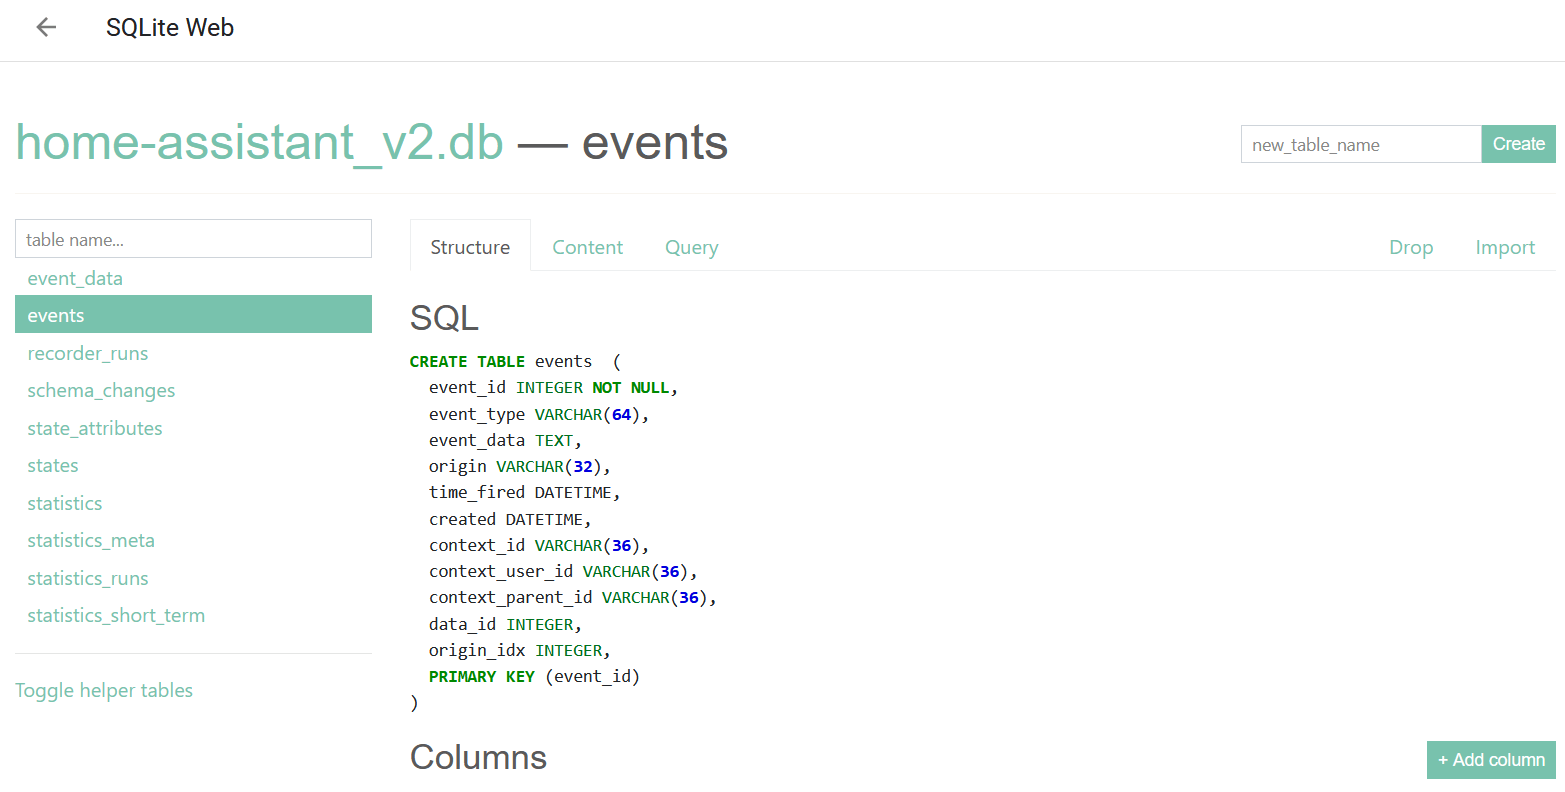
Home Assistant uses a SQLite database to store events and history. It is located at config/home-assistant_v2.db. After a few months of adding integrations and devices, the database grows significantly. SQLite reads and writes more data. This slows down Home Assistant.
You can view the database size using
— the Samba application;
— enter the command in the terminal:
du -h /config/home-assistant_v2.db;
— add the File Size integration by specifying the path /config/home-assistant_v2.db;
Then add the sensor to Lovelace. If you get the error Filepath /config/home-assistant_v2.db is not valid or allowed, allow the directory to be used by adding the following lines to configuration.yaml:
homeassistant:
  allowlist_external_dirs:
    - /config
To find out which entities are taking up the most space, you need to run a SQL query. To do this, you need to install the SQLite Web plugin.
In the SQLite interface, there are many tables on the left, two of which are relevant:
states a log of all states for all entities.
events a log of all events.
To see which type of events are used the most, on the Query tab, run the query:
SELECT
  COUNT(*) as cnt,
  SUM(LENGTH(event_data)) as bytes,
  event_type
FROM events
GROUP BY event_type
ORDER BY cnt DESC
The cnt column will show the number of events in descending order.
To see which sensor type is used the most, run the query:
SELECT
  COUNT(*) AS cnt,
  COUNT(*) * 100 / (SELECT COUNT(*) FROM states) AS cnt_pct,
  SUM(LENGTH(attributes)) AS bytes,
  SUM(LENGTH(attributes)) * 100 / (SELECT SUM(LENGTH(attributes))  FROM states) AS bytes_pct,
  entity_id
FROM states
GROUP BY entity_id
ORDER BY cnt DESC
Analyze the results. Most likely, the first few entities will be a quarter of the size of the table. Consider whether they are necessary.
Now that you know the largest events and entities, you can filter them by adding the following configuration to configuration.yaml:
recorder:
  exclude:
    domains:
      - device_tracker
      - media_player
      - worldclock
    entity_globs:
      - sensor.clock*
      - sensor.date*
      - sensor.glances*
    entities:
      - camera.front_door
      - sensor.home_assistant_v2_db
      - sensor.memory_free
By default, events are recorded every second! To reduce memory usage, you can increase the recording interval to 30 seconds or more:
recorder:
  commit_interval: 30
By default, the history in the database is stored for 10 days. To reduce this time, use the configuration:
recorder:
  purge_keep_days: 5
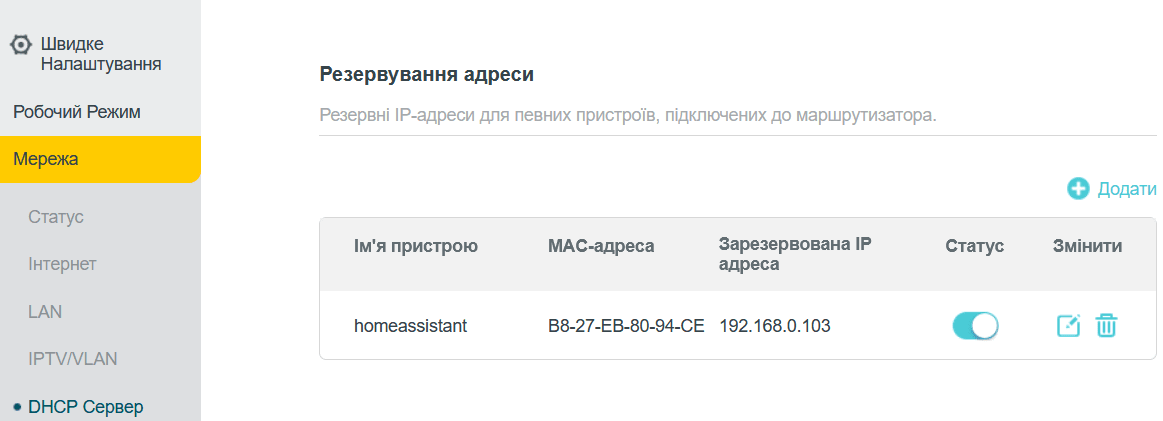
Home Assistant is available at homeassistant.local:8123/ You can also access it using a local address. To ensure that the address does not change over time, save it in your router’s web interface.
The highest stability can be achieved by connecting Home Assistant via cable. Using Wi-Fi is possible, but not recommended.
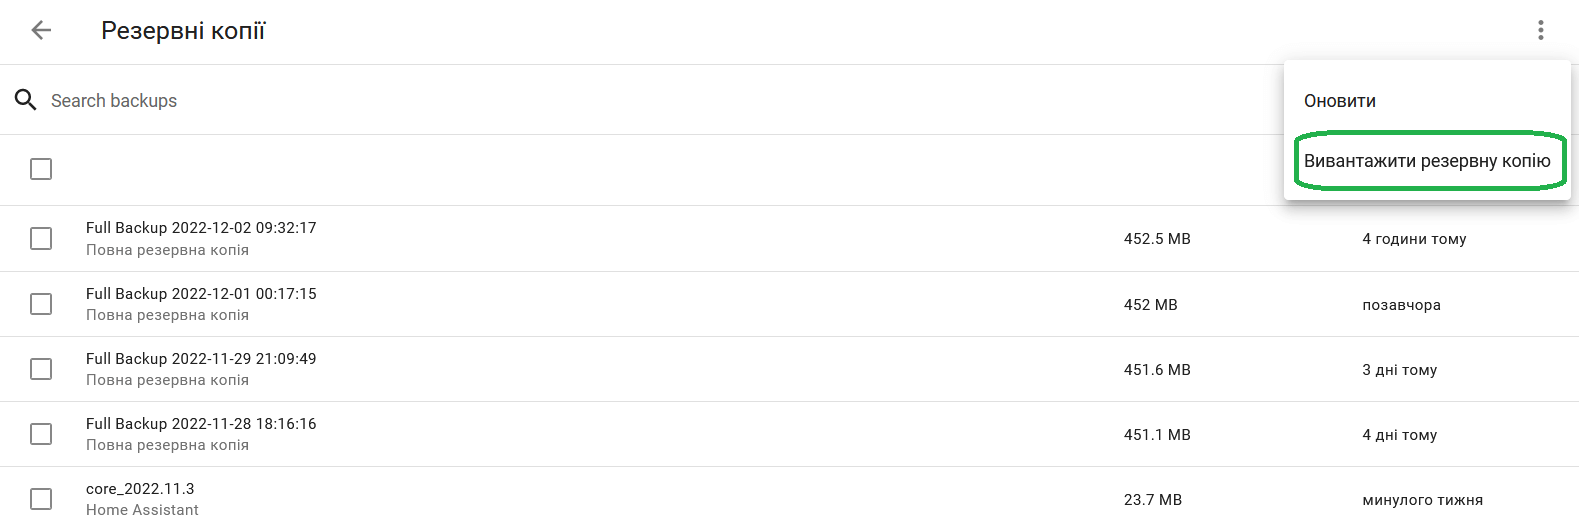
Home Assistant has a built-in backup tool. However, copies must be created manually. For convenient automatic creation, you can use Google Drive Backup (installation instructions).
To restore the system state, you can download a copy from Google Drive and restore it in the Configuration >> System >> Backups >> Upload backup. If you have problems with uploading, use the Google Chrome browser.
Devices that are constantly running can benefit from a periodic restart. To do this, in the Configuration >> Automations and Scenes section, you can create the following automation. It restarts Home Assistant every day at midnight:
alias: HA restart
description: ""
trigger:
  - platform: time
    at: "00:00:00"
condition:
  - condition: time
    weekday:
  	- mon
  	- tue
  	- wed
  	- thu
  	- fri
  	- sat
  	- sun
action:
  - service: homeassistant.restart
    data: {}
mode: parallel
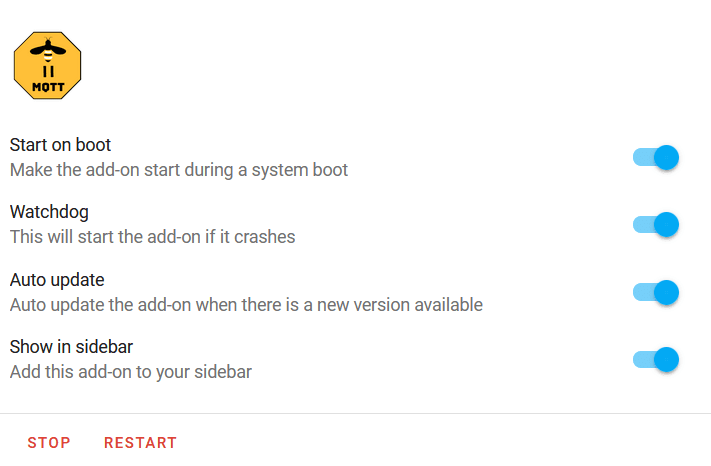
To ensure the reliability of installed applications, you can enable startup and Watchdog.
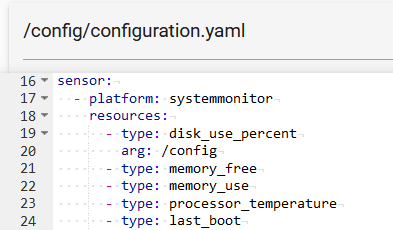
The systemmonitor integration allows you to monitor disk usage, RAM usage, CPU temperature and load, running processes, and network load. Unfortunately, it cannot be configured using the GUI, you need to add the configuration to configuration.yaml.
sensor:
  - platform: systemmonitor
    resources:
  	- type: disk_use_percent
    	arg: /config
  	- type: memory_free
  	- type: memory_use
  	- type: processor_temperature
  	- type: last_boot
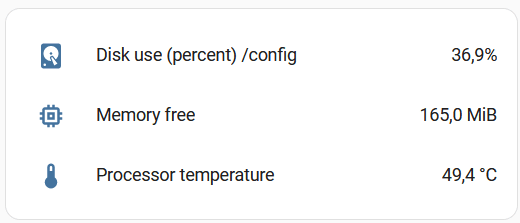
After that, you need to restart Home Assistant and add the card to Lovelace. For example, entities.
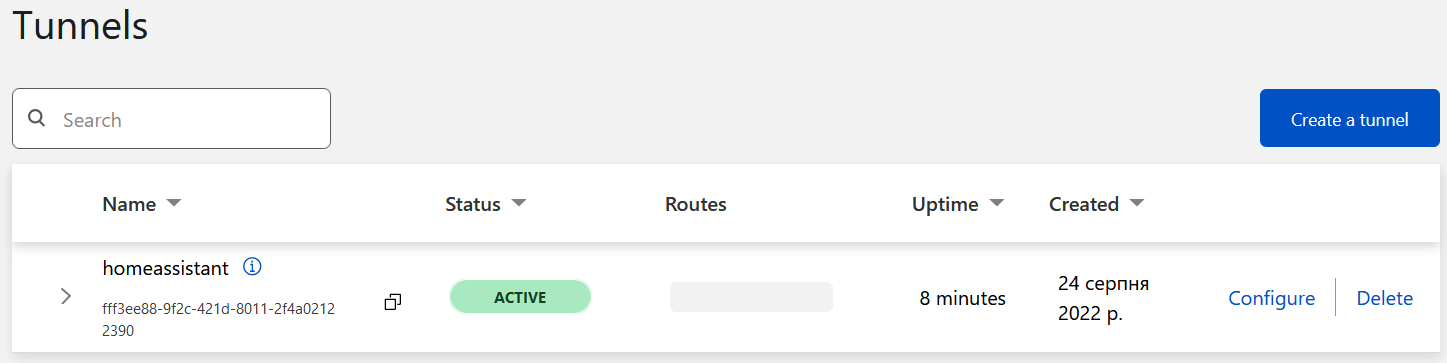
To check the availability of the Home Assistant server with the configured Cloudflared application, you can use the Zero Trust dashboard under Access >>Tunnels
If you use ping, the domain will always be available. You can get the status using a GET request in the format:
https://api.cloudflare.com/client/v4/accounts/{{account_id}}/cfd_tunnel/{{tunnel_id}}
You must also specify two headers:
X-Auth-Email is the email used to log in to Cloudflare;
X-Auth-Key is the Global API Key. You can find it in the Api Tokens section.
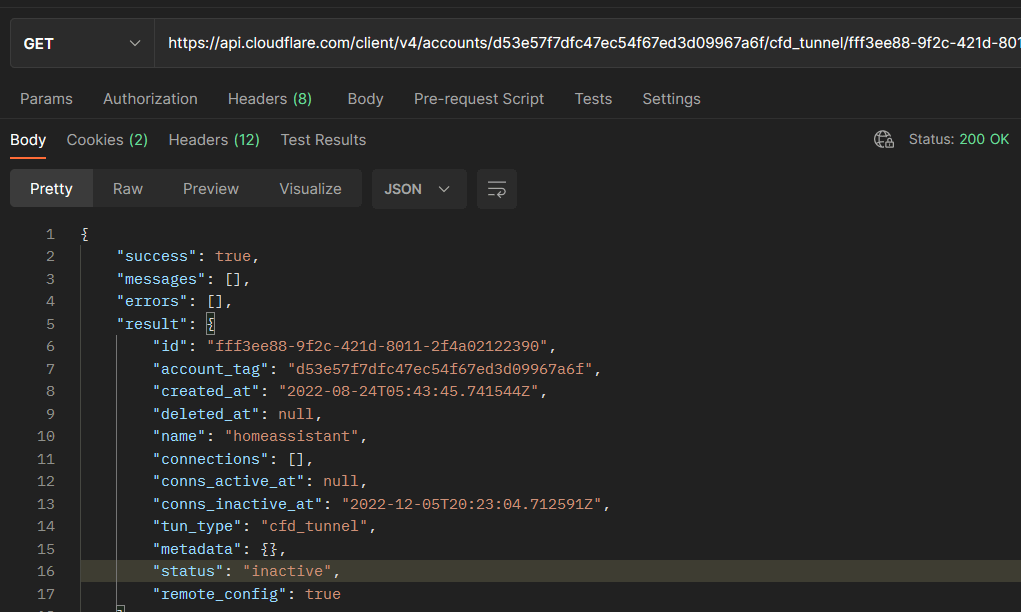
In my case, the request looks like this: https://api.cloudflare.com/client/v4/accounts/d53e57f7dfc47ec54f67ed3d09967a6f/cfd_tunnel/fff3ee88-9f2c-421d-8011-2f4a02122390
Documentation. List Cloudflare Tunnels section.
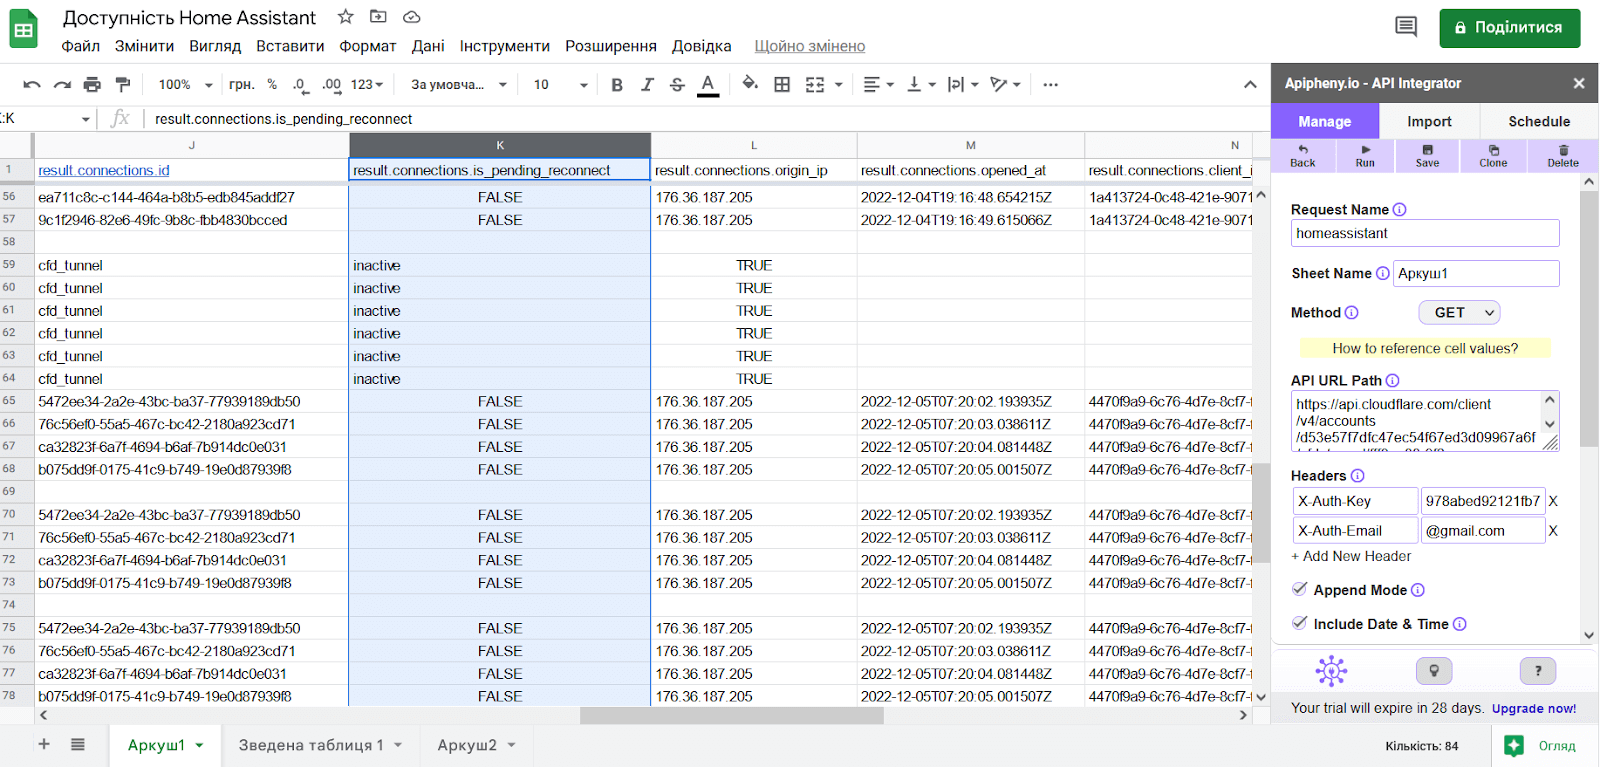
Requests can be sent using any convenient tool — Postman, Zapier, n8n, Apps Script. Here is an example of a request in Postman Online.
For example, you can send requests every hour and write to Google Sheets using the Apipheny.io add-on.
The connection status is shown in the result.connections.is_pending_reconnect column. If the tunnel is active, the status is FALSE, if inactive, it is inactive. The result.conns_inactive_at and result.conns_active_at columns show the time of the drop and recovery:
And then, based on this data, you can create a pivot table, an availability chart, create functions to calculate the % of uptime, physically restart the server using ESP, and much more.
Here is another example of Apps Script code that checks the availability of the tunnel every 5 minutes, enters the status and time into a Google spreadsheet, and notifies you by email when the tunnel is unavailable.
function checkTunnelAvailability() {
  var url = "https://api.cloudflare.com/client/v4/accounts/d53e57f7dfc47ec54f67ed3d09967a6f/cfd_tunnel/1668a6f5-708e-4189-9623-13b1f1cd6bd9";
  var options = {
     "async": true,
     "crossDomain": true,
     "method" : "GET",
     "headers" : {
       "X-Auth-Email" : "[email protected]",
       "X-Auth-Key": "543abed92128fb7f3036a76b1ebb61f21d3tf"
     }
  };
  var response = UrlFetchApp.fetch(url, options);
  var data = JSON.parse(response.getContentText());
  var status = data.result.status;
  var sheet = SpreadsheetApp.getActiveSheet();
  var date = new Date();
  var dateString = Utilities.formatDate(date, "GMT+2", "dd-MM-yyyy");
  var timestamp = Utilities.formatDate(date, "GMT+2", "dd-MM-yyyy HH:mm:ss");
  var sheetName = dateString;
  var sheetExists = false;
  var sheets = SpreadsheetApp.getActiveSpreadsheet().getSheets();
  for (var i = 0; i < sheets.length; i++) {
    if (sheets[i].getSheetName() == sheetName) {
      sheet = sheets[i];
      sheetExists = true;
      break;
    }
  }
  if (!sheetExists) {
    sheet = SpreadsheetApp.getActiveSpreadsheet().insertSheet(sheetName);
  }
  var row = sheet.getLastRow() + 1;
  sheet.appendRow([timestamp, status]);
  var cell = sheet.getRange(row, 2);
  if (status === "healthy") {
    cell.setBackground("#b7e1cd");
  } else {
    cell.setBackground("#ea9999");
  }
}
For stable operation of Home Assistant, it is important to take care of high-quality power supply, reliable storage and minimizing unnecessary entries in the database. Even small things like a cheap MicroSD or unstable Wi-Fi can break the entire system. If you configure everything correctly — with backup power, optimized database and monitoring — Home Assistant will work quietly, stably and without your intervention.