26.08.2024
2 min
1257

This approach allows you to build a powerful and reliable router for just $200, which is significantly cheaper than commercial solutions with similar functionality. We will tell the story of a guy from the USA who decided to build his own high-speed router after being disappointed with three previous models.
I was unhappy with my three previous routers. The first one was issued by my ISP—a white square box with no name or firmware updates. Its weak processor could handle no more than a few devices, which led to latency, lag, and high pings.
I bought a replacement WiFi 6 router and was happy for a while. That is, until cyber professionals started scolding me for choosing TP-Link.
While the cybersecurity community’s warnings about TP-Link were dramatic, they weren’t the reason I decided to switch. The nation-state wasn’t going to waste precious zero-day exploits on me, a casual home user.
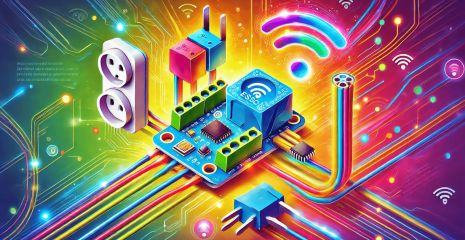
However, I wanted fast network-wide ad blocking (DNS filtering) and a fast VPN. I also want to separate my IoT devices and computers into separate subnets and have more controls that are often lacking in standard home routers. Oh, and security, too. For all of this, you need an advanced router and a firewall like pfSense.
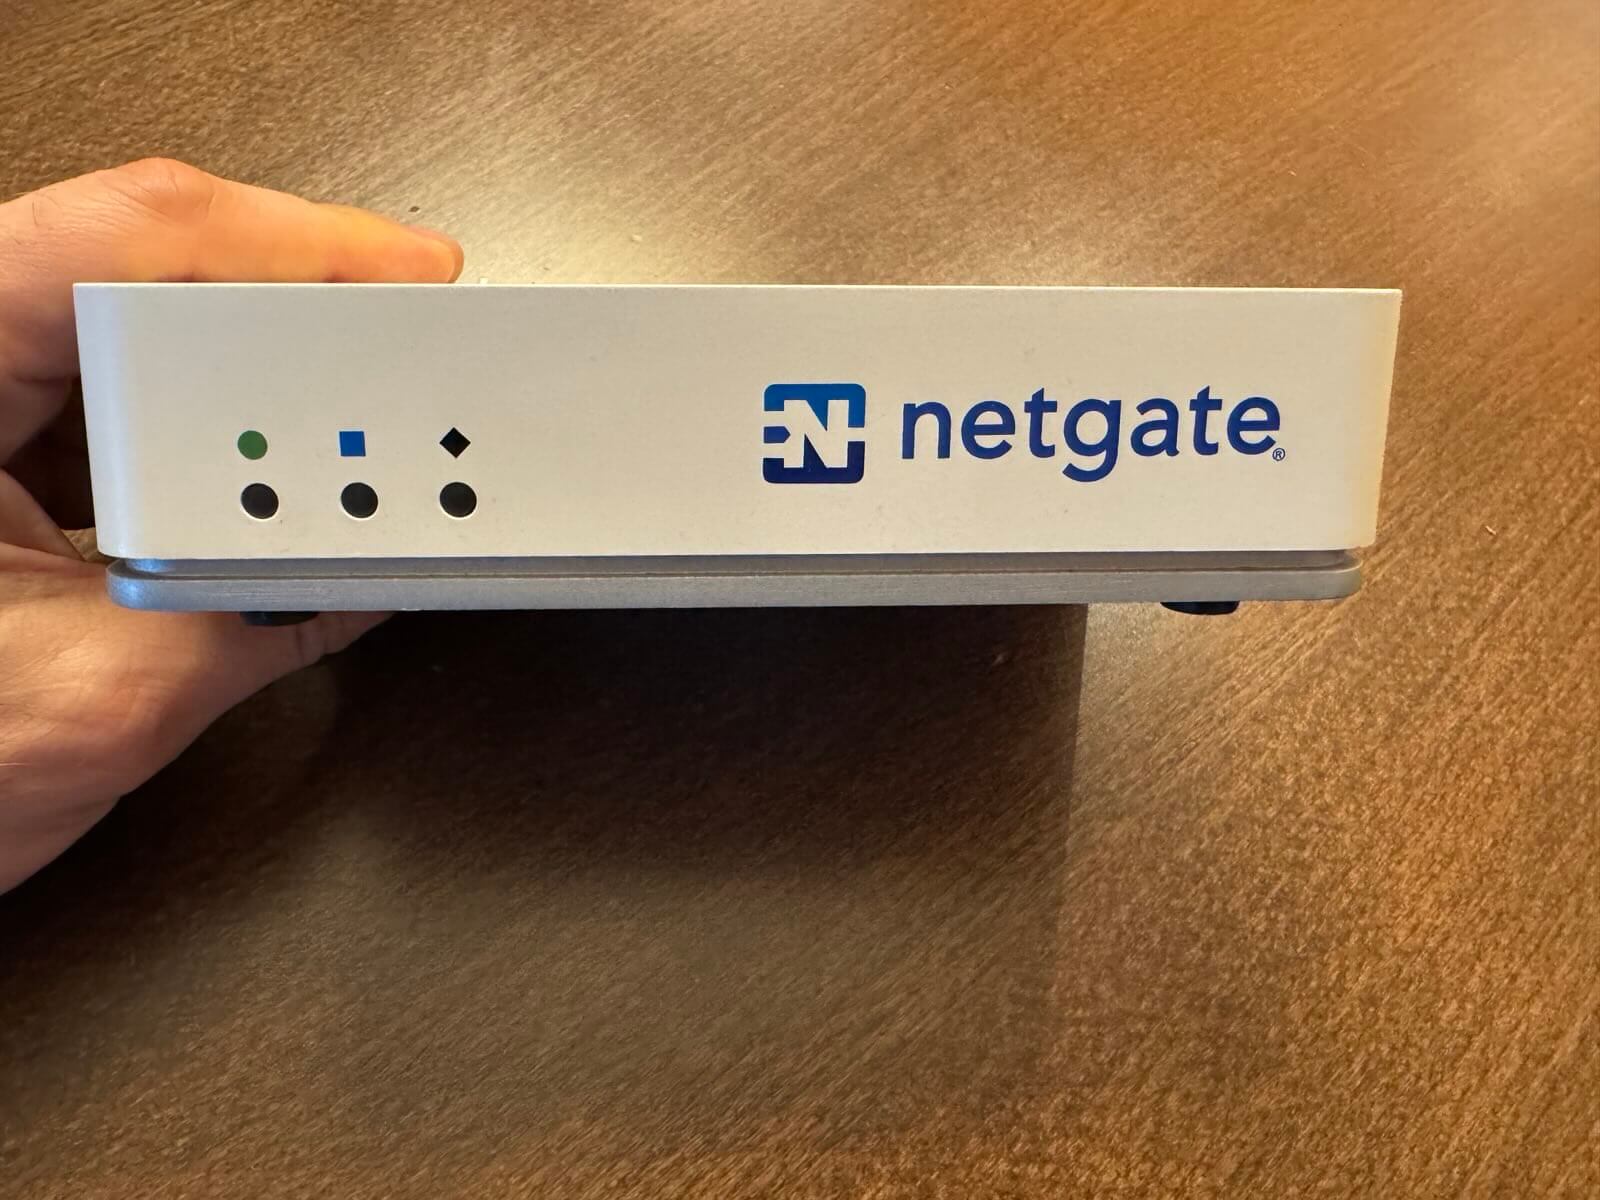
Without thinking twice, I grabbed a third router from the classifieds – a used Netgate 2100. I assumed that the device, which costs almost $400 new (even more in Europe), would definitely meet all my needs, since it even has an SFP port. How wrong I was.
It was even slower than my first router. The processor with only two ARM cores could not handle my 1 gigabit connection, providing only about 600-700 Mbps without any advanced features and packages that I would like to have.
That’s when I set myself the goal of creating a fast 2.5 Gbps router for less than $200. I wanted it to meet all the requirements: be compact and efficient, have reliable hardware, and have all the advanced features that a modern firewall has.
For me, the final assembly and installation took only 5% of the time. Most of it was spent researching all the available hardware options, analyzing spec lists, and tracking prices on Amazon and other sites.
I would never want to go down that rabbit hole again and would rather buy a more expensive ready-made solution.
As a beginner to building routers, you will consider the following options:
Cheap mini PCs (NUC clones) from China with two Ethernet ports. The cheapest ones often come with an Intel N100 processor, which is energy efficient and powerful enough, or with older Celerons. The downside is that the Ethernet ports are often Realtek, which does not work well with pfSense and other FreeBSD systems. These devices are also of questionable quality: plastic cases, noisy fans and still poor cooling, almost complete lack of support or BIOS updates, etc. And they are not cheap. These machines usually cost from $ 200.
Not so cheap firewalls from China. I would like Protectli, which seems to have excellent support, but the cheapest options cost well over $ 300. You just add some RAM and SSD, install and configure the software, and that’s it. There are other cheaper Chinese devices from TopTon, Glowary and others. While many users seemed happy with them, many also complained that the devices would shut down after a while for no reason.
A regular desktop PC. You could use any computer with a network interface card (NIC) or at least two Ethernet ports. But it’s a cumbersome solution, and I already had a separate PC that I hated.
Single-board computers. The ZimaBoard 2 seemed like the perfect fit for the job: up to 16GB of RAM, a powerful processor, and two Intel 2.5Gbps Ethernet ports. However, it was still affordable. The original ZimaBoard seemed too expensive for its low-end specs. Other single-board computers often add additional layers of complexity, requiring you to find a case, a cooling solution, or even soldering.
An old router supported by the open source software community. Some routers can be flashed with open source software like OpenWRT, but not mine, unfortunately. I haven’t really looked into this option, as stock routers often have poor performance.
That’s where 1-liter ultra-compact PCs come in. There’s a huge refurbished market that offers refurbished devices for very cheap. There are plenty of options from HP, Dell, or Lenovo, which are all trusted brands with business-class hardware and support, and plenty of spare parts if something goes wrong. I found that some of the Lenovo Tiny PCs were clearly better.
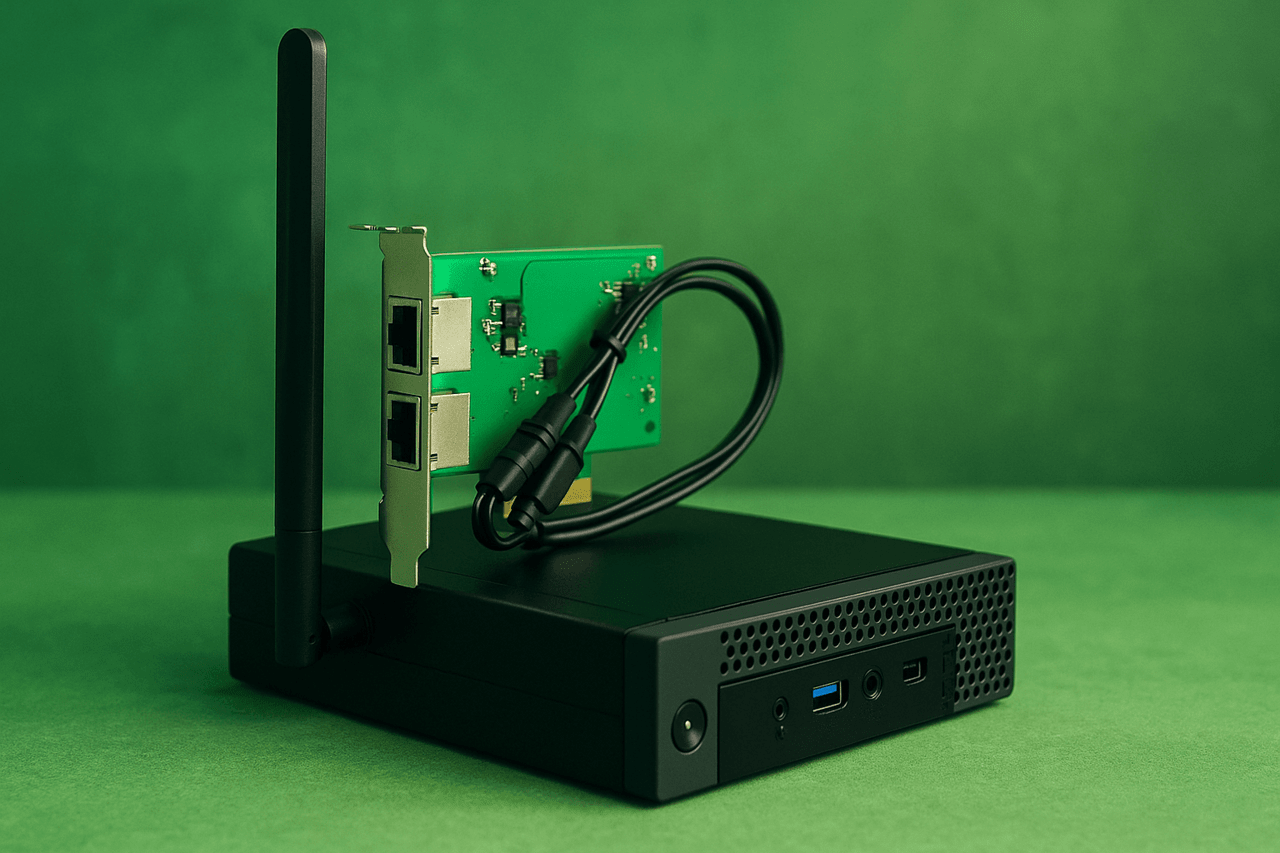
The short explanation is that some Lenovo Tiny PCs have a PCIe slot accessible via an optional PCIe riser. This makes building a router much easier – just buy the right network card and you’re all set for hardware. As far as I know, no other tiny PC or micro has such a slot.
These Lenovo ThinkCentre or ThinkStation Tiny models are in the S-tier: M720q, M920q, M920x, and P330. There are more expensive, newer models, and the Servethehome forum was a great resource for researching this.
I’ve also looked at the HP EliteDesk 800 G3-G5 with the 1L engine and similar models like the Dell Optiplex 7040 or 7050. Like Lenovo, HP offers a single 1Gbps Intel Ethernet port, and you can add multiple M.2 to PCIe slots like this one for a network card. There are even network cards that plug directly into the M.2 ports for SSDs or Wi-Fi cards.
While that would work, another problem is the design of the back panel. Lenovo ThinkCentres have a removable plate that makes it easy to install a network card. Other mini PCs often come with fixed back panels, which requires creative-destructive modifications. However, it is possible to do it.
After some price research, I quickly ruled out cheap knockoff NUCs or more expensive firewalls. There were plenty of Lenovo tiny PCs on eBay for under $200.
I found a Lenovo ThinkCentre M720 Tiny on one of the classifieds sites for $145. It has an Intel I5-8400T processor, which is overkill for a router, and a low TDP of 35W. You don’t need a power-hungry processor for a router—it’ll run 24/7. It also has 16GB of RAM, which is more than enough for the job. I bought a PCIe riser for about $15 on Amazon.
You should consider which network adapter to choose. Experts recommend Intel network adapters only for pfSense or OPNsense. I looked at models with two 10Gbps connectors. There were some pretty cheap network adapters with the old X540 controllers, but they didn’t support 5 or 2.5 Gbps (only 10 or 1 Gbps). The X550 controllers support all of those speeds, but they also cost over $100.
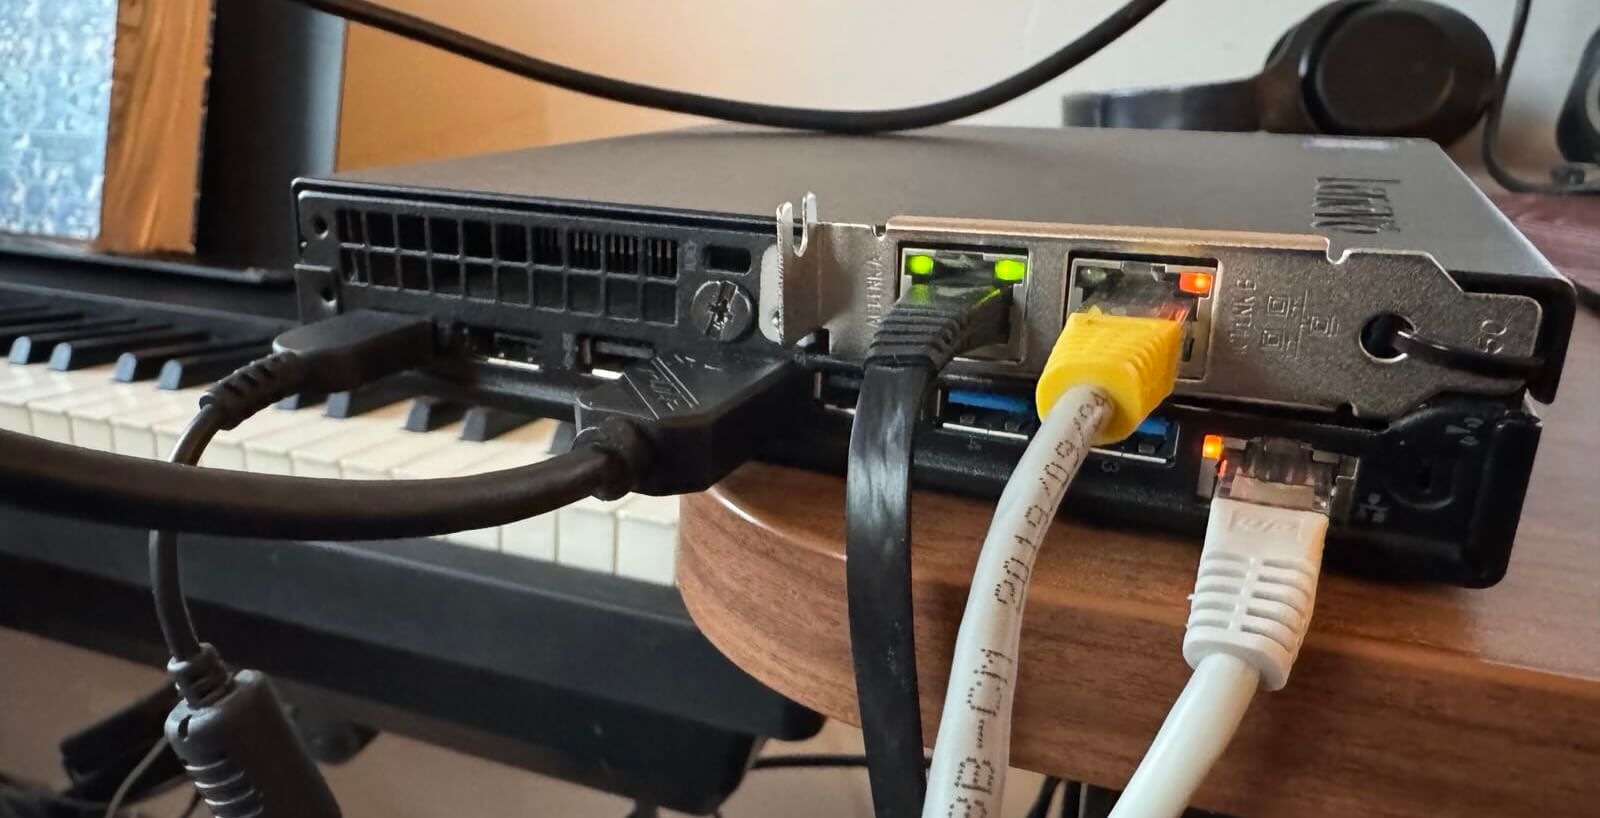
In the end, I settled on an old i225-V controller with two connectors and 2.5 Gbps bandwidth that I found for about $45 (my PC also has 2.5 Gbps Ethernet). If you want to find an even cheaper option, there are plenty of Intel options with 1 Gbps bandwidth.
When I received the network card, it honestly didn’t look like an Intel product at all and was probably some kind of clone shipped from China. However, it worked as it should and even had a small form factor bracket.
Here’s what each part looked like before assembly.
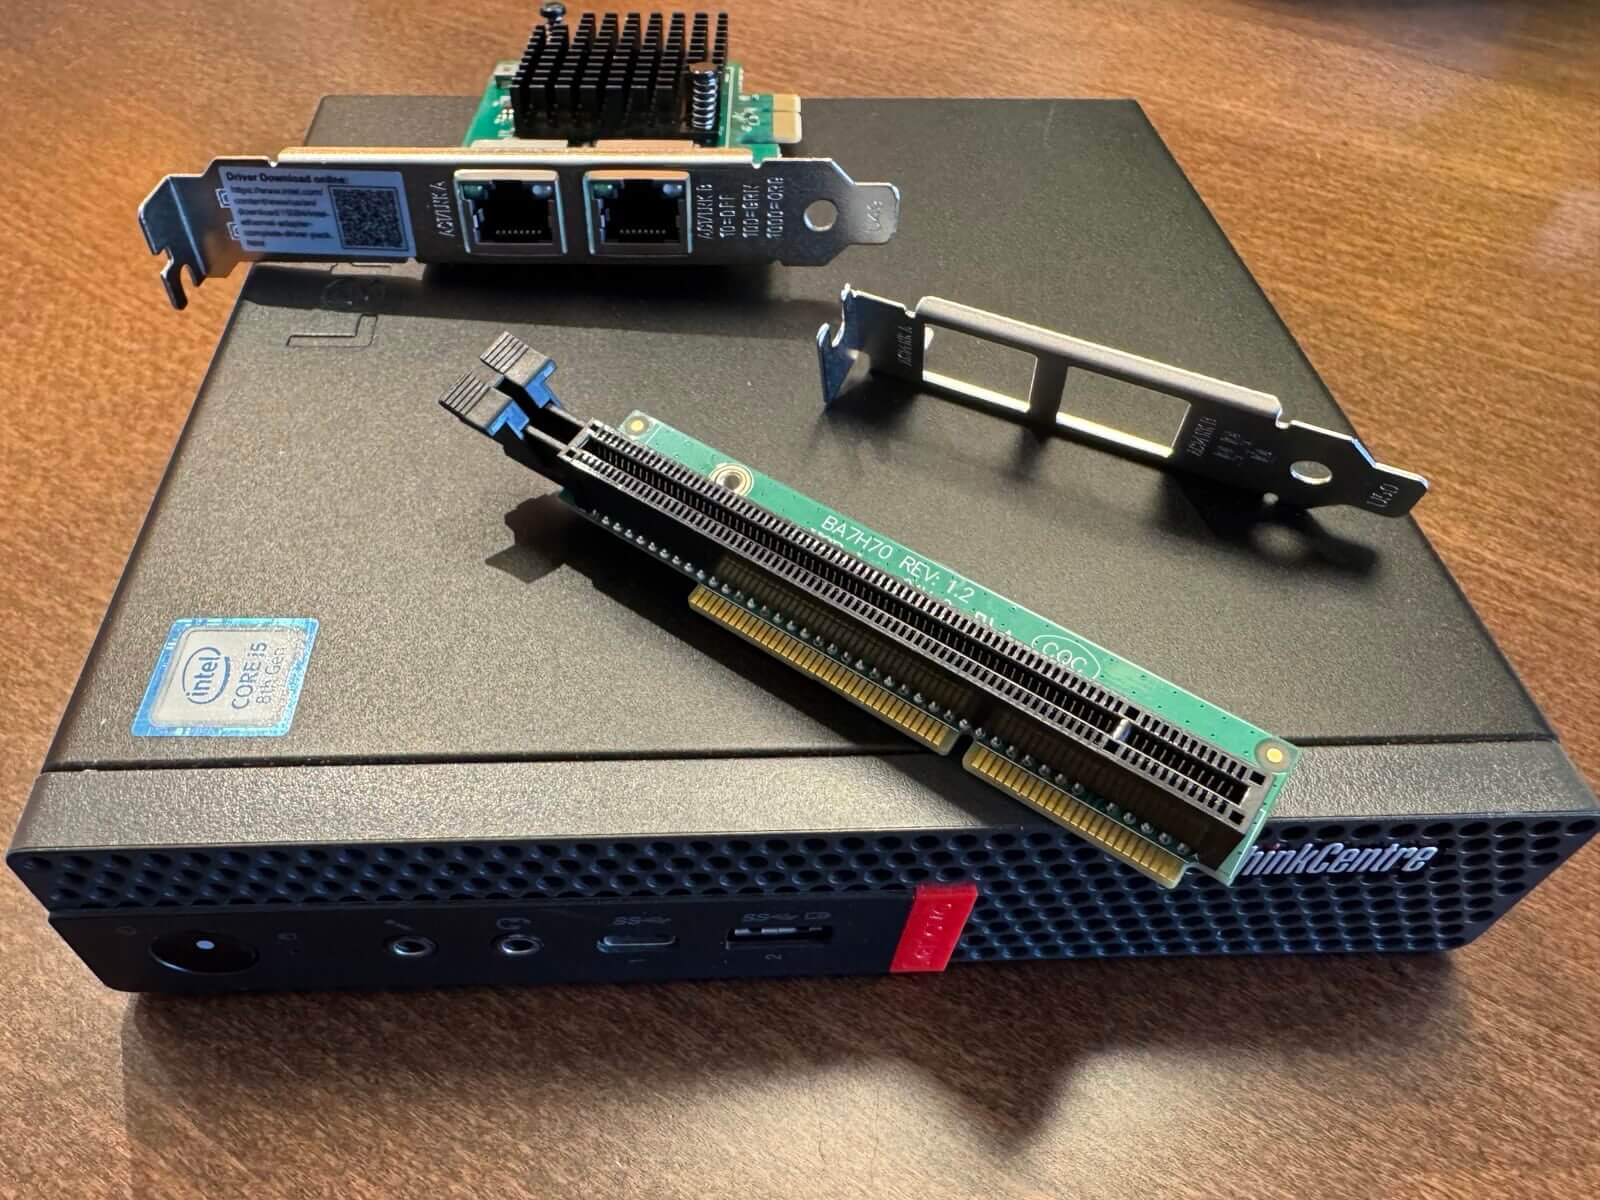
I was surprised to receive a used Lenovo computer that looked brand new—it even had logo stickers on it. The SSD looked original, and its SMART status showed it had only survived 219 power cycles. Assembly is as simple as you would expect. First, I loosened a single screw and slid the top cover off the mini PC.
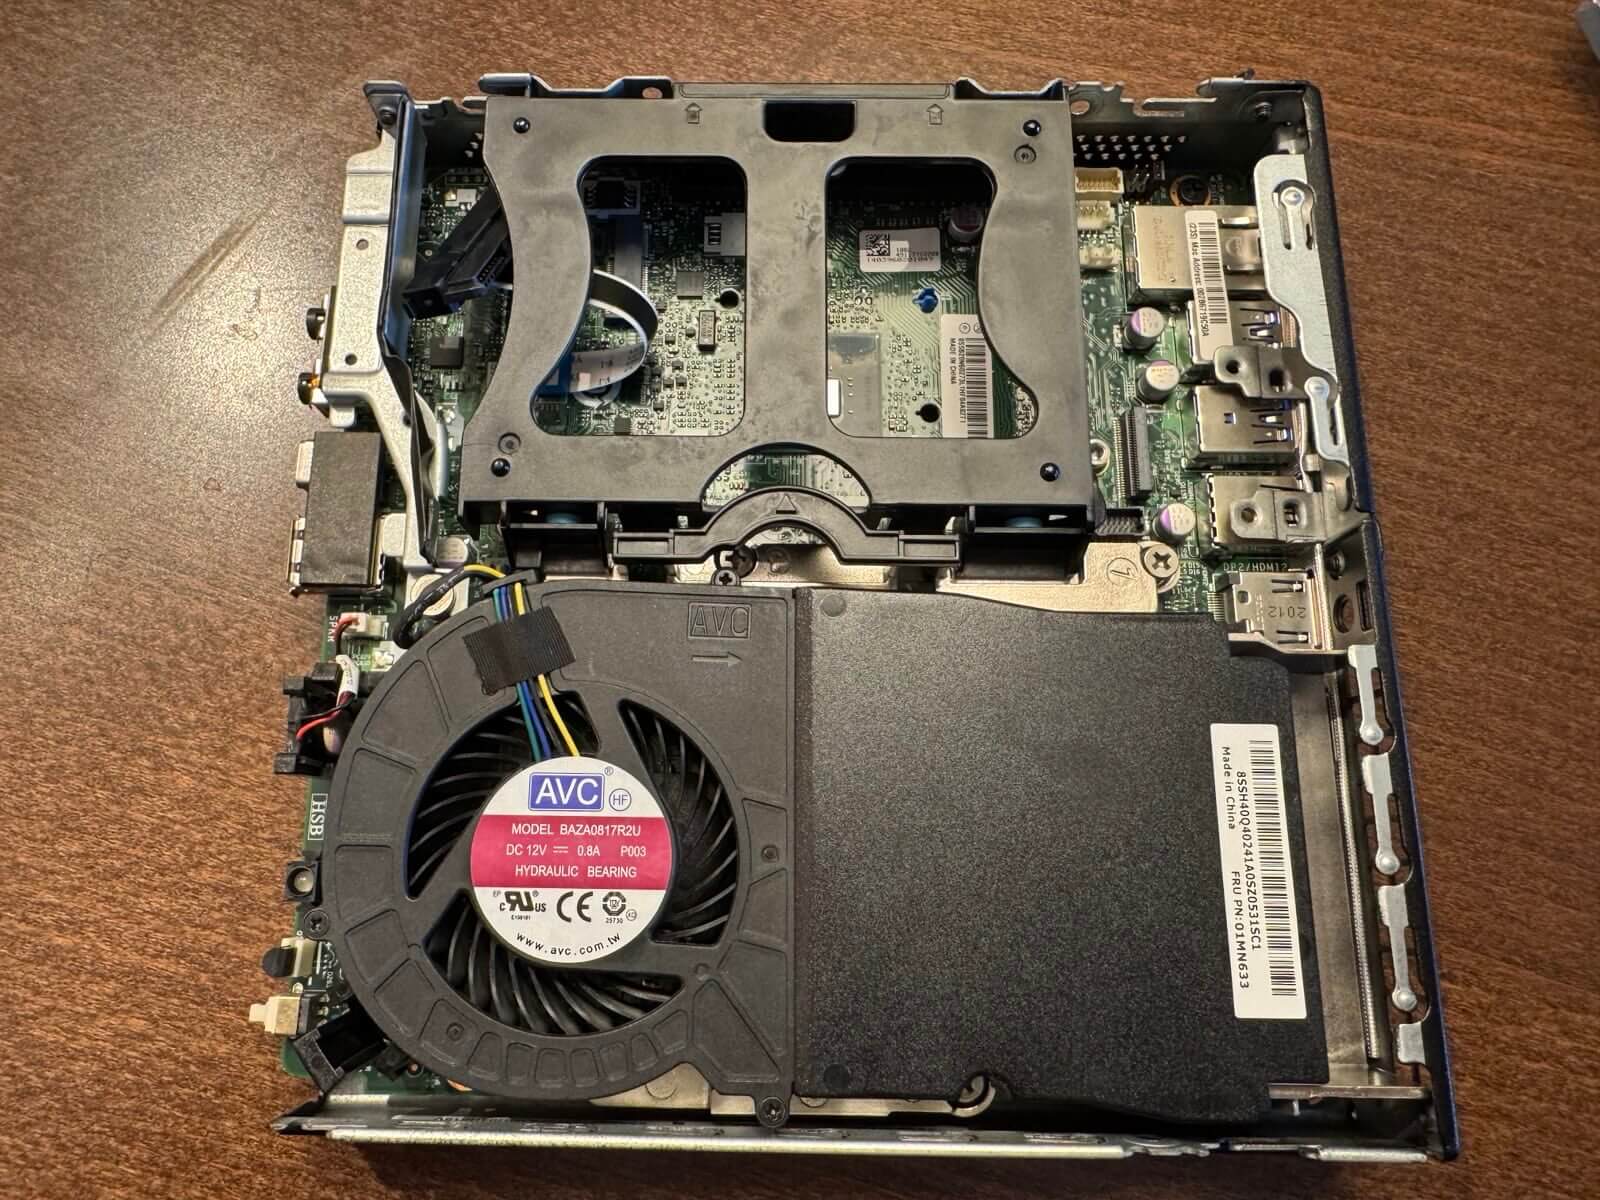
I then removed the SSD bracket and cable to make room for the NIC. After some deliberation on whether to leave the bracket on the NIC, I replaced the original bracket with one with a lower strength factor.
I then inserted the PCIe riser into the slot on the motherboard, the NIC into the riser, and the assembly was essentially complete.
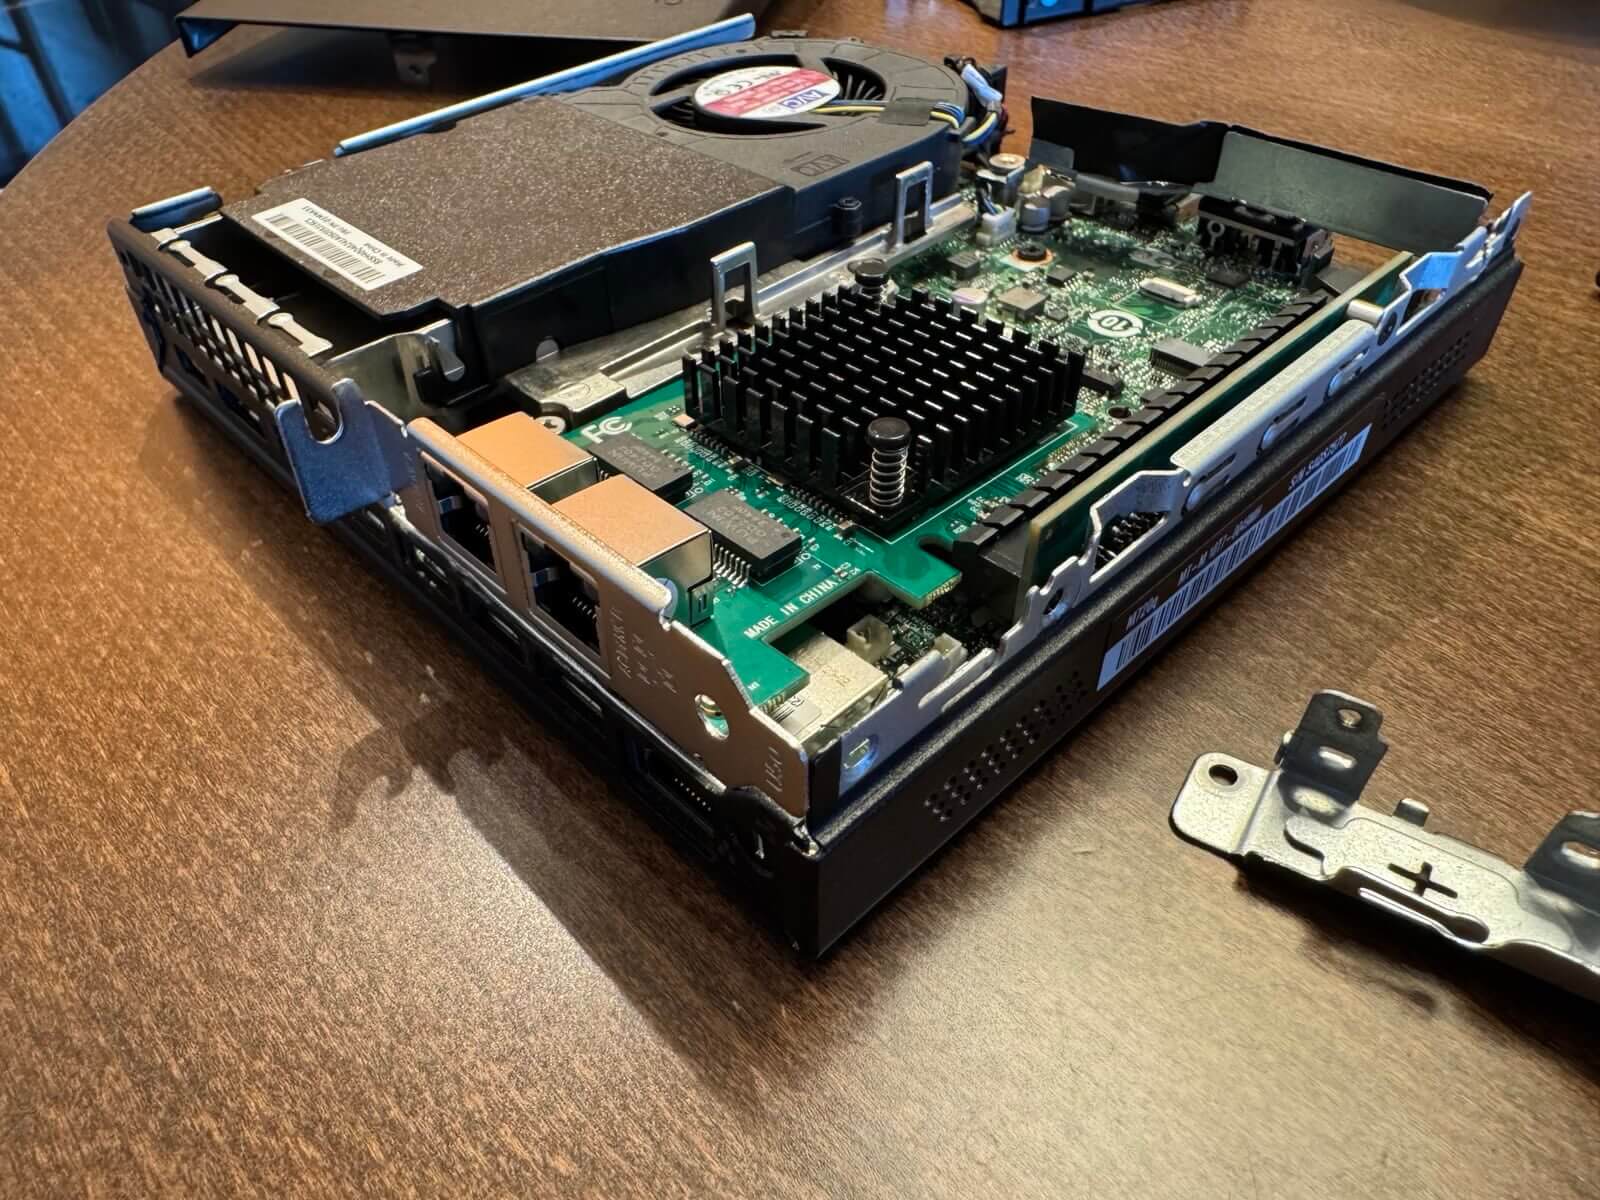
However, I noticed that the network card didn’t fit perfectly in the slot and was a bit wobbly. There was no way to screw the bracket in, so I had to resort to some creative engineering to hold the network card in place.
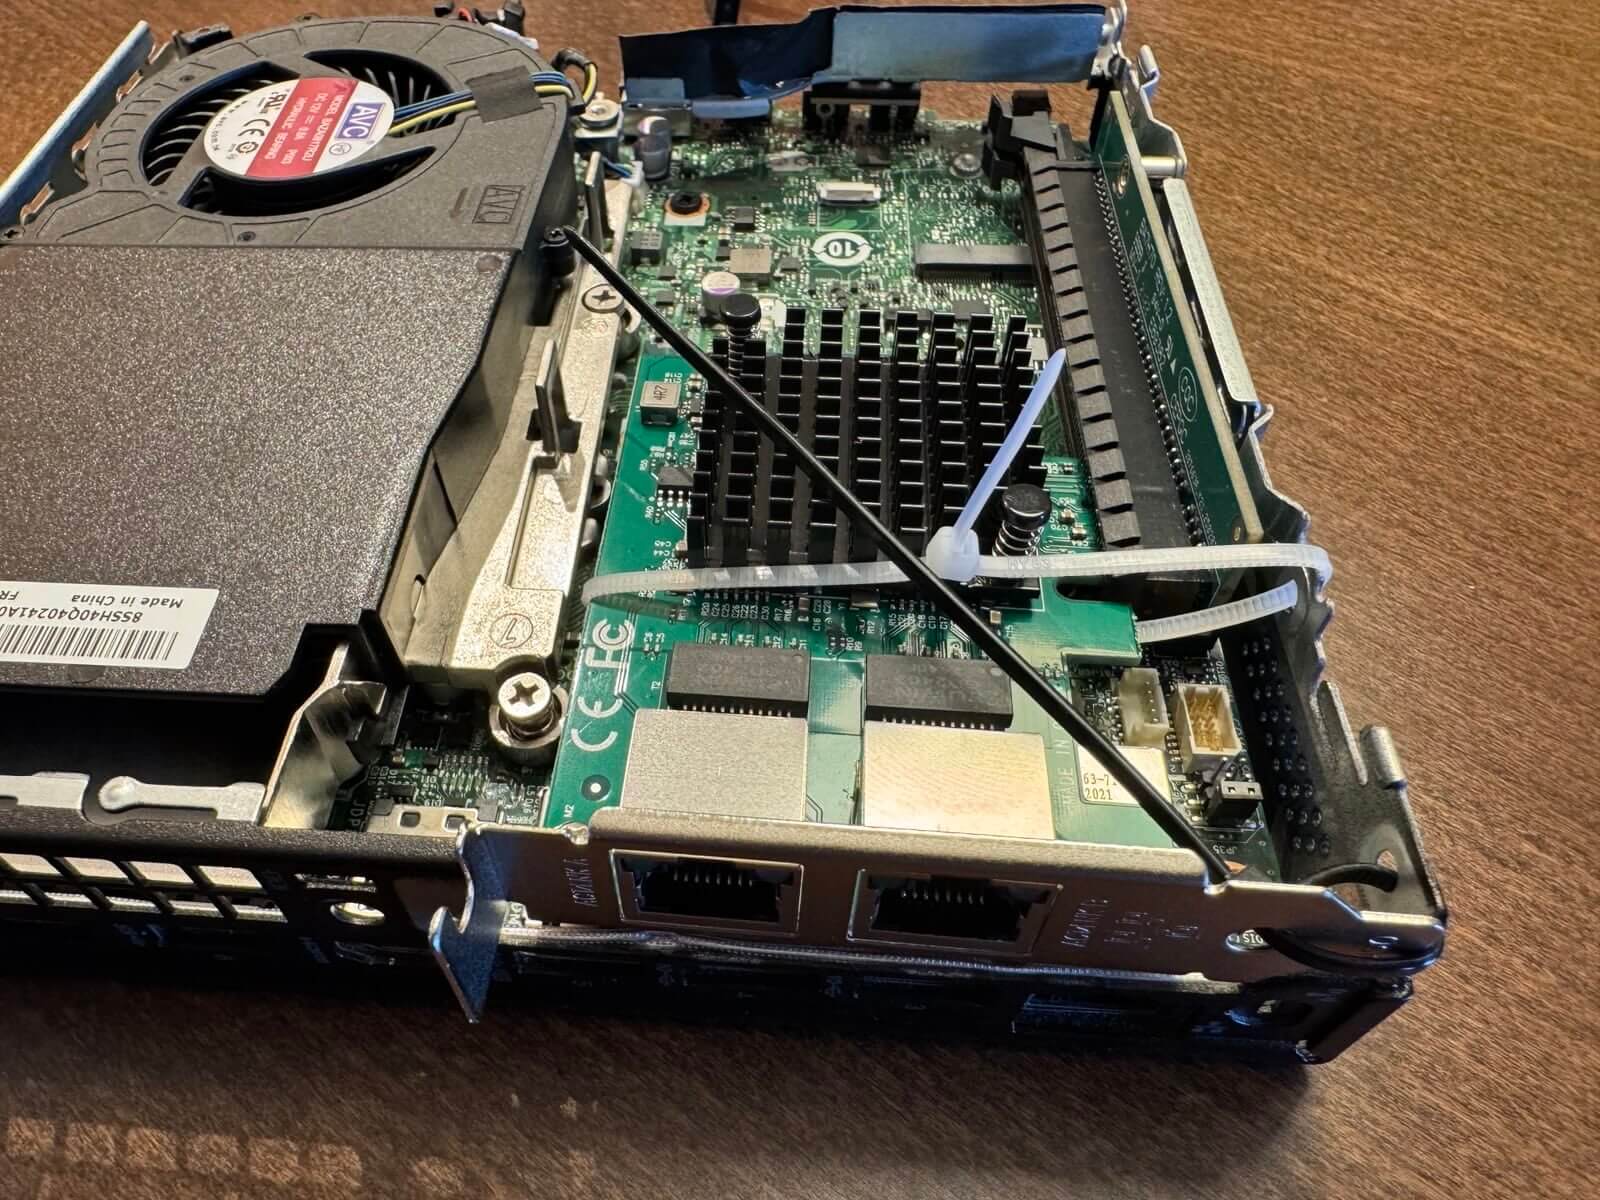
I closed the lid, tightened the screw holding it in place, and everything came to life.
I decided to stick with pfSense after using the original Netgate device for a while. However, other developers may also consider OPNsense, Sophos Free Firewall Home Edition, or other solutions.
It is a very advanced firewall that offers many security features that I will probably never use.
I won’t go into detail about how to install pfSense on the device – there are plenty of tutorials on YouTube and very detailed official documentation. After setting up my Netgate account to “purchase” the free installation media and create a bootable USB drive, I had to disable Secure Boot in the BIOS and boot from it. Everything else was pretty straightforward.
After the initial setup, which was easy even for a novice like me, I was surprised by how much of an overkill this setup turned out to be.
My previous Netgate 2100 was constantly running at 100% CPU usage and struggled to cope.
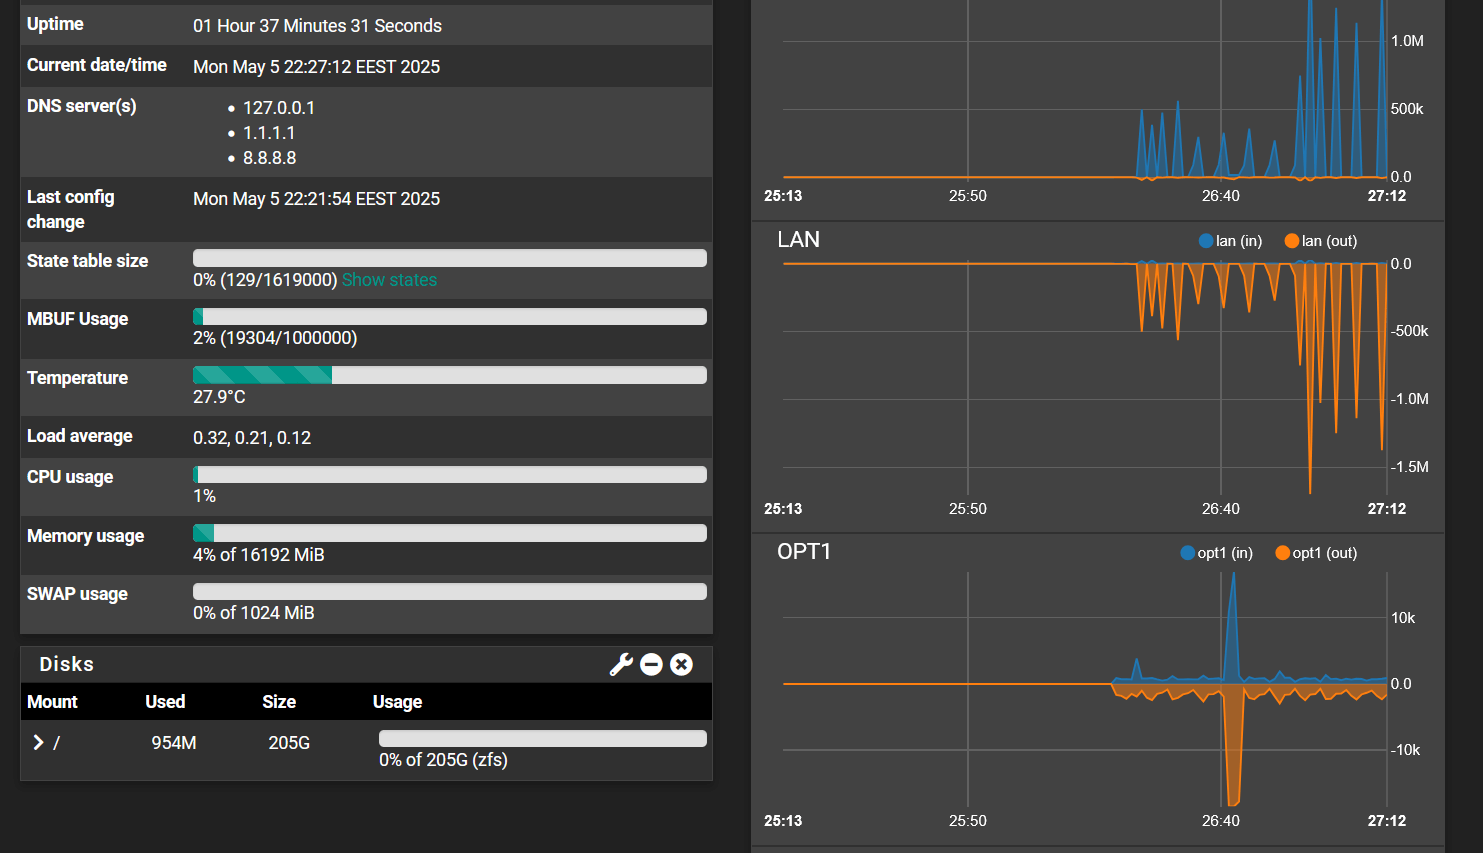
Now, for $200, I have a 2.5Gbps connection, and even at max download speeds, the CPU barely reaches 5% load. It stays at around 27 degrees Celsius (81 degrees Fahrenheit). I can’t wait until this thing is powerful enough. Finally, I’m ready to add a VPN, pfBlocker-NG for ad blocking, etc.
Will this be a long-term solution? Time will tell. Worst case scenario, I’ll find plenty of other uses for the little mini PC. I’ll keep you posted on my other experiments.
This story shows that building your own router can be not only a challenge, but also a smart solution for those who want to get high performance and control over the network without unnecessary costs. Using a refurbished Lenovo ThinkCentre M720 Tiny mini PC with pfSense configured, we were able to achieve speeds of 2.5 Gbps with minimal CPU load and stable operation. Despite the complexity of the component selection and some difficulties with installation, the result exceeded expectations. This approach makes it possible to bypass the limitations of commercial routers, providing a reliable and productive network.

Класно, дякую. Вже думав щоб купляти якесь готове рішення, бо взяв NIC з Realtek, а воно виявилось не стабільне і OPNSense просто відвалився після установки одного плагіна. Буду пробувати тепер інший варіант 🙂