08.06.2024
11 min
1925

In the world of cybersecurity, having handy tools for testing and analyzing vulnerabilities is becoming increasingly important. One such solution is to create a portable lab with Kali Linux on a Raspberry Pi Zero 2 W that can be controlled directly from a smartphone. This approach opens up new opportunities for hardware-free testing and allows for tasks such as network scanning, doppelgänger attacks, handshake capture, and even Metasploit.
Disclaimer: This material is created for informational purposes only. The information provided in the article is intended to raise awareness and educate on cybersecurity issues.
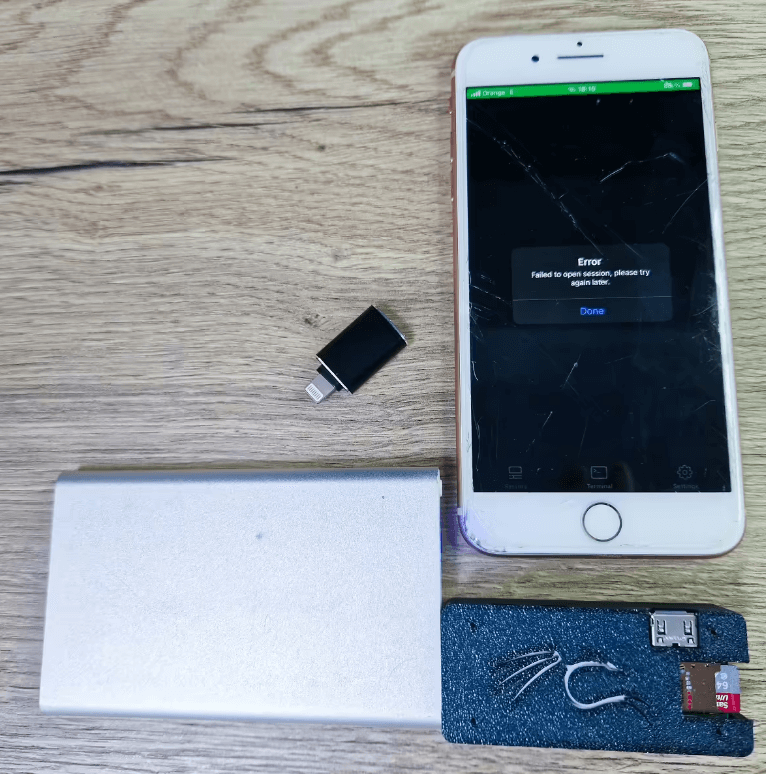
Running Kali Linux on a Raspberry Pi Zero is a great way to build a powerful and portable security testing device. This guide will help you set up a Kali Linux Pi-Tail on a headless Raspberry Pi Zero 2 W that can be powered and controlled via a smartphone using SSH or VNC. This setup provides a graphical interface for controlling the Pi-Tail. We consider it an ideal option for creating a compact and cheap hacking laboratory, fully controlled through a smartphone. Since it does not require a keyboard, mouse or screen to control, it makes it very convenient for pentesting, including tasks such as scanning Wi-Fi access points and clients, deauthentication, WPS PIN cracking, evil twin attacks, handshake capture , as well as network scanning and vulnerability assessment using nmap, brute force attacks, Bluetooth attacks, social engineering, using Metasploit, wardriving, proxy using Burp Suite, work with proxmark3, interaction with other Android devices via ADB commands and even dynamic analysis of iOS and Android applications using Frida.
If the Kali Pi-Tail is connected to a power source, it will automatically connect to predefined Wi-Fi networks broadcast by the smartphone as an access point, allowing you to control it via SSH or VNC.
Raspberry Pi Zero 2 W,
microSD card (minimum 16 GB),
OTG adapter,
USB power cable or USB-A option card,
A smartphone with SSH (Termux) and VNC (VNC Viewer for Android) installed. For some reason, RealVNC failed to connect to the Pi-Tail,
Image of Kali Linux Pi-Tail.
Download the Pi-Tail image from the official Kali Linux website.
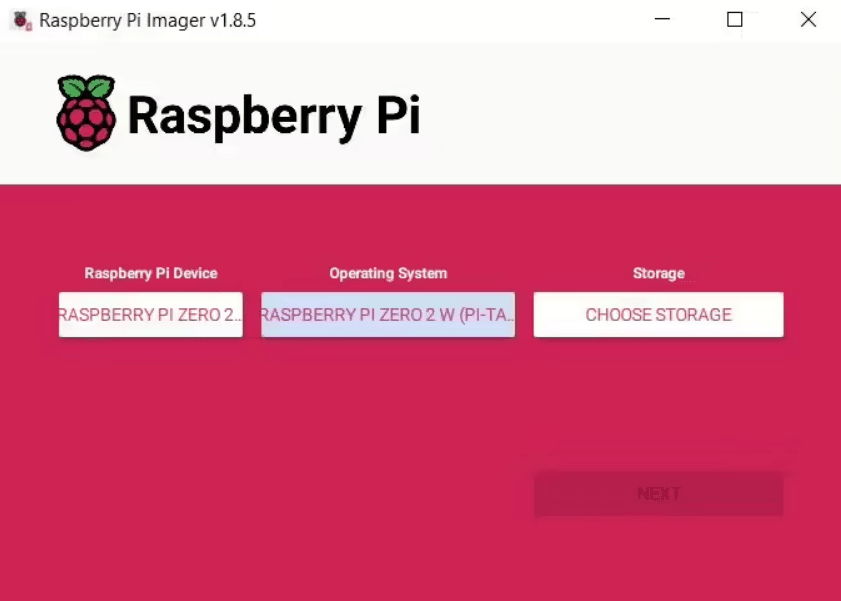
Use the Raspberry Pi Imager to write the image to the microSD card.
Under Operating System, select Other specific-purpose OS-> Kali Linux->Raspberry Pi Zero 2 W (Pi-Tail)
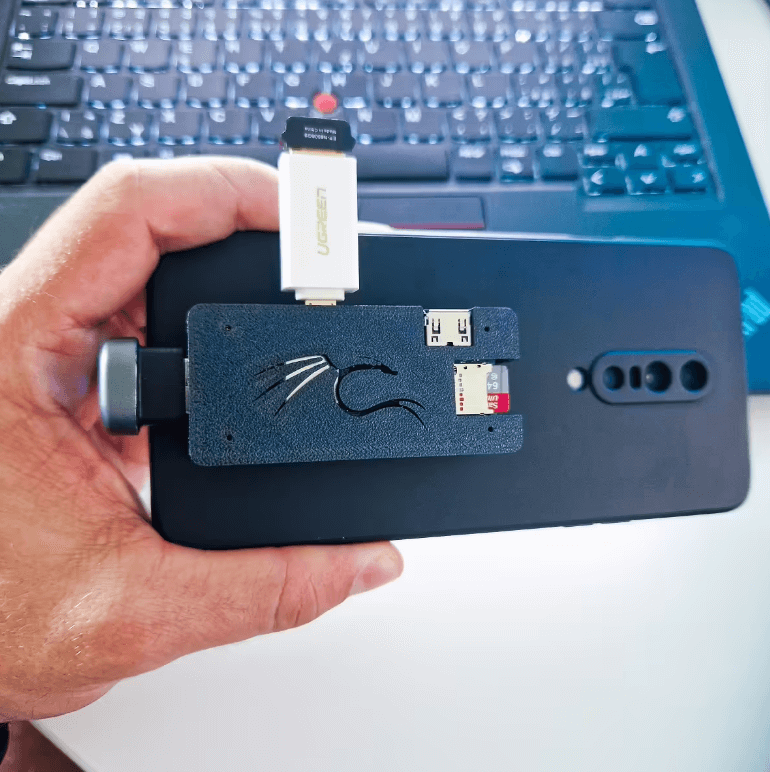
Insert the microSD card into your Raspberry Pi Zero 2 W.
Connect the OTG adapter to your smartphone and the USB power cable to the Pi-Tail to turn it on.
Enable the hotspot on your smartphone with SSID sepultura and password R4t4m4h4tt4.
Install Termux (for SSH) or VNC Viewer for Android on your smartphone.
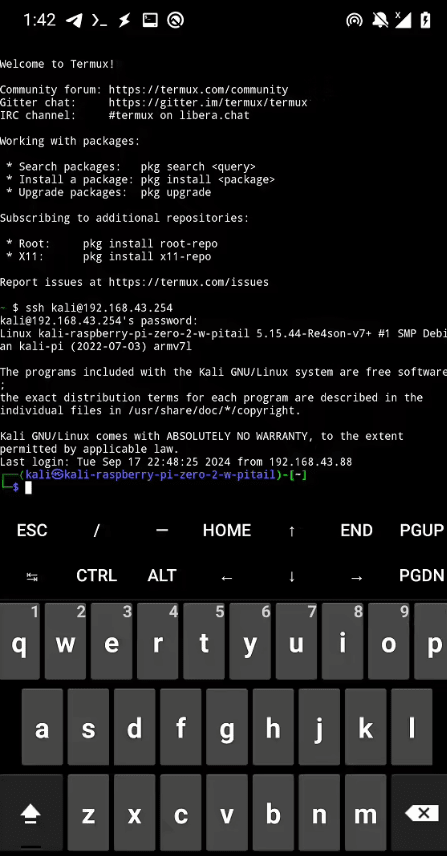
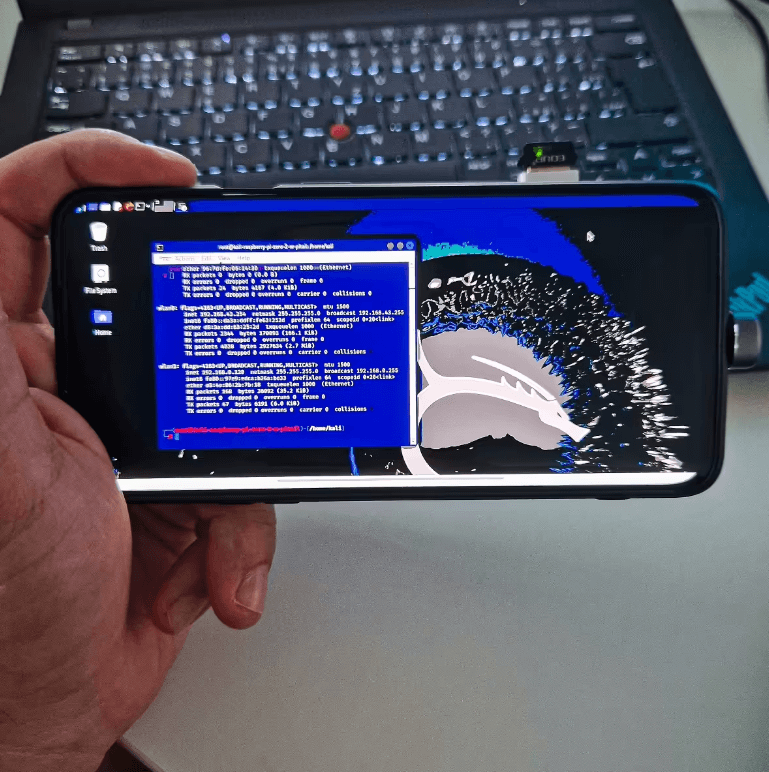
Open the Termux app and connect to the Pi-Tail using IP address 192.168.43.254 with username kali and password kali.
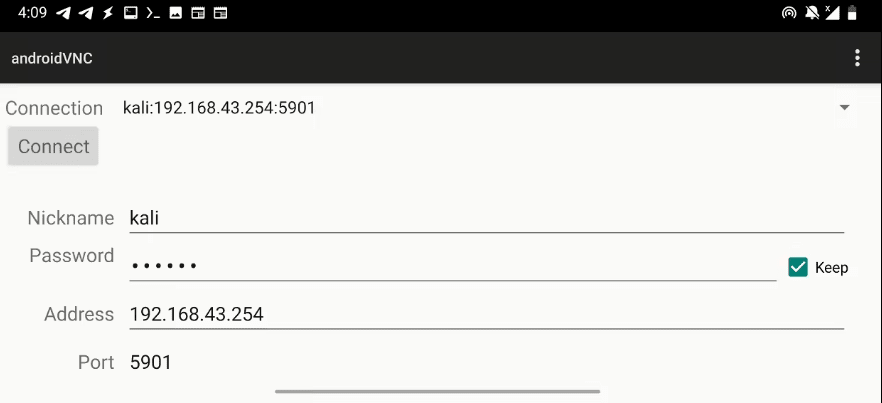
To configure VNC, start the VNC server on the Pi-Tail using the command sudo vncserver -localhost no. During setup, you will be asked to create a password that will be used to connect via VNC. After that, use the VNC Viewer app for Android to connect by entering the IP address 192.168.43.254:5901 and the username kali along with the password you created during setup.
After connecting via SSH, update and update the system:
sudo apt-get update&&sudo apt-get upgrade
Since your sepultura access point most likely does not have an internet connection, you can connect an external Wi-Fi adapter to the Pi-Tail and use it to connect to an internet access point.
Alternatively, you can remove the microSD card and connect it to another device, such as a Raspberry Pi, and update or install additional software.
The Pi-Tail setup is very portable. Your smartphone acts as a power source, screen, keyboard, and mouse, making it a great penetration testing companion.
To connect to an additional Wi-Fi network, you will need an additional Wi-Fi adapter. This is useful if you need to connect to the Internet or want to run network scanning tools like Nmap on different networks at the same time. For convenience, you can use the script below, which will automatically connect you to the network using its name and password.
#!/bin/bash

# Check if two arguments are provided
if [ "$#" -ne 2 ]; then
    echo "Usage: $0 <wifi_network> <password>"
    exit 1
fi

wifi=$1
pass=$2

sudo service NetworkManager start &
sudo ifconfig wlan1 up
sudo nmcli dev wifi connect $wifi password $pass ifname wlan1
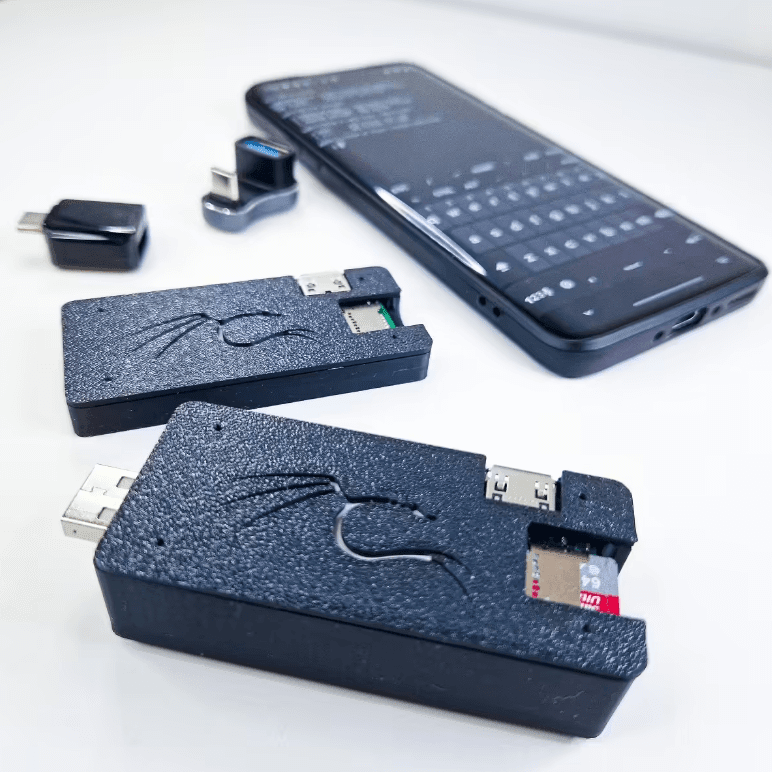
A high-quality case makes it much easier to transport and use the device, while ensuring its safety and stylish appearance in any conditions. A 3D case designed and published by 4x0nn is available for download on the Odysee platform.
When adding the USB-A board, the case needed adjustments to make it a bit thicker and add a USB port hole that allows for convenient device connectivity without restrictions.
Connection problems: When using a Samsung smartphone with the Pi-Tail, there is a problem connecting to the access point. No solution or workaround was found for this problem.
Performance: The Raspberry Pi Zero 2 W is a low-power device. For intensive tasks, it is recommended to use a more powerful Raspberry Pi model. Sometimes there are problems with the initialization of the external Wi-Fi adapter on the Pi-Tail. In order for the adapter to be recognized, it is necessary to turn it off and on several times.
Changing Access Points: Changes made to the wpa_supplicant file are not saved after a system restart. This makes it difficult to connect to another Wi-Fi network, particularly the sepultura hotspot, using the internal Wi-Fi chipset.
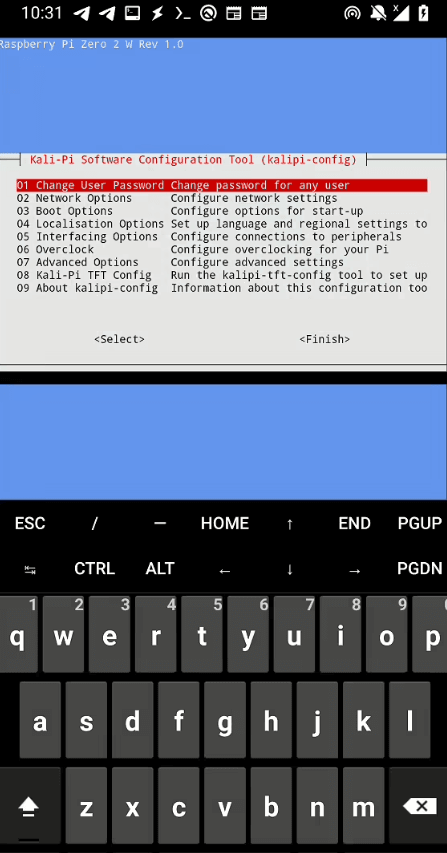
SSH connection refused: Sometimes the Pi-Tail refuses to establish an SSH connection with a “Connection rejected” error, especially when switching between the sepultura access point and the home LAN. To fix this, you need to enable the SSH service in the kalipi-config menu. To do this, you need to connect the Pi-Tail to the monitor via HDMI and connect the keyboard, then execute the command: sudo kalipi-config -> Interfacing Options -> SSH -> Yes.