In the second part of the Lilka guide, we explore how to apply the DIY console in real life: games, sensors, STEM learning, automation. Project examples and resources for development.
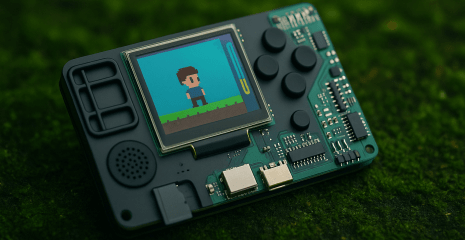
Lilka is not positioned as a game console, but this does not prevent you from writing and playing games on it.
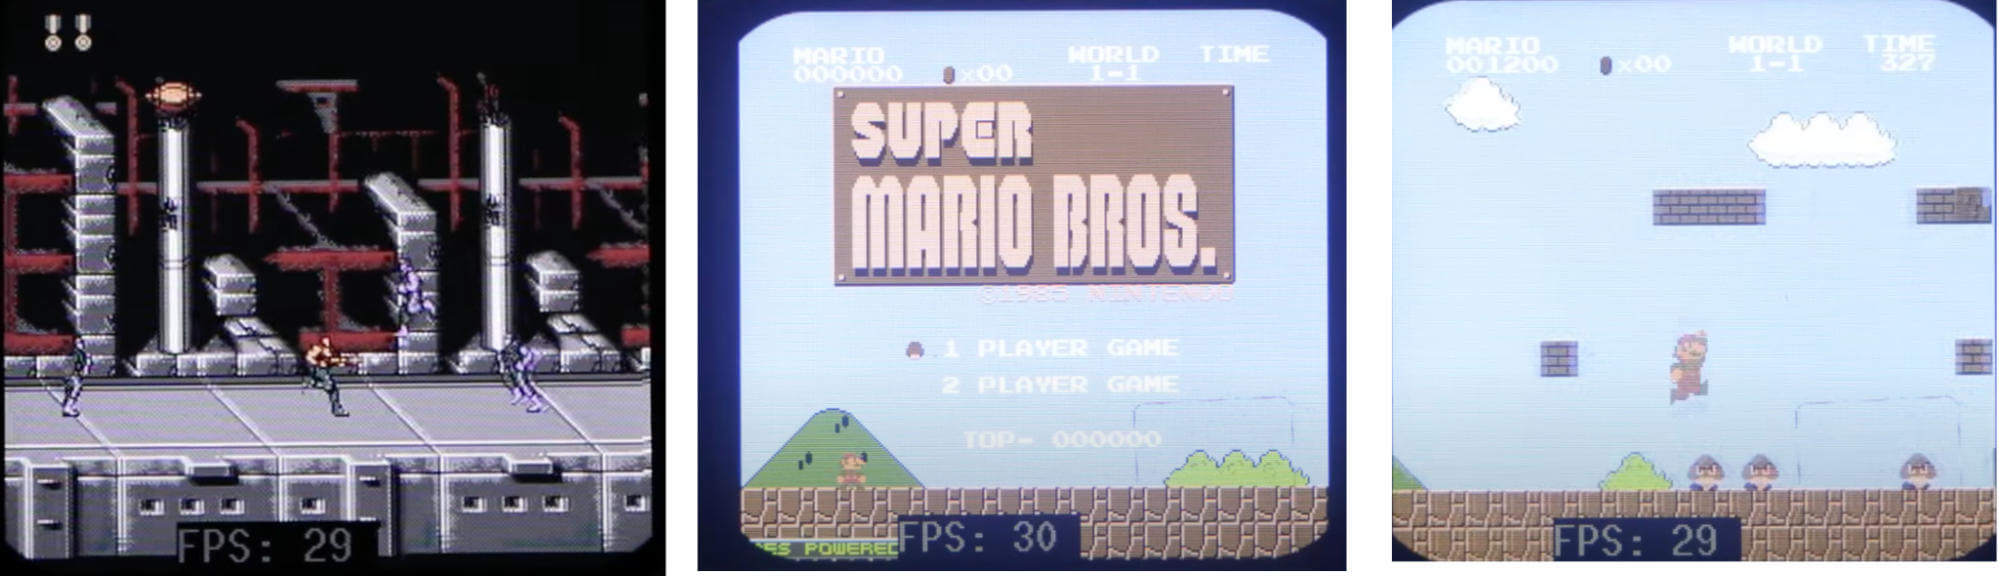
NES is a Nofrendo project ported to Keira, which allows you to run NES (dandy) games in .rom or .nes formats from an SD card.
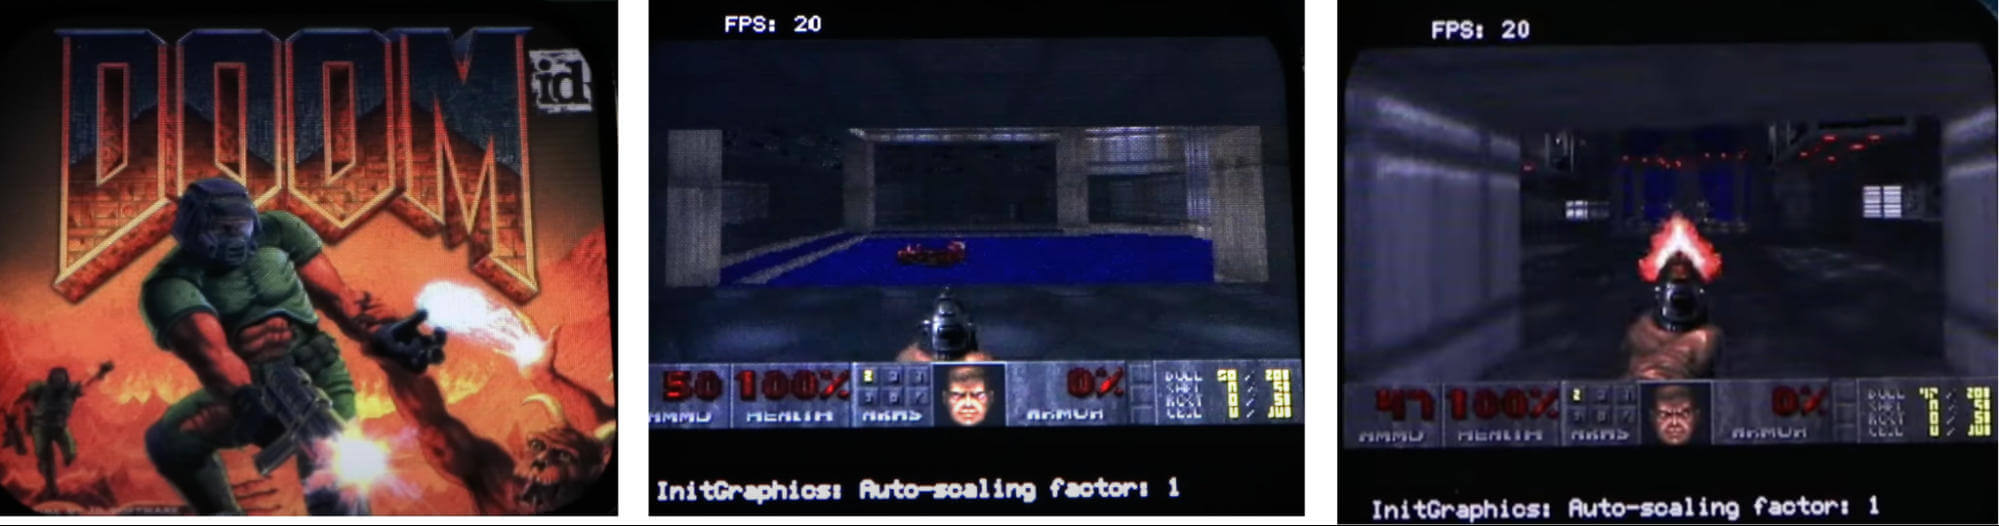
Doom – according to the popular phrase “If it has a processor, it can run Doom”, Lilka can also run Doom. To do this, you need to compile the firmware in the firmware/doom directory using the shareware version of Doom at this link.
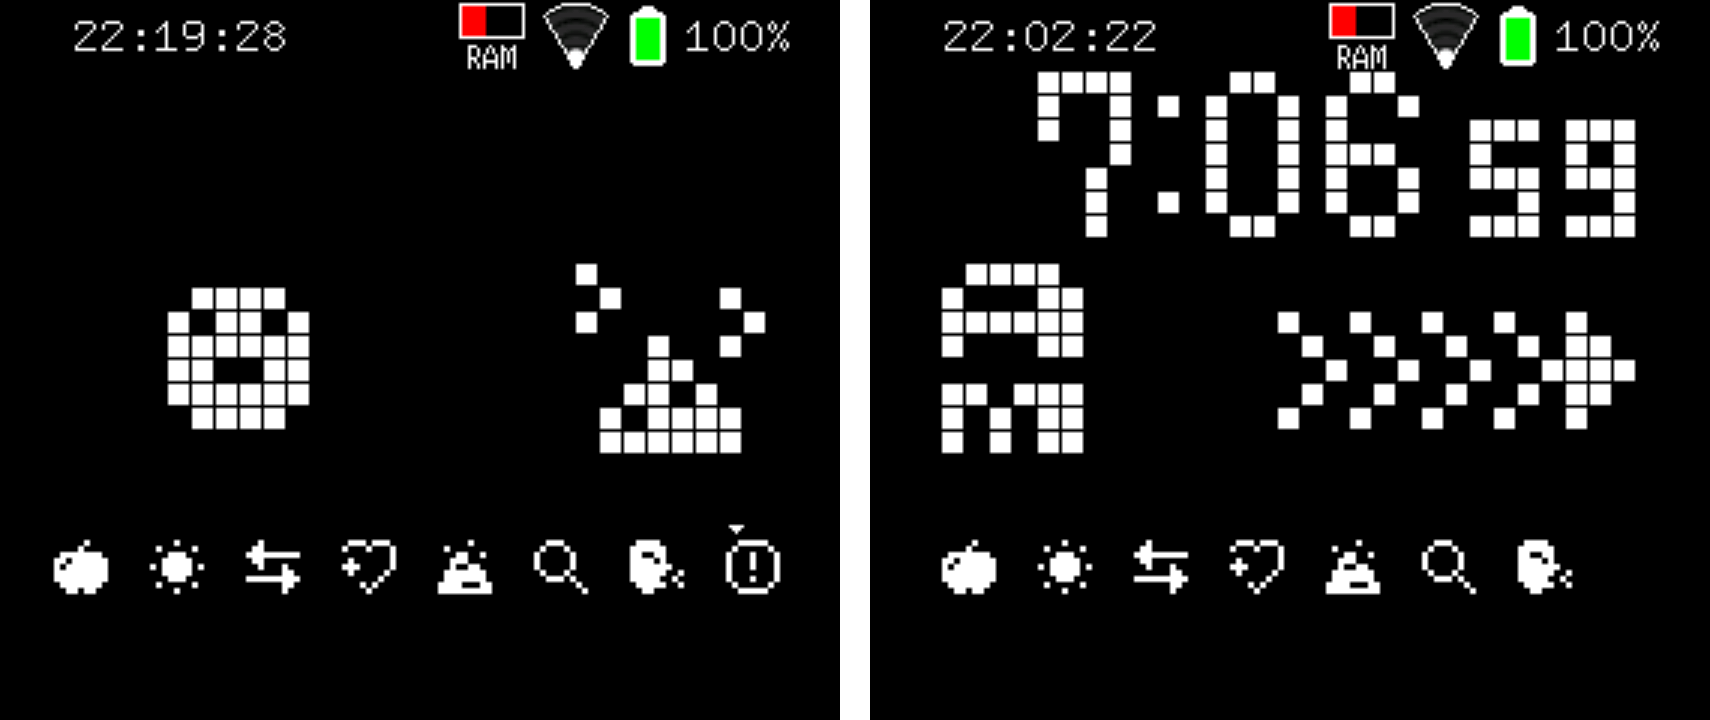
Tamagotchi is a virtual pet care simulation game. The player must feed, entertain, treat, and maintain the pet’s happiness and health to keep it happy.
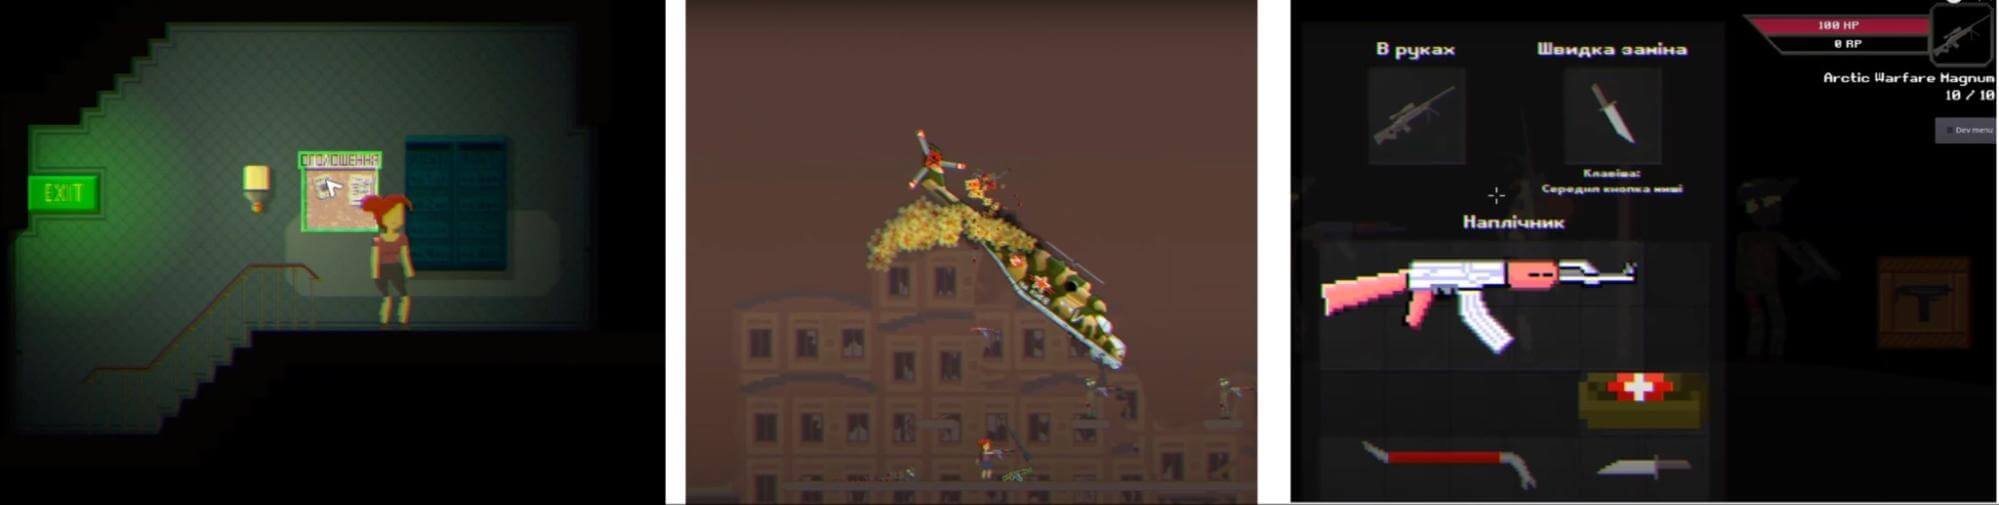
Stugna is a strategic 2D slasher about the Russian-Ukrainian war (video). The main character is a girl named Stugna, who falls into the epicenter of hostilities without training, but quickly learns and turns into a killing machine. The development of this game is currently suspended.
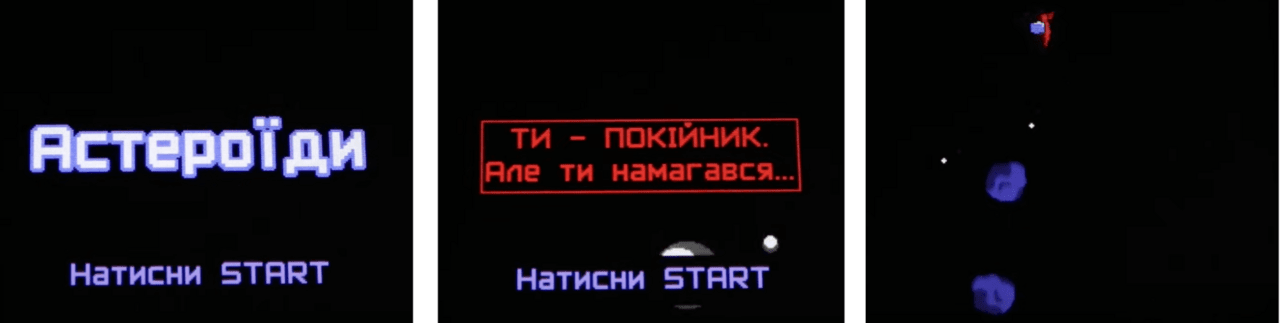
Asteroids is a clone of Asteroids 1979. In this arcade game, the player controls a spaceship that must destroy asteroids and avoid collisions with them.
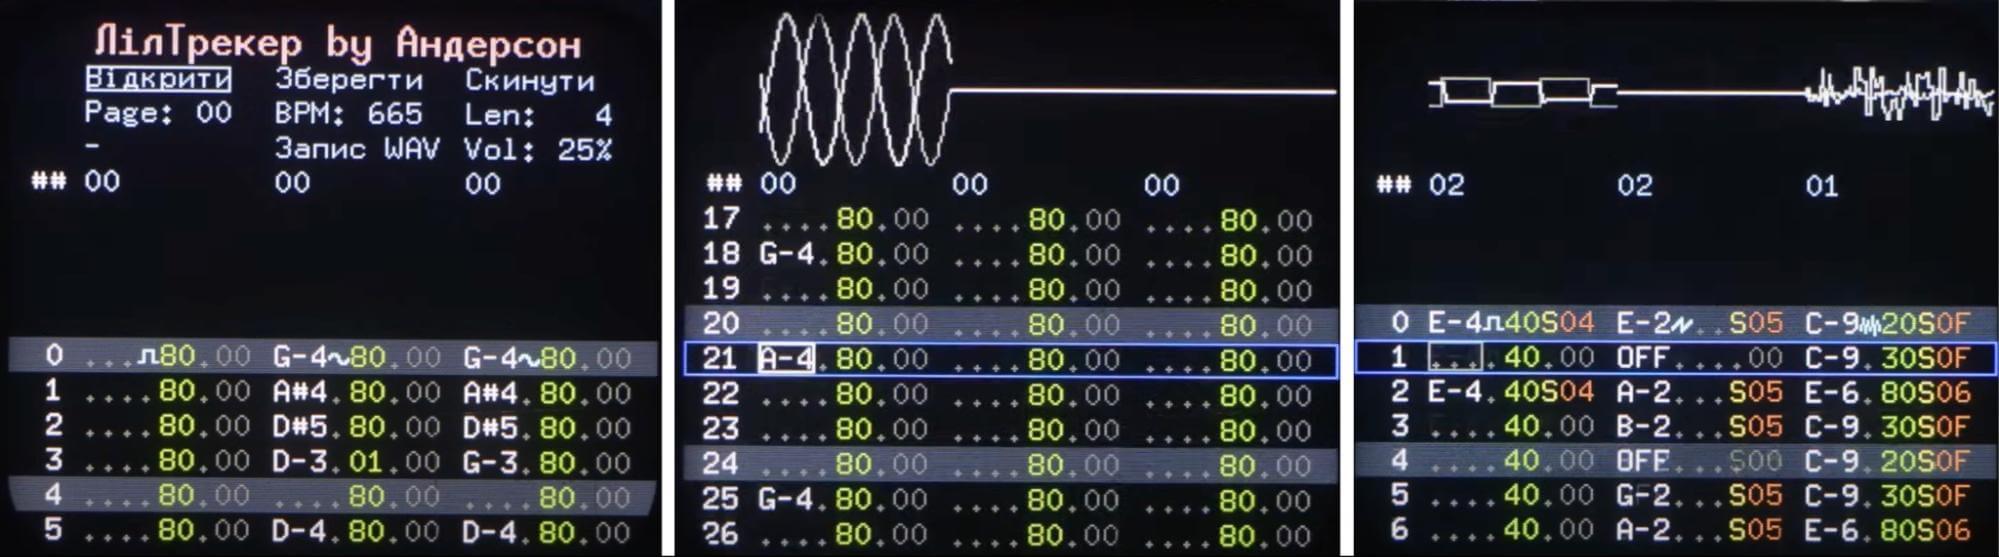
Liltracker – video. A three-channel tracker for Lilka. Supports various effects, such as tremolo, vibrato, arpeggio. You can also save written tracks in .lt and .waw formats on an SD card. The sound of Liltracker resembles a mixture of Commodore SID and Nintendo 2a03. ESP32 does not have built-in sound chips, all sound is synthesized programmatically on the fly. Anderson wrote several demo tracks.
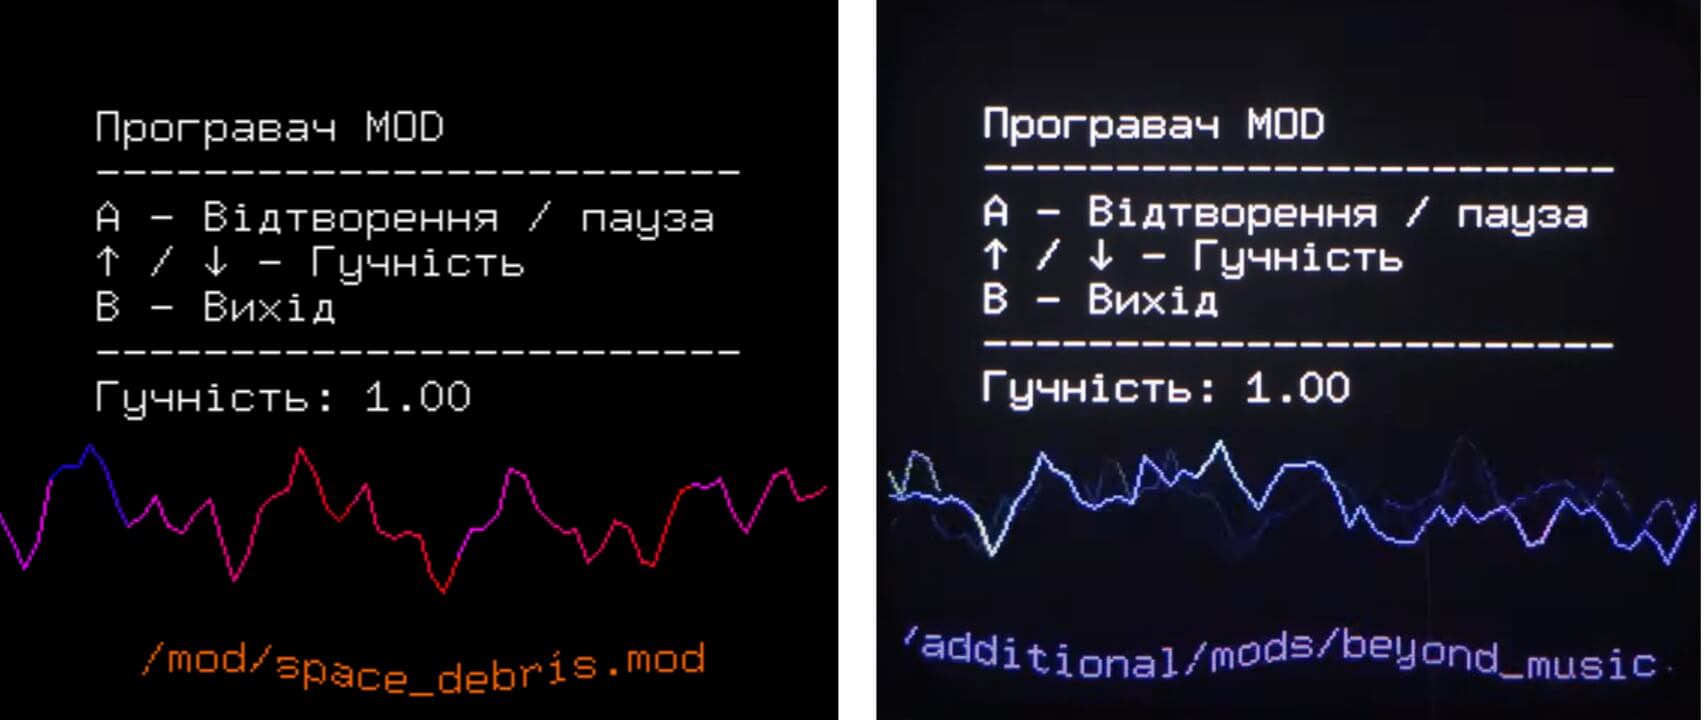
Modplayer is a simple MOD player based on the ESP8266Audio library. Not to be confused with the previous program Liltracker. Mod files can be downloaded here.
Weather – when connected to the Internet, shows the weather forecast for the specified coordinates.

BLE Gamepad – allows you to use Lilka as a wireless gamepad (joystick).
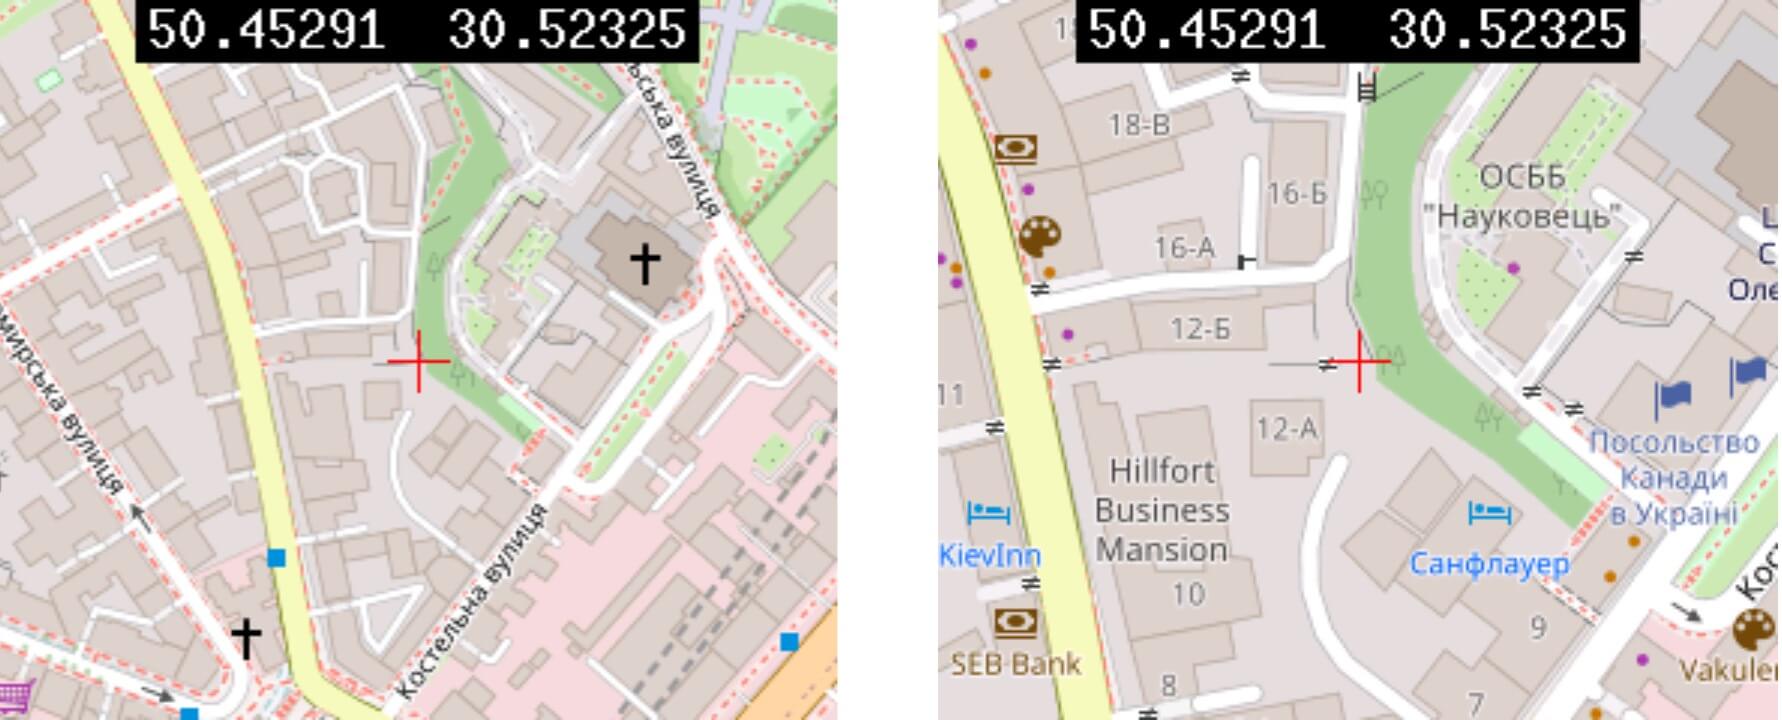
GPS Tracker – a module for displaying a map with GPS coordinates.
Li’l Video is a video converter for Lilka that converts video files to a format compatible with the device. It reduces the resolution and optimizes the data for playback on Lilka, ensuring efficient encoding under the console’s limitations. An example of how the video player works.
Screenshot — takes a screenshot when you hold down select + start.
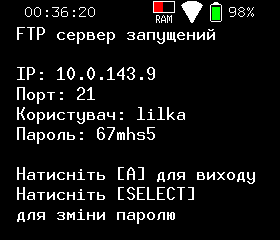
FTP server — launches an FTP server accessible from the local network. allows you to wirelessly send files to Lilka. Note: currently the FTP server has a feature when transferring files in both directions. To transfer, you need to disable and enable the FTP service in the Kiera menu, or press the quick connect button in FileZilla again.
Pastebin – download files from the pastebin website.
Runner – a small runner game where the character needs to dodge obstacles or perform other tasks.
Live Lua allows you to run Lua code on Lilka without having to save files to an SD card. By connecting Lilka to your computer via USB, you can test your program without unnecessary steps with copying files. However, if your program uses additional resources (images, sounds), they need to be downloaded to the SD card manually. To use Live Lua, you need to install the Serial Monitor extension for Visual Studio Code.
Lua REPL (Read-Eval-Print Loop) is an interactive environment that allows you to enter and execute Lua code on Lilka directly from your computer via a USB cable, one line at a time. This is convenient for testing functions, exploring APIs, or debugging.
To use the REPL, open the menu “Development” -> “Lua REPL” on Lilka, then in Visual Studio Code open “Serial Monitor”, select the desired COM port and click “Start Monitoring”. After that, you can enter code and the result will appear in the console.
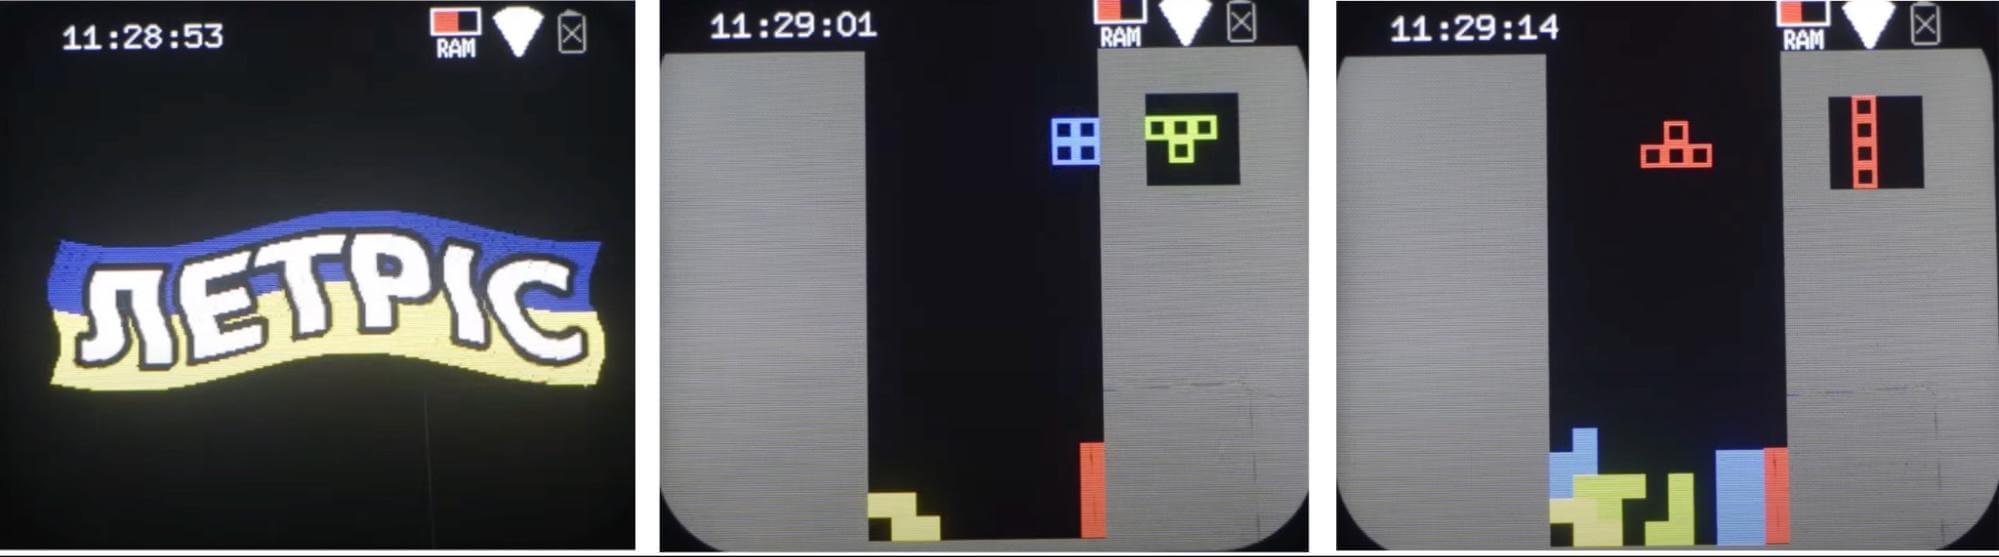
Letris is a clone of the classic Tetris.
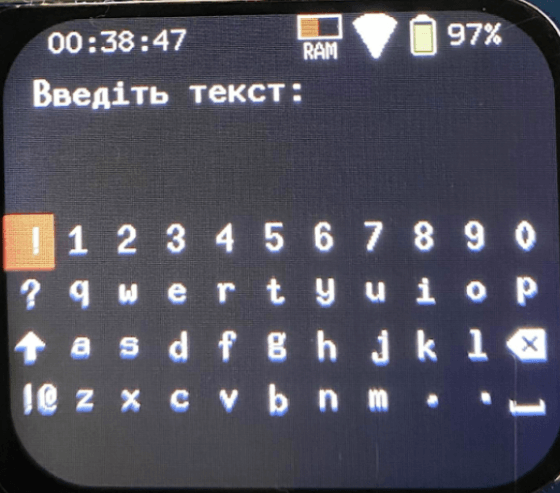
Keyboard – allows you to open the on-screen keyboard and type text.
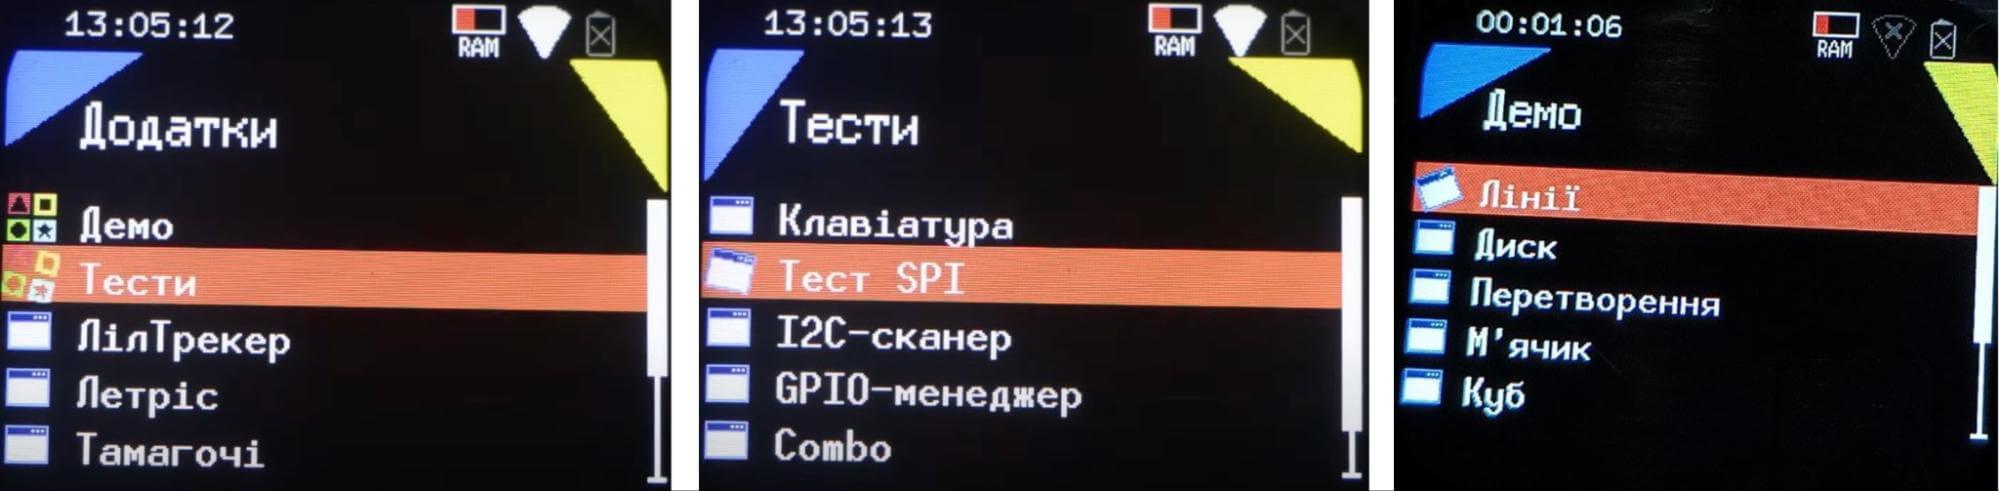
SPI Test is a demo program for working with SPI on Lilka. It initializes an SPI connection, sends and receives data, demonstrating the exchange with external devices. This is useful for testing peripherals and setting up interaction via SPI.
I2C Scanner is a demo program for scanning devices on the I2C bus. It initializes the connection, iterates through all possible addresses and sends requests, checking which devices respond. The detected addresses are displayed in a convenient format, which allows you to quickly identify connected I2C devices.
Lines is a demo program for drawing lines on the Lilka screen. It draws lines of different lengths, directions and colors, demonstrating the capabilities of graphic rendering. This allows you to check the correctness of the display and test the performance of drawing graphics. Video.
Ball – the program animates a ball that falls under the influence of gravity and bounces off the edges of the screen. The user can control its movement with the arrows, and the “A” button completes the work. The FPS is displayed on the screen, the animation is updated in real time.
LilCatalog – a catalog of Lua programs, scripts and firmware for Lilka. It has a convenient graphical interface and allows you to download games, programs and firmware in one click. If you have created a game, you can contact the author, or the general Discord community branch to include your program in the catalog.
To understand how to write a program, I suggest looking at an example of existing programs. For example, Cat is a simple program with a Bongo Cat-style cat that beats the table when you press the buttons. You can watch a video of the game here.
First, we load four images of a cat. In this case, the image is full-screen. It has a size of 280×240. Images in .bmp format are supported, and recently .png is also supported. We also invent variables no, left, right, both and set these variables to images of a cat without paws on the table, with a left paw, with a right paw, and with both.
state = controller.get_state() records the values of the pressed buttons.
function lilka.update(delta) is a function that updates the game state frame by frame; delta is the time in seconds since the last call, which allows for motion and animations that are independent of the application speed. Ideally, delta is about 0.0333 seconds.
Then state = controller.get_state() is called again to see if a button was pressed before each rendered frame of the game.
If the left button (letter D) or the right button (button B) was pressed, play the buzzer.
if state.b.just_pressed or state.d.just_pressed then
        buzzer.play(40, 100)
    end
When the up button (A) is pressed, the program ends:
-- Завершуємо програму при натисканні кнопки "A"
    if state.a.pressed then
        util.exit()
    end
end
The lilka.draw() function draws an image on the screen depending on the state of the buttons:
First displays the base image no.
If button D is pressed, draws the image left.
If button B is pressed, draws the image right.
If button B and D are pressed simultaneously, draws the image both.
If button C is pressed, plays a sound, briefly displays both, and then returns to no.
-- Завантажуємо зображення
no = resources.load_image("no.bmp")
left = resources.load_image("left.bmp")
right = resources.load_image("right.bmp")
both = resources.load_image("both.bmp")

-- Створюємо змінну в яку буде записуватись стан кнопок
state = controller.get_state()

function lilka.update(delta)

    -- Оновлюємо змінну з станом кнопок
    state = controller.get_state()

    -- Якщо була натиснута кнопка - відтворюємо звук
    if state.b.just_pressed or state.d.just_pressed then
        buzzer.play(40, 100)
    end

    -- Завершуємо програму при натисканні кнопки "A"
    if state.a.pressed then
        util.exit()
    end
end

function lilka.draw()

    -- Перевіряємо стан кнопок і відмальовуємо відповідне зображення
    display.draw_image(no, 0, 0)
    if state.d.pressed then
        display.draw_image(left, 0, 0)
    end
    if state.b.pressed then
        display.draw_image(right, 0, 0)
    end
    if state.b.pressed and state.d.pressed then
        display.draw_image(both, 0, 0)
    end
    if state.c.pressed then
        util.sleep(0.1)
        display.draw_image(both, 0, 0)
        buzzer.play(40, 100)
        display.queue_draw()
        util.sleep(0.1)
        display.draw_image(no, 0, 0)
    end
end
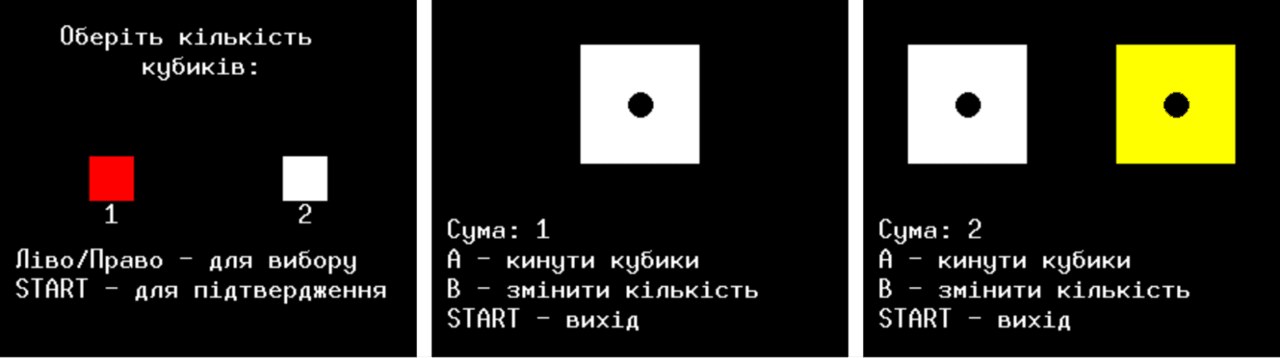
Let’s consider an example of another simple program – the game Cubes. The game is designed for two people without the participation of a computer. It is also interesting that the game was written with the help of artificial intelligence claude.ai based on the game Asteroids.
Let’s take a look at how lilkacubes.lua works.
Gameplay:
Start. The game begins with a welcome screen. The player presses A to enter the game.
Roll the dice. Players roll the dice simultaneously by pressing A. The dice animate (change values) for a short time.
Result. After the toss is complete, the winner is determined:
If the dice values are the same, it is a draw.
If the values are different, the winner is determined by the get_winner function.
New Round: Players can press A to re-roll or B to quit the game.
First, the RGB colors that will be used to display the dice and background are declared.
ROLL_SOUND — the dice roll sound — is a set of MIDI notes, where each note is specified in terms of frequency in Hertz and duration. In other words, it is a simple instruction for a piezo-dynamics (buzzer) on how to play a melody. The selection sound — SELECT_SOUND — works similarly.
The Dice class models a dice with certain characteristics, such as coordinates, size, color, current value, and status (rolled or not). The dice can also “remember” whether it is a winner.
The Dice:new(o) method creates a new dice object, storing the passed parameters or using the default values.
Dice:roll() method. This method starts the “rolling” of the dice. If the dice is not rolled, it changes its status to “rolling” (is_rolling = true), stores the start time of the roll (roll_start_time) and resets the winner status (is_winner = false).
The Dice:update() method updates the dice state: if the roll is in progress, it sets a random value from 1 to 6; if the time is up, it records the result and stops the roll.
The Dice:draw() method is responsible for the visualization of the dice. If the dice wins, a selection is added. An image corresponding to its value is displayed on the screen.
Game logic. The game has two states: greeting (HELLO) and the game process itself (IN_GAME).
The setup_game() function. This function configures the game. The necessary images are loaded, and two dice are created – one for each player. They are arranged symmetrically on the screen.
Function lilka.update(delta). This is the main function that is executed while the game is running. Its task depends on the current state of the game:
In the HELLO state, it waits for the player to press button A to start the game.
In the IN_GAME state, it updates the dice state, checking whether the player pressed A for a new roll or B to exit.
When both dice have finished rolling, the winner is determined using the get_winner function. The winner is assigned the status is_winner.
The lilka.draw() function. This function draws everything that happens in the game. In the HELLO state, it displays the welcome screen. In the IN_GAME state, it draws the dice, the names of the players, and the result of the round after the roll is complete. Additionally, instructions with buttons are displayed.
--[[
    Гра "Кубики"
    Гра з вибором кількості кубиків для консолі lilka.dev
]]

WHITE = display.color565(255, 255, 255)
BLACK = display.color565(0, 0, 0)
YELLOW = display.color565(255, 255, 0)
RED = display.color565(255, 0, 0)

-------------------------------------------------------------------------------
-- Завантаження ресурсів
-------------------------------------------------------------------------------

-- Звук кидання кубиків
ROLL_SOUND = {
    {440, 8},
    {523, 8},
    {659, 8},
    {784, 8},
    {880, 8},
}

-- Звук вибору
SELECT_SOUND = {
    {660, 8},
    {880, 8},
}

-------------------------------------------------------------------------------
-- Клас кубика
-------------------------------------------------------------------------------

Dice = {
    x = 0,
    y = 0,
    size = 80,
    color = WHITE,
    current_value = 1,
    is_rolling = false,
    roll_start_time = 0,
    roll_duration = 1,
}

function Dice:new(o)
    o = o or {}
    setmetatable(o, self)
    self.__index = self
    return o
end

function Dice:roll()
    if not self.is_rolling then
        self.is_rolling = true
        self.roll_start_time = util.time()
    end
end

function Dice:update()
    if self.is_rolling then
        local time_elapsed = util.time() - self.roll_start_time
        if time_elapsed < self.roll_duration then
            -- Під час анімації швидко змінюємо значення
            self.current_value = math.floor(math.random() * 6) + 1
        else
            -- Зупиняємо анімацію і встановлюємо фінальне значення
            self.current_value = math.floor(math.random() * 6) + 1
            self.is_rolling = false
        end
    end
end

function Dice:draw()
    -- Малюємо квадрат кубика
    display.fill_rect(self.x - self.size/2, self.y - self.size/2, self.size, self.size, self.color)

    -- Малюємо крапки відповідно до значення
    local dot_size = 8
    local padding = 18

    if self.current_value == 1 then
        -- Центральна крапка
        display.fill_circle(self.x, self.y, dot_size, BLACK)

    elseif self.current_value == 2 then
        -- Дві крапки по діагоналі
        display.fill_circle(self.x - padding, self.y - padding, dot_size, BLACK)
        display.fill_circle(self.x + padding, self.y + padding, dot_size, BLACK)

    elseif self.current_value == 3 then
        -- Три крапки по діагоналі
        display.fill_circle(self.x - padding, self.y - padding, dot_size, BLACK)
        display.fill_circle(self.x, self.y, dot_size, BLACK)
        display.fill_circle(self.x + padding, self.y + padding, dot_size, BLACK)

    elseif self.current_value == 4 then
        -- Чотири крапки по кутах
        display.fill_circle(self.x - padding, self.y - padding, dot_size, BLACK)
        display.fill_circle(self.x + padding, self.y - padding, dot_size, BLACK)
        display.fill_circle(self.x - padding, self.y + padding, dot_size, BLACK)
        display.fill_circle(self.x + padding, self.y + padding, dot_size, BLACK)

    elseif self.current_value == 5 then
        -- П'ять крапок
        display.fill_circle(self.x - padding, self.y - padding, dot_size, BLACK)
        display.fill_circle(self.x + padding, self.y - padding, dot_size, BLACK)
        display.fill_circle(self.x, self.y, dot_size, BLACK)
        display.fill_circle(self.x - padding, self.y + padding, dot_size, BLACK)
        display.fill_circle(self.x + padding, self.y + padding, dot_size, BLACK)

    elseif self.current_value == 6 then
        -- Шість крапок
        display.fill_circle(self.x - padding, self.y - padding, dot_size, BLACK)
        display.fill_circle(self.x + padding, self.y - padding, dot_size, BLACK)
        display.fill_circle(self.x - padding, self.y, dot_size, BLACK)
        display.fill_circle(self.x + padding, self.y, dot_size, BLACK)
        display.fill_circle(self.x - padding, self.y + padding, dot_size, BLACK)
        display.fill_circle(self.x + padding, self.y + padding, dot_size, BLACK)
    end
end

-------------------------------------------------------------------------------
-- Стани гри
-------------------------------------------------------------------------------

STATES = {
    HELLO = 0,     -- Початковий екран
    SELECT = 1,    -- Вибір кількості кубиків
    IN_GAME = 2,   -- Гра
}

-------------------------------------------------------------------------------
-- Змінні стану гри
-------------------------------------------------------------------------------

local game_state = STATES.HELLO
local selected_dice_count = 1  -- Вибрана кількість кубиків
local dice1 = nil
local dice2 = nil

-------------------------------------------------------------------------------
-- Головні цикли гри
-------------------------------------------------------------------------------

function setup_dice(count)
    if count == 1 then
        dice1 = Dice:new({
            x = display.width/2,
            y = display.height/2 - 50,
            color = WHITE
        })
        dice2 = nil
    else
        dice1 = Dice:new({
            x = display.width/2 - 70,
            y = display.height/2 - 50,
            color = WHITE
        })
        dice2 = Dice:new({
            x = display.width/2 + 70,
            y = display.height/2 - 50,
            color = YELLOW
        })
    end
end

function lilka.update(delta)
    local state = controller.get_state()

    if game_state == STATES.HELLO then
        if state.start.just_pressed then
            game_state = STATES.SELECT
        end
    elseif game_state == STATES.SELECT then
        -- Вибір кількості кубиків
        if state.left.just_pressed or state.right.just_pressed then
            selected_dice_count = selected_dice_count == 1 and 2 or 1
            buzzer.play_melody(SELECT_SOUND, 400)
        end

        if state.start.just_pressed then
            setup_dice(selected_dice_count)
            game_state = STATES.IN_GAME
        end
    else
        -- Оновлюємо стан кубиків
        dice1:update()
        if dice2 then
            dice2:update()
        end

        -- Якщо натиснута кнопка A і кубики не крутяться
        if state.a.just_pressed then
            local can_roll = not dice1.is_rolling
            if dice2 then
                can_roll = can_roll and not dice2.is_rolling
            end

            if can_roll then
                dice1:roll()
                if dice2 then
                    dice2:roll()
                end
                buzzer.play_melody(ROLL_SOUND, 400)
            end
        end

        -- Повернення до вибору кількості кубиків
        if state.b.just_pressed then
            game_state = STATES.SELECT
        end

        -- Вихід з гри
        if state.start.just_pressed then
            util.exit()
        end
    end
end

function lilka.draw()
    if game_state == STATES.HELLO then
        display.fill_screen(BLACK)
        display.set_cursor(display.width/2 - 50, display.height/2 - 20)
        display.print("ГРА КУБИКИ")
        display.set_cursor(display.width/2 - 80, display.height/2 + 20)
        display.print("Натисніть START")

    elseif game_state == STATES.SELECT then
        display.fill_screen(BLACK)
        display.set_cursor(display.width/2 - 100, 30)
        display.print("Оберіть кількість")
        display.set_cursor(display.width/2 - 45, 50)
        display.print("кубиків:")

        -- Малюємо варіанти вибору
        local y = display.height/2

        -- Перший кубик
        if selected_dice_count == 1 then
            display.fill_rect(display.width/2 - 80, y - 15, 30, 30, RED)
        else
            display.fill_rect(display.width/2 - 80, y - 15, 30, 30, WHITE)
        end
        display.set_cursor(display.width/2 - 70, y + 30)
        display.print("1")

        -- Два кубики
        if selected_dice_count == 2 then
            display.fill_rect(display.width/2 + 50, y - 15, 30, 30, RED)
        else
            display.fill_rect(display.width/2 + 50, y - 15, 30, 30, WHITE)
        end
        display.set_cursor(display.width/2 + 60, y + 30)
        display.print("2")

        display.set_cursor(10, display.height - 60)
        display.print("Ліво/Право - для вибору")
        display.set_cursor(10, display.height - 40)
        display.print("START - для підтвердження")

    else
        display.fill_screen(BLACK)
        -- Малюємо кубики
        dice1:draw()
        if dice2 then
            dice2:draw()
        end
        local instructions_y = display.height - 80

        display.set_cursor(10, instructions_y)
        if not dice1.is_rolling and (not dice2 or not dice2.is_rolling) then
            local sum = dice1.current_value
            if dice2 then
                sum = sum + dice2.current_value
            end
            display.print("Сума: " .. sum)
        else
            display.print("Сума: --")
        end

        display.set_cursor(10, instructions_y + 20)
        display.print("A - кинути кубики")
        display.set_cursor(10, instructions_y + 40)
        display.print("B - змінити кількість")
        display.set_cursor(10, instructions_y + 60)
        display.print("START - вихід")
    end
end
Let’s look at how Pastebin works – it’s a small program for downloading text files from the Pastebin web service. It allows users to enter a link code to a file, specify a file name, and then download and save the specified text file to a local drive.
Initially, the program connects three libraries.
#include “pastebinApp.h” is a separate file, an instruction for the program that describes its structure. More details here.
#include <HTTPClient.h> is a library for working with the Internet. It allows you to send requests (GET, POST) and receive responses from any websites or servers.
#include <lilka/config.h> is a configuration of the Lilka platform for interaction with buttons, the screen and files.
When a program is created, a special block of code called a constructor is called. It is responsible for the initial setup of the program, setting its basic parameters.
pastebinApp::pastebinApp() : App("pastebin loader") {
}
Here we see the constructor for our pastebinApp application. It says, “I am creating an application called pastebin loader.”
Think of it like putting a label on a box that says, “This is a program for loading files from Pastebin.” This name helps the application understand who it is, and it makes it easier for us to identify it if there are many such box applications.
The run() function is the entry point for the application. When the application starts running, the system automatically calls this method. This rule is built into the base class App, which defines the general structure of how applications work.
The run() function has only one line, uiLoop();. This command tells the application, “Run the menu and show it to the user.”
void pastebinApp::run() {
    uiLoop();
}

WiFiClientSecure client;
HTTPClient http;
String link_code = "";
String filename = "";

String path_pastebin_folder = "/pastebin";
String pastebin_url = "https://pastebin.com/raw/";
In this code snippet, we declare variables to prepare the program for working with the Internet, the file system, and data processing. Each variable has its own role and helps the program do its job correctly.
The first variable is WiFiClientSecure client. Here we create a “client” that will work with the Internet. Since the program needs to use secure access to sites (https), we create a secure client. This allows the program to connect securely to sites such as Pastebin.
The second variable is HTTPClient http. This is the so-called “middleman”. It helps the program send requests to Pastebin to get the necessary files. Imagine it like a person calling a store and asking if they have the product they need. This “middleman” makes requests so that the program can get what it needs.
Next are the String variables link_code and String filename. These are just empty strings or “boxes” where the program will store information. In link_code we will store the link code to the file, and in filename we will store the name of the file we want to download.
The String variable path_pastebin_folder points to the folder where the program will save the files that will be downloaded from Pastebin. It is like an address on your computer where all the files will be stored so that they can be easily found and opened.
And the last variable is String pastebin_url. This stores the address of the Pastebin site where the program will send requests to get the files. This is similar to when you type the address of a website in your browser to go to the desired page.
#include "pastebinApp.h"
#include <HTTPClient.h>
#include <lilka/config.h>

pastebinApp::pastebinApp() : App("pastebin loader") {
}

void pastebinApp::run() {
    uiLoop();
}

void pastebinApp::uiLoop() {
    WiFiClientSecure client;
    HTTPClient http;
    String link_code = "";
    String filename = "";

    String path_pastebin_folder = "/pastebin";
    String pastebin_url = "https://pastebin.com/raw/";

    while (1) {
        lilka::Menu settingsMenu("Pastebin");
        settingsMenu.addActivationButton(lilka::Button::B);
        settingsMenu.addItem("Код", 0, 0, link_code);
        settingsMenu.addItem("Назва", 0, 0, filename);
        settingsMenu.addItem("Завантажити", 0, 0, "");
        while (!settingsMenu.isFinished()) {
            settingsMenu.update();
            settingsMenu.draw(canvas);
            queueDraw();
        }
        if (settingsMenu.getButton() == lilka::Button::B) {
        } else {
            if (settingsMenu.getCursor() == 0) {
                lilka::InputDialog inputDialog(String("Введіть код"));
                inputDialog.setValue(link_code);
                while (!inputDialog.isFinished()) {
                    inputDialog.update();
                    inputDialog.draw(canvas);
                    queueDraw();
                }
                link_code = inputDialog.getValue();
            } else if (settingsMenu.getCursor() == 1) {
                lilka::InputDialog inputDialog(String("Введіть назву"));
                inputDialog.setValue(filename);
                while (!inputDialog.isFinished()) {
                    inputDialog.update();
                    inputDialog.draw(canvas);
                    queueDraw();
                }
                filename = inputDialog.getValue();
            } else if (settingsMenu.getCursor() == 2) {
                if (filename.length() == 0) {
                    filename = link_code;
                    continue;
                }

                FRESULT res = f_stat(path_pastebin_folder.c_str(), nullptr);

                if (res == FR_NO_FILE) {
                    res = f_mkdir(path_pastebin_folder.c_str());
                    if (res != FR_OK) {
                        lilka::Alert alert("pastebin", "Помилка створення директорії");
                        alert.draw(canvas);
                        queueDraw();
                        while (!alert.isFinished()) {
                            alert.update();
                        }
                        printf("Помилка створення директорії %d\n", res);
                    }
                } else if (res != FR_OK) {
                    lilka::Alert alert("pastebin", "Помилка створення директорії");
                    alert.draw(canvas);
                    queueDraw();
                    while (!alert.isFinished()) {
                        alert.update();
                    }
                } else {
                    String url = pastebin_url + link_code;
                    String fullPath = path_pastebin_folder + "/" + filename;

                    client.setInsecure();
                    http.begin(client, url);
                    int httpCode = http.GET();

                    if (httpCode == HTTP_CODE_OK) {
                        // Open file for writing
                        FILE* file = fopen((lilka::fileutils.getSDRoot() + fullPath).c_str(), FILE_WRITE);
                        if (!file) {
                            lilka::Alert alert("pastebin", "Помилка відкривання файлу");
                            alert.draw(canvas);
                            queueDraw();
                            while (!alert.isFinished()) {
                                alert.update();
                            }
                            printf("Помилка відкривання файлу");
                            break;
                        }

                        fprintf(file, "%s", http.getString().c_str());
                        fclose(file);

                        delay(10);

                        lilka::Alert alert("pastebin", "Файл завантажено, та збережено");
                        alert.draw(canvas);
                        queueDraw();
                        while (!alert.isFinished()) {
                            alert.update();
                        }

                        printf("Файл завантажено, та збережено");
                        break;
                    } else {
                        lilka::Alert alert("pastebin", "HTTP GET failed, error: " + http.errorToString(httpCode));
                        alert.draw(canvas);
                        queueDraw();
                        while (!alert.isFinished()) {
                            alert.update();
                        }

                        printf("HTTP GET failed, error: %s\n", http.errorToString(httpCode).c_str());
                    }
                }
            }
        }
    }
}
When creating your own programs, you can use the help of the community in the programming branch. I also used ChatGPT and Claude. But before writing any program, I feed them a similar existing program or an example program from the documentation. The written code can be uploaded to Github, and the link can be shared in the User Programs and Scripts branch.
There are a lot of interesting projects that can be implemented on Lilka. The examples that I will describe are not a roadmap for the Lilka project, but simply my own wishes. Perhaps they will inspire you to create your own port or program.
Help with porting Python to Lilka. MicroPython is a lightweight implementation of Python optimized for microcontrollers. It allows you to write clear and flexible code for embedded systems, supports peripherals (GPIO, I2C, SPI, UART), file system and multitasking.
The project currently needs help, as only one person is involved in porting. If you want to join, write to the appropriate thread.
Help with the development and understanding of the principles of .mjs scripts. At the moment, the project documentation does not have enough information.
App store. Since .lua and .mjs scripts can be run directly from files, then you can create an app store that will allow you to download such scripts. You can do this from scratch or be inspired by the existing program for Lilka Pastebin.
Pico8 is a modern game engine that mimics the limitations of 80s game systems to encourage creativity and ingenuity in game development without being overwhelmed by the many features of modern tools and machines.
These limitations also give PICO-8 games a unique look and feel. There is a port of Pico-8 to ESP32. However, there are some technical challenges to overcome in order to port it.
Micro Hydra is a simple MicroPython-based application launcher with some OS-like features. The main function of MicroHydra is to provide an interface for easily switching between MicroPython applications. A branch dedicated to MicroHydra.
Wi-Fi Duck is a device that acts as a wireless keyboard. It creates a Wi-Fi access point through which you can remotely enter text or commands on a connected device.
Module and program for reading and writing and emulating RFID keys. So that you can open the entrance door with Lilka. Something like a Chameleon device.
I am interested in a smart home. And you can port an MQTT client, server. Or a program similar to homeThings or ESPWA. A universal remote control for infrared devices (air conditioner, TV, fan, humidifier, etc.). A device for searching for IBeacon, launching the Ukrainian-language voice assistant Voice Assistant.
Meshtastic is a project for creating a wireless network without the Internet using LoRa. Lilka can be used as a node for exchanging messages over long distances. By the way, in Ukraine there is a separate community dedicated to this project. You can also join the Meshtastic discussion on Lilka in a separate community branch.
Lilka has huge potential – it opens up space for technical creativity, allowing everyone to create something unique. It can be as simple or complex as you want. Lilka is not just a set of parts, but an incredibly cool Ukrainian project with its own idea, vision and community.