15.07.2025
22 min
762

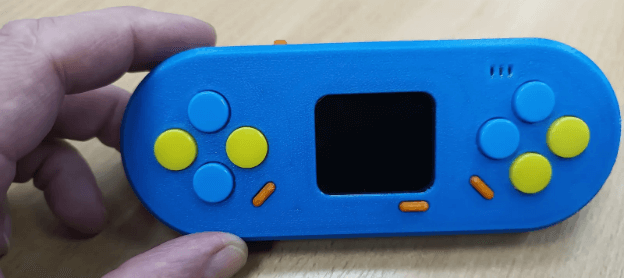
The Lilka DIY console based on ESP32‑S3 is an open Ukrainian project for education, hobby, and gaming. In this article, we look at how to assemble Lilka, where to get the components, and why it is already conquering the community.
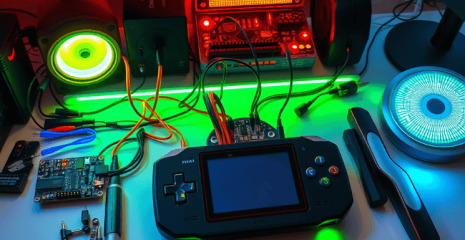
Hello everyone. The first release of the Ukrainian educational and hacking console Lilka based on the ESP32-S3 microcontroller from Anderson and his friends was recently released. And, in my opinion, it caused quite a stir in the Ukrainian IT community. I am absolutely delighted with this project. So in this article I will introduce you in detail to Lilka and its capabilities.
Lilka (GitHub) is an open source portable development console based on the ESP32-S3-wroom1 microcontroller, assembled from readily available components. Lilka has its own printed circuit board, operating system, ready-made libraries to simplify development, applications, games, demos, detailed documentation, and a great community.
The approximate cost of all parts of the basic version is 500-700 hryvnias.
Anyone can easily assemble Lilka by purchasing a kit (at the moment the first two batches have been sold out, it is unknown when the next batch will be).
If Lilka kits are not available for sale, you can write to the Imrad store ([email protected]) and pre-order the next batch.
You can ask if anyone has an extra Lilka board in the general Discord community branch. However, you need to buy the components yourself. Or write to the buy-sell branch.
You can also print the Lilka board yourself using the Chinese sites JLC PCB or PCBWay. To do this, you need to download all .gbr, .drl and .gbrjob files from here. Add them to a ZIP archive and upload to the site. You can see the board printing settings here. Manufacturing takes about a week, the road another two weeks.
If you want faster, you can print in Ukraine – pcb24.com.ua. To do this, you also need to download all .gbr, .drl and .gbrjob files from here and send them to the company’s email.
You can get help and advice on ordering a Lilka board yourself in the Lilkav2: PCB development branch.
Lilka is already called the Ukrainian Flipper Zero or game console. For me, Anderson’s video has a vibe from the era of ZX-Spectrum and Commodore computers. And Lilka is associated with the time when I tried to get the most out of my Java phone. For you, this project may have its own associations.
Lilka itself is positioned as a folk portable educational and hacking console for technical creativity. And as a multifunctional convenient platform for development, which gives a set of tools, and you can turn it into whatever you want.
Lilka can be used as:
A tool for self-study of programming languages.
A platform for creating a pet project.
A device for teaching Arduino and microcontrollers in computer science lessons in schools and Olympiads.
A device for monitoring and measuring (temperature, humidity, air quality, etc.).
A device for studying circuit design, networks, algorithms, automation, and developing intelligent devices in universities.
A controller for CNC machines (numerical control).
A device for creating and running games.
A wireless Bluetooth gamepad.
A pentesting and hacking tool (Wi-Fi jamming, bad USB, etc.).
SDR (RFID, NFC, 443).
A device for controlling climate, lighting, security, and integrating with MQTT, Rest, Post, ESPHome, Home Assistant, etc.
A controller for creating autonomous drones or other vehicles.
A device for writing and listening to tracker music.
A device for a demo scene.
A device for creating interactive art installations or musical instruments.
And this is not a complete list of what Lilka can be. The range of uses depends on your imagination.
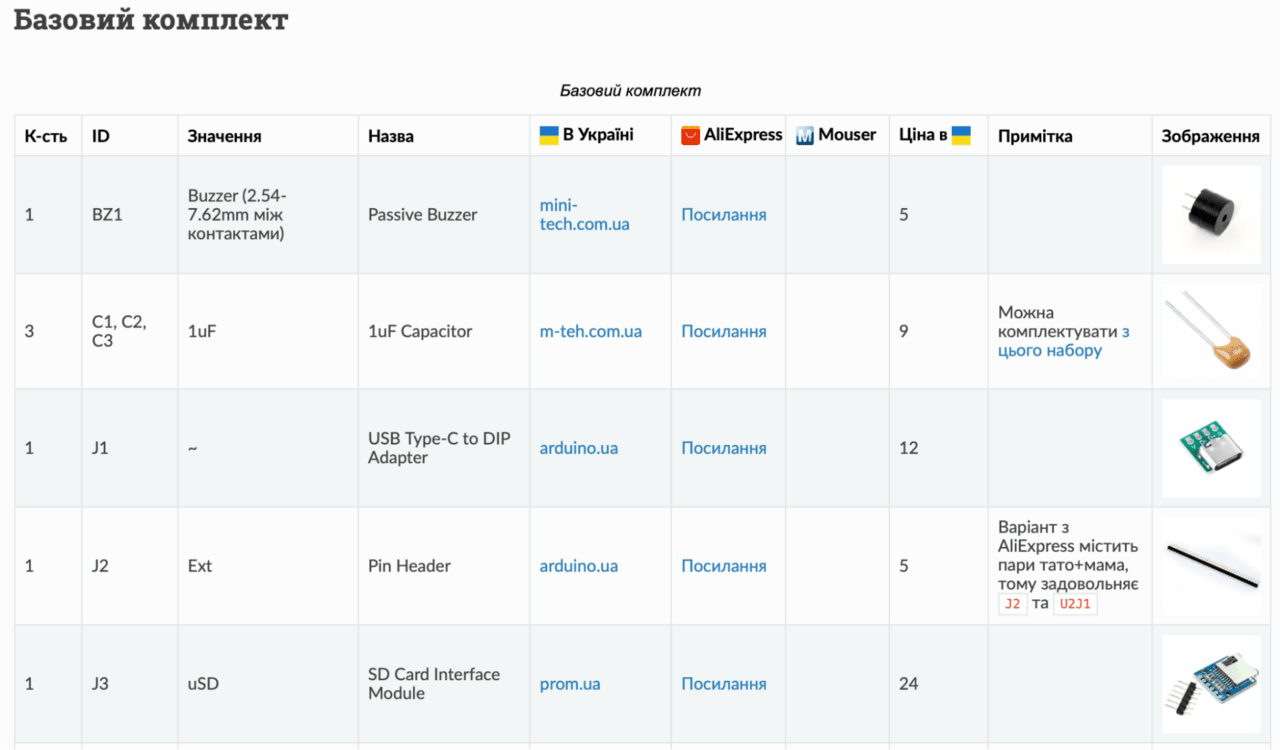
To assemble Lilka, you need a printed circuit board for the project and a set of electronic components. You can buy them in a ready-made set (they were sold out at the time of writing), ask the Discord community if anyone has an extra board, or print them yourself by downloading a separate Gerber file or the entire catalog. In Ukraine, you can print them here: pcb24, in China, popular sites are pcbway and jlcpcb. My friend printed 10 boards on jlc pcb for $25.
A full list of all the details can be found in the Lilka project documentation. I really liked that there is a link to where to buy in Ukraine on Ali and Mouser.
To reduce the cost of the project, there are three different configurations.
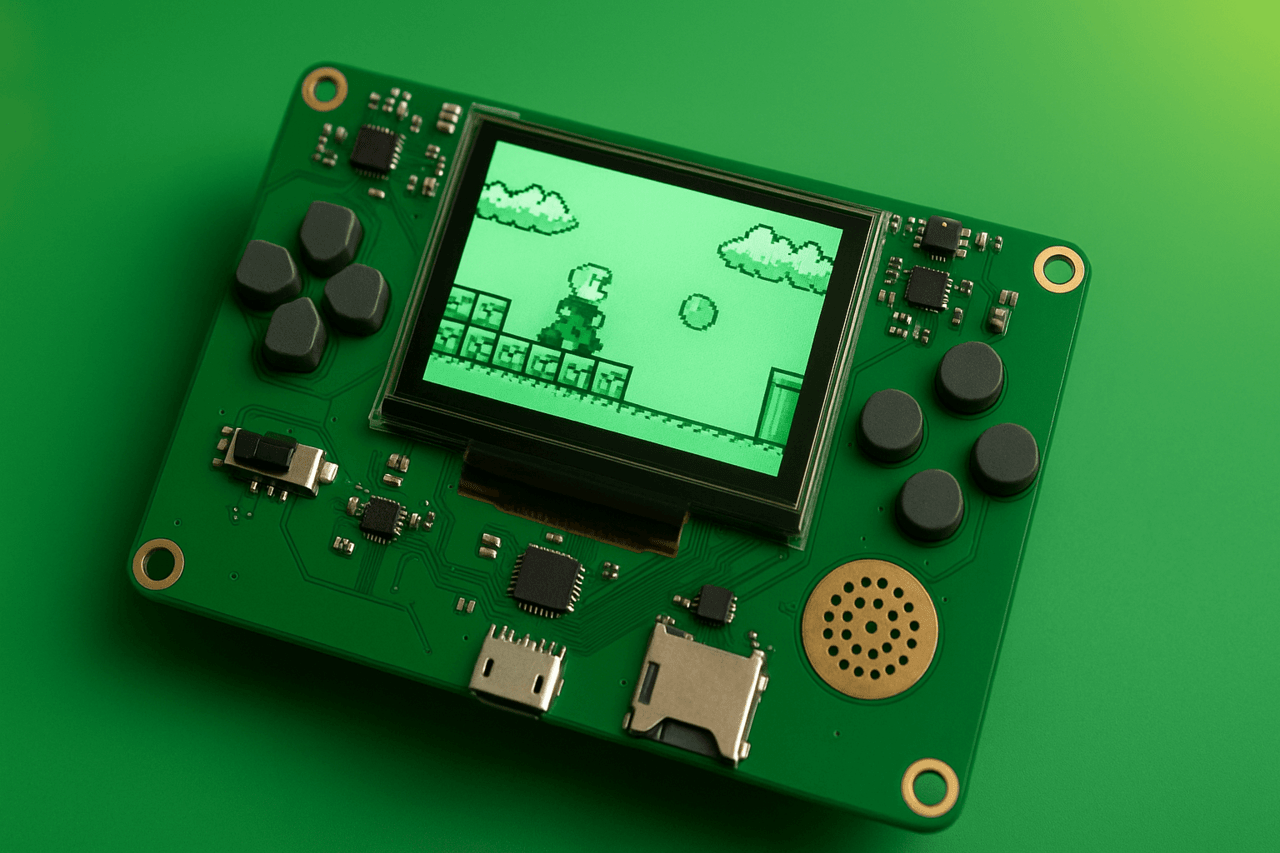
Basic – has a display, buttons, piezo speaker, micro sd slot, powered by a usb type-c cable.
Basic + Battery – has everything that the basic package has, but allows you to connect a battery to make the console portable, not tied to wires. You can use any 3.7 volt battery. 18650, bl 5c, AA batteries or any other option convenient for you.
Basic + Sound – has everything that the basic package has, but additionally has a MAX98357 amplifier and a small 8 Ohm 1 W speaker or a 3.5 port for headphones.
I was surprised why you had to choose. It’s really cool that the entire assembly process is documented step by step.
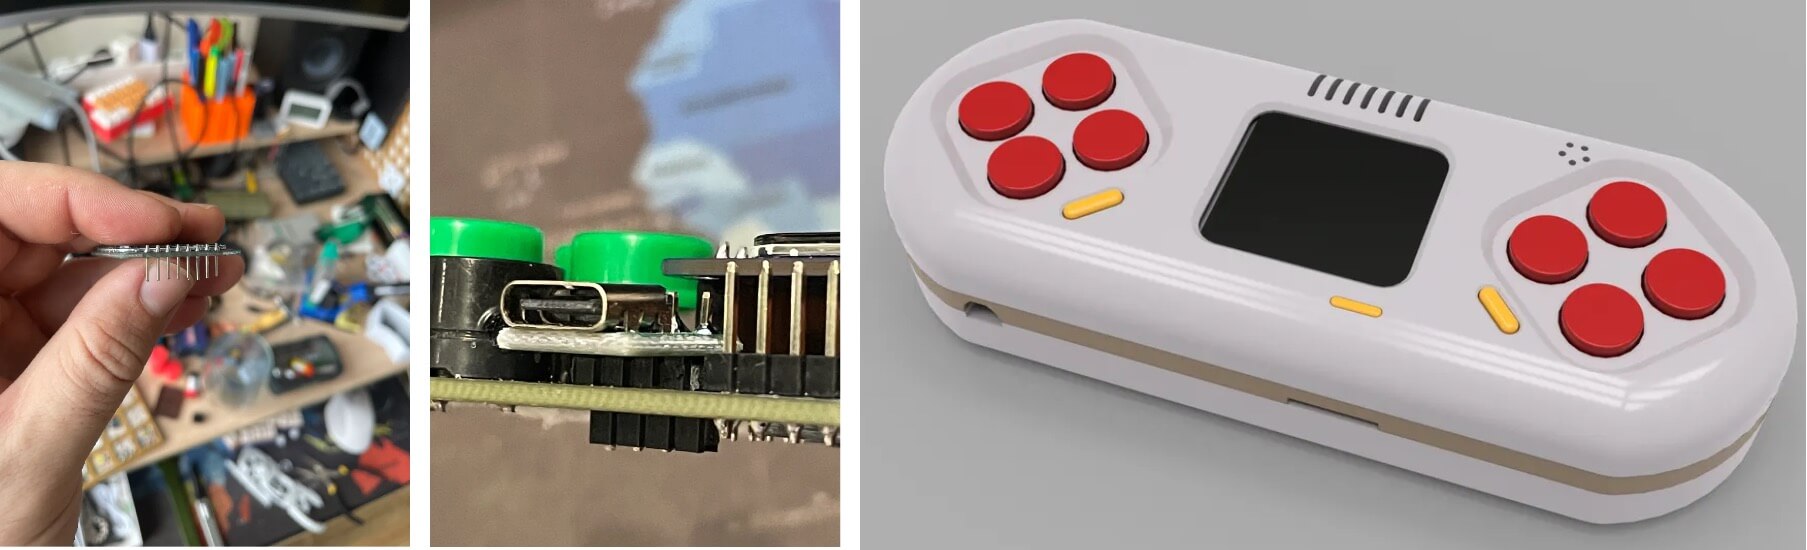
For the display, it is recommended to first solder the connector to the board, and then insert the display into it. This will make it easier to install and remove it if necessary.
The parts list does not include display stands. The imrad website lists the following stand parts: TFF-M2.5×10 (6 pcs), TFM-M2×10 (3 pcs). Screws and nuts: M2 nut (3 pcs), M2.5×6 screw (12 pcs), M2×6 screw (3 pcs). The display uses M2 stand nuts and screws – those in the amount of 3 pcs.
The list also contains a slightly misleading link to the SW11 button on AliExpress. It is not angled, when the switch is soldered, it looks the wrong way. There are side buttons on Ali, they are called MSK-05G2.0 or horizontal slide switch dip. If you plan to print the case, check the section about it, because the soldering of type c and display should be high.
After the device is assembled, when connecting it with a usb type-c cable (for data transfer), it should appear as a USB device. If so, you can flash it.
If Lilka is not displayed on the computer, perhaps something is left unsoldered. You can take a picture of your board from both sides and send it to the general Discord community branch. There you can ask why it does not work and get help.
1. Download and install Visual Studio Code from the official website.
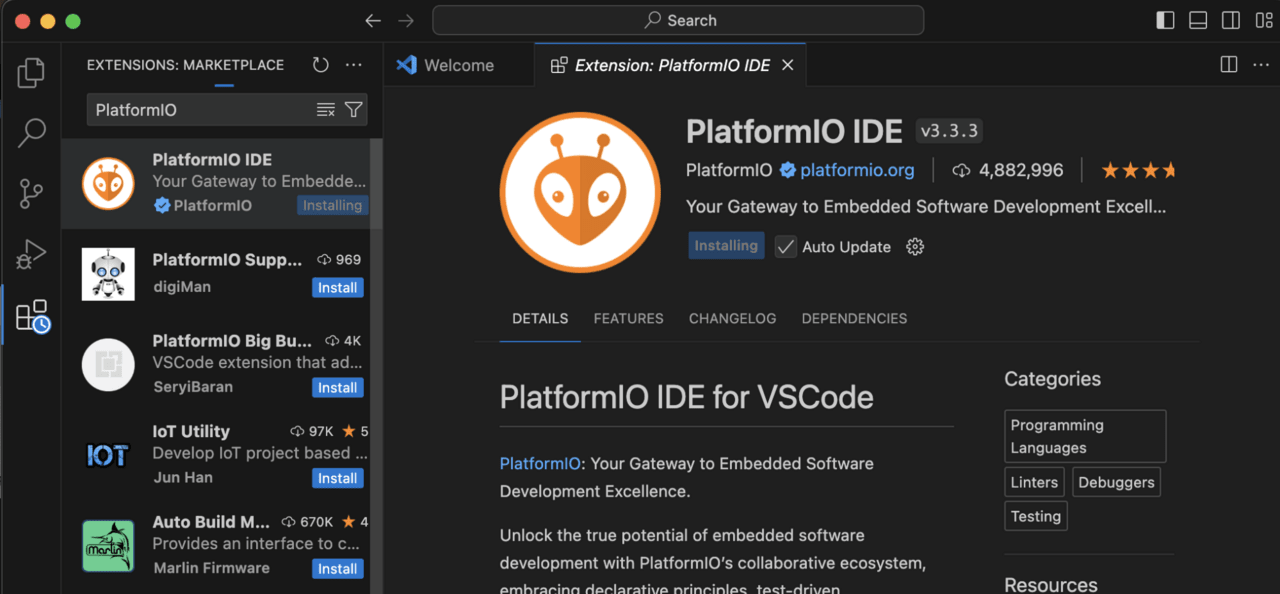
2. Go to the Extensions section and install the PlatformIO IDE plugin.
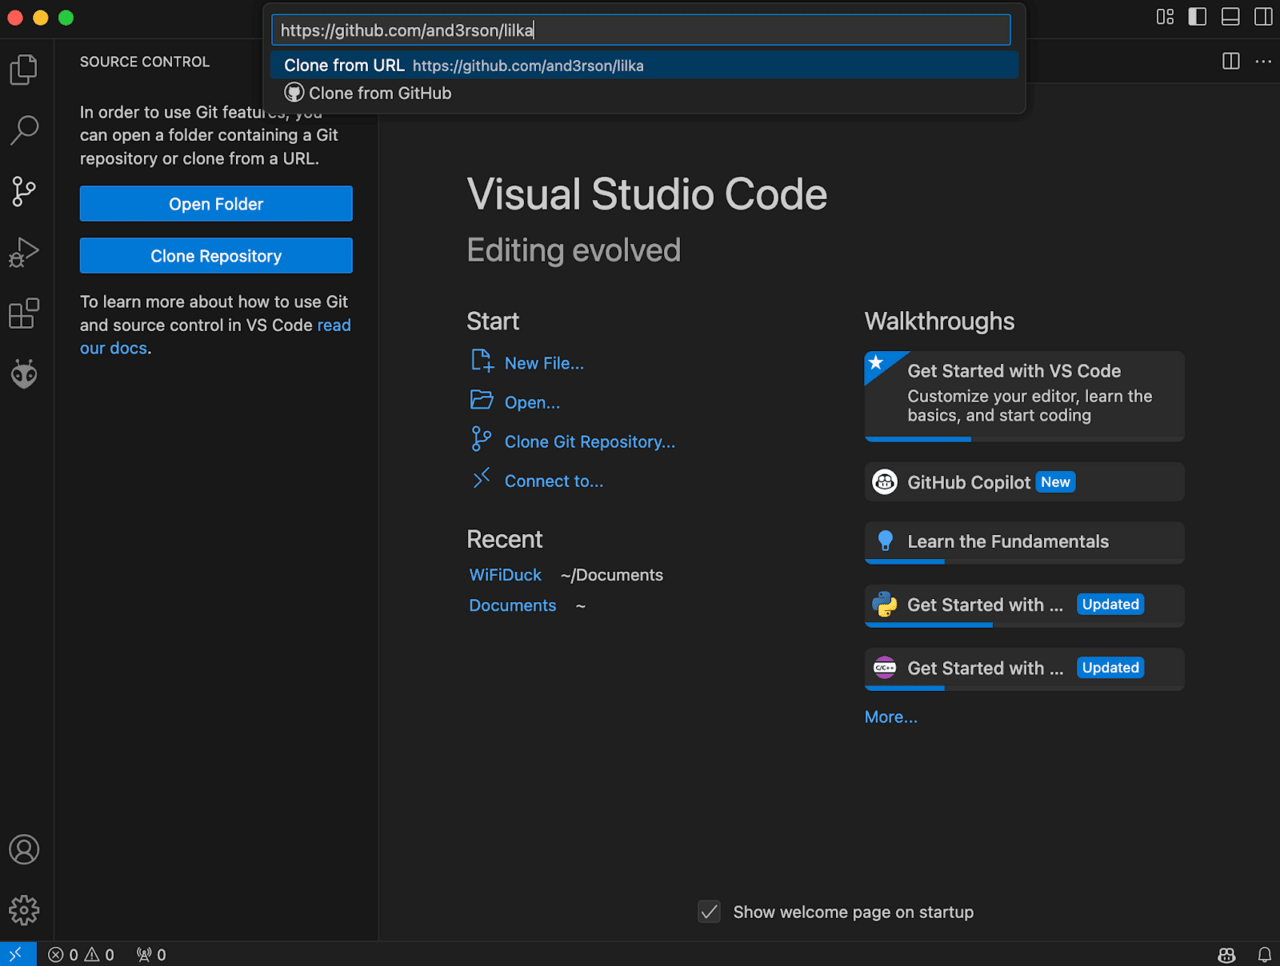
3. Go to the Source Control section (download Git if necessary) >> click Clone Repository >> paste the link github.com/lilka-dev/keira (link updated 06/25/25) and download the project code.
4. Go to File >> Open Folder >> lilka >> firmware >> kiera.
5. Install the SZ210x USB to UART drivers.
6. Connect Lilka with a USB type-c — type cable to transfer data to the computer. A type c — type a cable is required, since USB 3.0 and type-c type-c cables are not supported.
In Linux, you can run the connected USB devices using the sudo dmesg -wH or lsusb commands.
In MacOS: sudo dmesg or ls /dev/tty.* /dev/cu.*ioreg -p IOUSB — displays information about all connected USB devices using the IORegistry tree.
In Windows — can be viewed through the device manager.
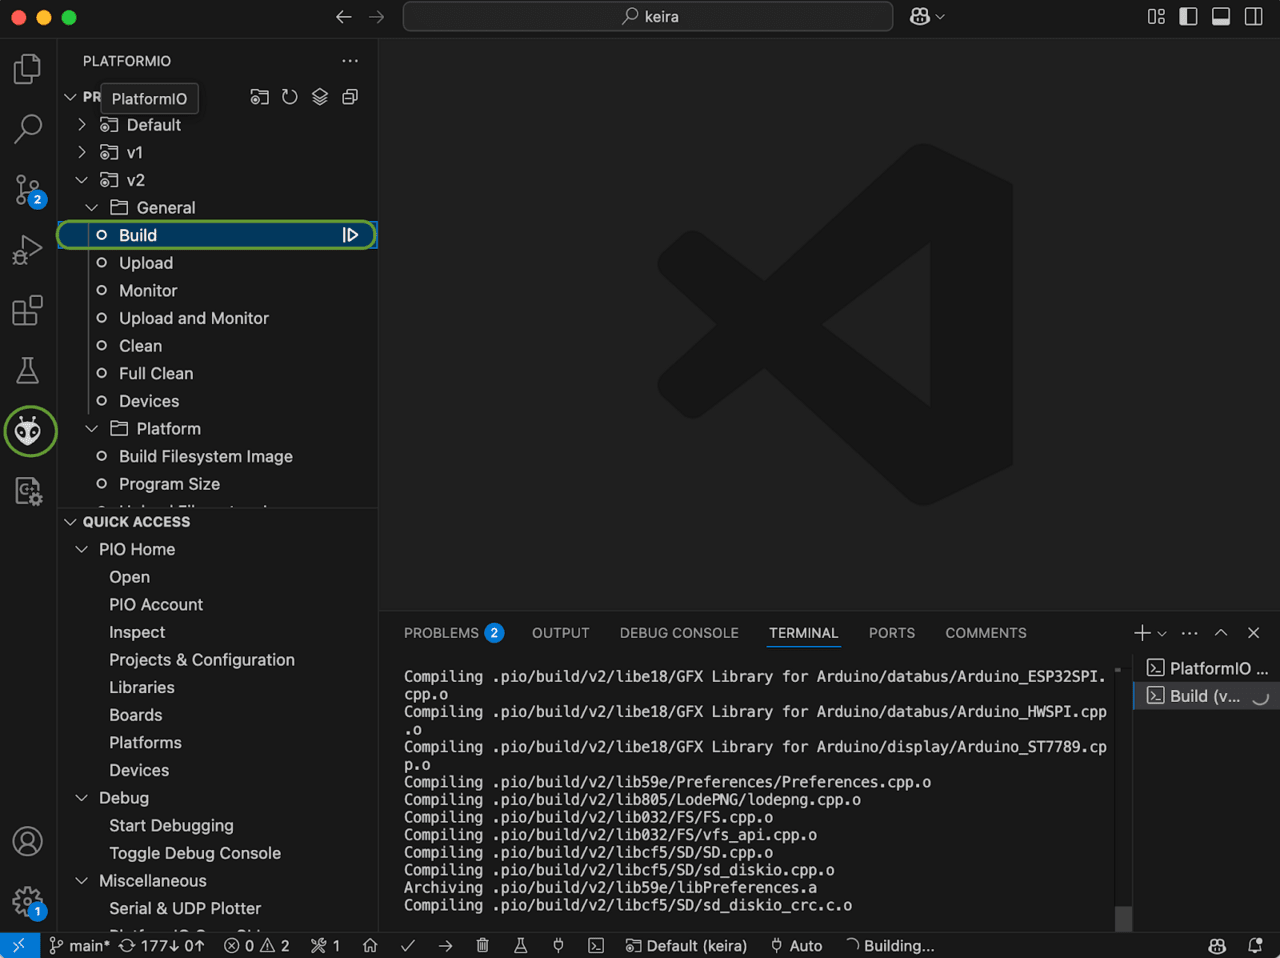
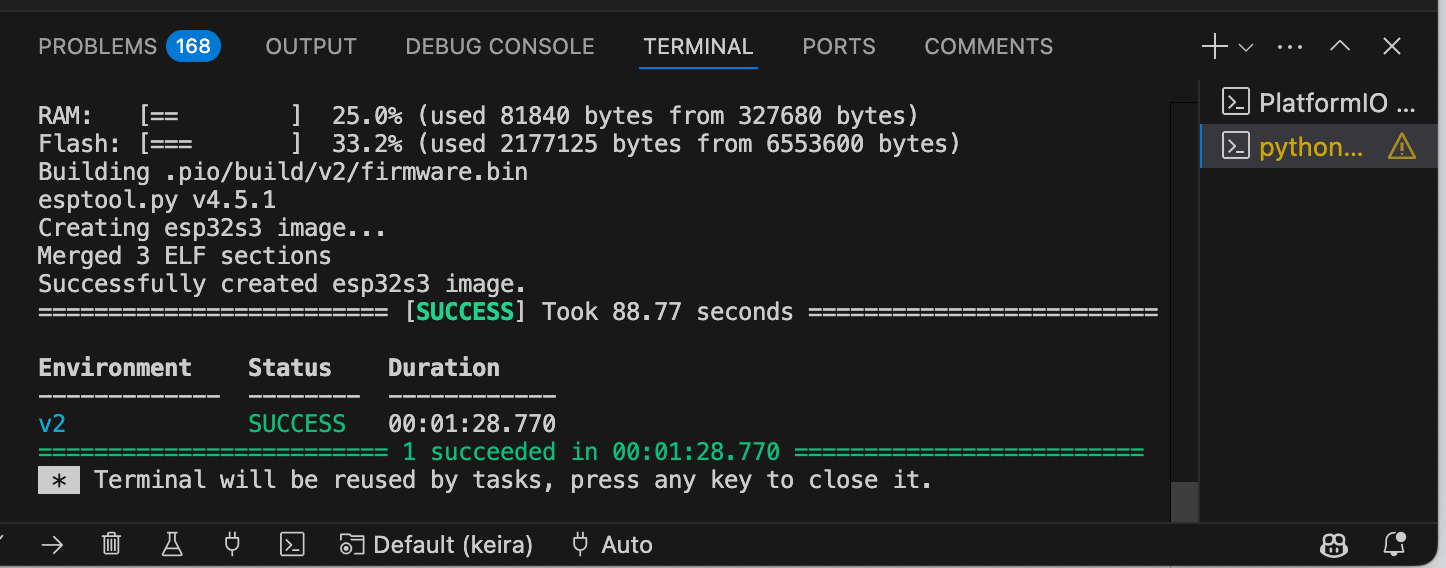
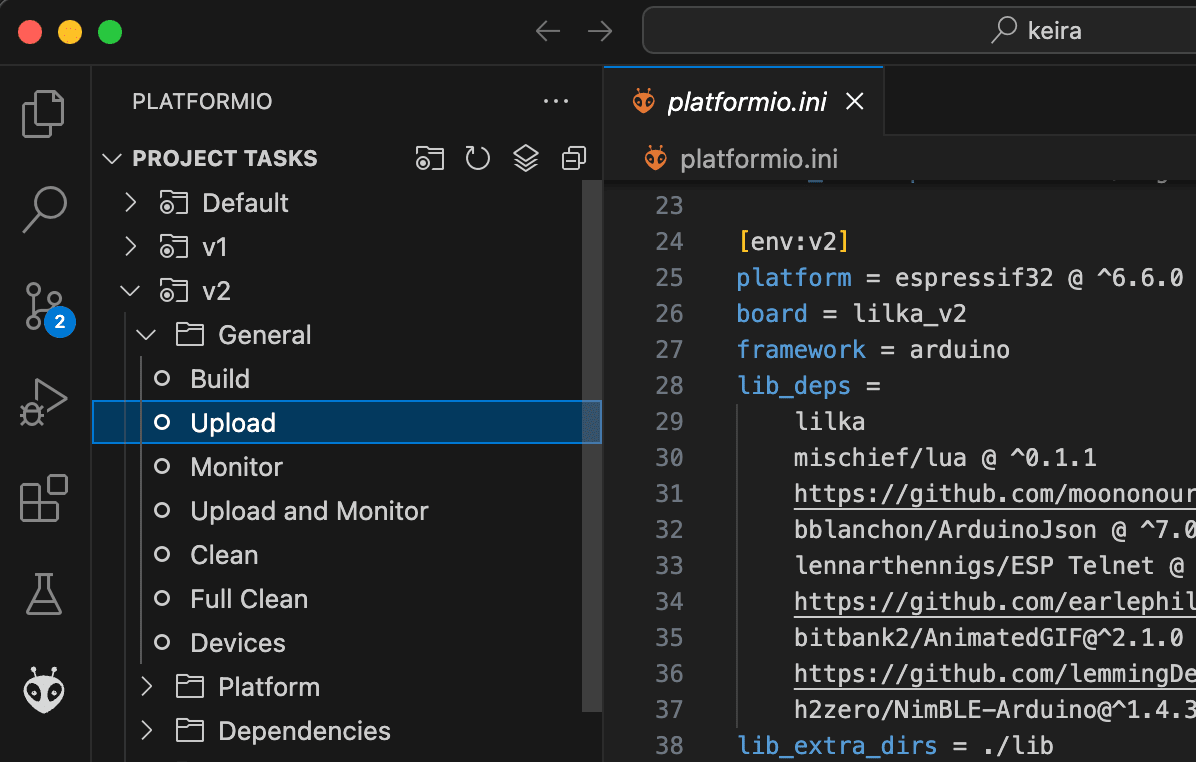
7. Go to the tab with the PlatformIO ant. Expand the v2 >> General >> Build directory and wait for the Lilka firmware to build.
If the build is successful, you will receive the message success.
8. Now you need to press and hold the SELECT button and turn on the Lilka. After that, you can release the SELECT button. This will put the Lilka into bootloader mode: in it you can upload the new firmware to it.
9. Expand the v2 >> General >> Upload directory.
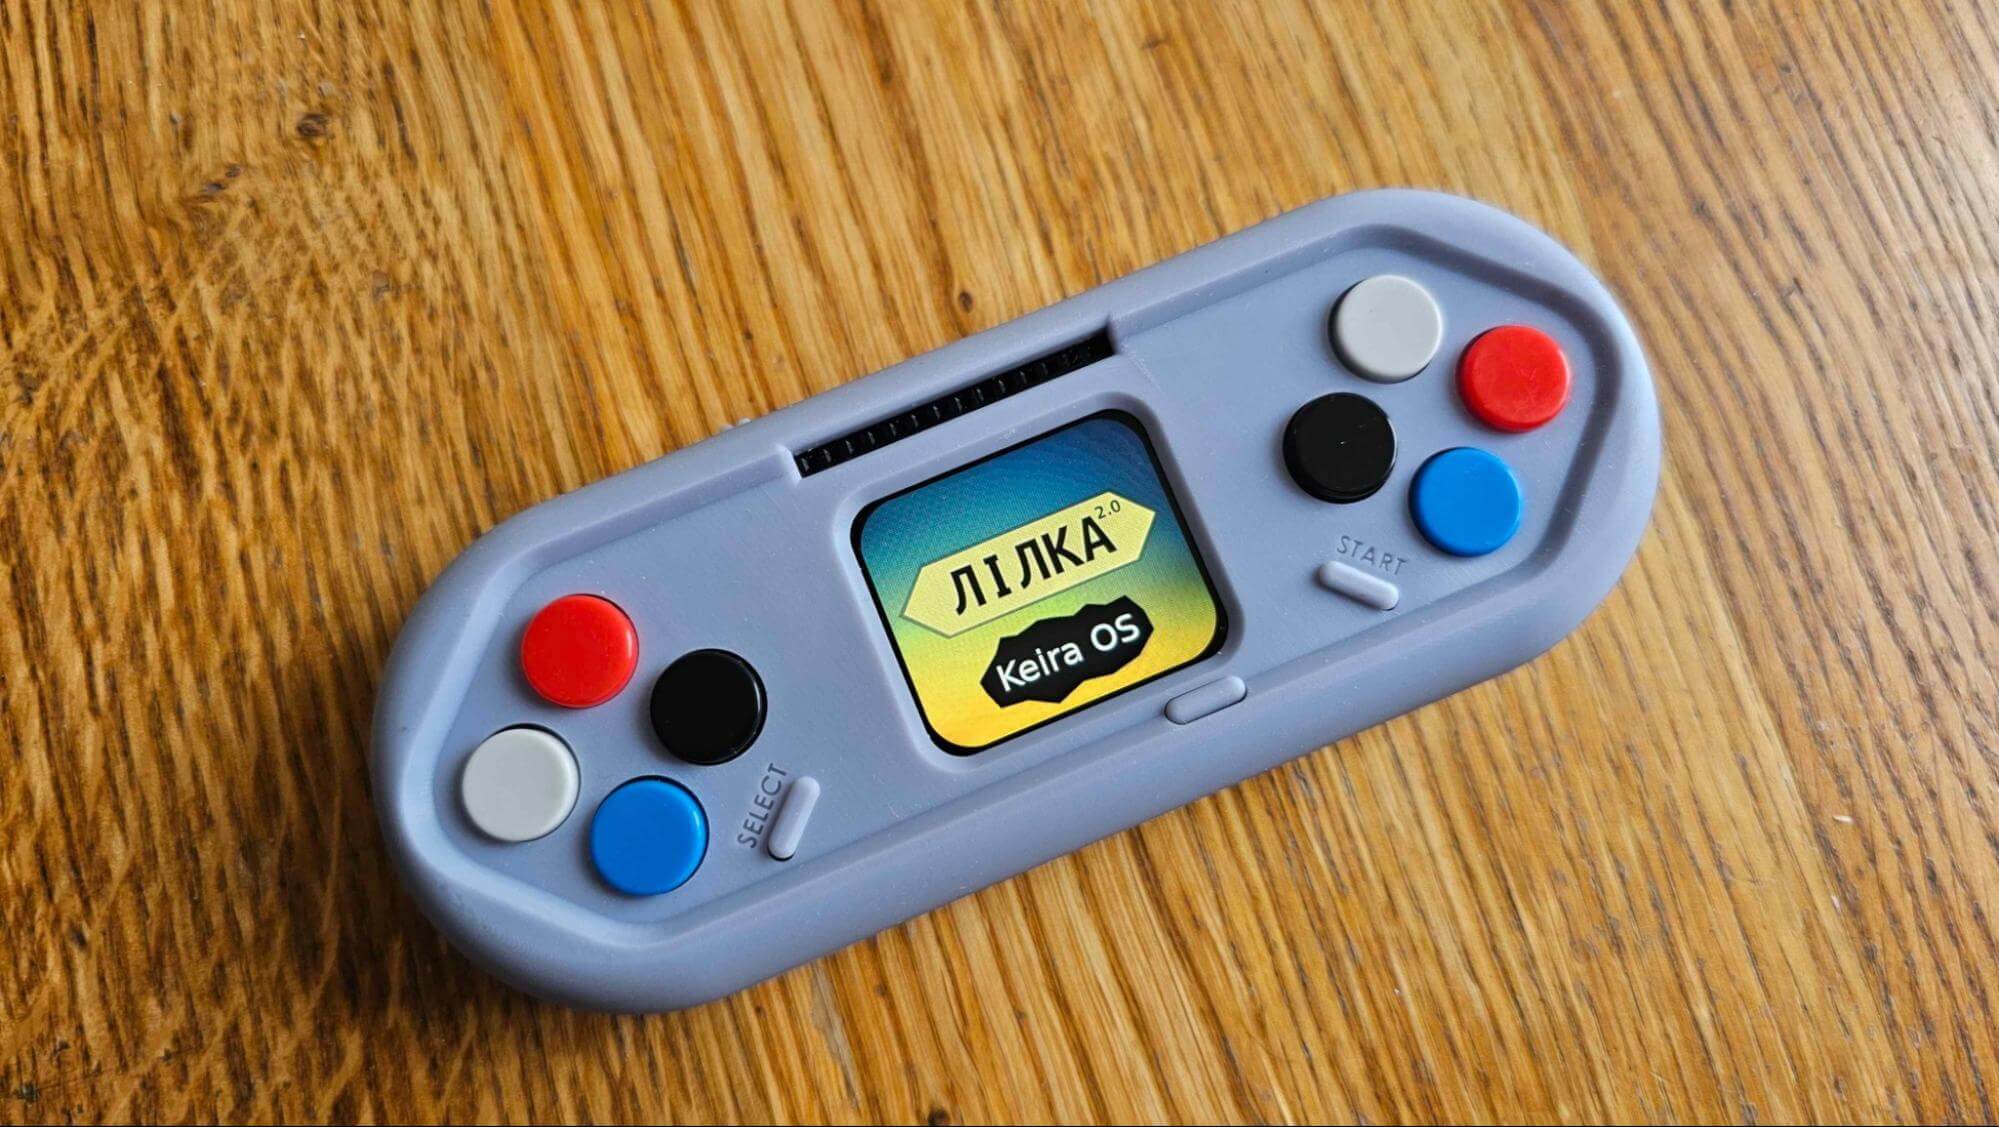
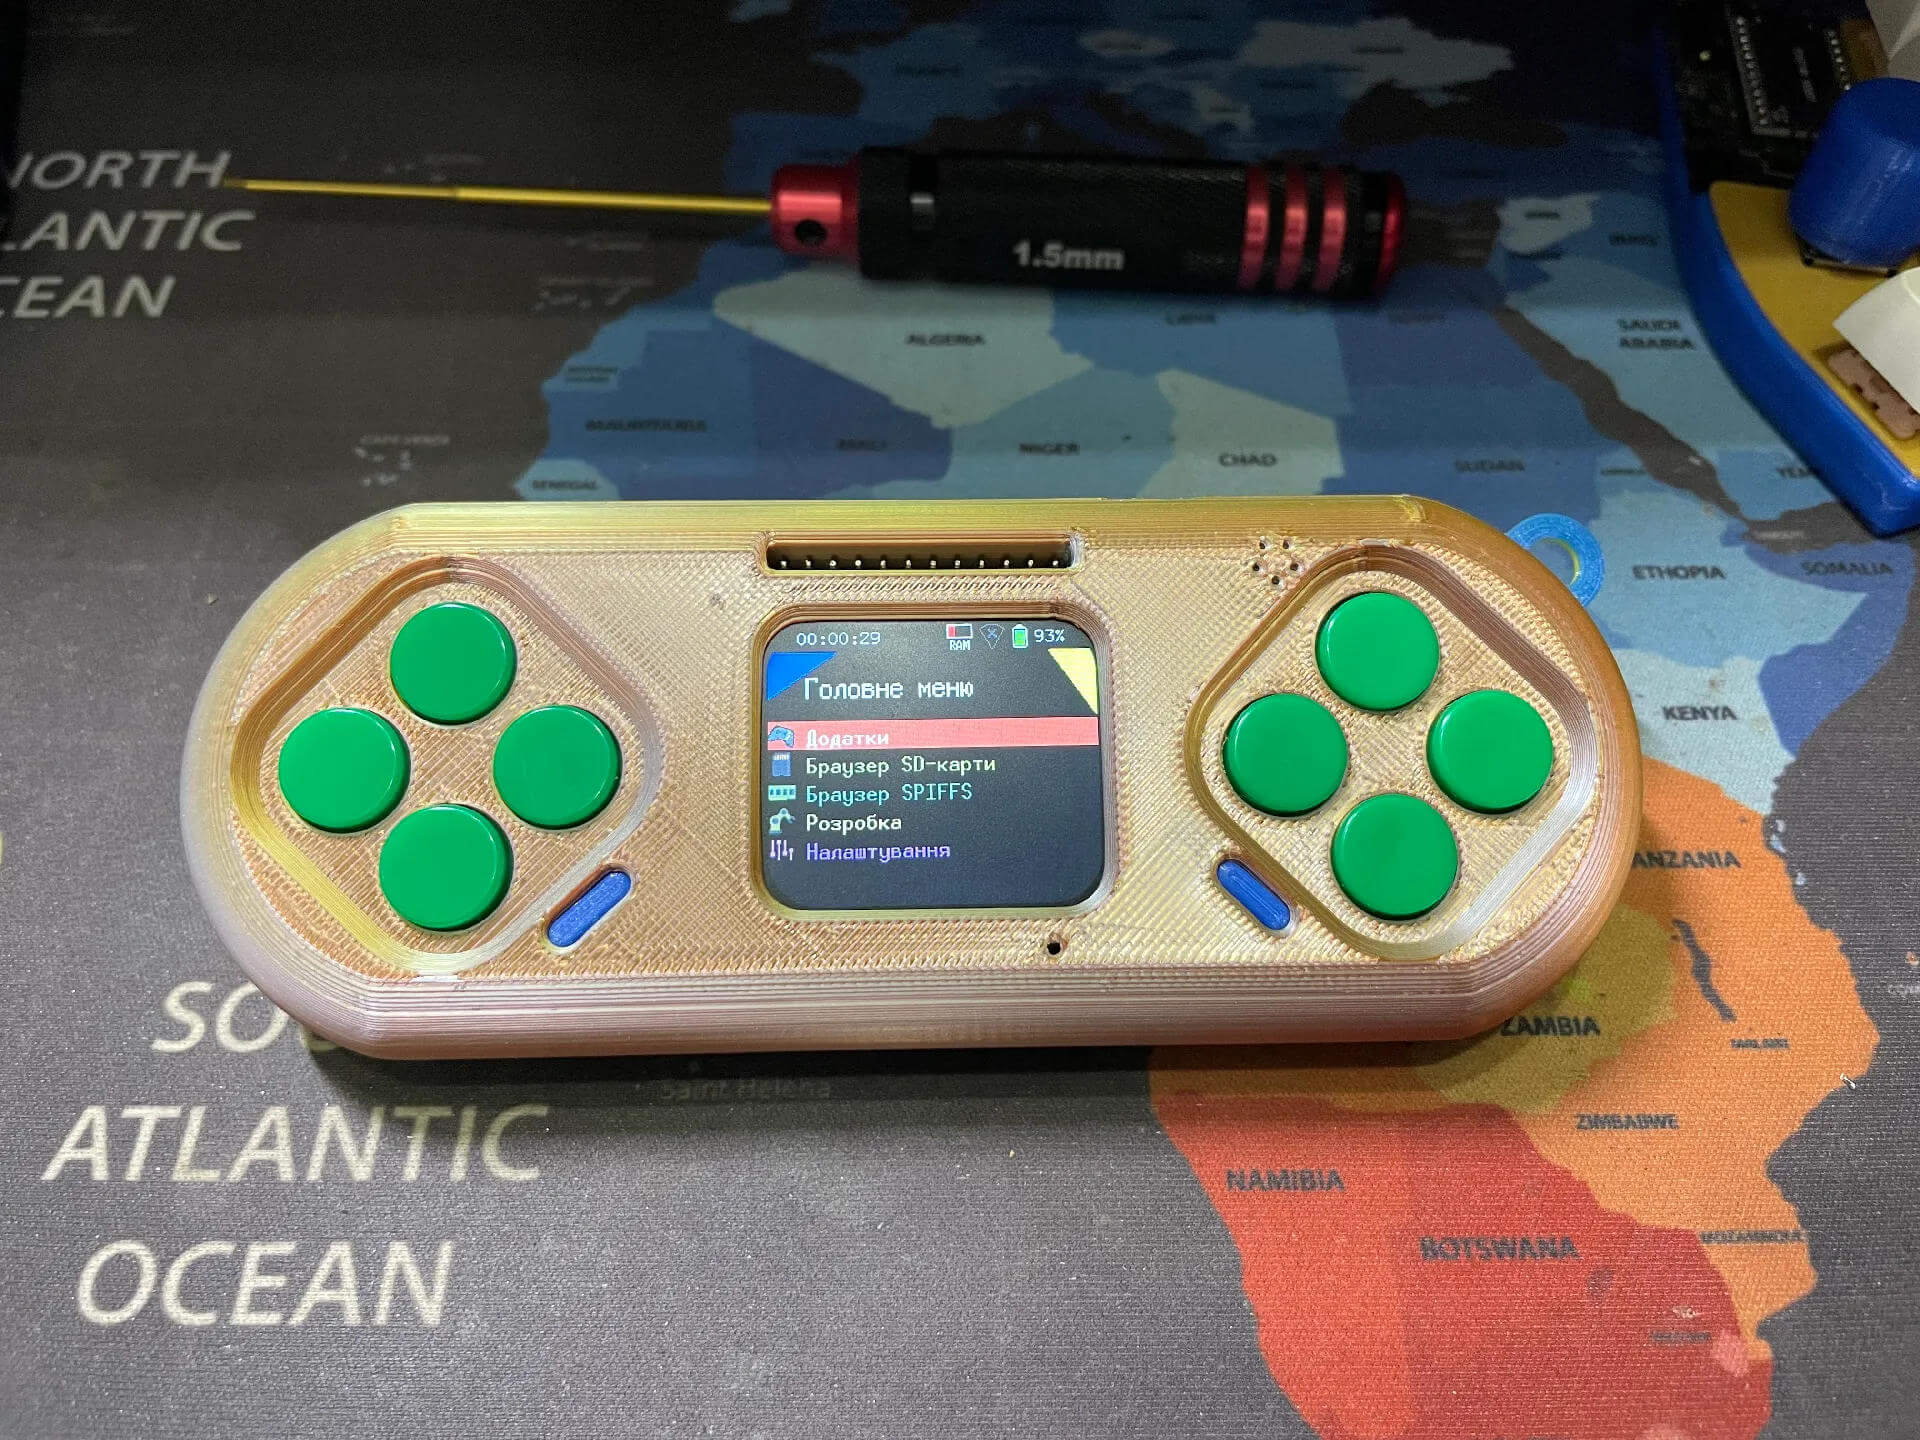
Keira (Keira Operating System) is a firmware and operating system based on the FreeRTOS project and contains basic functions for demonstrating the capabilities of the device. It supports multitasking (running multiple tasks at the same time), networking, running applications, and firmware directly from an SD card.
Note: Firmware is usually any compiled program developed for a microcontroller.
All Kiera applications can be divided into two categories.
Embedded (permanent) applications are programs written in C++ that are compiled into firmware and stored in the ESP memory. They are part of the main system and are always available for execution.
External (loadable) applications are stored on a microSD card. They can be run without any changes to the firmware, which allows you to add new features or try new applications without having to reflash the device.
Keira is written in C++ and contains a number of built-in programs. All programs are built-in, meaning they must be part of Keira. This means that you cannot add your program to Keira unless you modify Keira’s code and reflash Lilka with the new code.
All programs in Lilka are stored in firmware/keira/src/apps. The simplest program consists of two files: myapp.h and myapp.cpp. You can see an example program here.
myapp.cpp is the file that contains the main text of your program. It describes what it does.
myapp.h is the file that lists important parts of the program (such as function names) that may be needed elsewhere.
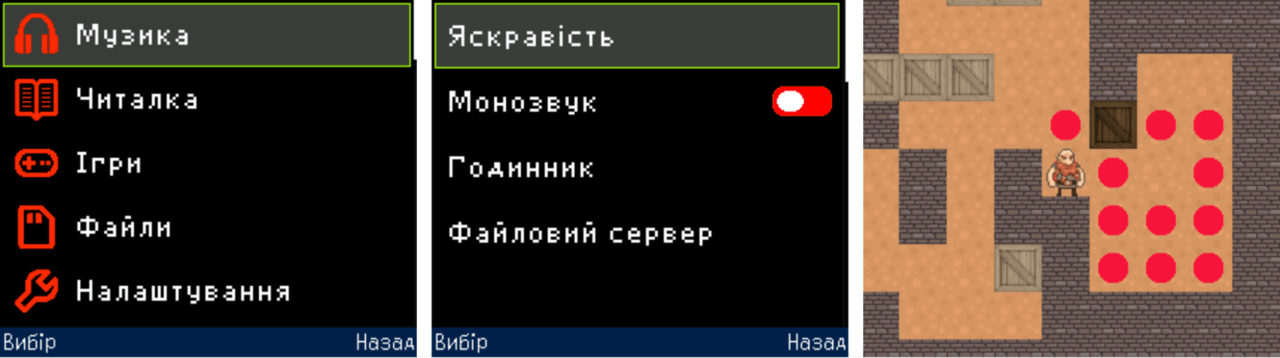
Kira’s main program is the Launcher. It displays a menu of programs, settings, information, and launches programs. To make your program appear in the menu, you need to register it with the Launcher. The easiest way is to add it to the application menu. To do this, find the code with the list of programs in the launcher.cpp file and add your program to it.
While you can use Arduino or ESP-IDF functions to program the Lilka in C++, the lilka library provides a much simpler and more convenient way to work with all the key components of the device. It allows you to easily work with the display, buttons, sound, battery, files, SPI, and other functions. Using this library not only simplifies writing code, but also helps reduce the number of lines of code and the likelihood of errors.
The library is already available in the PlatformIO repository, so it is easy to add it to your project. You can read more about all the library features here.
Binaries (.bin) are compiled programs that contain machine code ready to be executed by the microcontroller. They allow you to run secondary firmware or programs without flashing the device’s main memory.
Lua scripts (.lua) are text files with code that run directly on Lilka thanks to the built-in Lua interpreter version 5.4.6. They do not need to be compiled in advance – just copy the file to the SD card and run it. This saves time and allows you to easily share scripts for use on other devices. All Lua features can be conveniently viewed on this page.
mJS scripts (.js) are a minimalistic JavaScript dialect that allows you to run .js files directly from the SD card on Lilka. While this adds some flexibility, mJS has significant limitations: no classes, a limited set of functions, and incompatibility with standard JavaScript libraries.
Because of these shortcomings, the project team recommends using Lua, which is more functional, convenient, and stable for working on Lilka.
There are also plans to port the MicroPython interpreter, but due to a number of technical difficulties, this idea is at an early stage of implementation.
The Rustilka project aims to support the Rust programming language for Lilka platforms. This is a mini-project that allows developers to use Rust to create firmware for Lilka without depending on the official SDK. To use Rust, you need to install a special firmware that is available at rust.lilka.dev.
This project simplifies setup and development, and also provides a library for working with Lilka hardware capabilities. It is aimed at developers who have experience with Rust and basic knowledge in the field of embedded systems. Here is a branch dedicated to Rustilka.
MeowUI is an alternative firmware for Lilka v2 based on the meowui framework. Designed for creating beautiful graphical user interfaces on esp32, esp32-s3 microcontrollers. MeowUI offers a set of widgets (menu, scrollbar, keyboard, switches, etc.), supports creating window layouts with contexts, handles pin states, includes a simple 2D game engine and libraries for working with peripherals (i2s, spi). Recently, the engine allows you to create multiplayer games. There is a branch dedicated to MeowUI. Also, the project has recently added good documentation. It has a separate section dedicated to creating a game from scratch.
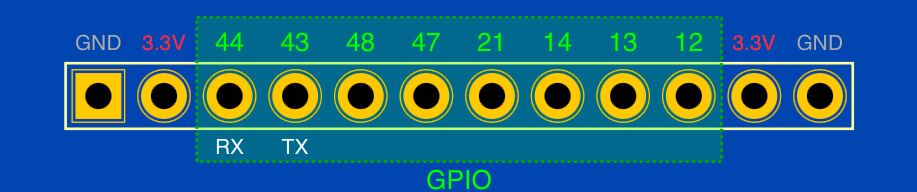
Extension header – allows you to connect additional modules to the main board, for example: microphone, relay, servos, GPS, gyroscope, LTE, LoRa, ERLS, etc. The board has a 12-pin extension header. These pins can be used for any purpose. If desired, for convenience, you can solder a comb (GPIO) or a 2.54 female connector to the connector.
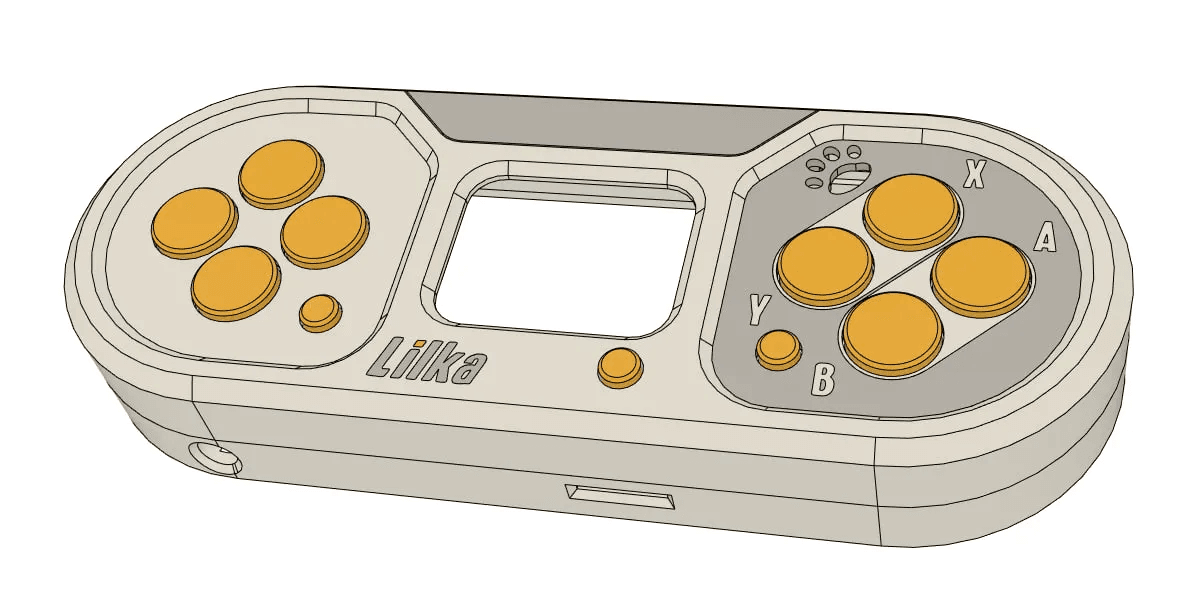
Konstantin Polishchuk has developed a very nice case for Lilka — LilCase. You can watch the video with it here. This is currently the third version of the case. To use it, it is important to solder the display and power connector, as in the photo, and the 8 mm display stands.
There is no bottom part – it is custom for different types of batteries. The author intends to eventually design the bottom cover for different types of batteries: 18650 or those that are in disposable 18350, 17350, 16350, 13400. You can edit the case online here. You can learn more about the development of the case in the Lilka v2: case branch.
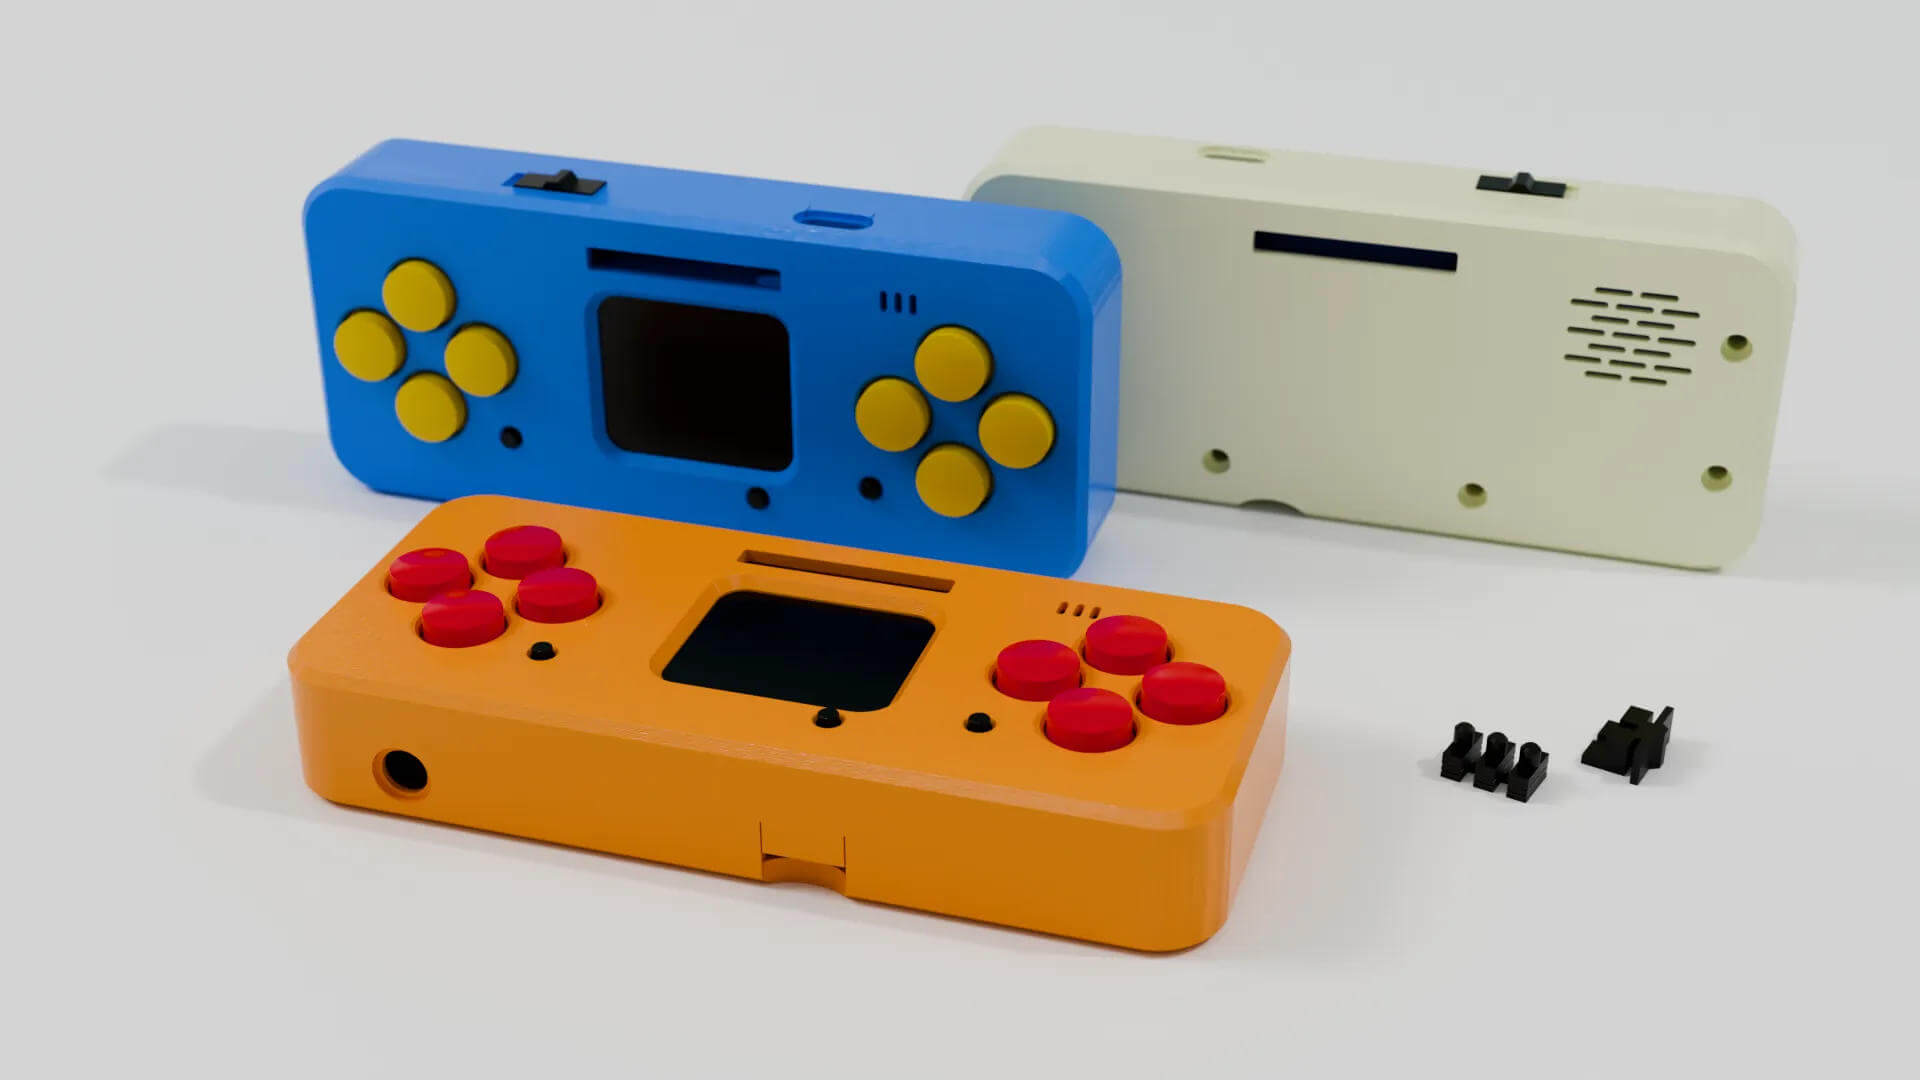
Slim Case is a compact case for Lilka. Its dimensions are 24×58×149 mm, and it is fully compatible with Imrad components without the need for additional parts. The design involves the use of a slim PR-285083 battery. The assembly process requires careful fitting and soldering to brass posts.
Low profile case — compact case (22mm), easy to print, without unnecessary parts, accommodates a BL-5C/BL-6C battery (nokia battery) or similar up to 53×34mm. The display is mounted on M2×5mm posts flush with the buttons, can be soldered directly or through a non-standard connector. The USB module is soldered close, microSD — with an indent. The buttons can be used in different heights, the switch — any slider, capacitor C1 — no higher than 5mm.
Case for Lilka (Shashel) — Case for the Lilka board with a soldered display on 5 mm posts, without access to headphones and combs. Assembly: the display is attached, the comb is soldered, excess pins are cut off. Threaded sleeves are melted in, buttons and a slider are installed, the board is mounted and checked. After soldering the speaker and battery, the case is connected with screws. PET-G printing on Elegoo Neptune 4 MAX, layer 0.16 mm, nozzle 0.6 mm, minimal supports.
Another option for protecting Lilka is to use a back cover. It is not possible to purchase it separately from the kit, but you can print it on a 3D printer, or order it, cut it out of acrylic or plywood.
More about cases, buttons and batteries for Lilka can be discussed in the Lilka v2 case thread.
To work with Lilka, the Micro SD card must be formatted in FAT32 format. The memory size is not important, there are no restrictions. Users have run 128 GB cards on Lilka. You can format the card using Windows, Rufus, Gparted or fdisk on Linux. You can also format using a push-button mobile phone.
However, some users periodically have problems formatting Micro SD. Perhaps not all cards are suitable. Formatting errors still occur, so support for setting up the card can be found in the SD card problem branch.
You can also download and write demo programs to the card. They are located in the firmware/keira/sdcard directory in the project repository on GitHub.
Concluding the first part, I want to say one thing – Lilka is really impressive. It’s not just about ESP32 or soldering. It’s a full-fledged platform with a soul that opens the door to technical creativity, gaming, STEM education, and even pentesting. And most importantly, it’s a Ukrainian project that has united hundreds of enthusiasts, teachers, students, makers, and just DIY fans around it.
We’ve already figured out how to assemble Lilka, where to get components, how to flash it, what cases there are, and why this console can be the beginning of a great technical journey. But that’s just the surface.
In the second part, we’ll move on to real-world use of Lilka. We’ll learn how to write your own programs, run scripts, manage modules, and turn the device into a tool for learning or hacking.