In my configuration, the command prompt is spread across multiple lines, so it will be different. The main thing is to notice that additional information appears when navigating to the repository.
There are various commands used to manage Git, the meaning of which is explained below.
When working with Git, it is important to understand the current status of the repository. For this, Git has the git status command:
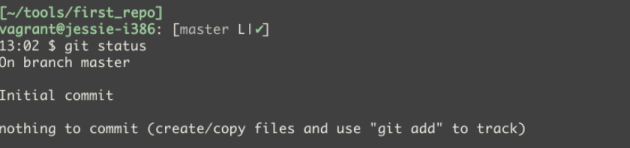
Git tells us that we are in the master branch (this branch is created by itself and is used by default), and that it has nothing to add to the commit. Git also suggests that we create or copy files and then use the git add command to have Git start tracking them.
Creating a README file and adding the line “test” to it:
$ vi README
$ echo "test" >> README
After this, the invitation looks like this:

The prompt shows that there are two files that Git is not tracking yet:
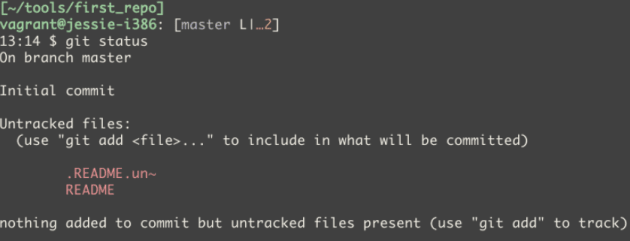
The two files are because I have set up undo files for Vim. These are special files that allow you to undo changes not only in the current file session, but also in previous ones. Note that Git tells you that there are files that it is not tracking and tells you what command to use to do this.
.gitignore file
The .README.un~ undo file is a service file that does not need to be added to the repository. Git has the ability to specify which files or directories should be ignored. To do this, you need to create the appropriate templates in the .gitignore file in the repository directory.
To make Git ignore Vim undo files, you can add, for example, the following line to the .gitignore file:
*.un~
This means that Git should ignore all files that end in .un ~.
After that, git status shows:
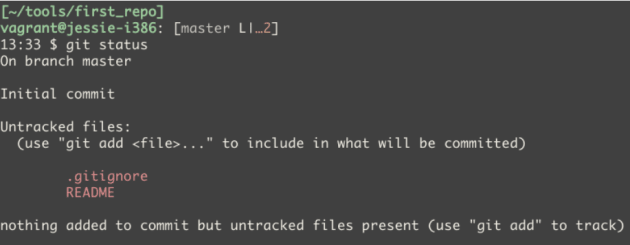
Notice that the .README.un~ file is no longer in the output. Once the .gitignore file has been added to the repository, the files listed in it are ignored.
git add
To have Git start watching files, use the git add command.
You can specify that a specific file should be watched:

Or for all files:

Output of git status:
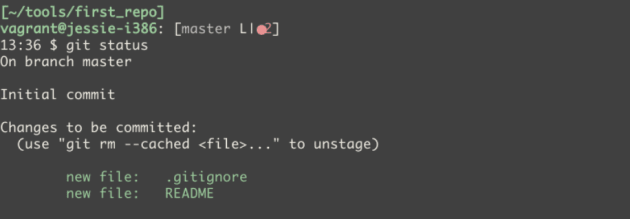
The files are now in a section called Changes to be committed.
git commit
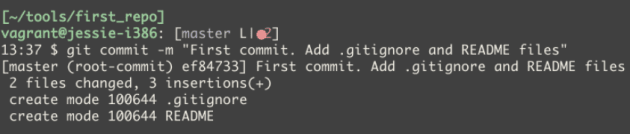
Once all the necessary files have been added to the staging, you can revert the changes. Staging is a collection of files that will be added to the next commit. The git commit command has only one required parameter, the “-m” flag. It allows you to specify a message for this commit.
After that, git status displays:

The phrase “nothing to commit, working directory clean” means that there are no changes to add to Git or commit.
Additional Features
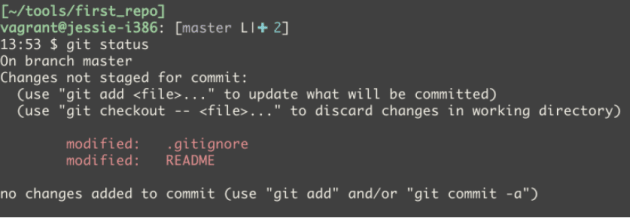
The git diff command allows you to view the differences between different states. For example, currently, the README and .gitignore files in the repository have been changed.
The git status command shows that both files have been changed:
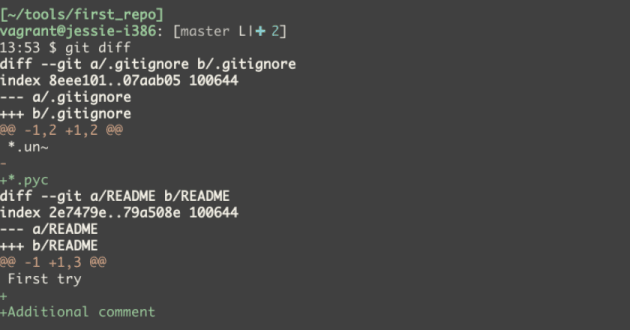
The git diff command shows what changes have been made since the last commit:
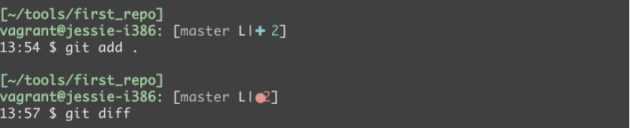
If you add the changes made to the files to staging with the git add git diff command and run the command again, it will show nothing:
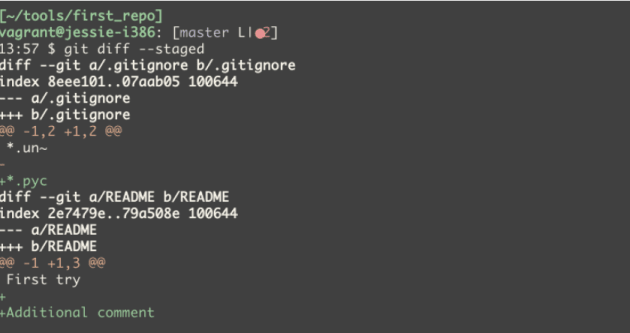
To show the differences between staging and the last commit, you need to add the –staged parameter:
Commit changes:

git log
The git log command shows when the last changes were made:
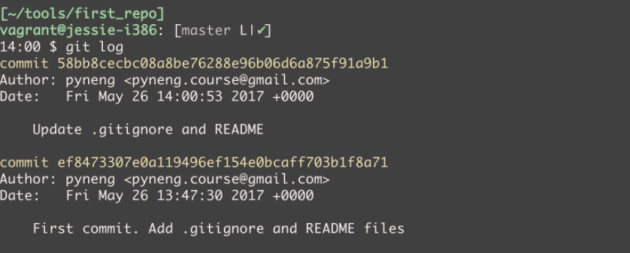
By default, the command shows all commits, starting with the most recent. With additional options, you can not only see information about the commits, but also what changes were made.
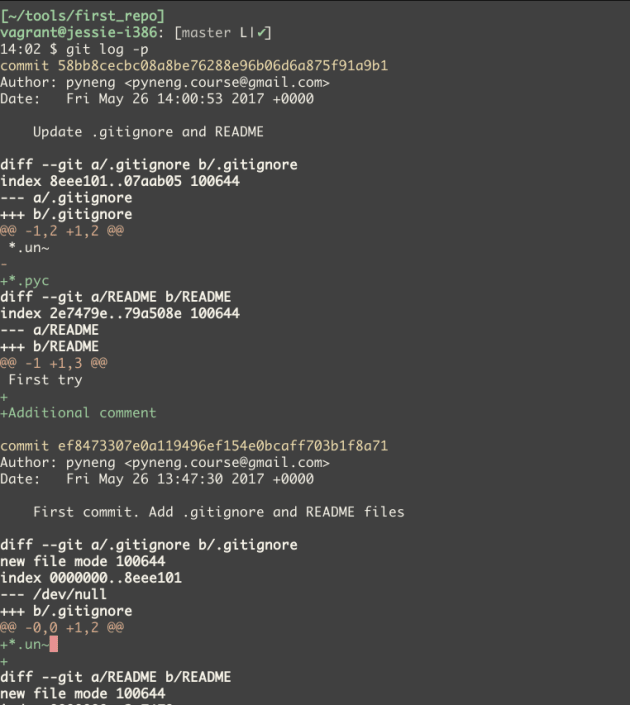
The -p flag allows you to display the differences made by each commit:
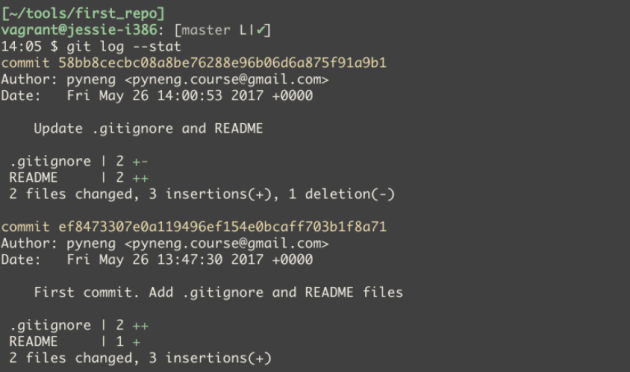
A shorter version of the output can be printed with the –stat flag:
Authentication on GitHub
To start working with GitHub, you need to register on it. For secure work with GitHub, it is better to use SSH key authentication.
Generating a new SSH key (use the e-mail that is associated with GitHub):
All you have to do is press Enter on all questions (it is safer to use a key with a passphrase, but you can do it without it, if you press Enter when asked, then the passphrase will not be asked from you constantly when operating with the repository).
The SSH agent is used to store keys in memory and is convenient because there is no need to enter the passphrase every time you interact with a remote host (in this case, github.com).
Starting the SSH agent (skip on Windows):
Add the key to the SSH agent (skip on Windows):
$ ssh-add ~/.ssh/id_rsa
Adding an SSH Key to GitHub
To add a key, you need to copy it.
For example, you can display the key to copy like this:
$ cat ~/.ssh/id_rsa.pub
After copying, you need to go to GitHub. While on any GitHub page, click on your profile picture in the upper right corner and select “Settings” from the list. In the list on the left, select the “SSH and GPG keys” field. After that, click New SSH key and in the Title field, write the name of the key (for example, Home), and in the Key field, paste the content that was copied from the file ~/.ssh/id_rsa.pub.
To check if everything went successfully, try executing the command .ssh -T [email protected]
The output should be as follows:
$ ssh -T [email protected]
Hi username! You've successfully authenticated, but GitHub does not provide shell access.
Now you are ready to work with Git and GitHub.
Creating a Repository on GitHub
To create your own repository based on a template, you need:
-
log in to GitHub
-
open the repository with tasks
-
click “Use this template” and create a new repository based on this template
-
in the window you need to enter the name of the repository
-
after that, a new repository is ready with a copy of all files from the original repository with tasks
Cloning a repository from GitHub
To work with a repository locally, you need to clone it.
To do this, use the git clone command:
$ git clone ssh://[email protected]/natenka/my_pyneng_tasks.git
Cloning into 'my_pyneng_tasks'...
remote: Counting objects: 241, done.
remote: Compressing objects: 100% (191/191), done.
remote: Total 241 (delta 43), reused 239 (delta 41), pack-reused 0
Receiving objects: 100% (241/241), 119.60 KiB | 0 bytes/s, done.
Resolving deltas: 100% (43/43), done.
Checking connectivity... done.
Compared to the command in this listing, you need to change:
-
username natenka to your GitHub username;
-
repository name my_pyneng_tasks to the name of your GitHub repository.
As a result, in the current directory where you ran the git clone command, you will see a directory with the name of the repository, in my case “my_pyneng_tasks”. This directory now contains the contents of the GitHub repository.
Working with the repository
The previous command not only copied the repository to use locally, but also configured Git accordingly:
-
created .git directory
-
downloaded all repository data
-
downloaded all changes that were in the repository
-
repository on GitHub is configured as remote for local repository
You now have a fully-fledged local Git repository that you can work in. Typically, the workflow will be as follows:
-
before starting work, syncing local content with GitHub with the git pull command
-
changing repository files
-
adding changed files to staging with the git add command
-
committing changes with the git commit command
-
pushing local changes in the repository to GitHub with the git push command
When working with tasks at work and at home, you need to pay special attention to the first and last steps:
-
first step – update local repository
-
last step – upload changes to GitHub
Synchronizing a local repository with a remote one
All commands are executed inside the repository directory (in the example above – my_pyneng_tasks).
If the contents of the local repository are the same as the remote one, the output will be:
$ git pull
Already up-to-date.
If there were changes, the output would be something like this:
$ git pull
remote: Counting objects: 5, done.
remote: Compressing objects: 100% (1/1), done.
remote: Total 5 (delta 4), reused 5 (delta 4), pack-reused 0
Unpacking objects: 100% (5/5), done.
From ssh://github.com/natenka/my_pyneng_tasks
   89c04b6..fc4c721  master     -> origin/master
Updating 89c04b6..fc4c721
Fast-forward
 exercises/03_data_structures/task_3_3.py | 2 ++
 1 file changed, 2 insertions(+)
Adding new files or making changes to existing ones
If you want to add a specific file (in this case, README.md), you need to issue the command. Adding all files in the current directory is done with the command .git add README.mdgit add .
Commit
When performing a commit, you must specify a message. It is better if the message is meaningful, and not just “update” or something like that. A commit is made with a command similar to .git commit -m “Done tasks 4.1-4.3”
Push to GitHub
To upload all local changes to GitHub, use the git push command:
$ git push origin master
Counting objects: 5, done.
Compressing objects: 100% (5/5), done.
Writing objects: 100% (5/5), 426 bytes | 0 bytes/s, done.
Total 5 (delta 4), reused 0 (delta 0)
remote: Resolving deltas: 100% (4/4), completed with 4 local objects.
To ssh://[email protected]/natenka/my_pyneng_tasks.git
   fc4c721..edcf417  master -> master
Before you do a git push, you can run the command git log -p origin/master.
Copying a repository from GitHub
The examples and tasks are updated occasionally, so it’s a good idea to clone this repository to your machine and update it periodically.
To copy a repository from GitHub, run the command git clone:
$ git clone https://github.com/natenka/pyneng-examples-exercises
Cloning into 'pyneng-examples-exercises'...
remote: Counting objects: 1263, done.
remote: Compressing objects: 100% (504/504), done.
remote: Total 1263 (delta 735), reused 1263 (delta 735), pack-reused 0
Receiving objects: 100% (1263/1263), 267.10 KiB | 444.00 KiB/s, done.
Resolving deltas: 100% (735/735), done.
Checking connectivity... done.
Updating a local copy of the repository
If you need to update your local repository to synchronize it with the version on GitHub, you need to run git pull while inside the created pyneng-examples-exercises directory.
If there were no updates, the output will be as follows:
$ git pull
Already up-to-date.
If there were updates, the output will be something like this:
$ git pull
remote: Counting objects: 3, done.
remote: Compressing objects: 100% (1/1), done.
remote: Total 3 (delta 2), reused 3 (delta 2), pack-reused 0
Unpacking objects: 100% (3/3), done.
From https://github.com/natenka/pyneng-examples-exercises
   49e9f1b..1eb82ad  master     -> origin/master
Updating 49e9f1b..1eb82ad
Fast-forward
 README.md | 2 +-
 1 file changed, 1 insertion(+), 1 deletion(-)
Note that only the README.md file has changed.
Viewing changes
If you want to see exactly what changes were made, you can use the git log command:
$ git log -p -1
commit 98e393c27e7aae4b41878d9d979c7587bfeb24b4
Author: Наташа Самойленко <[email protected]>
Date:   Fri Aug 18 17:32:07 2017 +0300

    Update task_24_4.md

diff --git a/exercises/24_ansible_for_network/task_24_4.md b/exercises/24_ansible_for_network/task_24_4.md
index c4307fa..137a221 100644
--- a/exercises/24_ansible_for_network/task_24_4.md
+++ b/exercises/24_ansible_for_network/task_24_4.md
@@ -13,11 +13,12 @@
 * применить ACL к интерфейсу

 ACL должен быть таким:
+
 ip access-list extended INET-to-LAN
  permit tcp 10.0.1.0 0.0.0.255 any eq www
  permit tcp 10.0.1.0 0.0.0.255 any eq 22
  permit icmp any any
-
+

 Проверьте работу playbook на маршрутизаторе R1.
In this command, the -p flag indicates that you want to display the output of the Linux diff utility for the changes, not just the commit message. In turn, -1 indicates that you want to display only the most recent commit.
Viewing changes that will be synced
The previous version of git log relied on the number of commits, but this is not always convenient. Before running the git pull command, you can view what changes have been made since the last sync.
To do this, use the following command:
$ git log -p ..origin/master
commit 4c1821030d20b3682b67caf362fd777d098d9126
Author: Наташа Самойленко <[email protected]>
Date:   Mon May 29 07:53:45 2017 +0300

Update README.md

diff --git a/tools/README.md b/tools/README.md
index 2b6f380..4f8d4af 100644
--- a/tools/README.md
+++ b/tools/README.md
@@ -1 +1,4 @@
+
+Тут находятся PDF версии руководств по настройке инструментов, которые используются на курсе.
In this case, the changes were only in one file. This command will be very useful for seeing what changes were made to the wording of the tasks and which tasks. This will make it easier to navigate and understand whether this applies to tasks that you have already done, and if so, whether they need to be changed.
If the changes were in tasks that you have not yet done, this conclusion will tell you which files need to be copied from the course repository to your personal repository (or possibly the entire section, if you have not yet done the tasks from this section).
Conclusion
Knowledge of Git and GitHub is not just a technical skill, but a necessity for anyone who works with code or documentation. This section will help you lay a solid foundation for further work with version control systems. You will learn to save your projects in a safe and convenient format, analyze changes, and perform tasks in an organized manner. After going through this material, you will be able to work confidently with repositories, keep a history of changes, and not be afraid of losing progress in your work. This is the first, but very important step on the path to professional development.