03.03.2026
8 min
397

Using Kubernetes in the way that it defaults to gives hackers the means to access your entire network. A Kubernetes architecture can be extremely difficult to protect because by default, there are no built-in security features to prevent unauthorized users from accessing your resources. I wrote this content for members of the Ukrainian HackYourMom community and for engineers looking to stop relying on chance and develop their own approaches to protecting their environments. The content provides an overview of how to properly configure your clusters, build an isolated testing environment to ensure you have a safe space to test your security configurations and identify your weak points.
Trying to secure cluster configurations for a Kubernetes cluster can feel like building a fort on sand when you don’t take into consideration the fundamental way that the environment works. Kubernetes was built to be flexible and scale quickly while being convenient for developers; therefore, there is little to no out-of-the-box security built-in to the environment. By leaving the cluster with all default settings is essentially setting a bright neon sign on the Internet saying “Come hack my stuff.”
The number of configuration options, the number of hidden parameters, and the complexity of the network abstraction layers make managing the cluster a serious challenge for many engineers regardless of how much time they have spent managing clusters. Referring to the official Kubernetes documentation will help to understand what the design philosophy is and some of the original architectural decisions made by Kubernetes. This information is valuable for DevOps people, HackYourMom Platform Administrators and engineers that are responsible for managing clusters for a living, and are looking to move their clusters to a significantly hardened security model (hardening).
As mentioned previously, this content is focused specifically on experience with vanilla installations running on on-premises server deployments utilizing the kubeadm utility. Managed Cloud services including Amazon EKS, Google Kubernetes Engine, and Microsoft Azure Kubernetes Service generally handle a large amount of the responsibility of configuring the cluster, and prevent users from accessing the Control Plane directly. With self-managed deployments, the user has complete control over the configuration of the cluster and therefore complete responsibility for any mistakes that occur during the configuration process.

Having a solid theoretical background is important, but conducting security tests on the live production servers typically leads to extended downtime and hectic recovery from backed-up data. A well-rounded understanding of the architecture comes from hands-on experience, both deeply and thoroughly practiced within an entirely separate and completely isolated environment — one that will not result in any negative impact to the business when you are able to completely destroy the architecture.
There are numerous pre-built tools available today that will enable you to stand-up a cluster using a simple command — e.g., Minikube, Kind or k3s. For a complete security review, however, you cannot rely on pre-built tools because they provide a layer of abstraction from the actual processes (e.g., network interface(s), configuration file(s) of key components, etc.) that comprise the cluster “behind the scenes,” thus eliminating your ability to perform realistic security testing.
A self-deployed cluster built with multiple fully functional virtual machines provides, without question, the most ideal environment for this type of work. Although, the process of setting up a self-deployed lab is relatively easy to automate with Multipass by Canonical; and, with it, you can rapidly create highly optimized virtual machines for use as nodes in your Kubernetes cluster, using Ubuntu as the base operating system. In order to get started quickly, all you have to do is install Multipass on your workstation, download the kubectl command line client, clone the provided repository, and then run a bash script.
git clone https://github.com/reynardsec/kubernetes-security-guide
cd kubernetes-security-guide
./bootstrap-kubernetes.sh
For users of the Windows operating system, the repository thoughtfully includes an equivalent PowerShell script that performs the same steps via Hyper-V:
.\bootstrap-kubernetes.ps1
This script automatically pulls the required operating system images, creates virtual networks, installs the container runtime (containerd), and initializes the cluster using kubeadm.
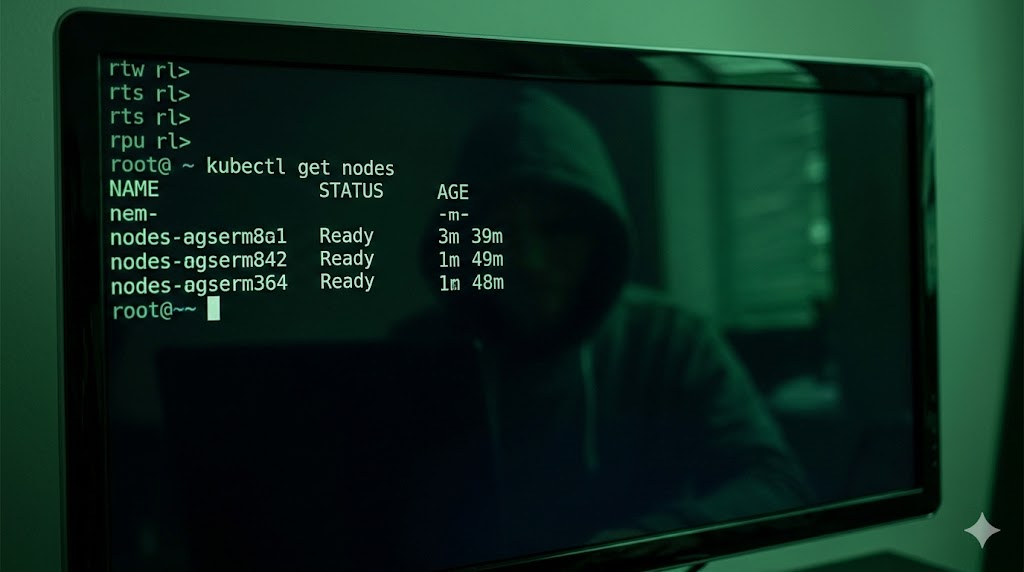
Once the process completes, you will have full access to a local cluster consisting of one control plane node and two worker nodes. You can verify the status of these virtual machines using the standard command:
kubectl get nodes
To remove the created virtual machines and fully free up disk space and memory, a separate cleanup script is provided:
./cleanup.sh
Thanks to its deep integration with Multipass, interacting with the command line of any created virtual machine is instantaneous. There is no need to generate SSH keys or manually configure access — simply use the exec command:
multipass exec control-plane -- bash
ubuntu@control-plane:~$ hostname
control-plane
ubuntu@control-plane:~$ exit
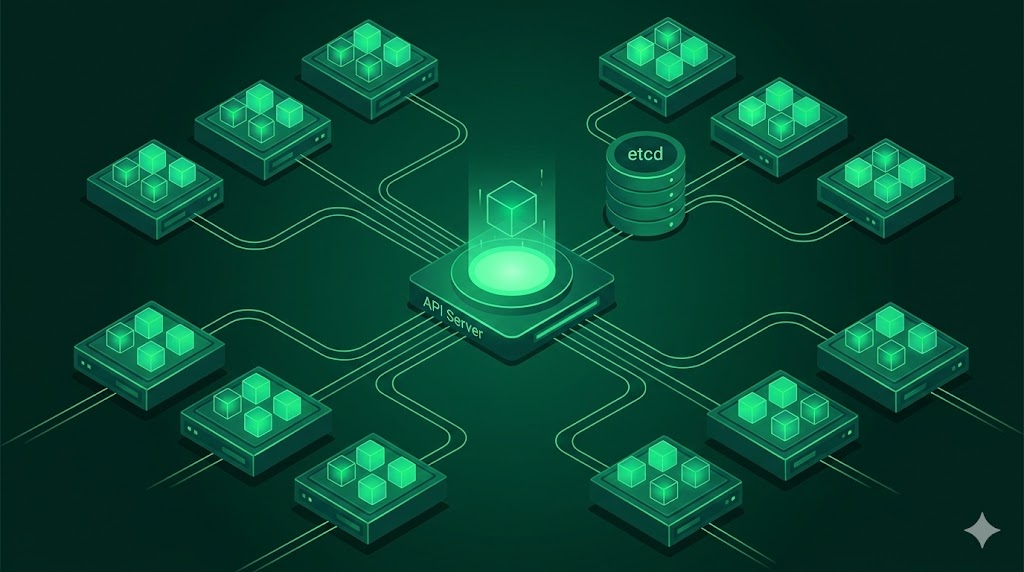
Understanding how different parts of the Kubernetes System talk to one another is the foundation for creating security measures that will actually work. The number of micro services making up the Kubernetes system is quite large; therefore, any one of these could be a target of an attack.
The API Server (kube-apiserver) is essentially the “brain” and the “front door” to the entire cluster. Like a bouncer at a nightclub, it is the first to see every incoming request from both inside the cluster and from the user interface. The API Server, acting as a gatekeeper, verifies the identity of the sender, checks permissions (RBAC), and only after successful verification will allow the request to be processed or the change to be saved. If the API Server is compromised, the entire cluster would immediately lose all control.
The etcd Database is a Distributed Key-Value Store. The configuration of the entire cluster and the status of the pods exist within the etcd Database. More importantly, sensitive information (secrets) also exist within the etcd Database. One of the characteristics of etcd is that it does not have granular permissions to restrict access to specific tables or rows within the database. Any connection providing a valid certificate is trusted. Additionally, gaining direct access to the etcd data files on disk (i.e., doing a database dump) gives an attacker full control over the environment. This is because the Kubernetes Secrets are stored here in a base64 encoded format only – not encrypted. For more insight into its inner workings, I recommend referencing the official etcd Project Documentation.
Each Node has an instance of the kubelet Agent running as a system service (e.g., managed via systemd). Each instance of the kubelet Agent performs several functions:
Registers itself with the cluster.
Receives instructions from the control plane via the API Server.
Interacts with the container runtime to manage the lifecycle of the containers (start/stop/container health).
Kube-Proxy provides basic networking capabilities by managing the routing of packets between pods across the cluster at the operating system’s kernel level (using iptables or IPVS). Kube-Proxy creates the necessary routes so that packets are delivered to the correct pod even if the pod’s IP address has changed due to a restart of the container.
While the kube-proxy is creating routes for packet delivery, the kube-scheduler is always monitoring the cluster for newly created pods that do not have a Node associated with them and determines the best Node to place the Pod based on factors including but not limited to: Memory/CPU Requirements, Affinity Policies. Simultaneously, the kube-controller-manager continuously monitors the actual state of the system against the expected state as defined in the manifests and adjusts the system accordingly to ensure consistency.
Threat modelling helps bring order to the disorganised process of searching for vulnerabilities. Without a clear audit strategy, it’s easy to become overwhelmed by the sheer volume of detail that exists within hundreds of relatively minor configuration options and miss a potentially significant weakness. In scenarios such as this, the Microsoft STRIDE classification model is an ideal choice for logical separation of potential attack vectors into six distinct and accessible categories.
This category deals primarily with deception through identity fraud. One major area of concern here is the use of outdated or insecure protocols for internal communication. As a simple example of how this works, consider traffic sent between nodes and control plane components via an unencrypted protocol (e.g., no mTLS). An attacker who has successfully breached the internal corporate network could then launch a Man-in-the-Middle (MitM) attack using intercepted packets. From this point, the attacker could successfully impersonate legitimate system services and send malicious commands on behalf of the API server to the kubelet agent, essentially controlling the cluster from the inside.
This category represents a serious integrity violation of the system. Perhaps the most common and most painful vector to deal with is through supply chain attacks. For instance, attackers may exploit a vulnerability in a CI/CD pipeline and silently replace a legitimate Docker image in the registry with a modified version containing a hidden backdoor or crypto miner.
During the next release cycle, the compromised image will be automatically deployed as part of updating content blocks on the HackYourMom portal; once it is running, the malicious code will run undetected at the core of the project’s infrastructure.
This category also covers unauthorized modifications of Network Policies made by inexperienced developers. While they may have been trying to help, their changes may inadvertently remove the isolation controls in place, allowing internal databases to be exposed to the public Internet.
This category is focused entirely on the lack of comprehensive audit logging. It is very common for experienced administrators to disable auditing of API requests due to concerns about disk usage or CPU utilization. However, when a critical incident occurs (for example, when an administrator deletes an entire namespace that contains a production database), it is virtually impossible to determine which service account or administrator issued the destructive command.
In essence, the cluster will provide little to no evidence of the destructive action taken, making it functionally blind to internal threats and accountability due to a complete lack of digital evidence.

Often times the easiest way to escalate a large-scale attack is by opening up service ports. For example, the infamous kubelet agent port 10250 (if you have anonymous access enabled) provides any unauthorized scanner with the ability to execute any command they want directly in your production containers.
Also, mis-configured Role Based Access Control (RBAC) is another classic problem for many organizations. It is common for RBAC policies to be configured in such a way that allows an average intern or a compromised Continuous Integration (CI) service to have unrestricted READ access to ALL Secret objects in the system (including master passwords for core database systems and encryption keys for payment gateways).
A Denial of Service (DoS) attack originating from within the boundaries of your containerized application is much more common than one originating from outside hackers or botnets. A poorly constructed script that enters into an infinite loop, if there are no memory limits (limits: memory) or CPU resource limits defined for the process running inside a pod, can quickly consume all available resources of a given physical node.
Eventually, the operating system will fail and, via the OOM Killer mechanism, begin randomly terminating other processes in order to save itself. This cascading failure event will inevitably result in the shutdown of any other mission-critical business component(s) running on the same server.
The final piece of the puzzle — and the ultimate goal of any well-organized cyber-attack. Running containers as root (or using the privileged: true flag) creates an immediate opportunity for the attacker to escape the contained environment to the level of the host operating system — also commonly referred to as a container breakout.
Through the exploitation of known Linux kernel vulnerabilities, an attacker may also be able to break out of the virtualized environment and obtain complete and unrestricted control of the physical server.
The lack of network separation between the various containers will only make it even easier for the attacker to quietly and easily migrate from a compromised minor test service to the most critical components of the company’s infrastructure.
We’ve completed the first step. We broke down Kubernetes architecture in print — we created an actual sandbox where we can destroy things without worrying about taking down production. We’ve come to realize that a cluster isn’t a single entity — but instead a collection of multiple services, each having their own weaknesses that we identified using STRIDE to create this map of weak areas.
That was our starting point. Now we’re going to move from theoretical concepts to “toughen up” the system in practical terms — covering how to best protect your API server from being exposed unnecessarily and what steps to take so your etcd-based secrets aren’t immediately exploited by the first opportunistic attacker to stumble upon your system.