01.07.2025
1 хв
1381

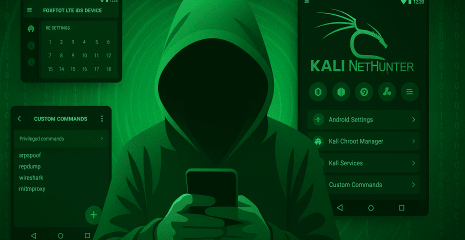
Встановлення Kali NetHunter на OnePlus 7 Pro — повний гайд для тих, хто хоче перетворити смартфон на повноцінну хакерську платформу. Покрокова інструкція: прошивка, root-доступ, TWRP, Magisk та NetHunter. Дізнайтесь, як налаштувати середовище для тестування безпеки, запускати HID-атаки, використовувати Wi-Fi-адаптери та працювати через chroot на Android. Підійде для Android 10 (OxygenOS).

У цій публікації ми розглянемо встановлення NetHunter з повною підтримкою ядра на пристрій OnePlus 7 Pro. Головною перевагою є підтримка драйверів для внутрішніх або зовнішніх пристроїв, таких як Wi-Fi, Bluetooth, HID, BadUSB та SDR-гаджети. Нашою метою буде прошити стандартну OOS 10, відкрити завантажувач, прошити кастомне відновлення TWRP, отримати root-права, встановити кастомне ядро та прошити NetHunter.
NetHunter — це chroot (rootfs називається Kali NetHunter), а не кастомний ROM, який можна прошити. Простіше кажучи, це система в системі. Через це для його встановлення потрібні деякі попередні умови, такі як точна версія операційної системи з певною версією Android, яка має бути встановлена на пристрої. На момент написання цієї публікації NetHunter можна встановити лише на стандартні версії OxygenOS 10 та 11. На наступних кроках ми встановимо OOS 10 за допомогою офіційного інструменту завантаження MSM в екстреному режимі (EDL), наданого та перевіреного OnePlus. Це призведе до скидання всіх ваших даних до заводських налаштувань, тому обов’язково створіть резервну копію.
Як передумову, вам потрібно завантажити на свій комп’ютер інструменти Android SDK (adb та fastboot). Ви можете завантажити їх з офіційного веб-сайту Android для вашої платформи.

Вимкніть перевірку підпису драйверів на комп’ютері з Windows за допомогою CMD, виконаної з правами адміністратора, та перезавантажте комп’ютер.
bcdedit /set testsigning on
Завантажте та встановіть драйвери Qualcomm
Завантажити OOS 10 ROM: guacamoleb_14_P.32_210127.zip
Розпакуйте завантажений ROM та запустіть
MsmDownloadTool V4.0.exe
Вимкніть OnePlus 7 Pro. Одночасно натисніть кнопки збільшення та зменшення гучності протягом 5 секунд і підключіть пристрій до комп’ютера. Щойно MSM Download Tool розпізнає пристрій (підключено, а не N/A), натисніть кнопку «Пуск». Це потрібно зробити протягом приблизно 15 секунд, оскільки приблизно через 30 секунд пристрій перейде в режим завантажувача, і його не буде розпізнано. Через кілька хвилин пристрій перезавантажиться.
Налаштування пристрою
Увімкнути налагодження по USB та розблокувати завантажувач: Перейдіть до
Settings->About Phoneта натисніть 7 разів наBuild NumberНатисніть кнопку «Назад» і , щоб перейтиDevelopers optionsтаUnlock bootloaderувімкнутиADB debugging
Перезавантажте Android у режим завантажувача за допомогою команди adb:
adb reboot bootloader
З завантажувача розблокувати OEM, використовуючи команду:
fastboot oem unlock
Дані пристрою буде стерто
Тепер пристрій має бути успішно прошитий зі стандартною прошивкою OOS 10 та мати відкритий завантажувач.
Після успішного розблокування завантажувача ми можемо встановити кастомне відновлення. З відновлення ми встановимо Magisk; це виправить образ завантаження та дозволить нам використовувати root-права. Без кастомного відновлення ми не зможемо отримати root-права на пристрої та встановити NetHunter.
Увімкнути налагодження по USB (згадано вище)
Завантажте та скопіюйте на Android файли TWRP та Magisk: twrp-3.4.0-10-guacamole-unified-installer-mauronofrio.zip та Magisk-v23.0.zip.
Завантажити TWRP: twrp-3.4.0-10-guacamole-unified-Q-mauronofrio.img
Перезавантажте Android у режим завантажувача за допомогою команди adb:
adb reboot bootloader
Завантажте завантажений TWRP з ПК за допомогою команди:
fastboot boot twrp-3.4.0-10-guacamole-unified-Q-mauronofrio.img
З завантаженого TWRP встановіть, скопіюйте TWRP (
twrp-3.4.0-10-guacamole-unified-installer-mauronofrio.zip) та Magisk (Magisk-v23.0.zip)
Перезавантаження системи
Відкрийте та налаштуйте програму Magisk (оновіть та встановіть)
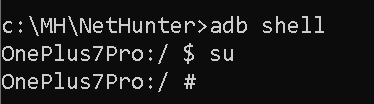
Для уточнення ви можете перевірити, чи пристрій успішно отримав root-доступ за допомогою команд adb:
adb shell and su
Нам потрібно вимкнути примусове шифрування розділу даних, щоб читати дані користувача. Вимкніть dm-verity, функцію ядра для перевірки цілісності завантажувального образу. Прошивка zip-файлу, згаданого в розділі інструкцій, також дозволяє користувачеві вмикати або вимикати дискову квоту, що дозволяє системі швидше отримувати статистику сховища, і це навіть має покращити стабільність системи, але її не обов’язково вимикати.
Завантажте та скопіюйте в Android Disable_Dm-Verity_ForceEncrypt_11.02.2020.zip
Перезавантажте Android у режим відновлення за допомогою команди adb:
adb reboot recovery
Треба стерти, натиснути на та написати «так» як підтвердження.
Format data
Перезавантаження для відновлення
Magisk-v23.0.zipЗ TWRP знову встановіть Magisk ( )
З встановлення TWRP
Disable_Dm-Verity_ForceEncrypt_11.02.2020.zip
Перезавантаження системи
Налаштування пристрою (не вмикайте жодних функцій захисту блокування екрана)
Відкрийте та налаштуйте програму Magisk (оновіть та встановіть)
Тепер все готове до встановлення NetHunter. Ми окремо прошиємо кастомне ядро, потім образ NetHunter, і знову нам потрібно прошити Magisk та dm-verity.
Увімкнути налагодження USB
Завантажте та скопіюйте на Android: kernel-nethunter-2021.3-oneplus7-oos-ten.zip та образ NetHunter останньої версії для OnePlus 7 / 7 Pro / 7T / 7T Pro (Ten)
Перезавантажте Android у режим відновлення за допомогою команди adb:
adb reboot recovery
Встановити ядро (
kernel-nethunter-2021.3-oneplus7-oos-ten.zip)
Встановлення образу NetHunter (у моєму випадку
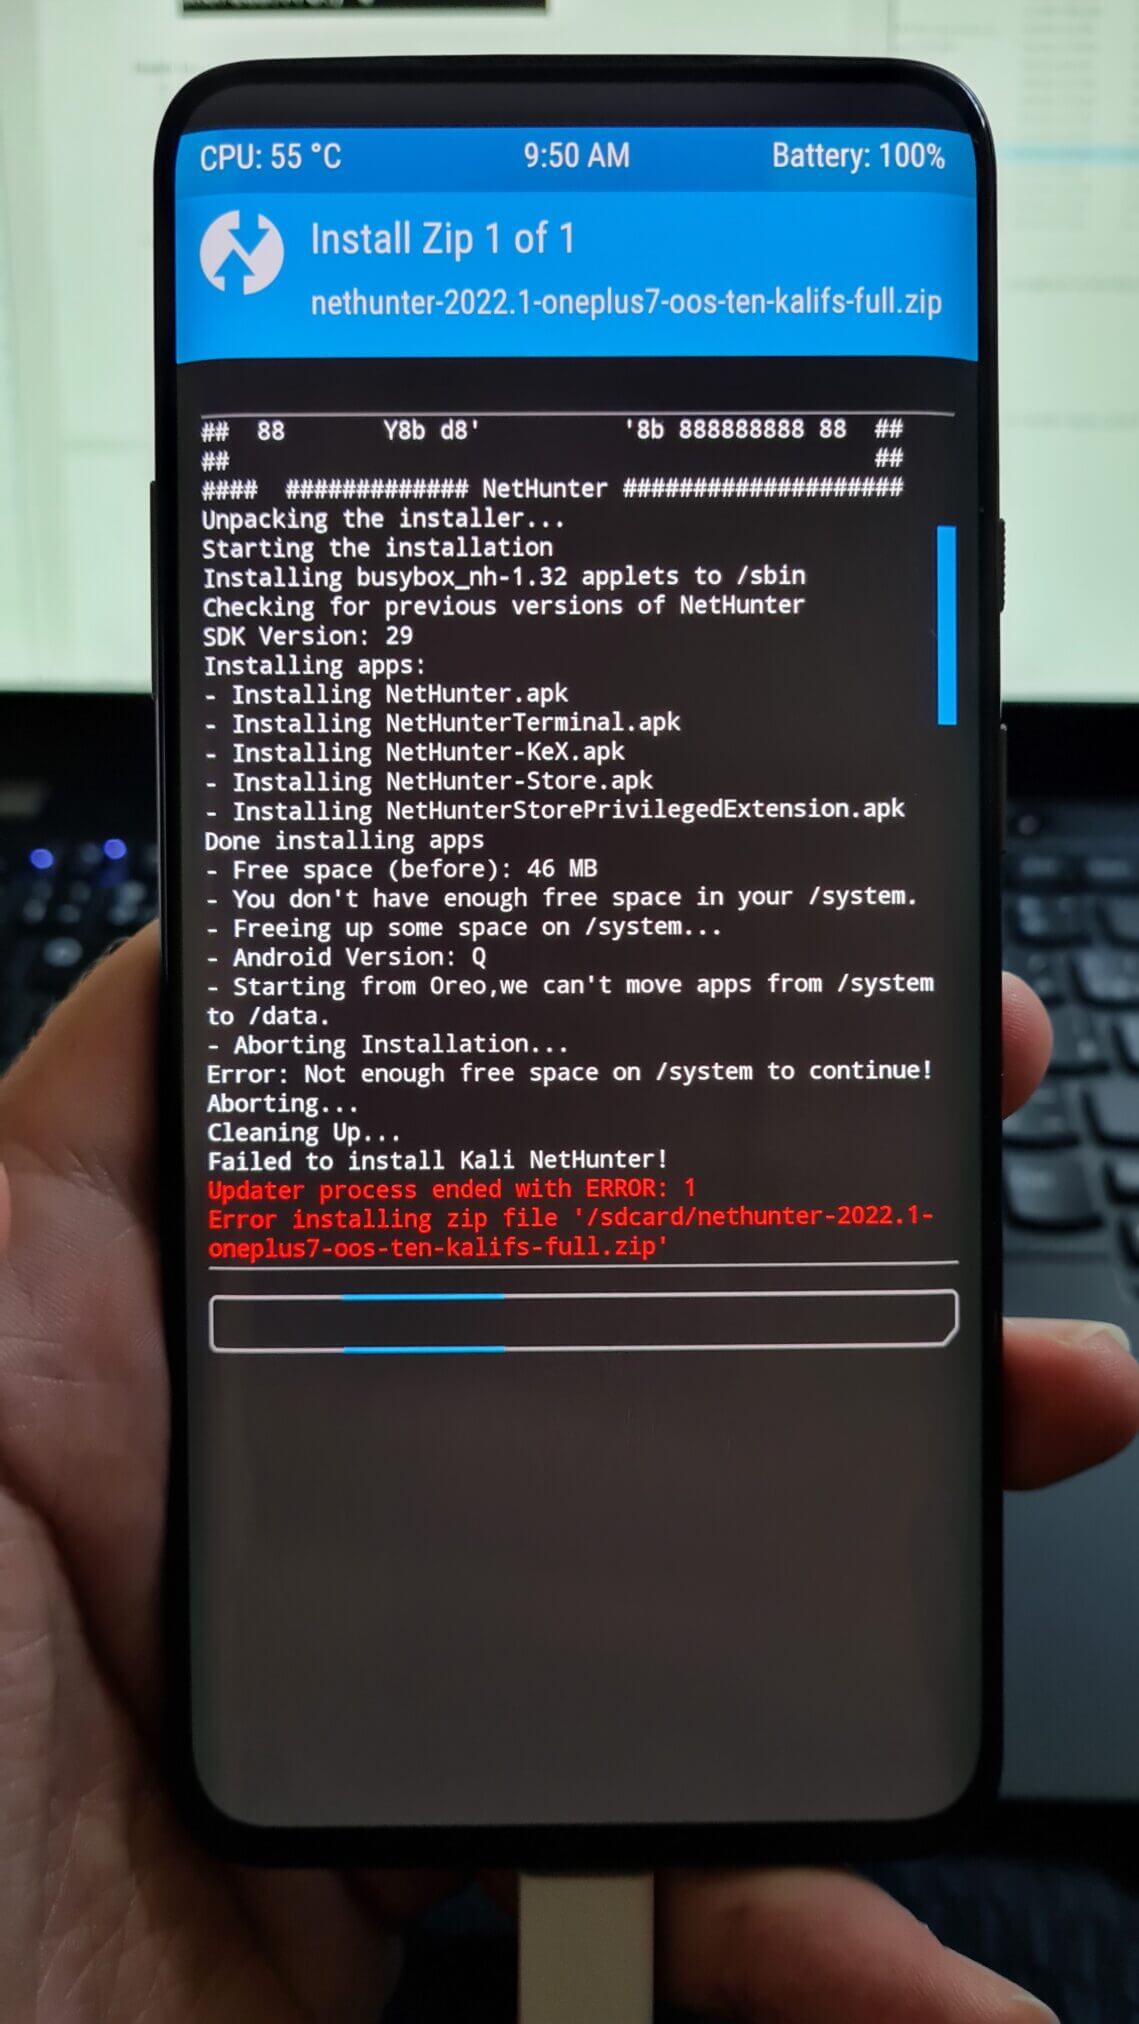
nethunter-2022.4-oneplus7-oos-ten-kalifs-full.zip) Якщо встановлення завершується помилкою « Недостатньо вільного місця у вашій системній папці /system для продовження! », як видно на малюнку 3, тоді вам потрібно змінити розмір розділу /system. Виправте це, перейшовши доWipe->Advanced wipe-> вибрати/system->Repair or Change File System->Resize File SystemПовторіть крок 5)
Встановлення Magisk
Встановлення dm-verify
Перезавантаження системи
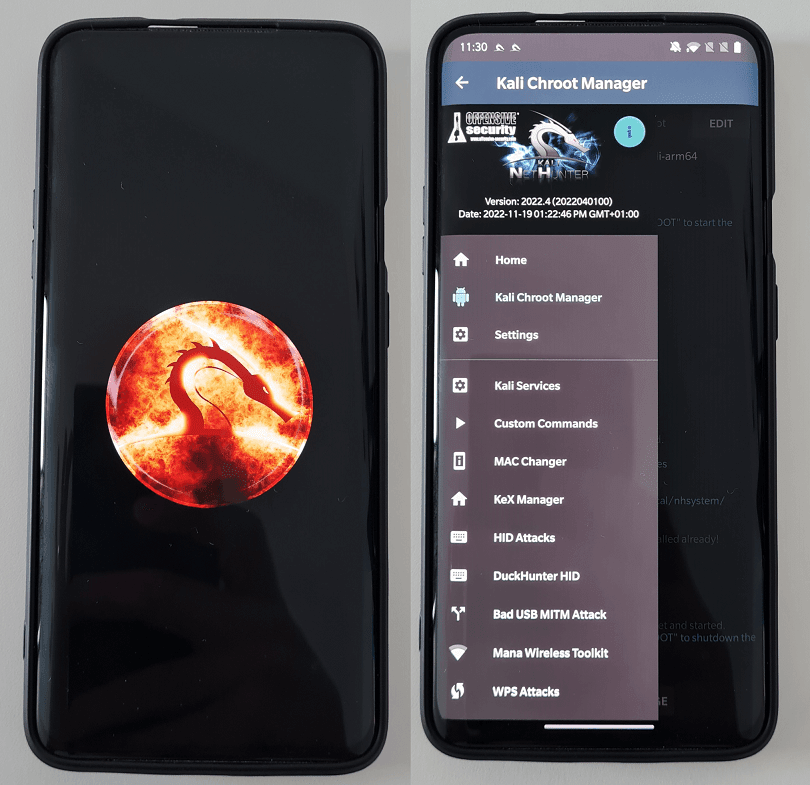
Відкрийте застосунок NetHunter та оновіть його через NetHunter App Store (необов’язково)
Запустіть chroot у NetHunter
Перезавантажте пристрій
Вимкнути оновлення системи:
su -c pm disable com.oneplus.opbackup
У
NetHunter Terminalзастосунку запустіть команду оновлення та оновлення:sudo apt update && sudo apt full-upgrade -y
Вітаємо! Якщо ви уважно виконали всі кроки, Kali NetHunter має бути успішно встановлено на вашому пристрої OnePlus 7.
Встановлення Kali NetHunter на пристрій OnePlus 7 відкриває світ можливостей для мобільного тестування на проникнення та етичного хакерства. Дотримуючись покрокових інструкцій, викладених у цій публікації блогу, ви можете розкрити можливості Kali Linux на своєму OnePlus 7, перетворивши його на потужний інструмент для оцінки безпеки мереж та систем.
Ми обговорили необхідні умови, такі як розблокування завантажувача та ввімкнення налагодження через USB, а також пояснили, як прошити образ NetHunter на пристрій за допомогою TWRP Recovery. Ми також наголосили на важливості створення резервних копій та забезпечення сумісності з конкретною моделлю OnePlus 7.
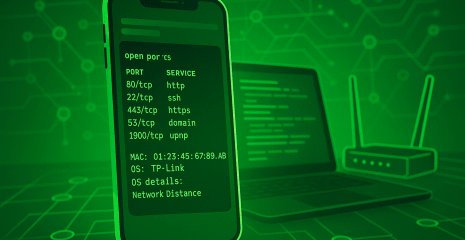
Після успішного встановлення Kali NetHunter ви отримаєте доступ до широкого спектру потужних інструментів та можливостей, спеціально розроблених для тестування на проникнення мобільних пристроїв. Ви можете виконувати сканування мережі, використовувати вразливості та аналізувати трафік – і все це зручно за допомогою вашого пристрою OnePlus 7.