26.04.2023
5 min
2539

Geolocation is a powerful tool in the world of Open Source Intelligence (OSINT), which allows specialists to obtain valuable information about the location of objects or people. Using MW-OSINT for these purposes opens new horizons for analysts, detectives, journalists, and other professionals using OSINT in their work. MW-OSINT is a specialized tool for collecting and analyzing open sources of information that can help you make your OSINT work more efficient and accurate. With its help, you will be able to determine the geolocation of persons or objects of interest to you with high accuracy and reliability. MW-OSINT not only offers various techniques for geolocation, but also provides the possibility of using automated processes for data collection and analysis.
This can significantly improve your productivity and allow you to focus on the important aspects of your work. However, it is important to note that effective use of MW-OSINT requires you to have knowledge and skills in OSINT and geolocation. Mastering these skills may take some time, but the results you will get are definitely worth the effort. Proficiency in using MW-OSINT for geolocation in OSINT can become your competitive advantage and help you reach new heights in your professional activities. Accept this challenge and discover new possibilities with MW-OSINT. In this article, we will teach you to advance the exact coordinates and time just one photo at a time, it’s easier than you think, let’s get started.
We will continue this article with the next publication from MW-OSINT. Namely from this photo.
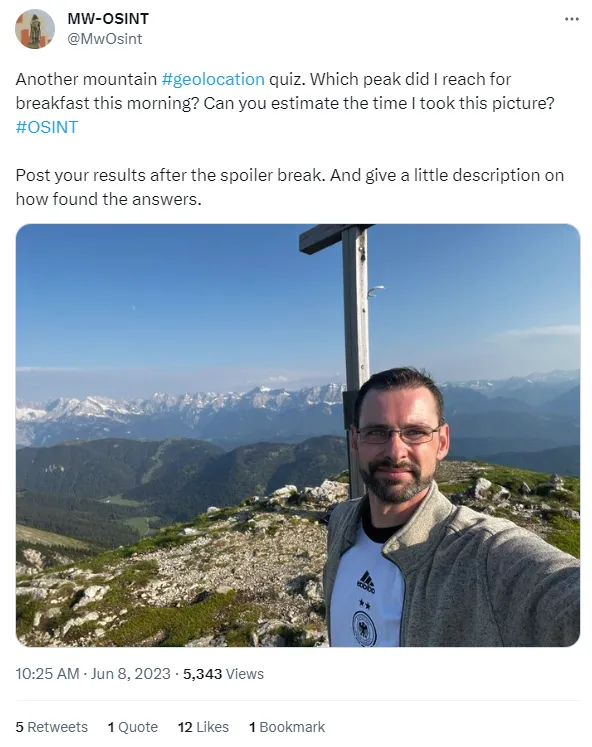
We immediately started looking because the post was just posted and no one had shared a solution yet.
Where did MW-OSINT get this picture?
What time was the photo taken?
Let’s start with where the photo was taken!
The image is a selfie, and selfies are almost always flipped, so the first thing I did was flip the image to the other side and start searching for the two images open on the screen.
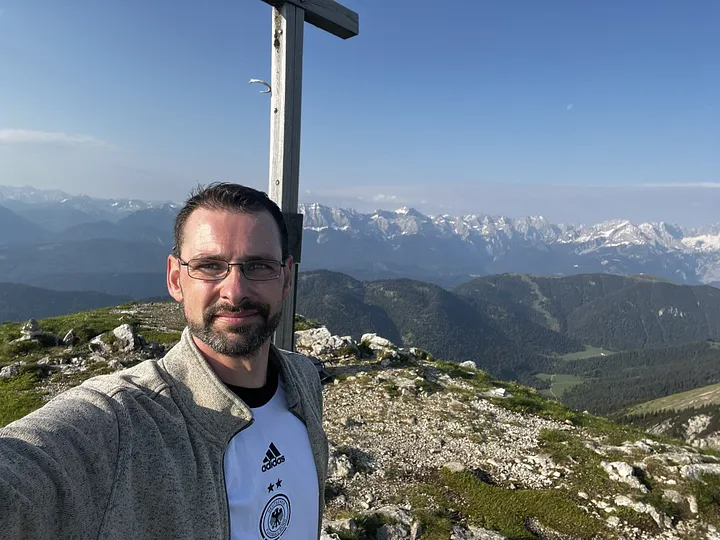
I then began gathering additional information about what I was seeing in the photo and the person who took it (MW-OSINT). When I first saw this image, I immediately thought that the mountain range in the background was part of the Alps in Europe. I just had a feeling because I’ve seen a lot of the Alps in person and it was very recognizable. To see if this picture could have been taken in the Alps, I started looking for information on where the MW-OSINT was from.
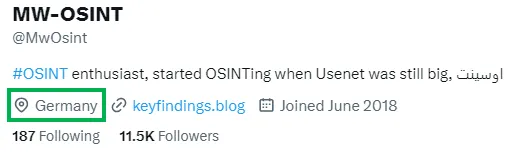
MW-OSINT says on its Twitter page that it is from Germany, which already indicates that the photo may indeed have been taken in the Alps (part of the Alps is in southern Germany). But it’s also very easy to spoof your location on Twitter, so I needed to confirm it with more information.
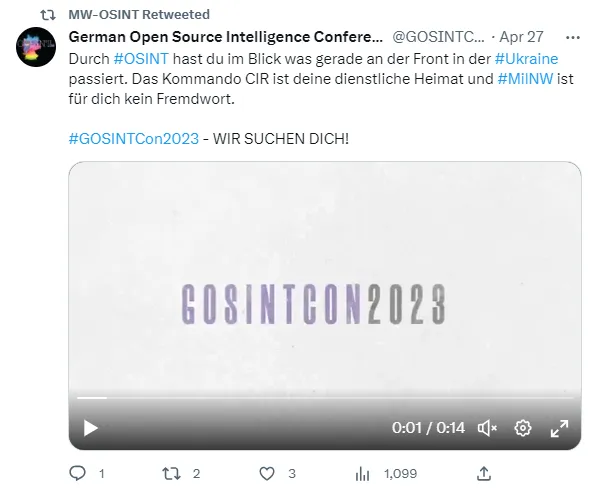
Doing a simple search on the MW-OSINT Twitter account, I found that it retweets many posts from the German Open Source Intelligence Conference. This is one clue to look out for when searching for MW-OSINT on Google.
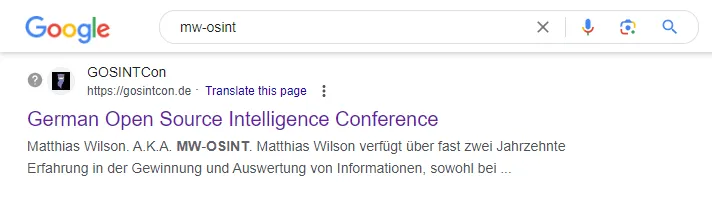
And unexpectedly, I found the GOSINTCon website with his Twitter username on the page. I then went to the website to see if I could find more information about MW-OSINT.
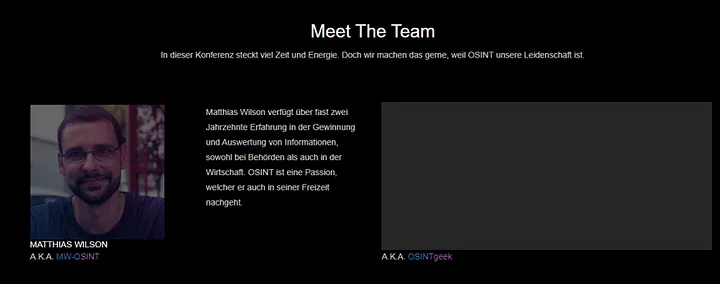
Scrolling down the homepage, I already found the “Meet the Team” section where MW-OSINT can be found under the name Matthias Wilson.
On the Bellingcat website, I found that « open source research often relies on social media posts that include videos and images. However, these posts may be removed by the platforms or removed by those who post them. This also applies to websites and virtually all information on the Internet.
Now we had Mathias Wilson’s name and it was time to google that name. The first search result is Matthias’s LinkedIn page, and most of the time people share their location on LinkedIn, so I searched there.
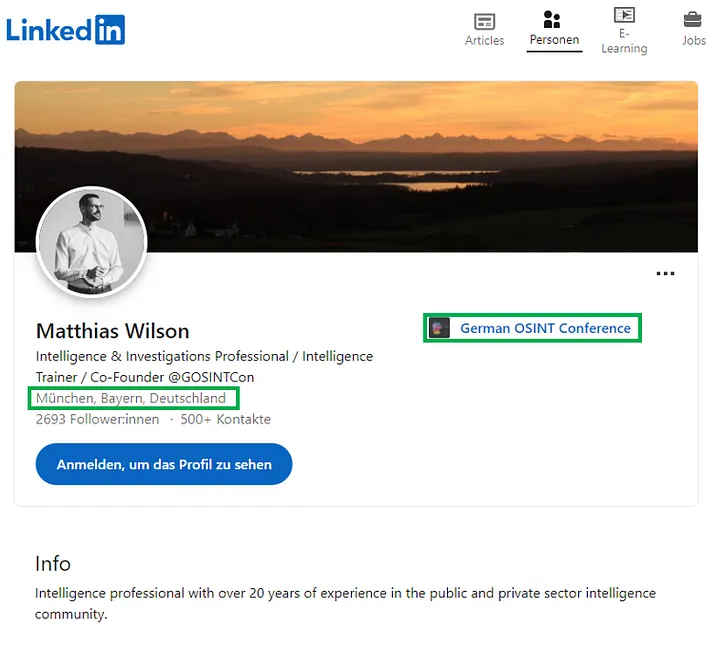
Here we see that also here Mathias says that he is from Germany, or rather from Munich in the federal state of Bavaria. So this was my second check and I was hoping the information was true. We can also see that he linked the German OSINT conference to his profile. With this information, I started looking in the south of Germany for possible locations.
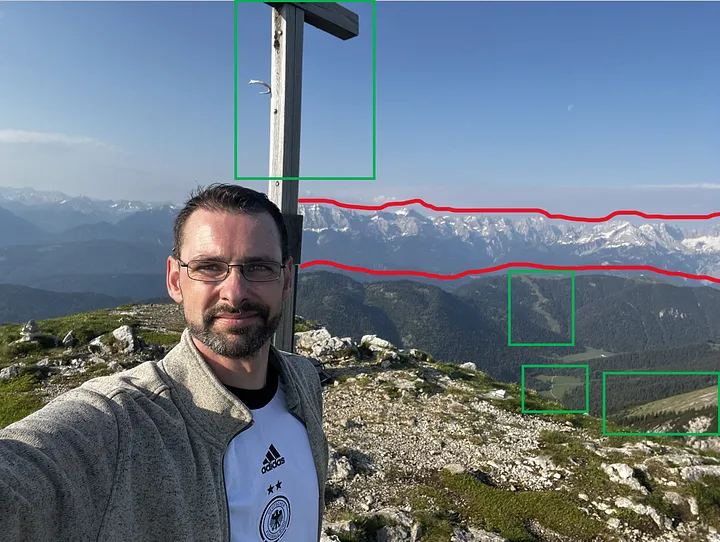
What I always do before looking for a location is to analyze the source image. In this case, we see in the foreground a mountain peak with a cross on top (in the Alps, as in other places, a cross is very often placed on top of a mountain). In the background we can see the road, a large part of the hill without trees, a part that looks like a ski slope on the first row of mountains, and a second row of mountains with steep, high and rocky mountains.
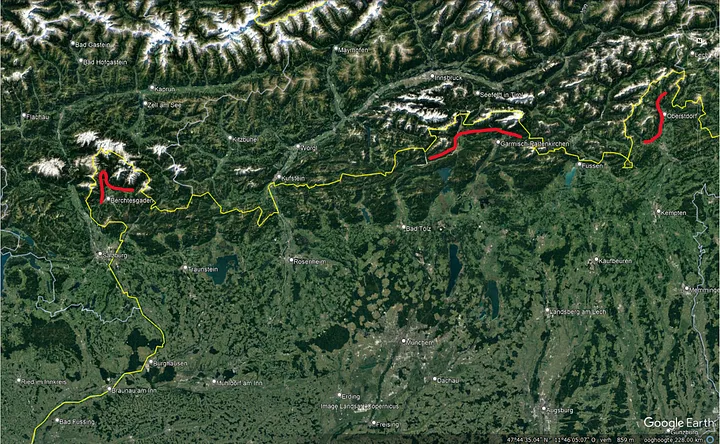
On a satellite image from Google Earth Pro, I looked at the south of Germany (the top part of the image is south) and found three places that met the basic requirements of my search. Such places were Berchtesgaden, Garmisch-Partenkirchen and Oberstdorf. Then I started looking for big ski resorts in these places to try to find a suitable one.
On Google Maps, most lifts and slopes of ski resorts in the Alps are fully mapped. This is how I was able to find the great ski resort in Garmisch-Partenkirchen. My search area has now narrowed down to this area on the German side of the border with Austria.
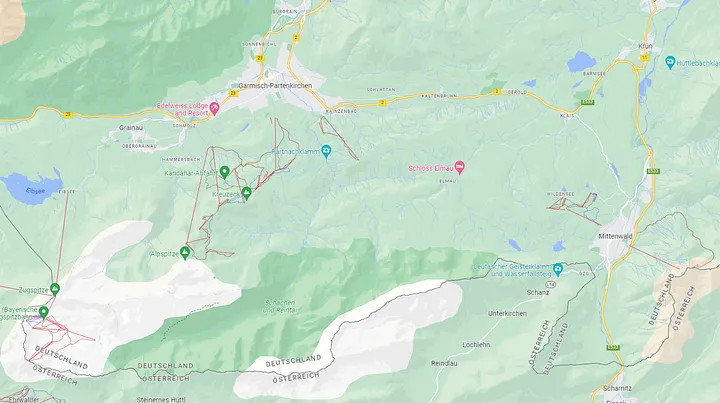
Then I started looking on Google Maps for peaks located two mountain ranges from high and rocky to the north. I checked every vertex and searched for 360 views until I found the vertex I was looking for.
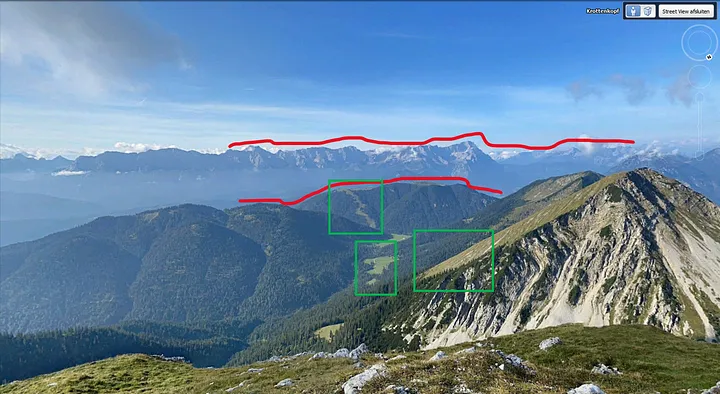
In the 360 image, I recognized many elements of the original image. We can see two mountain ranges, a ski slope, a road in a valley and a large treeless area on the mountain to the right. To see if this was the peak I was looking for, I looked for additional images of the cross and the view.
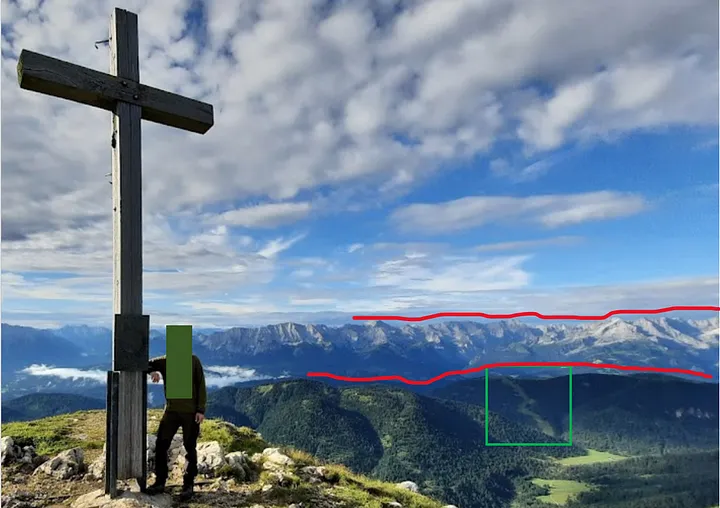
In this image I was able to confirm that I had found the correct peak. The mountain is called Krottenkopf and is located in Garmisch-Partenkirchen, Bavaria. Coordinates 47.544383, 11.191428
I also want to verify my location on peakvisor.com if possible. So I uploaded the image and made an overlay of the mountain.
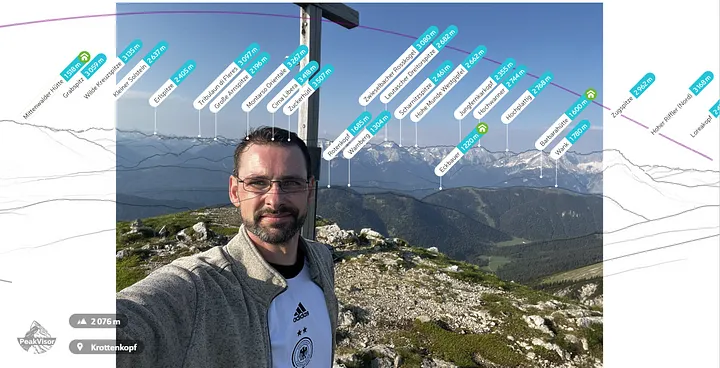
Peakvisor confirmed the second location check. In the middle of the picture, the mountains are perfectly aligned. Due to the distortion of the mountains on the left and right of the selfie, the images are not perfectly aligned.
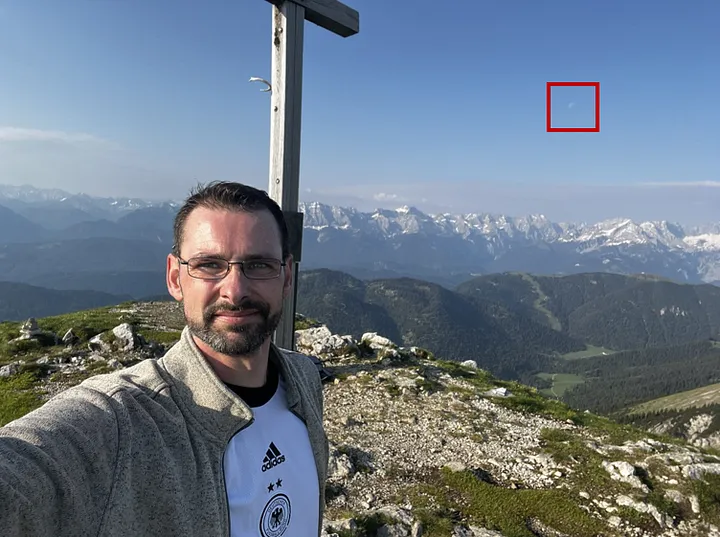
If you look closely at the original image, you will see that the moon is visible. Since this is easier to use instead of the shadow, I followed the moon to determine the exact time.
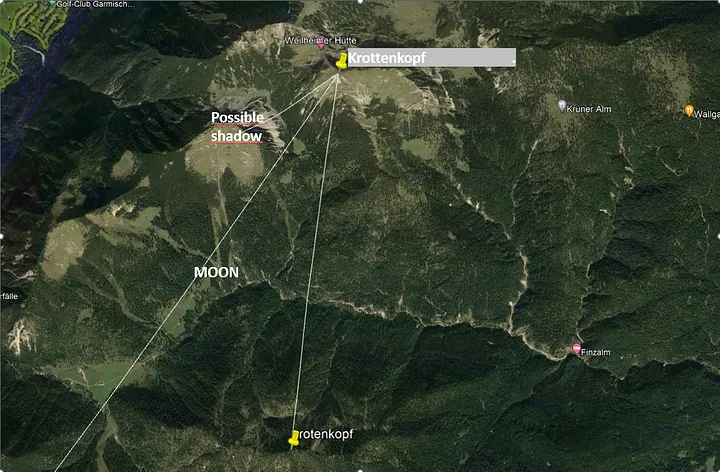
The first thing I did was map the location of the moon in Google Earth Pro to know the exact angle from the Krottenkopf. For reference, I used Mount Rothenkopf in the first row of mountains visible from Krottenkopf.
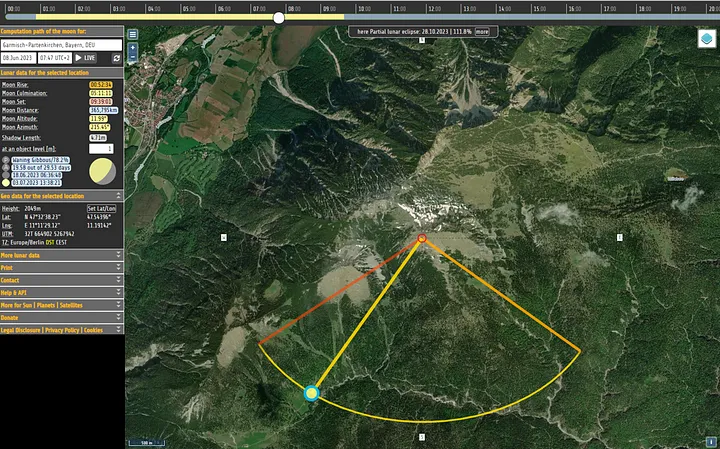
I used mooncalc.org to determine the exact time. This is a very handy tool to use when investigating if the moon is visible. On mooncalc.org, I dragged the position of the moon exactly to the position of the moon in the source image and found that the picture was taken at 07:47 CET.
Where did MW-OSINT get this picture? Coordinates: 47.544383, 11.191428
What time was the photo taken? Time: 07:47 CET
The time and place were later confirmed by MW-OSINT itself (exact time 07:39 CET).