25.04.2023
10 min
1548

Learn how to use QGIS to analyze aerial imagery to create highly accurate maps and enhance data visualization capabilities. The article describes the main methods of processing satellite images, the use of geoinformation tools, as well as step-by-step instructions for accurate analysis and storage of aerial photo data.

QGIS is a free tool widely used in geographic information systems (GIS) for processing data related to geography, topology, and cartography. Although this tool is typically used by GIS professionals, it can also be used effectively by insurance investigators, law enforcement agencies, or journalists for tasks such as geolocation or obtaining additional data about specific regions and situations. The article provides instructions for installing QGIS, introduces the basics of its interface, and shows how easy it is to add high-resolution aerial photos with simple tweaks.
QGIS provides access to ultra-high resolution images that are often not available in Google Earth, particularly for some urban areas and municipalities where the resolution reaches 3.5 cm. This is significantly higher than Google Earth’s satellite imagery, which provides up to 30 cm resolution in Europe and the US, and up to 15 cm in some areas. Although not all areas have this coverage, the article presents techniques to help you find the right images with the right level of detail.
These resources are not a substitute for current Maxar or Google Earth satellite imagery, but can be a great supplement. The ultra-high resolution of aerial photography allows you to see details that are not always visible on satellite images. Such images can be useful for context when dealing with stationary objects or in cases where high-quality images are needed for reports or publications.
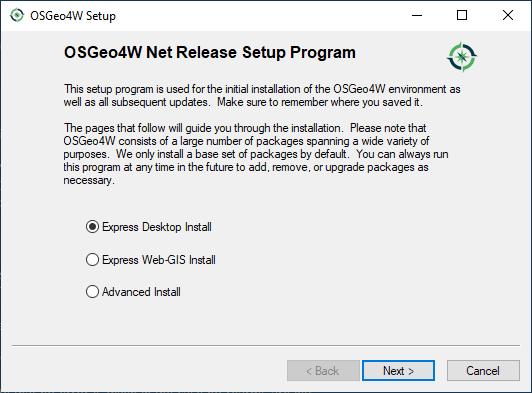
QGIS can be downloaded from the official website, where versions are available for various operating systems such as Windows, macOS, Linux, BSD, as well as for Android and Windows-based tablets. For installation on Windows, the OSGeo4W installer is used, which provides a wide set of options, additional programs and libraries for installation, in particular for GIS. On macOS, installation is easier, as QGIS is available as a standalone application that does not require additional configuration. The installation process on Windows starts with the OSGeo4W Net Release Setup, where the user should select the “Desktop Express Install” option, which provides the latest version of QGIS with basic settings focused only on the main functions of working with spatial data, without the need to install additional components.
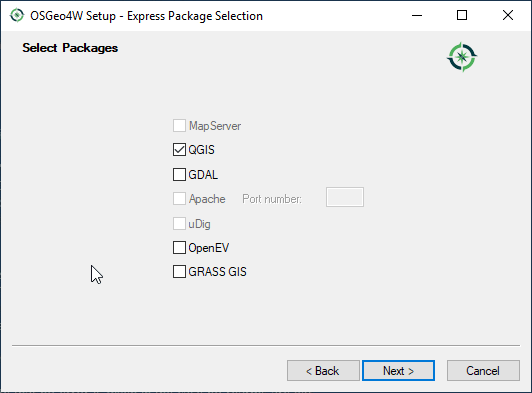
In the next step of the installation, the user has the option to deselect all additional components, leaving only “QGIS” checked, and then click “Next” to continue.
After that we need to approve the permanent terms of service before we can start the actual installation. It downloads a few hundred MB in total, so make sure you have plenty of time and a fast connection.
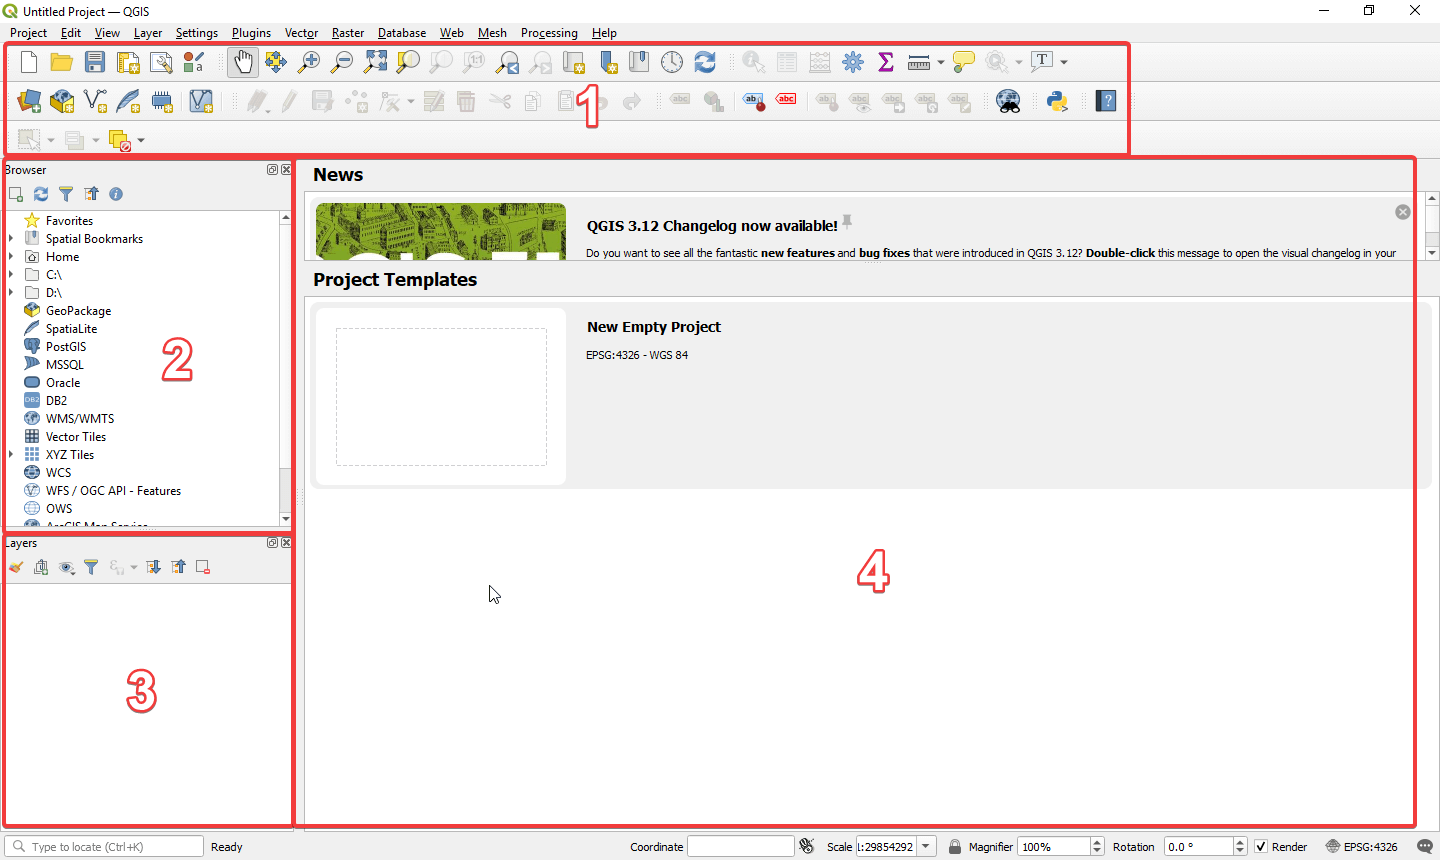
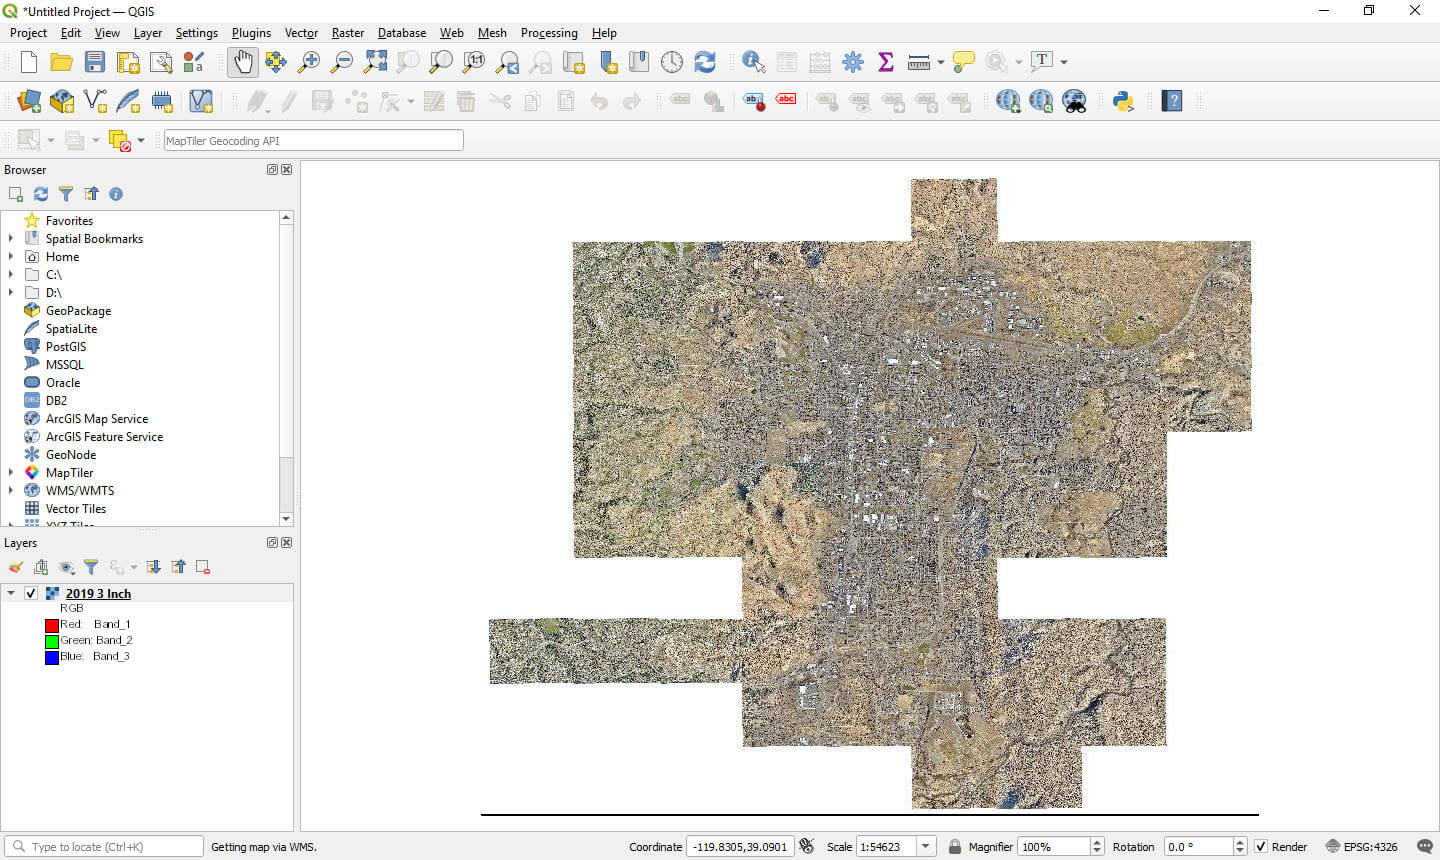
Start QGIS and you’ll be presented with a main workspace that consists of a few general areas and lots of menu buttons. Don’t get upset about this, as we won’t be using many menus for now. At the top, we have the main menu (1) with many buttons that open different functions of QGIS. On the left we have the browser (2) where we can open local files and below that the layers (3). The rest of the screen is filled by the general work area (4), where the high-resolution images will appear later.
Before adding external sources, it is convenient to open a base layer, such as Open Street Map, to zoom in on the desired area and work with several map services in one program. For this, there are several plugins that allow you to connect such services. Popular options include QuickMapServices or HCMGIS. HCMGIS plugin allows you to select images from Google, Bing, ESRI. To install a plugin, just go to the “Plugin” menu, select “Manage and install plugins” and add the desired tool.
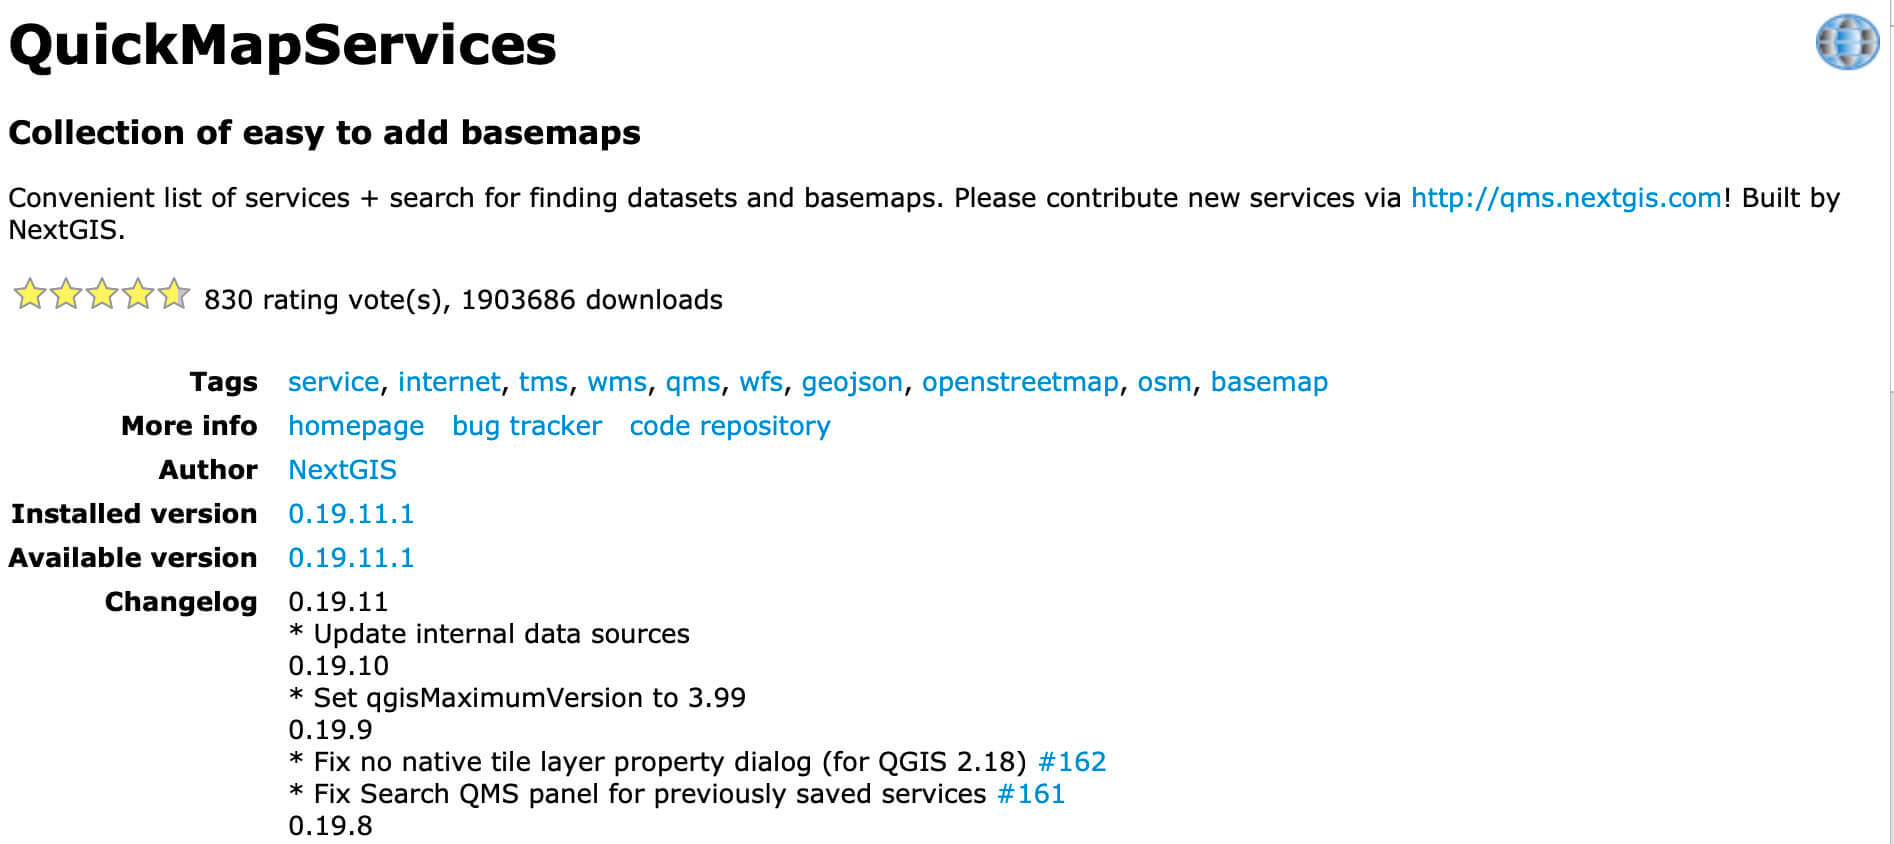
Find the “QuickMapServices” plugin and click “Install Plugin”. After installing and creating a new project, from the start page you go to the web menu or look for the small globe icon in the menu bar. From there, you can quickly select the OSM layer to display.
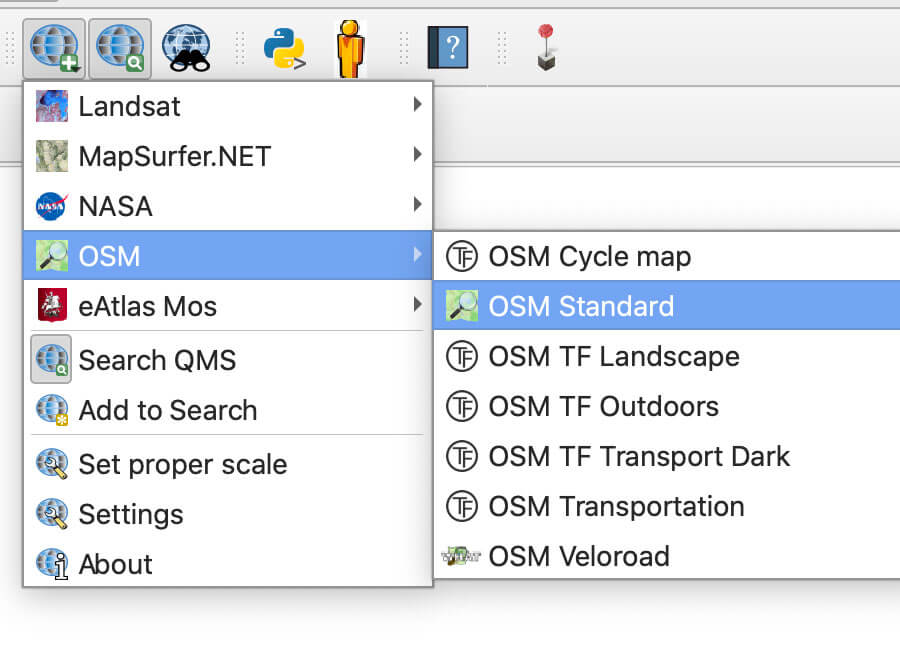

This article focuses on obtaining high-resolution aerial photographs and satellite images. After setting up QGIS, you can switch to the GeoSeer spatial database. This platform provides access to more than 1.8 million datasets from around the world, including geological information, climate data and image services. GeoSeer offers a manual search or a “WebGIS” option to visually search for areas of interest. In this section, we will consider the manual search option.
Not every country in the world has a reliable high-resolution image provider open to the public, but many regions in North America or Europe do. With the vast number of data sets available, it can be difficult to find the most useful set at first and may take some practice. But one thing you can try is searching for the area or city name you’re interested in combined with one of these words to find what’s there:
satellite
air
photo
air photo
imagery
inch
see
Don’t forget that it may help to search in the native language of the area, so the word “photo” will not be useful when searching in German-speaking countries. To do this, change the keyword to “luftbilder” or just “bilder” if you are not getting any hits for the word “photo”. Or leave out keywords entirely and search only for a specific area or city. You may have to go through many links before you find what you need. If you can’t find it in GeoSeer, just search Google for aerial photos that provide a WMS or WMTS connection. Another thing to try is to search for a general area or even a city name combined with a different resolution such as: 5cm, 30cm or “6” (in quotes).
Once you’ve found a potentially interesting dataset, you can open the page to view the details. In this case, we open a set of 3-inch aerial photos of Carson City, Nevada.
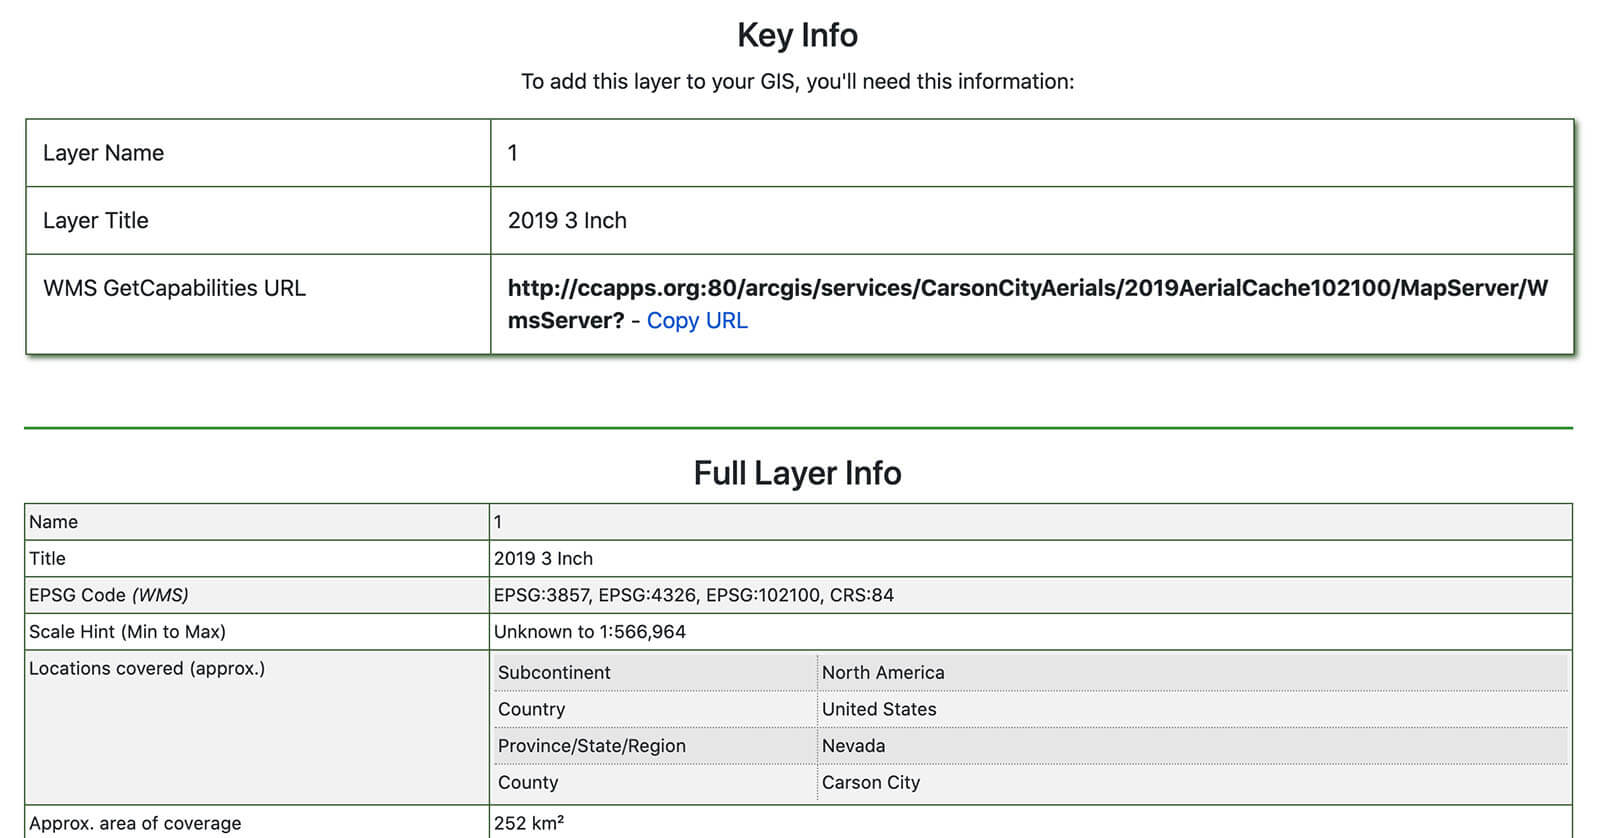
Details say the dataset is dated 2019, has a resolution of 3 inches per pixel (or about 7.5 cm/pixel), covers 252 km2, and is bounding box coordinates. Additionally, we also have a bunch of URLs that provide features, map snippets, capabilities, and more. It’s not that important right now, so let’s focus on the URL above. It shows the URL:
http://ccapps.org:80/arcgis/services/CarsonCityAerials/2019AerialCache102100/MapServer/WmsServer?
Just click Copy URL and we’re ready to add a layer to our project.
If you think you have found a suitable or suitable mapping service, you can use it. Alternatively, you can use Carson City’s example now. After that, it’s time for the following two-part steps:
Select and connect to the dataset of your choice
Download one or more products from this dataset
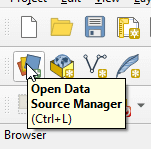
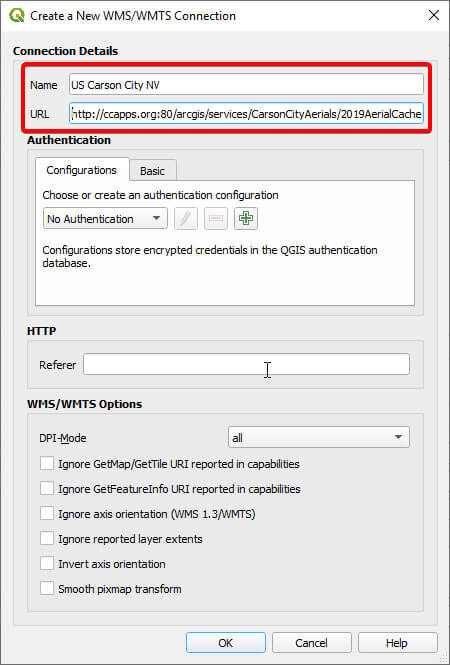
Most datasets in GeoSeer have multiple “products,” such as environmental data or multi-year aerial imagery. After connecting to the corresponding WMS service, you can view their content. To begin with, you need to click “Manager of open data sources”, after which a dialog box for adding or editing map services will open. The first step is to select the WMS/WMTS option as this is the type of service you plan to add. Next, click the “New” button, where you need to specify the name and URL of the service to access. After entering the data, click OK to return to the Data Source Manager.
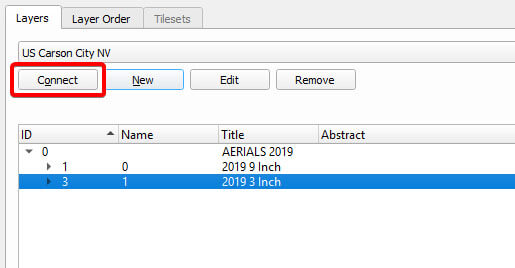
To get a list of products provided by the mapping service, click Connect and a list of products available to you will be downloaded. It can be a few lines, but there are services that have over 100 products that you can use. To find the right data, you can use the search option at the top right by entering the keywords you expect in the product. Think like: aerial photography, photography, 10cm, or anything that might suggest satellite or aerial photography.
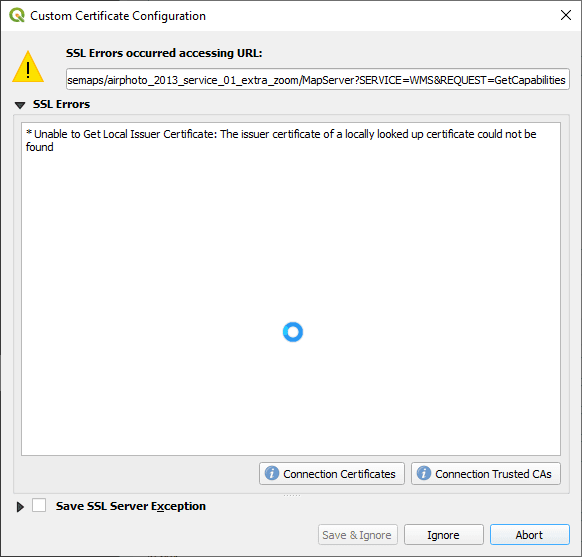
In the process of connecting to the service, a “certificate error” may occur, which is usually associated with an incorrect setting of the digital certificate on the server, which provides a level of security. In such cases where only image tiles from a public source are requested, most users may choose to ignore this error. However, for those with sufficient security knowledge and willingness to investigate the issue, there is always the option of finding a different URL or alternative setting to fix the error.
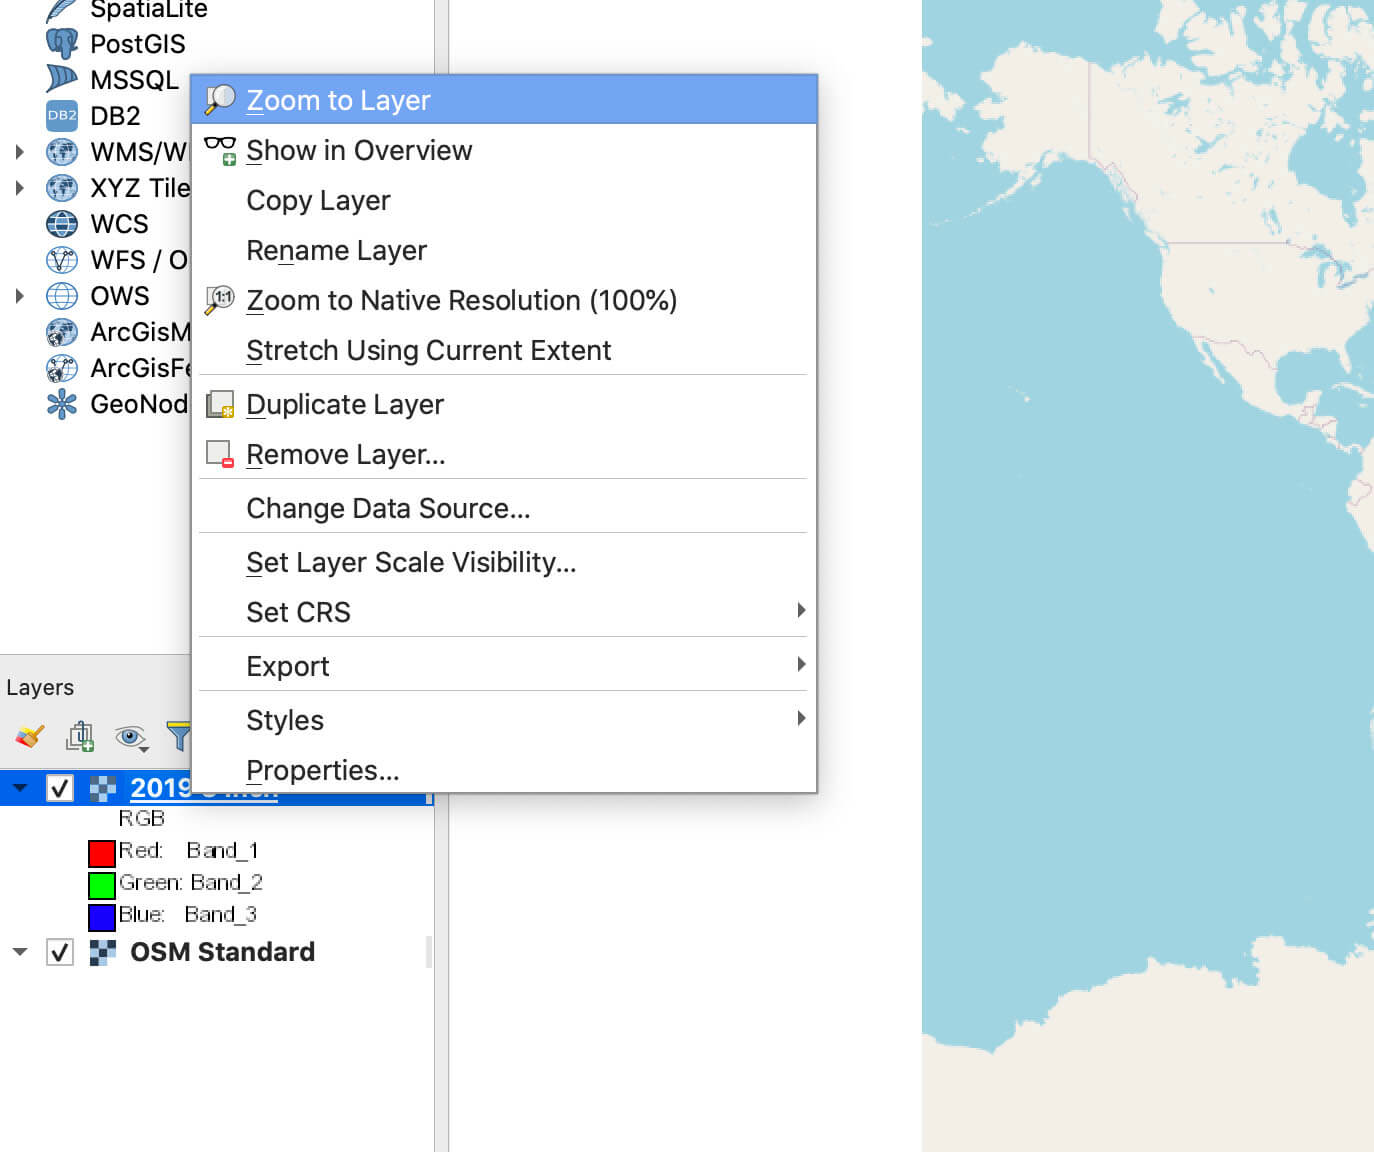
Once the datasets are loaded, select the desired product and click Add, then you can close the wizard and the image will automatically be loaded into the project for viewing. If the project contains no other layers, the image will appear immediately. However, if a base layer such as OpenStreetMap has been added before this, scaling to the desired area may be required. This can be done by right-clicking on the layer and choosing the option “Zoom to layer” or by clicking the corresponding icon in the toolbar.
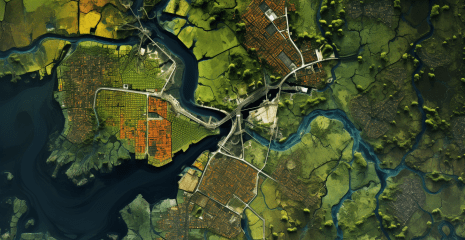
Once you’ve uploaded aerial photos or satellite imagery, you’re ready to explore. As an example, here’s an aerial photo of Carson City after it was uploaded:
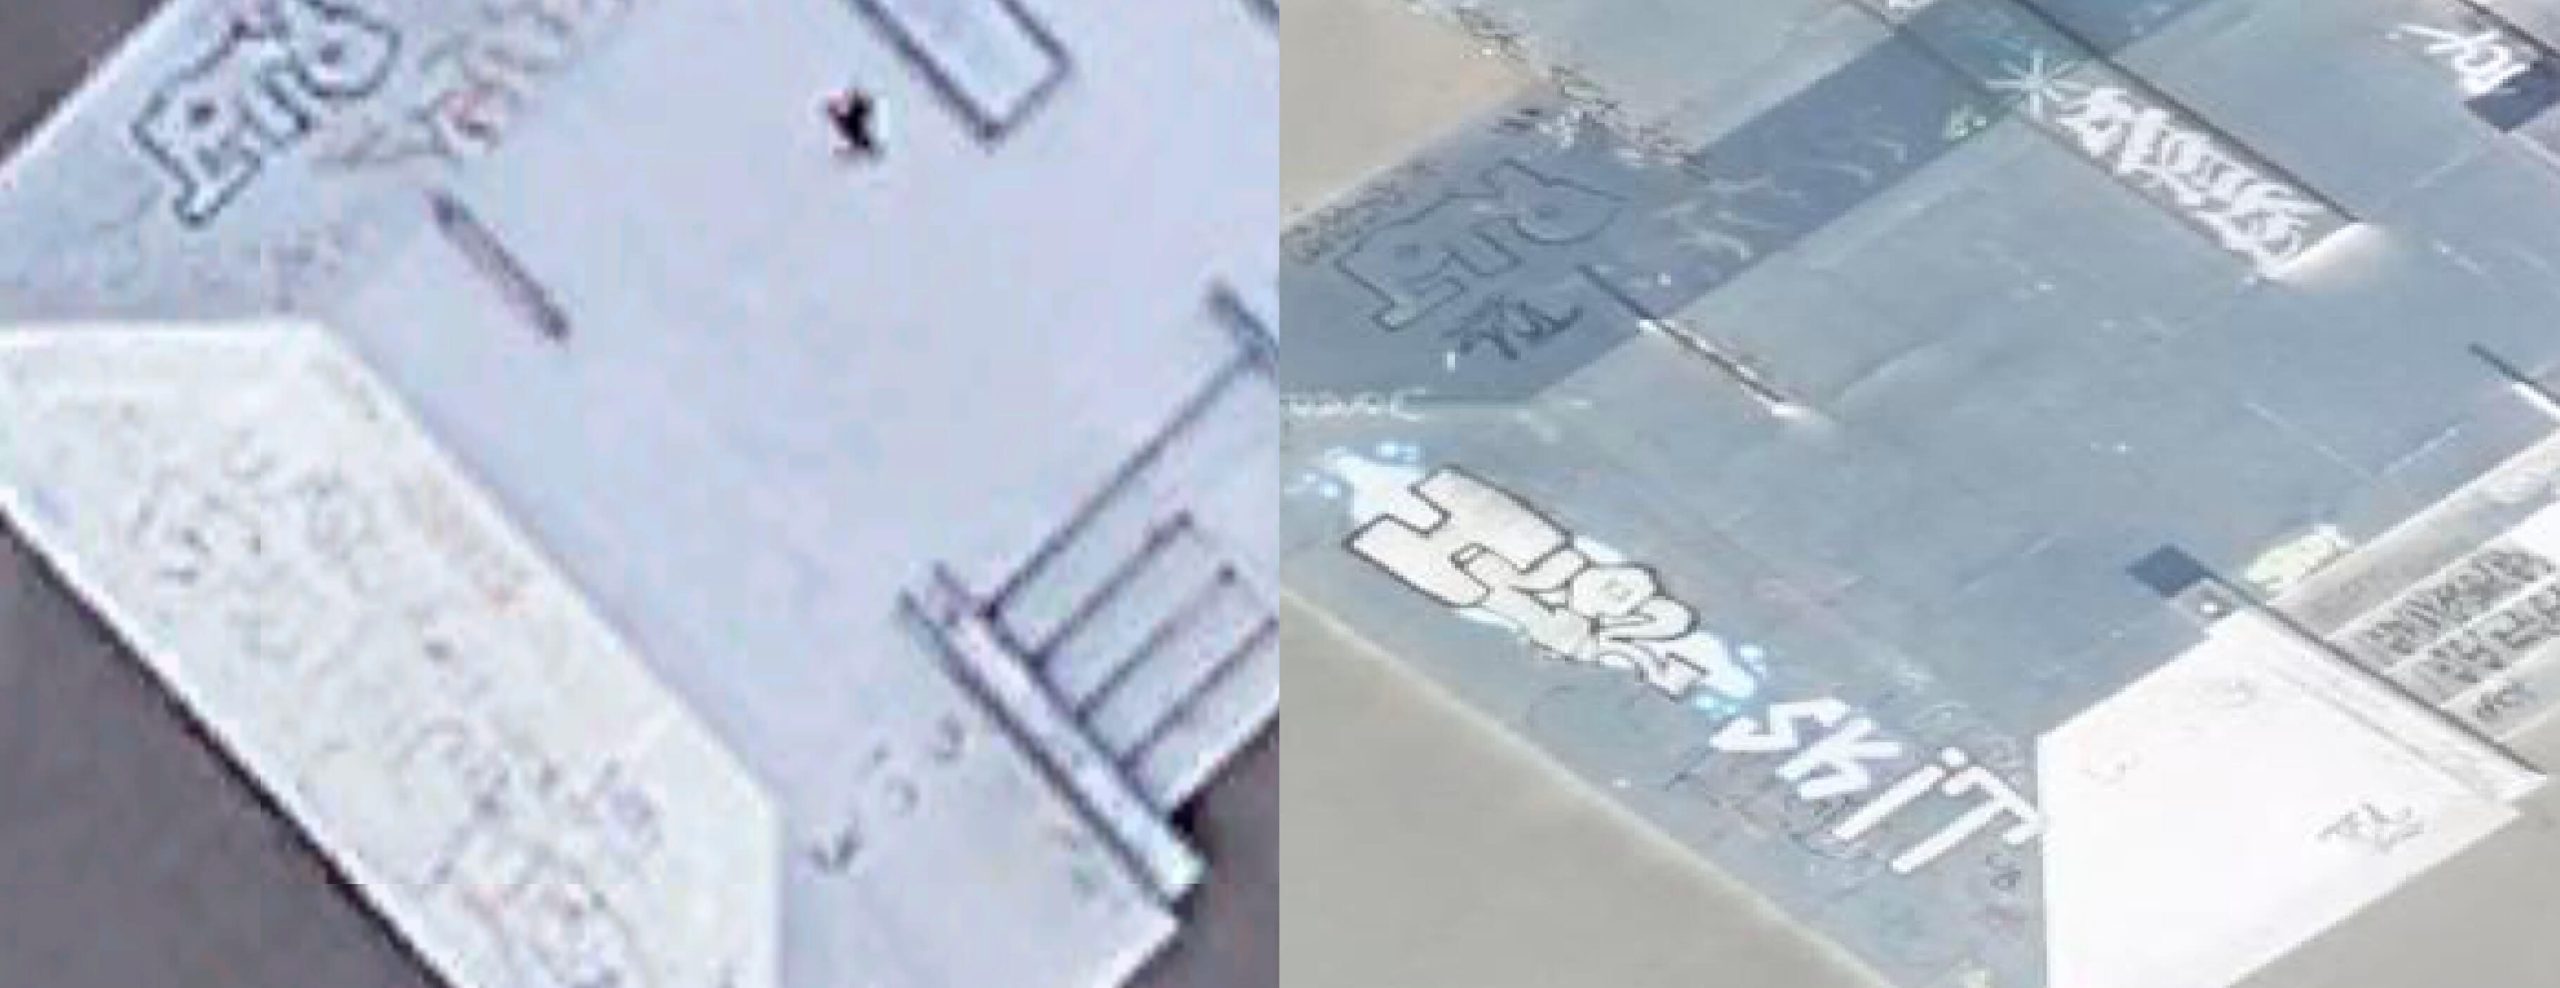
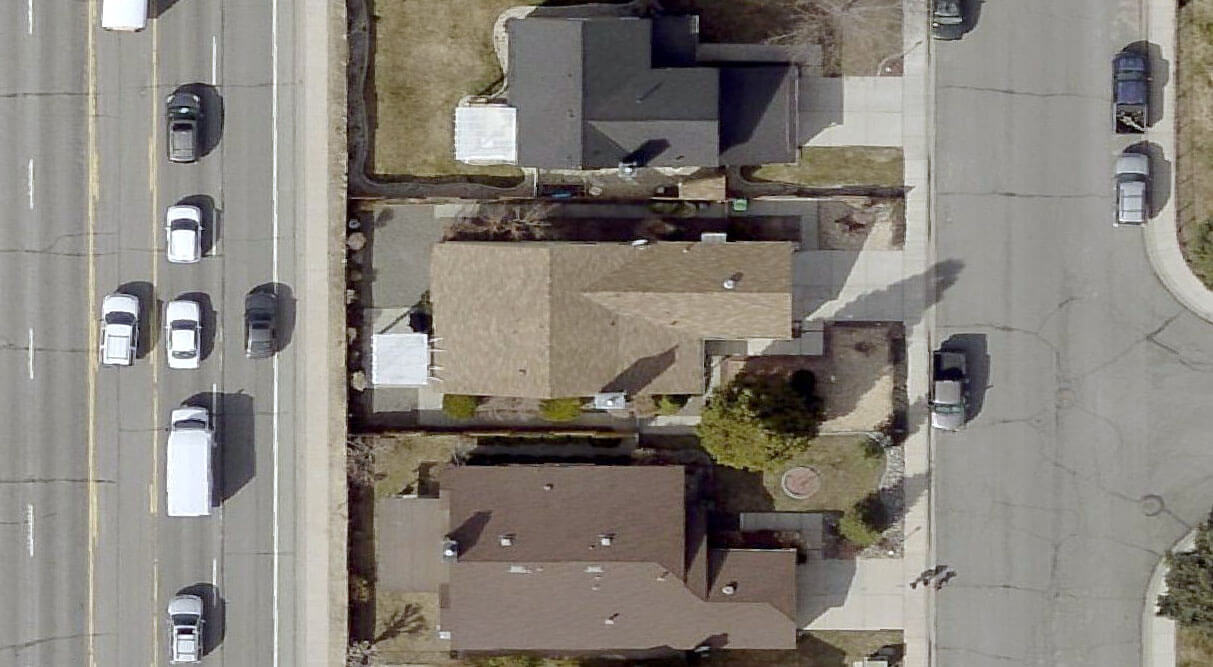
And after zooming in, you can identify the make and model of the cars that are visible.
Tip: If you’ve loaded a dataset into your project and zoomed in but you can’t see anything, try zooming in or out. The WMS vendor may have set a minimum or maximum scaling level.
There are many interesting web map tile services that are free to use, too many to list here. But to give you some examples, here are some screenshots and information on where to find the data.
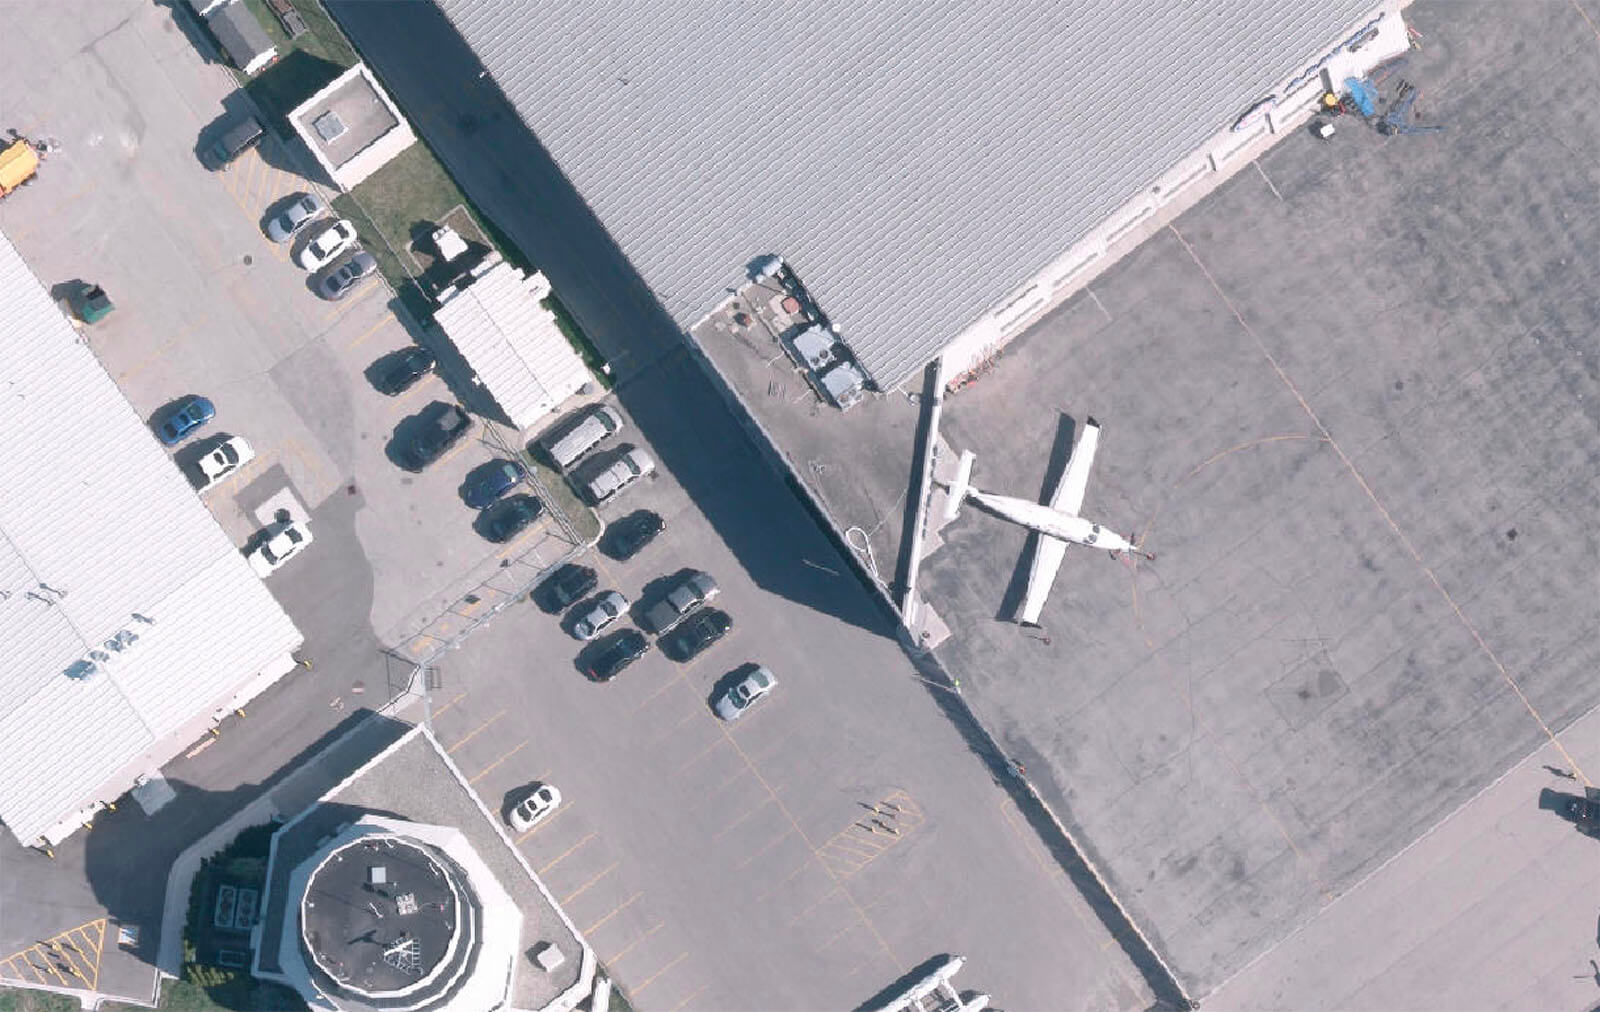
Date. 2012 year
Resolution 5 cm
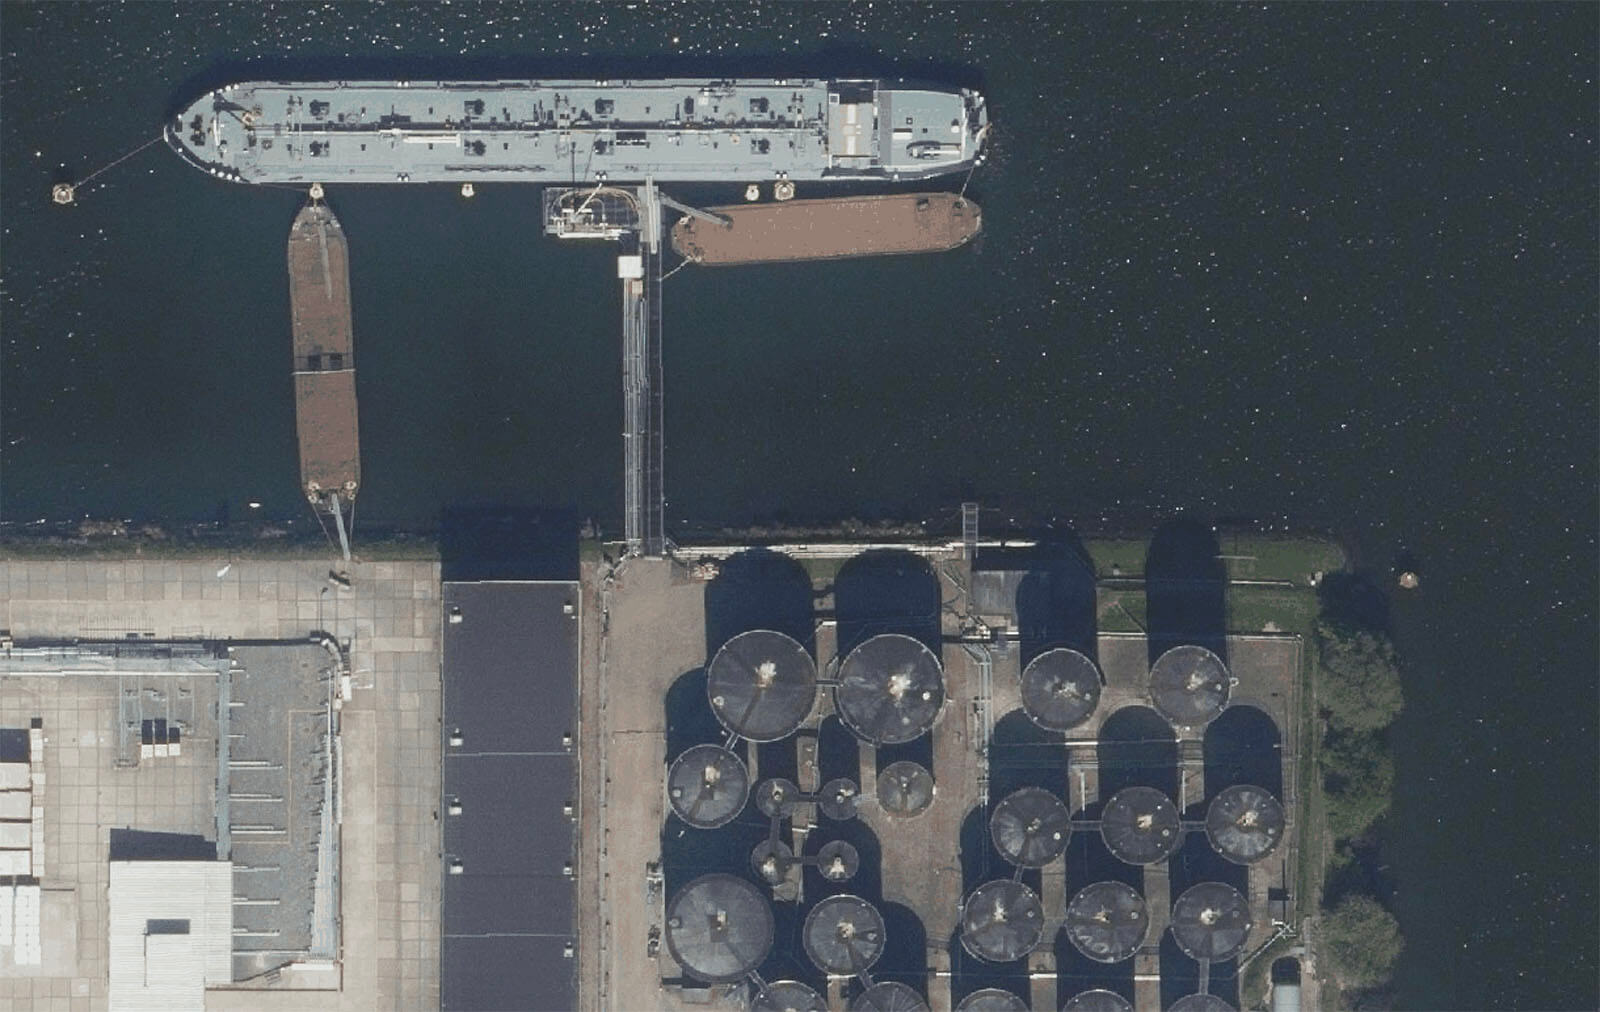
Date. 2009-2019 years
Resolution Unknown (probably around 10-15cm)
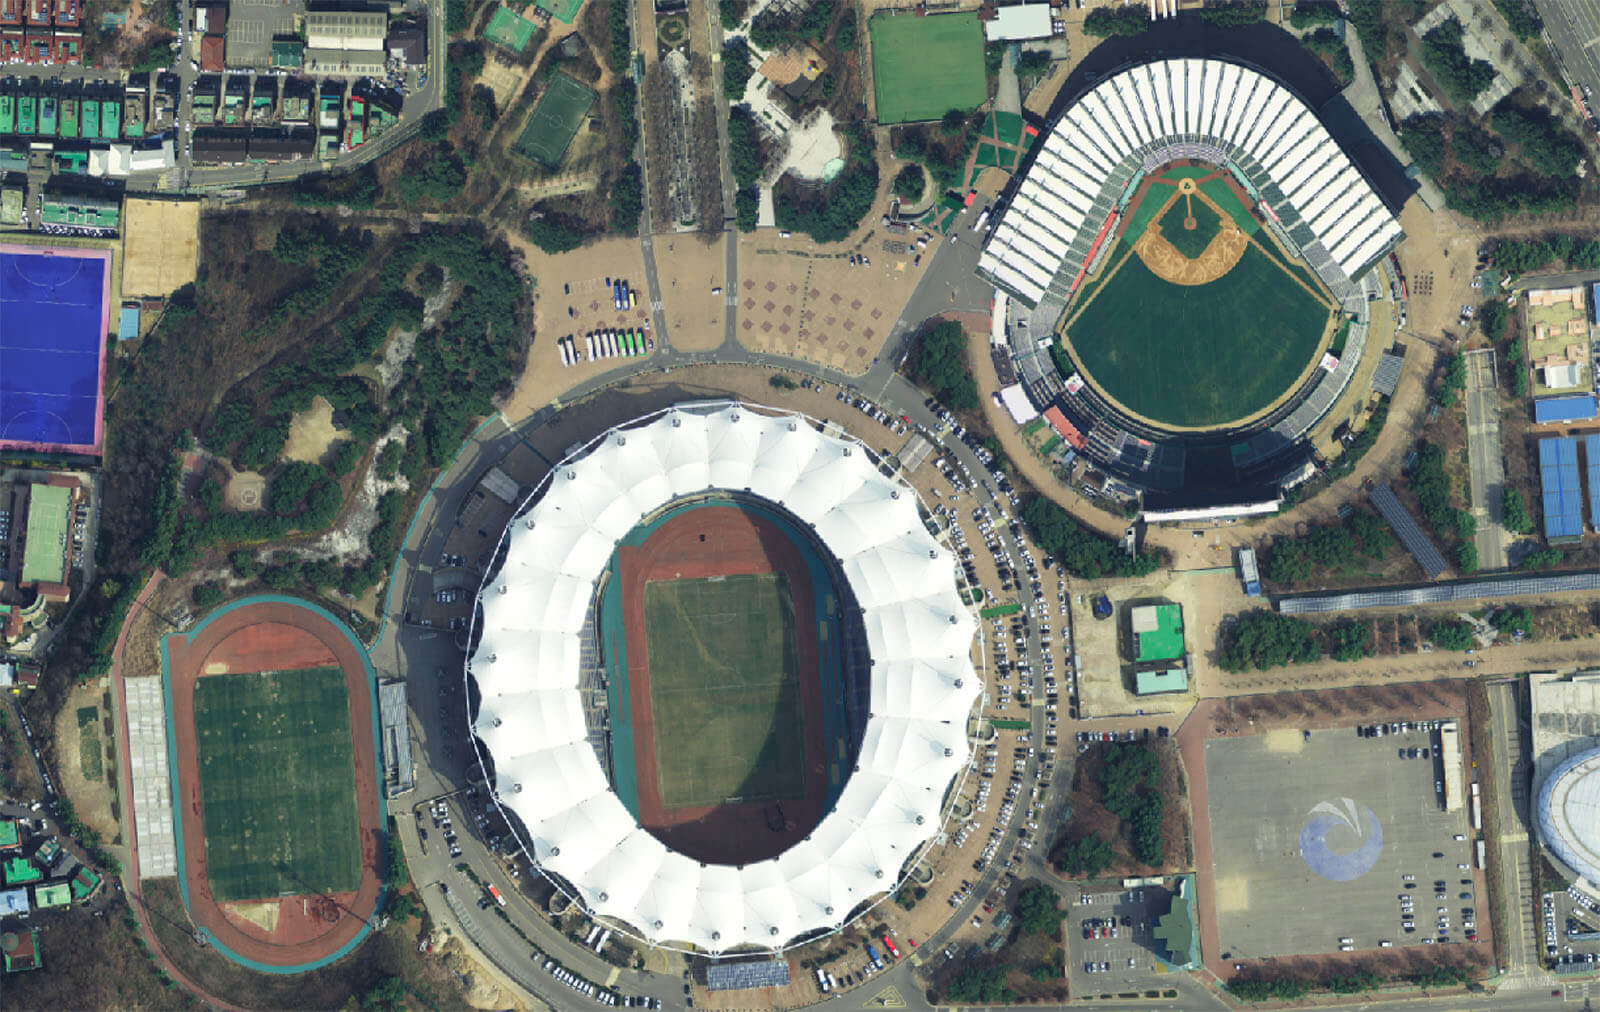
Date. Unknown
Resolution 25 cm

Date. 2013 year
Resolution 6″ or 15 cm
QGIS is an extremely powerful and versatile tool that allows you to work with geographic information, including aerial photographs and satellite images. With access to ultra-high resolution, QGIS opens up new perspectives for analysts, journalists, law enforcement and other professionals who need to analyze and evaluate areas and objects with maximum accuracy. This tool becomes indispensable for working with cartographic data, providing additional capabilities compared to public maps.
Many more aerial photography articles are planned to advance knowledge in the field and provide more tools for spatial data analysis. So stay tuned to the Cyber War section so you don’t miss out on new material that will help you gain more insights in the field of geographic analysis.