28.05.2025
9 min
1046

I want to share my personal experience of getting started with STM32. In many ways, this will be my own journey, reflected and summarized in this article. I started with Arduino, so everything here is geared towards those already familiar with Arduino and looking for a roadmap to transition to STM32. If you’re not familiar with Arduino yet, I recommend starting there. It might be all you need and could become a great lifelong hobby. For those who want to go beyond or develop professionally in Embedded — welcome!
Let’s start by describing what STM32 is. It’s a family of microcontrollers (MCUs) from STMicroelectronics based on the ARM Cortex-M architecture. This is a modern and efficient architecture from ARM, designed for low-power and high-performance devices. Now, after the official intro, let’s see how to start working with these MCUs. Unsurprisingly, you’ll need a development board built around an STM32 MCU. This is quite straightforward and it’s hard to go wrong when choosing your first dev board. Even the cheapest MCU includes a standard set of peripherals that you’ll be learning about if you choose to start this journey: GPIO, UART, I2C, SPI, ADC, Timers, DMA, Watchdog. More advanced MCUs have additional peripherals (DAC, CAN, USB, Ethernet, etc.), but the standard set is present in all and is more than enough to begin with.
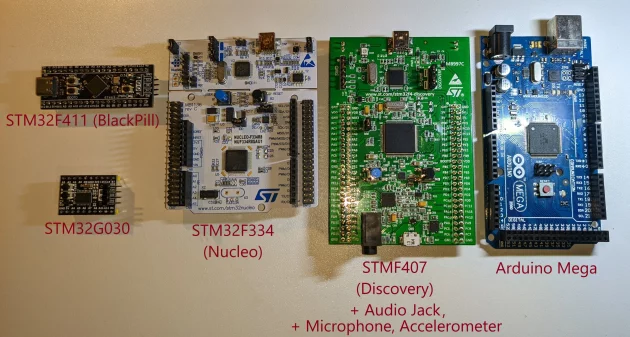
There are a lot of dev boards available, but two official lines from STMicroelectronics dominate: Nucleo and Discovery.
Advantages of Nucleo boards:
Discovery boards share the same advantages as Nucleo, except Arduino compatibility. They also often include specific peripherals on the board such as:
The cost of these boards usually starts around 800 UAH, and the price difference often depends on whether the Discovery board includes extra peripherals like a display or sensor. Discovery is ideal for specific projects when you know you’ll be using a display or sensor and want that functionality built into the dev board. You won’t go wrong if your first dev board is any Nucleo without extra peripherals, since all standard peripherals mentioned earlier are built into the MCU itself. You can always buy a compatible display or temperature sensor later and connect it.
Though Nucleo is highly recommended for a smooth start, it’s worth mentioning AliExpress alternatives. These are more budget-friendly, but also more “hardcore” options (like the well-known BlackPill — F401 or F411). They require a bit more technical skill to connect and flash. Such boards are significantly smaller and do not include the ST-Link programmer/debugger. Flashing is usually done via an external programmer, which you’ll need to buy separately. In more expensive versions, you can flash via DFU (USB), but external programmers are better. These boards also use simpler power circuits with fewer protection features. Still, they are great for home projects due to their size and price once you gain experience and the drawbacks aren’t a big deal. After all, you won’t be buying large, expensive Nucleo/Discovery boards for every hobby project you want to fit into a small plastic case. These boards range from 60 to 200 UAH depending on the MCU and seller. I recommend WeAct Studio on AliExpress. I’ve bought various dev boards, an ST-Link programmer, a logic analyzer from them with no complaints. I won’t add links as they tend to break.
The development environment (IDE) is the main place you’ll be working, where you write programs for your STM32 MCU. There are many options: STM32CubeIDE (official from STMicroelectronics), Microsoft VS Code, Keil uVision (official from ARM), IAR, and even Arduino IDE. If we’re planning to work professionally with STM32, then Arduino isn’t suitable. Still, Arduino can be useful for quick proof-of-concept tests. Just note that Arduino IDE guarantees Arduino API compatibility, but many Arduino libraries may not work or work poorly since they’re often designed for AVR (classic Arduino) or ESP32. But blinking an LED? That’ll work, and more.
Next is STM32CubeIDE, which will likely be your first choice. It’s the official development environment from STMicroelectronics and helps you launch a simple “blink” relatively quickly. It’s based on Eclipse. Here, you can graphically initialize GPIO pins, set up peripherals, and configure the MCU and peripheral clocks in a few mouse clicks. Under the hood, the IDE writes all the boring initialization code for you, and you’re left to implement only the logic you need in a predefined section. This creates a controlled development environment that helps prevent errors and ensures your MCU actually starts.
Another option is Microsoft Visual Studio Code (VS Code). Of all the mentioned IDEs, this one wasn’t designed specifically for microcontroller development (PlatformIO plugin from Ukrainian developers fills this gap), but it’s my favorite due to its speed, UX, and modern feel. If you already use it for other programming languages, transitioning should be easy (except for parts where STM32CubeIDE would auto-generate non-trivial boilerplate code).
So, at the start of your journey, the choice falls on STM32CubeIDE. Later, once you’re comfortable with MCU and peripheral initialization, understand HAL, and if you also dislike Eclipse-like IDEs, you’ll move to VS Code. Eventually, for real projects, you’ll manage your toolchain (compiler, linker, debugger), dependencies, and libraries yourself in whichever IDE suits you. But that comes later.
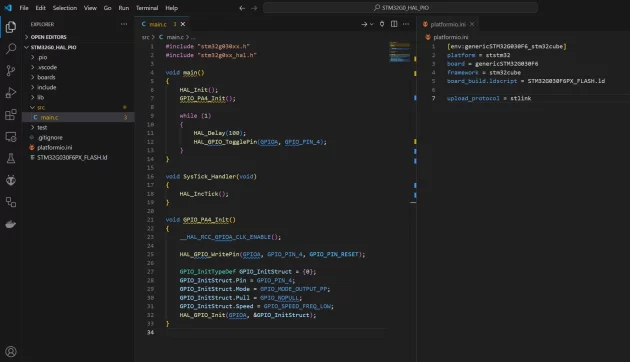
Here’s an example of how PlatformIO setup and blink code looks for STM32G030 with default core frequency and GPIO init:
To summarize, you’ll need one of these setups to get started:
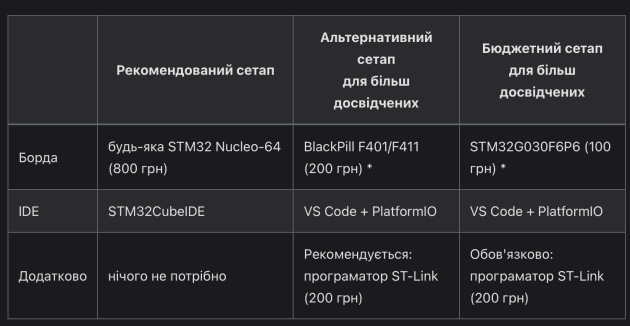
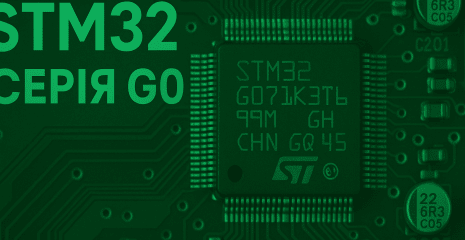
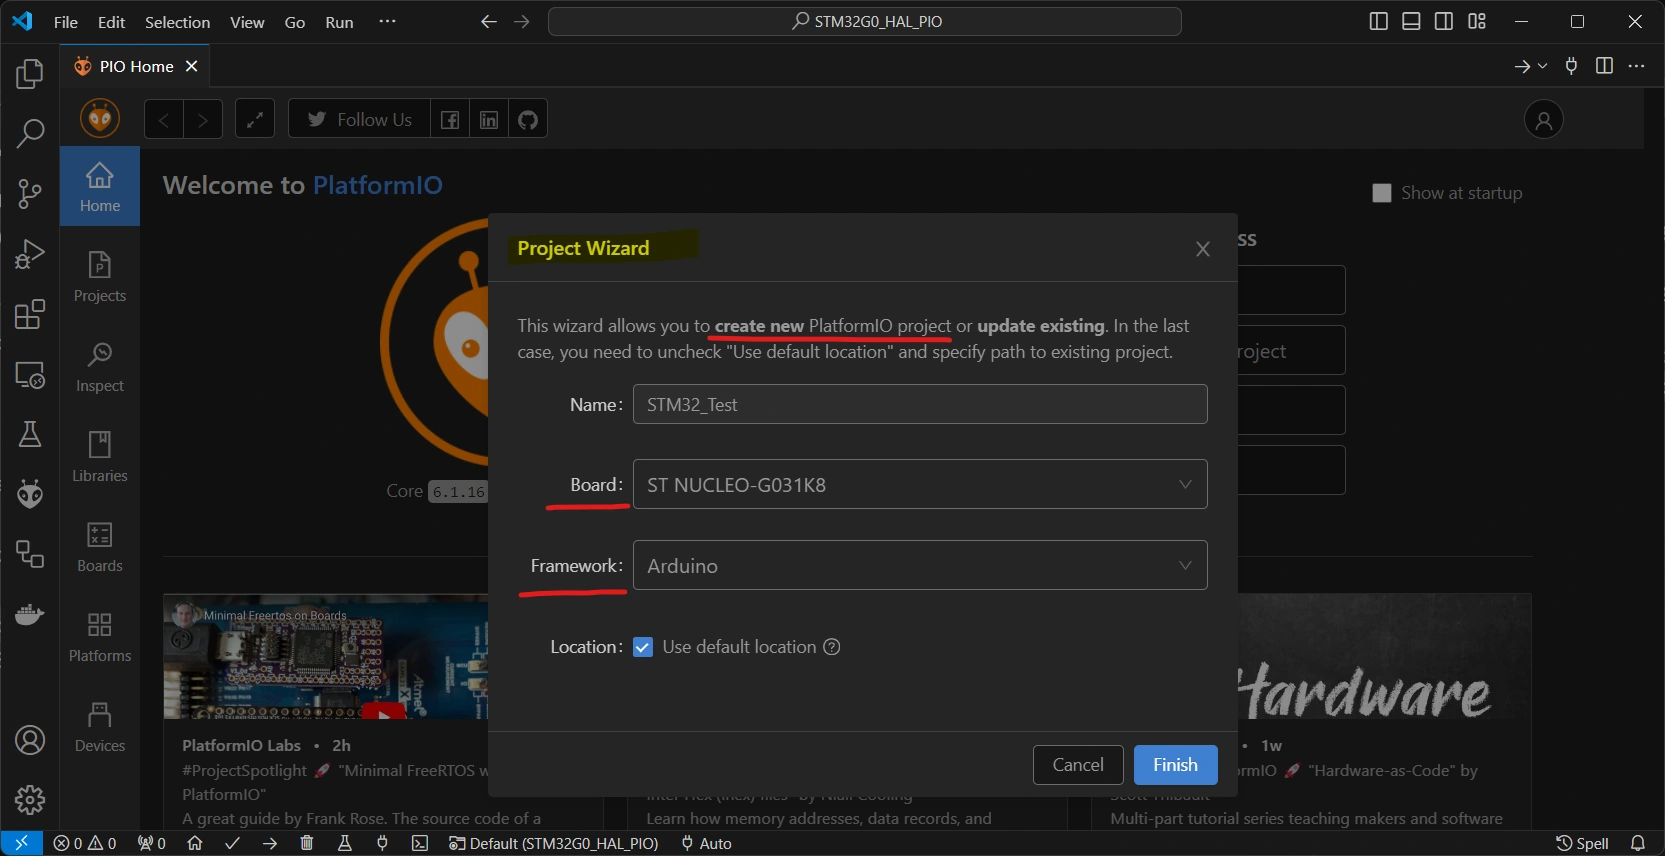
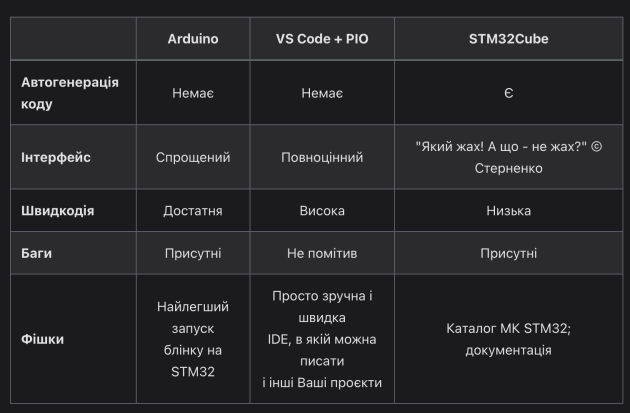
So for getting started with STM32, I recommend a Nucleo-64 dev board, not necessarily from powerful series like G4 or H5 — G0 or F3 will do fine. You’ll also need STM32CubeIDE (free, requires registration) as your IDE. Let’s compare a few popular STM32 IDEs: Arduino, VS Code + PlatformIO, and STM32Cube.
Of course, STM32 development isn’t limited to just these IDEs, but these are the most popular ones beginners encounter, and it’s important to understand their differences for a smoother learning curve.
Arduino is a universal platform for developing with microcontrollers from different vendors. There’s a good chance you’ve already used it. It’s great for classic Arduino boards (Mega, Uno, Nano) and ESP32. To use it with MCUs, you need to install an Arduino “core” for your specific MCU. For classic Arduino boards, this is pre-installed, but for ESP32 and STM32 (as we’ll see below), you need to install it manually. Arduino IDE includes a built-in library manager for working with various modules like displays, sensors, addressable LEDs, which lowers the entry barrier. Many libraries also come with example projects.
But from personal experience, many libraries are optimized only for classic Arduino or ESP32. Still, with STM32 you can rely on basic Arduino core functions: digitalRead, digitalWrite, tone, Serial.println, etc.
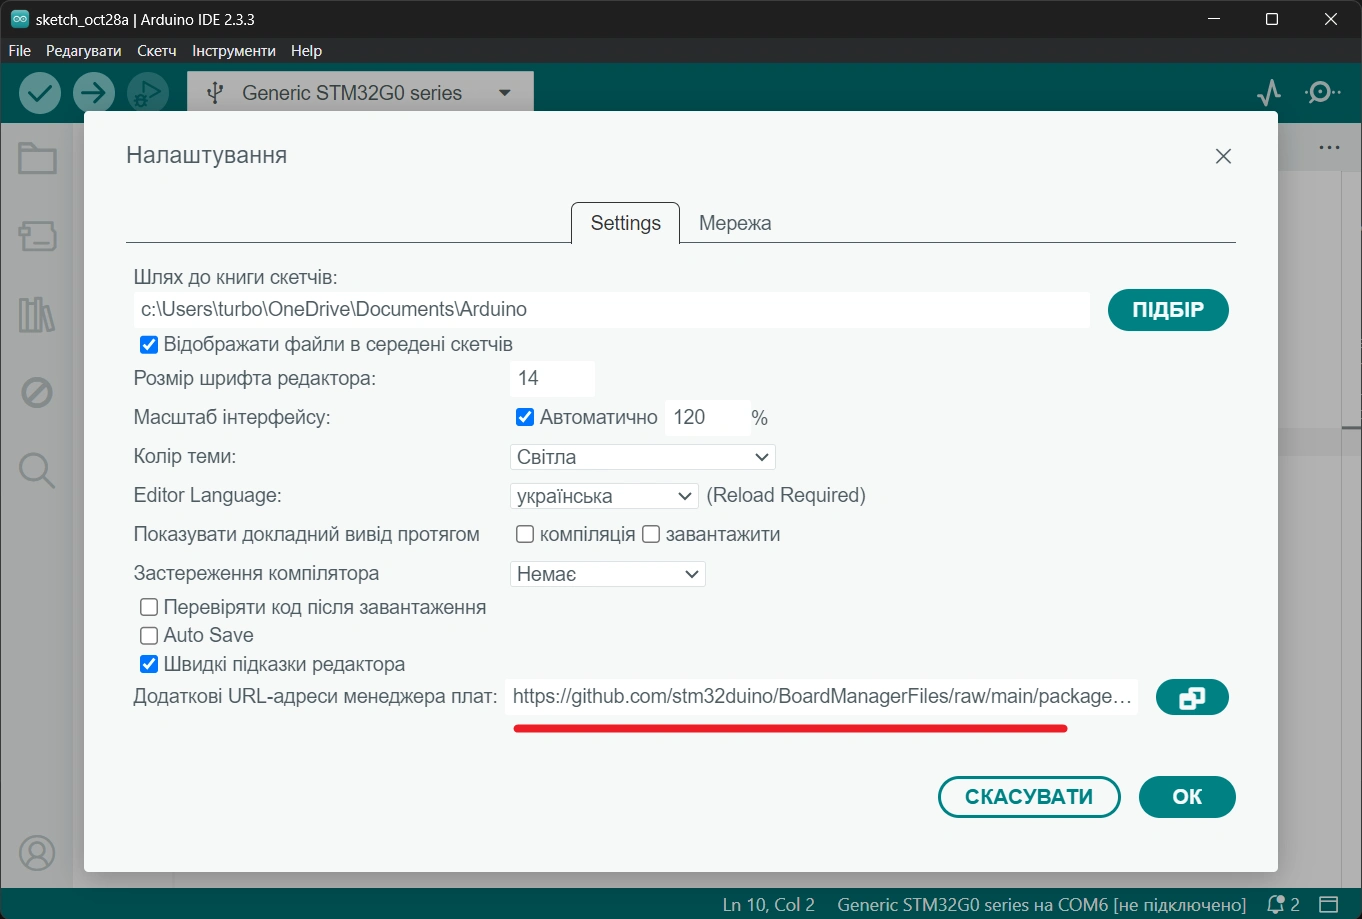
Let’s look at how to set up Arduino IDE for STM32 development. First, install the STM32 core: go to Arduino IDE Preferences and paste the following URL:
https://github.com/stm32duino/BoardManagerFiles/raw/main/package_stmicroelectronics_index.json
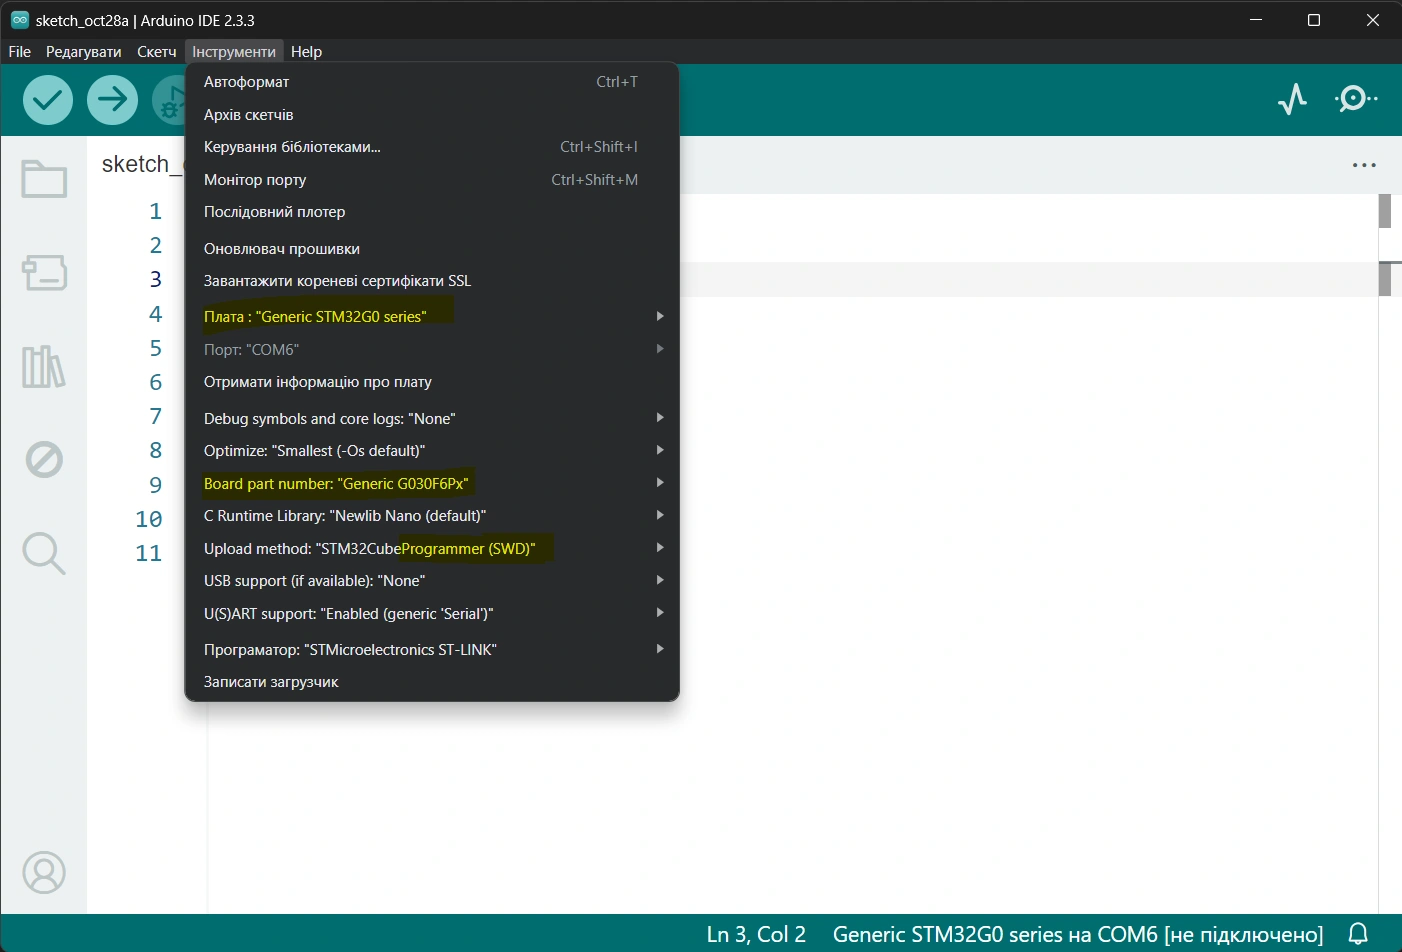
Then, go to Board Manager, search for “stm32” and install the core. Finally, configure Tools menu for your specific setup. I use STM32G030F6P6 with an ST-Link programmer (SWD), so here are my settings as shown in the screenshot.
In order for the Arduino IDE to be able to download the written program to the microcontroller, you need to install STM32CubeProgrammer from the official STMicroelectronics website: https://www.st.com/en/development-tools/stm32cubeprog.html and restart the PC.
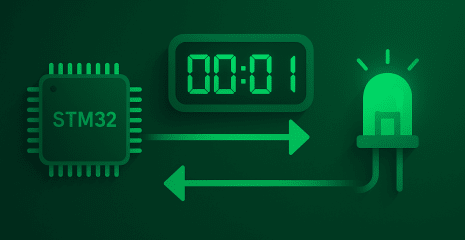
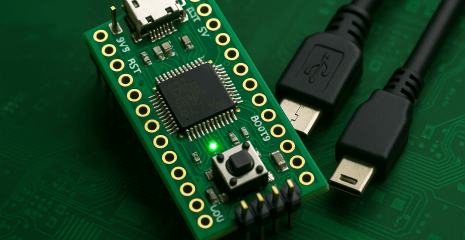
Let’s write a simple blink. On my board, the LED is connected to pin PA4, so the program (sketch) looks like this.
void setup() {
pinMode(PA4, OUTPUT);
}
void loop() {
digitalWrite(PA4, 1);
delay(100);
digitalWrite(PA4, 0);
delay(100);
}
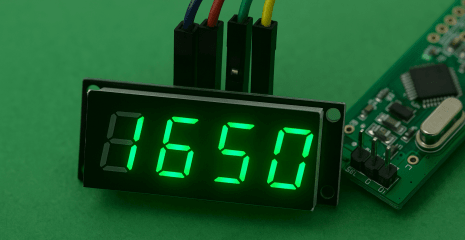
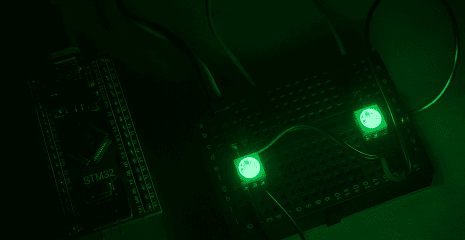
Result After Successful Firmware Upload
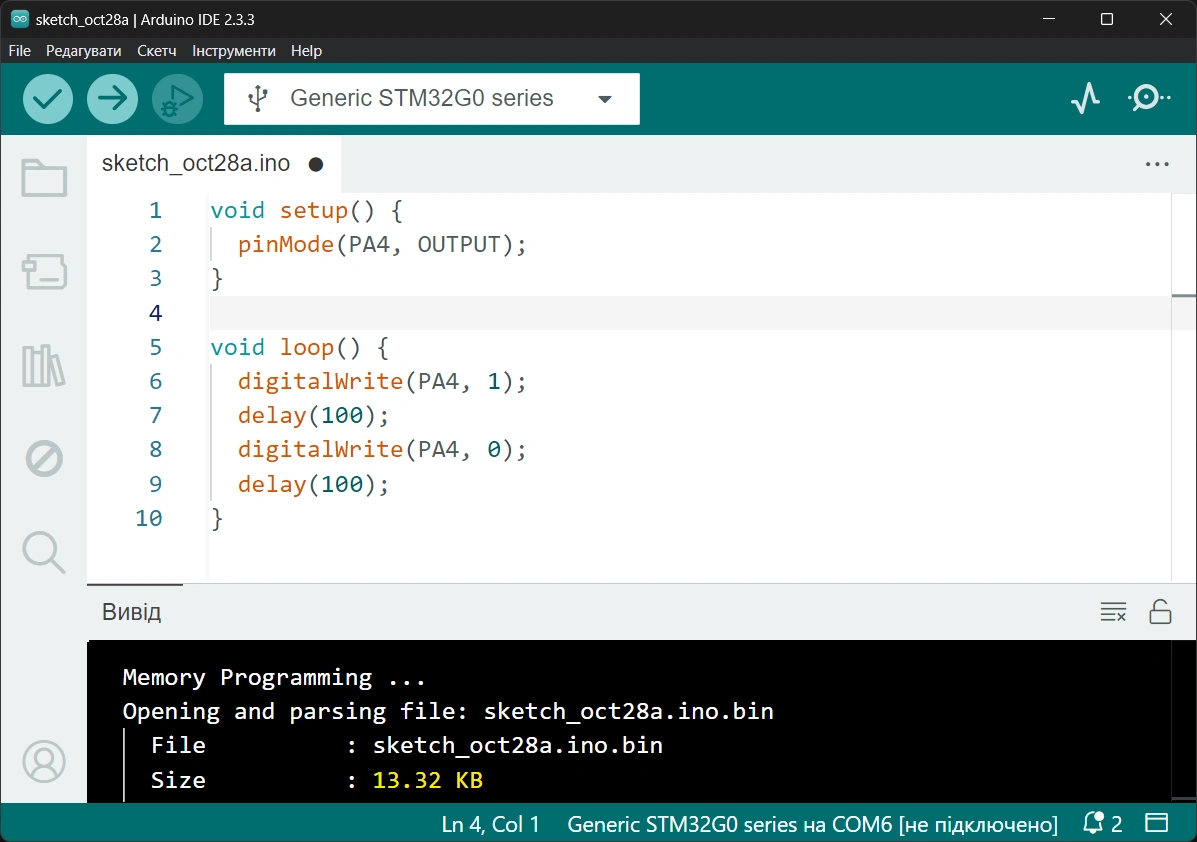
Despite the very simple sketch code, the program size in the MCU’s flash memory takes up nearly half of the available 32KB on my chip. While 32KB isn’t considered tiny by today’s standards, this is the result. I once encountered a case where I used a few standard peripherals and had over 100 lines of code in the sketch, only to get an error that the MCU didn’t have enough memory. This shows that we can’t control exactly what Arduino compiles under the hood or what parameters it uses. It’s worth noting that for classic Arduino boards, the core is more efficient — which makes sense. AVR architecture is simpler than Cortex-M, which results in a more lightweight initialization code. Nevertheless, this IDE is great for quick POCs (proof of concepts) or as a hobbyist tool.
The over-simplified nature of this IDE is both its strength and its weakness. Its minimalist UI discourages working with multiple code files and encourages keeping everything in one sketch. Other limitations include a still-developing debug feature. As of now, debugging is only supported for a limited number of Nucleo boards. In other words, you can’t just debug any random STM32 MCU out of the box. Some additional cons:
In summary, Arduino IDE is great for classic Arduino or ESP32, but significantly weaker for STM32. It’s okay to start with, but moving to something more advanced is highly recommended.
VS Code offers a much more refined experience when working with STM32. First of all, VS Code itself is a fast and user-friendly development environment. Secondly, with the right extensions, you can code in multiple languages across different platforms — including STM32.
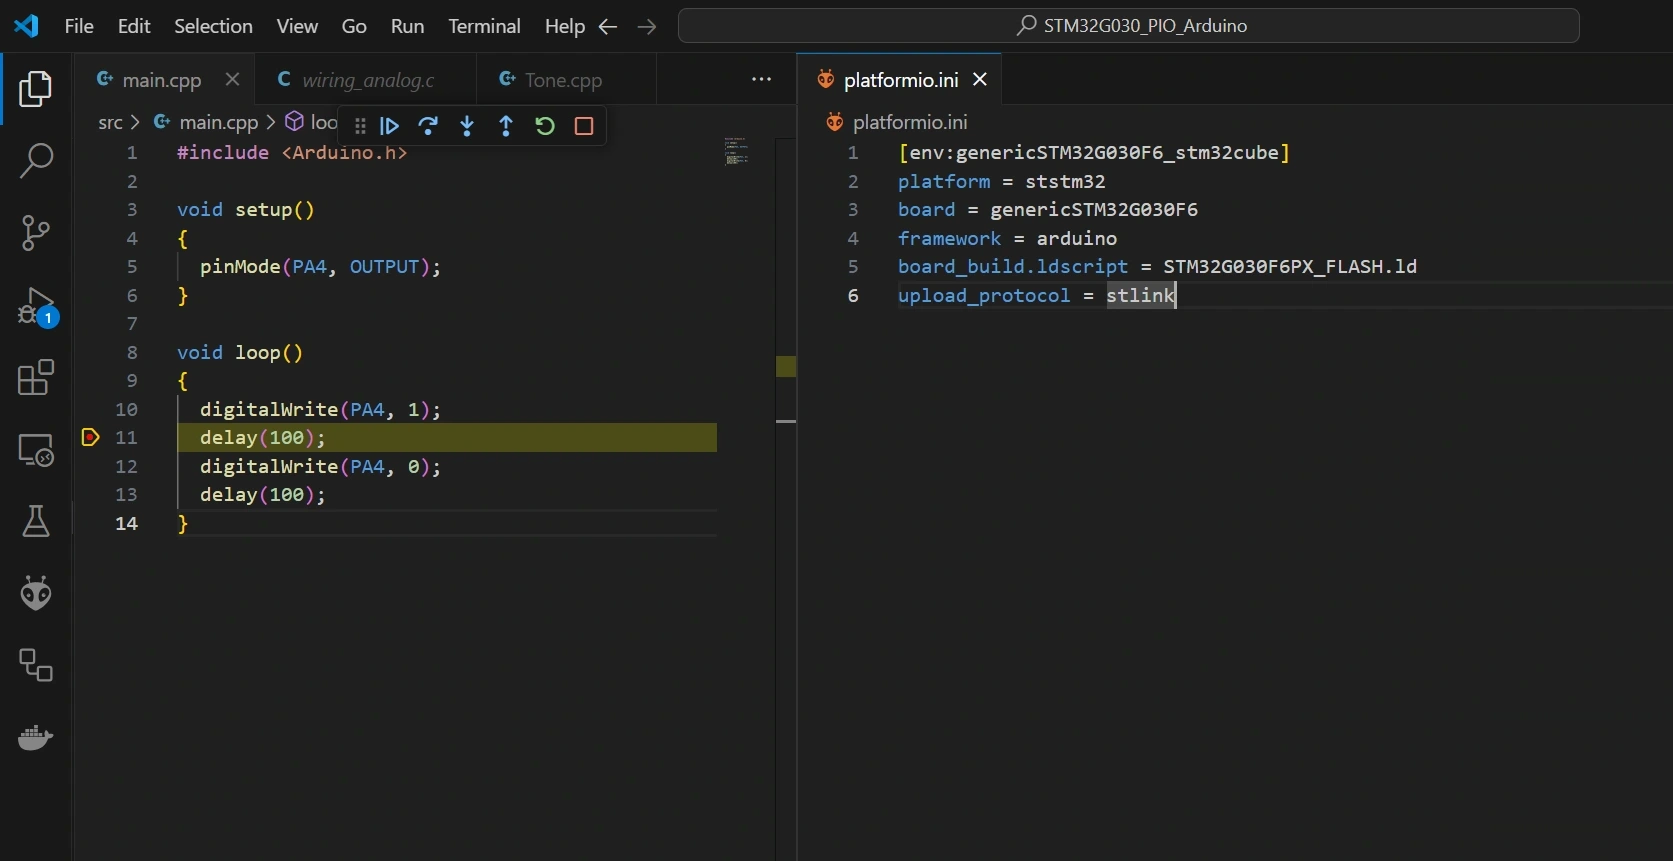
The key extension to install is PlatformIO (a Ukrainian project). PlatformIO enables development for many types of MCUs across various frameworks. For STM32, you can choose between three main frameworks: Arduino, HAL, and CMSIS. Let’s start by looking at the Arduino framework. Using this, you can write the same Arduino-style code but in a much more convenient and professional environment, eliminating many of the Arduino IDE’s downsides:
Fewer bugs (at least in my experience)
The next two frameworks: HAL and CMSIS. They differ in their level of abstraction when working with MCU registers. CMSIS is the lowest level of abstraction—if macro definitions of registers can even be called abstraction. HAL is a higher level of abstraction over CMSIS, adding logical wrappers for register operations. In other words, HAL includes code that we would otherwise have to write manually to perform basic tasks with the MCU. So, we can say Arduino and HAL are high-level frameworks, while CMSIS is low-level.
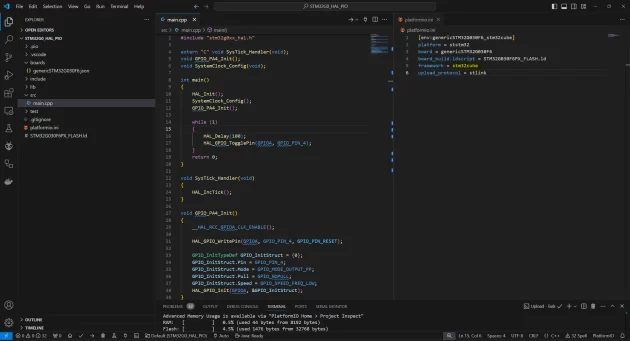
Let’s look at the HAL framework, for example. The code looks like this:
Here we initialize the framework using HAL_Init (essentially starts the system timer with 1ms interrupts), then in SystemClock_Config we configure the core frequency, and in GPIO_PA4_Init we initialize the PA4 pin to output mode. Then, in the while loop, we turn the LED on and off.
As we can see, the complexity of a simple blink sketch has increased significantly. That’s only because we now have to do many things ourselves, without relying on the Arduino framework. The Arduino framework was doing all this under the hood (using HAL), making code writing easier. Also, notice the flash memory usage shown at the bottom of the screenshot. We now have the same blink functionality using only 1.5KB instead of 13KB — almost an order of magnitude smaller. This leaves enough space to store images for display rendering or to deploy FreeRTOS, for example.
We won’t go into CMSIS in detail, since it would require even more code directly interacting with memory registers. To work with CMSIS, you must either already know a lot or be able to read the Reference Manual for your MCU. This manual describes, step by step, how to initialize pins or other peripherals — often with helpful flowcharts. If you do want an example with CMSIS and working from the manual, let me know in the comments — I may write a dedicated article.
STM32Cube is the official IDE from STMicroelectronics, based on Eclipse. That already implies several drawbacks:
Despite the drawbacks, there are scenarios where this IDE is unfortunately irreplaceable. Specifically, when you are just getting started with a new MCU (e.g., from a new series) or your very first STM32, and you’re not yet familiar with how to initialize the MCU, its clocks, or peripherals. In this case, STM32Cube lets you configure all of that using a graphical UI, and it auto-generates the necessary initialization code.
Unlike previous IDEs (Arduino and VS Code with Arduino framework) that offer only default settings and no configuration flexibility, STM32Cube allows for customized setup quite easily—just with your mouse. A key feature of this auto-generation is that your user code must be written in special comment-marked sections. This avoids conflicts between your code and the auto-generated one since they coexist in the same file. Otherwise, the next time you regenerate code (e.g., for I2C initialization), your code might be erased if it was placed outside the allowed sections. You can see examples of these special sections in the blink example screenshot.
So, STM32Cube IDE offers the following advantages:
Link to the original source: https://solderkid-blog.netlify.app/stm32/neopixel