
26.12.2025
12 min
546

Budget smart locks are nothing more than an illusion of security held together by a piece of double-sided tape. Manufacturers have stuffed all the electronics into the exterior handle, meaning these doors can be opened with a common needle or a screwdriver in seconds. When you buy a gadget like this for a few dozen dollars, you aren’t getting security—you’re getting an expensive toy that a burglar can bypass faster than an old-school mechanical lock. Between cloned key cards, fingerprint smudges on the keypad, and a flawed architecture, these devices are practically useless for real home protection. In this article, we’ll break down five real ways to crack this lock and show you how to tell the difference between actual security and a cheap marketing gimmick.

Imagine that you have installed what you believe to be a state-of-the-art smart lock on the front of your home. This smart lock includes all the bells-and-whistles including biometric identification (fingerprint, facial recognition), access cards, and even PIN codes for added security.
You now feel as if you are a character in a James Bond movie where access to your home can only be achieved through fingerprint or facial recognition, and the potential intruder cannot get into your home. But imagine when you find out that these multiple layers of protection, which you believed to be a true “cyberpunk” level of security, can be compromised in 5 ways in less than 5 minutes by an ordinary neighbor who has a screwdriver. Your feeling of safety disappears immediately, and your new “future-proof” fortress begins to resemble a poorly-made cardboard box used as a movie prop.
Below is an overview of five methods to compromise a smart lock. As you will see, no matter how impressive the technology may look in its outer shell, there is little assurance that the outer shell is protecting anything from being compromised. The examples below should be both interesting and, at times, unbelievable.
Anatomy of the “Patient”: How Does it Work? In order to break something (a lock), first, you need to understand how that device works. Just like surgeons have an understanding of their patients’ anatomy so do hackers of their devices; this knowledge makes up the majority of the challenge.
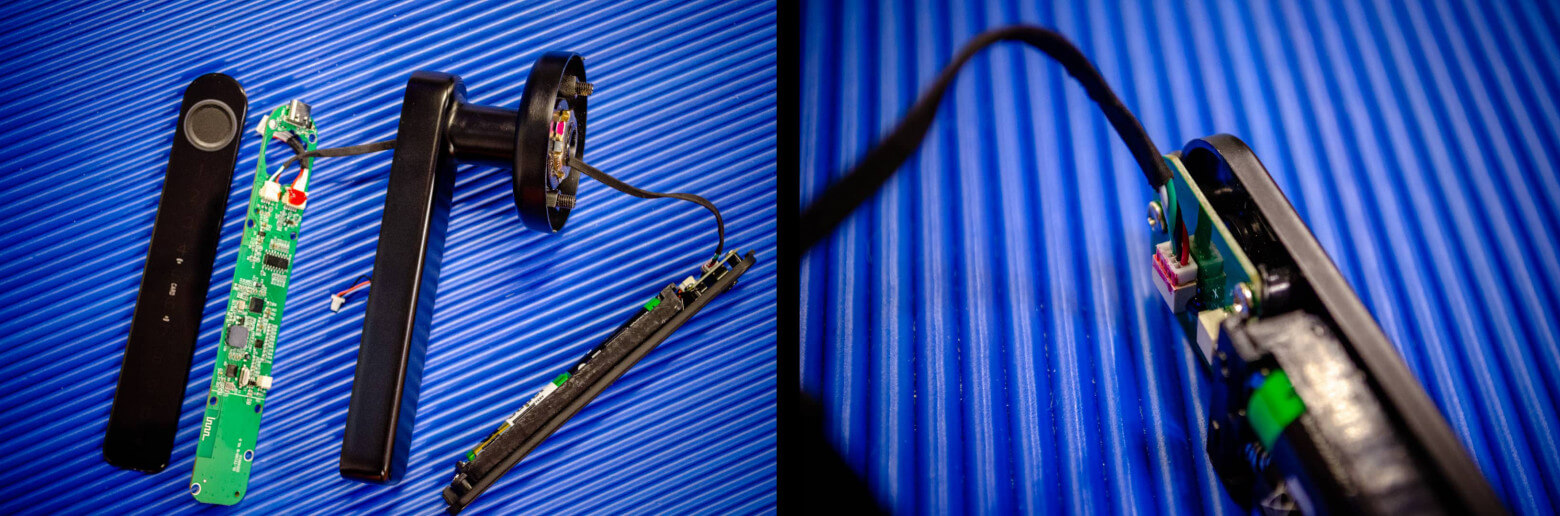
Now we get to the easy stuff. A lock has three main parts: the interior handle, the lock cylinder and the outer casing. All these are connected to each other via a square metal bar (the spindle).
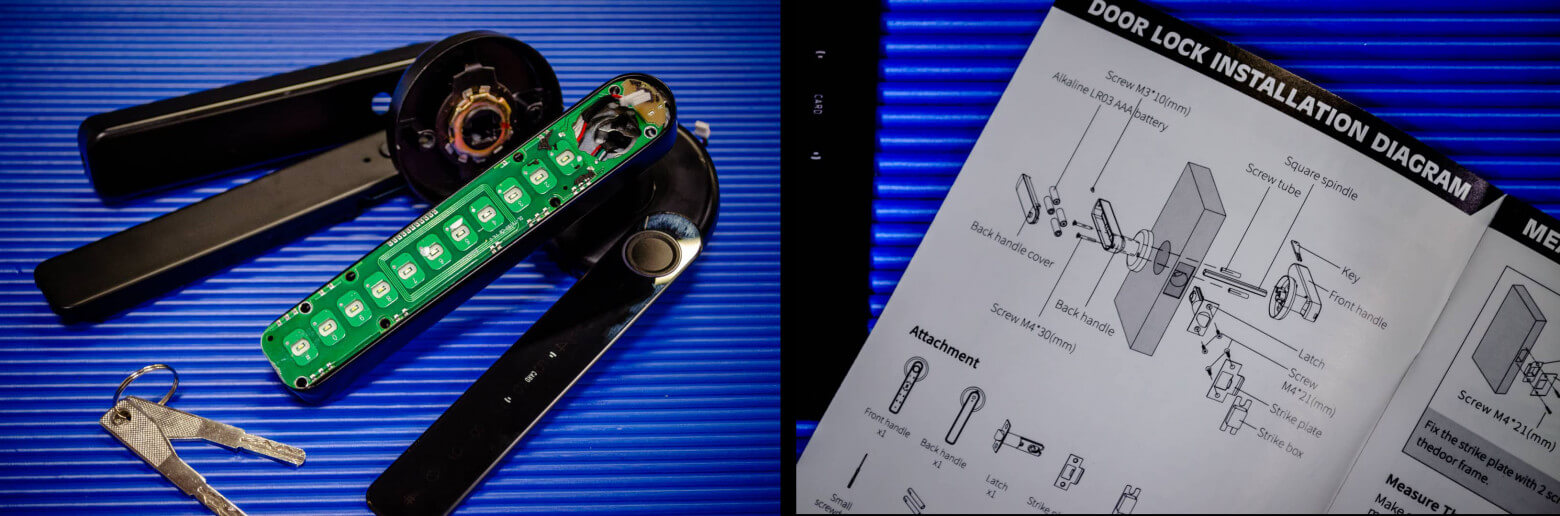
When a command arrives at the lock—be it through code, card, fingerprint, or Bluetooth—it sends an electrical signal to a small electric motor that extends a thin metal rod (also known as a “pin”). This serves much like a car’s clutch; it physically locks the outside handle to the spindle allowing the handle to be turned which in turn will eventually engage the mechanism to open the door. Once this has been done the pin then retracts and the handle once again goes into the “free wheel” mode where the handle spins without effect until another command is received.
In case all of the electronics within the system “dies” you can still use a standard backup key. The backup key is inserted into a cylinder located on the end of the handle, and moves the same metal rod, but using mechanical means instead of electronically. I’m sure by now you’ve probably already seen the weak link in the chain. And that’s only the beginning.
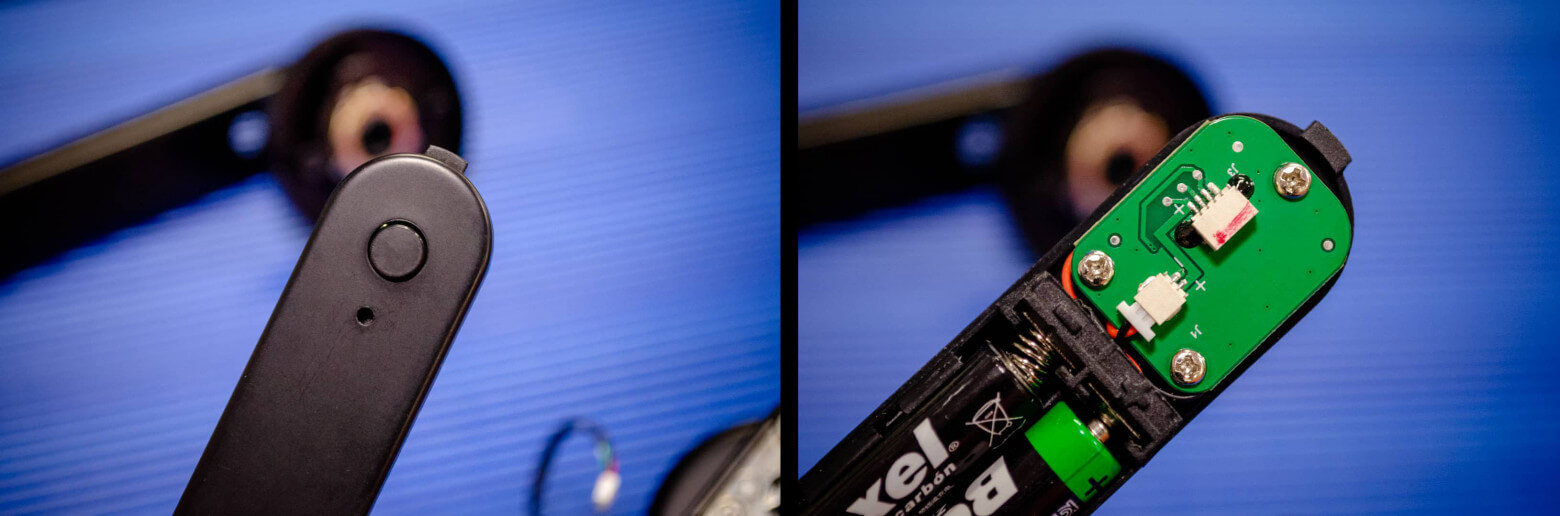
The “brain” of the entire electronic system is contained entirely within the handle of the door. There are two components to the electronic system: The interior unit, located inside the apartment, houses a compartment for four AAA batteries and several pushbuttons.

The “Always Open” switch is the largest one and has to be held down for 3 seconds to turn the locking mechanism into an always unlocked mechanism. The “Factory Reset” switch is smaller and is located in a very small hole in the case. To use it, just poke the hole with a needle and hold it there for 5 seconds. This will restore the locking mechanism to the way it was when it left the factory; all user-defined passwords will have been deleted.
It is the front facing part of the handle that the manufacture put all of the brain power of this lock on which includes the main control board and the controllers. Installing a home security system outside the house in a mailbox at the front of the property (like this), may make it easier to do maintenance, however from a security perspective, it is completely ridiculous.
The first thing you’ll see in the “mailbox” is the primary control panel of your smart lock – its brain – which makes all the decisions for the system. The primary control panel is attached to the input peripherals (the keypad on the touchpad for PIN entry, the fingerprint sensor, and the card reader) and connected to a Bluetooth module to allow smartphone connectivity. On the bottom is the USB-C charging port for emergency battery charging (only for charging; no data transmission capabilities). Below the control panel is the actuator – the small electric motor that moves the locking mechanism.
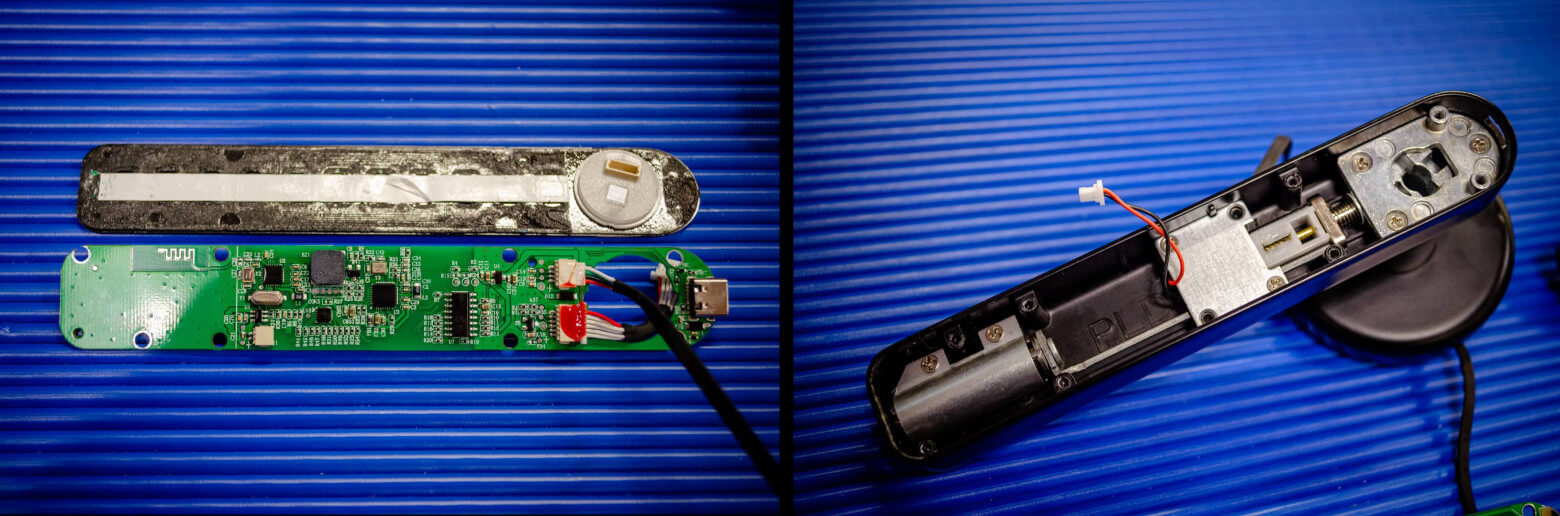
The red, black, green and white wires run from the board to the interior handle via a hole in the spindle. These wires provide the power and signals from the buttons which are physically located inside the room.
From Digital Copies to Physical Compromises — A Cascade of Vulnerabilities In this section we will move into the actual pentesting process. I can assure you there are a lot of “flowers” (and other things) waiting to be found here.
We’re going to begin by looking at how humans use social media to express themselves about an item for purchase. Many buyers, who have recently purchased an item such as a gadget, write enthusiastic reviews on online marketplaces that include photographs. These reviewers may be so excited about their new gadget, they will take a photo of everything (including the physical keys) within the frame of the image. The excitement of the reviewer is a great way to find us – we can use this to get started.
Here’s a classic example: A review on a large online marketplace site where the key is clear in the photograph.
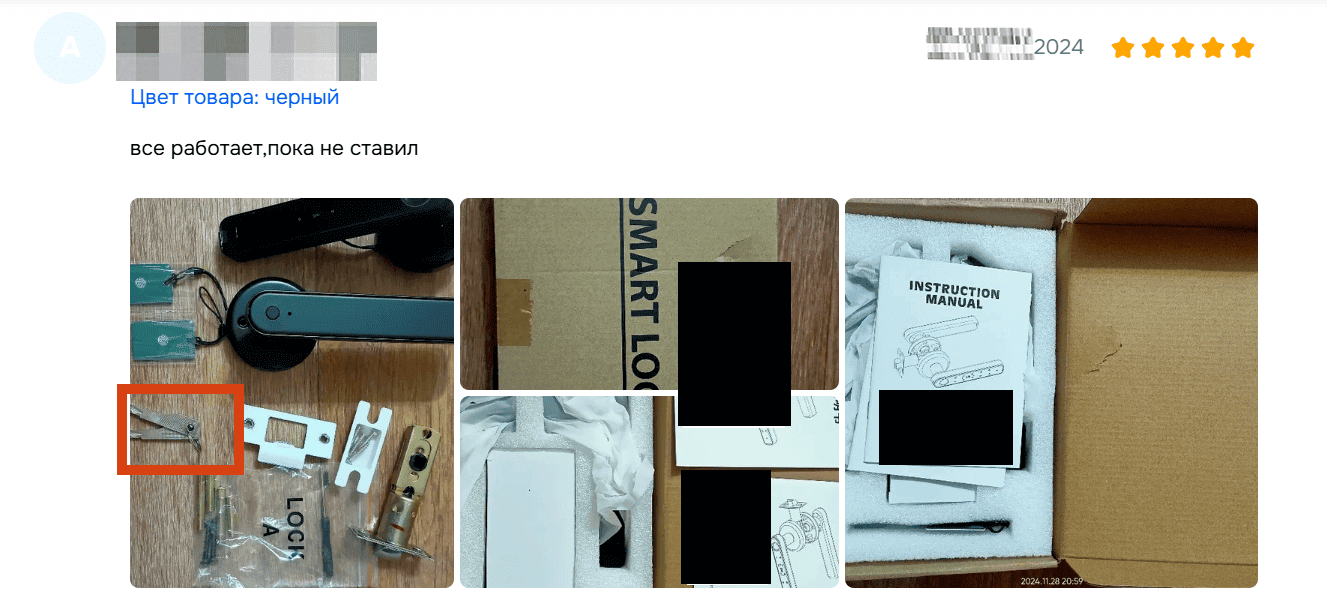
Just zoom in on the image, trace the contours right off the screen, and head to the nearest locksmith. You can get a duplicate of a key like this cut for peanuts at any local kiosk.
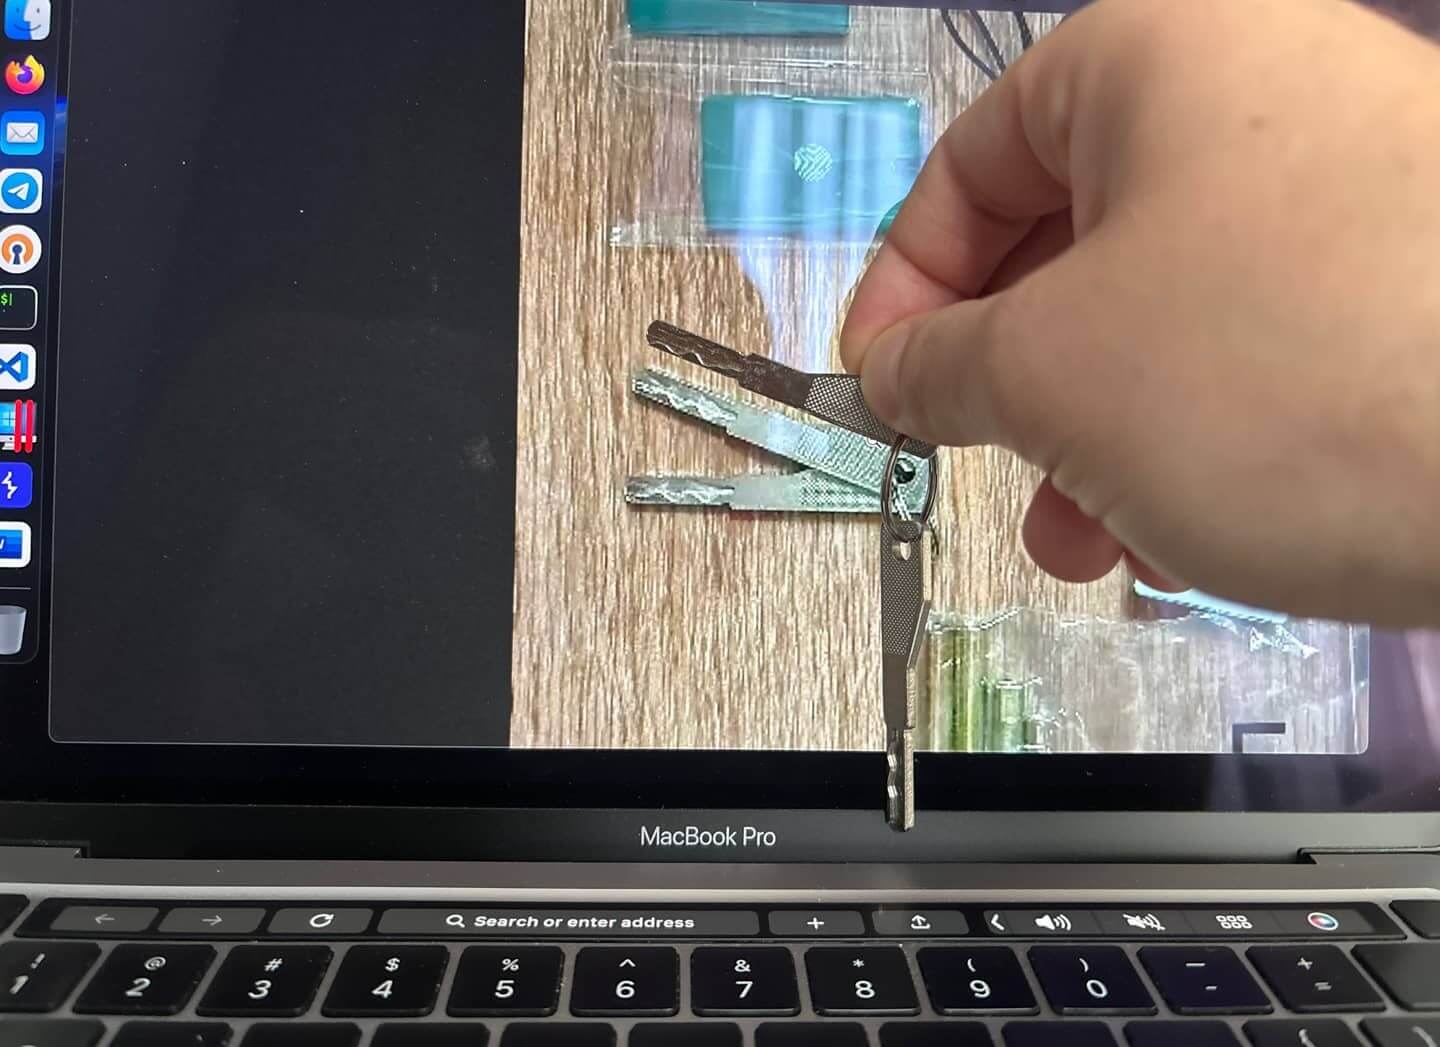
Actually, you do not need to take it that far. The mechanical keys used in most locks are virtually interchangeable. Manufacturers make an enormous number of keys with very few different key combinations.
Therefore, the security is based upon the assumption that manufacturers will not ship locks with the same type of keys at the same time to the same location. However, since we were able to find a match for our key simply by scrolling through the photos on a marketplace, it appears that the manufacturer did indeed cut corners on that very small amount of variety.
Now, let’s take a closer look at the keypad. The black glossy plastic used in the keypad may appear high-end in the manufacturer’s brochure, however, in reality it will attract fingerprints like crazy and the smudges will provide us with a second entry point into attacking the lock.
The algorithm is very straightforward. Wipe the keypad clean with a cloth, allow the user to enter their PIN, then go back to the keypad and examine the fresh finger prints. We can shine a smart phone light (flashlight) on the keypad at a particular angle and the numbers entered will appear clearly as the light hits them.
However, the order of the digits remains a secret. This lock allows the user to set a PIN from 6 to 10 digits; however, once you have determined how many digits are smudged on the keypad the number of possible combinations becomes greatly reduced. For example, if you knew the code was six digits and there were smudges on all six keys, then you would only need to test $6! = 720$ possible sequences.
Obviously, a six-digit code with no repeating digits is the most ideal situation for an intruder. However, if the digits do repeat the number of possible sequences jumps to $6^6 = 46,\!656$. Therefore, while this is not exactly a “cheat code” to immediately bypass the lock, it certainly provides the intruder with a valuable tool.
Is anybody really reading this documentation? I am — and that’s how I discovered a little “Easter Egg” that was apparently placed there by the developers.
You can put the lock into “initialization mode” by typing 888#. If another authorized person then unlocks the door with their regular method (fingerprint or card) within the 10-second window after entering the number above, the lock will enter “Always Open Mode”. The lock will remain in this mode until it receives a “counter-command”.
As you may now realize, this is a relatively straightforward attack. An attacker arrives at your door, a second or two prior to your arrival. They type in 888# and pretend they are simply feeling the handle of the door. Upon your arrival, you scan your fingerprint and go inside. Congratulations; you have just invited a stranger to come on in.
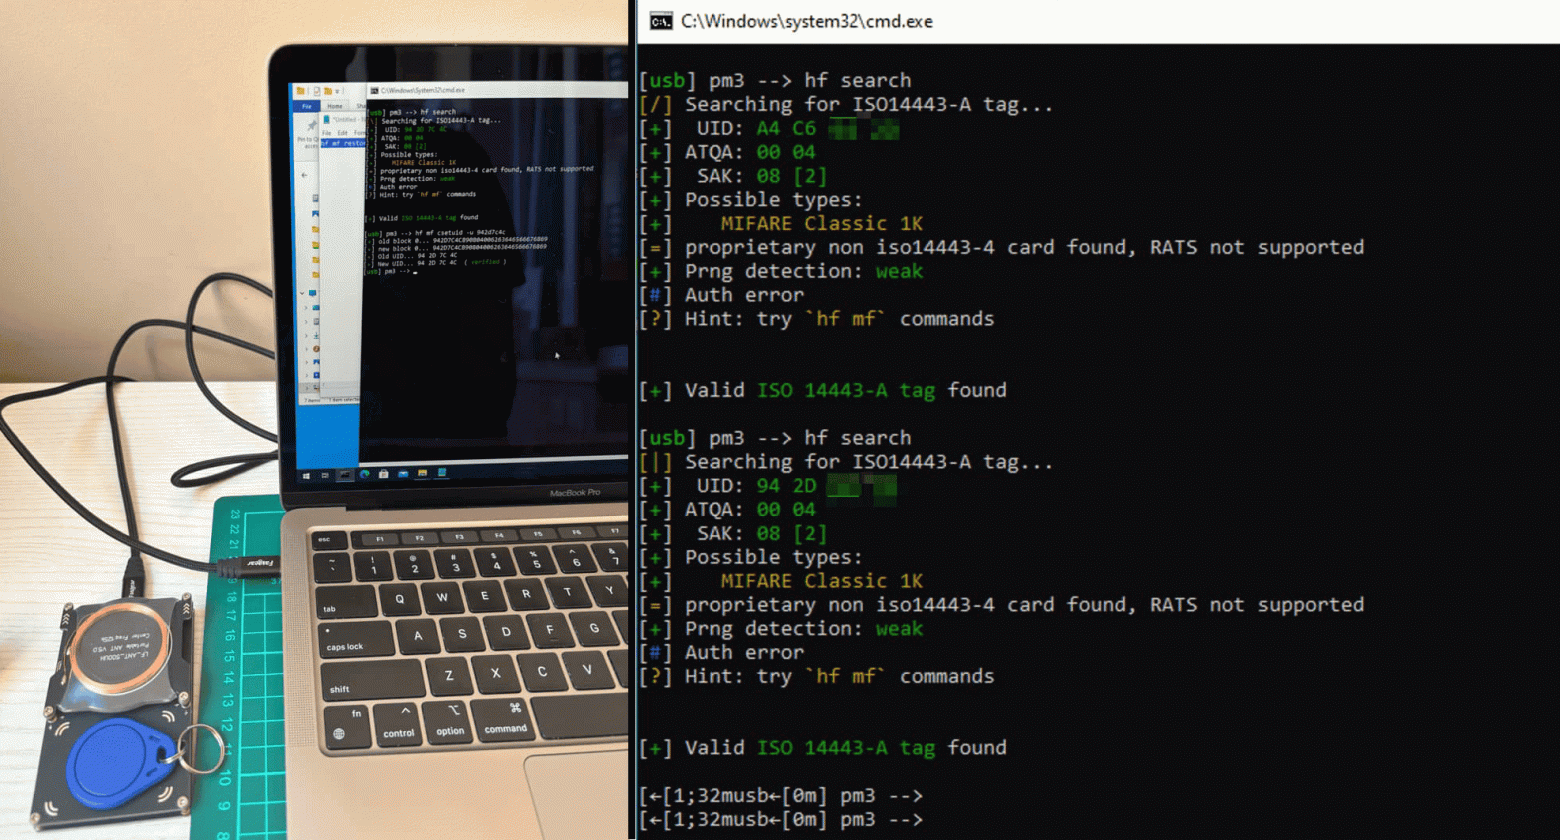
The fourth method involves access cards. Our “patient” uses the Mifare Classic 1K format. This is an ancient standard that was compromised ages ago.
Using gadgets like a Flipper Zero or Proxmark, you can clone the card data in seconds and write it onto a blank “magic” card. The lock won’t even realize it’s been duped. It’s about as insecure as it gets.
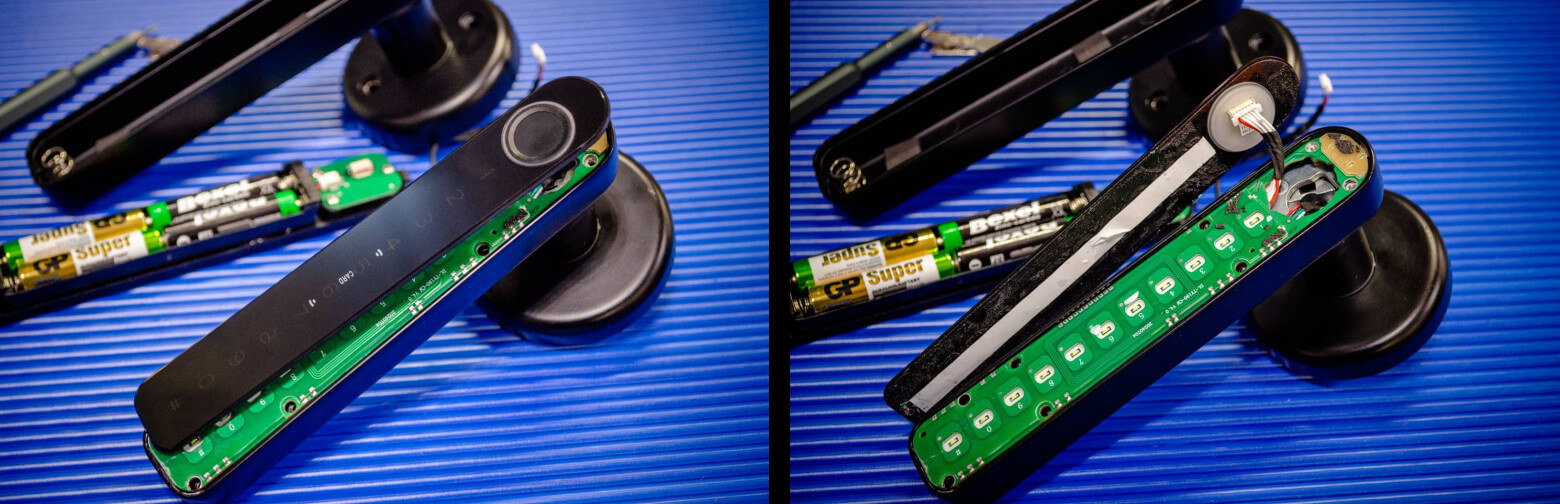
In the last part we are going to talk about the most efficient way of bypassing locks. As always we will start with the general overview of the lock. The brain of the lock – which includes the electronic circuitry, wiring, and controller – is located on the outside of the door. It seems like no effort would be required to protect this valuable equipment as it has only a simple plastic housing with adhesive-backed double-sided tape.
In my opinion this type of protection is not so much security theater but rather a craft project.
You have several options when it comes to removing the housing and gaining access to the interior circuitry and electrical connections. For example you can use a utility knife, a credit card or a pry bar. After opening the housing you can quickly expose the printed circuit board with all of its electrical connections.
As I mentioned earlier there were four wires inside the housing. The wire that connects the exit button on the inside (white wire in this example) sends the signal to the lock’s controller and the other wire (black wire in this example) is the grounding connection. Using two needles you can make contact between the corresponding electrical contacts on the circuit board. Wait three seconds then the lock thinks that the button was pushed from the inside. The result is that the lock will click and you will be able to open the door. This entire process should take approximately 10-15 seconds.
This opens up a world of “creative” possibilities. An attacker could discreetly prep the lock for future visits. For example:
Install a tiny reed switch: Solder it to the contacts, and the door will open just by holding a magnet up to the handle.
Create a USB backdoor: Re-solder the USB-C port so that plugging in a cable automatically shorts the opening contacts. Just walk up, plug in a power bank, and you’re in.
Honestly, you don’t even need to understand electronics. If you strip the handle down to its base (just a couple more screws), you can simply use a screwdriver to manually push the mechanism that turns the spindle.
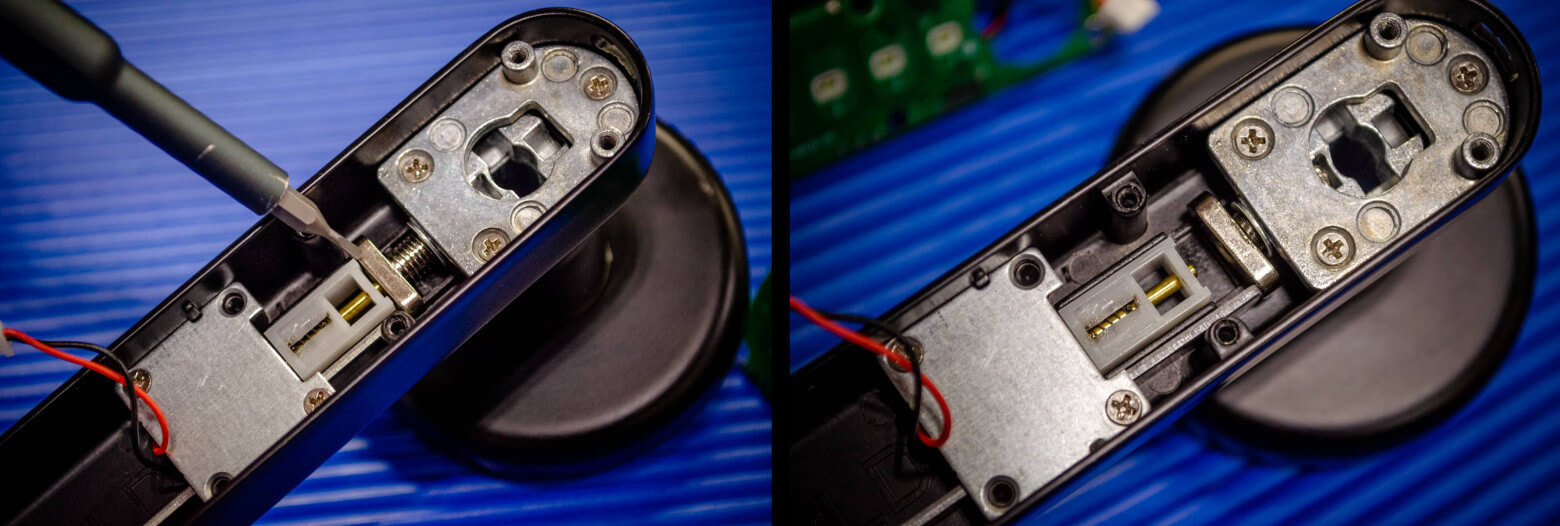
We open the disassembled lock using a regular screwdriver
Recommendations: How It Should Actually Work
After seeing all this, one thing is clear: the lock is fundamentally flawed at the architectural level. If engineered correctly, a system like this should have looked completely different:
Move all electronics inside. The controller, wiring, and locking mechanisms must be physically inaccessible from the outside.
Exterior is for interfaces only. The outside handle should only house the “dumb” peripherals—the card reader, scanner, or keypad. Zero critical logic should reside in the external unit.
Robust mounting hardware. Instead of tape, use security screws, tamper-resistant rivets, or any other heavy-duty hardware.
Randomized service codes. Get rid of the universal
888#master code or make it unique for every single device.
Tamper protection. Add chassis-intrusion sensors that trigger an instant alert to the owner if the cover is removed.