


11.05.2023
16 min
1877

Many people use OpenVPN to hide their real IP and bypass blocking websites. But the capabilities of VPN technology are not limited to this. According to its concept (Virtual Private Network), with the help of OpenVPN, you can configure virtual private networks, thus organizing a closed space with convenient access to local resources for those who are connected to these networks. Moreover, these resources are “local” inside a virtual private network, that is, in fact, a remote computer can be connected to the Internet on the other side of the world through two NATs, but we can connect to its web server or file storage directly inside the virtual network. That is, this approach allows you to solve other tasks as well: access to the resources of a computer located behind a NAT (which does not have a static public IP), data encryption, access to the Internet while hiding your real IP, and others.

Now I propose to study OpenVPN and consider various features of not quite standard use of OpenVPN: bypassing intercepting portals, bypassing NAT restrictions, using the advantages of a virtual private network. By the way, if you need a VPS server so you can install OpenVPN on it and repeat what I show, try this one. This is an opportunity to create a secure environment in which participants can access each other’s resources, bypassing all the problems and limitations of NAT. You can also come up with non-standard ways of using OpenVPN — to bypass Wi-Fi hotspots, for example. The main goal is to make you think about OpenVPN more broadly. This is an opportunity to create a secure environment in which participants can access each other’s resources by bypassing NAT restrictions.
If you looked at the OpenVPN Server and Client Setup Guide, you may have noticed that it is quite long. By the way, some time ago I supplemented and corrected this instruction (in terms of installation on Debian, Ubuntu, Linux Mint, Kali Linux). To make life a little easier, I wrote an OpenVPNassistent script that helps automate the process of creating configuration files and keys for the OpenVPN server and clients. Moreover, this script creates configuration files with built-in certificates (there are 5 for the server, and 4 for each client. The script, as far as possible, automates all processes.
The script supports work in Debian derivatives (Ubuntu, Kali Linux, Linux Mint), as well as in Arch Linux derivatives (BlackArch, Manjaro). I tested it in Kali Linux, Arch Linux/BlackArch, Ubuntu.
Download the script:
Let’s start:
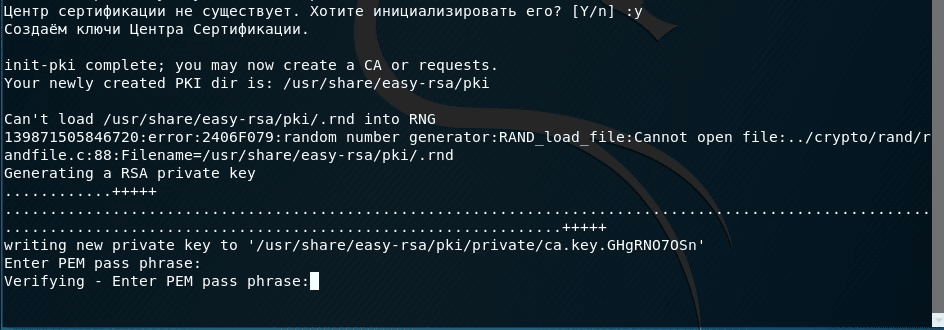
When running, the script will check if OpenVPN is installed, if not, ask for permission and install. Next, it will check whether the Certification Authority (CA) has been created – if not, it will offer to create it – we agree.
Come up with, enter and (most importantly) remember the certificate authority password. Then confirm this password:
If everything went without errors, a message will appear that a private key (.key file) and a request file (.req) have been created.
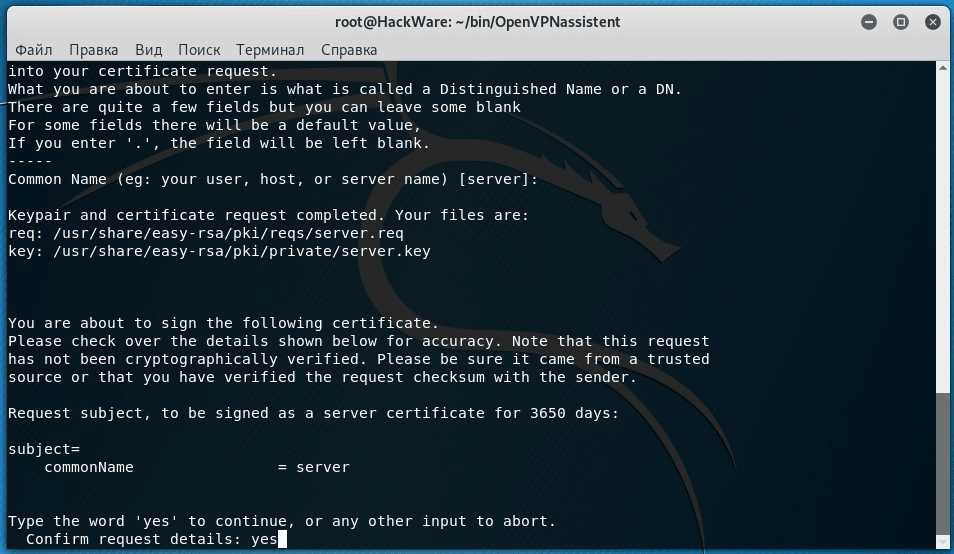
To receive a certificate (public key), you need to sign the request file – this is what the script immediately goes to. We are asked if we want to sign a key for, typeyes:
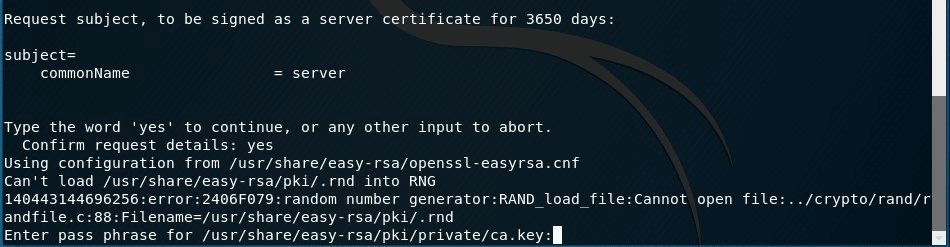
Enter the password from the certification center:
If everything is fine, the following will be displayed:

These files are located in the script folder in a subfolderconfigs. All certificates are already embedded inside the configuration files – it’s very convenient, you don’t need to place them, specify the paths. Moreover, the created configuration files are universal, you can use them to connect to the OpenVPN server from Linux, Windows, Android.
Nuances appear during the restart. First, if you don’t change the server and client names, the script will ask if you want to overwrite the existing files? Second, if you use the same file names of the client and server, then creating a signed certificate for them will always end with an error that such a certificate already exists in the database. This database is several plain text files that list previously created certificates. This looks very much like a bug as it is not possible to sign a certificate for the same name. Therefore, to “work around” this problem in the event that it is necessary to re-create certificates for the server and clients with the same names (server, client1, client2, client3, etc.), I simply delete the Certificate Authority and then create it as new
To delete a CA in Debian and derivatives (along with the CA keys and all other keys generated in the CA):
To delete a CA on Arch Linux and derivatives (along with the CA’s own keys and all other keys generated by the CA):
If you have your own settings and infrastructure there, then don’t do it! If you create a Certificate Authority only to sign keys for OpenVPN server/clients, then there is nothing wrong with that – the same CA can be initialized by one command as many times as you like. Moreover, this is not a problem of my script – it is a problem of easy-rsa for which my script is a wrapper. That is, if you manually enter the commands to create each certificate, you will encounter the same problems.
Since this can be confusing, let’s go back to the basics of OpenVPN server and client theory. Servers are required to run OpenVPN:
In the previous article on setting up OpenVPN, we placed the necessary certificates, then specified the path to each of these certificates in the configuration file, and only then started the OpenVPN server pointing to our configuration file. For OpenVPN, certificate files can be embedded (implemented) in the configuration file. I told how to do it in addition to that article. At the previous stage, with the help of a script, we created configuration files in which all the necessary certificates are already embedded, that is, we do not need to install them separately on the server and clients. Just copy the server.conf file to the server, and the files client1.ovpn, client2.ovpn, etc. distribute to the respective customers.
The server.conf file can be “dropped” to the server using the scp and sftp utilities, using FTP or a web-based file manager, however you can. Moreover, if you have SSH access, you can simply create a text file on the server using nano/vim and copy and paste the contents of the server.conf file, since it is a plain text file.
To test, I run OpenVPN on the server in the console (the server.conf file is located in the current folder):
![]()
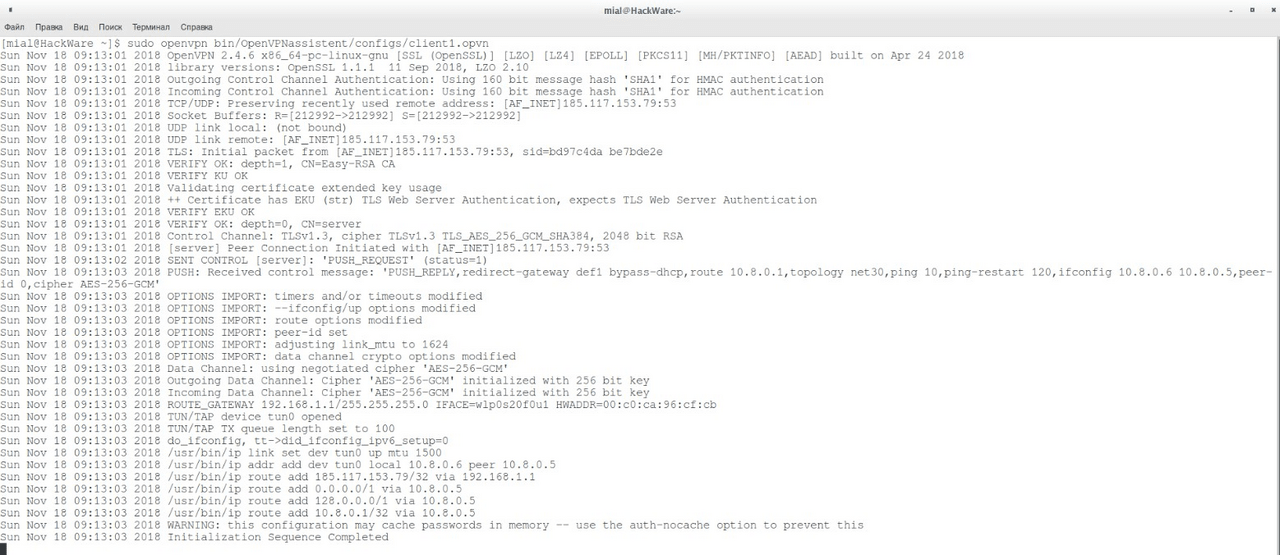
The inscription appeared:
This means that the OpenVPN server has started successfully.
Now on the client side I run (I have a settings file on the way bin/OpenVPNassistent/configs/client1.ovpn):
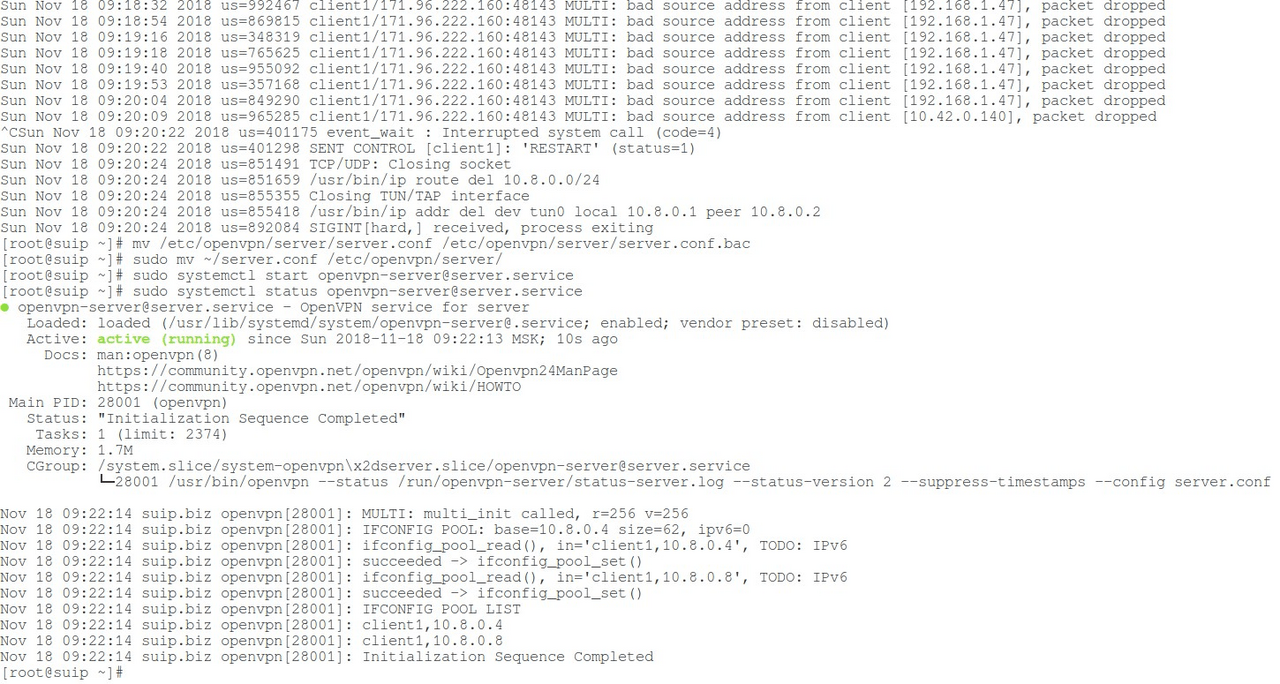
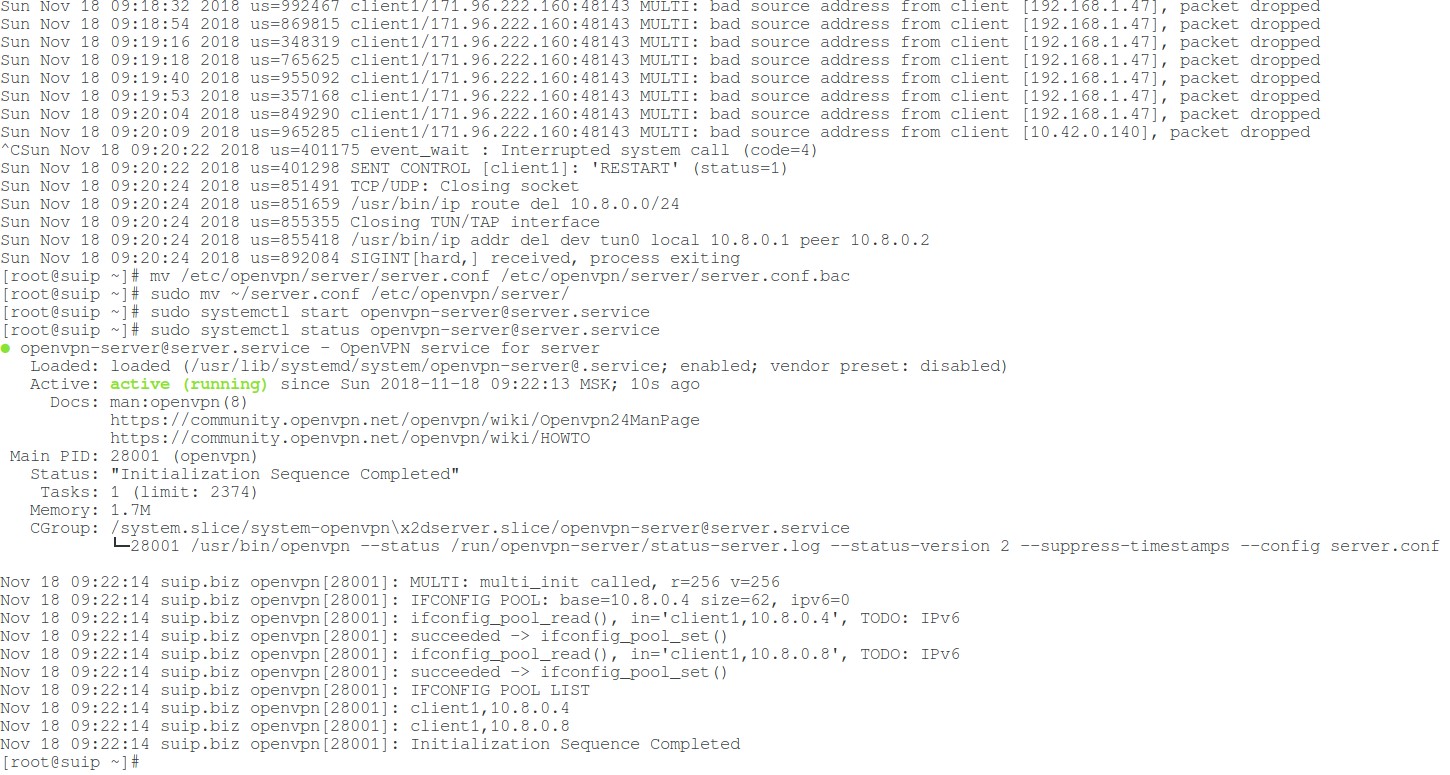
By the way, to access the Internet through the OpenVPN network, you need to configure routing on the server. We look again at the OpenVPN server window:
There are numerous messages about the fact that the packet was dropped -packet dropped:
You might think that there are problems, but in fact the OpenVPN network is working, you can check on the client:
The traffic goes through node 10.8.0.1 – this is the gateway of our virtual private network, that is, it works normally. For some reason, local packets end up on the OpenVPN server. On the one hand, there is nothing particularly terrible in this, they are simply rejected. But, on the other hand, it’s wrong – we need to figure out the routing – I’ll come back to it later.
If everything is fine with you too, the server.conf file can be placed in a folder/etc/openvpn/server/:
We start the OpenVPN background service:
We check its status:
And add it to autoload:
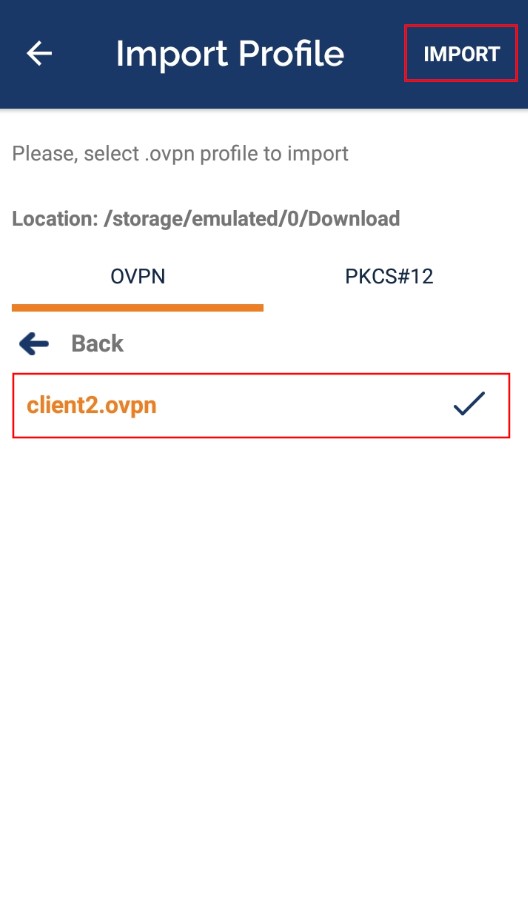
I’ll show you how to connect to the .ovpn file that was created with my script at the beginning of this article. Download the official OpenVPN client from Google Play.
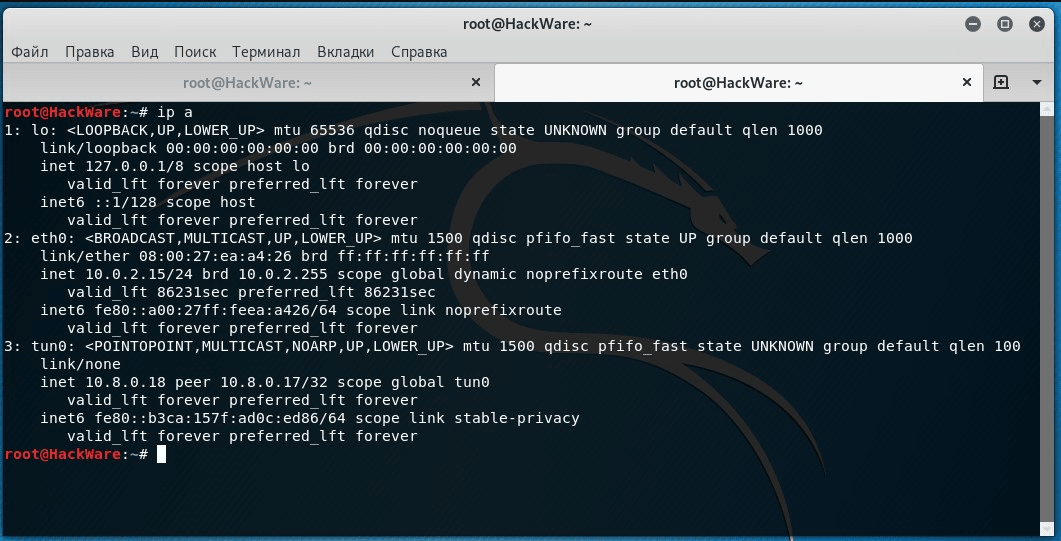
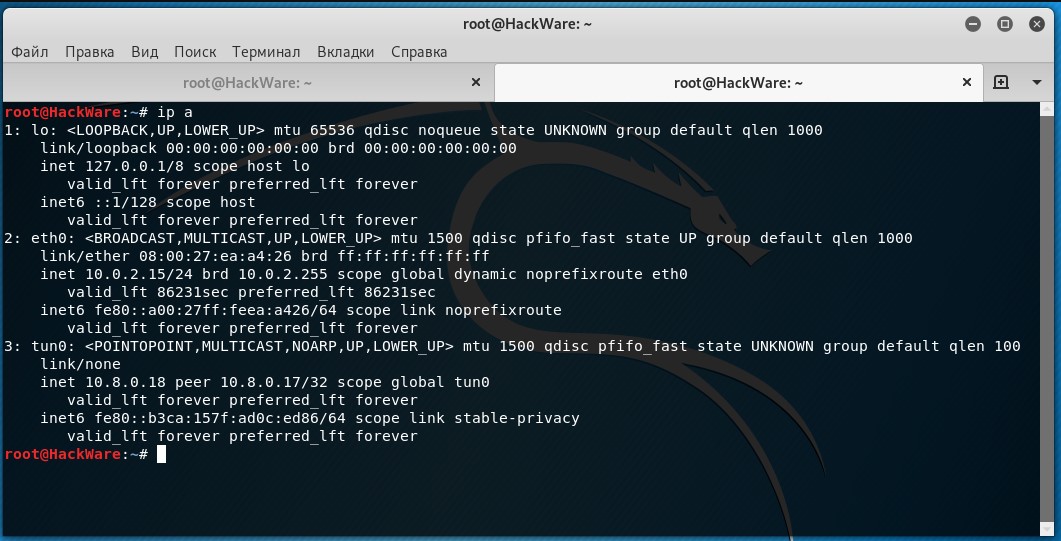
Now that everything is set up and ready, we can finally get down to the fun (it took a few minutes for you from the beginning of the article – it took a few days for me: while I wrote the script, debugged it on several systems, dealt with various technical issues, tweaked the commands in the OpenVPN settings and finally reached this place). VPN – virtual private network – has its own address space, by default it is 10.8.0.0/24. Each device (computer, phone) is assigned an IP address from this space. These addresses are local. And by contacting this address, you can access the resources (network services, files) of a computer that does not have a white IP. For example, I’ve connected a new device to my local network—a Linux system running a web server. Let’s look at the list of network interfaces:
You can see that the eth0 interface has an IP address of 10.0.2.15 – this is a gray IP and it is not possible to connect to this computer from the Internet. In addition, the system itself is behind NAT.
After enabling OpenVPN, a new network interface tun0 is created, for this system it has an IP address of 10.8.0.18. Використовуючи IP-адресу інтерфейсу OpenVPN (tun0), інші учасники мережі OpenVPN можуть підключатися до цього комп’ютера. As I said, this computer is running a web server. Let’s try to open it on a phone that is connected to this OpenVPN network through a completely different provider and may be thousands of kilometers away:
As you can see, it really works. It can be a web server, a file server (FTP and others), working environments for collaboration (for example, implemented as web applications running on a web server). At the same time, only members of the VPN network will have access to this working environment — it will be completely isolated from everyone else. Any member of the network can share any resources and any other member can connect using the gray IP assigned inside the OpenVPN network. Only one white (external) IP is needed for this to work – for the OpenVPN server itself. For these purposes, an ordinary VPSka (VPS – Virtual Private Server) with a minimal configuration is enough for the eyes.
The easiest way to access network services inside a local network is by IP address, as shown above. The problem is that in the OpenVPN network, IP addresses are not rigidly tied to clients, and after reconnecting, clients can get a different IP. It is possible to configure the OpenVPN server to issue the same IP to the same clients, but this requires compliance with one condition. To make it clear, I will explain that to connect different clients to the same OpenVPN server, you can use the same public-private key pair, that is, in other words, the same configuration file. It is not forbidden, but it is not recommended and to activate this possibility, it must be clearly indicated by a directive in the configuration file. With this connection method, the server will not be able to distinguish between clients. That is, if the same keys (configuration files) are used by different clients, it is impossible to configure static IP addresses in OpenVPN.
Therefore, the condition for configuring static IP addresses for OpenVPN clients is to use different keys. According to this principle – each client has a unique key – configuration files are created by my script, which I presented at the very beginning. So, if you created the client configuration files using the script, you will now be able to configure static IP addresses. Configuration is only required on the OpenVPN server side — nothing needs to be changed in the client settings.
Let’s say I want client1 to have the IP address 10.8.0.10, the others:
I need to create a directory on the server in which there will be settings for each client. With this folder I selected /etc/openvpn/ccd/, we create it:
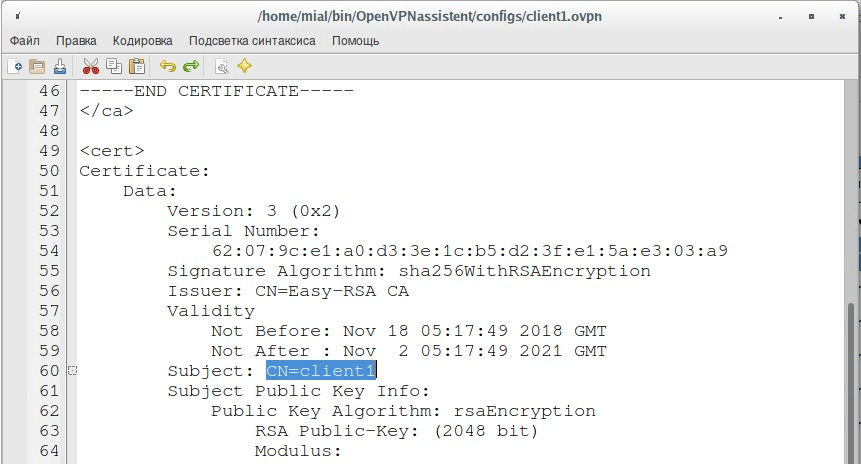
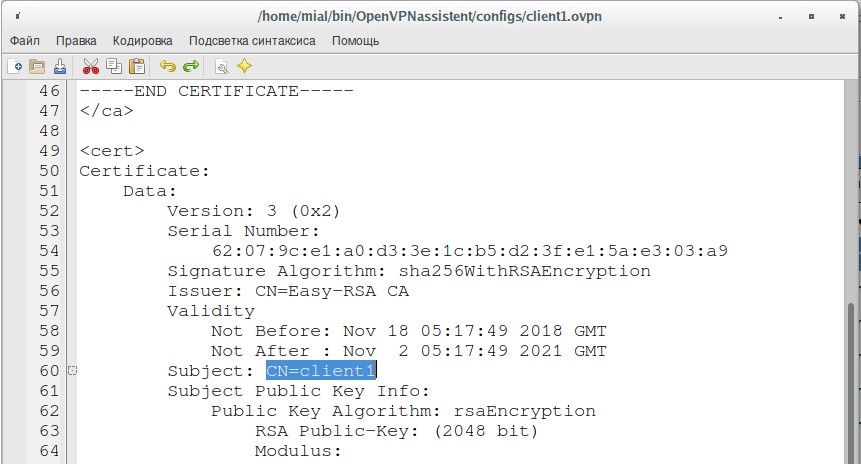
In this folder, you need to create text files with the same names as the OpenVPN clients that will store their special settings. By the way, the client’s name can be viewed in its configuration file, it is placed in the cert certificate and goes into the Subject field, for example:
In this case, the client name is client1, so the file needs to be created /etc/openvpn/ccd/client1.
In this file, it is enough to specify a line of the form:
If you have normal settings, you will always have 255.255.255.0 as SUBNET_MASKS. So, for the first client to which I want to give the IP address 10.8.0.10, in the file /etc/openvpn/ccd/client1 I write:
The same can be done with the command:
And for all other customers:
For the OpenVPN server to pick up new settings for clients, in the file /etc/openvpn/server/server.conf
Add a line (I inserted it before the certificates):
For the changes to take effect:
And make sure we haven’t messed anything up:
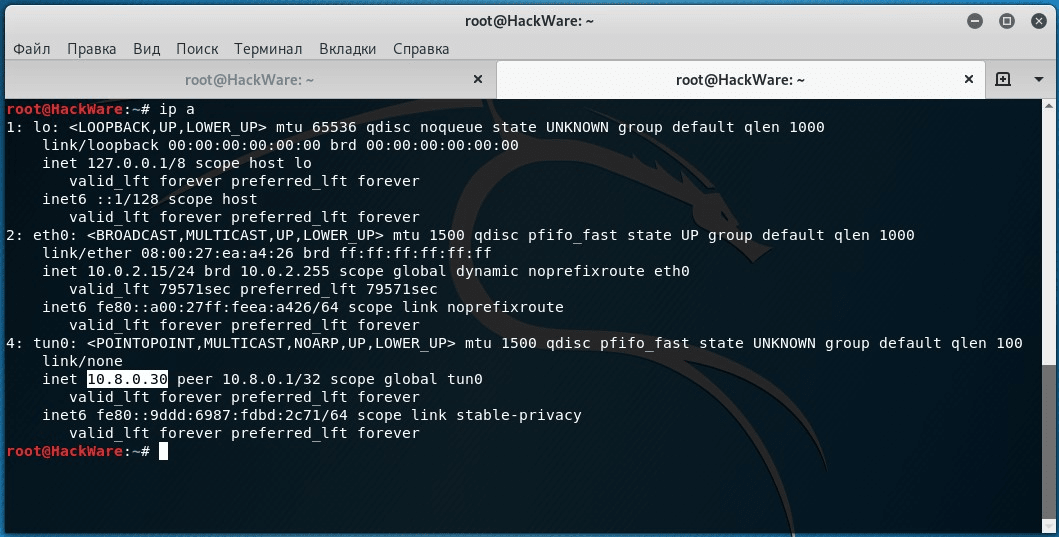
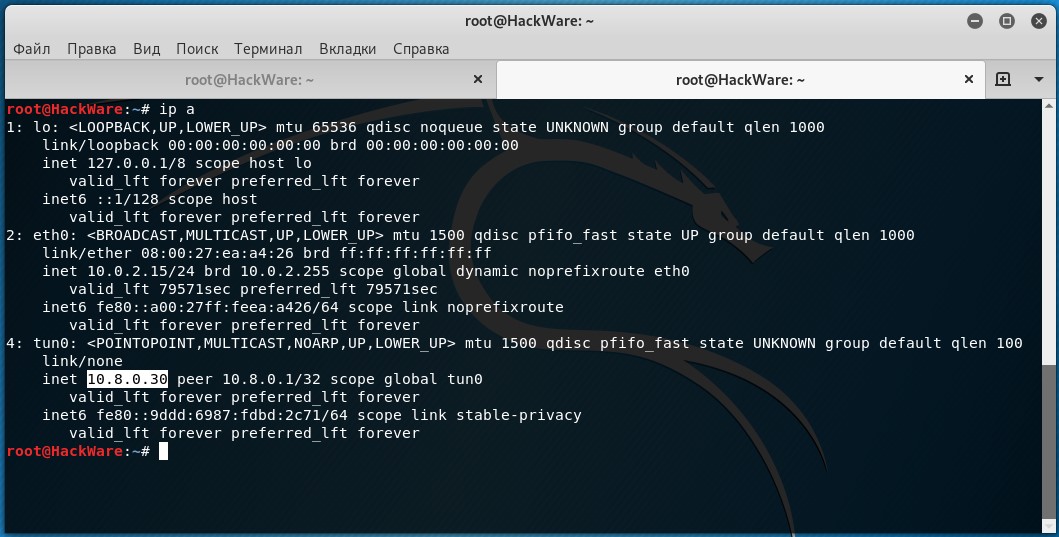
Our Linux system with a web server is named client3, let’s look at its IP after reconnecting:
It now has the address 10.8.0.30, and that is the address this system will have every time it connects to the OpenVPN server. So the web server will always have the IP 10.8.0.30 – can be bookmarked.
Note: Topology net30 is used for OpenVPN mobile clients – this may be due to some limitations of mobile phones. Therefore, Android will not be able to set the IP using the method described above. IP addresses for Android (perhaps the same situation for Windows) must end with numbers from the following list (the first number of each pair is for the server, the second for the client):
For example, if we want to set the IP address 10.8.0.14 for the client client2, then for the server we need to write 10.8.0.13, for example:
I repeat, perhaps this rule is mandatory for Windows clients as well — at least it used to be like that. Everything works great in Linux as described above.
In the article “Fast, simple and working way to bypass Captive Portal (hotspot with authorization on the web interface)” as a theoretical way of bypassing, I mentioned the possibility of configuring OpenVPN on UDP port 53. I also wrote that it did not work. I didn’t have my OpenVPN server at the time, so I found OpenVPN with a trial period and with the option to select port 53 UDP. But attempts to connect to the OpenVPN server failed.
Now I again had the opportunity to test another hotspot with authorization on the web interface and it really works in it. That is, if I just try to go online, I get:
But if I turn on OpenVPN, I can immediately use the Internet without authorization! That is, it does work, although probably not with all intercepting Portals. Apparently, some of them are intelligent enough to realize that these are some bad DNS queries and should not be ignored.
Let me remind you what the essence of the vulnerability of some Captive Portals is: the principle of their work is that they close all TCP and UDP ports for devices that have not yet logged in. All except one UDP port number 53. This port is required for DNS queries and closing it causes too many problems. Therefore, this port is open and you can go out into the world through it.
Without prior preparation, through this port you will only be able to make DNS requests for free… But if you have configured your OpenVPN accordingly, then through the open UDP port 53 you will be able to connect to the OpenVPN server, and it will already go out to the outside world for you, and just as well, return the received information in the same way. It works consistently and subjectively feels that when the network is busy, UDP 53 traffic takes priority…
That is, it works even better than if I bought access and sat through the same hotspot on TCP traffic (I compared both so and so). Although OpenVPN may play a role. I’ve noticed that on a good connection, when I’m sitting through OpenVPN, the pings are better than when I’m using the internet connection normally.
So, this only requires an OpenVPN server configured for UDP protocol (by default) with port number 53 (it must be selected when creating the configuration files). May not work for all hotspots – will continue to test
Perhaps this is too special a case, but I will still tell you about an interesting situation. Let’s assume that the IP address of the OpenVPN server is 185.117.153.79. Then the routing on the computer will be configured something like this:
It is through the traffic to the address 185.117.153.79 that the connection to the OpenVPN server takes place. If an exception was not made for this address, then it would be impossible to connect to the OpenVPN server and the computer would remain without Internet access at all.
In principle, it’s okay, but what to do if, for example, I want to open the site suip.biz, which has an IP address of 185.117.153.79? Every time I open this site, the traffic is routed directly – bypassing the OpenVPN network. Under normal circumstances this might be fine, but if OpenVPN is used for anonymity or to bypass an intercepting portal (which is my case), then I can’t open suip.biz at all. The way out of the situation is very simple. Recall that the OpenVPN server is available as part of a virtual private network at the IP address 10.8.0.1.
Therefore, in the file /etc/hosts
Just add the line:
And now access to this site will be through the OpenVPN network – that is, it will open without problems (but while I’m connected to OpenVPN – after disconnecting, you need to delete / comment out this entry). Likewise, if I need to SSH into an OpenVPN server:
When I’m connected to OpenVPN, I can use the local IP of the virtual private network:
I will connect to the same server, but at the same time the traffic will not go “outside” – everything is inside the VPN!
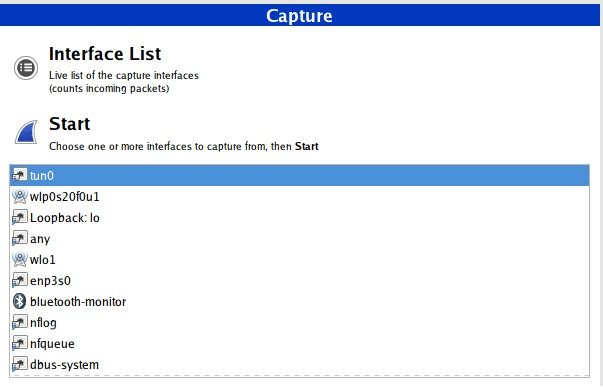
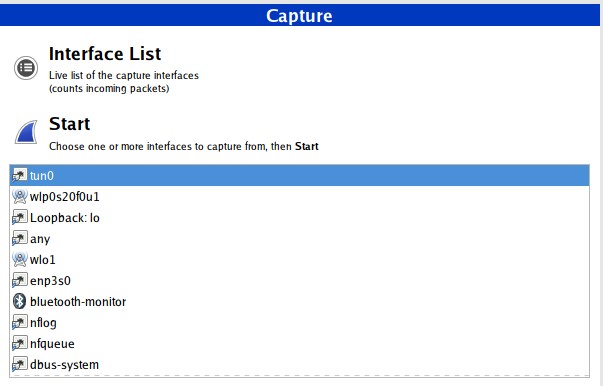
If you select a normal interface for capture, for example wlan0 or eth0, all data will be encrypted – it cannot be analyzed.
In order for the data transmitted via OpenVPN to be visible normally, you need to select the tun0 interface for capture.
By the way, if you are faced with the task of assessing the quality / security of a VPN, then the capture should be done on the usual interface – if you see readable data there like this:
So, your VPN connection is simply not encrypted. By the way, this is not related to the topic of OpenVPN, but as researchers found out from free Android VPN applications – 84% of them reveal the user’s IP address. And among paid VPNs, there are also many that allow data leakage.
But it would be much more interesting to find out how many of them monitor and log traffic…
That’s all for today, I hope you find this information useful. To be continued…

