31.08.2023
2 min
2106

Encrypting your Windows operating system drives with BitLocker is an important step in keeping your data safe. In this article, we take a detailed look at the process of setting up BitLocker, which provides reliable encryption of hard drives in Windows. Encrypting Windows operating system drives using BitLocker is an important step to ensure data security. In this article, we provide detailed step-by-step instructions for installing and configuring BitLocker. From choosing an encryption type to managing recovery keys, we cover all the necessary steps to ensure your hard drive is effectively encrypted.

This article is made to help users easily understand and perform the encryption process, making their digital world more secure. Our goal is to provide readers with a complete understanding of the Windows drive encryption process using BitLocker. In this article, you will find a complete guide to using BitLocker to encrypt drives on the Windows operating system. We provide step-by-step instructions for setting up BitLocker, tips for managing encryption keys, and recommendations for optimal security. This article also covers the technical aspects of encryption and provides important tips for data recovery in case of lost keys or hardware changes.
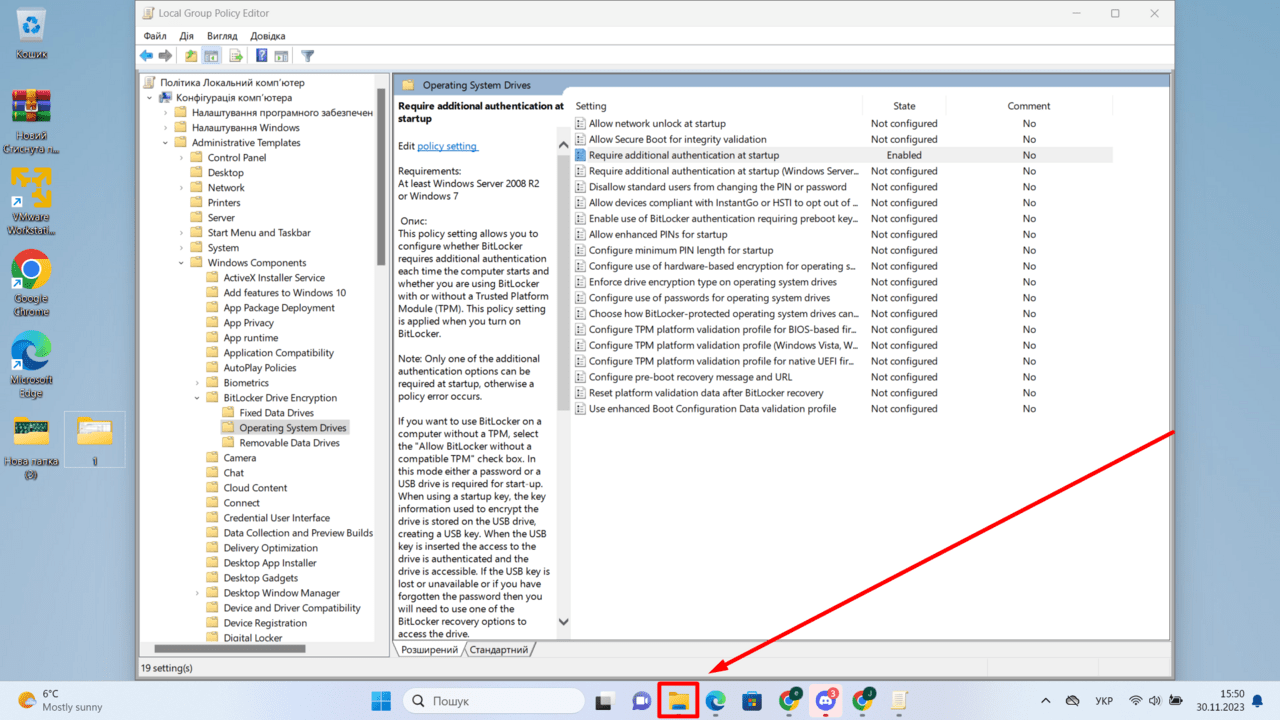
Press the Win+r key combination

In the open window, write the gpedit.msc command and click OK
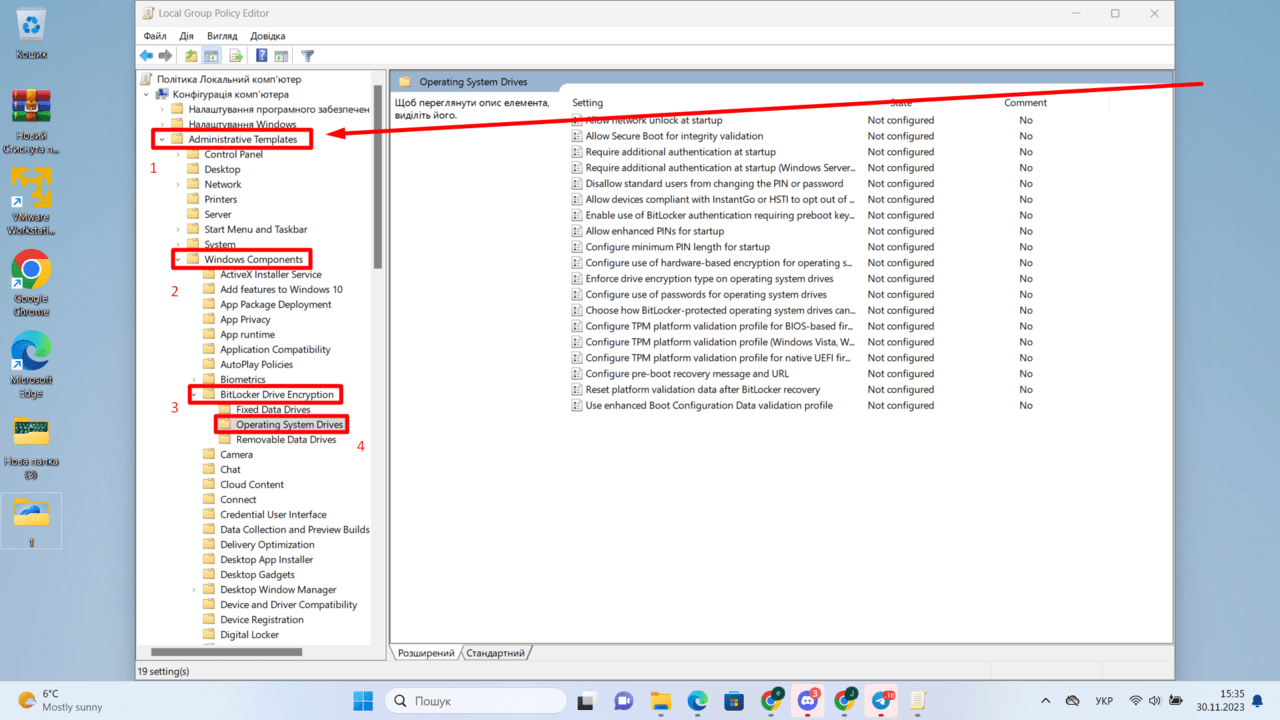
Step by step, we open the folder with the folder until we finally open Operating system drivers

In this folder, open the file as shown in the screenshot
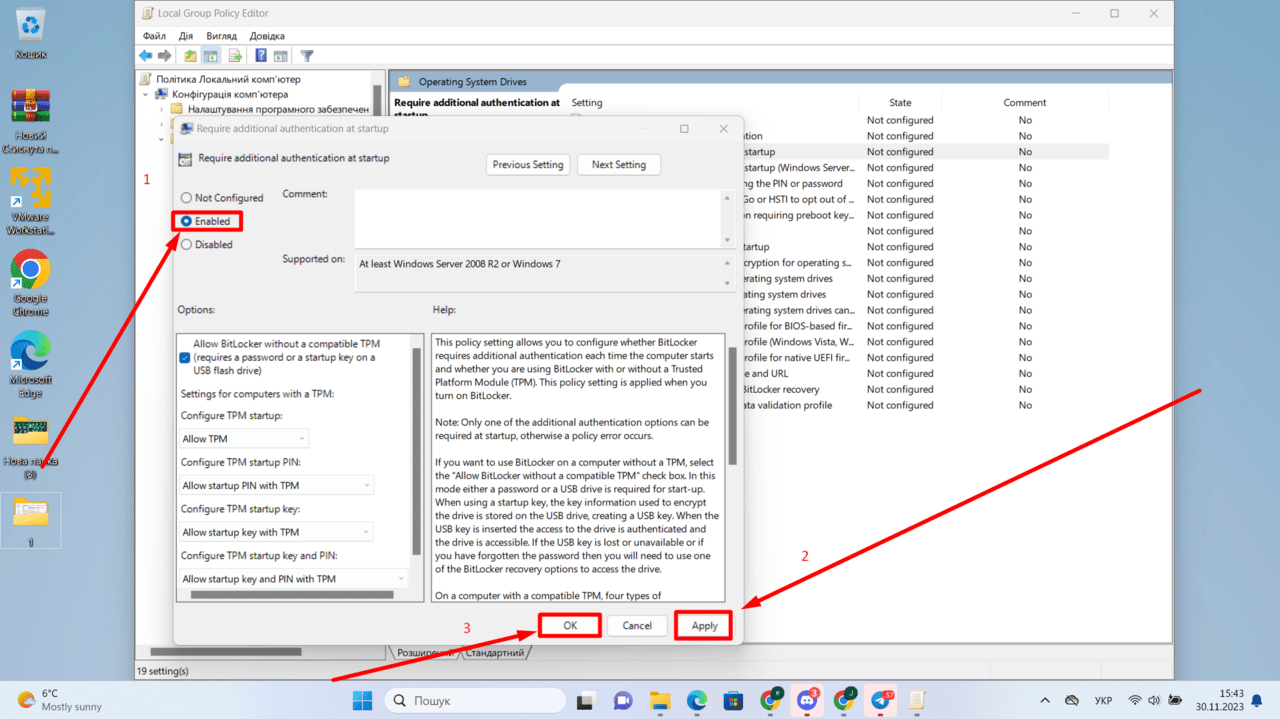
Select Enabled from the top, then click apply and OK
We open the location of your disk
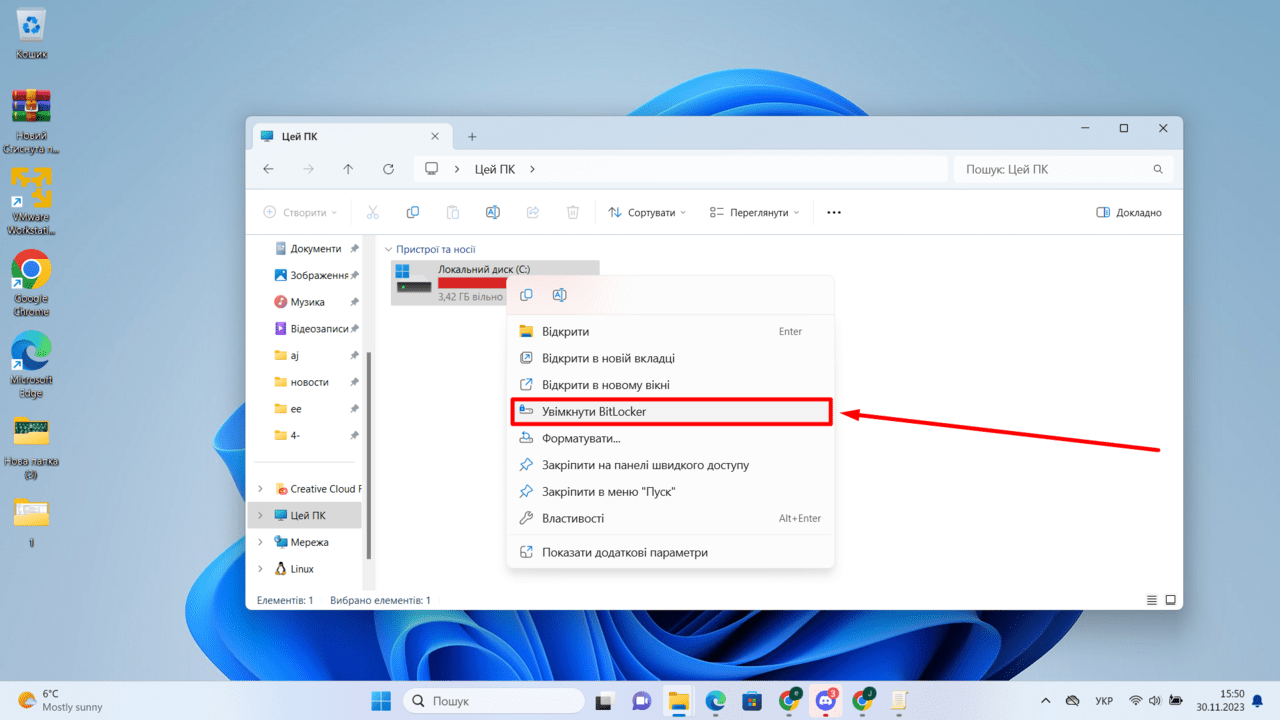
Click Enable BitLocker
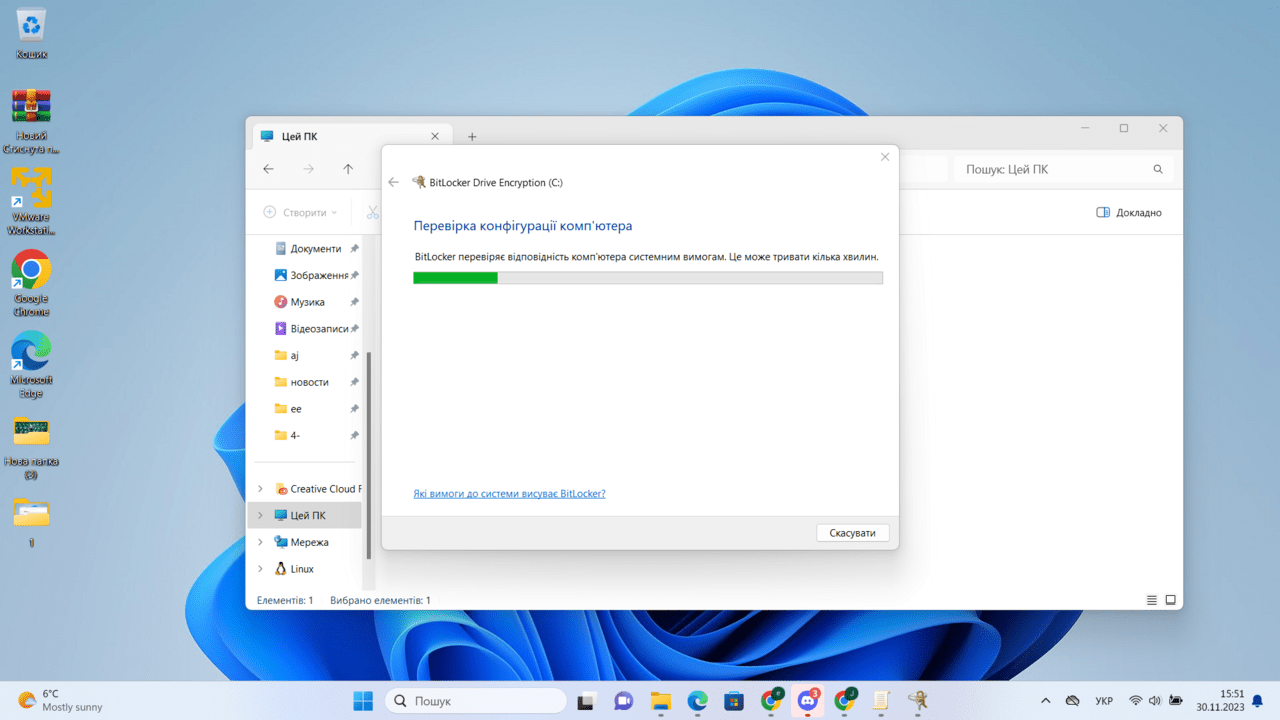
We are waiting while BitLocker checks the compliance of the computer with the system requirements
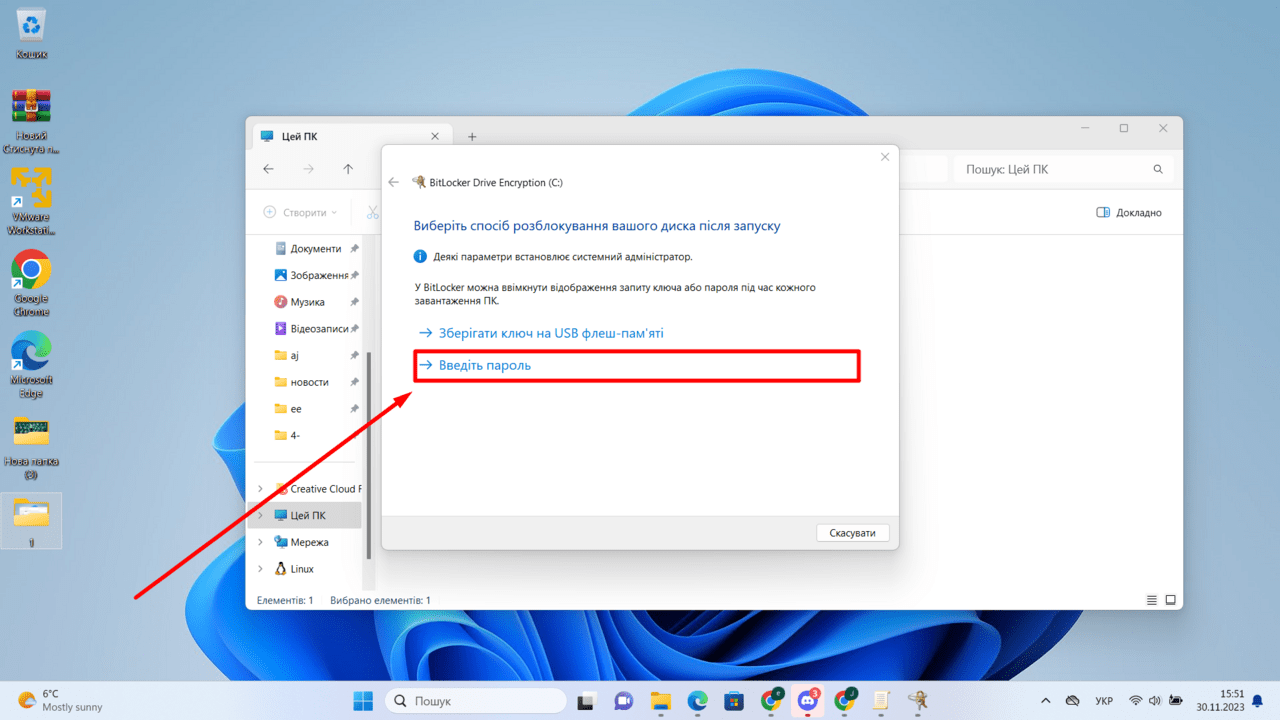
Click Enter password
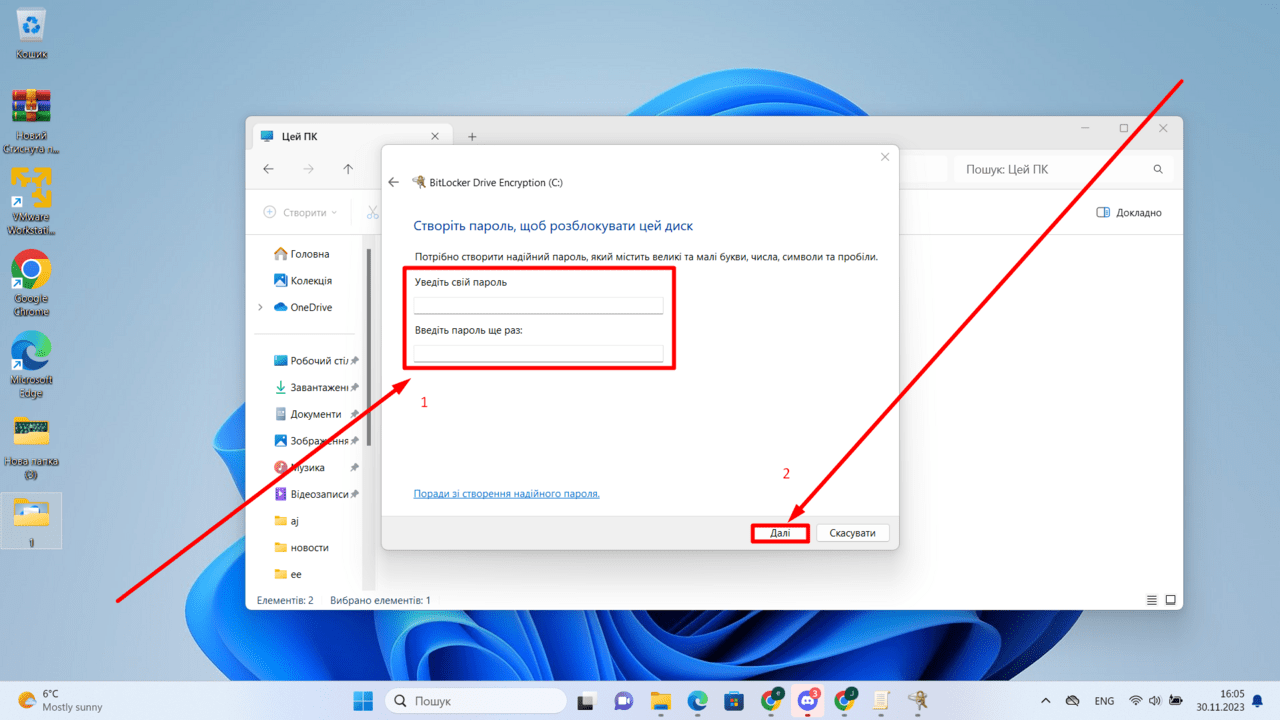
Let’s come up with a password and click Next

Choose the method that is convenient for you, but we recommend saving to a file, but note that you will not be able to save this file to a disk that is encrypted. Click Save to file
Unfortunately, if you lose your BitLocker recovery key, you could be in serious trouble. BitLocker is a very powerful encryption tool, and the recovery key is like a spare key to your apartment. If you lose it and forget the password, then access to the encrypted disk will be lost. This means that you will not be able to access your files, data, programs – anything stored on that drive.

Click Next
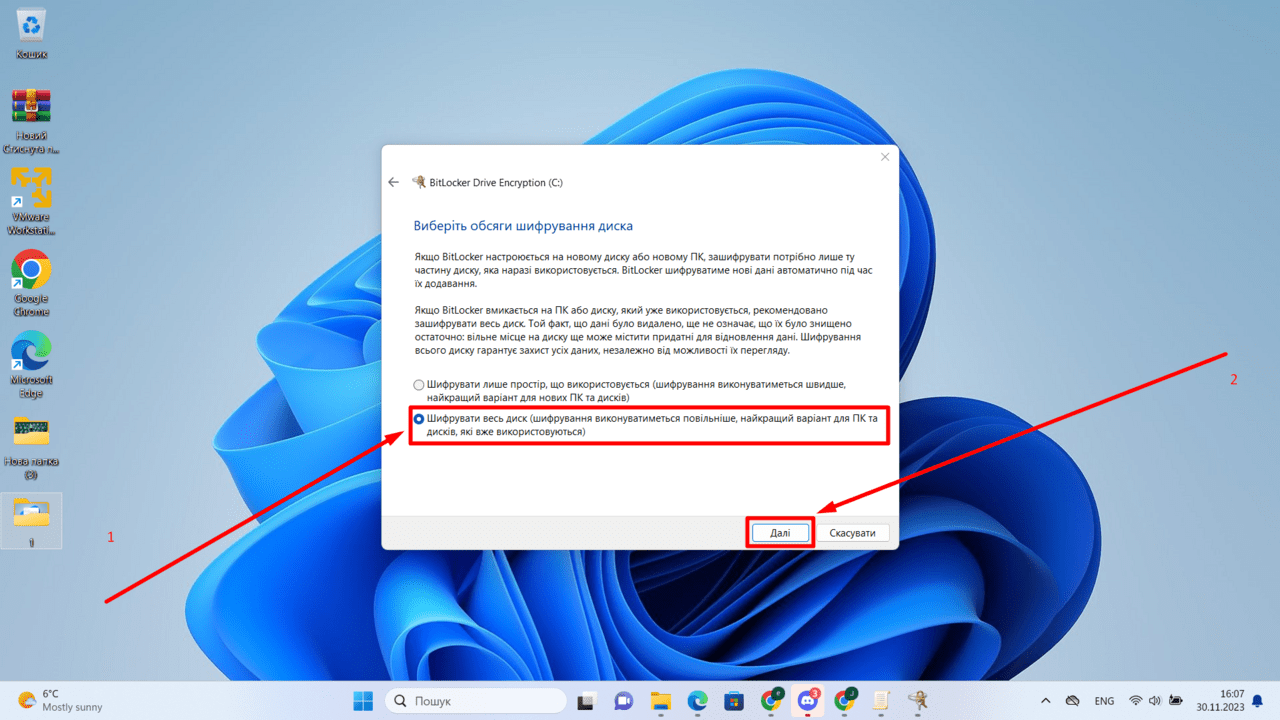
We choose to encrypt the entire disk (this method is suitable for PCs that are already actively used) and click Next
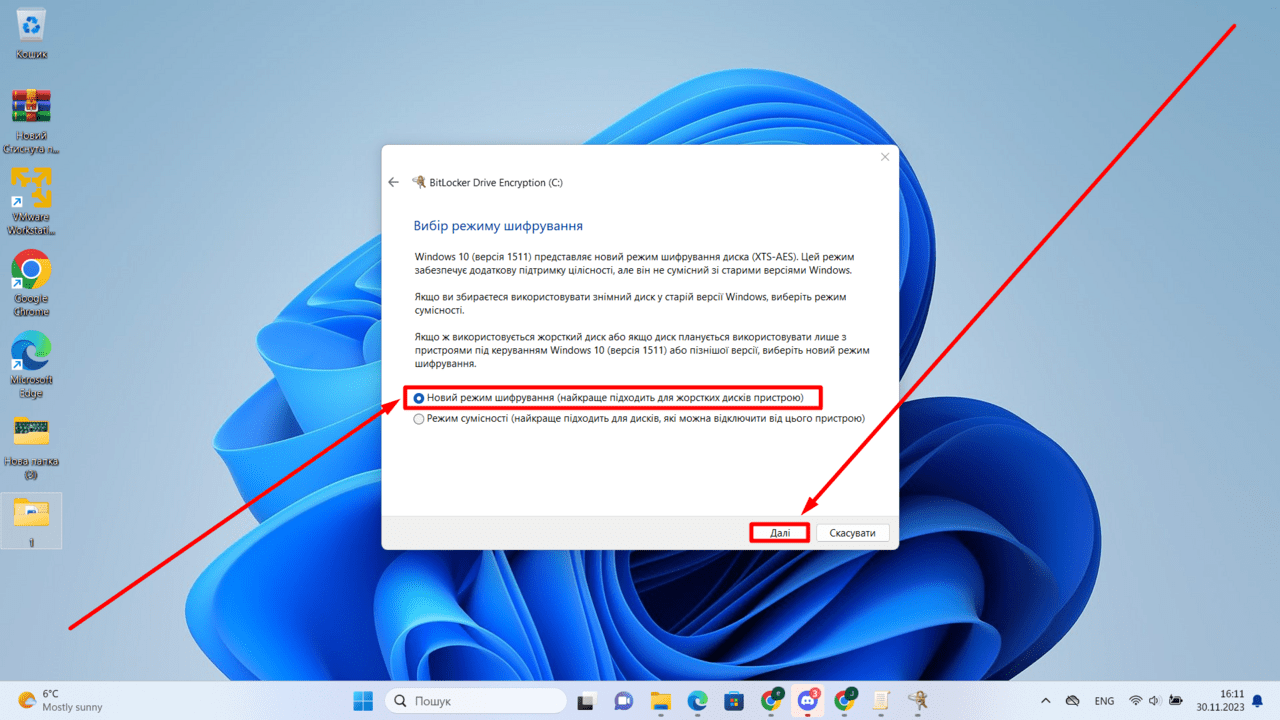
Select New encryption mode and click Next
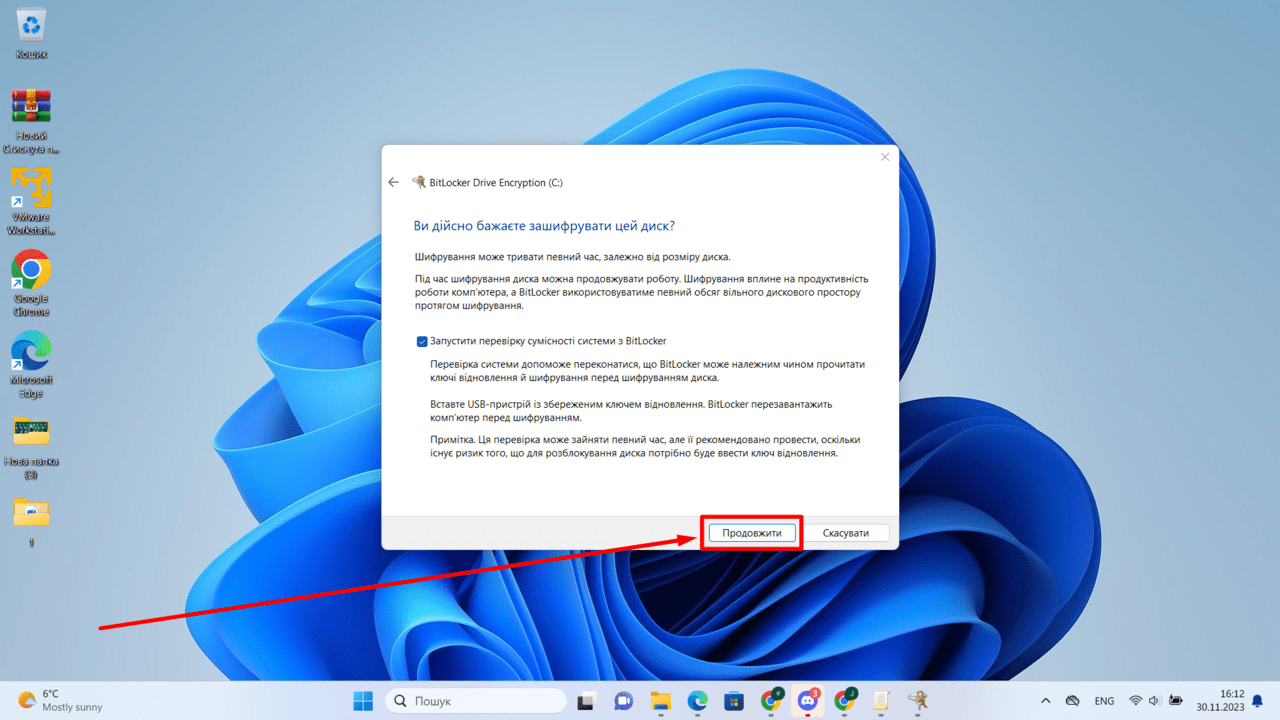
Click Continue
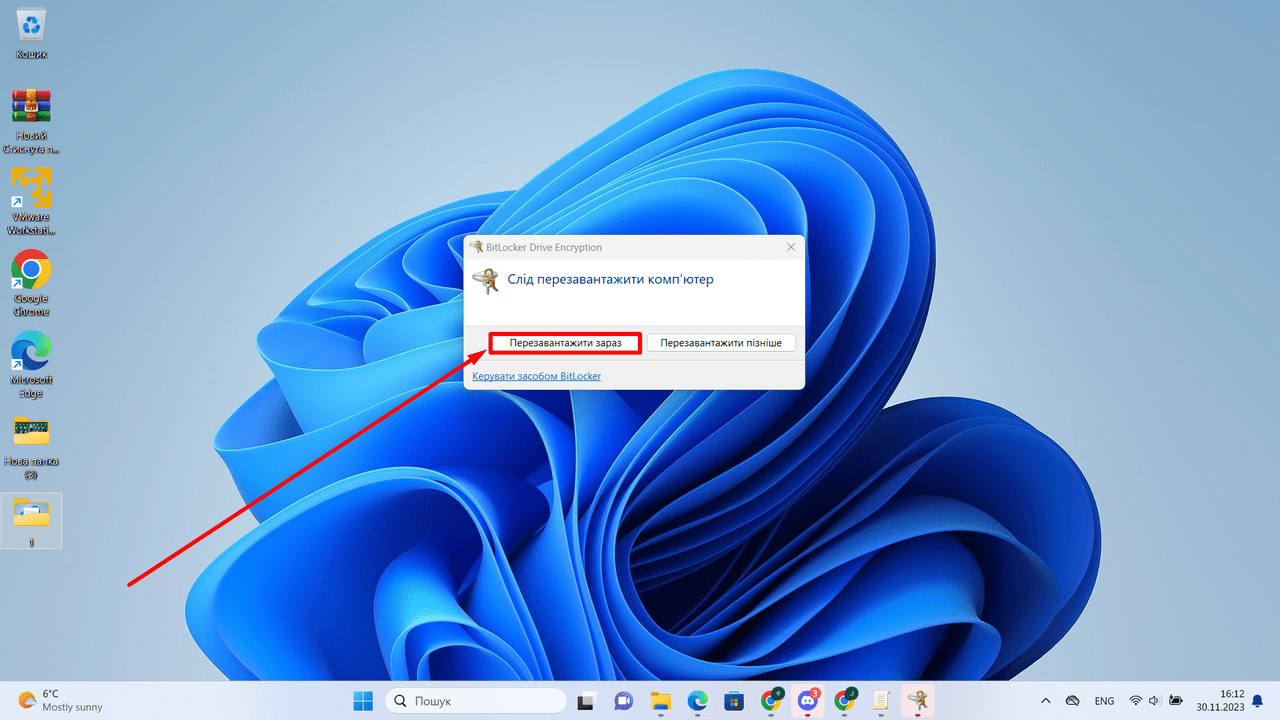
Click Reload now
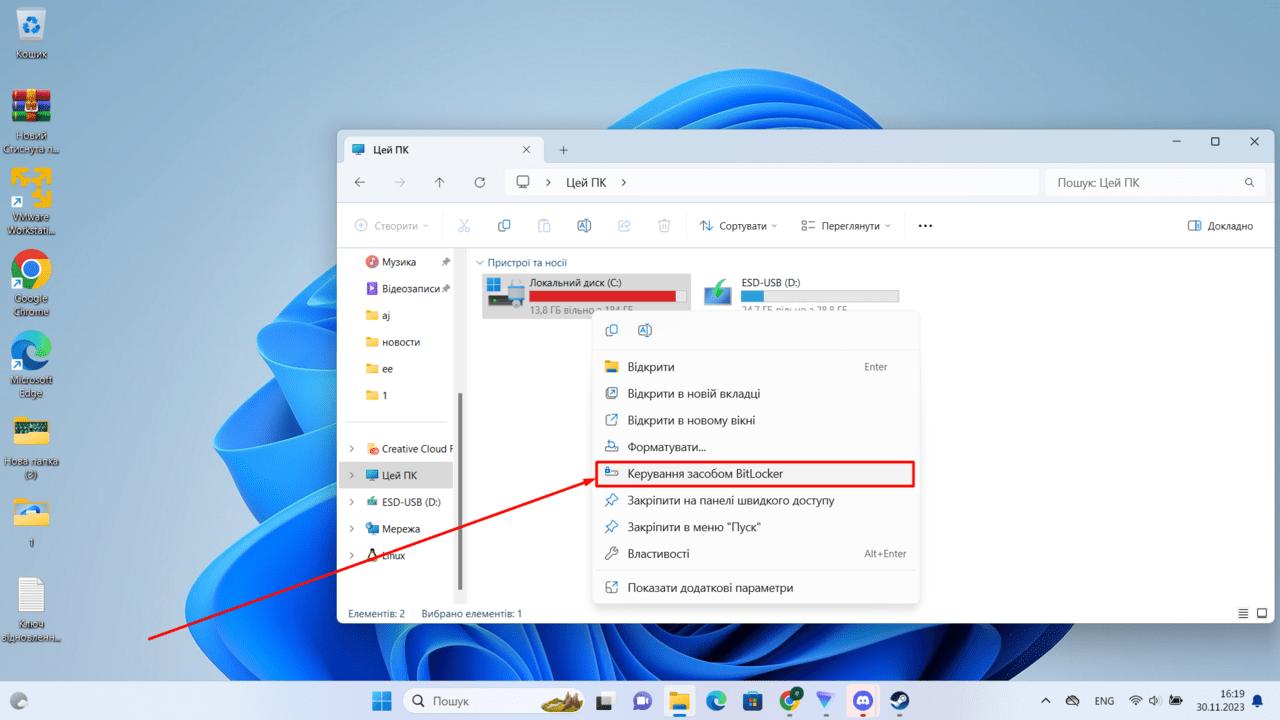
Click Manage BitLocker
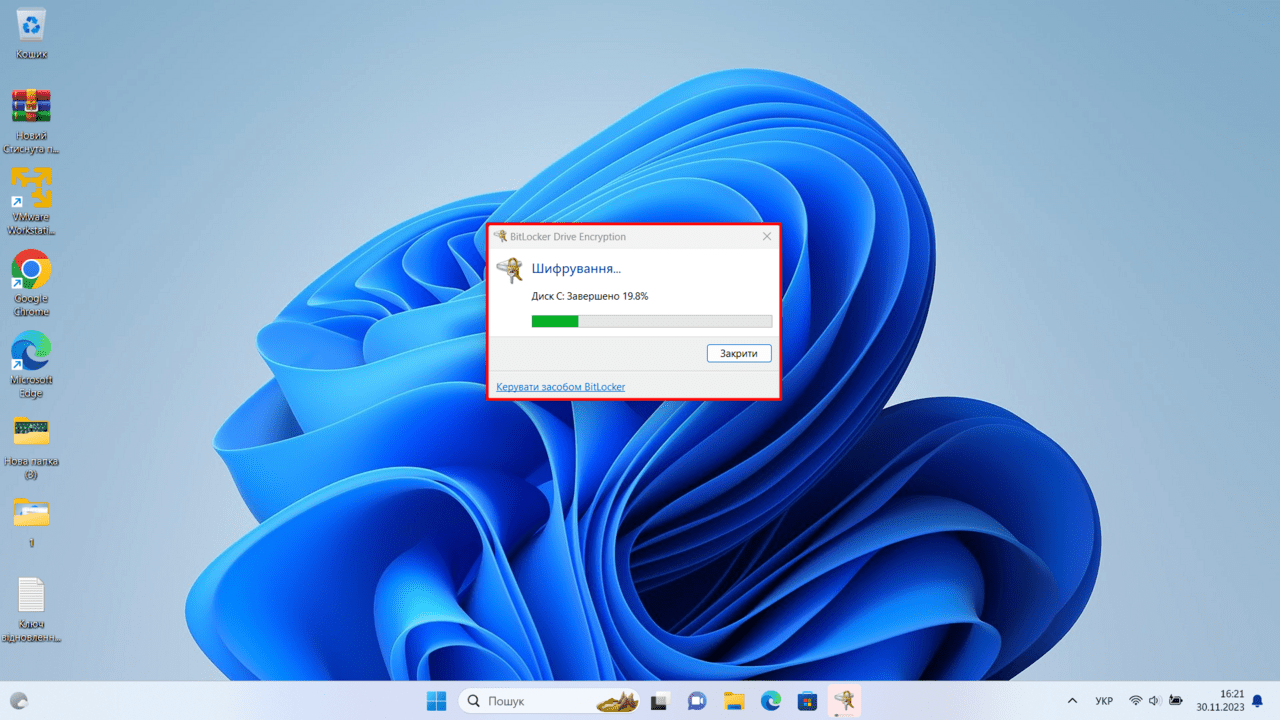
Encrypting is in progress, waiting for completion
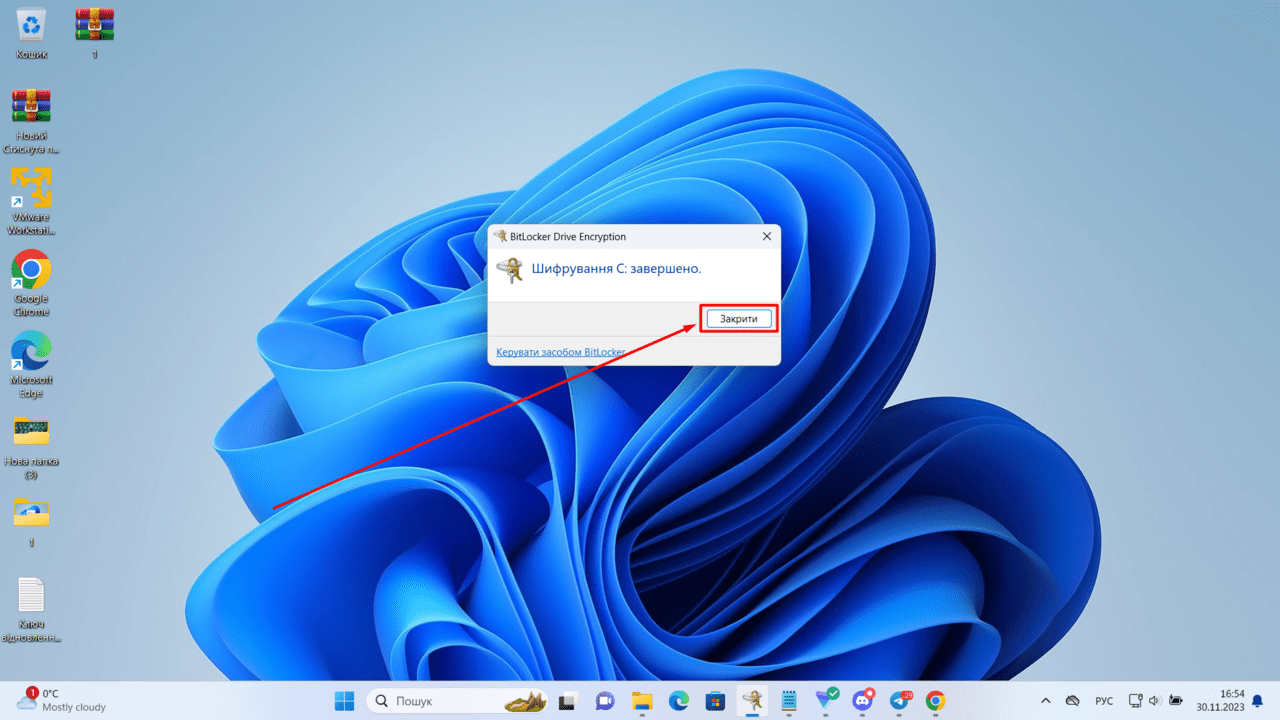
Click Close