
22.08.2023
3 min
2028

Створення віртуальної машини на Windows за допомогою VirtualBox та ISO-образу Kali Linux – це завдання, що стає все більш актуальним для всіх користувасів пк, незалежно від того, спеціалістів – ви в галузі кібербезпеки або просто ентузіаст з хакінгу. Ця докладна інструкція по створенню такої віртуальної машини із оптимальними налаштуваннями для максимальної продуктивності допоможе усім. VirtualBox – відомий інструмент віртуалізації, який вже давно завоював популярність завдяки своїй гнучкості та безкоштовності. Його комбінація з Kali Linux, провідною операційною системою для тестування на проникнення та кібербезпеки, відкриває перед всіми мамкіними хакерами безмежні можливості.

Virtual machines are becoming a key tool for those seeking maximum security in the online space. They create an isolated environment that effectively blocks out potential threats and malware. Using a virtual machine reduces the risk of compromising the underlying system and provides an additional layer of protection against intrusions. Thus, for those who want to keep their data safe, virtual machines are becoming an indispensable tool in today’s digital world. VMware Player and VirtualBox are two well-known virtualization platforms for creating a virtual machine. Their key difference is that VMware Player is free for personal use only, while VirtualBox is completely free and open source software available for personal and commercial use. VMware Player is developed by VMware, a leader in virtualization, while VirtualBox is owned by Oracle. “Oracle” is an American corporation that specializes in the production of software, hardware for computing and other products and services in the field of information technology. VirtualBox, thanks to its transparent operation, has a larger set of features and settings, so we consider this virtual machine to be the best. Also, VirtualBox provides more flexible options and this is all thanks to its open source. On top of that, compatibility in VirtualBox, thanks to its open nature, supports a wider range of operating systems compared to VMware Player. Both tools, VMWare Player and VirtualBox, have their merits and each of them may be better depending on the specific use case scenario. The best way to determine which app best suits your needs is to install both and experiment with them. Only practice will help you figure out which virtual machine best meets your requirements.

Open the Google Chrome browser
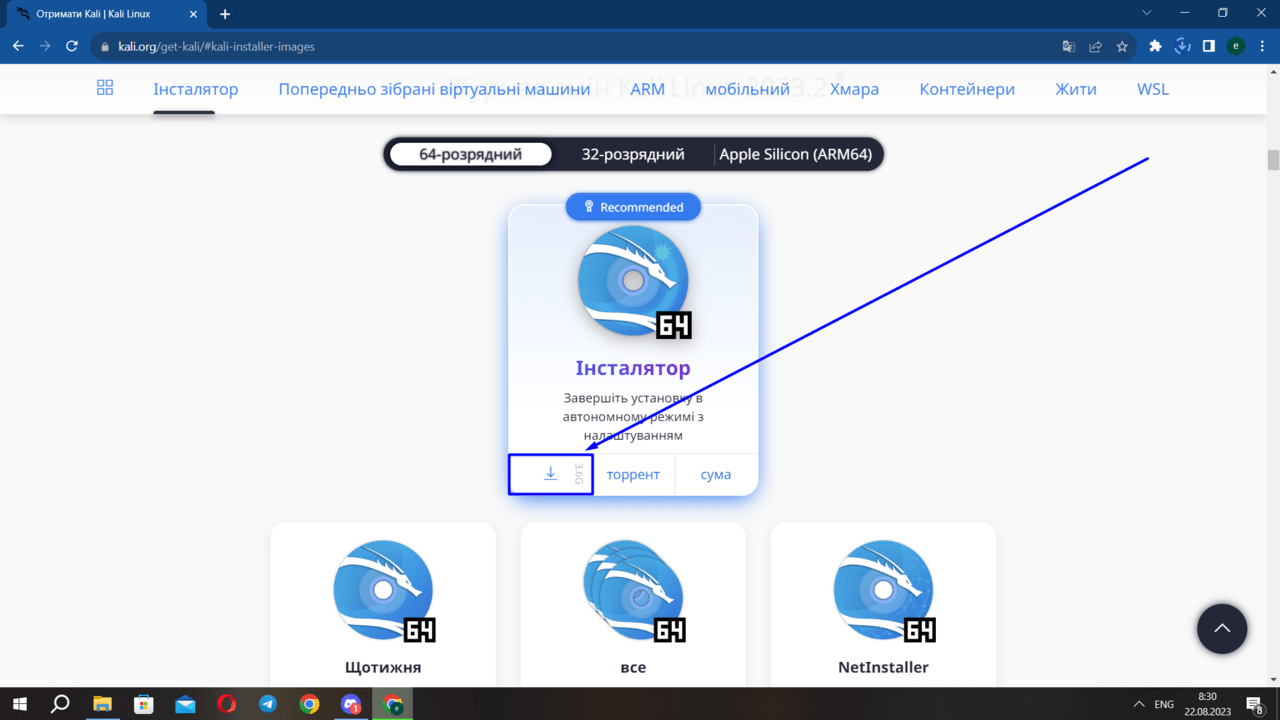
Click on the download icon as shown in the screenshot
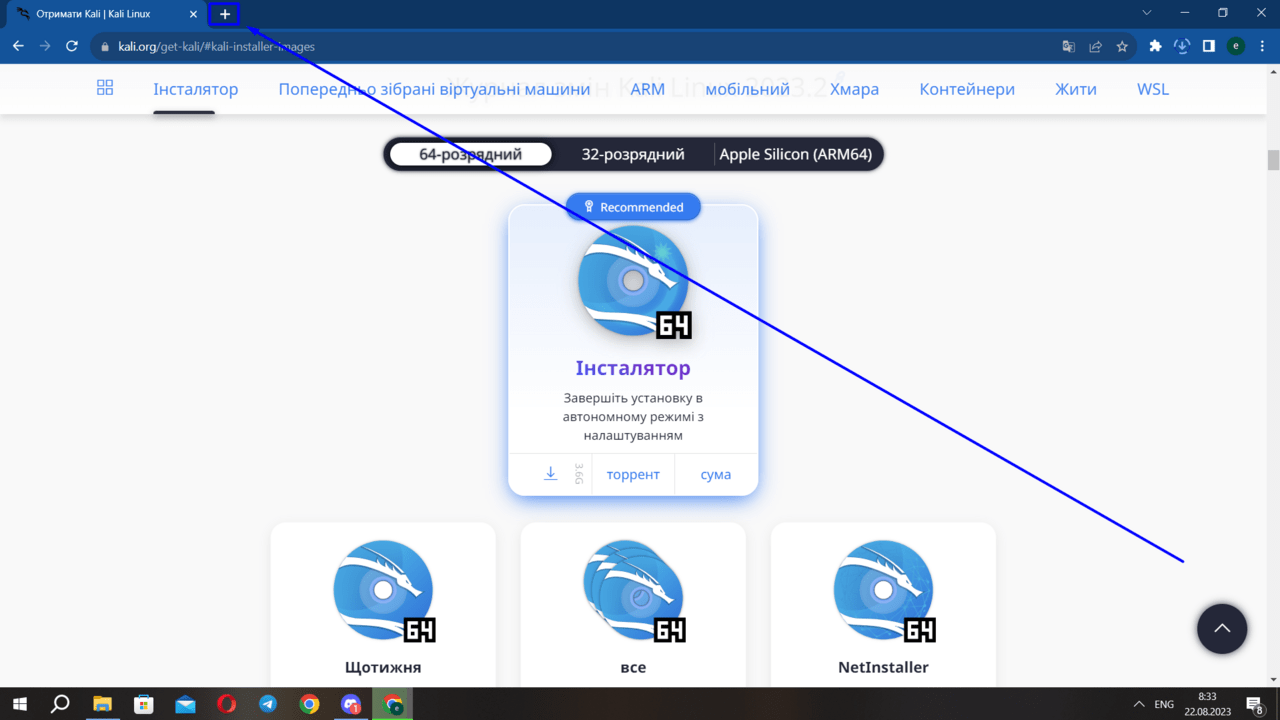
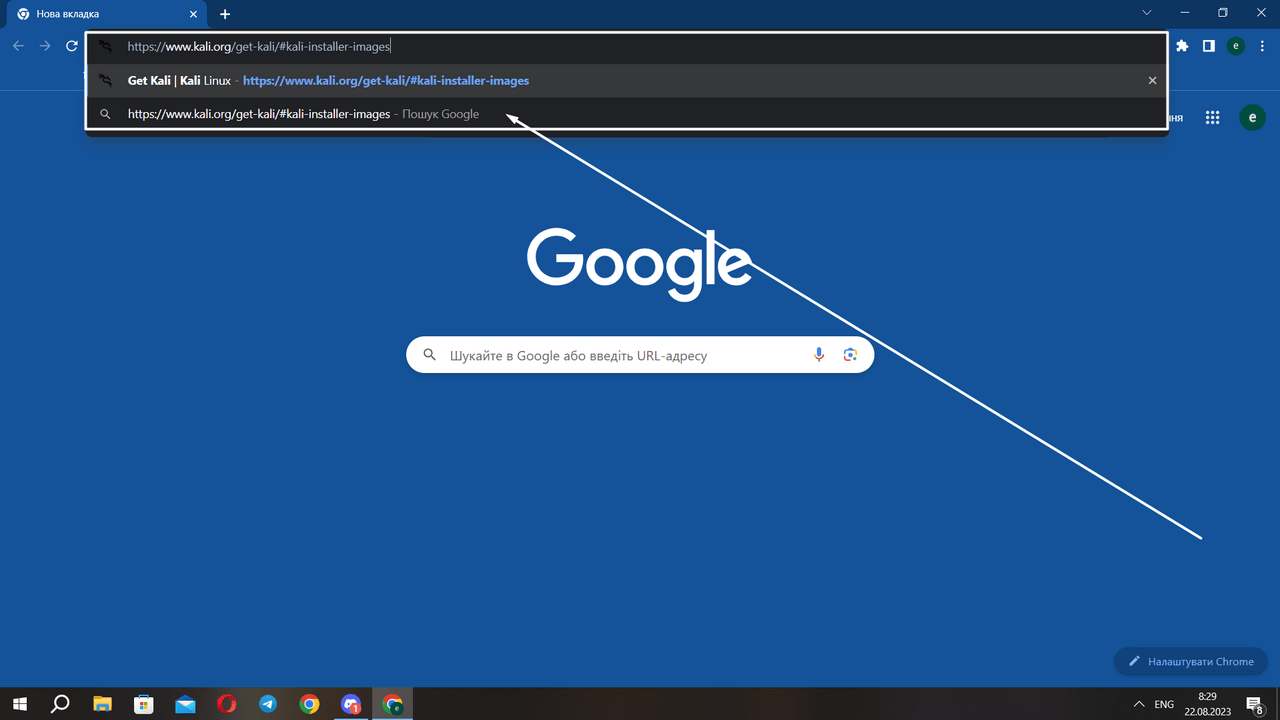
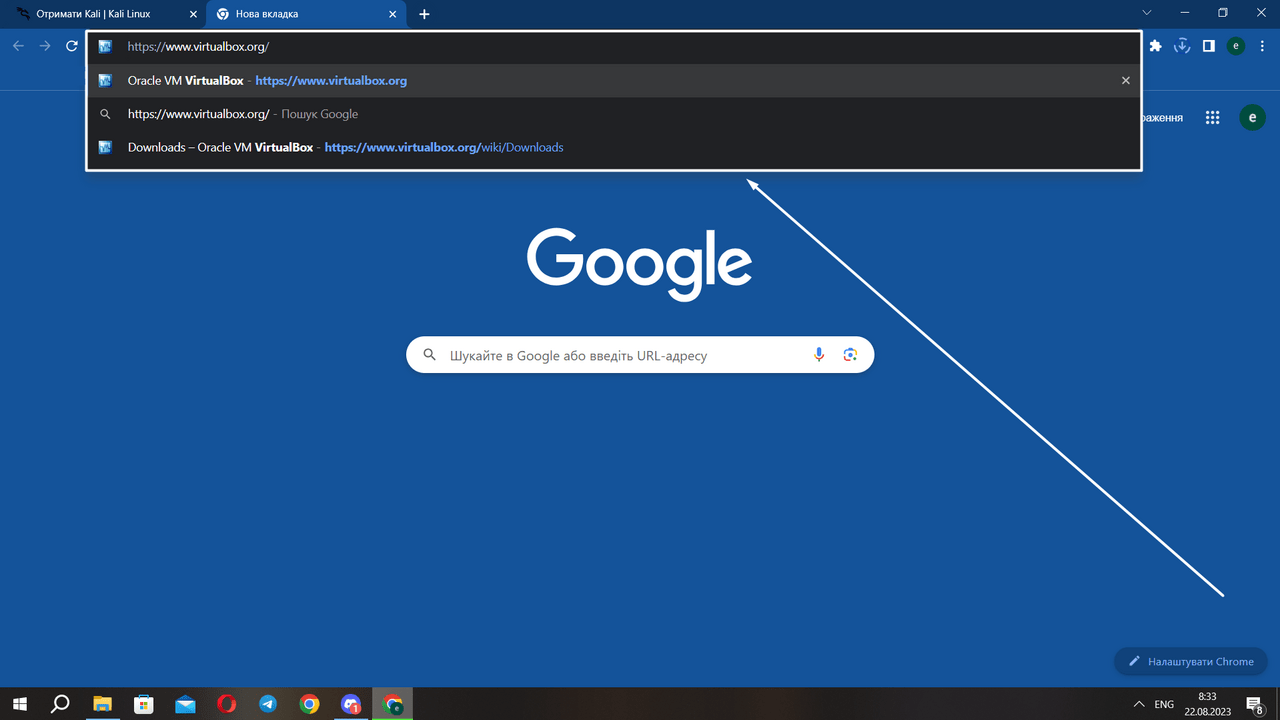
Open a new tab
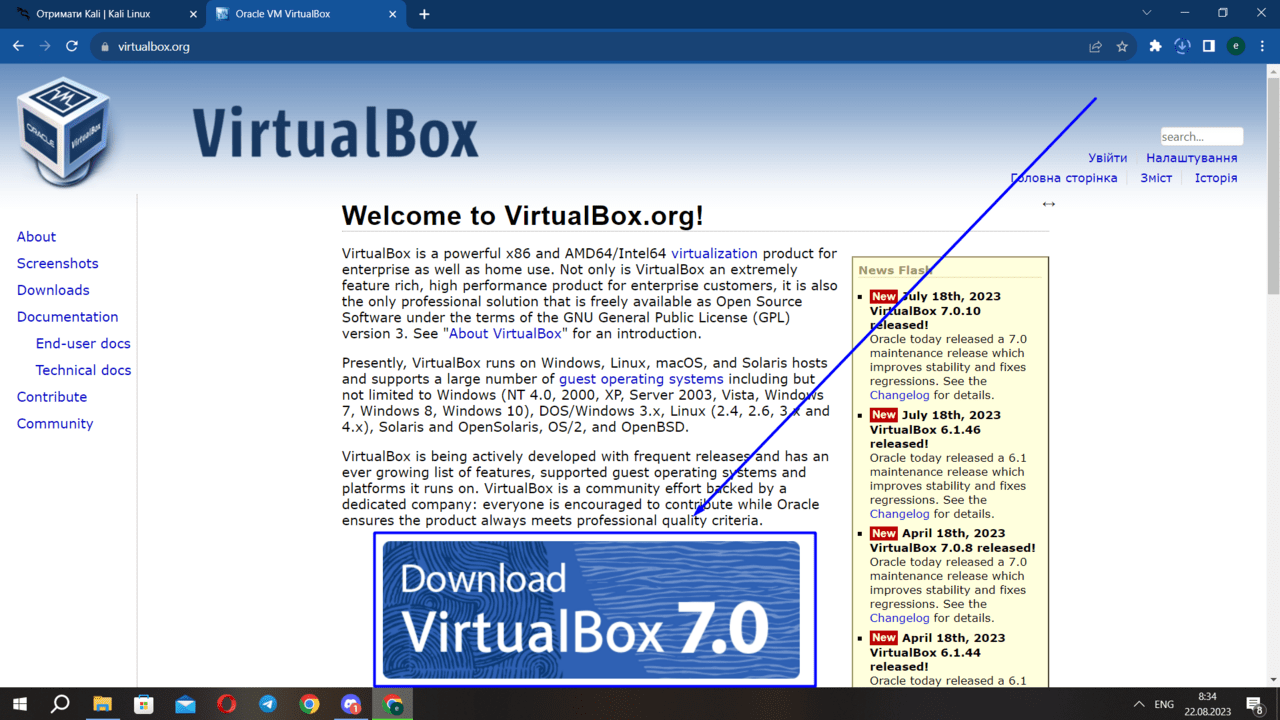
Click on “Download VirtualBox 7.0”
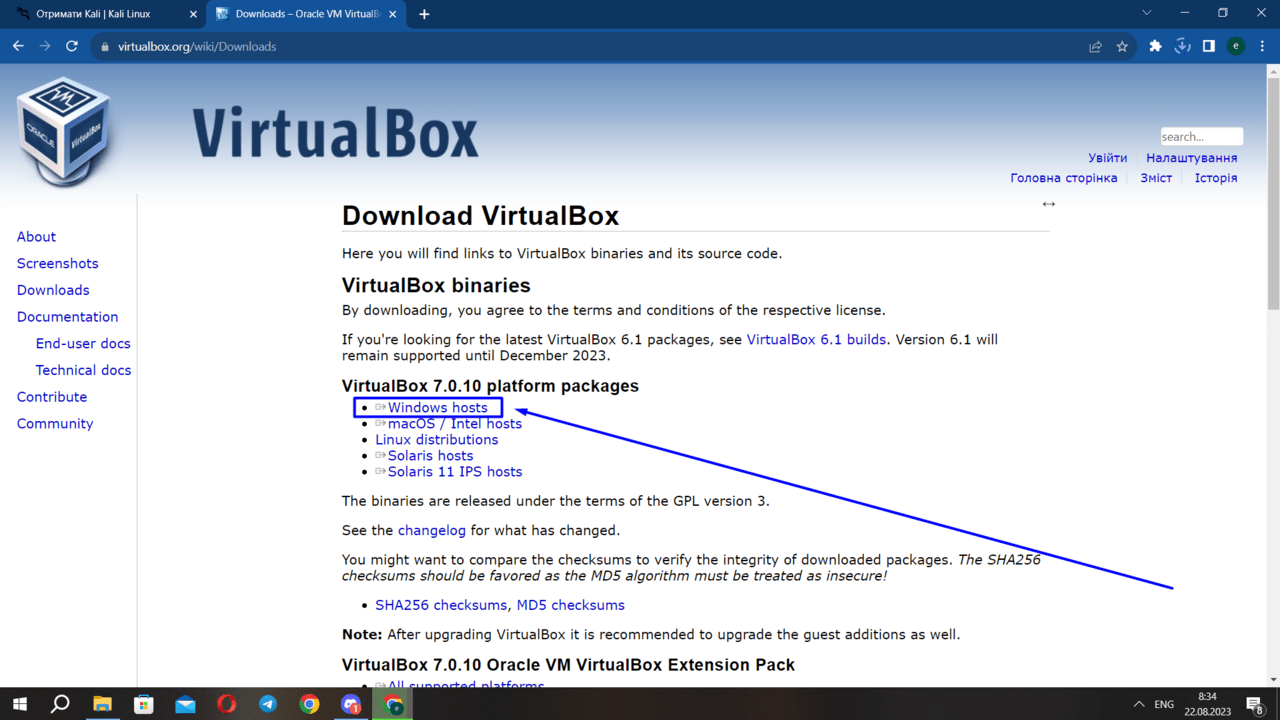
Click on the highlighted fragment “Windows hosts”
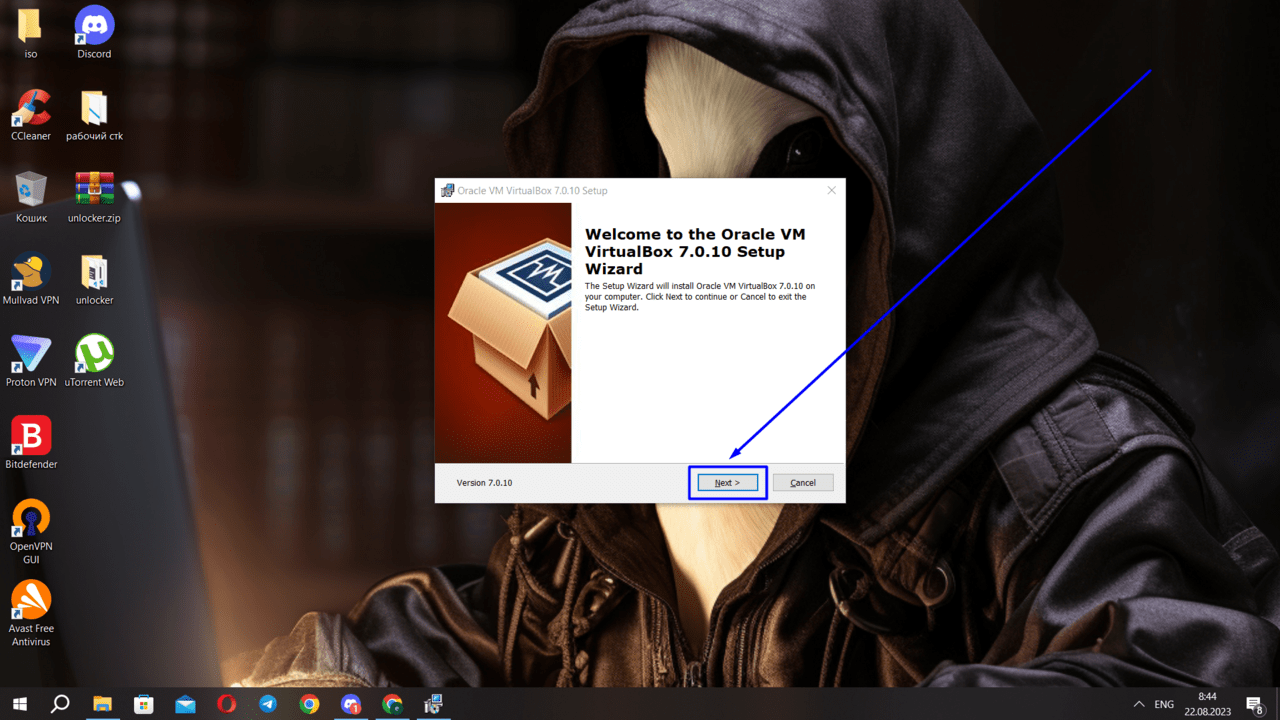
Click “Next”
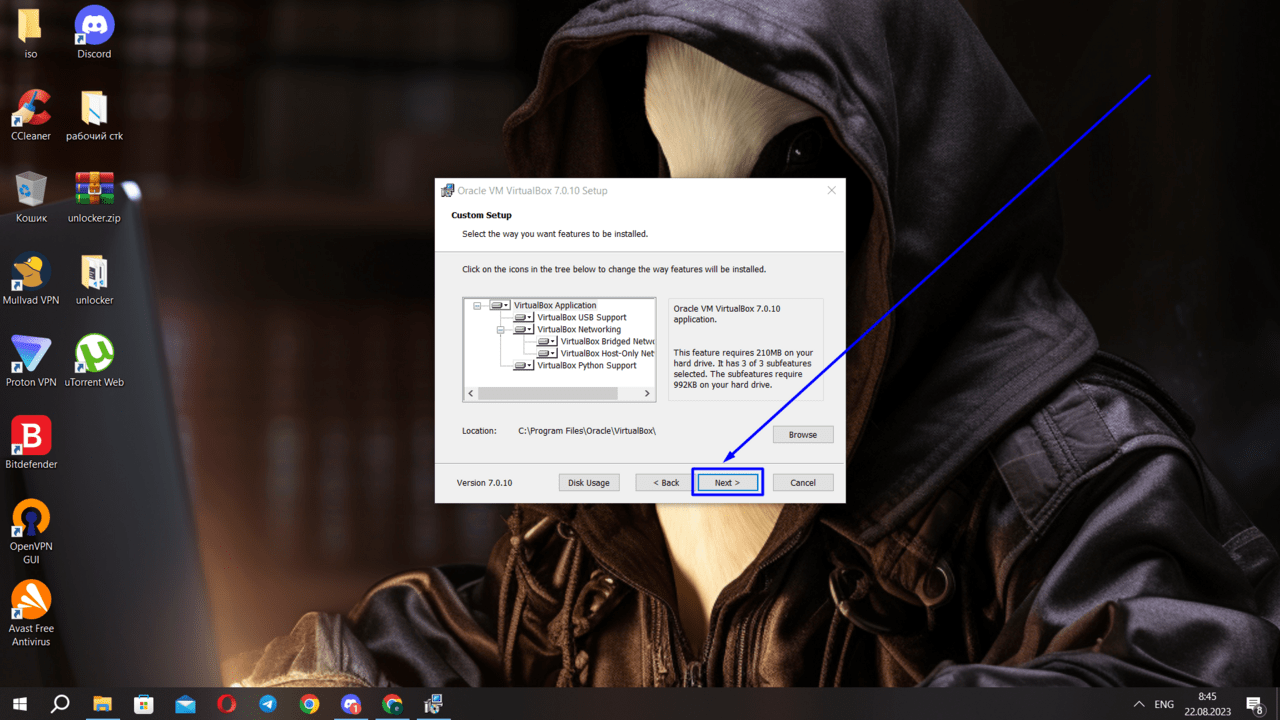
Click “Next”
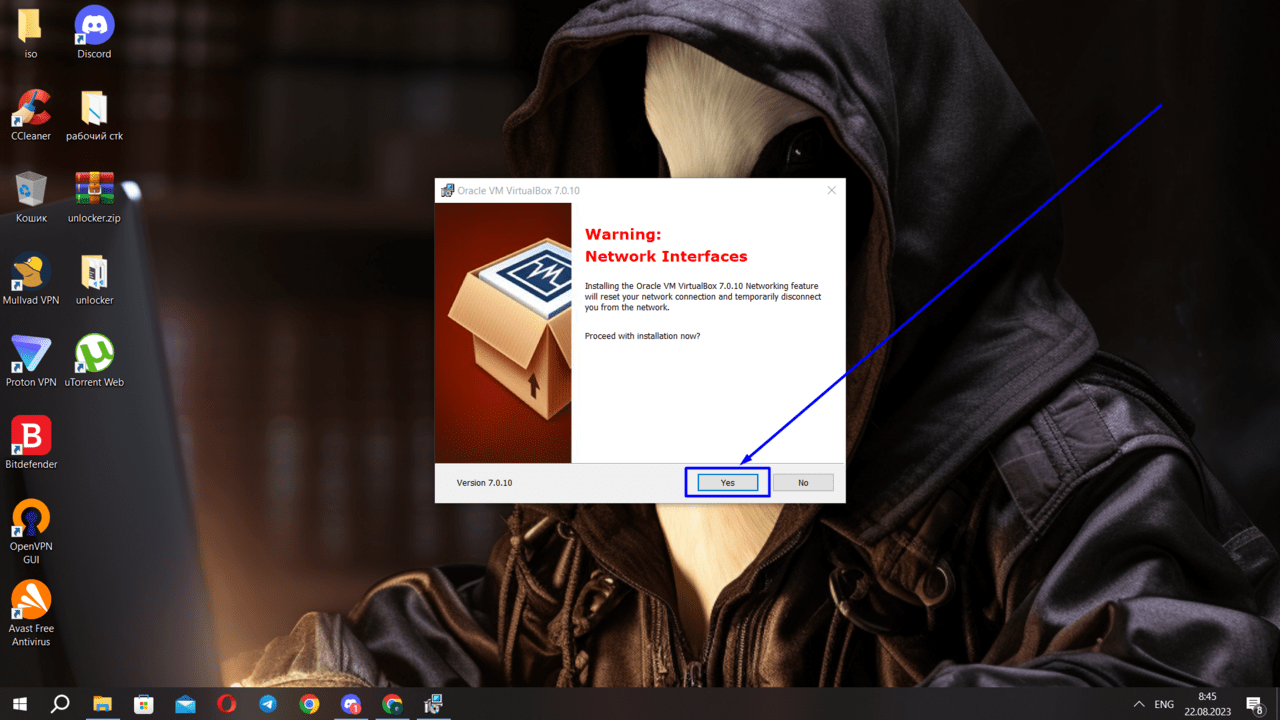
Click “Yes”

Click “Yes”
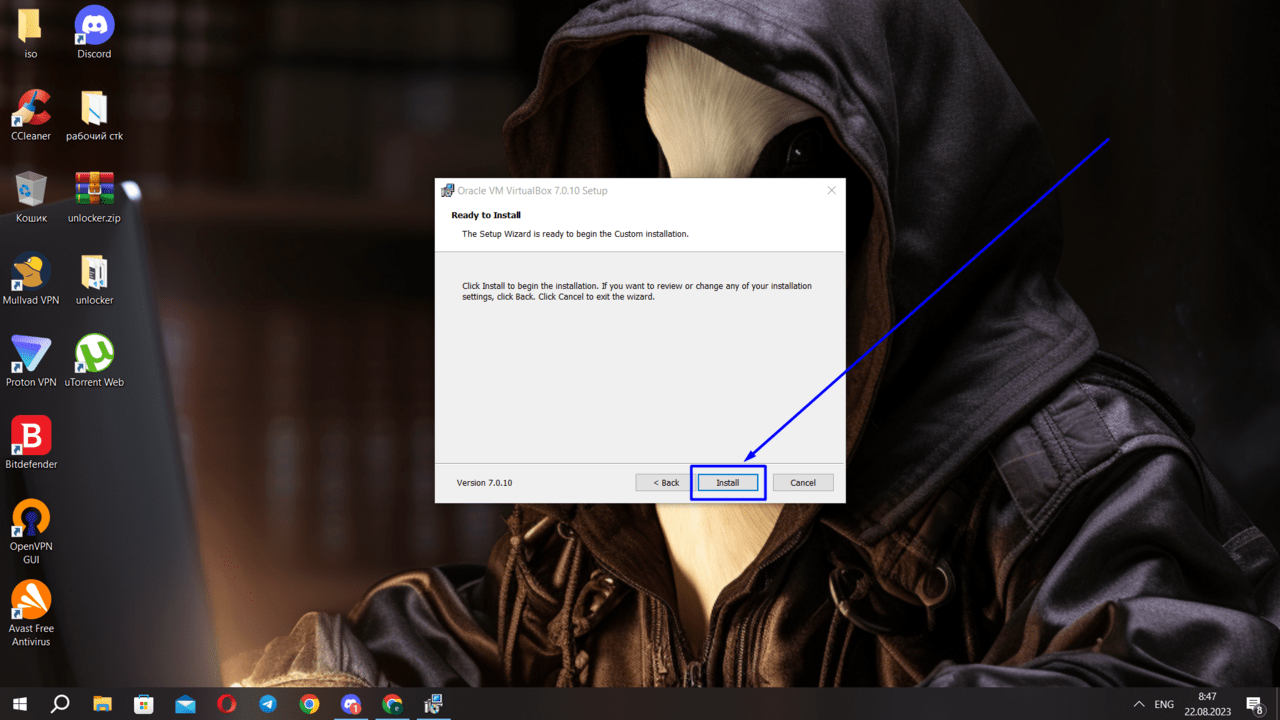
Click “Install”
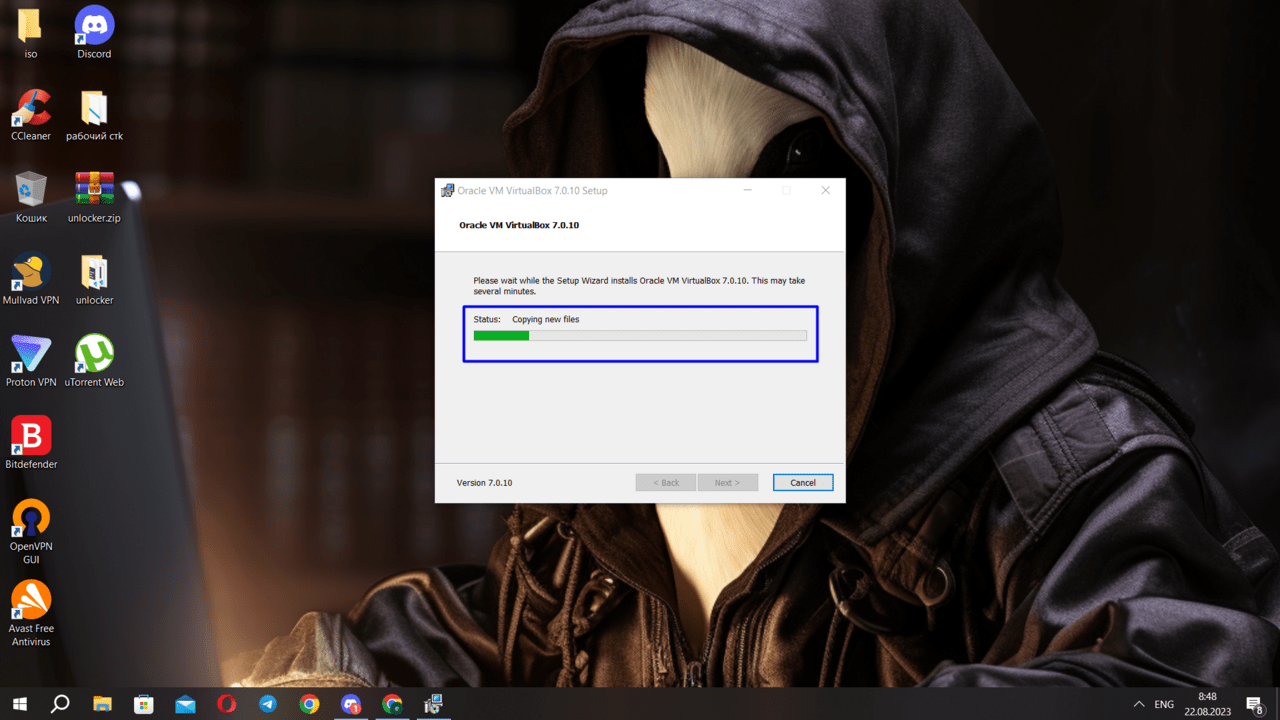
Waiting for the download to finish
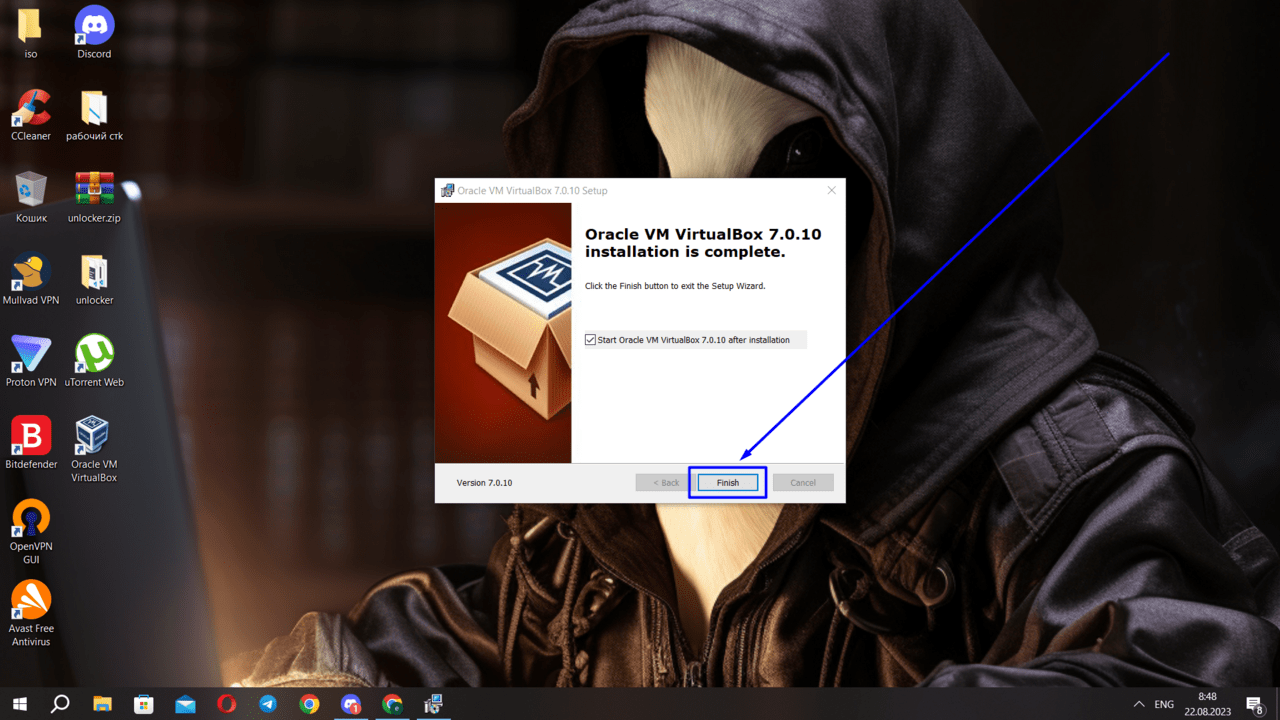
Click “Finish”

Click “Create…”
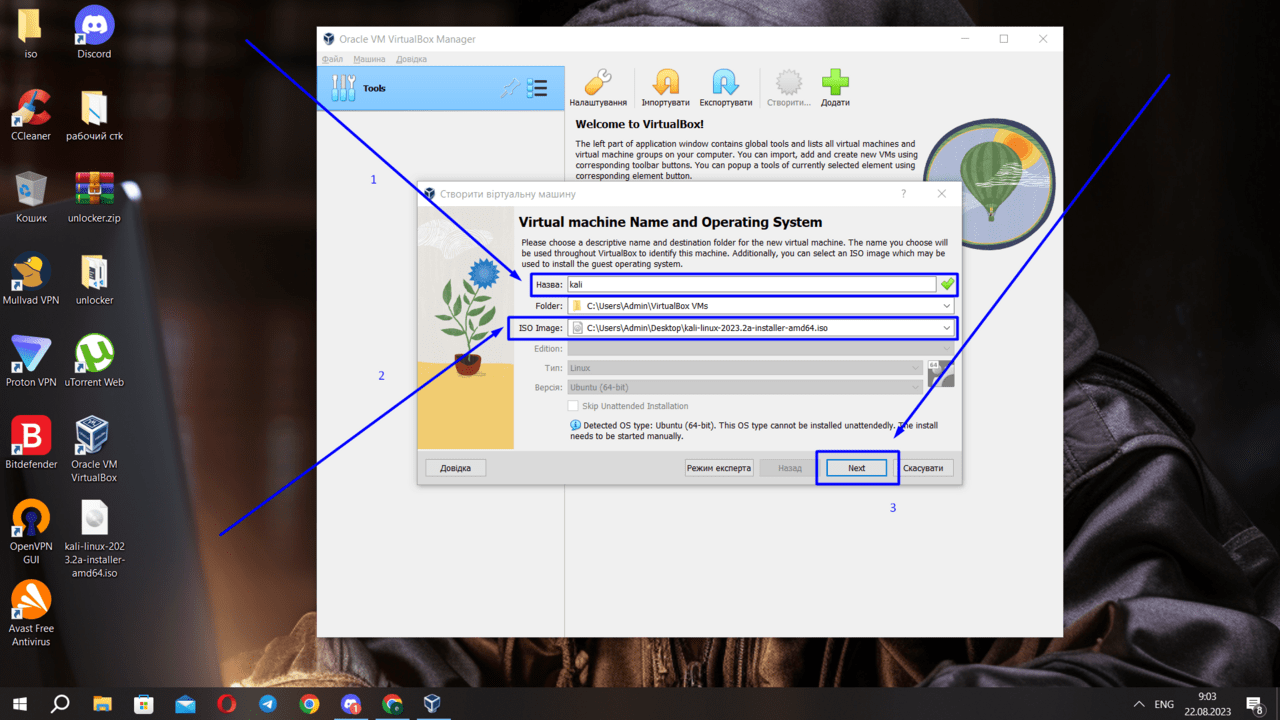
We name our virtual machine, specify the path of our ISO image and move on
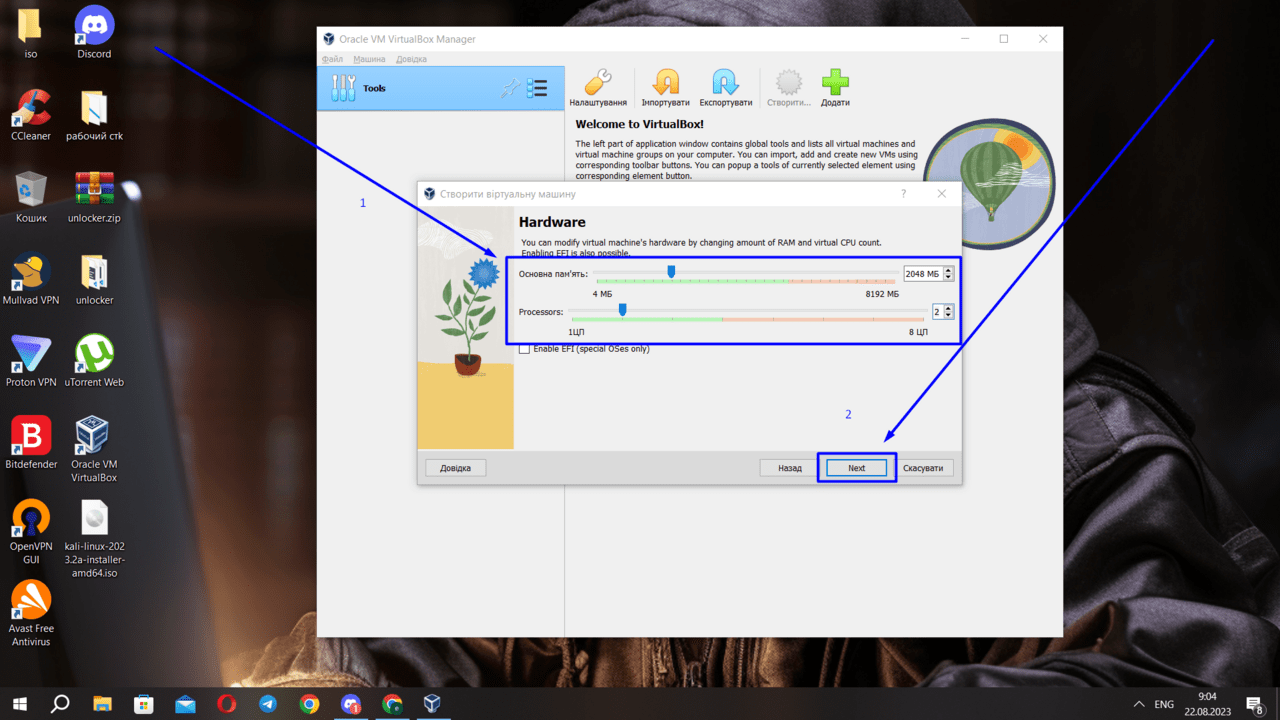
You can modify the hardware by changing the amount of RAM and the virtual number of CPUs, then click “Next”
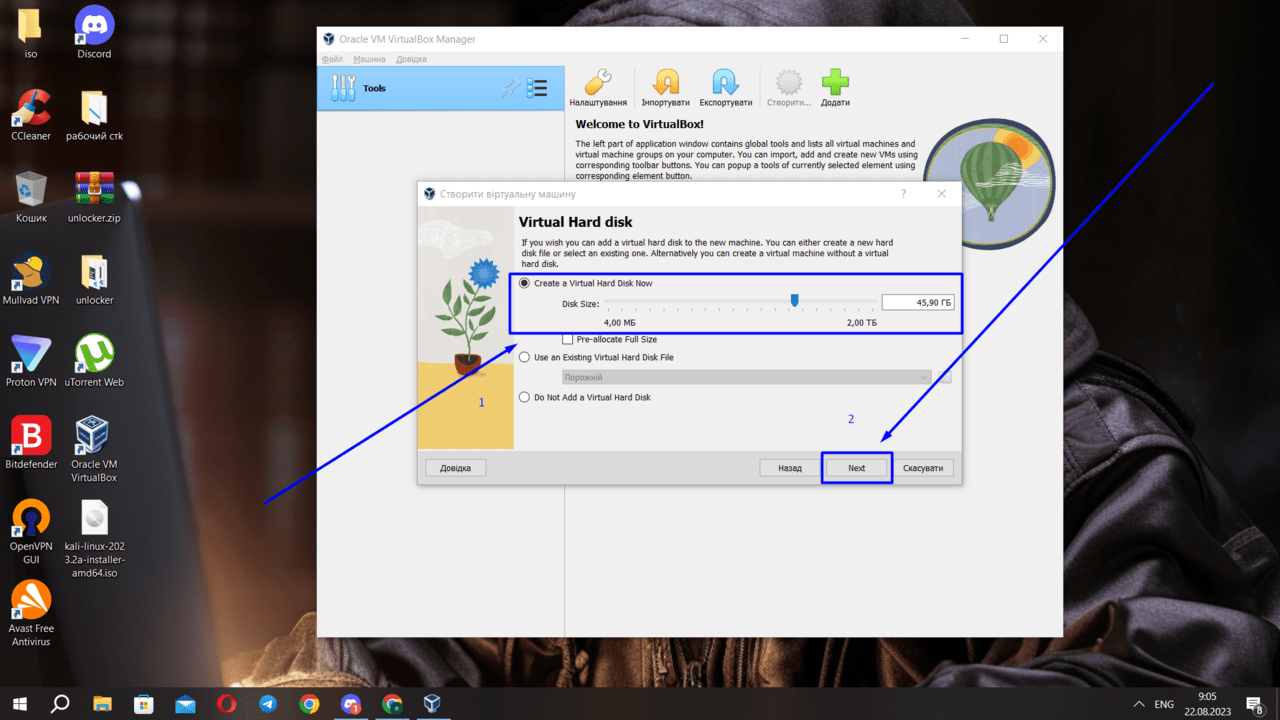
Choose the size of the Virtual Hard disk (at least 45GB) and click “Next”
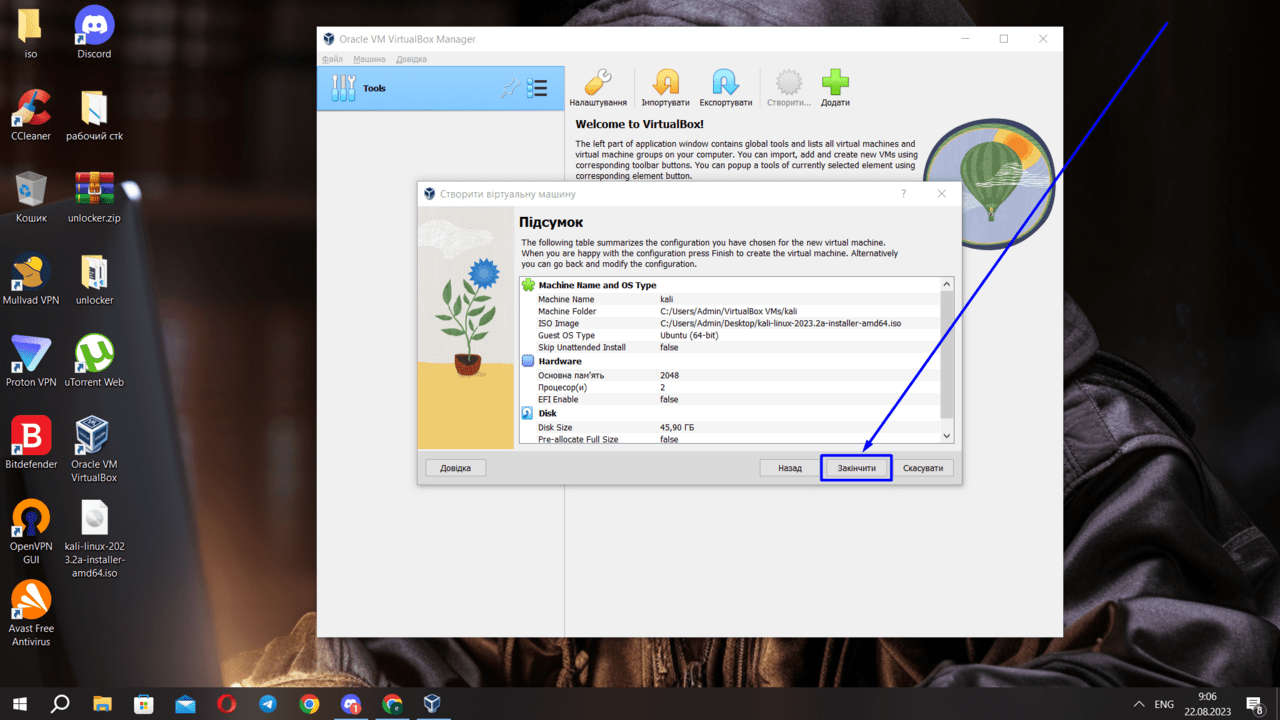
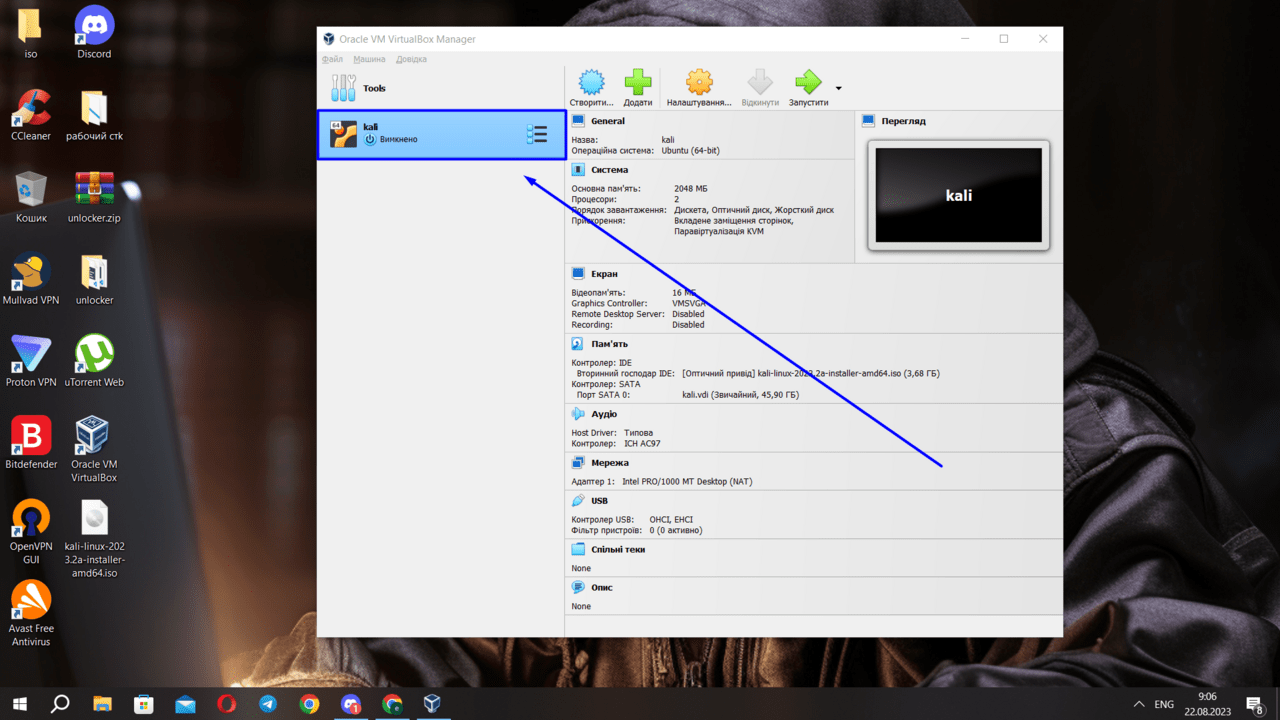
Click “Finish”
Click on the selected fragment, as shown in the screenshot
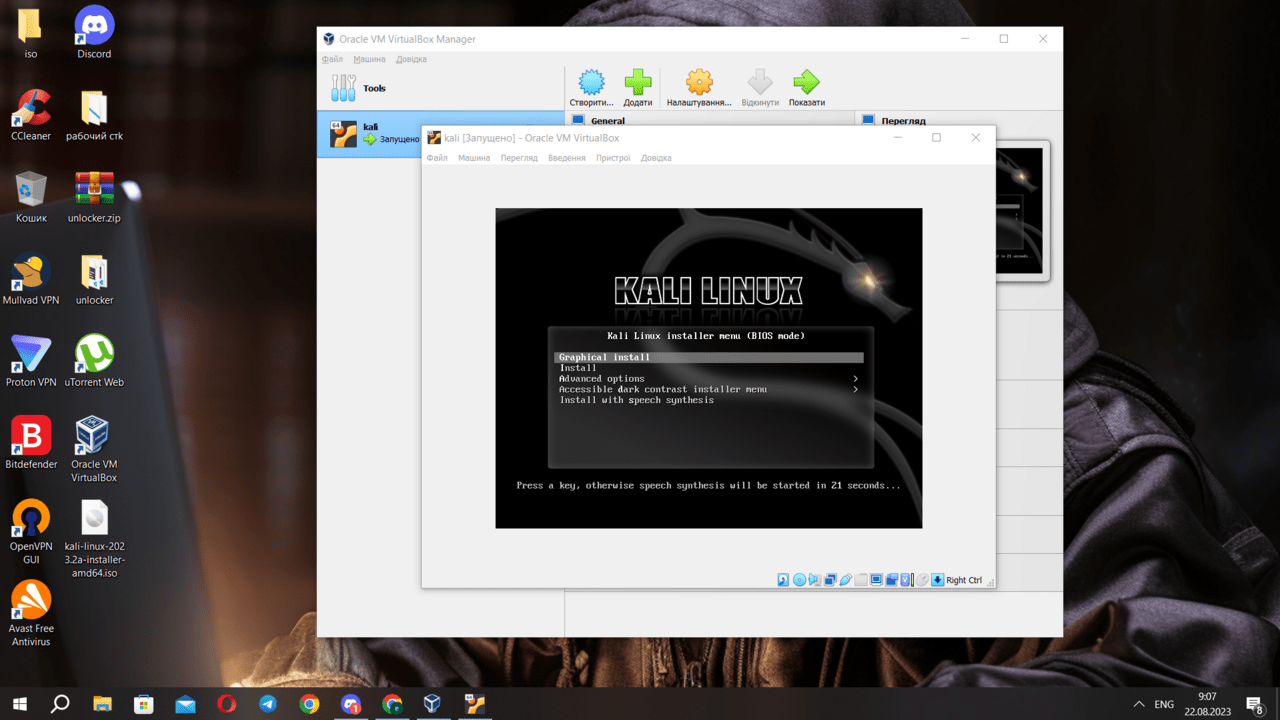
Click “Graphical install”
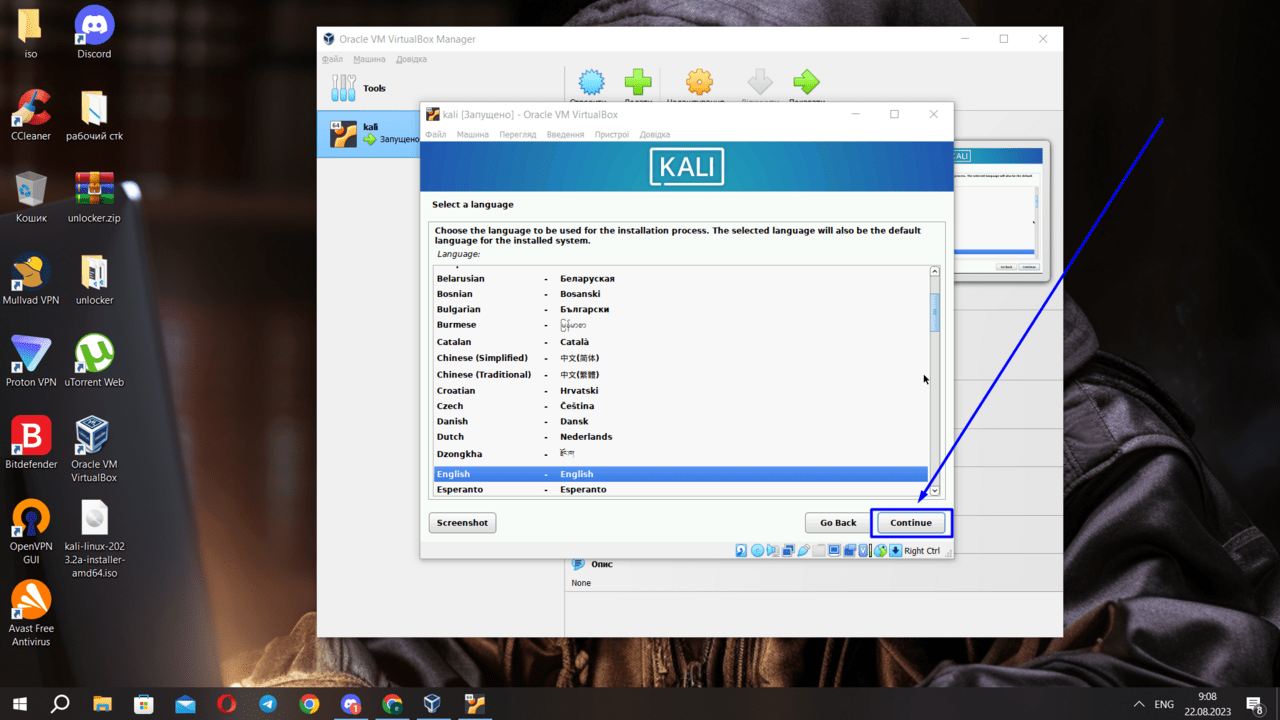
Select the language and click “Continue”
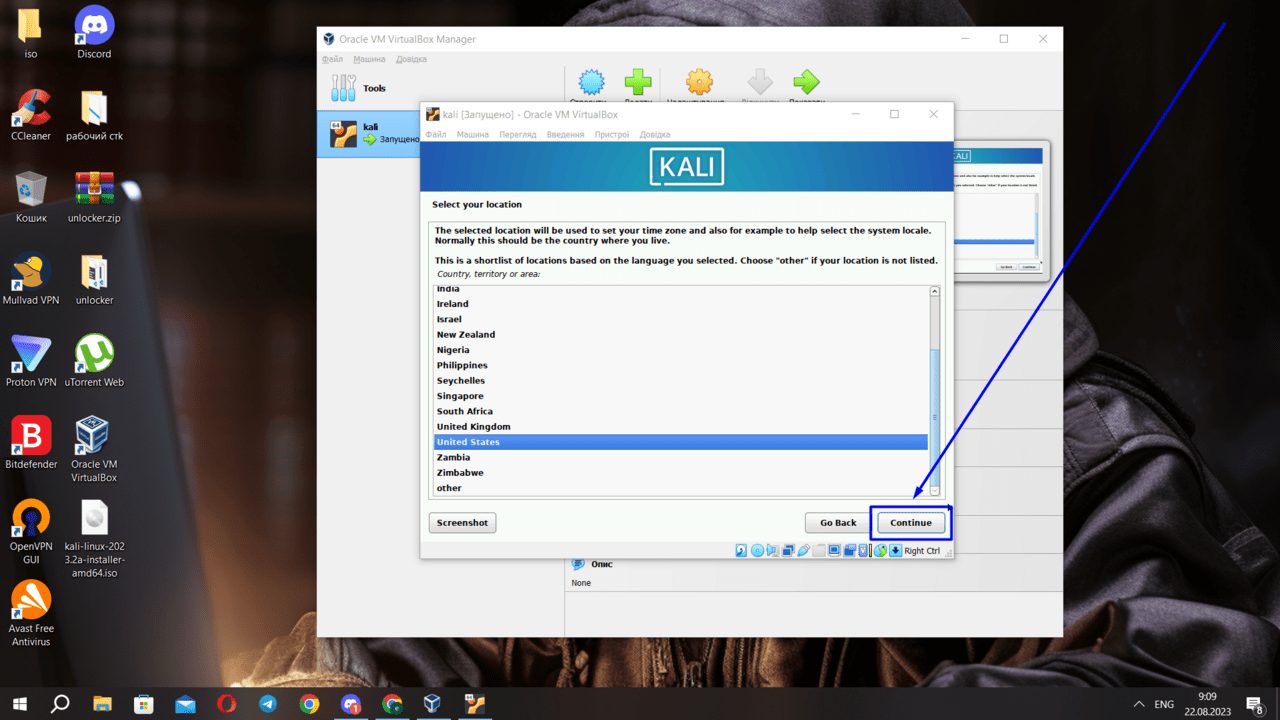
Select the country and click “Continue”
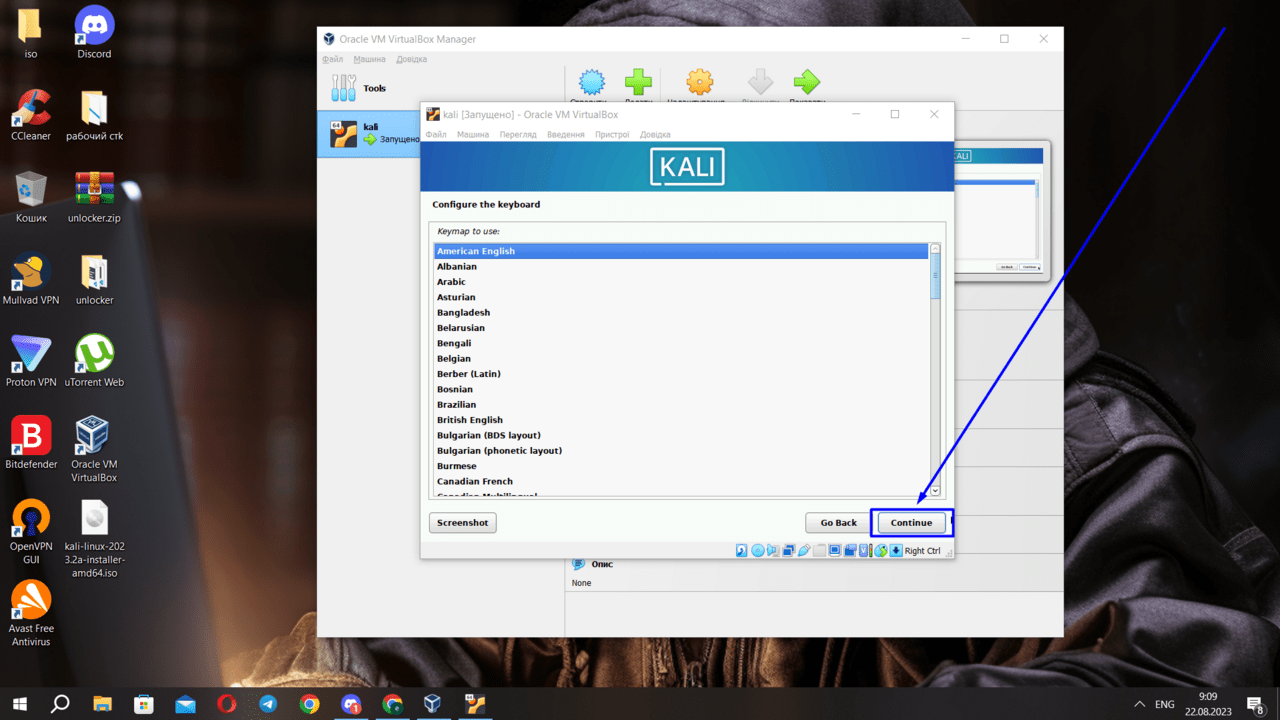
Choose the language for the keyboard and press as in the screenshot
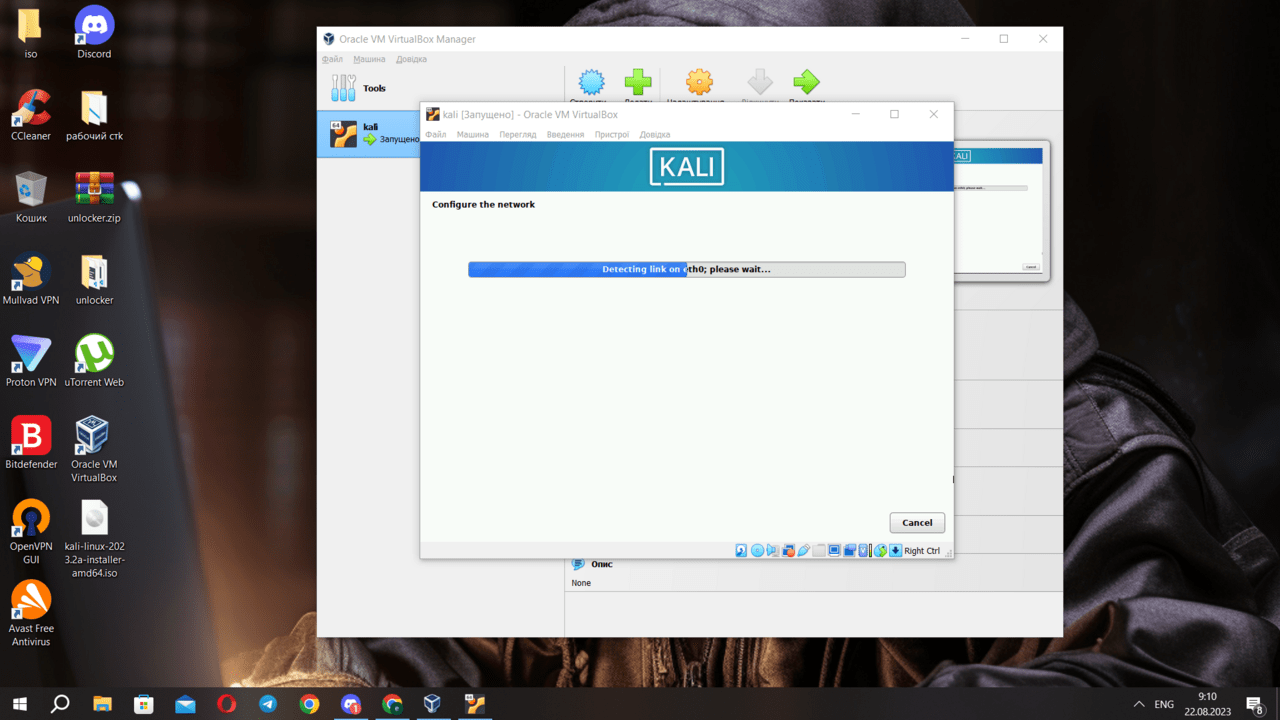
Waiting for download
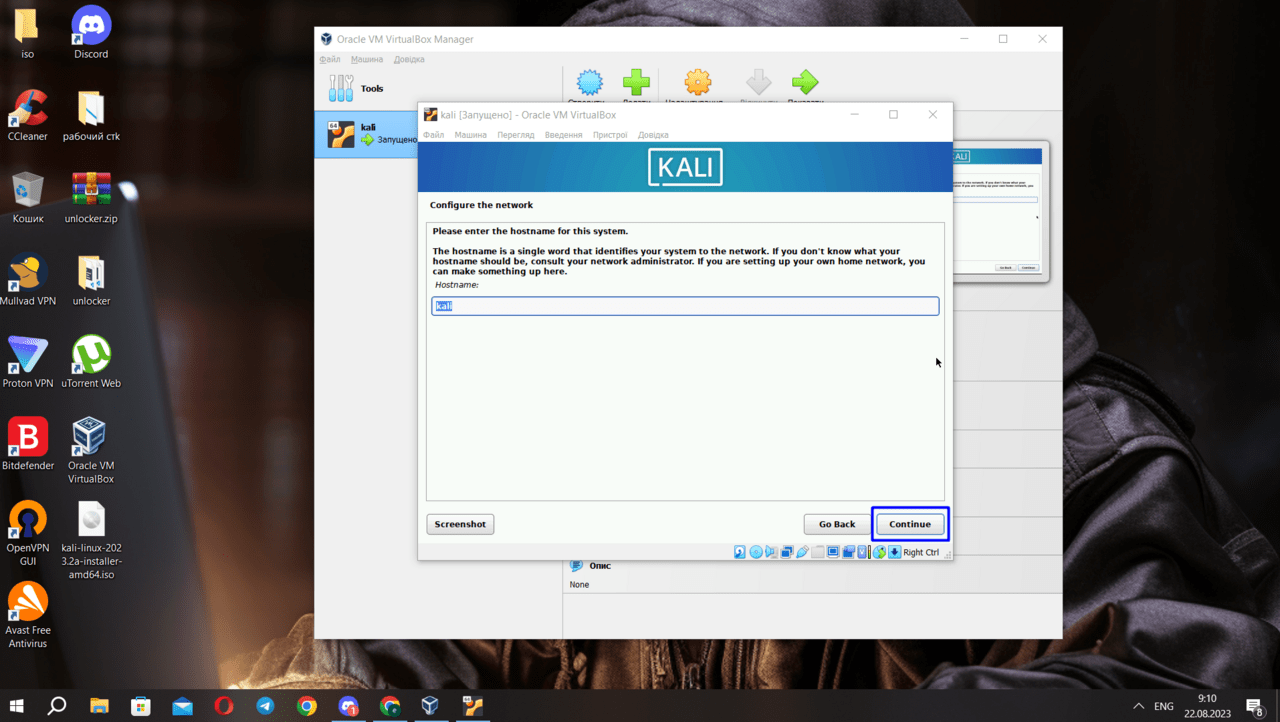
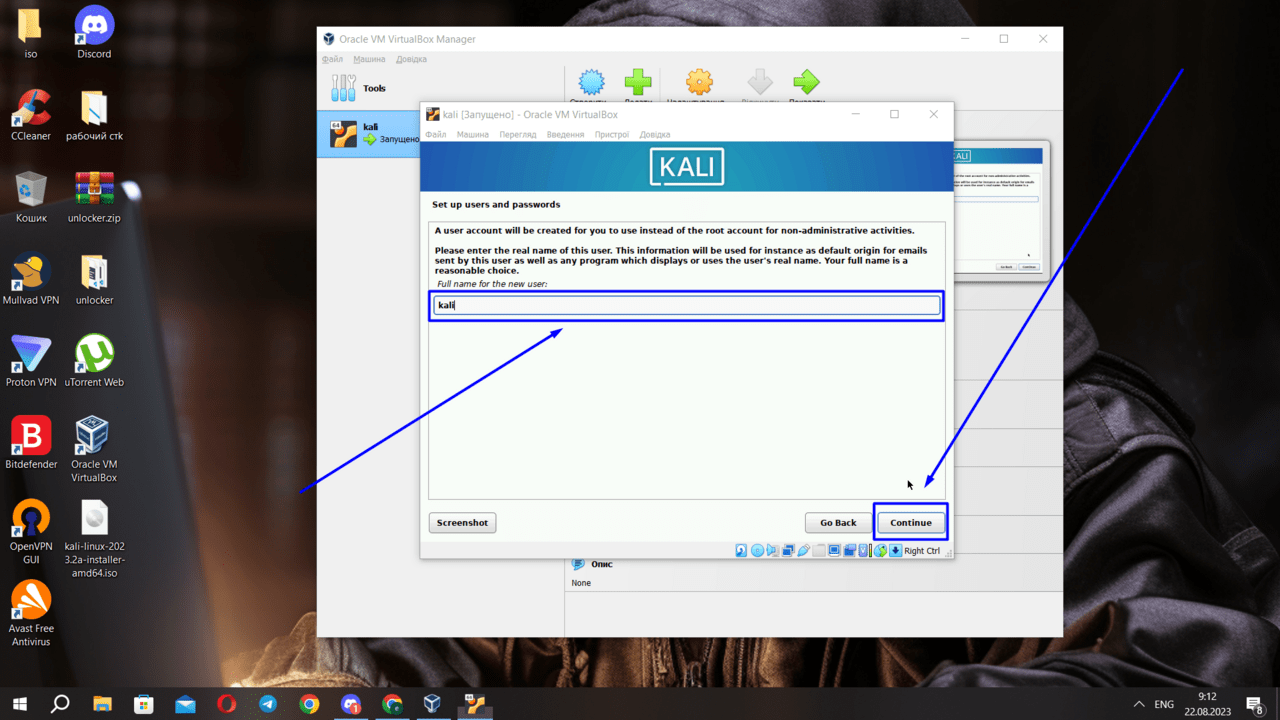
We give a name and move on

Just click “continue” and skip this step
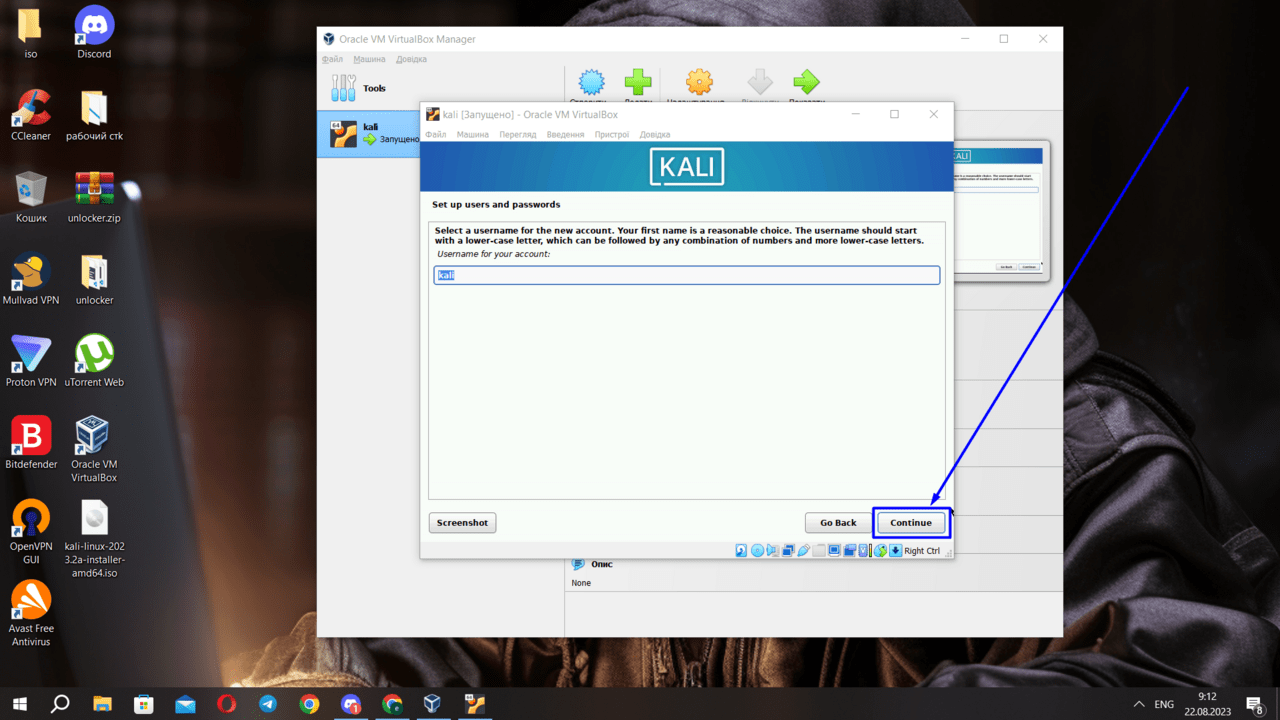
Give a name and click “continue”
Click “Continue”

Select your time zone
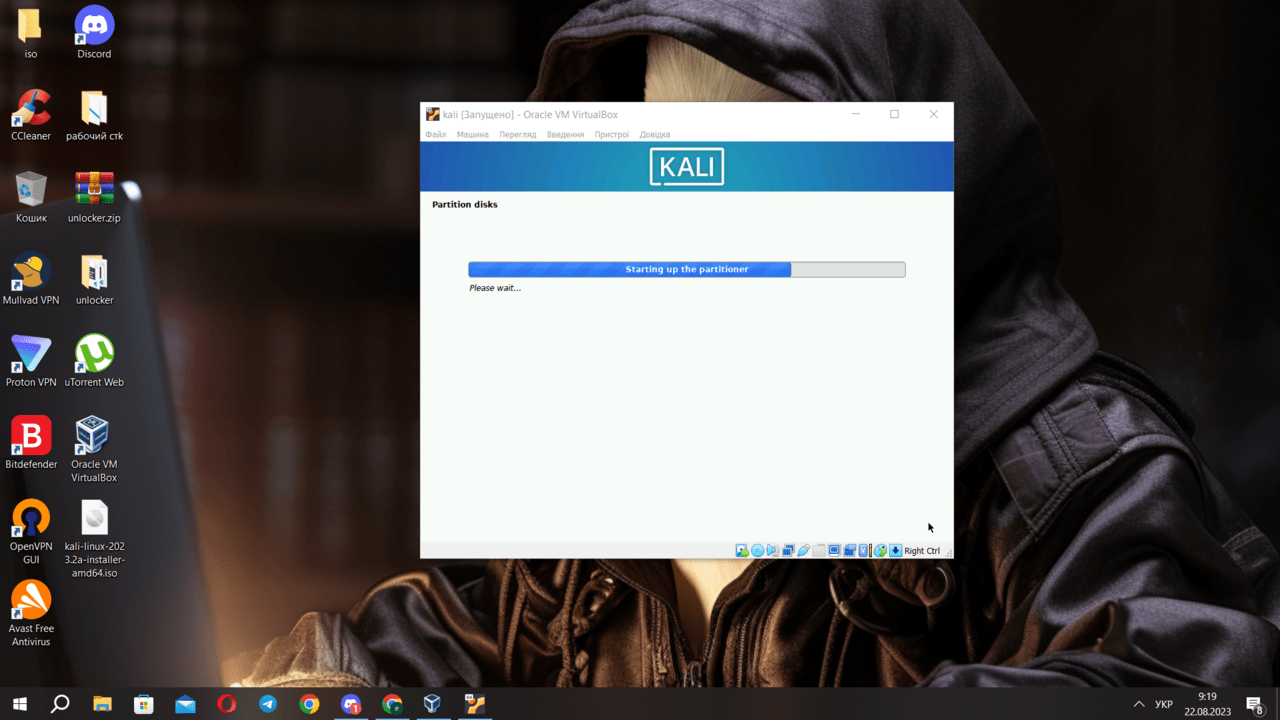
Waiting for another download

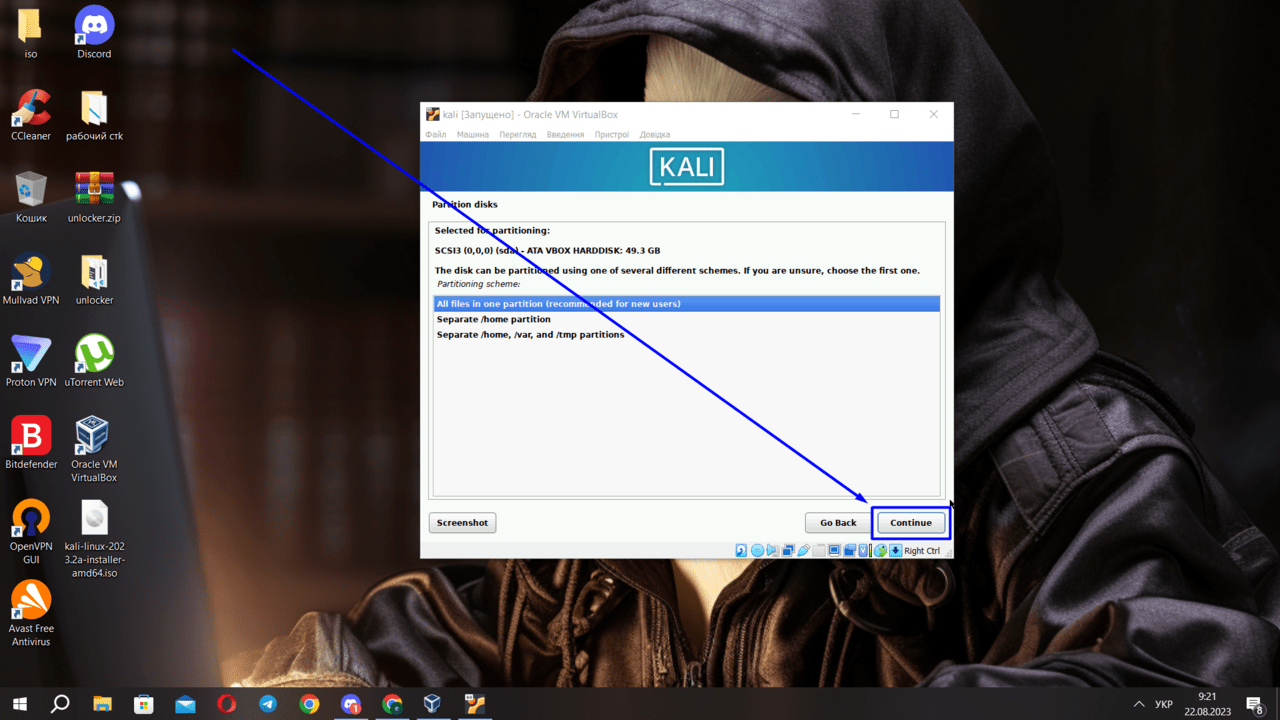
We choose to use the entire disk
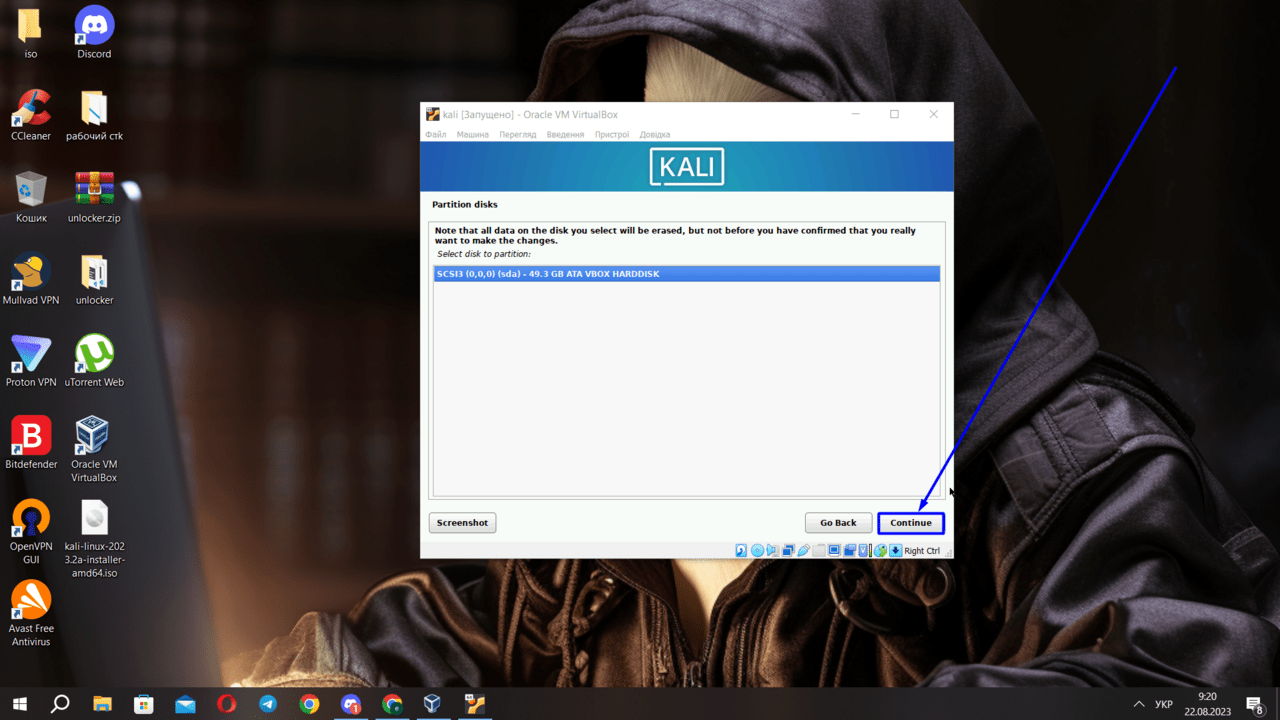
We select our disk
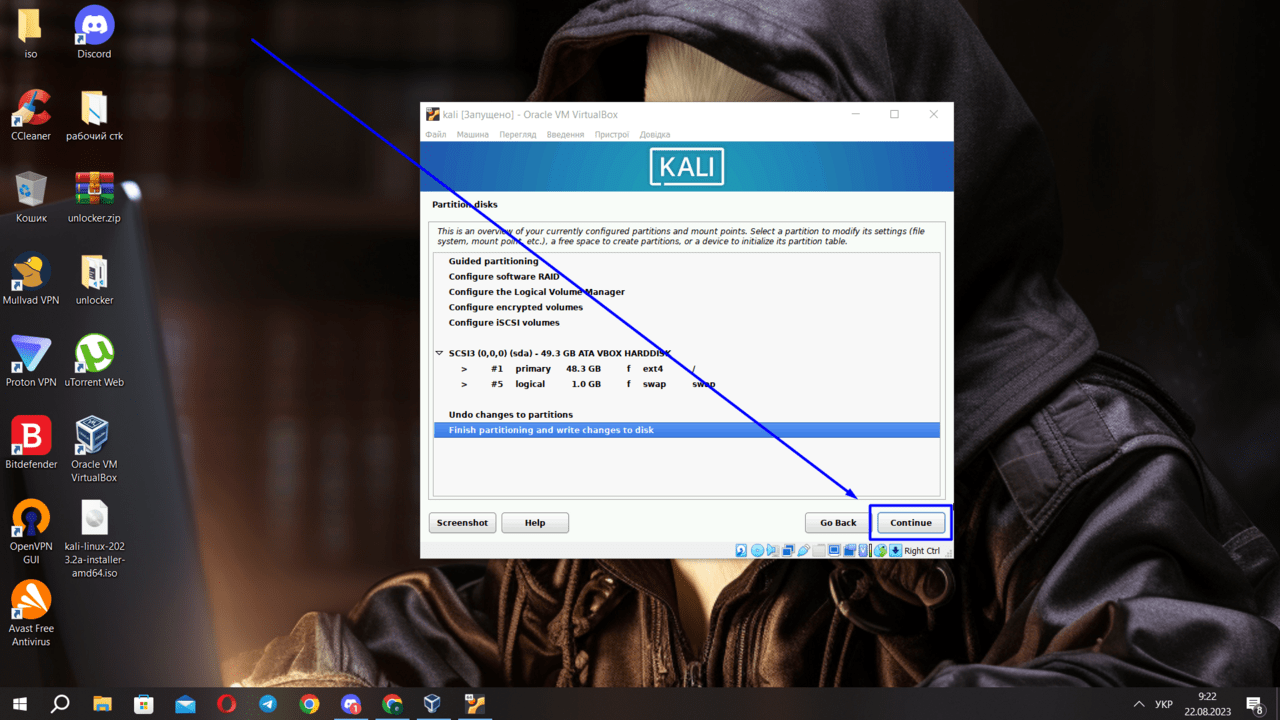
We choose their storage location
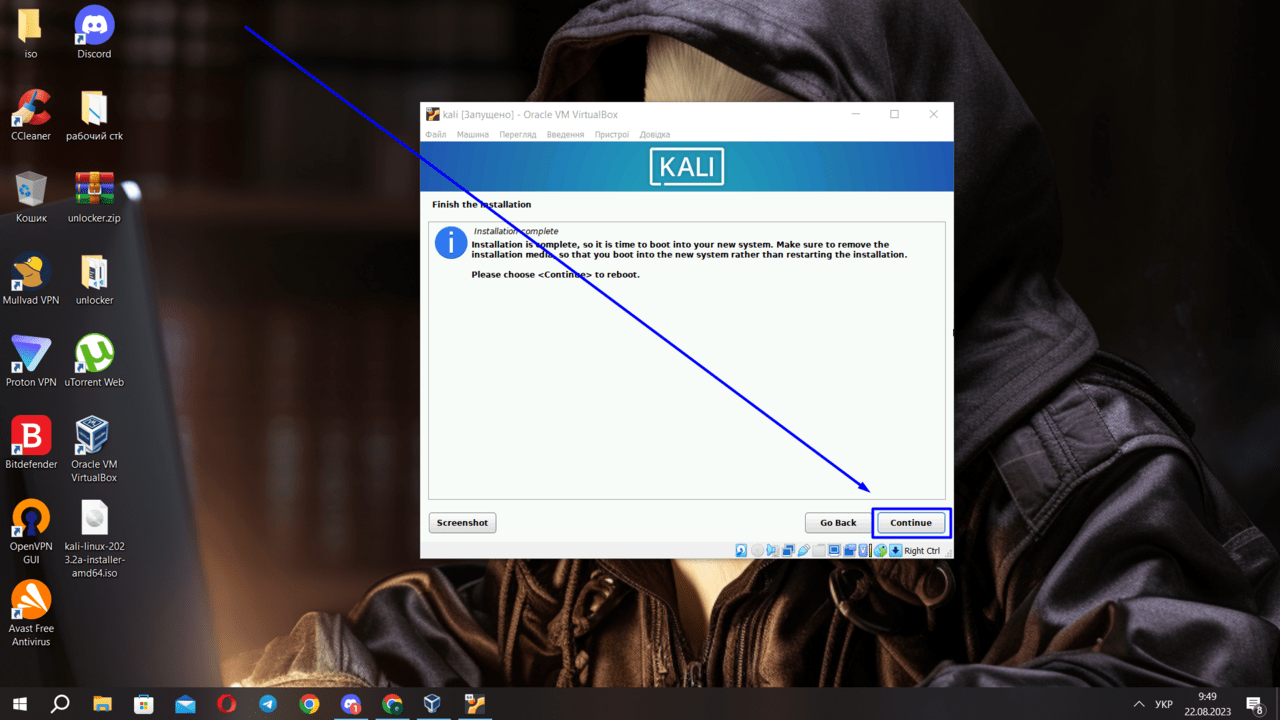
Finishing our installation
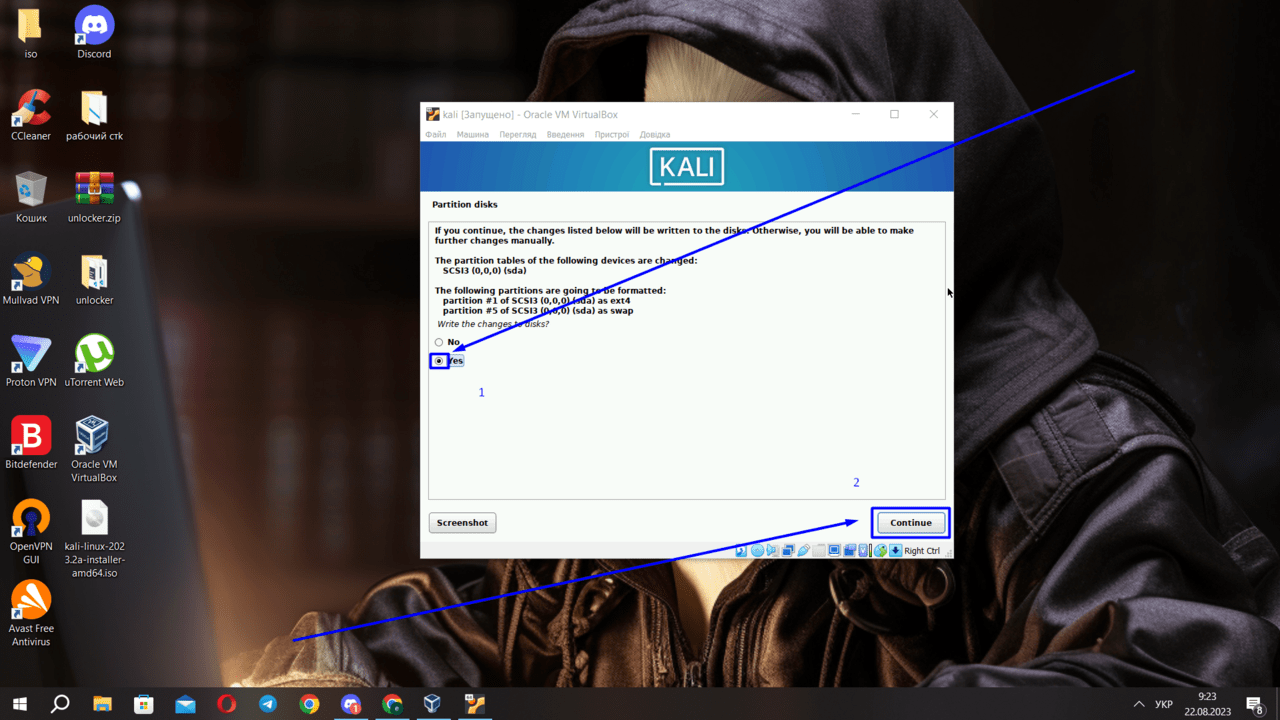
Click “Yes” and click “Continue”

We continue loading our system
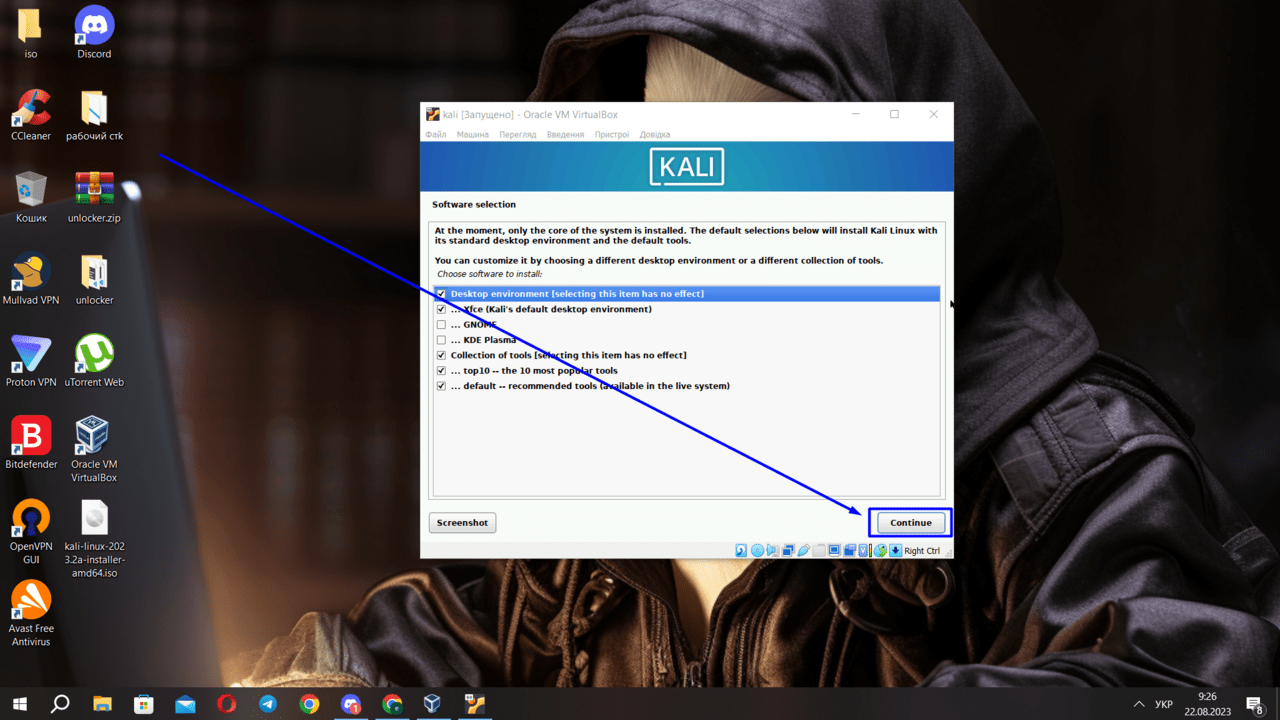
We select all the ticks that are shown in the screenshot. This is the most optimal option for choosing all tools and optimal operation of the OS

Click “Continue”
Your virtual machine will reboot
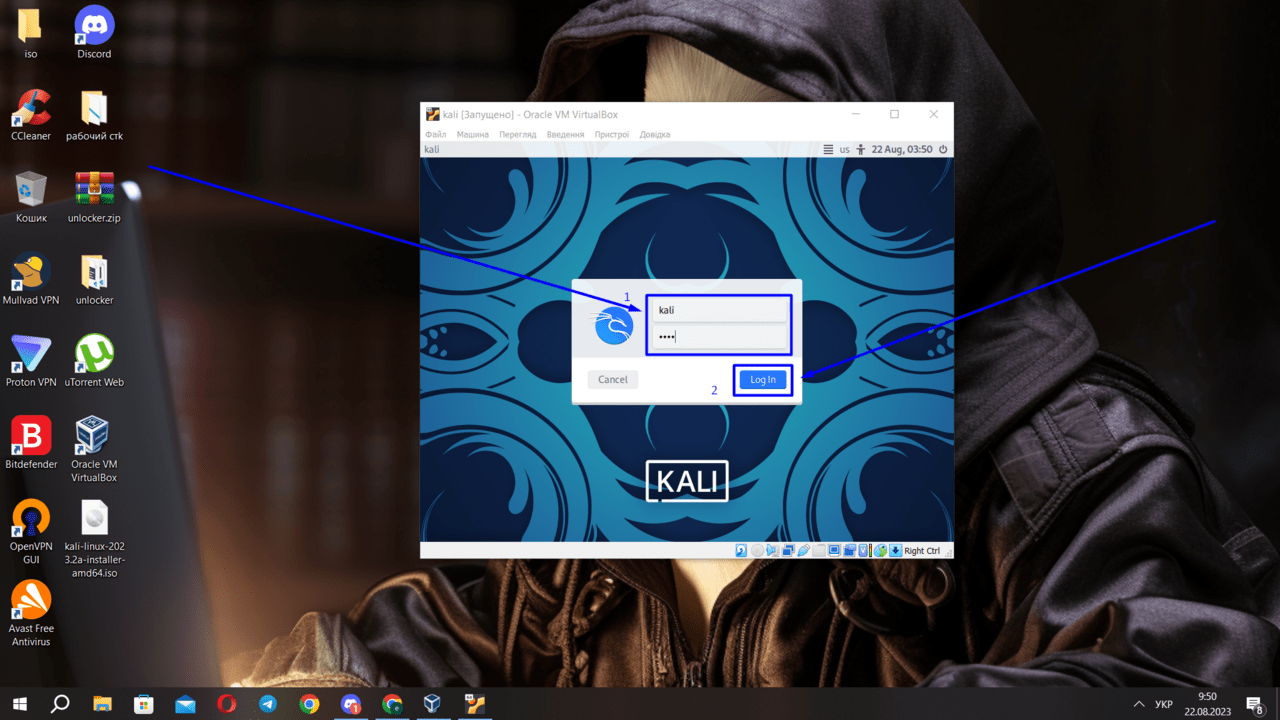
Enter your login and password and click “Login”
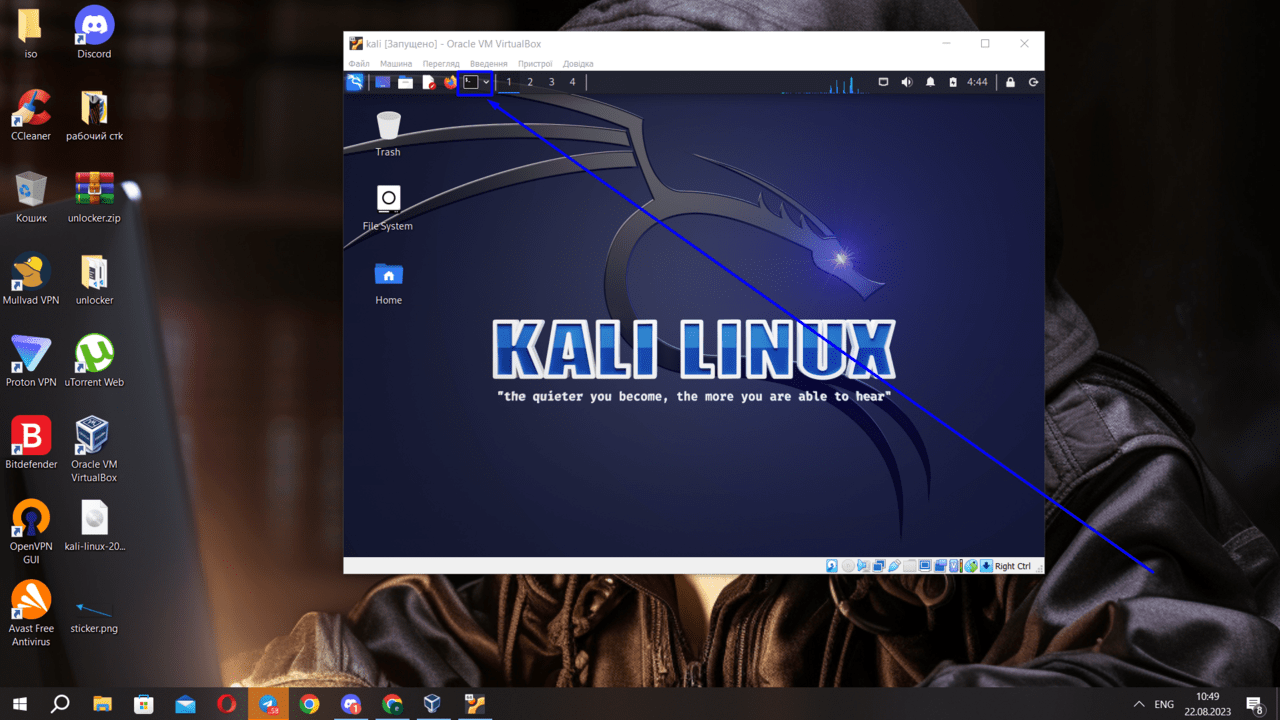
Congratulations. everything worked out for us. now we can use VirtualBox on Kali Linux