
05.05.2023
6 min
4748

When learning to hack Wi-Fi, choosing a compatible Wi-Fi network adapter is the first step to learning how to crack Wi-Fi passwords. First, let’s figure out what this network adapter is. It is a peripheral device that allows the computer to interact with other network devices. That is, it is a device that is a connecting link between your computer / laptop and the Internet. Many compatible adapters have replaceable antennas and there are several different types of specialized antennas that can be added to a network adapter to increase its range and performance. For example, they use an omnidirectional antenna that emits the same radio signal power in all directions. Or a directional antenna that emits or receives more power in certain directions, providing increased performance and less interference from unwanted sources.

Directional antennas provide better performance than omnidirectional antennas in general when a higher concentration of radiation in a specific direction is required. There is also a panel antenna that gives users the ability to maximize the signal in places that are far from base stations. A universal panel antenna will help you stabilize signal reception, as well as increase the speed of the Internet connection several times. By using a high-gain omnidirectional antenna, a panel antenna, and a parabolic dish that is highly directional, we can test the effect on Wi-Fi signal strength for each Wi-Fi antenna category. In this article, we will look at several different types of antennas to get an idea of their performance.
Wireless network adapters often come with a small omnidirectional antenna that can be replaced with an additional antenna. These omnidirectional antennas can pick up the signal roughly equally from all directions and work best in an office or home where it is impossible to know which direction the signal will come from. In circumstances where the signal is still not strong enough, we may sacrifice the ability to receive a sufficiently strong signal from any direction for a much larger gain in directional signal strength.
Some applications of directional antennas include extreme range and the ability to detect signals by signal strength. While omnidirectional antennas make it extremely difficult to find a signal, directional antennas will register a spike in signal strength every time they are pointed at a Wi-Fi transmission source.
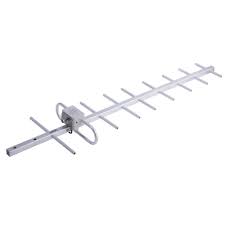
You’ll also find different types of directional antennas that connect long-range Wi-Fi lines that can span over a mile with a clear line of sight. They are popular on boats, remote sensing stations and construction sites with remotely connected security cameras.
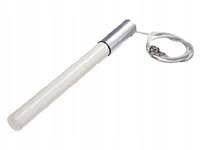
The standard antenna you’d expect to see on a router or network adapter is a “Rubber Ducky” style antenna that looks like a simple stick. They are simple, cheap and very well suited to the needs of most consumers. Such an antenna will have a flat circular pattern. The pattern is suitable for connecting to a wireless access point on the same floor, but not suitable for connecting to any network out of range or on a different level.
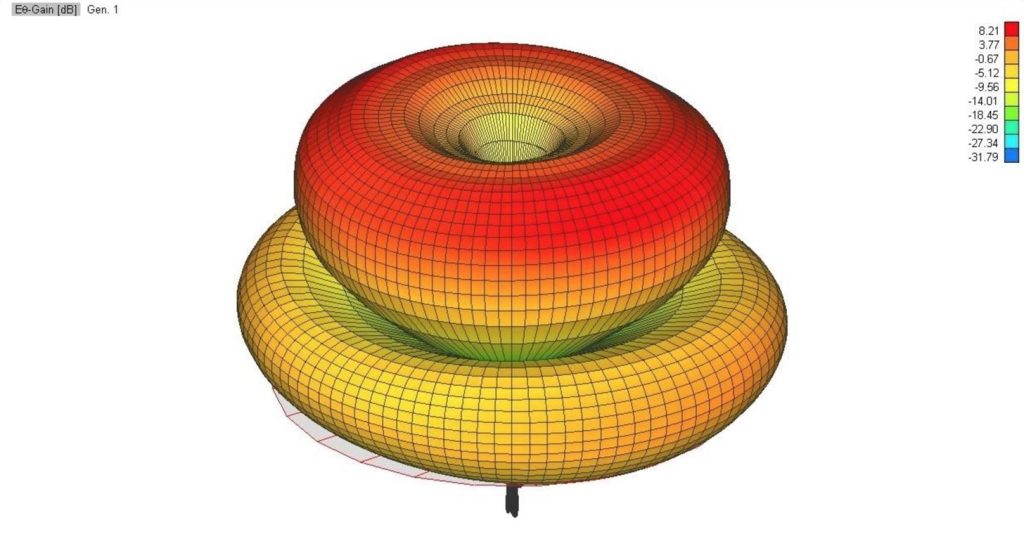
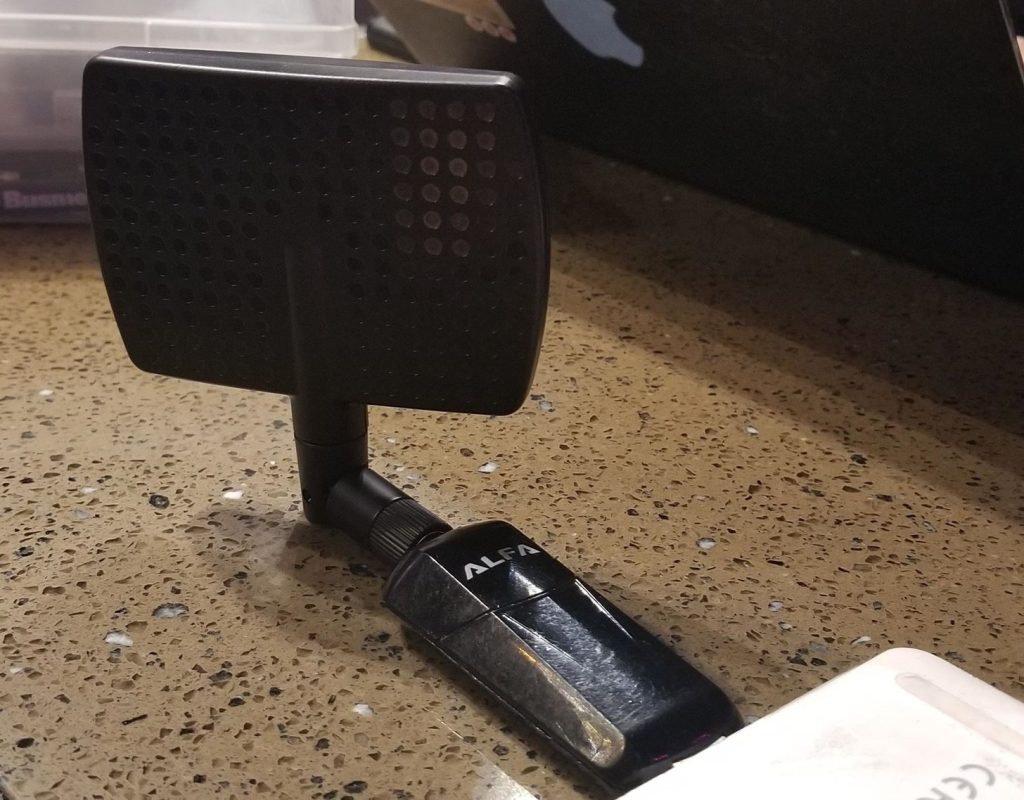
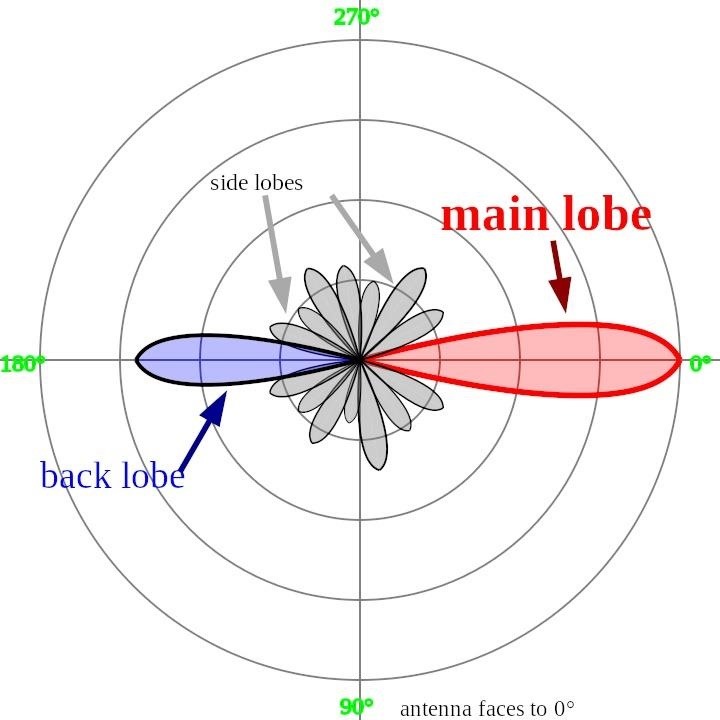
Directional panel antennas have a pattern that looks more like a flashlight than a donut. This pattern is much weaker than an omnidirectional antenna in most directions, but very strong both directly in front of and behind the antenna. The main lobe of this pattern, aimed at a Wi-Fi network source, can project an extraordinary range where a conventional “Duck” antenna will never reach. However, if the antenna is moved even by a small amount, the signal strength can drop quickly. This makes a panel antenna a great choice for a fixed location, but a poor choice for an environment where you don’t know the direction of the Wi-Fi signal.
If the pattern of a panel antenna is similar to a flashlight, then the pattern of a parabolic dish is more like a laser beam. These antennas can have extreme range and are designed for remote fixed locations that can span many miles with a clear line of sight. Although bulky and far from thin, parabolic antennas have the longest range of almost any type of Wi-Fi antenna. Due to their high gain and directivity, they can sniff out information compared to programs like Kismet at great distances if positioned correctly.
Similar to panel antennas, bumping or changing the angle of the antenna can cause rapid signal degradation. As we later learned, even picking up the Wi-Fi device we were tracking could cause a measurable signal spike.
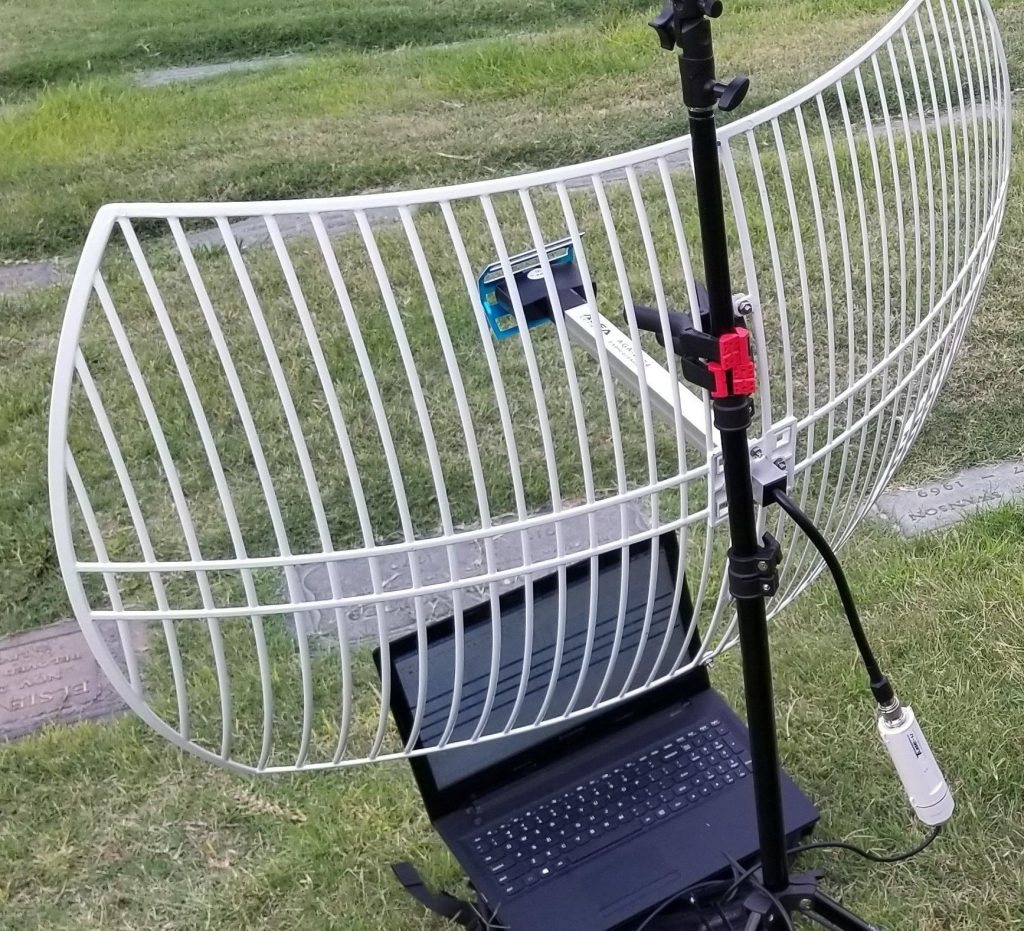

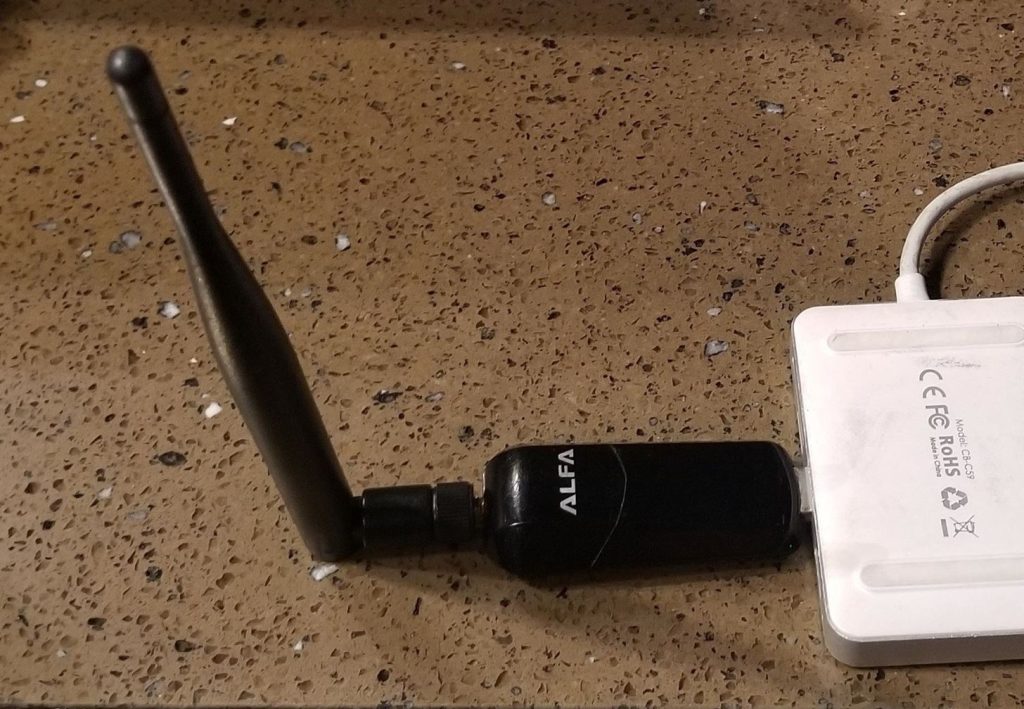
To follow this guide, you’ll need a Kali-compatible Wi-Fi network adapter, such as the Alfa AWUS036NEH, which has a removable Wi-Fi antenna. As for the omnidirectional antenna, check out high gain omnidirectional antennas like the Alfa ARS-N19 9 dBi Wireless Antenna. A variety of adapters are available for indoor and outdoor panels, but I used the Alfa RP-SMA 7 dBi panel antenna. Parabolic nets are more expensive, but worth it if you’re looking for the best range. If portability and thinness aren’t important, the SimpleWiFi G2424 Parabolic Mesh Antenna has the best range of any option we’ve tried.
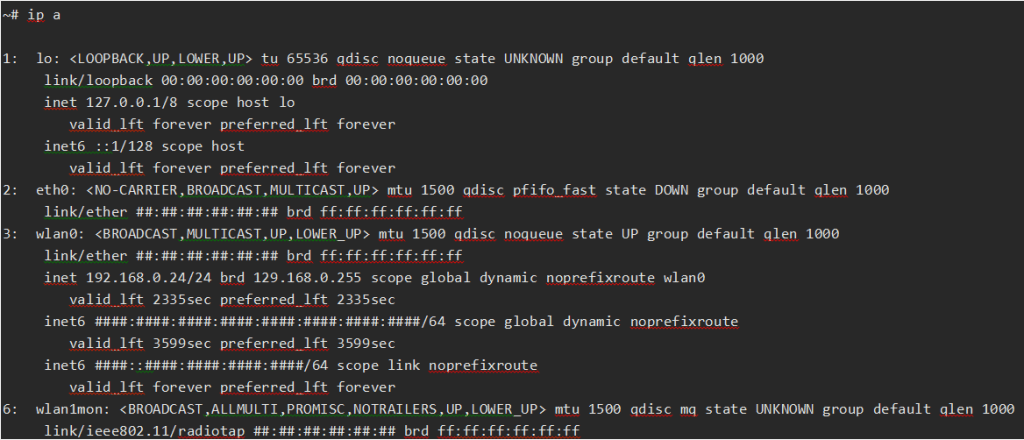
You will need to connect a Wi-Fi network adapter compatible with Kali. Once it’s connected, you can run ip a to find it. It should be named something like wlan1 if your internal card is wlan0. If your internal card has a different name, then name the network adapter with a similar name.
Next, in a terminal window, run the following ifconfig command to activate the network adapter and the airmon-ng command to put it in monitoring mode. If your card has a name other than wlan1, be sure to change the name to match yours. Once your card is in monitoring mode, you can run ifconfig to confirm that the card now has a name like wlan1mon.

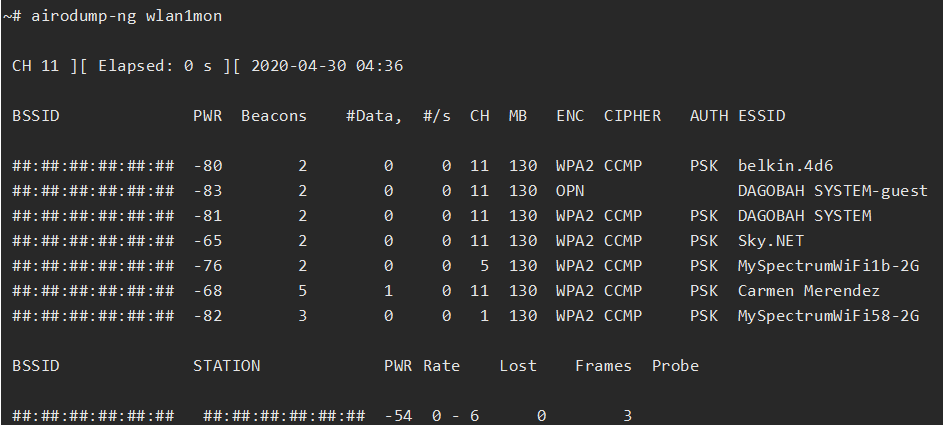
Тепер, коли наша карта перебуває в режимі моніторингу, ми виберемо мережу для відстеження як контрольну точку. Ми використаємо потужність сигналу цієї мережі, щоб перевірити наші антени та побачити, яку силу сигналу дає нам кожен тип антени. По-перше, давайте витягнемо список мереж Wi-Fi, на які ми можемо орієнтуватися. Ми можемо зробити це, запустивши airodump-ng wlan1mon і спостерігаючи, як адаптер сканує всі канали Wi-Fi. Коли список трохи заповниться, натисніть Control-C, щоб скасувати сканування.
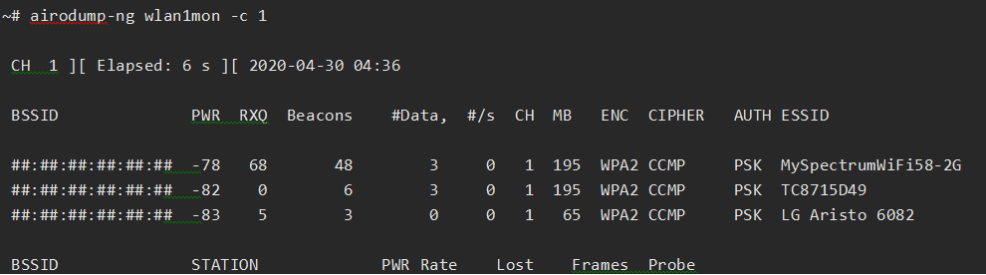
Now identify the channel on which the network with a strong signal is operating. We will rerun the airodump-ng command with the -c flag added to scan only the channel our target network is broadcasting. If we want to scan channel 1, our command will look like below.
Leave this running in a terminal window. From here we’ll open Wireshark to start plotting the data.
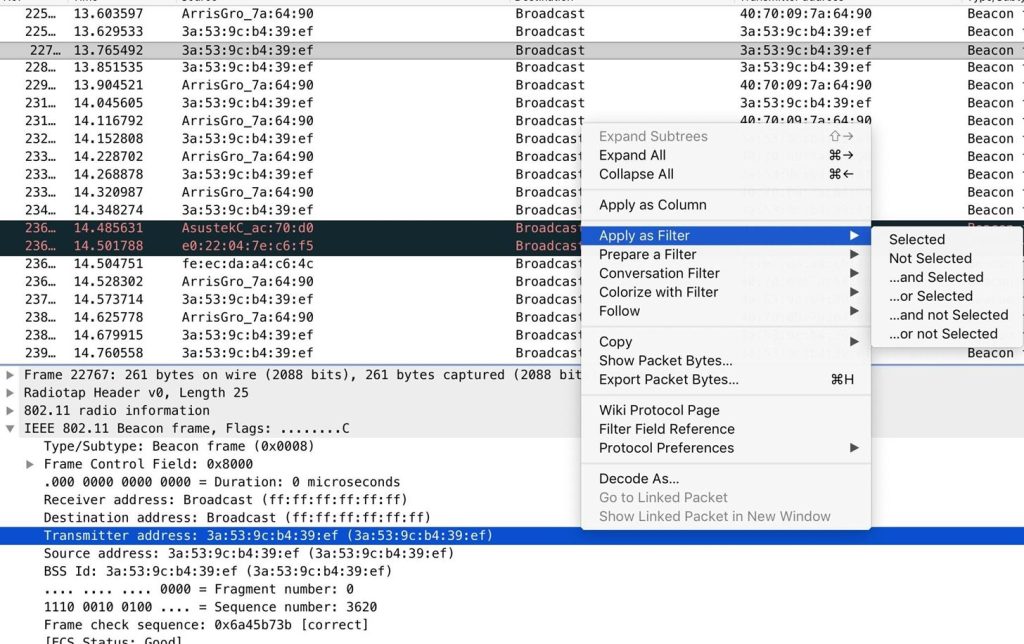
With Wireshark open, select the network adapter as the source and click the shark fin icon to start capturing. After the capture starts, you will see many packets from different networks in this region. Find the broadcast packet from the network you want to track and click on it.
Under IEEE 802.11 Beacon Frame information, find the transmitter address and right-click it. From the menu, click Apply as filter, then select Selected to create a display filter for transmissions from this Wi-Fi device only.
You should now only see packets from the device you are monitoring and you should have a display filter as shown in Wireshark’s filter panel.

This tells Wireshark to only display packets with a transmitter address that matches the address of the device you want to monitor. You can track any other device that is constantly streaming the same way, but you may have to target other data packets since smartphones don’t output beacon frames.
Now connect your omnidirectional antenna. After initially not receiving a signal, the signal increases dramatically when we screw on our omnidirectional antenna and remains relatively stable no matter what angle we hold the adapter. This constant signal is good enough for reception and resistant to changes as I move the adapter around the room. The only position it doesn’t like is when its tip is pointed straight at the Wi-Fi source.
Next, screw in your directional panel antenna. After the signal drops due to the removal of the omnidirectional antenna, we begin to see the pattern. A directional antenna can receive consistently higher signal strength when pointed directly at a broadcast source, but receives worse signal strength when pointed sideways.
We can use this directivity to achieve a higher signal strength when pointing at any fixed Wi-Fi target, but moving targets will cause the signal to drop when they go beyond the main lobe of the panel.
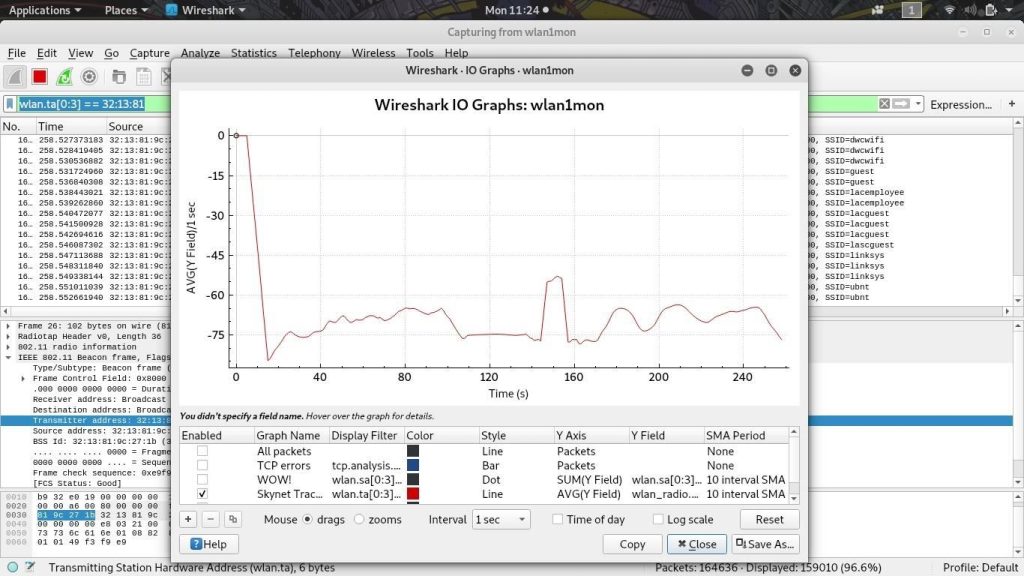
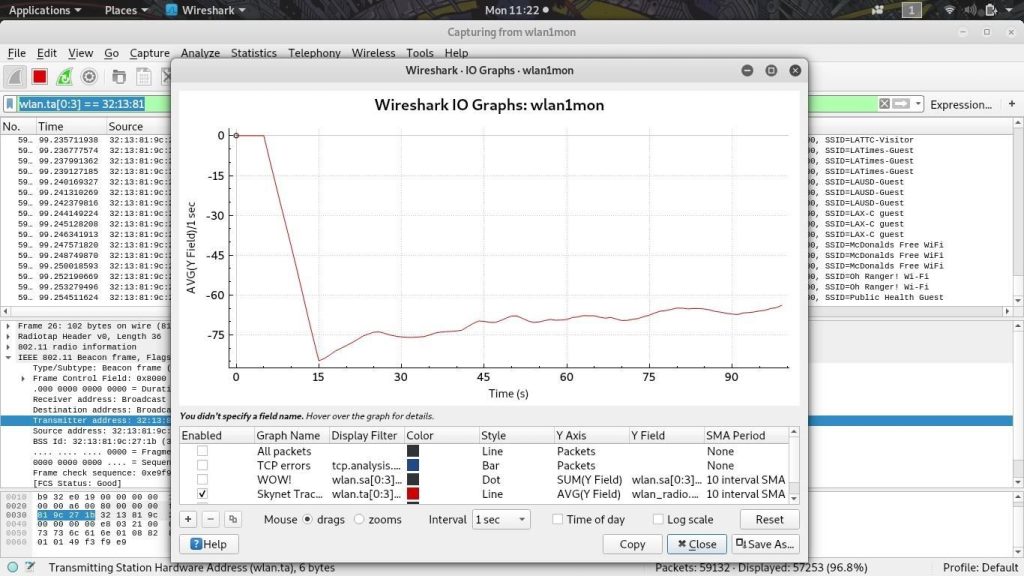
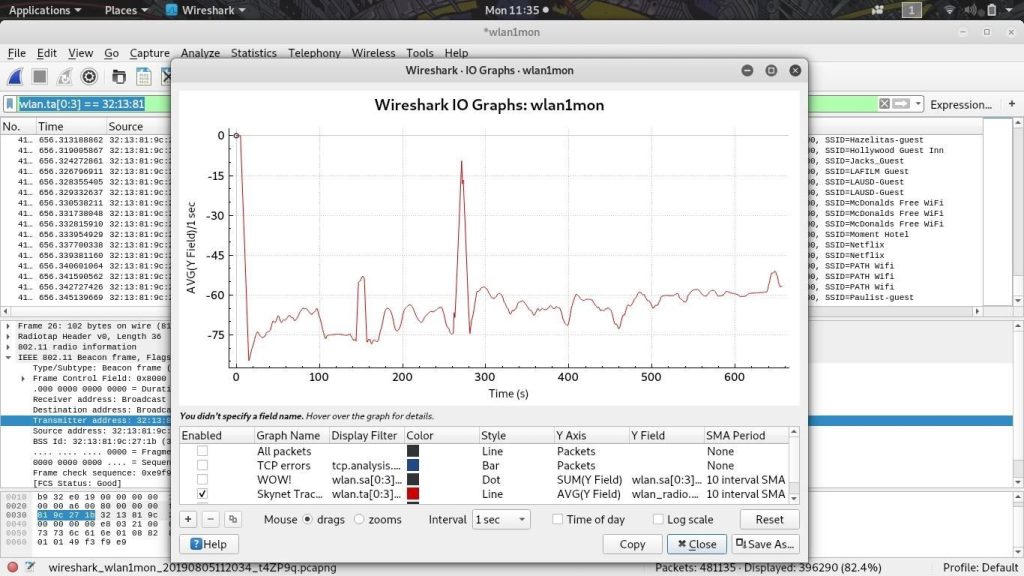
Finally we attach the parabolic grid and, after a huge spike after disconnecting the panel antenna, we start to get the highest signal strength we’ve been able to achieve. By moving the antenna back and forth, I can not only pinpoint where the source is, but also get spikes in signal strength that far exceed anything I could get with an omnidirectional or panel antenna.
In the graphic, the omnidirectional and panel antennas are to the left of the signal wave in the middle, and the parabolic grid is to the right. Once we set up the parabolic dish, we got a much stronger and more sensitive signal.
Towards the end of the shoot, I picked up a Wi-Fi device we were monitoring in another room and noticed a spike in signal strength from the antenna, meaning you can even detect when someone physically moves the device using the highly directional antenna.
Although a directional network adapter can significantly boost a network signal if properly aimed, the advantage is lost or can shift when Wi-Fi signals bounce off walls and other obstacles. In an environment with a lot of interference, you may find that the strongest signal that a directional antenna can receive may be at an angle other than straight to the source. It is also worth noting that a larger omnidirectional antenna does not always mean a stronger signal. If the Wi-Fi source is nearby, a larger antenna can spread the strongest part of the pattern beyond the target location. I hope you enjoyed this tutorial on using specialized antennas to hack wifi! If you have any questions about this tutorial on using directional and omnidirectional antennas, leave a comment below and hit me up on Twitter @KodyKinzie.