
19.11.2025
11 min
598

BUSY Bar is a modern focus device that supports the creation of simple and useful widgets without programming. Through a convenient HTTP-API, the user can add their own interface elements, update information in real time, and integrate BUSY Bar into workflows or a smart home. The device is suitable for both beginners and tech enthusiasts, as setup is easy and customization options are almost limitless.
BUSY Bar – a device for concentration and a modern Pomodoro timer with blocking distracting applications and integration into a smart home. In this post, we will show how to create widgets for BUSY Bar using the HTTP API. This will be possible not only for developers, but also for ordinary users.
Next you will learn how to:
Display images and text on the BUSY Bar screen.
Interact with the device directly from the browser.
Create widgets without programming.
Before we start creating widgets, let’s get acquainted with the HTTP API and how to use it.
HTTP API is a protocol for interacting with BUSY Bar, available through all 3 supported connection types:
USB Ethernet — when connecting BUSY Bar to a PC, it is defined as a network adapter with a virtual network.
Wi-Fi network — fast, wireless connection. BUSY Bar can be placed anywhere within Wi-Fi coverage.
Cloud server — remote control via the Internet with encryption and authorization by key, using an API token issued in your BUSY account.
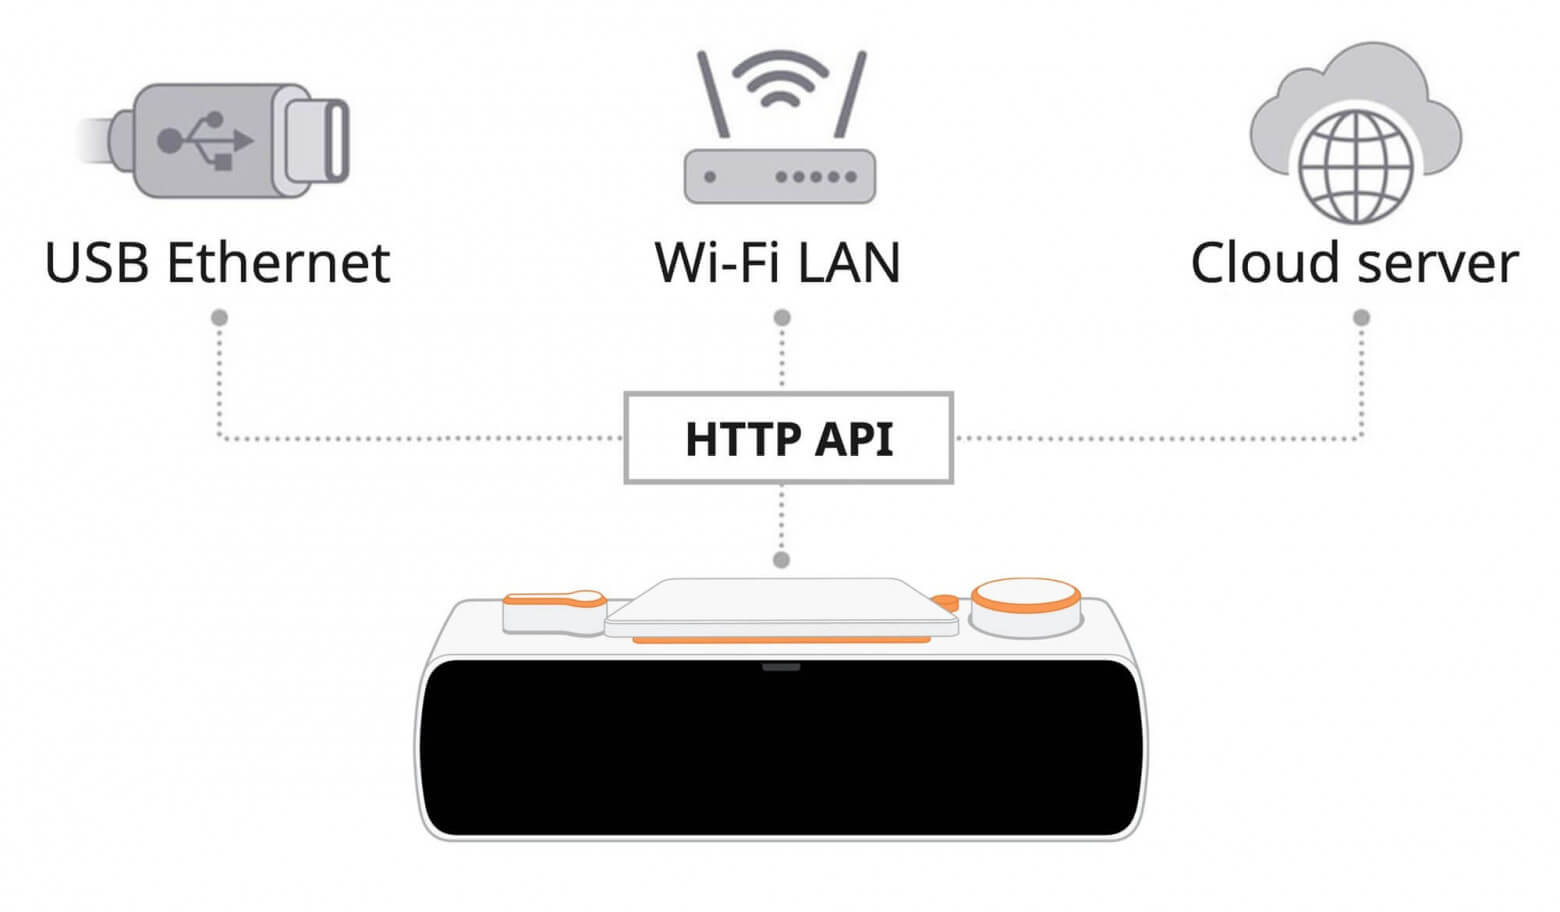
By using the same HTTP API across all three connection types, you can switch between them without rewriting your code.
As the name suggests, the HTTP API is based on the HTTP protocol, which is used to transfer data over the Internet between a browser and a web server. When you enter a website URL, your browser sends an HTTP request and the server returns a web page in response.
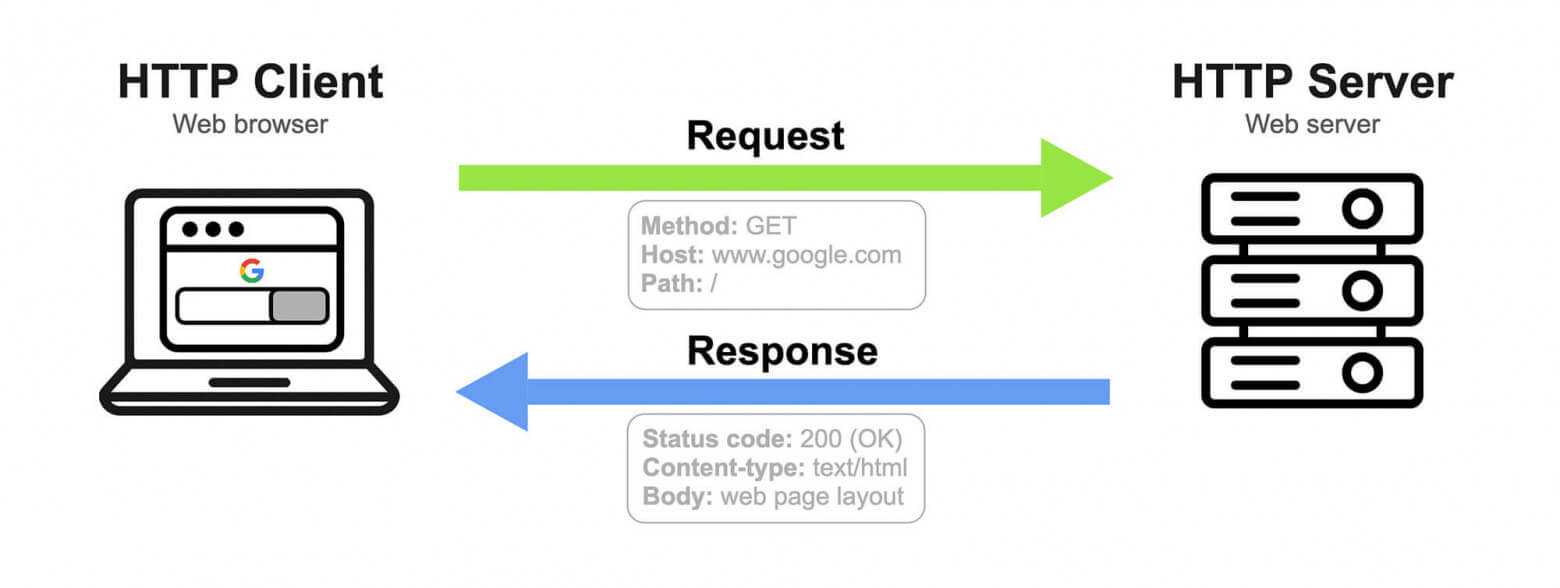
Interaction with BUSY Bar is arranged in a similar way. BUSY Bar acts as an HTTP server and waits for requests, and the software on the PC acts as an HTTP client. This software can be any program that supports sending HTTP requests, for example, a smart home system, an application or a script.
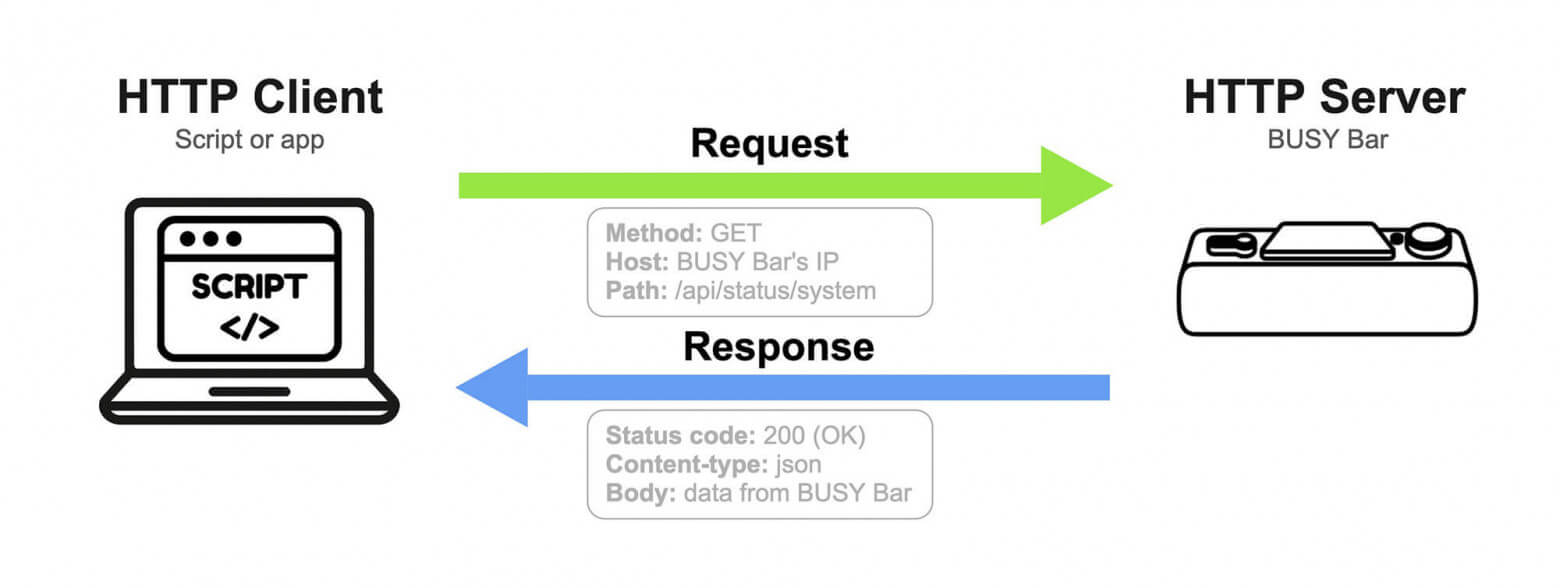
Thanks to the broad support of HTTP in programming languages, BUSY Bar can be accessed with just a few lines of code. And some simple requests, such as requesting general information about BUSY Bar, can be sent directly from the browser – simply by opening http://10.0.4.20/api/status/system.
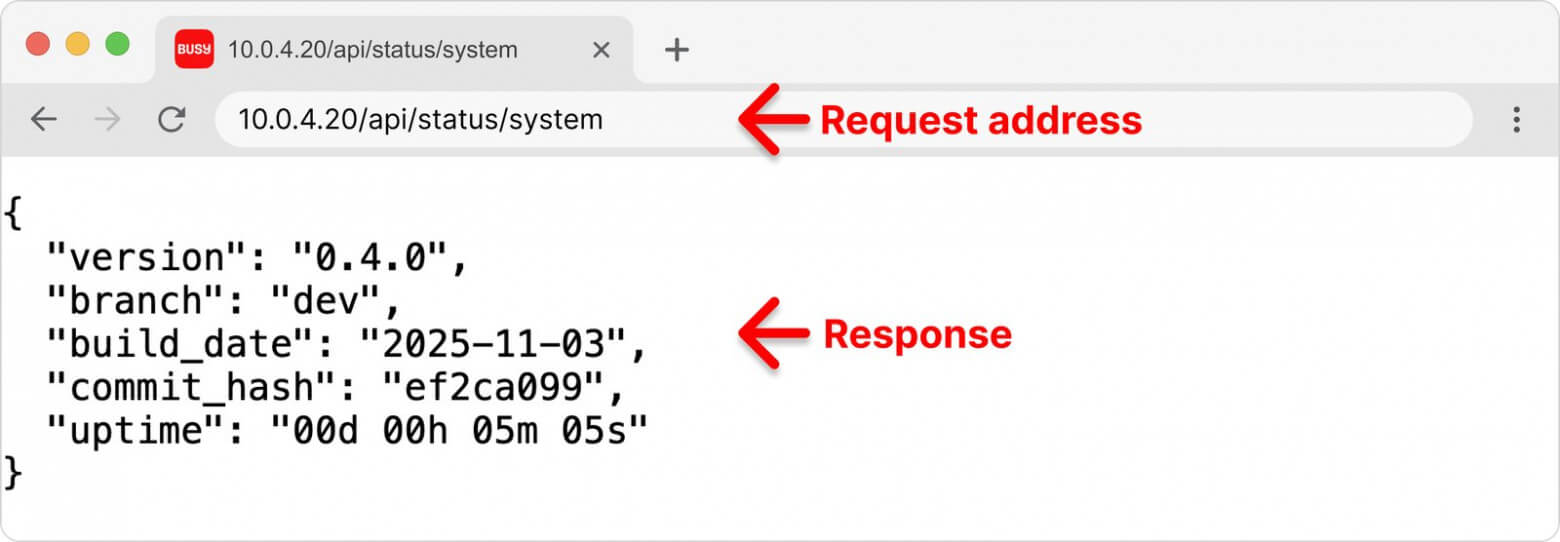
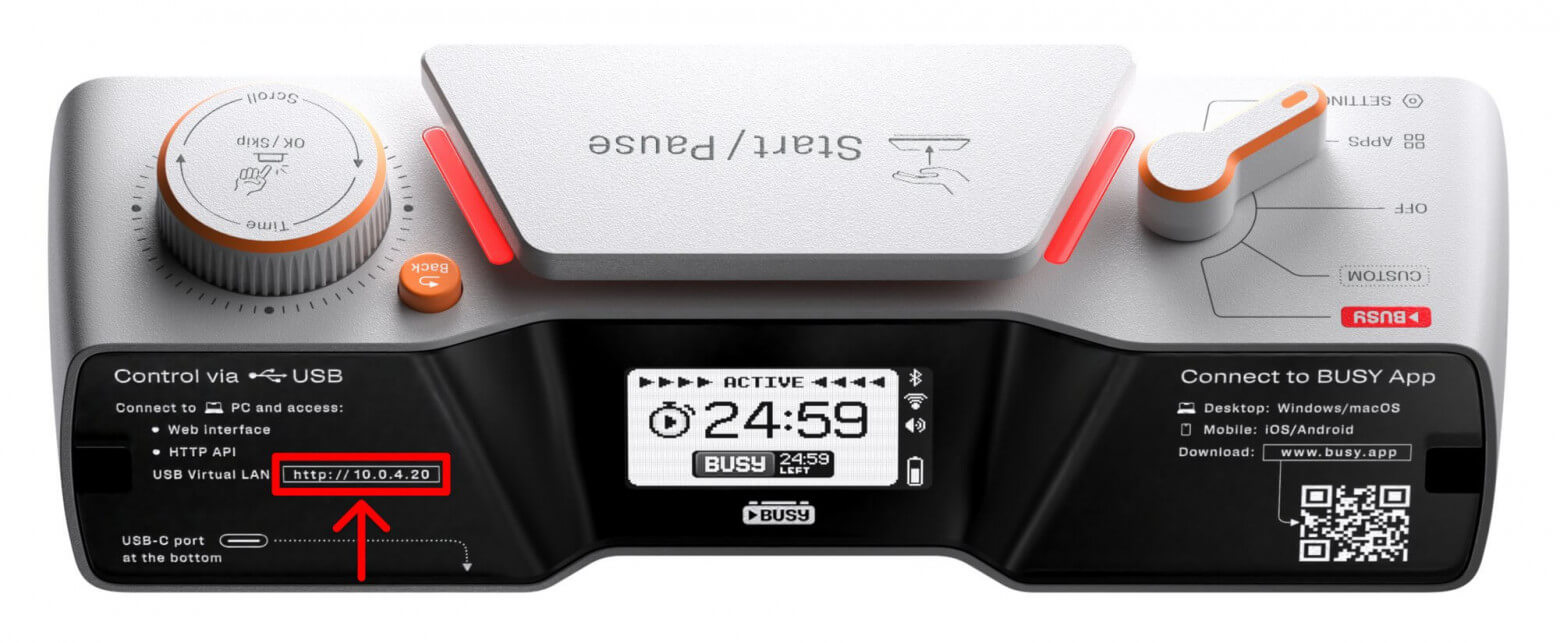
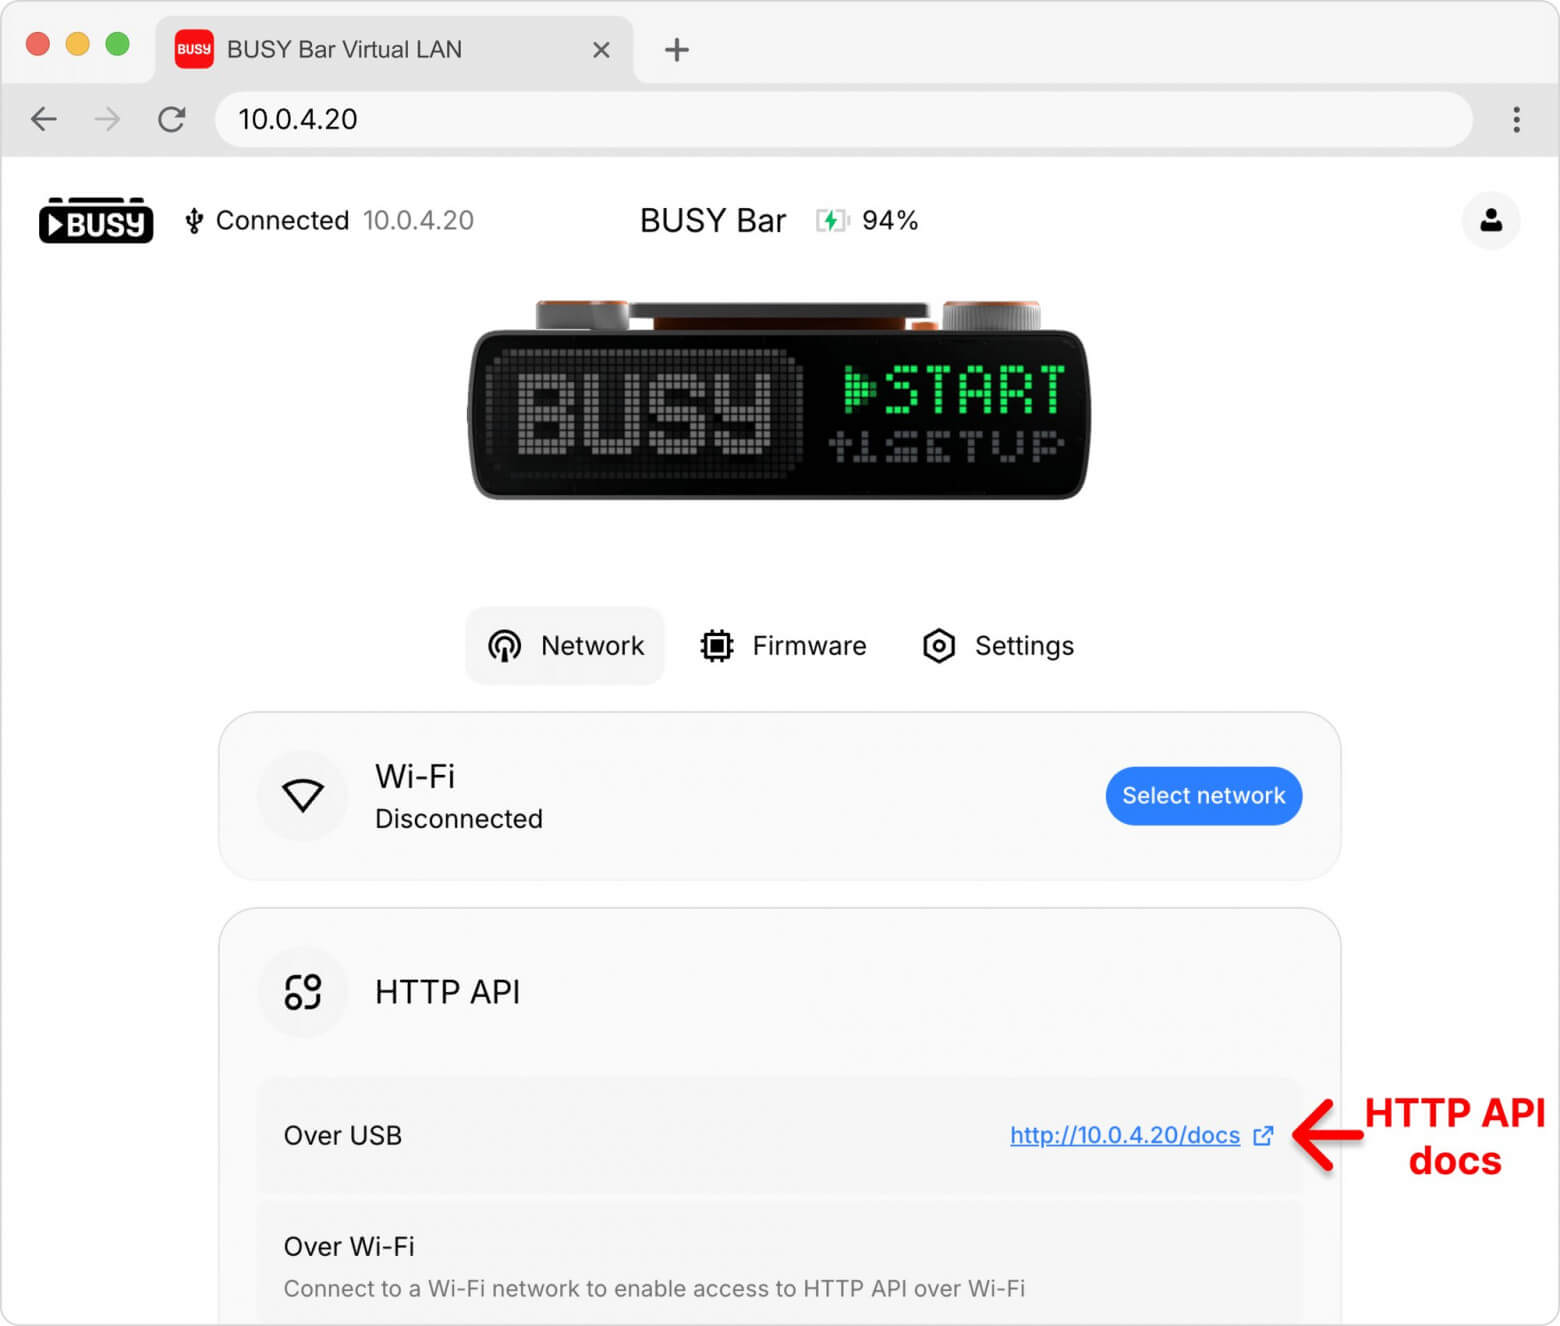
When using a USB connection, the BUSY Bar’s IP address will always be 10.0.4.20 – it is even listed on the back of the device. When connecting via Wi-Fi, the IP address is assigned by the router. In the examples below, we will use a USB connection.
All supported HTTP requests, their parameters, and response formats are described in the HTTP API documentation, which is hosted directly on the device. When connected via USB, it is available at: http://10.0.4.20/docs.
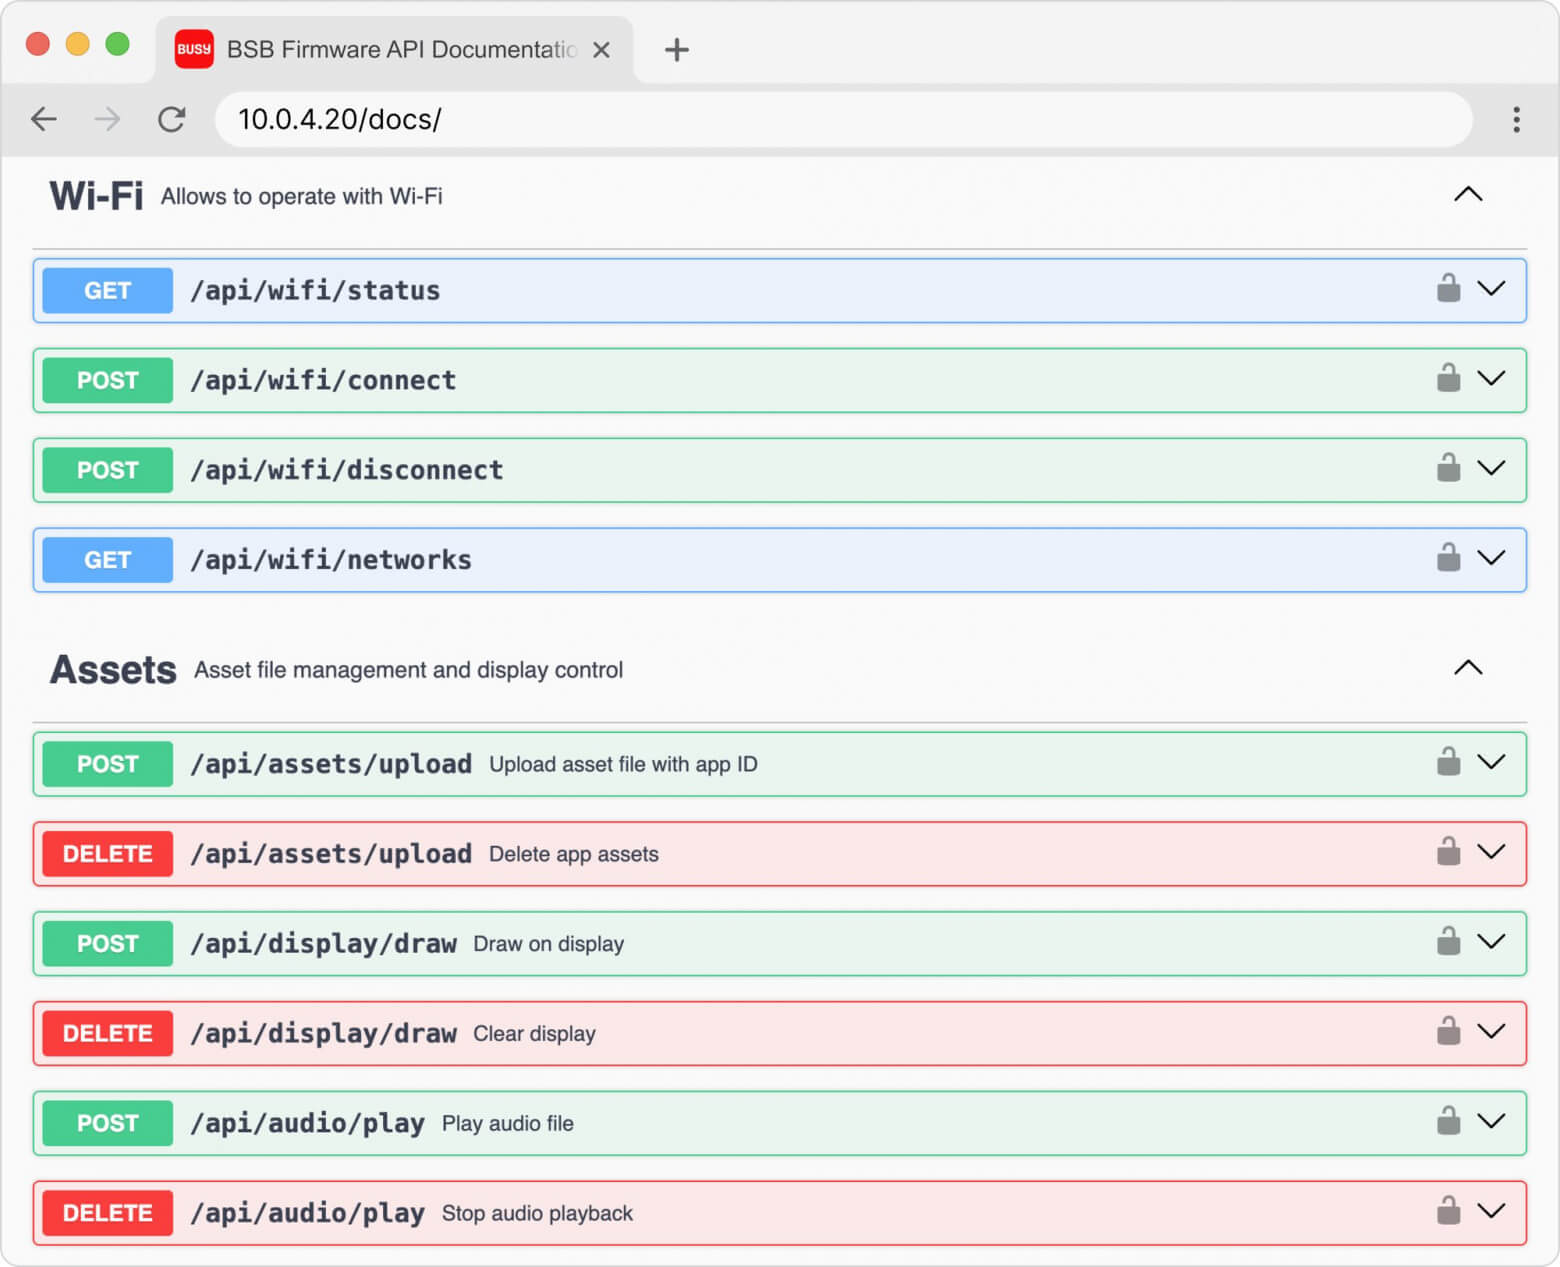
You can also open the HTTP API documentation from the main page of the BUSY Bar web interface, which is available at http://10.0.4.20.
You can test HTTP requests directly on the documentation page by doing the following:
Select a request, for example: /api/display/draw (display text and images on the screen).
Click Try it out.
Configure the request parameters.
Click Execute to send the request to the BUSY Bar.
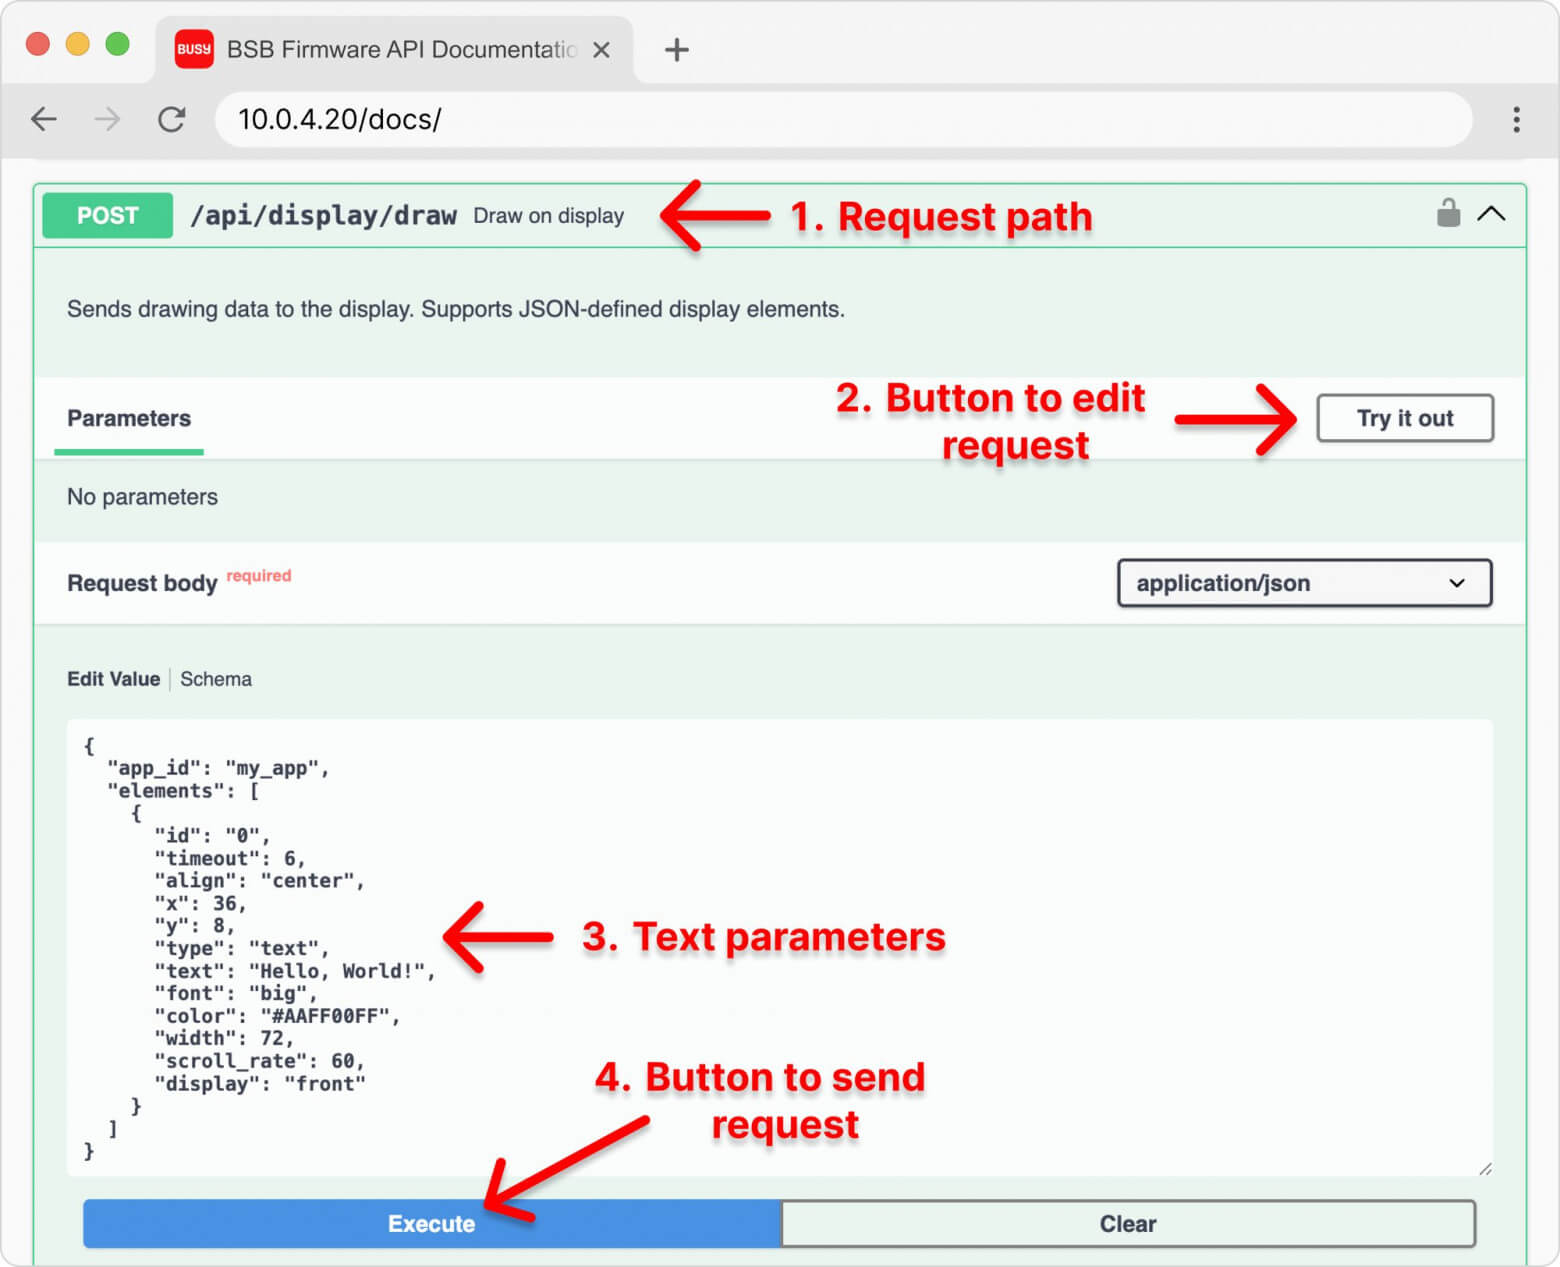
After pressing Execute, the browser sends an HTTP API request to BUSY Bar, which returns a response indicating either success (OK) or an error (Bad Request) if something went wrong with the request. If successful, BUSY Bar displays “HELLO, WORLD!” on the screen.
There are tons of guides, discussions, and code examples online for working with HTTP. And AI assistants can work with all this knowledge. So even without programming skills, you can create BUSY Bar widgets. For advanced users, there are also ready-made libraries for Python and JavaScript that implement our HTTP API.
To create a widget using an AI assistant (ChatGPT, Gemini, Claude, and others), you need:
Explain to him how to display images and text on the screen (1 prompt).
Explain what the widget should do (1-2 prompts).
Ask him to fix the problems (0-10 prompts).
As a result, you will get a script that runs on your PC and sends the widget UI to the connected USB device via HTTP API.
Next, we will show you with real practical examples how to make a widget without programming. We will use ChatGPT. All generated AI scripts are available via links at each step.
When creating each widget, you first need to explain to the AI how to use the HTTP API, namely two requests:
/api/assets/upload — to upload images to BUSY Bar memory.
/api/display/draw — to display text and previously uploaded images.
AI prompt (based on HTTP API documentation):
У мене є девайс із кольоровим LED екраном 72x16 та HTTP API. IP адреса девайсу – 10.0.4.20. HTTP API підтримує 2 POST запиту: /api/assets/upload - для завантаження картинки на пам'ять девайса (картинка передається в двійковому вигляді). Запитує 2 параметри: app_id (текстовий id програми) і file (ім'я файлу). /api/display/draw - для виведення тексту та раніше завантажених картинок. Є 3 шрифти: мало (висота 5), medium (висота 7), big (висота 10). width задає ширину поля виведення тексту (текст прокручуватиметься зі швидкістю scroll_rate, якщо не міститься). Приклад запиту:
{
  "app_id": "my_app",
  "elements": [
    {
      "id": "0",
      "timeout": 6,
      "type": "text",
      "text": "Hello, World!",
      "x": 1,
      "y": 3,
      "font": "big",
      "color": "#AAFF00FF",
      "width": 72,
      "scroll_rate": 60,
    },
    {
      "id": "1",
      "timeout": 6,
      "type": "image",
      "path": "data.png",
      "x": 0,
      "y": 0,
    }
  ]
}
Result: AI is now able to display images and texts on the screen via USB, as well as use different fonts and text colors.
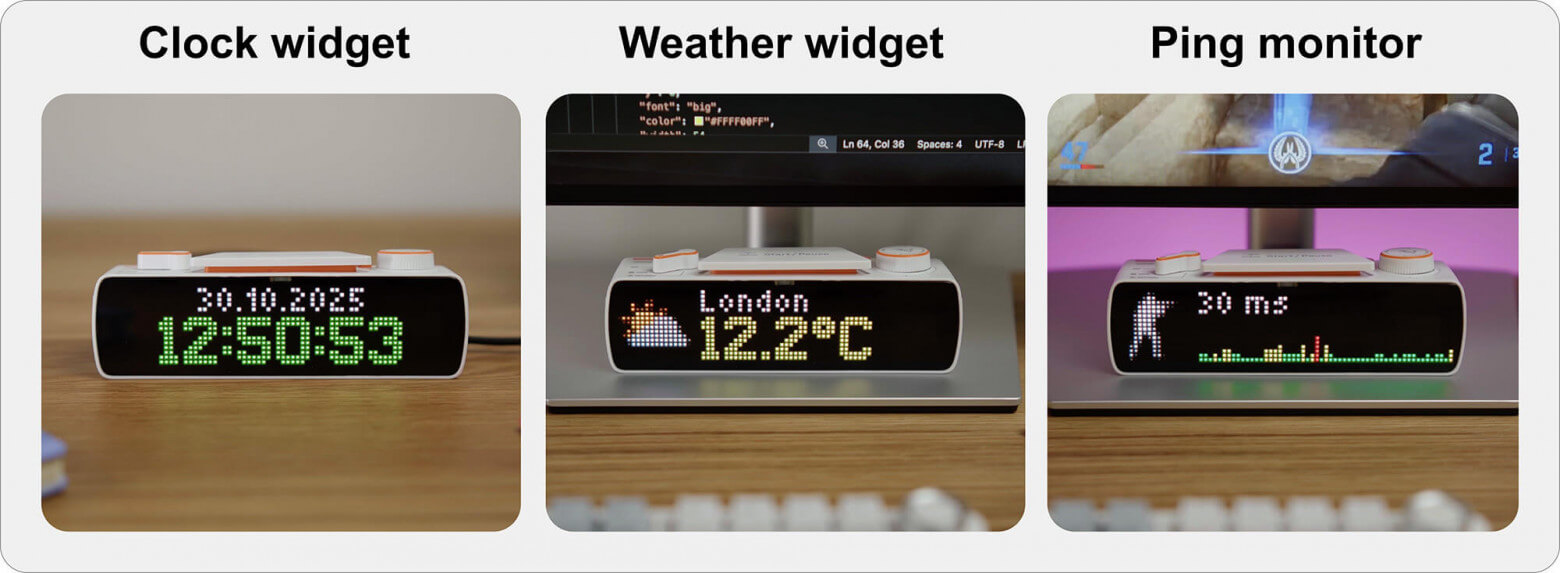
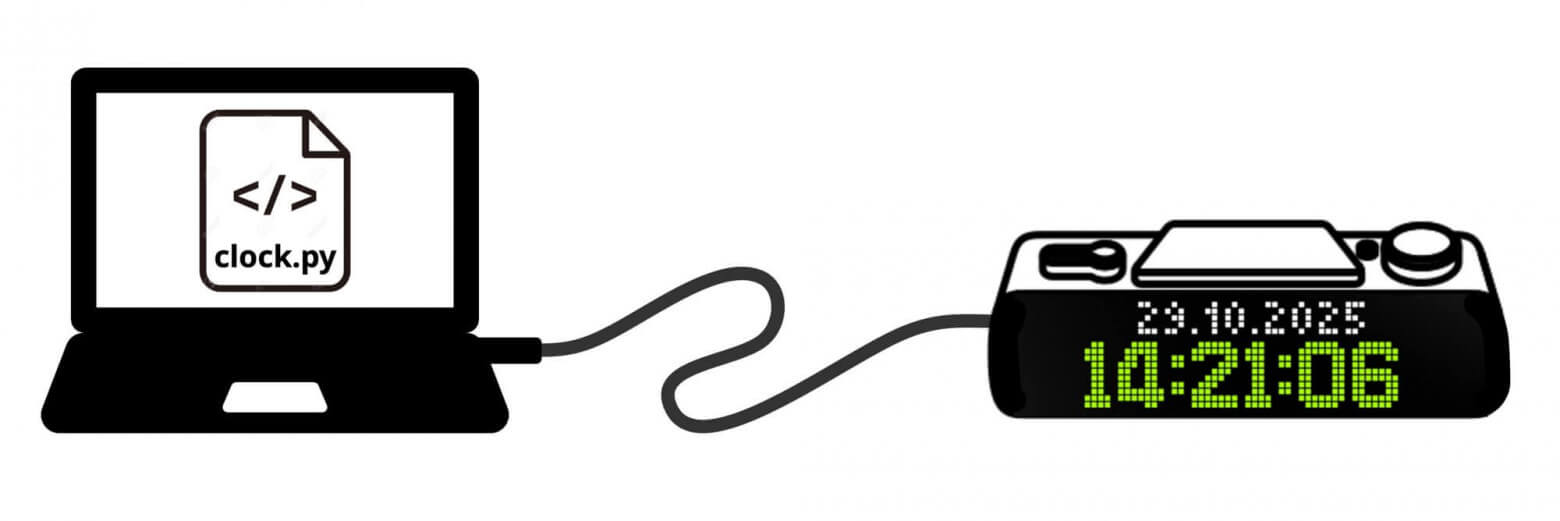
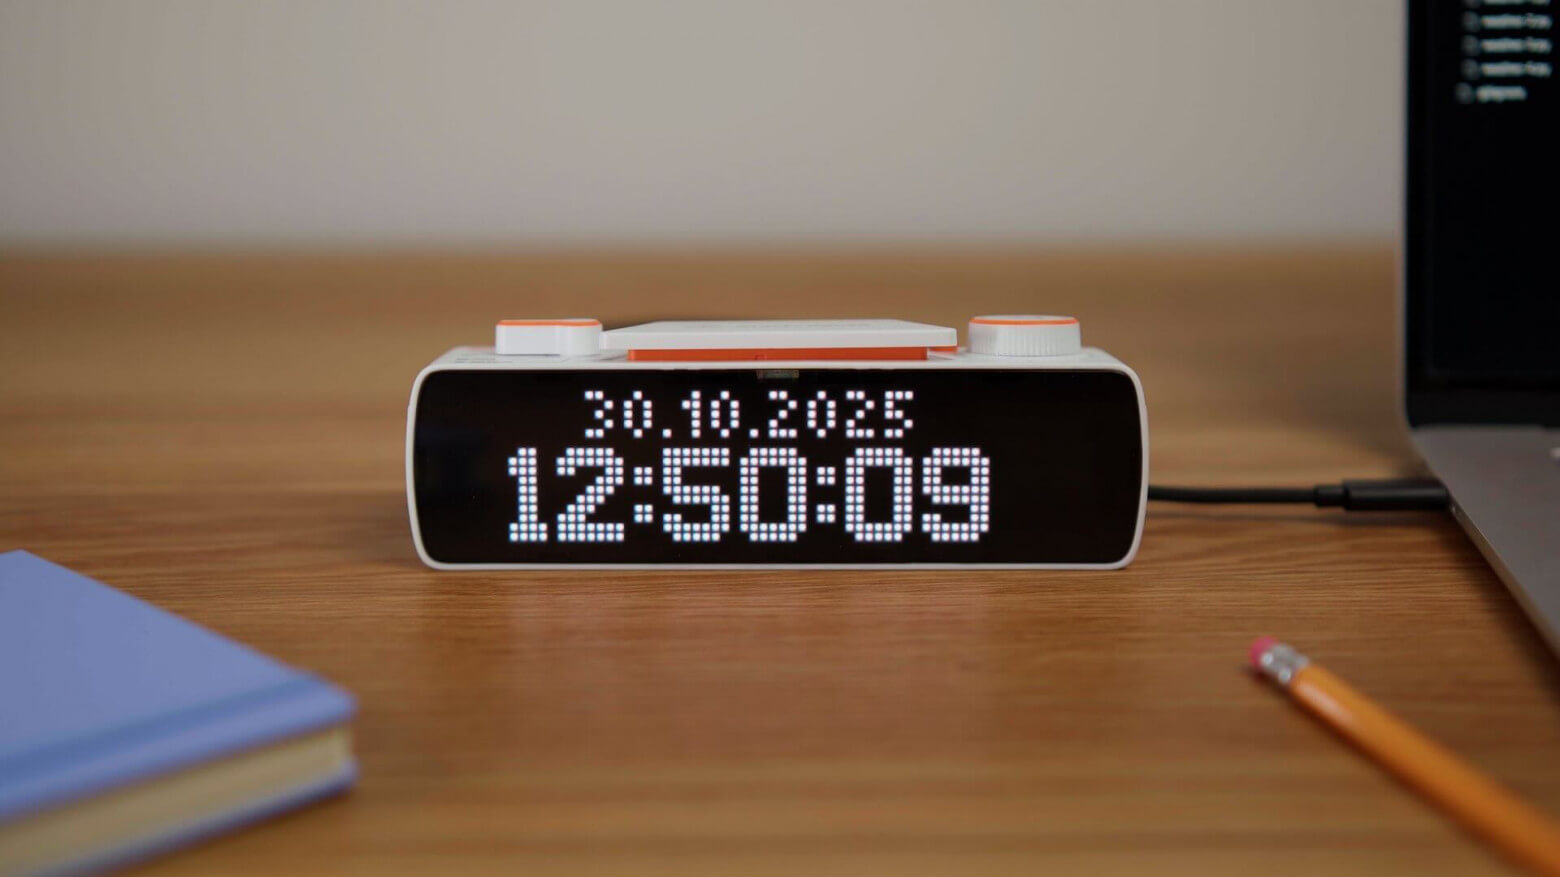
To start, just for practice, let’s make a very simple clock and date widget. The time and date will be taken from the PC and updated on the BUSY Bar screen once a second. We will display the time in a large font – often it is more important to see it than the date.
Prompt to AI: Display the current date (small) and time (large) in the center of the screen. Date format – day. month. year. Display time with seconds.
Result: The AI has written a script in Python. It needs to be saved in a file with the extension .py and run with the command python file.py (Windows) or python3 file.py (Linux/macOS).
Script from AI: clock-1.py
Not bad, but it’s a static image. Let’s ask the AI to make the clock tick, and at the same time fix the horizontal alignment and add colors.
🤖 AI Prompt: Make the clock tick and not stop. The text is currently not centered, move it to the right by 3 pixels. Display the time in light green.
Script from AI: clock-2.py
Result:
We got the widget ready in just 3 prompts. The only caveat is that AI aligns the text to the center with an error, since the characters have different widths (for example, the numbers 1 and 5). In the next version of the HTTP API, we will add horizontal and vertical text alignment, which will completely solve this problem.
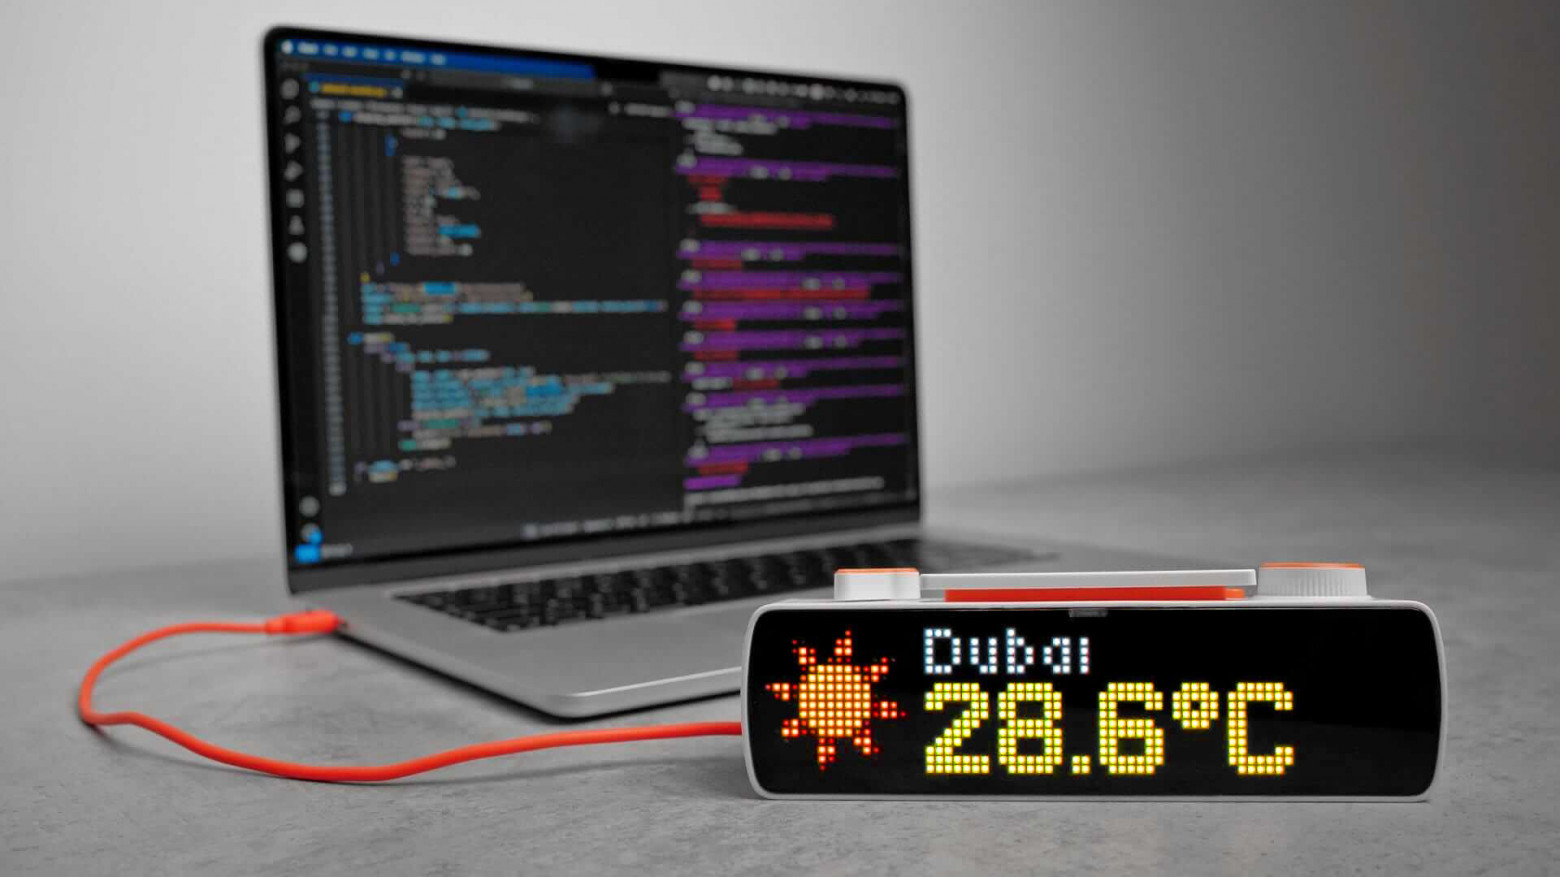
The script, running on a PC, will receive weather from open sources on the Internet and display it on the BUSY Bar screen for several cities. For each city, the script will display a weather icon, city, and temperature.
🤖 AI Prompt: Create a script that displays the weather in 3 cities in turn: Dubai, London, New York with a 3-second pause. Get the weather from open sources without the need for registration.
Script from AI: weather-1.py
Result:
You can see that the script is successfully retrieving weather data, but due to the rapid scrolling of the text and frequent switching of cities, it is impossible to read anything right now. Let’s fix this.
🤖 Prompt to AI: On the left, display a weather icon (16×16), let the script draw them itself. On the right, display: city (small) and temperature (large).
Script from AI: weather-2.py
Result:
It’s better, but there are still a few shortcomings that we will eliminate with the next requests to AI.
🤖 AI prompt: The degree symbol is not displayed. The device is definitely able to display this symbol in big font.
Script from AI: weather-3.py
Result:
You need to prepare icons for the main weather phenomena (sunny, cloudy, rainy, etc.). The icons themselves can be taken from open sources, for example, there is an excellent font Noto Color Emoji 16.0 from Google. Images of all symbols are available in репозиторії GitHub .
We will need pictures:
☀️
sun.png(сонячно) – символ u2600
☁️
cloud.png(хмарно) — символ u2601
🌫️
fog.png(туман) – символ u1f32b
⛅
partly.png(хмарно) — символ u1324
🌧️
rain.png(дощ) – символ u1327
🌨️
snow.png(сніг) – символ u1328
These images need to be scaled to 16×16 and saved in the icons folder, which should be located in the script folder. After that, you need to ask the AI to refine the script.
🤖 AI prompt: Extract icons from the ready-made files I put in the icons folder: cloud.png, fog.png, partly.png, rain.png, snow.png, sun.png.
Script from AI: weather-4.py
Result:
Done! You can change the list of cities in the script. You can leave only one city and then only its weather will be displayed, updating every 3 seconds.
Ping is a way to check the availability of devices on the network. The point is to send a special request to the IP address of the node being tested and measure the time from sending the request to receiving a response.
This parameter is important in some online games, where the game server’s response speed and the quality of the connection can determine the outcome of the game. Therefore, it is useful to have a ping indicator that is updated in real time.

🤖 AI Prompt: Create a script that displays a graph of the game server’s ping by IP. Update the graph once a second. In the upper left corner, display the ping in small font.
Script from AI: ping-monitor-1.py
AI generated a script that takes the server IP address as a parameter. Therefore, the address must be specified when running the script. For example, if the server address is 8.8.8.8, then to monitor its availability, the command would look like this: python3 ping-monitor-1.py –server 8.8.8.8
Result:
Great, almost done. But it’s not clear what values we see on the graph. But that’s not so important. What’s more important is that we can immediately see the deviation of the ping from normal values. We can use different colors to identify good, average and bad ping.
🤖 AI Prompt: Let the bars corresponding to 0-20 ms be green, 21-50 – yellow, and more than 50 – red. The height of the scale is 100 ms.
Script from AI: ping-monitor-2.py
Result:
🤖 Prompt to AI: Let’s display the CS: GO game logo to the left of the graph.
The AI asks for the game logo file to be called csgo.png and placed in the script folder. Google the image you want, scale it to 16×16, and save it.
Script from AI: ping-monitor-3.py
Result:
Done! In a few steps, without any programming, we were able to create a visual widget. It can be used not only to monitor the availability of a game server, but also to monitor the availability of any other servers on the LAN or the Internet in general.
BUSY Bar demonstrates how easy it can be to create your own widgets by combining an open HTTP API with the capabilities of modern AI assistants. Even without programming, a user can quickly learn to display text, graphics, weather icons, or ping graphs – just a few clear prompts are enough. The single logic of operation is the same for all connection types, and the documentation is available directly on the device, which makes the process even more convenient. As a result, BUSY Bar becomes not just a Pomodoro timer, but a flexible tool for creating personalized microinterfaces for any tasks.