MicroHydra is a convenient MicroPython application launcher for ESP32-S3, created specifically for M5Stack Cardputer and compatible devices. Thanks to its simple structure, the user can launch, switch and delete apps without complex settings, as well as install them directly from microSD or internal memory. The system works on the principle of “one process – one app”, which minimizes the risk of crashes and memory leaks.
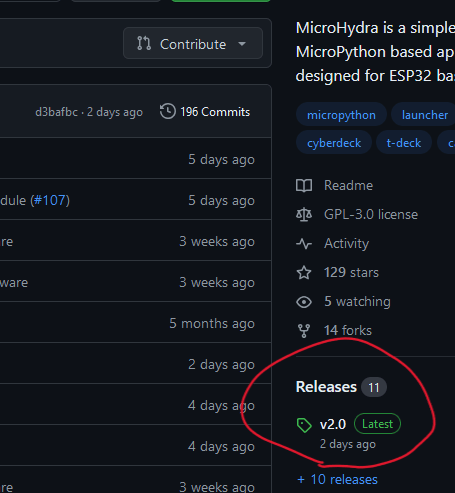
MicroHydra is a simple MicroPython-based application launcher with some OS-like features.

This code was compiled using MicroPython version 1.23 for ESP32-S3.
The main function of MicroHydra is to provide an interface for easily switching between MicroPython applications. And to lower the barrier to entry for those who want to develop applications for their Cardputer (or other supported device!). Python scripts can be placed in the /apps folder of your device (on a flash drive) or in the /apps folder on the micro SD card. The launcher scans these two locations on startup.
Check out the wiki for basic tutorials on getting started with MicroPython. And see the MicroHydra community app repository here.
MicroHydra runs only one “application” at a time and switches between them, saving data to RTC memory and resetting MicroPython.
The launcher, main.py, and other built-in programs import the hydra.loader module to store or load strings into RTC memory.
MicroPython automatically starts main.py on startup, main.py looks for the stored path to the application and imports it if it exists. Otherwise, it runs the launcher.
This approach was chosen to avoid memory management problems or import conflicts between applications. Resetting the entire device means that the only thing loaded before the application is the lightweight hydra.loader and main.py modules.
When MicroHydra is precompiled into .mpy files (and therefore does not need to be compiled before startup), this reset is quite fast. And when it is frozen in the MicroPython firmware, the reset is almost instantaneous.
Programs that need to pass information to each other can use the same hydra.loader module to read/store additional arguments to the RTC. For example, when you use the Files application to open a file in a text editor, the Files application adds both the path to the text editor and the path to the text file to the RTC memory.
Applications are designed to be very easy to run in this launcher. Any Python file placed in the “apps” folder on a flash drive or SD card will be found and can be run as an application. This also works with .mpy files, meaning that machine code written in other languages can also be linked and run as an application (although I haven’t tested this yet).
MicroHydra applications can be simple single-file scripts or contained in a folder with the extension __init__.py, like a standard Python module. You can learn more about these features in the application format section of the wiki.
Some common applications for MH can be found here (and this is where the built-in “GetApps” application finds applications to download).
You can install MicroHydra in a few different ways.
Встановіть поверх звичайної інсталяції MicroPython: Flash Micropython to your Cardputer and copy the contents of the file DEVICENAME_compiled.zip (or DEVICENAME_raw.zip) from the “releases” section to the flash memory on your device.
This is the most convenient installation method for developers, as you can simply open the MicroHydra files to see what’s going on. However, the raw version of the software (i.e., ending in “.py”) is much more prone to memory issues than other installation methods, so it’s recommended to use the compiled (.mpy) version for any files you don’t work with directly.
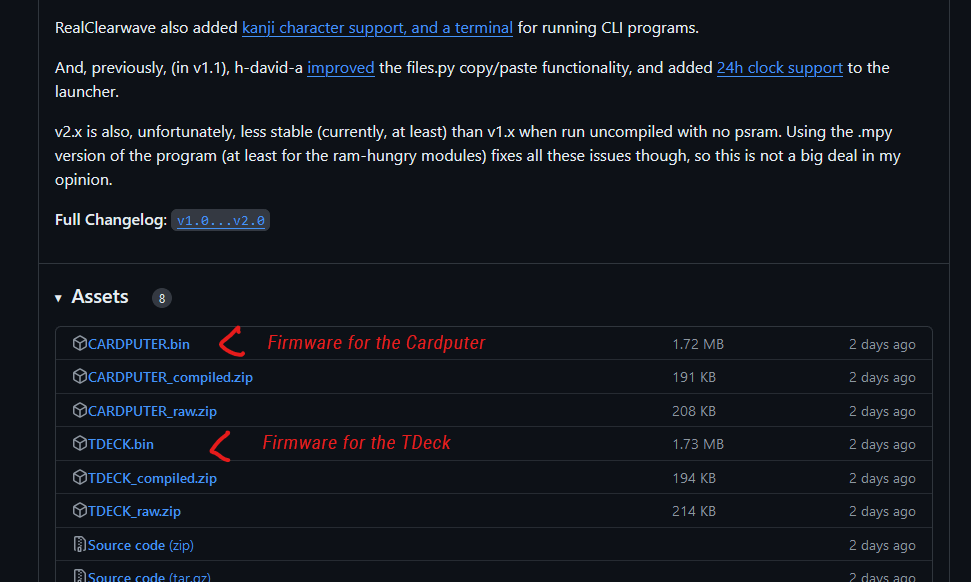
Прошивання MH як скомпільованої прошивки: You can flash MicroHydra (along with MicroPython) directly to your device using the DEVICENAME.bin file from the Releases section. (You can also usually find the latest builds on M5Burner.) This is the fastest and easiest form of MH to use!
In this installation, the MicroHydra files have been “frozen” in the MicroPython firmware. This makes loading the embedded files much faster and allows them to use less memory. Before installing, make sure you clear the flash memory, and when connecting, put the device into download mode by holding G0.
This is a detailed guide to installing MicroHydra on a regular MicroPython installation using Thonny.
Thonny is a tool that provides a very easy way to flash MicroPython, edit code, and view/edit files on the device. You can follow the instructions to install it here: https://thonny.org/
Make sure you are using a recent version; older versions may not flash the ESP32-S3. Some Thonny sources (such as some built-in package managers) can cause strange permissions issues or missing dependencies. If you are having trouble setting up thonny and there is no other clear solution to your problem, it may be worth trying to install it from a different source.
Next we need to flash MicroPython on your device
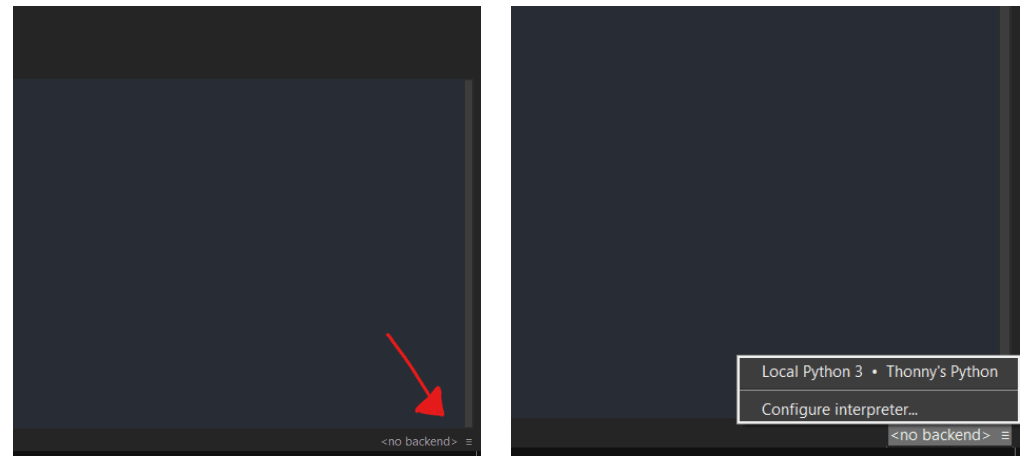
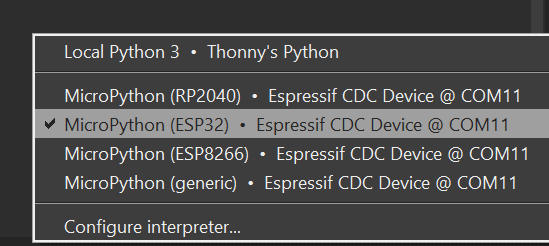
Open Thonny, click this button at the bottom right and select “Configure interpreter”:
The following menu should open:
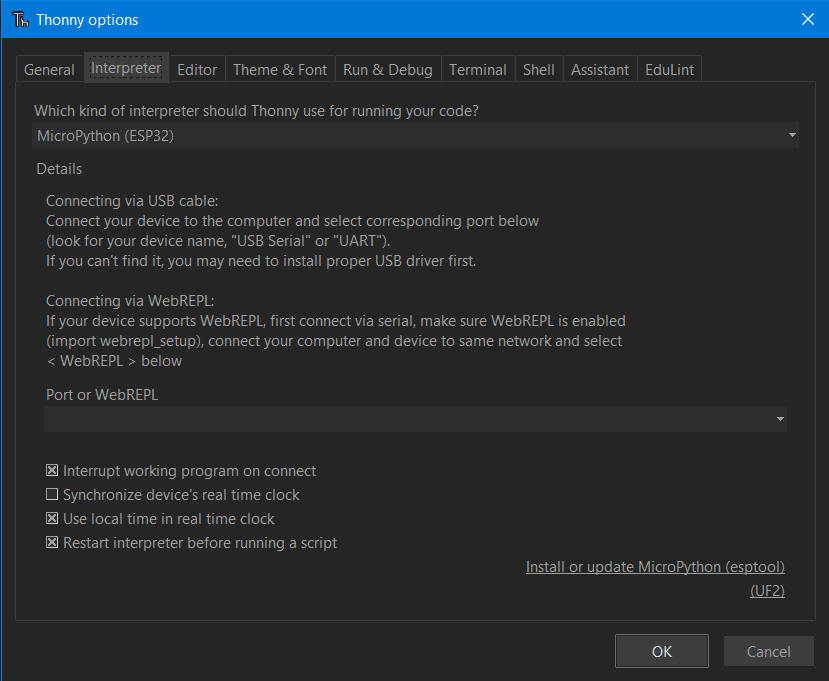
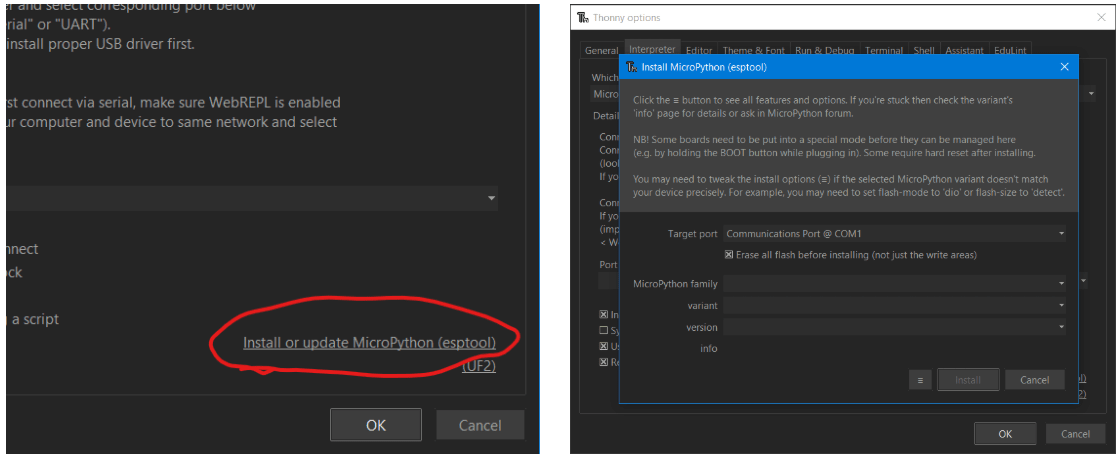
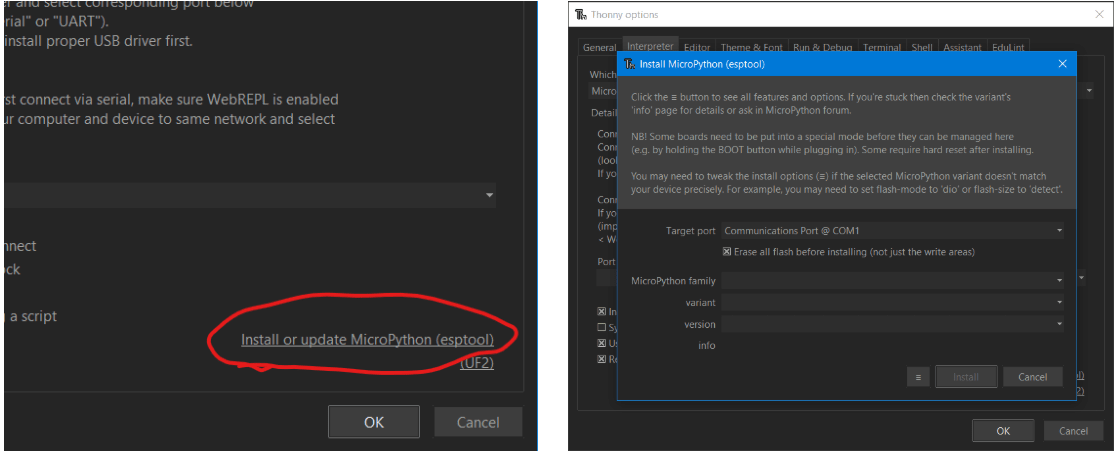
click “install or update micropython” and you will see another window:
Now you need to put your device into bootloader mode and connect it to your computer. To do this, simply hold the G0 button while connecting it to your PC.
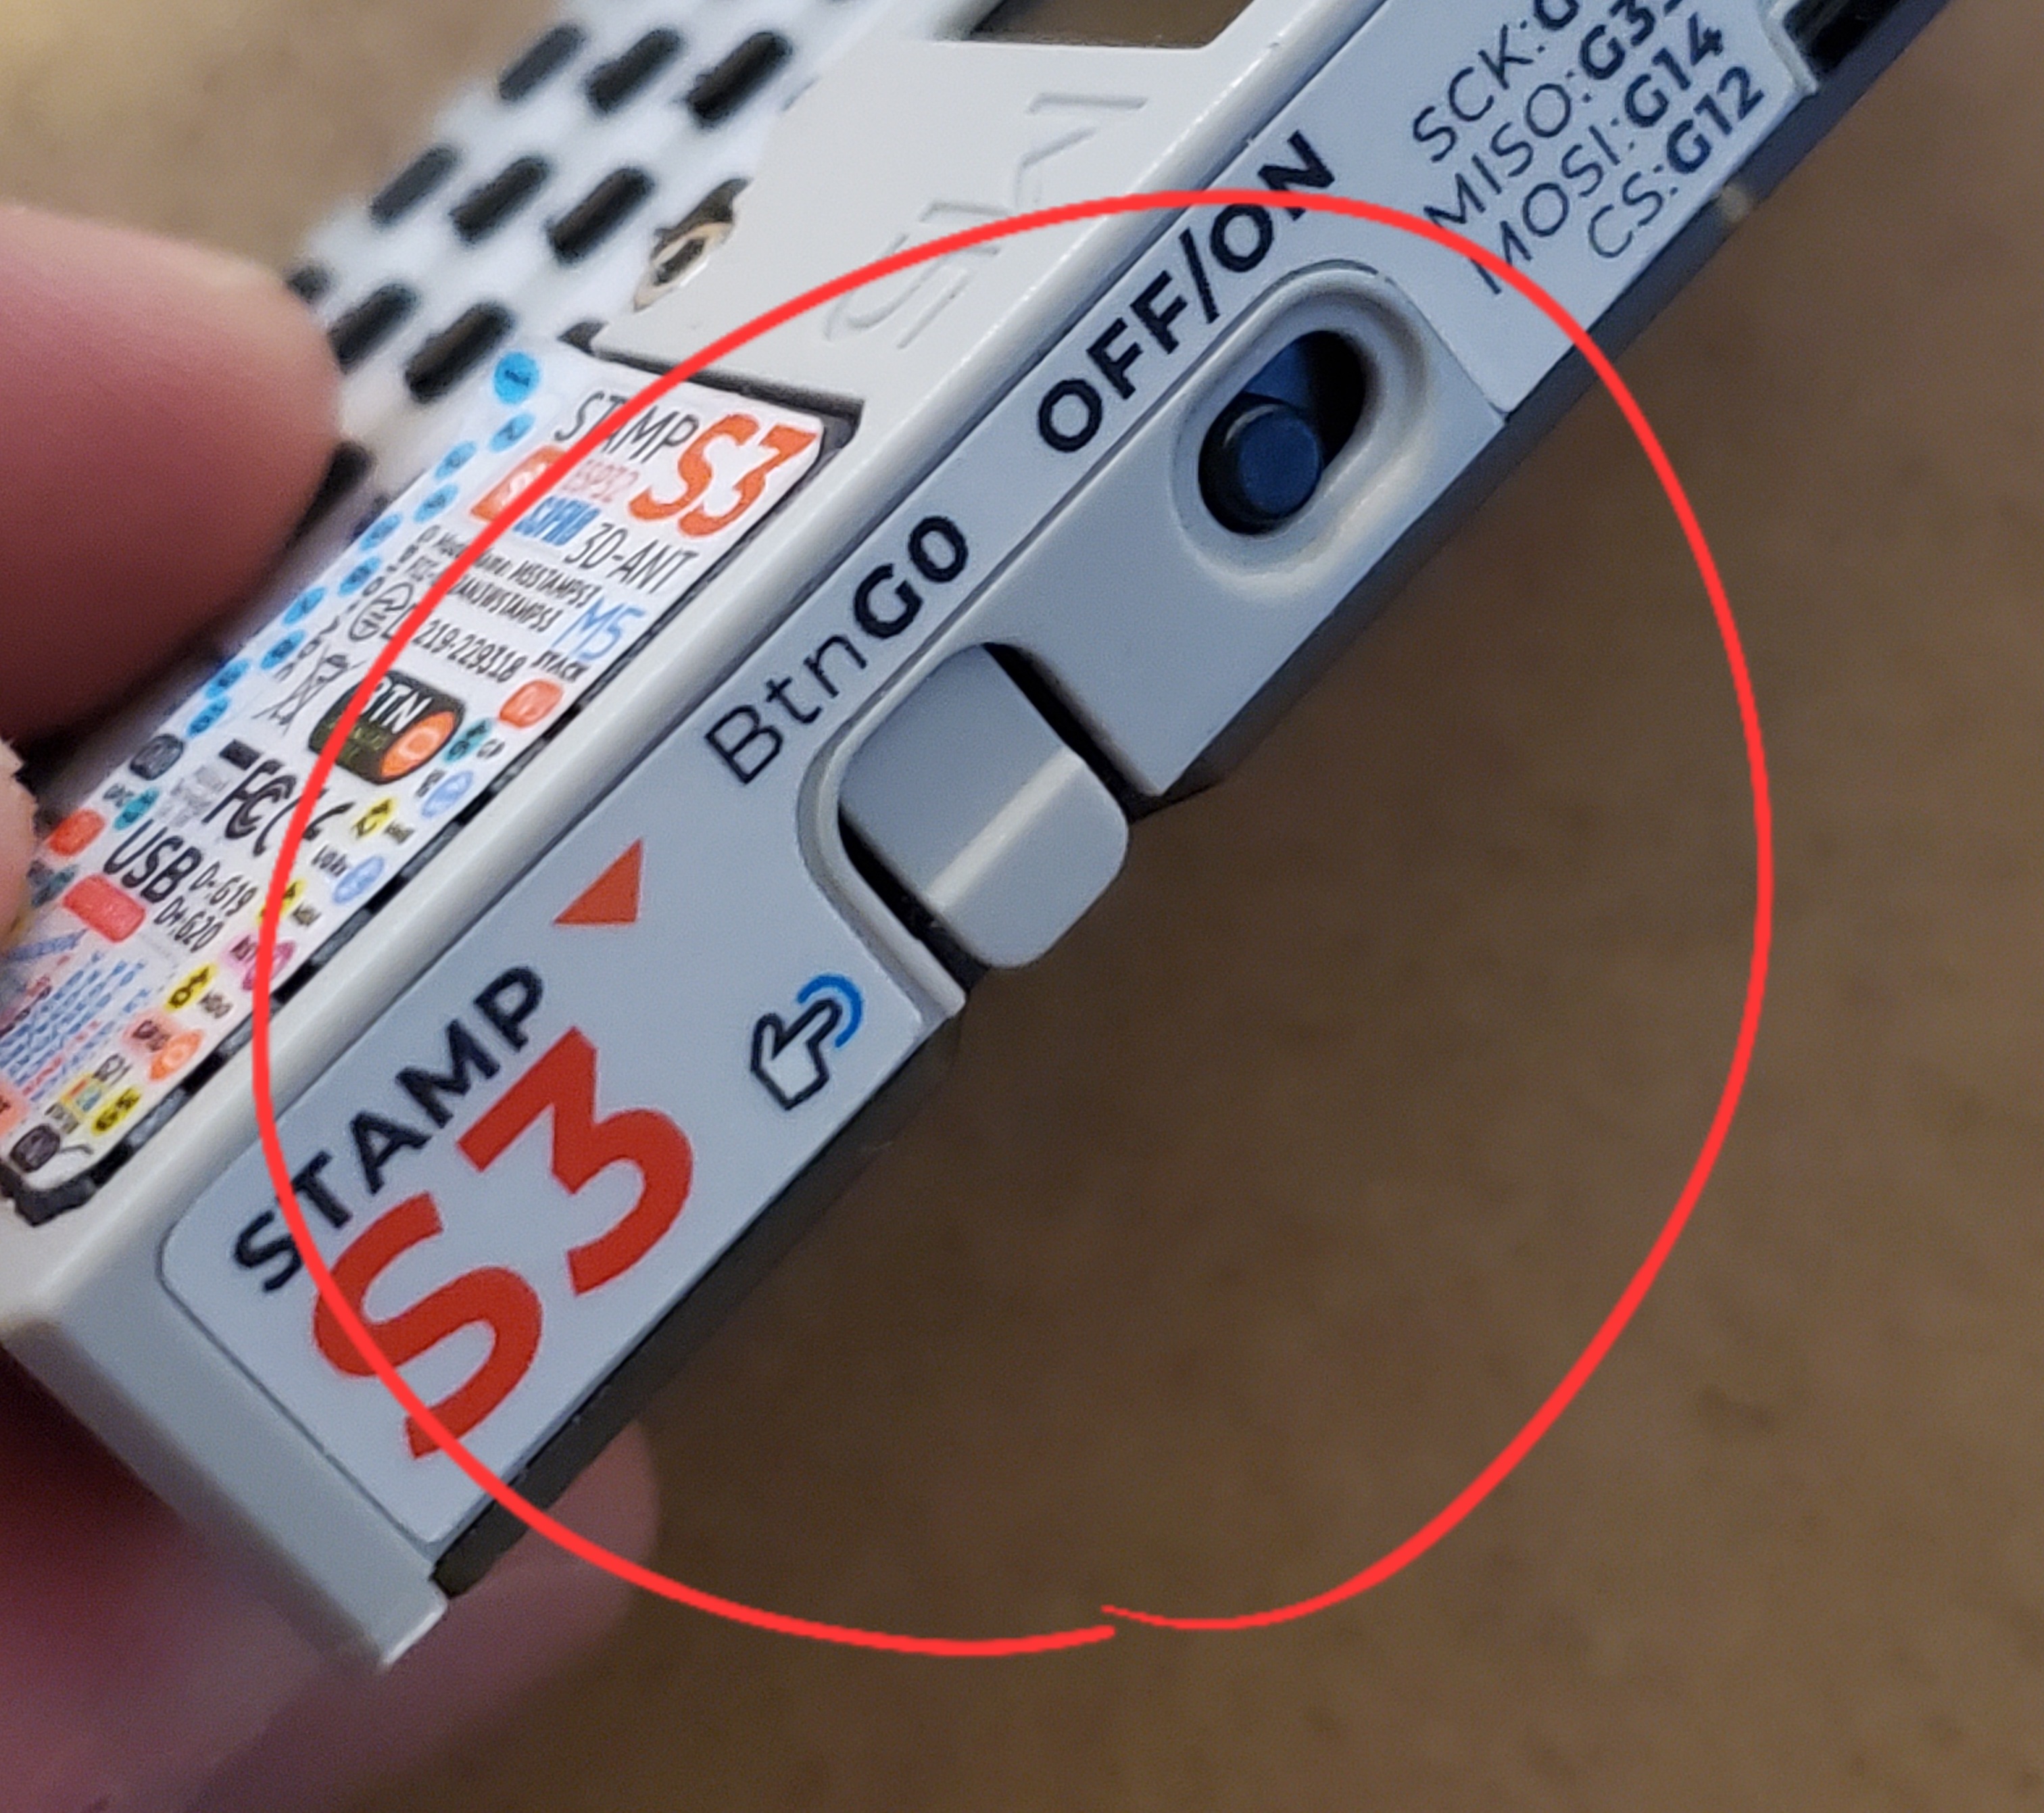
You can also hold G0 and press the reset button to enter bootloader mode. If you are using a device like TDeck that does not turn on after connecting, you will need to hold g0 and then turn on the power switch.
Under the “target port” section, you should see a device with a name like “USB JTAG”. Set the parameters as shown and click “Install”:

For a device with Octal-SPIRAM (like TDeck), you will need to download a specific variant of Octal-SPIRAM from the MicroPython website. If the installation does not start, check that the correct device is selected and that it is in bootloader mode.
After flashing with MicroPython, disconnect the device from the network and reconnect it. Thonny may not automatically detect it right away. If not, you can select it here, at the bottom right: You may also need to click the red “stop/restart” button at the top to make it appear.
If you see something like this in the terminal below, you have successfully flashed it!

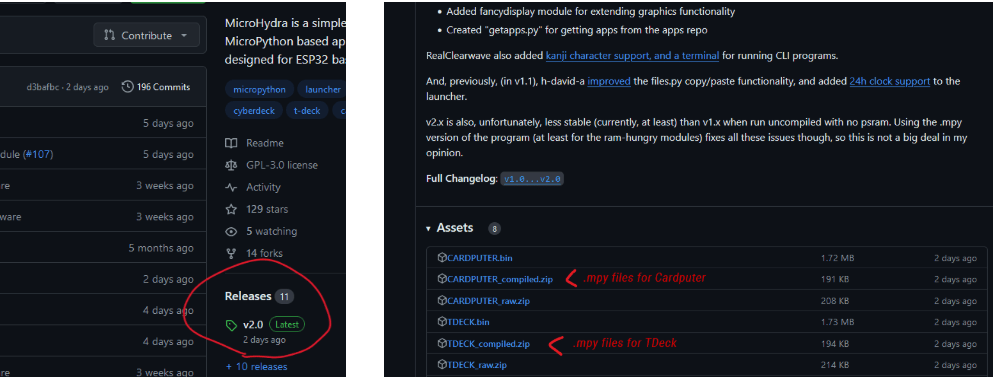
You can now download and install MicroHydra. To get the appropriate files for your device, you should go to the Releases section of the GitHub page and find the DEVICENAME_compiled.zip file and the DEVICENAME_raw.zip file.
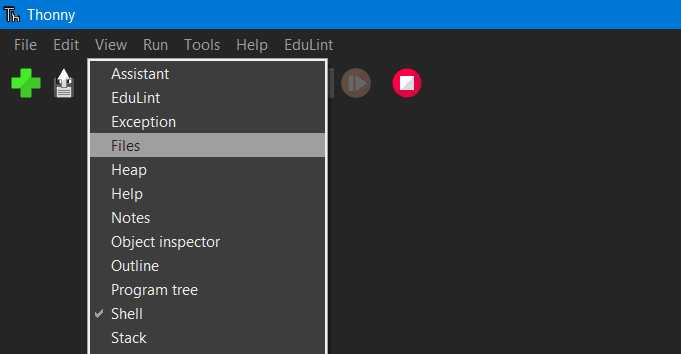
Unzip the .zip file and go back to Thonny. We need to use the Thonny file browser. If you don’t see it on the left, you can open it by clicking View > Files in the top left corner.
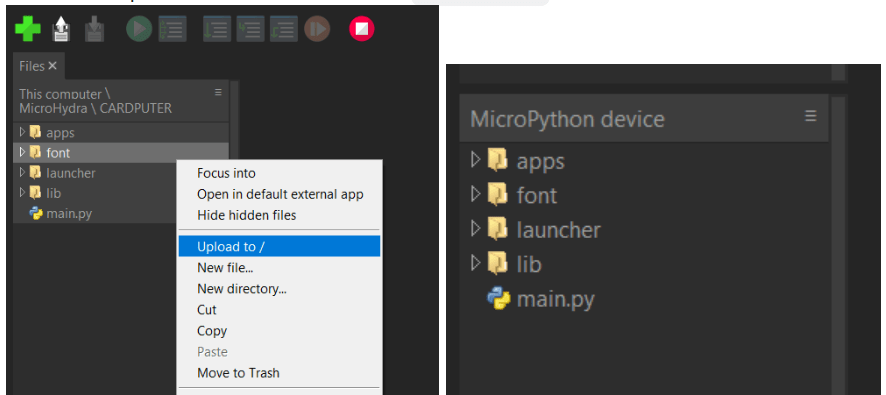
In the top half of the file browser window, navigate to the folder where you extracted the MicroHydra zip file. Then select all the contents and click Upload to /
After transferring the files, you can test it by turning it off and on. If everything works, you should see the main launch window open! If you have any problems, feel free to reach out. MH is still under development and I’m interested to hear about any problems it may cause you.
This is a step-by-step guide to flashing a MicroHydra on your device using Thonny.
Thonny is a tool that provides a very easy way to flash MicroPython, edit code, and view/edit files on the device. You can follow the instructions to install it here: https://thonny.org/
Make sure you are using a recent version; older versions may not flash the ESP32-S3. Some Thonny sources (such as some built-in package managers) can cause strange permissions issues or missing dependencies. If you are having trouble setting up thonny and there is no other clear solution to your problem, it may be worth trying to install it from a different source.
You can now download and install MicroHydra. To get the appropriate firmware for your device, you should go to the Releases section of the GitHub page, find the DEVICENAME.bin file, and download it.
Open Thonny, click this button at the bottom right and select “Configure interpreter”:
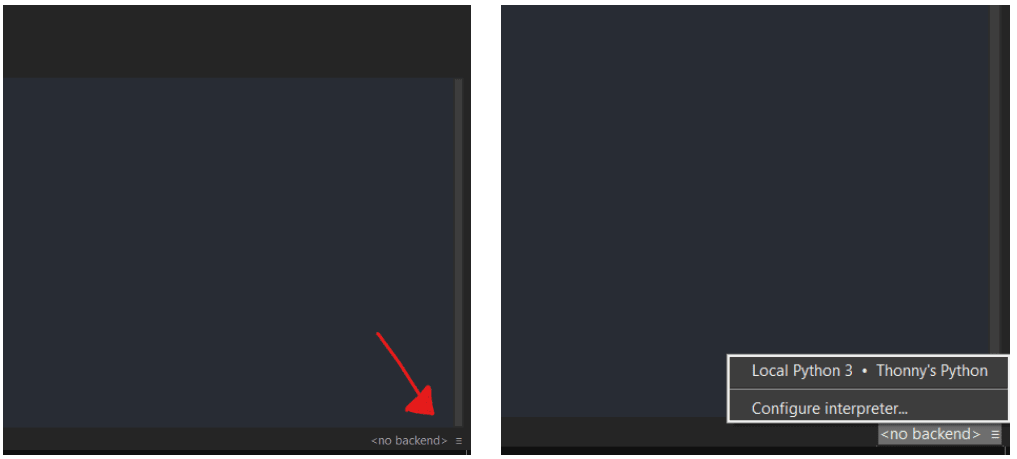
The following menu should open:

click “install or update micropython” and you will see another window:
Now you need to put your device into bootloader mode and connect it to your computer. To do this, simply hold the G0 button while connecting it to your PC.
You can also hold G0 and press the reset button to enter bootloader mode. If you are using a device like the TDeck that does not turn on after plugging it in, you will need to hold g0 and then turn on the power switch.
Next, we will select the .bin firmware file that we downloaded. Click the little menu button and select “Go to downloaded .bin file” and select it. Make sure you also select your device in the “Target port” drop-down list (it should have a name like “USB JTAG”).Select local MicroPython image …
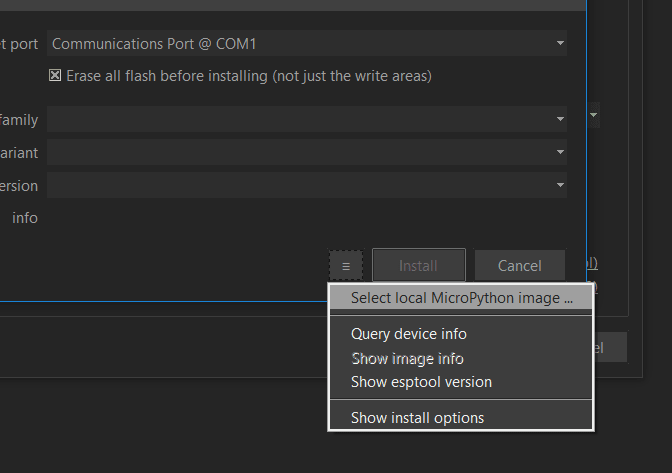
Your window should look something like this:
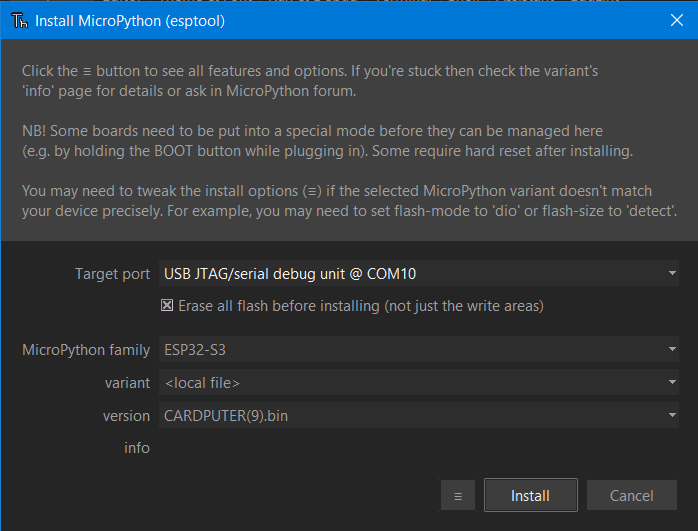
Click the “Install” button and let it do its thing! If the installation doesn’t start, check that the correct device is selected and that it is in bootloader mode. After flashing, you can test it by turning it off and on. If everything works, you should see the main startup window open!