14.10.2024
13 min
1024

If you want to configure the HC-05 Bluetooth module in slave or master mode and combine two Arduino boards for wireless communication, this instruction will be a reliable assistant for you. In the article, we will take a detailed look at how to use AT commands to configure the module, and also create sketches for successfully connecting two Arduinos via Bluetooth.
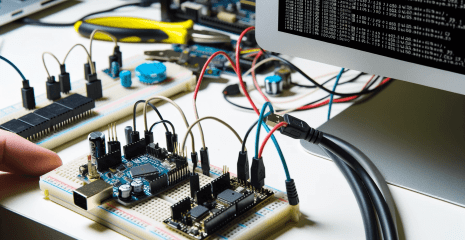
The HC-05 Bluetooth module allows you to easily organize wireless communication between various devices, such as Arduino boards. For configuration, the module uses AT commands, which help set it up to work in slave or master mode. This instruction describes how to properly configure the module using Arduino and how to connect it for data transfer.
AT+NAME? — find out the current name of the module.
AT+PSWD? — find out the connection password.
AT+UART? — check the baud rate settings.
AT+CMODE? — find out how the module searches for devices to connect to.
AT+ADDR? — get the module address.
AT+ROLE? — find out the current role (master or slave).
For slaves:
AT+NAME=SLAVE
AT+PSWD=”1234″
AT+UART=9600,0,0
AT+CMODE=1
AT+ROLE=0
For master:
AT+NAME=MASTER
AT+PSWD=”1234″
AT+UART=9600,0,0
AT+CMODE=0
AT+BIND=<адреса_slave>
AT+ROLE=1
If you make a mistake during the settings, use the AT+ORGL command to return the module to factory settings.
//Start sketch
#include <SoftwareSerial.h>

const int arduino_rx = 5; // Пін RX для Arduino
const int arduino_tx = 6; // Пін TX для Arduino
SoftwareSerial mySerial(arduino_rx, arduino_tx);

void setup() {
  pinMode(arduino_rx, INPUT);
  pinMode(arduino_tx, OUTPUT);

  Serial.begin(9600);        // Швидкість з’єднання Arduino з ПК
  mySerial.begin(38400);     // Швидкість Bluetooth модуля в режимі AT-команд
  Serial.println("<<< Початок роботи! >>>");
  mySerial.println("AT");    // Перевірка зв’язку з модулем
}

void loop() {
  if (mySerial.available()) {
    char c = mySerial.read();        // Читаємо дані з Bluetooth
    Serial.print(c);                 // Виводимо дані в монітор порту
  }
  if (Serial.available()) {
    char c = Serial.read();          // Читаємо дані з ПК
    mySerial.write(c);               // Передаємо їх Bluetooth модулю
  }
}
// End of sketch
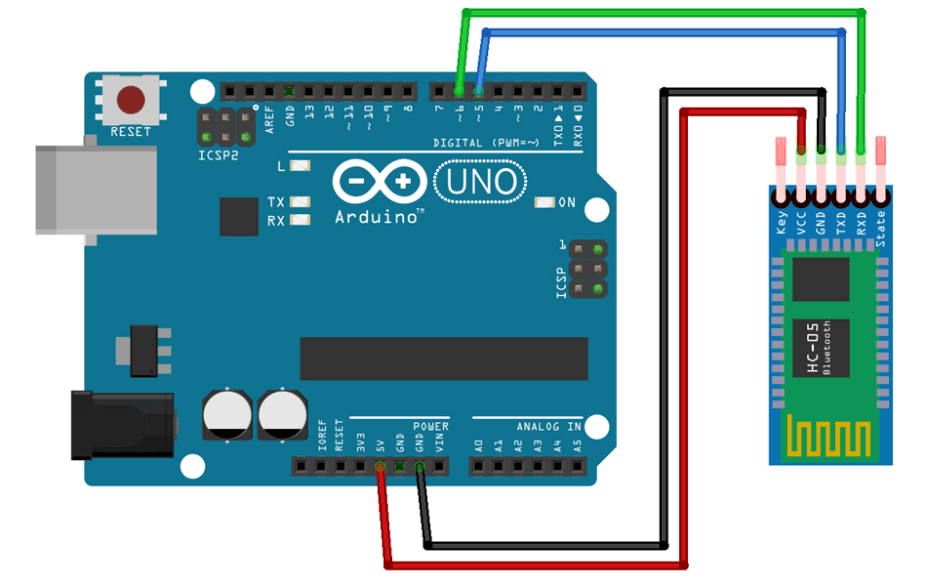
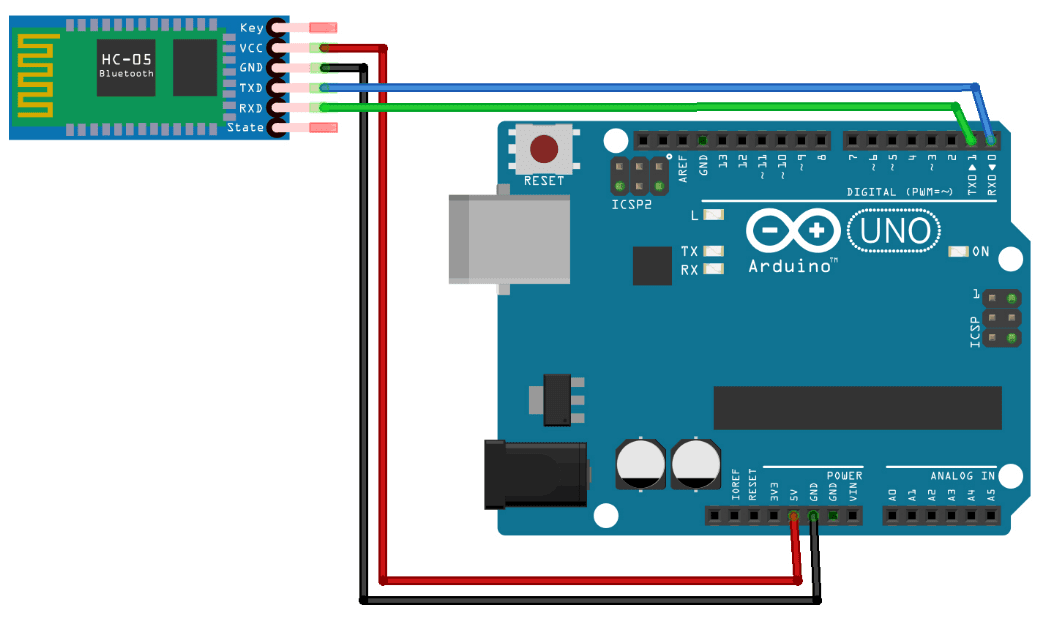
After downloading the sketch, assemble everything as shown in this diagram.
Below are two sketches for the interaction of two Arduino boards using HC-05 Bluetooth modules. Sketch for Arduino Nano board (with button)
//Start sketch
const int button = 2;
int button_state = 0;

void setup()  {
  pinMode( button,INPUT_PULLUP);
  Serial.begin(9600);
}

void loop() {
  button_state = digitalRead(button);
  if (button_state == LOW){ Serial.print("1"); }
  if (button_state == HIGH){ Serial.print("0"); }
}
A sketch for an Arduino Uno board that will include an LED.
//Start sketch
const int led_Pin = 13;

void setup()  {
  pinMode( led_Pin,OUTPUT);
  Serial.begin(9600);
}

void loop() {
  if (Serial.available()) {
    char c = Serial.read();

if (c == '1'){ digitalWrite(led_Pin, HIGH);}
if (c == '0'){ digitalWrite(led_Pin, LOW);}
  }
}
After downloading the sketch, assemble everything as shown in this diagram.
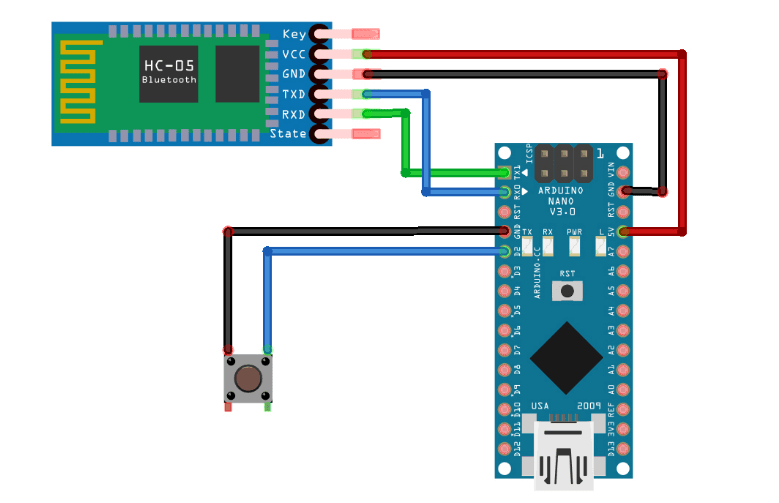
If everything is correct, then connect the power and check by pressing the button.