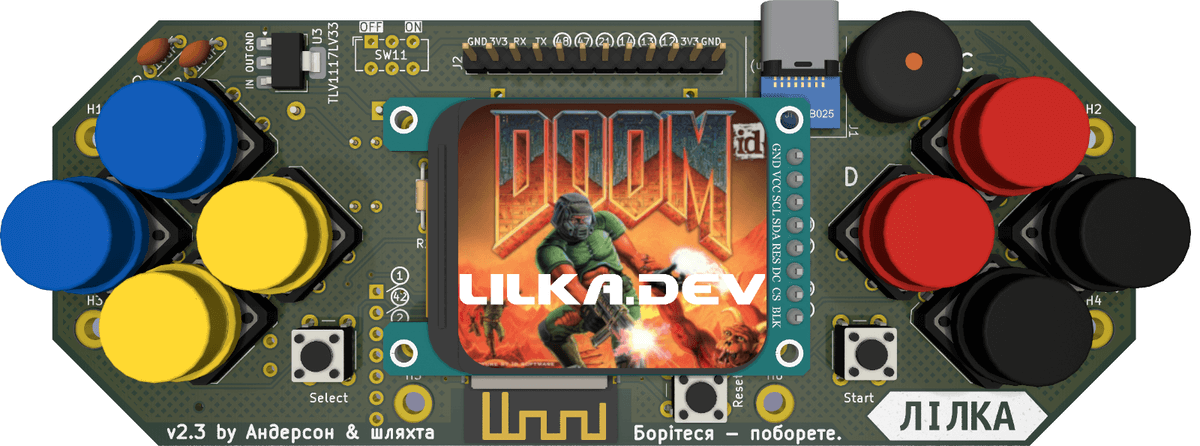
Creating your own firmware for LILKA opens up new possibilities for developers working with the ESP32-S3 microcontroller. Thanks to the PlatformIO environment in VS Code and the lilka library, users can quickly set up a project, compile the code, and upload it directly to the console. The article describes in detail how to prepare the working environment, connect the necessary dependencies, and also understand the basic functions for working with buttons, display, and buzzer. Code examples are provided that will help not only test the basic capabilities, but also become the basis for future games and programs. This guide will be useful for both beginners and experienced DIY electronics enthusiasts who want to better understand the LILKA architecture, optimize their own projects, and create custom firmware from scratch.
First, open Visual Studio Code, go to the PlatformIO tab, and select Create New Project.
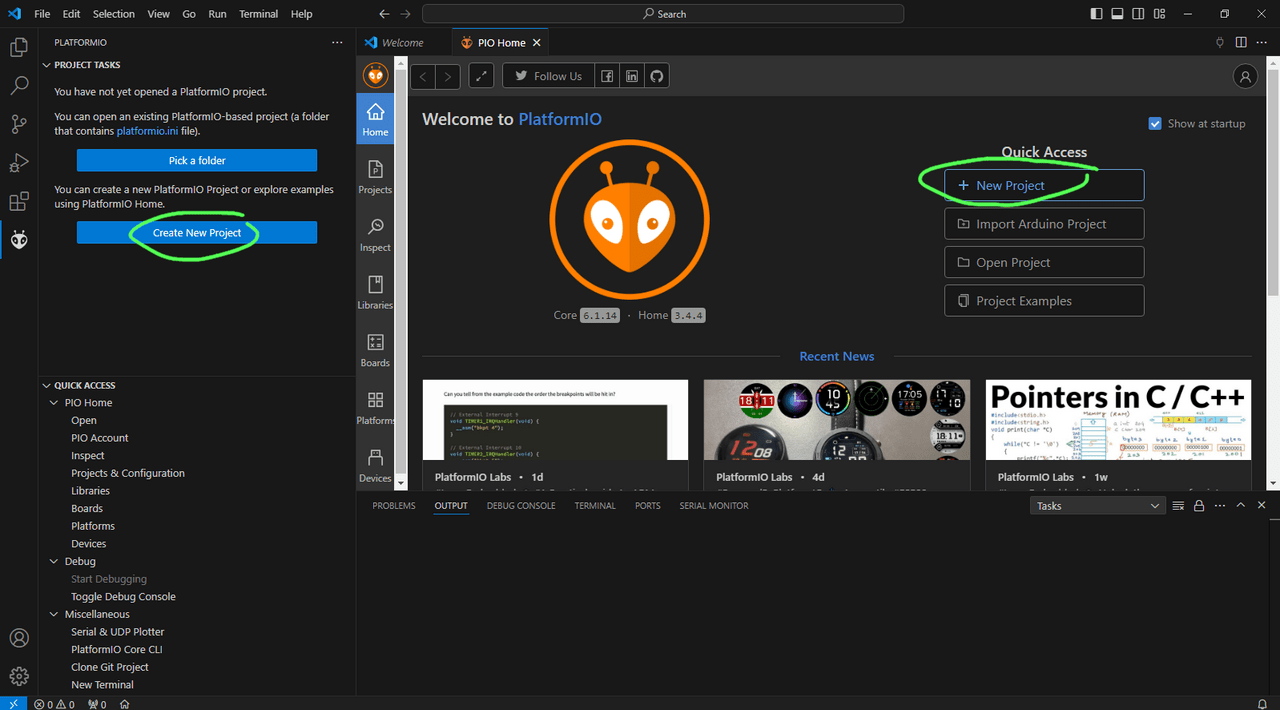
In the window that opens, click the New Project button.
In the boards list, select Lilka v2 (Anderson & friends).
In the frameworks list, select Arduino.
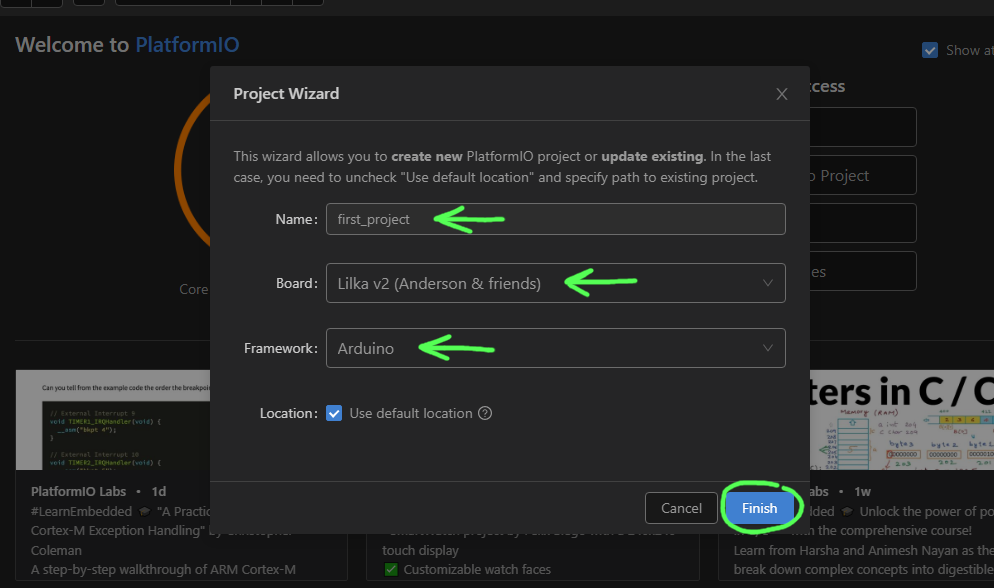
Then click on the Finish button.
Note:
If you don’t see Lilka v2 (Anderson & friends) listed or you get an error when creating your project, you need to update your PlatformIO packages.
To do this, run the command pio pkg update -g -p espressif32 in the Visual Studio Code terminal.
To open the terminal, in the Quick Access panel, select Miscellaneous, and then click on PlatformIO Core CLI. The console will open at the bottom of the Visual Studio Code window.
After that, you need to restart Visual Studio Code.
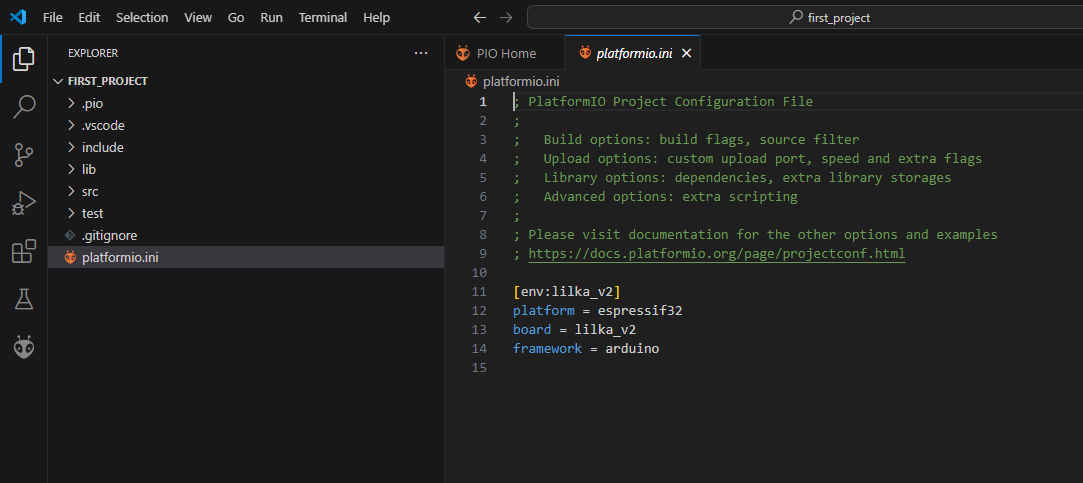
This is the project configuration file, which specifies all the project settings: platform, framework, libraries, etc. You can edit it manually, or you can use the PlatformIO graphical interface.
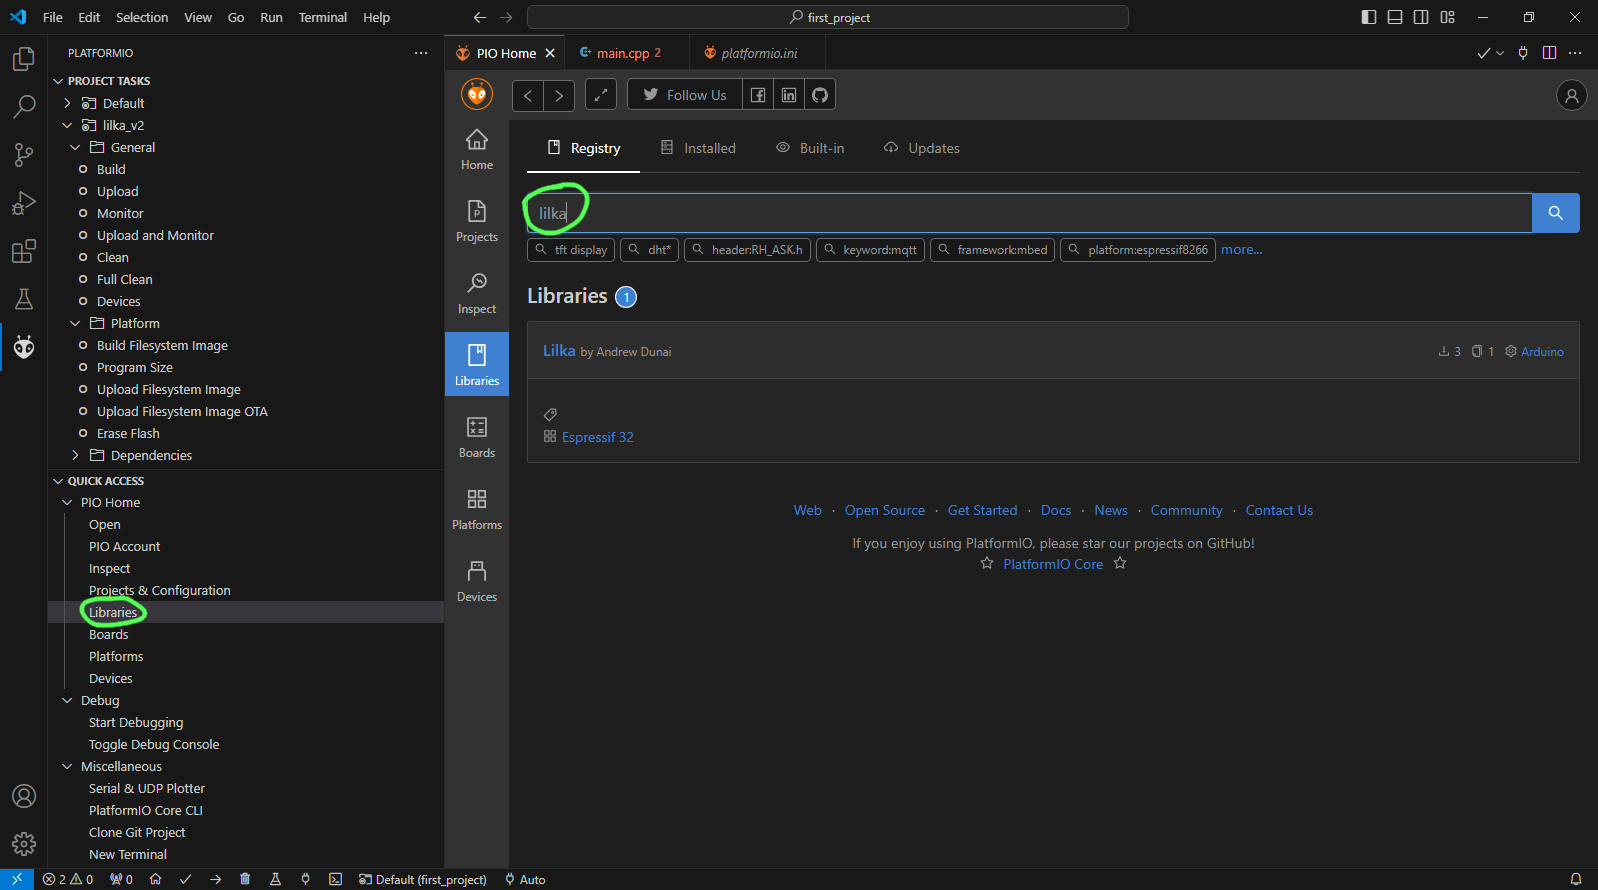
Now click on the Add to Project button.
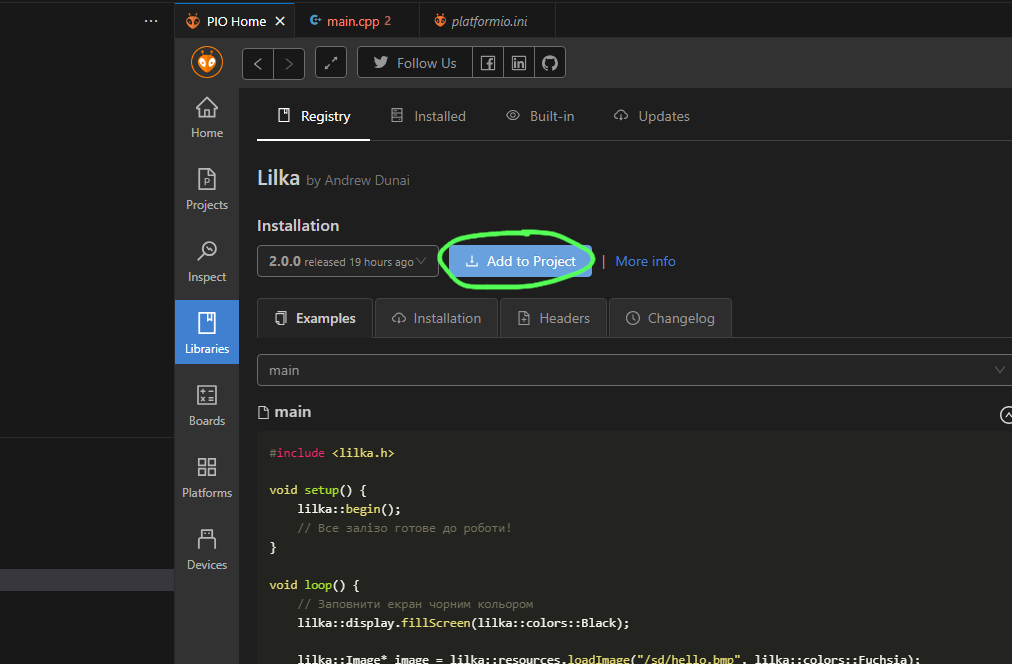
Once the library has finished loading, you will see it appear in the lib_deps field of the platformio.ini file.
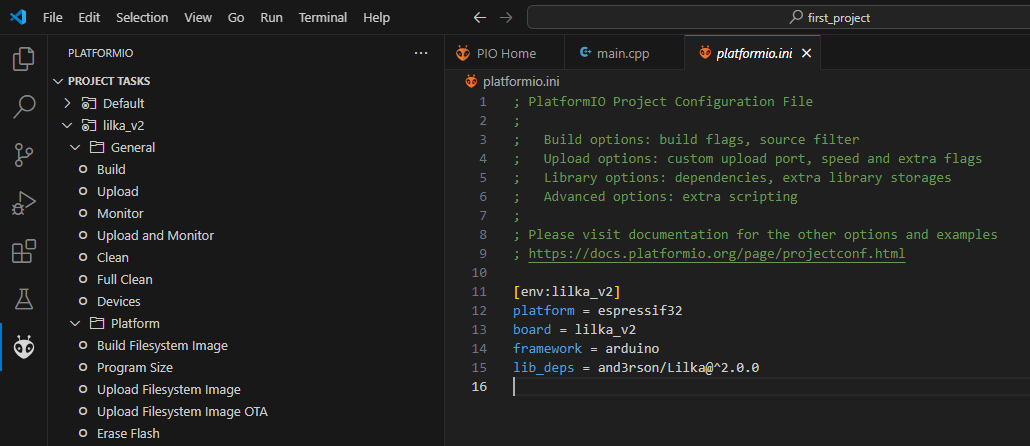
This field indicates which libraries are used in the project. PlatformIO automatically downloads and installs all libraries specified in this field, as well as their dependencies. Installing the lilka library automatically installs various libraries for working with Lilka, such as Arduino-GFX, which is used to work with the Lilka display.
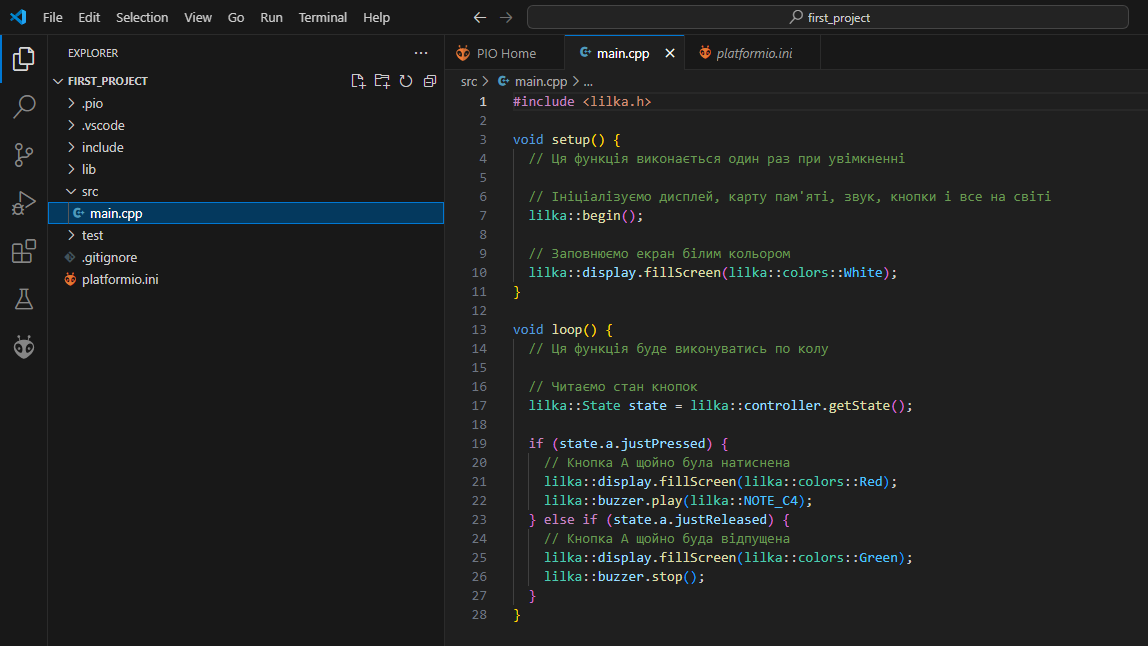
#include <lilka.h>

void setup() {
  // Ця функція виконається один раз при увімкненні

  // Ініціалізуємо дисплей, карту пам'яті, звук, кнопки і все на світі
  lilka::begin();

  // Заповнюємо екран білим кольором
  lilka::display.fillScreen(lilka::colors::White);
}

void loop() {
  // Ця функція буде виконуватись по колу

  // Читаємо стан кнопок
  lilka::State state = lilka::controller.getState();

  if (state.a.justPressed) {
    // Кнопка A щойно була натиснена
    lilka::display.fillScreen(lilka::colors::Red);
    lilka::buzzer.play(lilka::NOTE_C4);
  } else if (state.a.justReleased) {
    // Кнопка A щойно буда відпущена
    lilka::display.fillScreen(lilka::colors::Green);
    lilka::buzzer.stop();
  }
}
This is a simple program that, when you press the A button, changes the screen color to red and plays a sound, and when you release it, fills the screen with green and stops the sound.
To do this, connect Lilka to your computer using a USB cable, open the PlatformIO tab, and click the Upload action.
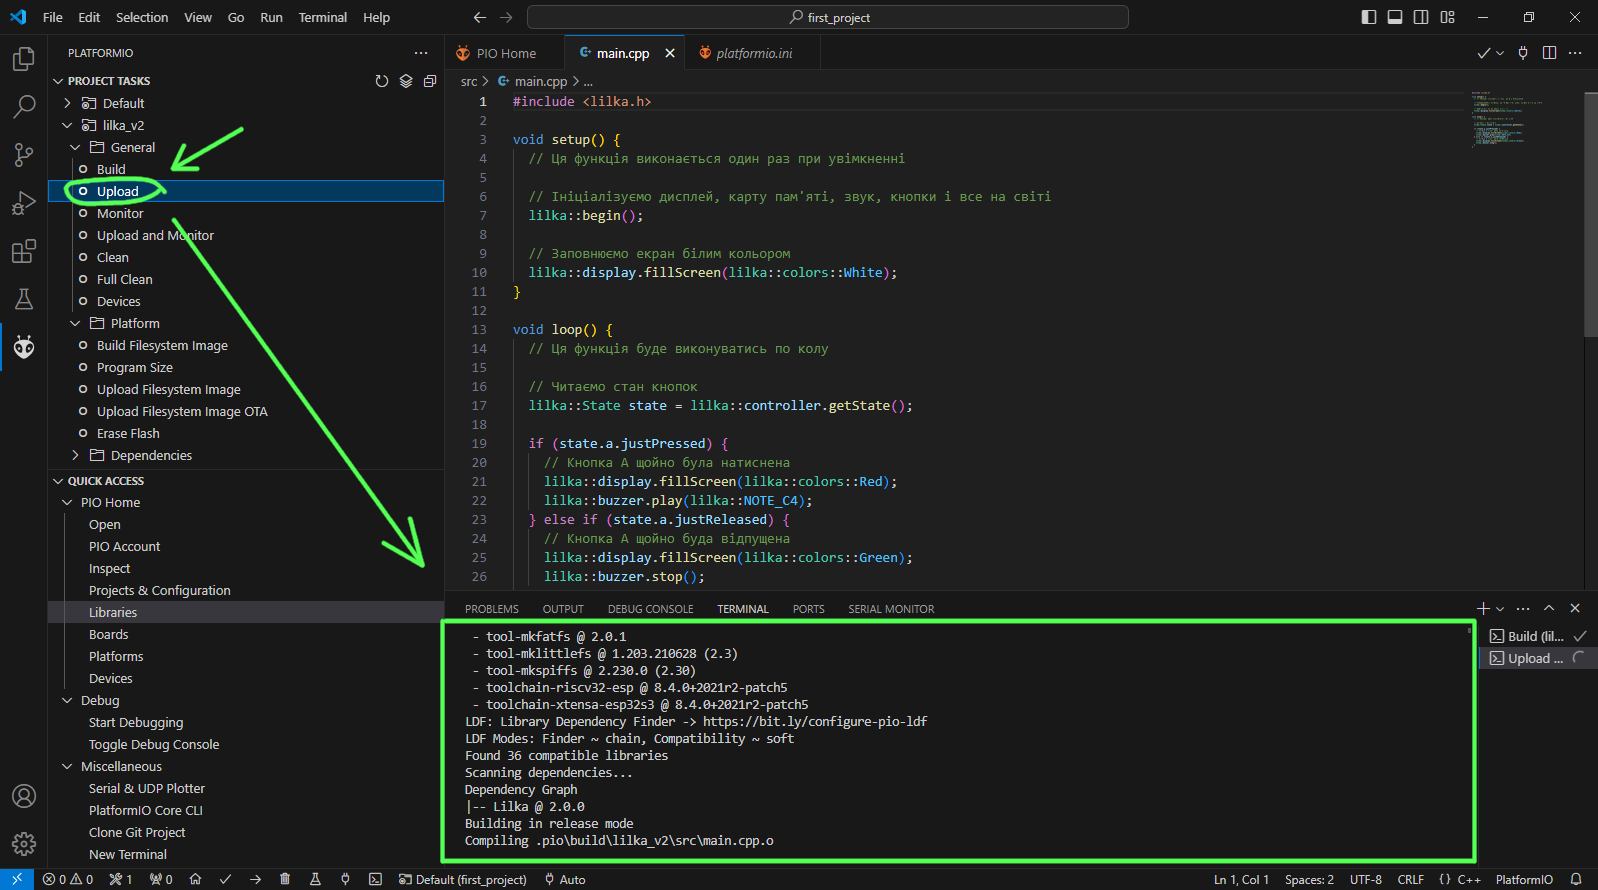
Once the compilation is complete and the firmware is loaded, you will see Lilka executing your program. Try pressing and releasing the A button and make sure everything works!