
06.06.2025
23 min
1292

A comprehensive guide to Pineapple Mark VII and Enterprise WiFi — from first launch, stager and firmware configuration, to full control via the web interface. Step-by-step consideration of connecting on Windows and Linux, Recon scanning of the Wi-Fi environment, attacks via PineAP, creating fake access points, frame injection, intercepting WPA handshakes, working with CLI, bash terminal, Cloud C2, installing modules and extending functions via packages. Ideal for Red Team, pentesters and experienced Wi-Fi analysts.

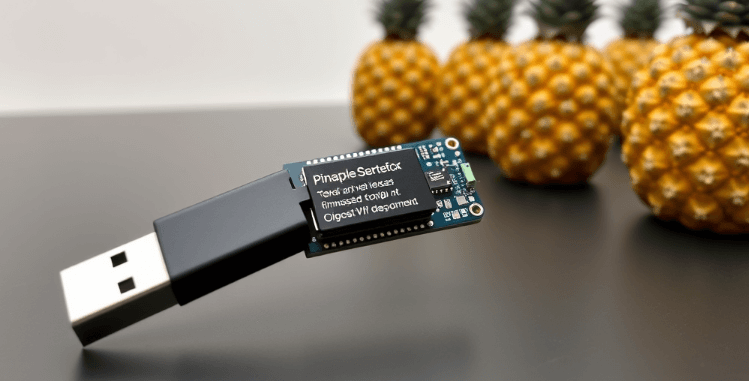
This section covers the entire process of first booting a WiFi Pineapple Mark VII or Enterprise: from the moment the device is turned on to the completion of the firmware and starting up. When the device boots for the first time, it starts a lightweight system – a stager, which serves as a temporary environment for updating to the full firmware.
The main ways to configure WiFi Pineapple:
automatic update via Wi-Fi (OTA);
manual firmware download in the browser;
headless mode via USB drive;
system recovery via Recovery Mode.
The first and easiest option is OTA update. After turning on the device, an open Wi-Fi network with the name Pineapple_XXXX will appear next to it. Having connected to it, the user enters the browser at http://172.16.42.1, selects a familiar Wi-Fi network, enters the password – and the device independently connects to the Internet, downloads the current firmware version, installs it and reboots. After that, the interface becomes available at the secure address https://172.16.42.1:1471.
If an Internet connection is not possible, a manual installation option is available. You need to download the .bin firmware file from the official Hak5 website, check its SHA256 hash, connect the device to the computer via USB-C, set the IP to 172.16.42.42, and in the browser go to http://172.16.42.1. There is a link there for manually downloading the firmware. After confirming compatibility, the file will be flashed into the system.
Another scenario is a headless setup, useful for automatic deployment of multiple devices. The USB flash drive is formatted in FAT32 or EXT4, the firmware upgrade-x.x.x.bin and the configuration file config.txt are written to the root. This file has a clear structure:
Typical config.txt content:
ROOT_PASSWORD="hak5pineapple"
HOSTNAME="pineapple"
TIMEZONE="utc"
MANAGEMENT_SSID="Pineapple_Management"
MANAGEMENT_PSK="AGoodWPA-PSKPassphrase"
OPEN_SSID="Open"
COUNTRY_CODE="US"
ENABLE_C2=1
The USB drive is inserted into the device before turning it on. After starting, WiFi Pineapple independently reads the data, flashes and applies all the settings without user intervention.
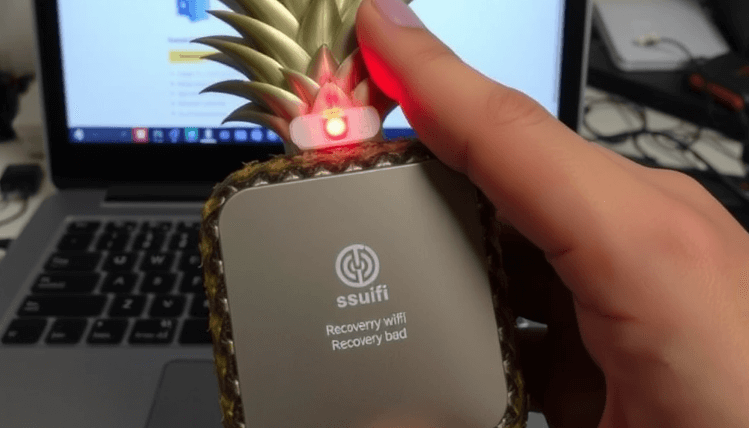
In cases where the device freezes, receives an update error or requires a full reset, Recovery Mode is used. To activate it, you need to hold the Reset button while powering it on. The indicator will light up (red or blue – depending on the model), after which the recovery web interface will open at http://172.16.42.1. The user downloads stager.bin and a full recovery of the device begins.
This process is completed by the first login to the system: https://172.16.42.1:1471, login root, password or the one that was set in the settings, or the default hak5pineapple. After that, WiFi Pineapple is completely ready for further operation.
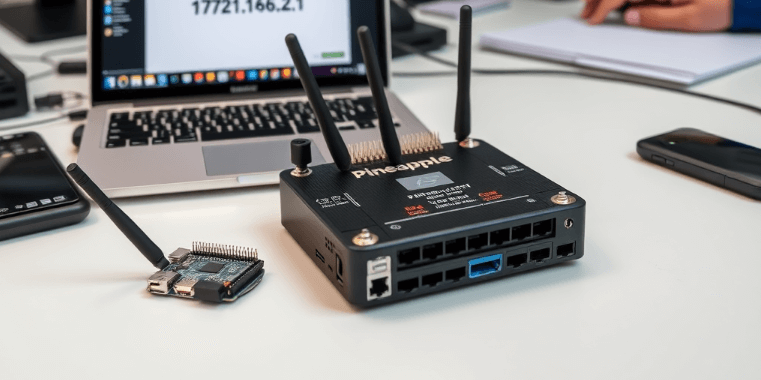
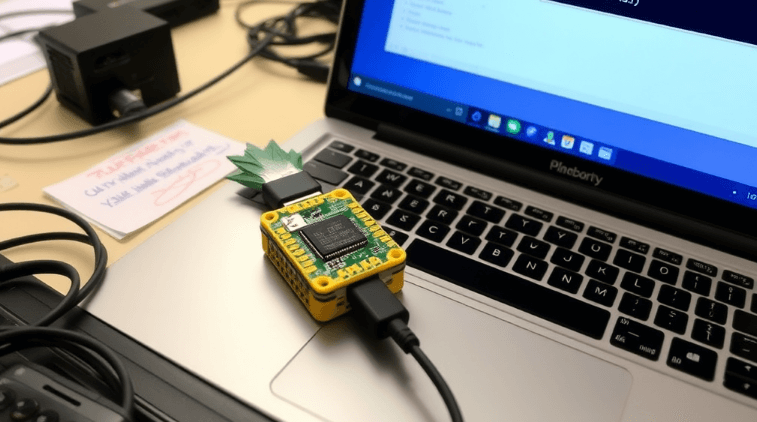
Once the device is flashed, the question arises: how is it most convenient to connect to it for everyday work. WiFi Pineapple Mark VII supports several types of connections: via USB-C Ethernet, via Wi-Fi access point or, in the case of the Enterprise version, even via the WAN port. For most users, the first acquaintance begins with connecting to the device via USB, because this is the most reliable way.
On Linux, everything is very simple. After connecting WiFi Pineapple via USB-C, a new Ethernet interface appears. If you set the IP address 172.16.42.42 and the mask 255.255.255.0, the device will be available at the address 172.16.42.1. This can be done through the graphical interface (Network Manager) or manually via the command line. In the command line, it is enough to execute a few familiar commands using ip link and ip addr. After that, the browser opens the full device management interface.
On Windows, the procedure is similar, but somewhat multi-step. First you need to go into the network adapter settings and find the one that matches Pineapple. In the TCP/IPv4 properties, set IP 172.16.42.42, mask 255.255.0.0, and DNS — usually 8.8.8.8 and 8.8.4.4. If everything is done correctly, the device will be available immediately.
It is most convenient to work with WiFi Pineapple not through wires, but through the air. All devices create an open access point immediately after launch. By connecting to it, you can not only update the firmware, as at the Setup stage, but also fully work with the device without any cables. This mode is convenient for field conditions, mobile groups or testing in difficult conditions.
The most common connection options:
Via USB-C Ethernet (with static IP setting);
Via Wi-Fi access point Pineapple_XXXX;
Via Cloud C2 or local LAN (for Enterprise);
Via Client Mode, when Pineapple itself connects to external Wi-Fi.
Of particular note is Client Mode — this is the ability of Pineapple itself to connect to an external Wi-Fi as a client. This allows it to get the Internet, update, download modules or interact with the C2 server. Enabling this mode occurs from the interface in the Settings > Networking section. The device scans all available networks, the user selects the desired one, enters the key — and Pineapple connects independently. This parameter is saved and activated automatically at each startup.
Another option is ICS (Internet Connection Sharing). This is a way to transfer the Internet from a computer to the Pineapple WiFi via USB. On Linux, it is convenient to use the official wp7.sh script, which automatically detects interfaces and configures NAT. On Windows, the standard “Network Access” function is used, which allows you to forward the connection from one adapter to another.
After successful connection, it is recommended to check:
is the address 172.16.42.1 available;
is the ping responding;
is the web interface opening (https://172.16.42.1:1471);
is there internet access (e.g., module updates).
Once the connection is stable, you have full control over the device. You can then proceed to configure access points, recon, PineAP, or connect to the Hak5 Cloud C2.
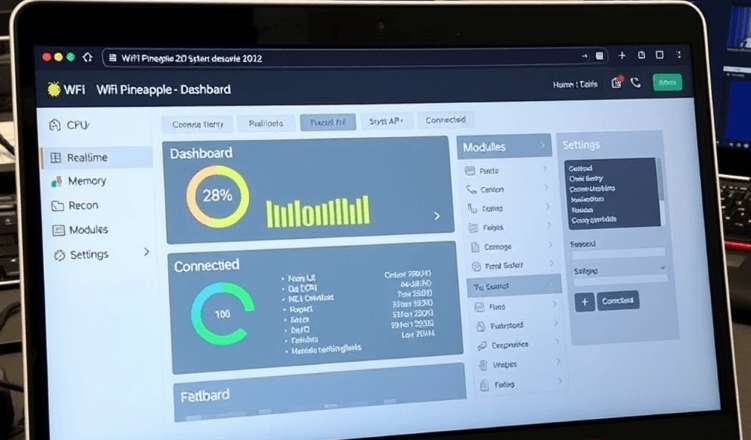
Immediately after connecting to WiFi Pineapple via cable or Wi-Fi, the user enters the main device management tool – the web interface, located at https://172.16.42.1:1471. This is the heart of the system, where everything is available: from traffic monitoring to launching attacks and installing modules.
After entering the root login and password (which is set during the first setup or headless configuration), the user enters the Dashboard – the central panel, which displays the device status in real time: processor, RAM, disk, connected clients and active campaigns. This is a starting point that allows you to quickly navigate the situation.
The interface is built quite logically. On the left is a side menu, which consists of the main sections: Dashboard, PineAP, Recon, Campaigns, Modules, Settings, etc. It is compact, but when you click “show more” it expands to a full-fledged panel. Above is the top panel, which displays messages, firmware version, access to the Web Terminal and quick access to functions.
It is especially important to pay attention to the Web Terminal – a built-in bash terminal. It allows you to work with the device as with a full-fledged Linux host: install packages, run scripts, debug and fully control the internal system without external SSH.
All changes in the system or warnings are displayed as messages. They are divided by level of importance: informational, warning, error, success or unspecified events. Thanks to this, the user always sees what is happening, even if he does not look into the log.
Main elements of the web interface:
Dashboard — main panel with resources and statuses.
PineAP — management of fake access points, SSIDs, clients.
Recon — wireless environment scanner.
Campaigns — attack automation and reporting system.
Modules — module and package manager.
Settings — system configuration, themes, updates, C2.
Terminal — built-in bash shell.
Help — help, diagnostics, licenses.
A special place is occupied by Campaigns – here you can create automated actions that combine several stages of testing, from scanning to report generation. Each campaign stores logs, it can be activated, stopped or restarted with one click.
The Modules tab is where the system really expands. There are dozens of third-party modules available: from credential collection to port scanners, rogue DHCP, EvilAP or specific payloads. Update, installation and removal – everything is integrated into the UI without the need for a terminal.
Key benefits of the WiFi Pineapple web interface:
no external software required;
works both wired and Wi-Fi;
integrates both basic control and advanced features;
allows you to deploy campaigns without CLI knowledge;
supports full bash access without SSH.
Even a beginner with no Linux experience can interact with Pineapple quite effectively via a browser. Everything is logically structured, real-time display works smoothly, and interaction with clients and SSIDs is reduced to an intuitive level. At the same time, for an experienced user, all the necessary tools are available: scripts, root access, configurations.
And this is the main strength of WiFi Pineapple: the power of a hacking tool wrapped in a simple and understandable interface.
PineAP is the core of the WiFi Pineapple attacks. It is through it that the device is able to launch fake access points, respond to client requests, emulate networks to which they have previously connected, and control all traffic passing through these connections. In most Red Team scenarios, PineAP is the same module that allows you to conduct full-fledged wireless perimeter testing, implementing attacks such as Evil Twin, deauth, phishing or MITM.
The essence of PineAP is as follows: Wi-Fi clients constantly query the environment – which networks are nearby, which ones are familiar, which ones can be connected to. PineAP responds to these requests, “impersonating” the network the client needs, even if it actually does not exist nearby. As soon as the client “takes a bite” – the device completely controls the traffic, can collect data, launch campaigns or launch further attacks.
PineAP is managed through a separate tab in the interface, where the user can see the daemon status, current parameters, SSID pool, filter types, as well as the number of connected or previously detected clients. PineAP works in several modes – passive, active or custom, through the “Advanced” tab.
What PineAP can do:
create fake access points (open and WPA2);
respond to probe requests from clients, emulating familiar SSIDs;
collect SSIDs into a pool from various sources (scan, log, manual entry);
maintain a list of connected and previous clients;
automatically connect clients to yourself;
launch attacks via frame injection (e.g. deauth).
All SSIDs that PineAP can impersonate are stored in a separate SSID Pool — it can be created manually or automatically. For example, if you run a scan (Recon), the system will collect SSIDs that it sees in the air and immediately add them to the pool. This allows you to quickly get a list of targets — especially in public places where there are many real access points. PineAP can emulate all these networks at the same time, the probability that the user will connect is very high.
In addition, filters play an important role. PineAP allows you to use Client Filter and SSID Filter — each with Allow or Deny modes. This allows you to control who can join and which networks can be emulated. For example, you can configure it so that only certain MAC addresses can connect, or that responses are given only to requests to specific SSIDs.
PineAP also has an Enterprise tab, where WPA-EAP support is implemented — this is a special type of fake access point that works in the style of corporate networks. The user creates self-signed certificates, after which the device simulates real WPA2-Enterprise — with challenge-response data logging. This is a powerful tool for Red Team for corporate purposes.
What attacks are implemented through PineAP:
phishing portals after connecting to a fake AP;
Evil Twin: spoofing a legitimate network with a stronger signal;
Wi-Fi phishing to steal logins (via captive portal);
WPA-EAP harvesting in corporate environments;
deauth attacks with forced connection to yourself.
PineAP is the functional center from which almost every WiFi Pineapple attack begins. Its strength lies in its easy control, flexibility, scalability, and ability to work with multiple clients and dozens of SSIDs simultaneously. In skilled hands, it transforms from a tool into a full-fledged platform for wireless reconnaissance, manipulation, and exploitation.
The Recon function is the eyes of WiFi Pineapple. It allows you to see everything that is happening in the wireless environment: which access points are present, which clients are connected to them, who is searching for networks, and which devices are in range. This tool allows you to form a complete picture of the wireless landscape – and only then proceed to attacks, manipulations or further research.
It all starts with starting a scan. WiFi Pineapple switches one of the antennas to monitor mode and starts going through the channels – channel by channel, in the so-called channel hopping mode. On each of them, the device listens to the air and captures all the frames it sees: beacons from access points, probe requests from clients, associations, disassociations, authorizations and others. All this is displayed in a convenient form: a table of access points with MAC addresses, SSIDs, encryption types and signal strength, as well as a separate table of clients – connected, unassociated, or those that are simply “looking” for familiar networks.
The interface allows you to instantly filter and interact with each target. Clicking on any row brings up a side menu where you can select additional actions: add the SSID to the PineAP pool, clone the point, target a deauth attack, or save the client MAC to the filter.
Recon allows you to detect:
active access points (with SSID, MAC, encryption, channel);
connected clients with MAC addresses and session duration;
unassociated clients that transmit probe requests;
lost clients (out of range) that were already in the zone before scanning;
previously collected handshakes — if their capture is enabled.
Recon mode is not only passive. During scanning, the device can automatically capture WPA2 handshakes – this is useful for further offline password cracking using Hashcat or other tools. Pineapple records these handshakes in PCAP or Hashcat’s 22000 format, after which they are stored in the “Handshakes” tab with the source (Recon or EvilAP) marked.
The peculiarity is that scanning does not just collect information – it forms the basis for everything that will be done later. All SSIDs can be immediately added to PineAP, clients can be redirected, and points can be cloned. Thus, Recon is not just a surveillance tool, but a launching pad for influence.
In the settings tab, you can select the interface for scanning, change the width of tables, columns, and the display format – in mobile view or full grid. This is convenient both in the field and for in-depth analysis in the laboratory.
Recon allows you to:
build a map of the Wi-Fi environment for any location;
detect attack targets from real traffic;
capture WPA2 handshakes without active actions;
see who users’ devices are connecting to;
react instantly: clone, disconnect, record.
This is one of the most powerful modules in the entire system. It is where reconnaissance begins, a plan is formed, and the first tactical decisions are made. Without high-quality scanning, there will be no high-quality interception.
WiFi Pineapple is not limited to the functionality that comes out of the box. The main strength of the device is its modular architecture. This means that its capabilities can be constantly expanded: adding new tools, graphical interfaces to CLI utilities, utilities for exploiting vulnerabilities, scanners, phishing templates, DNS spoofing, MITM attacks, loggers, etc. This is why Pineapple is often called the “App Store for the Red Team”.
All available modules are divided into two categories: already installed and available for installation. They are displayed in the corresponding section of the “Modules” interface, where each one has a name, version, size, author and a short description. One click is enough to install or update. In this case, there is no need to manually work with the terminal or write commands in the system – although, of course, this option is also available.
Most modules are graphical shells over already known utilities, adapted for Pineapple. For example, classic nmap is available through a convenient interface where you can specify IP range, ports, scan mode, and see results in tabular form right in the browser.
Typical modules that are often installed first:
Evil Portal — for creating phishing pages with login interception.
DNSspoof — DNS spoofing for attacks via PineAP.
SiteSurvey — deep scanning of the Wi-Fi environment with GPS binding.
Logging — logging of all client events, HTTP requests, connections.
nmap — graphical TCP/UDP port scanner.
WPA Harvester — automatic saving of WPA handshakes.
SSID Pool Manager — advanced management of the list of fake networks.
All modules are stored in the device’s file system, so before installing large components, you should make sure that there is enough space. It is also important to consider that some modules depend on external packages (for example, Python, libpcap libraries, curl, etc.). In this case, Pineapple will automatically offer to install everything you need through the Packages section – this is another powerful tool that opens up full access to system resources.
The Packages section is, in fact, a package manager like apt in Debian. It allows you to install CLI utilities, drivers for external Wi-Fi adapters, network libraries and everything that may be useful in your work. Installation, removal, update – all through the interface, or via the Web Terminal.
For experienced users, Pineapple also offers tools for creating your own modules. This process is well documented and based on the classic GitHub pull request pool principle: the user forks the official repository, creates their module (usually a shell or Python + HTML/JS), tests it, and after moderation can make it available to the entire community.
The modules allow WiFi Pineapple to:
turn into a MITM platform with phishing and DNS poisoning;
conduct a constant audit of the Wi-Fi environment with GPS-binding;
log all HTTP/S traffic and client activity;
scan networks for open ports and potential vulnerabilities;
customize the system for specific Red Team tasks.
So, modules are not just applications. They are tools that make Pineapple different from other devices. It adapts to a specific environment, to your tasks, to the work style of your team. This is where flexibility and creativity in pentesting begins.
To work effectively with WiFi Pineapple, it is not enough to simply tap on the interface buttons. You need to understand how the environment in which this device operates works – that is, protocols, frames, MAC addresses, radio frequencies and operating modes of wireless devices. Pineapple is not magic. It is a technique that understands the rules of the game and knows how to circumvent them.
Wi-Fi (802.11) is a set of standards that describe how devices transmit and receive information in the radio range. In the classic infrastructure model, there is an access point (AP) and clients (STA). AP works in Master Mode, clients – in Managed Mode, and Pineapple can switch its adapters to Monitor Mode to listen to the air without a connection, or to Injection Mode to artificially create frames – responses, commands, disconnections, etc.
All these devices communicate using 802.11 frames – these are the basic units of traffic. They come in three types: Management, Data, Control. Management frames are everything related to connection: beacon, probe, association, deauthentication. Data are regular user packets. Control are service packets to support transmission. Pineapple works most with management frames, because they allow attacks without a real connection.
Typical Wi-Fi frames that Pineapple works with:
Beacon — transmitted by the AP to “announce itself” to all devices in range.
Probe Request/Response — searches for known networks or responds to a request.
Authentication/Association — starts a real connection between the STA and the AP.
Deauthentication/Disassociation — “kicks” the client out of the network.
Data — real IP packets that go in sessions after the connection.
Each frame contains MAC addresses — identifiers of each adapter. They can be unique (assigned by the manufacturer) or local (spoofing, substitution). Pineapple actively uses MAC spoofing to imitate networks familiar to clients or even known production access points. There is also a special address FF:FF:FF:FF:FF:FF — this is a broadcast, that is, a message to all devices around.
The space in which Wi-Fi operates is limited by frequencies — 2.4 GHz (universal) and 5 GHz (faster, but more limited in range and licenses). Pineapple Mark VII operates in 2.4 GHz, and Enterprise — also in 5 GHz, which gives it an advantage in attacks in corporate environments.
There are channels within the frequency range. For example, in 2.4 GHz — there are 14 channels, but only 1, 6 and 11 do not overlap. When scanning or attacking, it is important to correctly understand which channels the target uses. Therefore, Pineapple uses channel hopping — quickly switching across all channels to capture the maximum amount of information.
What else is worth knowing about Wi-Fi for a pentester:
EIRP (effective power) = radio power + antenna gain in dBi.
More does not mean better: high power = more noise = more chance of detection.
Protocols: 802.11b (old), g (up to 54 Mbps), n (up to 150 Mbps), ac (even faster).
Modulation: OFDM (modern, efficient), DSSS (old, slow).
Channel width: 20/40/80 MHz = more speed, but less stability.
When Pineapple intercepts a handshake, it saves the traffic to a PCAP file. This traffic can be loaded into Hashcat or aircrack-ng to crack the password offline. But without understanding how the handshake is formed (the four-step interaction between the STA and the AP), such attacks will be random. In Enterprise networks, the handshake goes through EAP and certificates — Pineapple also supports replacing such points with the generation of self-signed TLS.
This system is completed by frame injection — the ability to create your own packets and “throw” them into the air. For example, you can manually create a beacon frame and impersonate Starbucks Free WiFi. Or send mass deauth packets to knock all users off the network and force them to connect to a fake point. And this is where Pineapple reveals itself in full — because it doesn’t just listen, it affects the environment.
WiFi Pineapple Mark VII / Enterprise is a universal tool for auditing wireless networks, combining simplicity, flexibility and powerful functionality. From configuration to launching complex attacks, everything is built logically and clearly, both for a beginner and an experienced pentester.
Its main modules — Recon and PineAP — allow you to see the entire network picture and actively influence it: emulate access points, intercept traffic, collect handshakes and launch phishing attacks. Thanks to the modular architecture and CLI access, the device is easily adapted to any task.
This is not just a gadget — it is a reliable basis for serious work in the field.