08.09.2026
28 min
229



How to Install GrapheneOS on a Google Pixel via Linux: Preparing Ubuntu, Chrome, and udev, Flashing with the Web Installer, and Verifying the System with Screenshots.
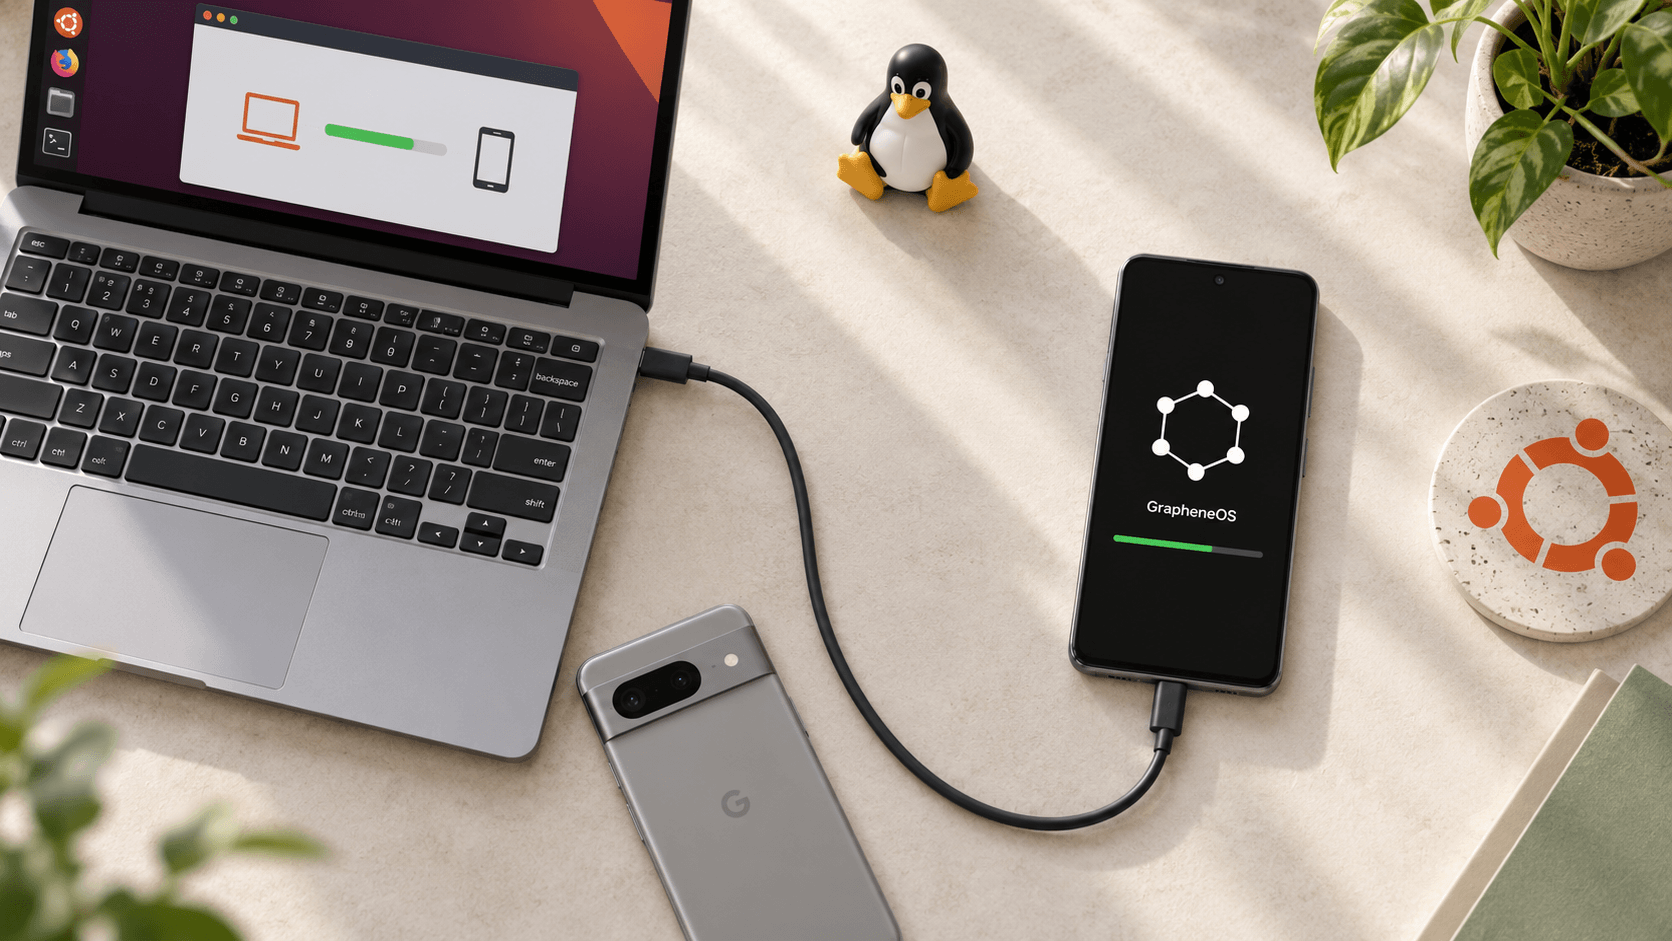
Follow these steps to install GrapheneOS on a Google Pixel using Linux: prepare the browser and USB access, unlock the bootloader, flash the operating system, and verify the result. This illustrated guide uses a Pixel 10 and Ubuntu 24.04 LTS as examples.
To install GrapheneOS, you only need a compatible Google Pixel smartphone, a Linux computer, and a USB cable that supports data transfer. The official Web Installer downloads the required image and flashes it to the phone through the browser. Linux remains the computer’s operating system, while GrapheneOS replaces the operating system on the Pixel itself.
This guide primarily uses Ubuntu 24.04 LTS on an x86_64 computer, Google Chrome installed from the official .deb package, and a standard Pixel 10. It also explains the preparation differences for Debian, Arch Linux, and Linux Mint. The installer’s button labels are kept in English so that they are easy to find on the official website.
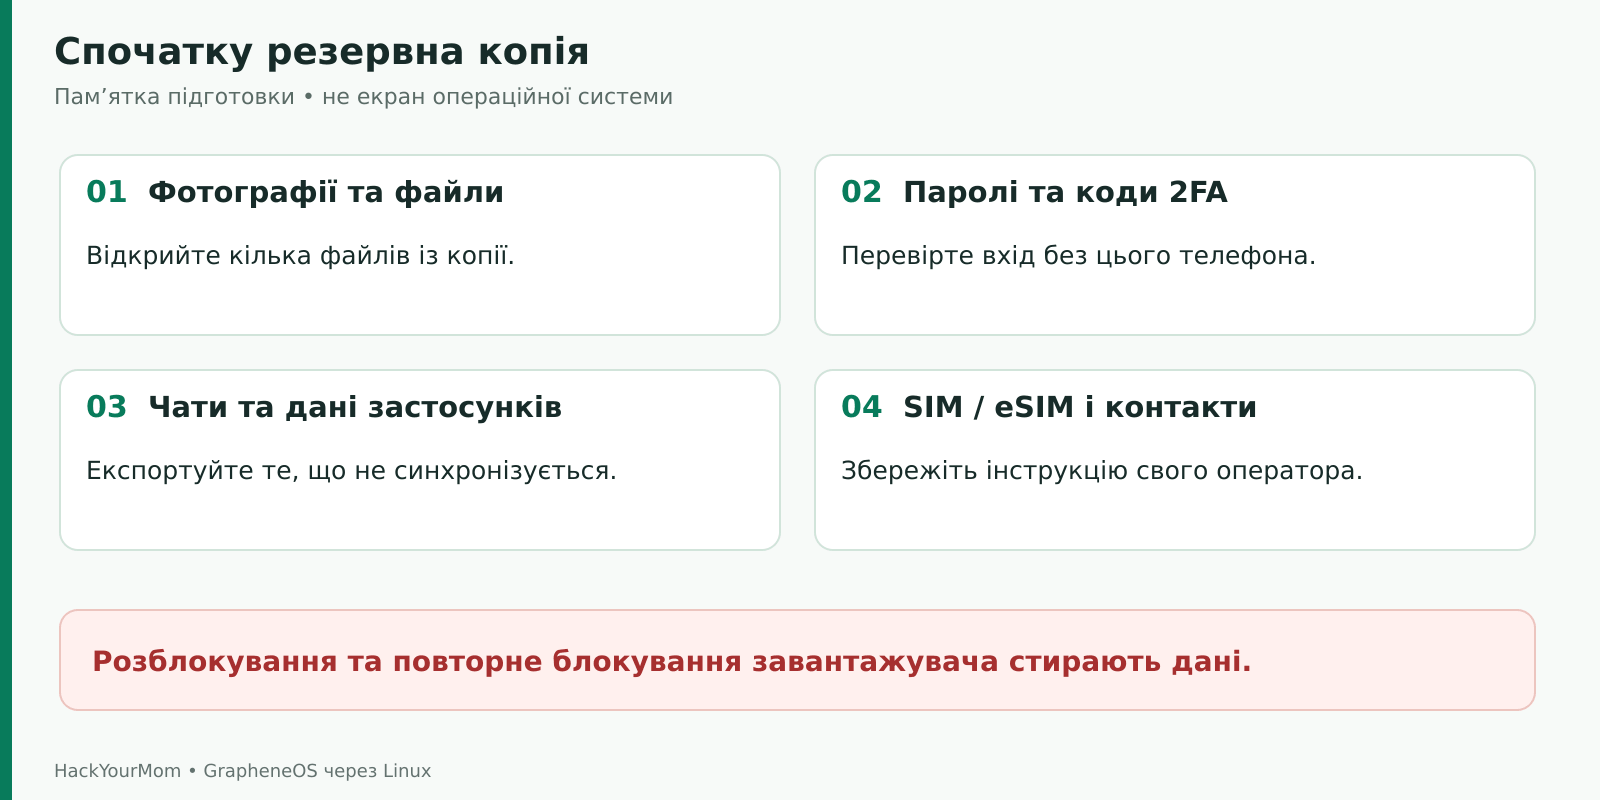
Important: unlocking and relocking the bootloader erases all user data from the Pixel. Before you begin, back up any necessary files and make sure you can access your important accounts without this phone. Data should only be restored after flashing GrapheneOS, relocking the bootloader, and completing the initial system verification.
The list of supported environments is available in the official Web Installer requirements. At the time this guide was prepared, the list included Arch Linux, Debian 12 and 13, Ubuntu 22.04 LTS and 24.04 LTS, as well as Linux Mint 21, Linux Mint 22, and LMDE 6. For Mint 21, follow the Ubuntu 22.04 instructions; for Mint 22, follow the Ubuntu 24.04 instructions; and for LMDE 6, follow the Debian 12 instructions.
Ubuntu 24.04 LTS was chosen for this guide because it is explicitly listed in the installer requirements, and its standard security maintenance continues until May 2029 according to Canonical’s release-cycle schedule. The newer Ubuntu 26.04 LTS has already been released, but it is not yet included in the verified Web Installer list. This does not necessarily mean that it is incompatible, but it would be premature to describe it as an officially confirmed environment for this guide.
Ubuntu 25.04 also remains listed by GrapheneOS. When choosing an operating system, check not only whether it appears in the installer’s compatibility list but also whether the distribution itself is still officially supported. Interim Ubuntu releases have shorter support lifecycles. If you are installing an operating system on a computer specifically for this procedure, choose a currently supported release rather than an outdated one simply because it is still mentioned on the website.
Fedora, openSUSE, and other distributions may provide the necessary technical components, but they should not automatically be treated as equivalent to the listed environments. The apt commands in this article do not apply to them. If your distribution is not included in the current list, check its documentation for browser compatibility and USB rules, or use a computer running one of the listed operating systems.
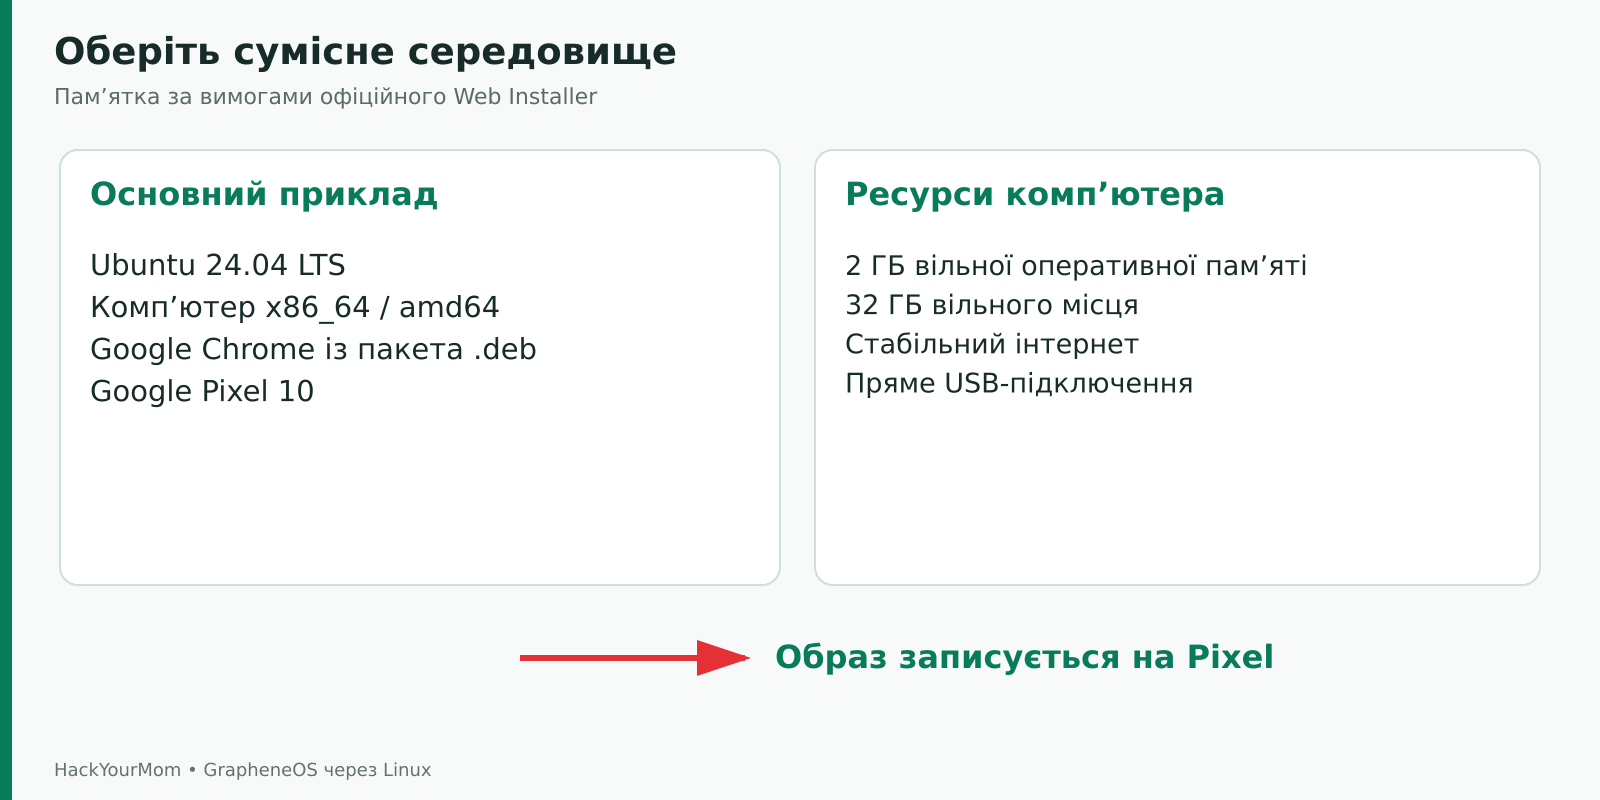
Make sure your computer has at least 2 GB of available RAM and 32 GB of free storage space. The browser downloads and extracts a large system image, so having sufficient resources available is important. Close unnecessary tabs and resource-intensive applications, and free up the required storage space before connecting the phone. These requirements refer to available resources, not the total amount of memory or storage installed on the computer.
Use a high-quality cable that supports data transfer, preferably the USB-C cable supplied with your Pixel. If your computer only has USB-A ports, you will need a suitable USB-A-to-USB-C cable. Connect it directly to a laptop port or a rear USB port on a desktop computer. USB hubs, docking stations, and front-panel ports introduce additional connections that may interfere with the flashing process.
Check the phone’s full model name in the list of devices supported by GrapheneOS. This guide uses the standard Pixel 10, without the Pro or “a” designation. The Pixel 10, Pixel 10 Pro, Pixel 10 Pro XL, and Pixel 10a require different system images. Support for an entire device family does not mean that one image is suitable for all its models.
As of September 2026, the Pixel 11 is not included in the verified official list of devices with production support for GrapheneOS. Before installing GrapheneOS on it, you must wait until the relevant model and system images are officially added. A Pixel 10 build cannot be used as a substitute.
Charge the Pixel sufficiently, preferably to at least 60%, and connect the laptop to a power source. This is a practical safety margin for the procedure, not a separate flashing requirement.
Make sure you have a stable internet connection. Do not use the Pixel itself as your only hotspot because it will restart during the installation.
Use a regular local graphical Linux session. A virtual machine and USB passthrough introduce additional potential causes of failure.
Check in advance that you can perform administrative actions on the computer. You will need the password of a user with sudo privileges to install the USB rules package.
Allow approximately 30–60 minutes after completing the backup. The image download speed, USB connection speed, and computer preparation will affect the actual installation time.
Copy any photos, videos, documents, and downloaded files that exist only on the phone. After copying them, open several files on another device to make sure they can be accessed correctly. Simply having synchronization enabled does not prove that every folder and all application data have been backed up.
Pay particular attention to messaging applications. Simply enabling synchronization does not guarantee that all chats, media files, and application data have been saved.
Also pay close attention to two-factor authentication. If your one-time codes are available only on this Pixel, wiping it may cause you to lose access to your email and other services. Check your authenticator’s export options, save your backup codes, and verify access to your password manager. Copies of the codes must be accessible without the phone you are about to flash.
Install all available system updates using your distribution’s standard update tool. In Ubuntu, you can do this through Software Updater. If a restart is required, complete it before beginning the flashing process. Updating Linux or the browser while flashing the operating system to the phone makes the process more difficult to control.
You can check your Ubuntu version and system architecture in Settings under About. If the menu names differ, open Terminal through the application search and run these two commands separately:
cat /etc/os-release

uname -m
The first command displays the name and version of the Linux distribution. In our example, the second command should return x86_64. The Chrome package labelled amd64 is intended for this architecture; the name does not mean that the computer must have an AMD processor. Do not install this package on an ARM64 system. Instead, you must select a compatible browser built for that architecture.
In Ubuntu, open Settings → Power → Automatic Suspend and temporarily disable automatic suspend while the computer is plugged in. On a desktop computer, the corresponding setting may be called When Idle. Its location is described in the Ubuntu documentation on automatic suspend. If your interface looks different, search for Power in the application list to locate the setting.
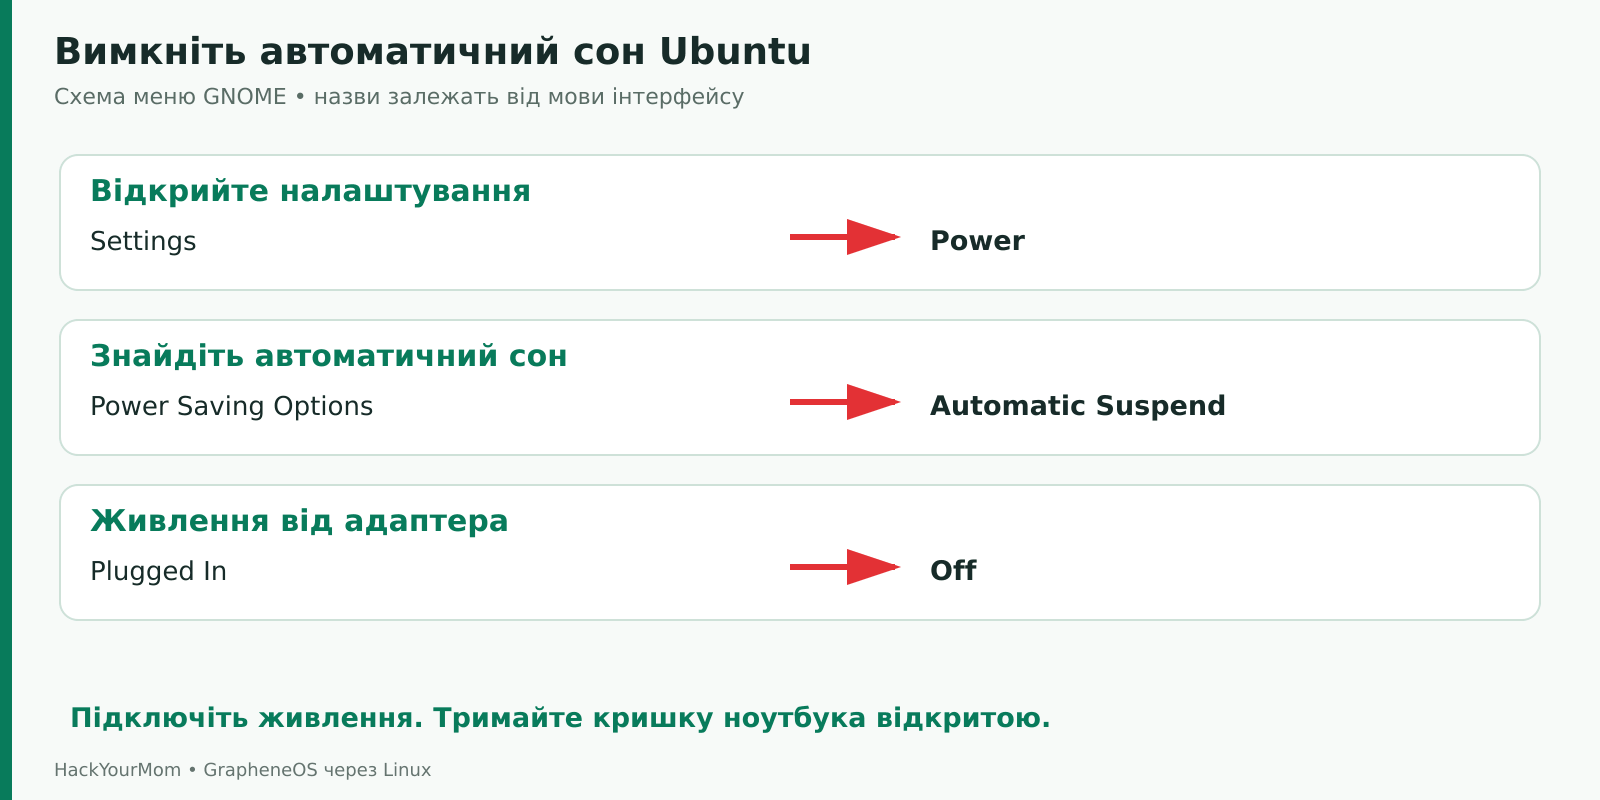
Turning off the display and putting the computer to sleep are two different states. Changing only the screen timeout does not guarantee that the system will remain active. Keep the laptop lid open and do not disconnect it from the power supply. After completing the installation, restore your usual power-saving settings.
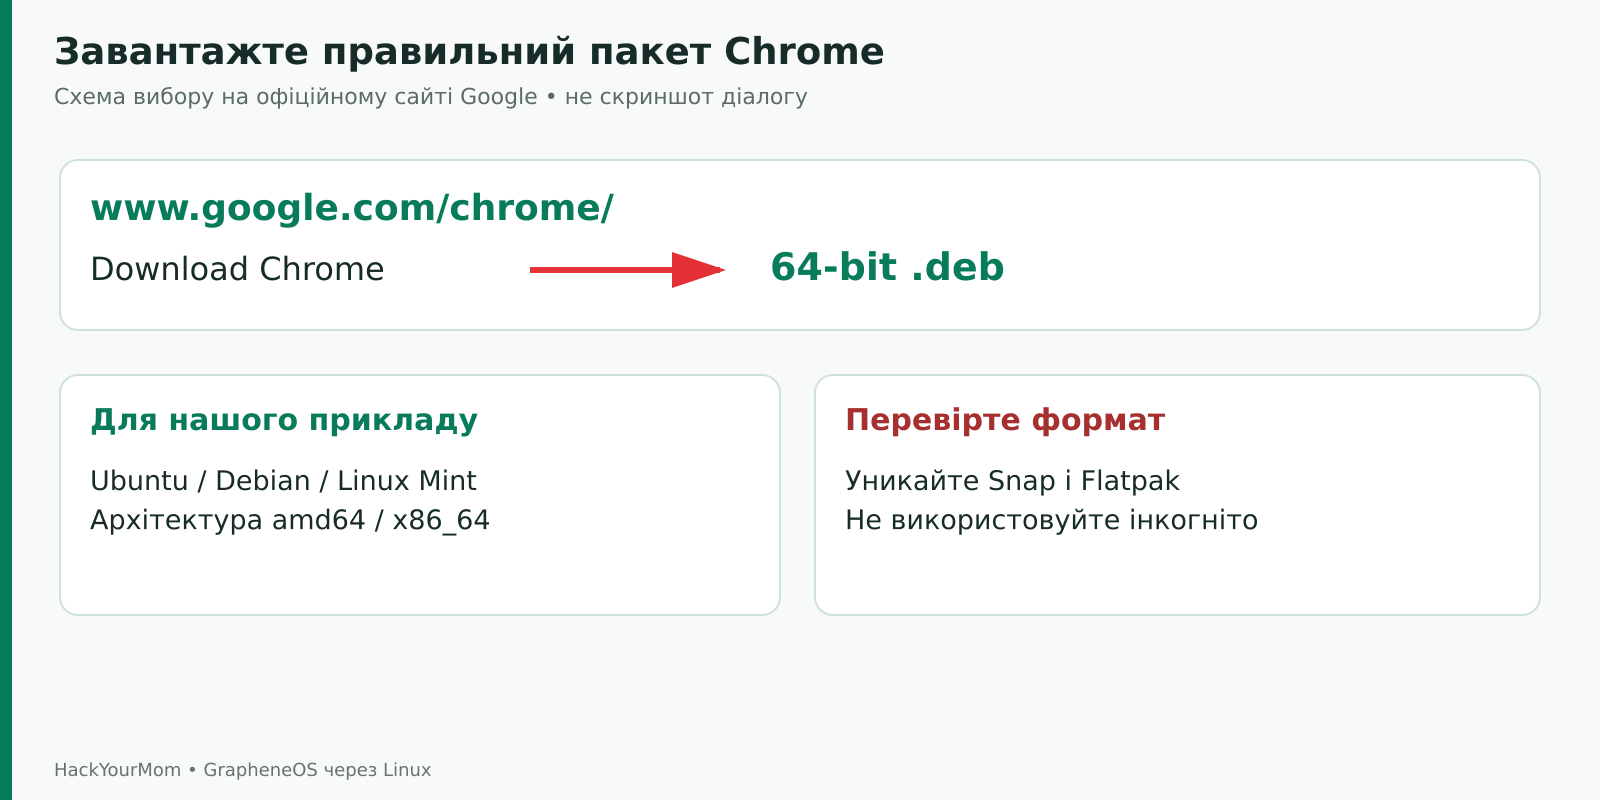
For the primary installation method, we will use Google Chrome installed from the official .deb package. Firefox is not compatible with this Web Installer. GrapheneOS also supports appropriate versions of Chromium, Microsoft Edge, and Brave, but warns against using browser builds distributed through Snap or Flatpak because they may cause problems during installation. On Ubuntu, the Chromium Snap package is specifically listed as lacking functional WebUSB support.
Open the official Google Chrome website in your current browser, click Download Chrome, and select 64-bit .deb for Debian/Ubuntu. Google explains the difference between .deb and .rpm packages in its download instructions. Ubuntu specifically requires the .deb package; renaming a package intended for another operating system will not make it compatible.
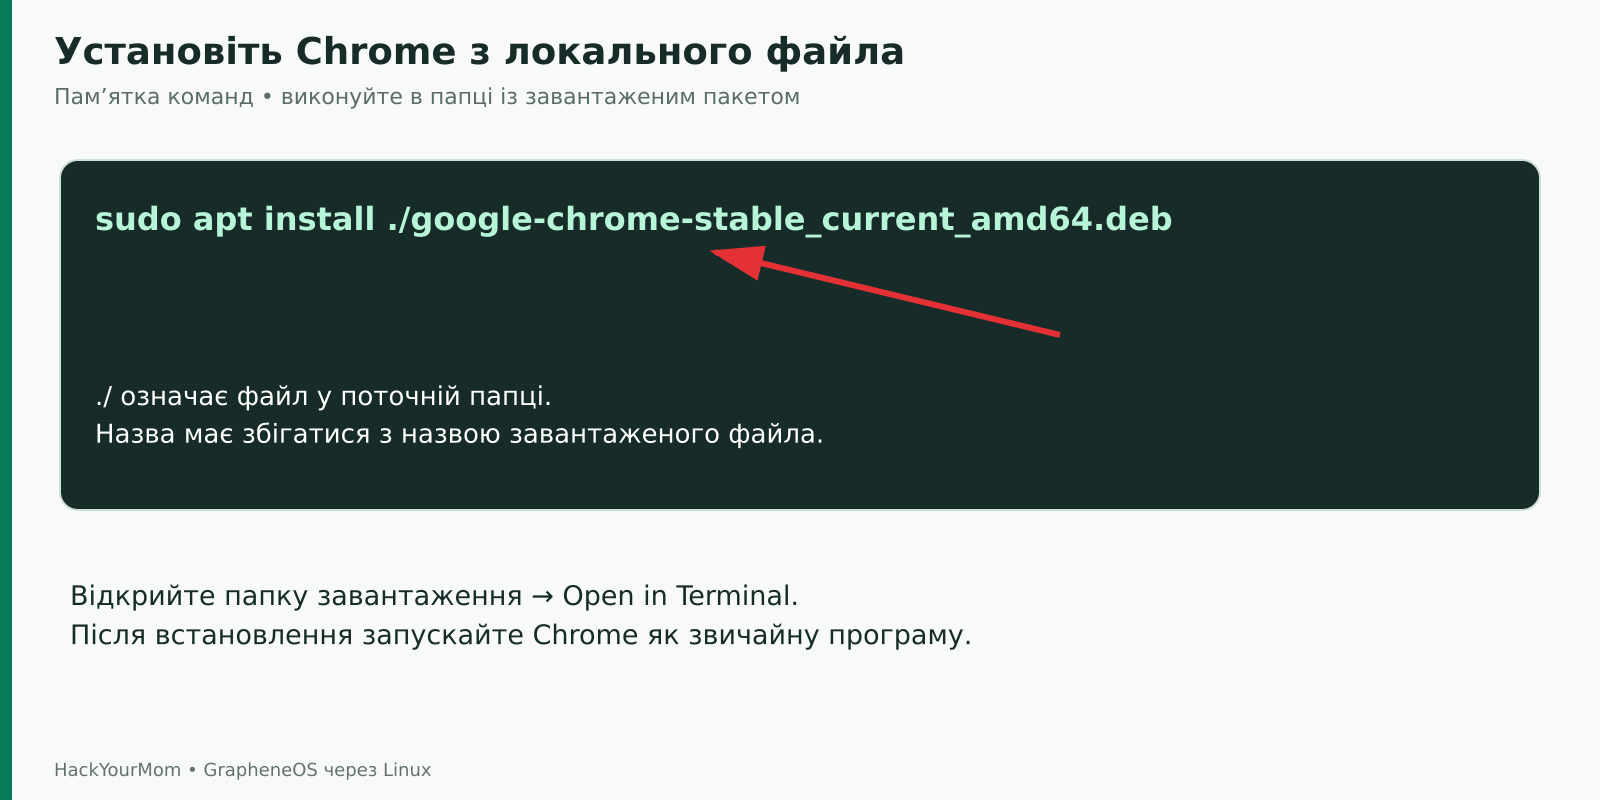
Save the file, open the download folder in your file manager, and find Open in Terminal in the folder’s context menu. This will open a terminal right where the package is located, even if the download folder has a localized name. For a standard file name, the command is:
sudo apt install ./google-chrome-stable_current_amd64.deb
If your browser has added a copy number to the name, use the actual file name. Start typing it after ./ and press Tab to autocomplete. The ./ prefix tells apt to install a local file from the current directory. Read the suggested changes before confirming.
When sudo asks for a password, enter your Linux user password and press Enter. Password characters are usually not displayed in the terminal. Do not provide this password to the installer website: it is only required by the local operating system to install the application.
Launch Chrome from the application list as a regular user. If an update is available, install it and restart the browser before proceeding. Do not launch Chrome with sudo or add the --no-sandbox option. We will configure the USB rules separately to provide access to the phone.
If Chrome is already installed from a regular package and is up to date, you do not need to reinstall it. If you use Brave, disable Shields on the installer page because its storage restrictions may interfere with image preparation. Do not use private or incognito mode, regardless of the browser.
On Linux, it is not enough for the browser to physically detect the connected cable. A regular user must also have permission to access the corresponding USB device. This is managed by udev rules, which are applied when hardware is connected. GrapheneOS provides additional information about this in the Flashing as non-root section.
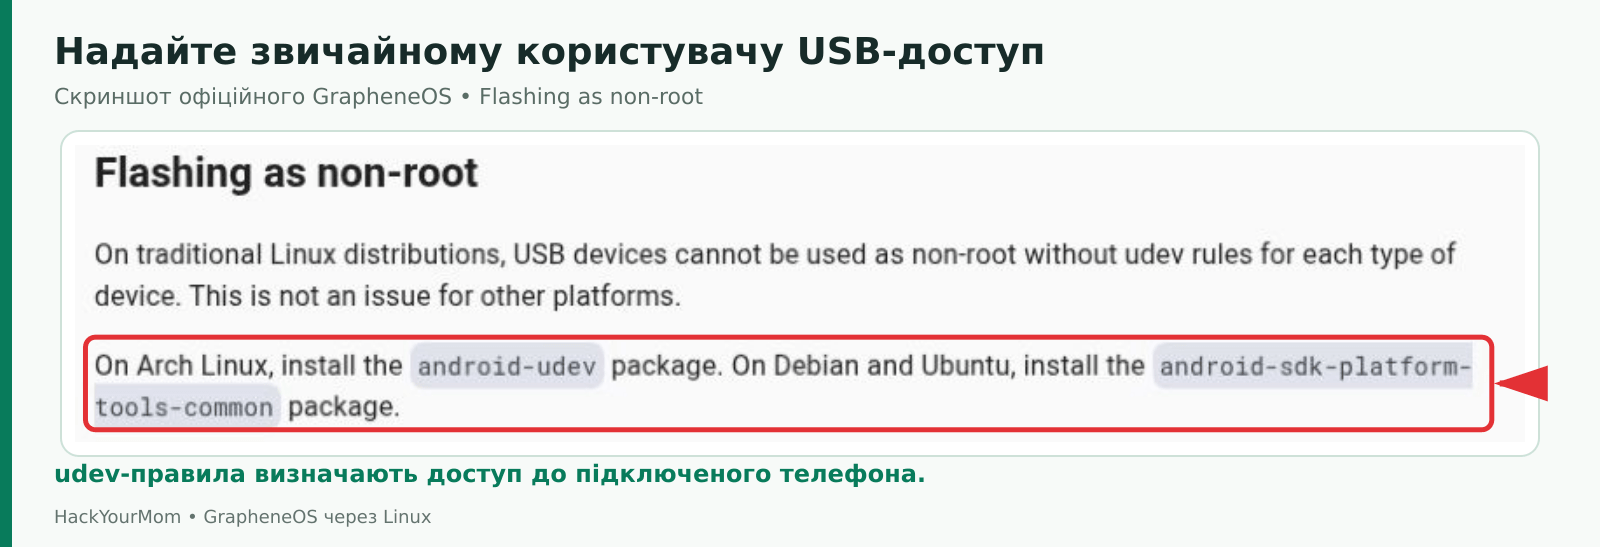
For Ubuntu, Debian, and the corresponding versions of Linux Mint, run the commands one by one. The second one is required after the package list has been successfully updated:
sudo apt update

sudo apt install android-sdk-platform-tools-common
The package is available in the Ubuntu 24.04 repository. In Debian 13, it depends on android-udev-rules, as shown on the Debian package page. This difference in package structure is normal. The complete Android Studio package is not required for the browser-based installation method.
If Ubuntu displays an Unable to locate package error, first check your internet connection and the output of apt update. The package is located in the Universe repository component. In Ubuntu, open Software & Updates and make sure that the community-maintained software component labelled universe is enabled. Update the package list and try installing the package again. This advice applies specifically to Ubuntu: Debian does not have a repository component with that name.
For Arch Linux, use its package manager and install the android-udev package:
sudo pacman -Syu android-udev
The command also updates the Arch system. Review the changes and wait for it to complete; if a reboot is required after the upgrade, do so now. Do not replace apt with Arch commands or pacman with Ubuntu commands. The remaining Web Installer buttons are the same, but the preparation of packages depends on the distribution.
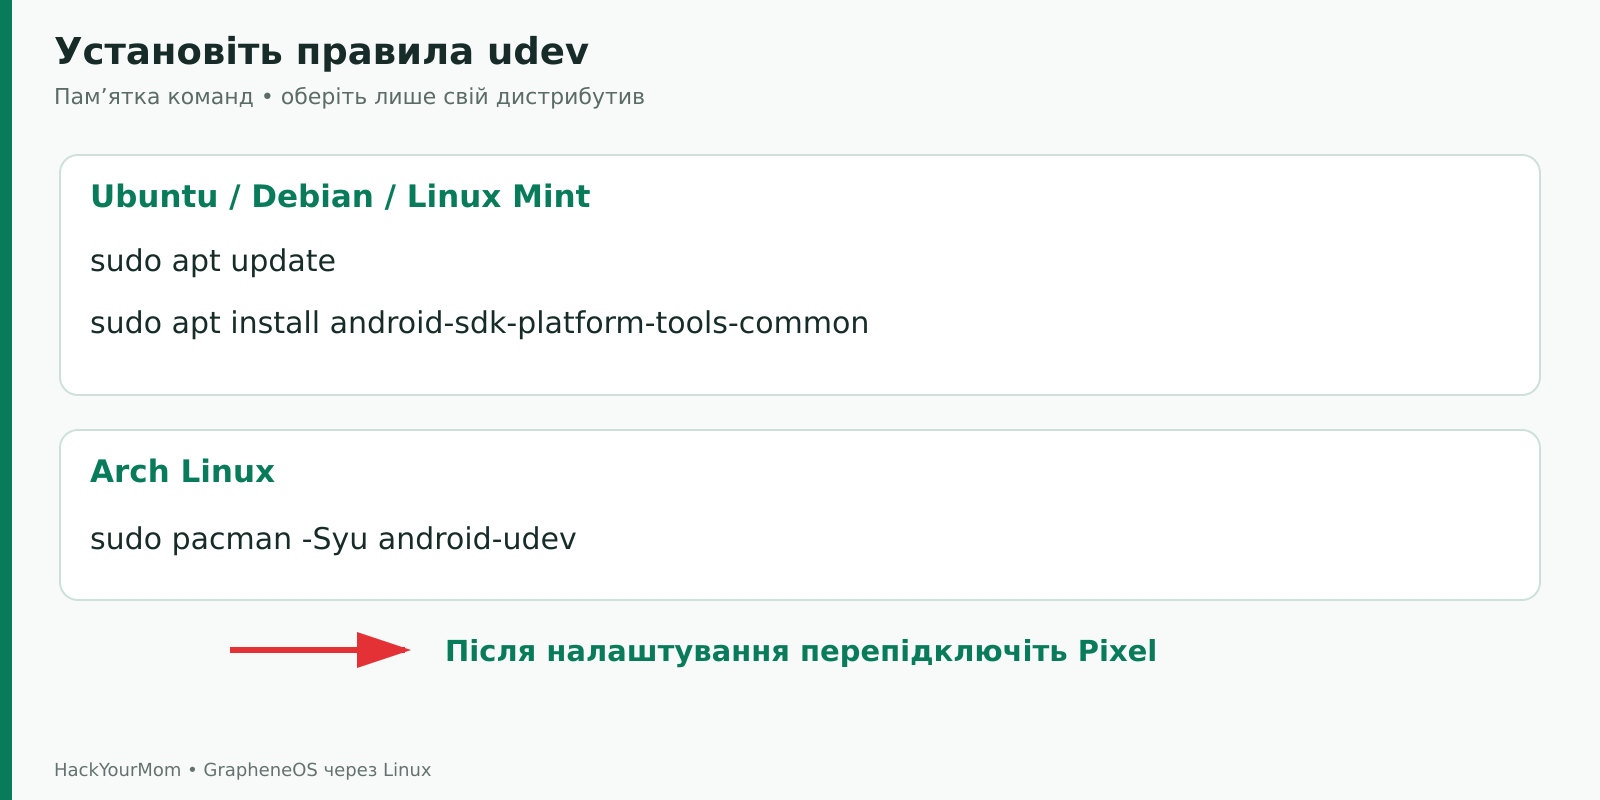
If the phone was connected before the USB rules were installed, disconnect it and reconnect it after switching it to Fastboot Mode. Reconnecting the device is explicitly required by the official instructions. If USB access is still unavailable, restart the computer before beginning the flashing process and sign back into a regular local session. Do not attempt to fix the issue by running the browser as root or applying broad chmod permissions to all USB devices.
First, install all available updates for the stock operating system on the phone and complete the required restart. This ensures that you begin the procedure with up-to-date components. GrapheneOS also flashes the appropriate device firmware during installation, but updating the stock operating system beforehand remains a recommended preparation step.
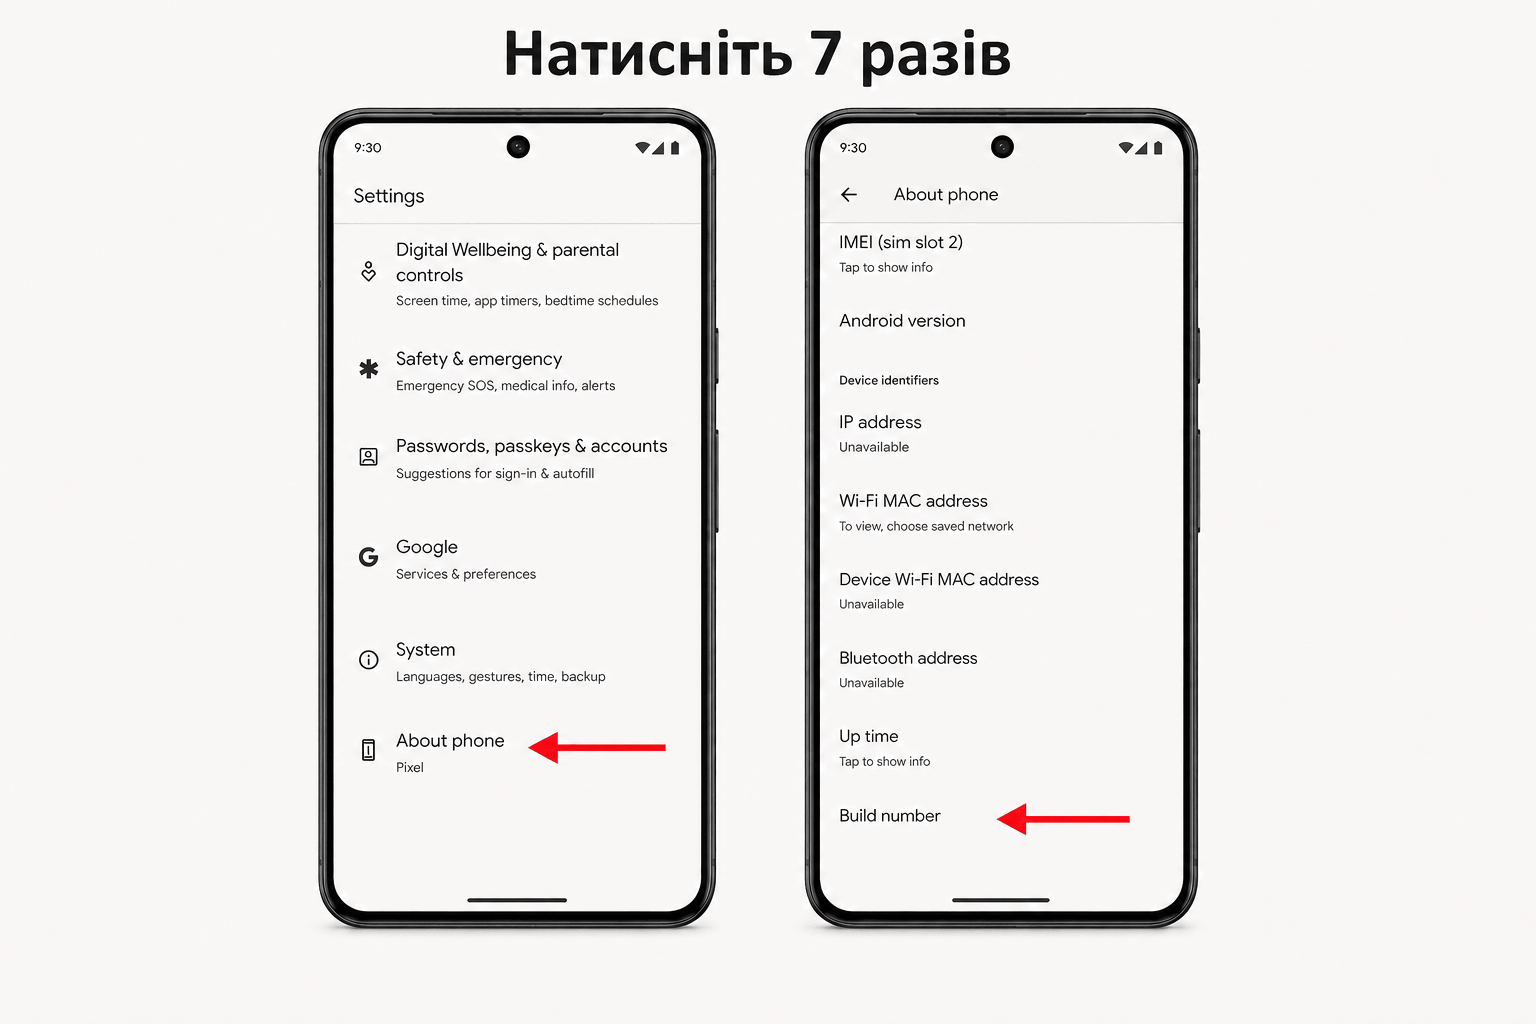
Open Settings → About phone. Find Build number and tap it seven times. If Android asks for your PIN or screen-lock password, enter it. A message will then appear confirming that Developer options are now available.
Go to Settings → System → Developer options. Enable OEM unlocking and confirm the warning. Your phone may need internet to check carrier restrictions. At this point, you are only allowing the following bootloader unlock.
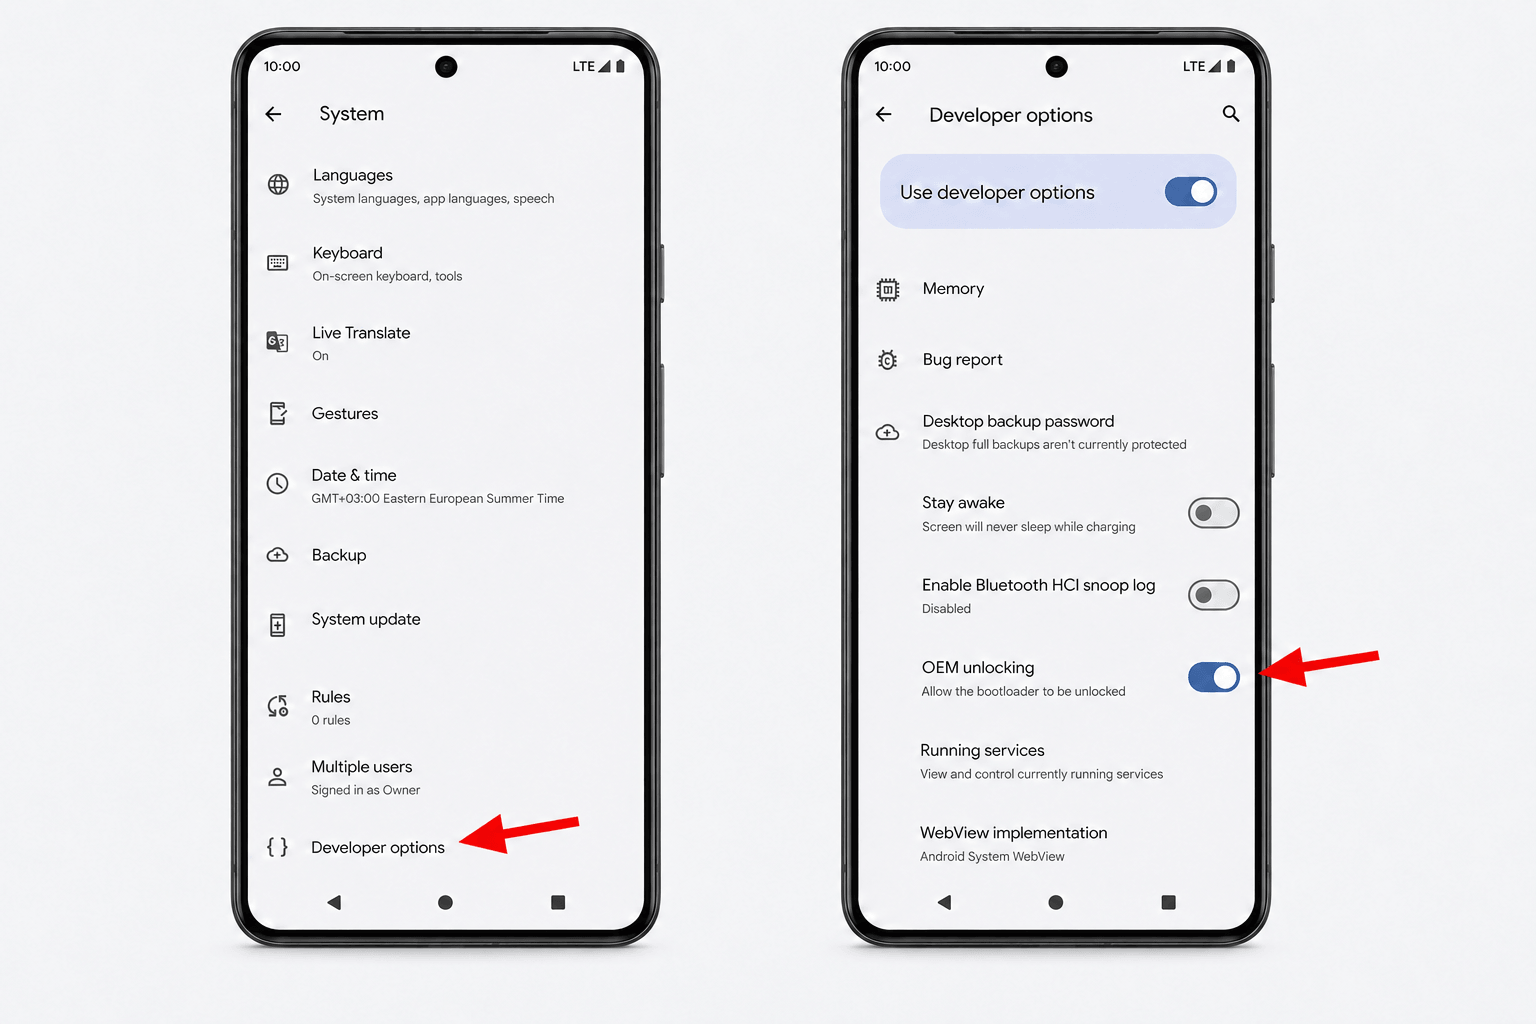
If the switch is greyed out, determine the reason before proceeding: check the internet connection, available updates, and the phone’s origin. The ability to use SIM cards from different carriers does not necessarily mean that the bootloader can be unlocked. Linux udev rules cannot remove carrier-imposed restrictions from the phone.
OEM unlocking and USB debugging are separate settings. In this guide, the computer communicates with the Pixel in Fastboot Mode through WebUSB, so enabling USB debugging and approving an ADB key are not required for this installation method. Do not change other Developer options unless instructed.
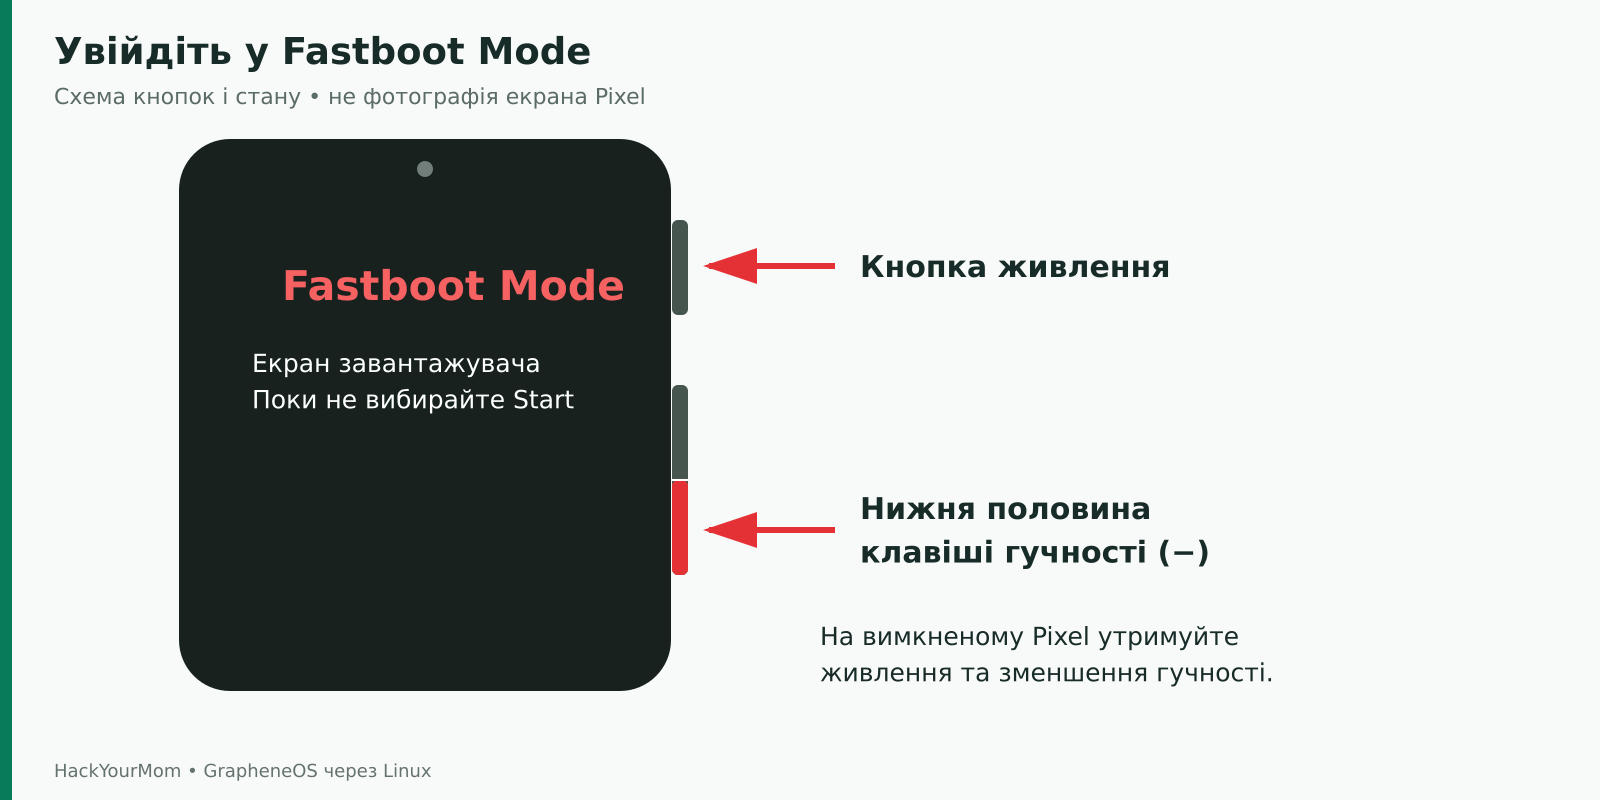
Turn off the smartphone. Press and hold the Power and Volume Down buttons until the bootloader interface appears. Another method described in the official instructions is to restart the phone and hold the Volume Down button as it begins to boot.
Look for the Fastboot Mode label and the warning displayed on the screen. Do not select Start at this point: that option launches the operating system, while the installer requires the phone to remain in the bootloader menu. Use the volume buttons to move between options in this menu and press the Power button to confirm your selection.
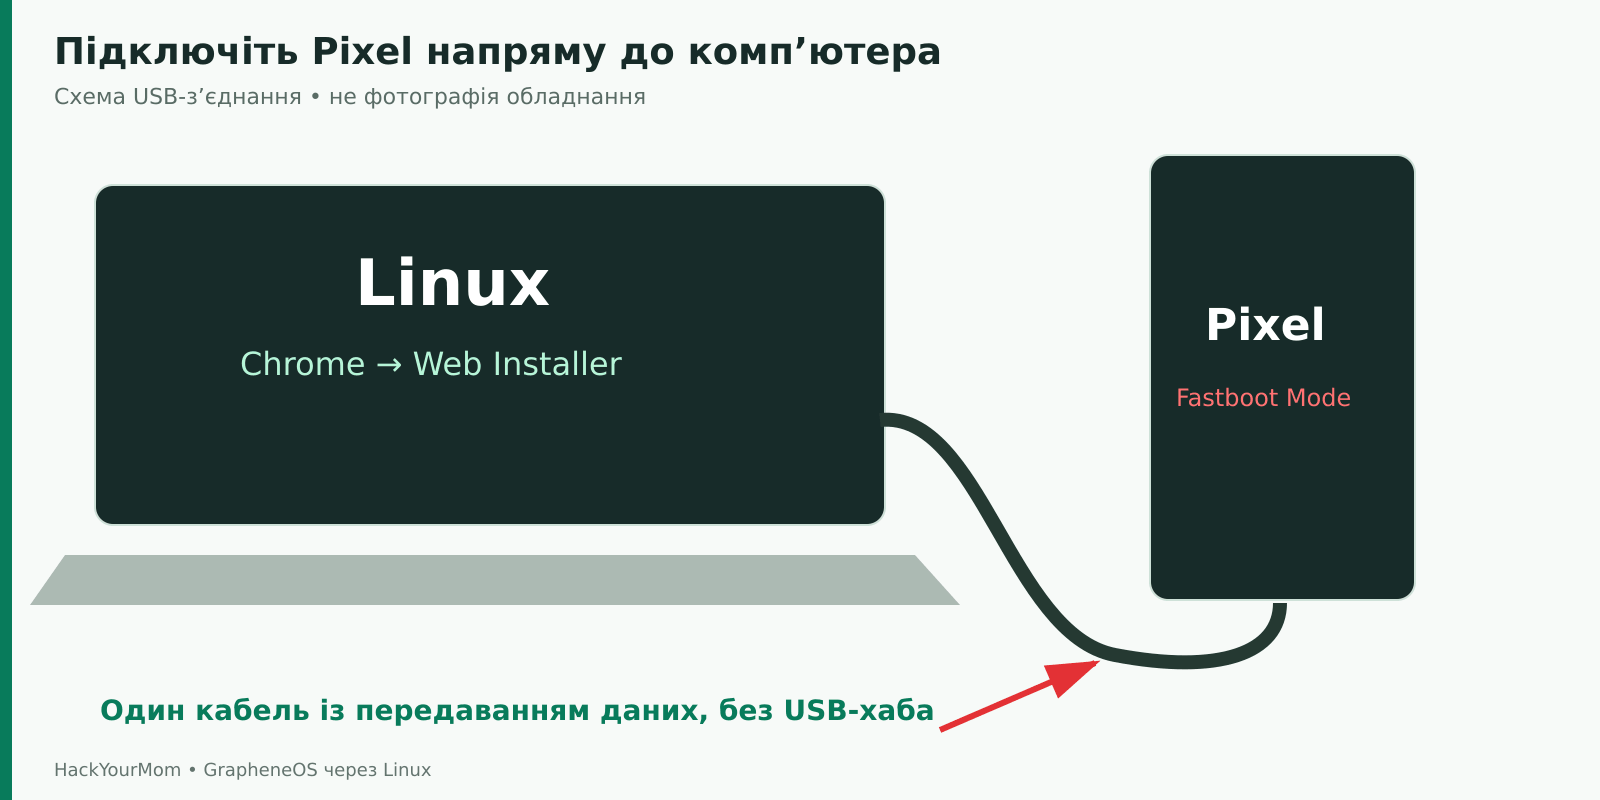
fwupd ConflictConnect your Pixel in Fastboot Mode directly to your computer using a data cable. Insert both plugs all the way in and position the devices so that you don’t accidentally touch the cable. On a desktop PC, choose a rear USB port on your motherboard if possible.
On Linux, another possible cause of connection errors is fwupd, a service used to update hardware firmware. According to the GrapheneOS documentation, it may sometimes claim Fastboot devices and prevent other applications from accessing them. When attempting to connect the phone, you may see a USB device already in use or claimed error.
If this error occurs, first close any other flashing tools and applications that may be communicating with the phone. Make sure that no other hardware firmware update is currently running on the computer. You can then temporarily stop fwupd:
sudo systemctl stop fwupd.service
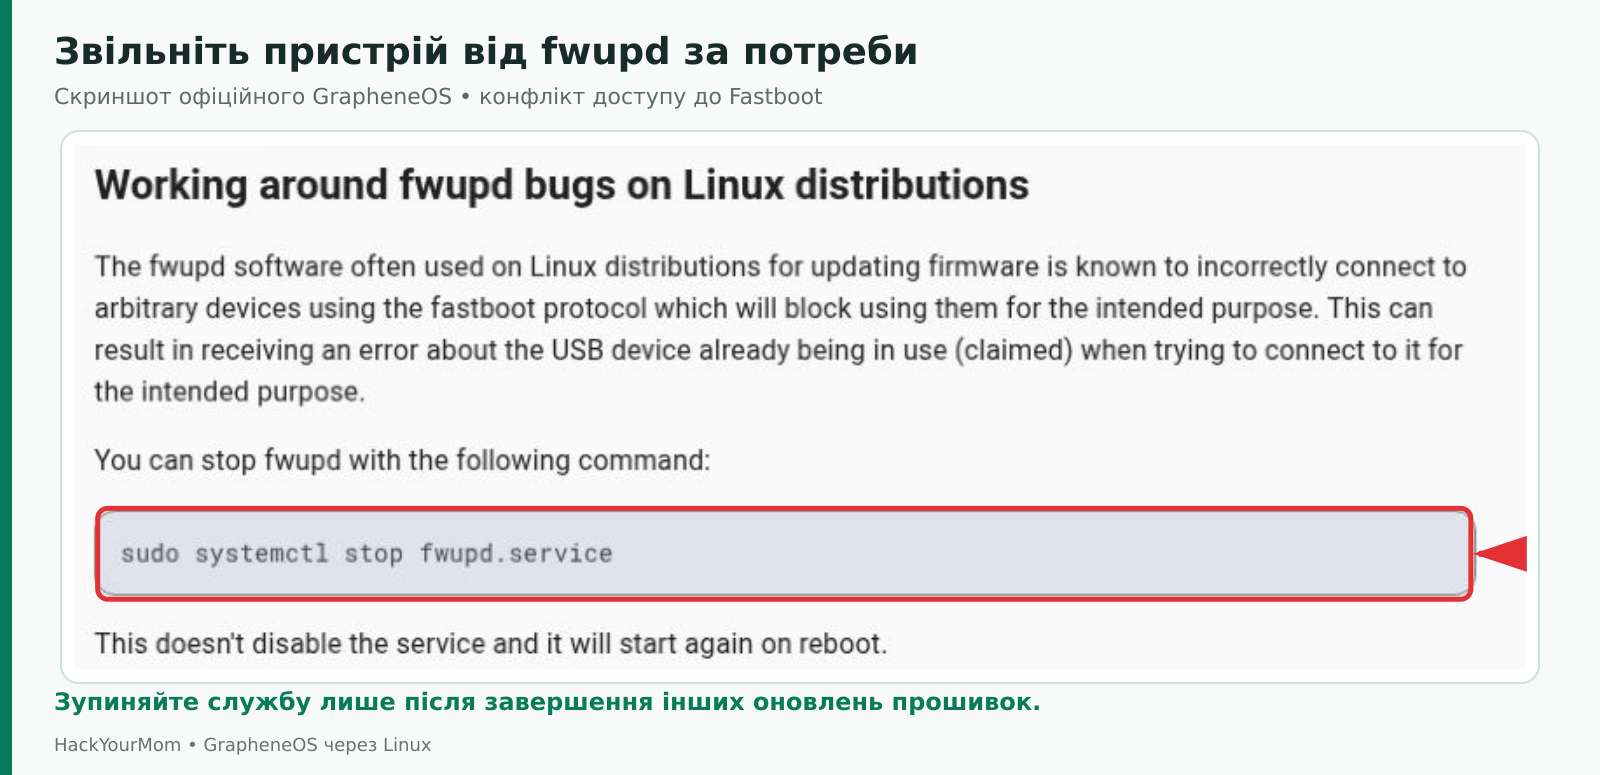
Do not interrupt an active BIOS or other firmware update just to release the phone. Allow the update to finish first. If systemctl reports that fwupd.service cannot be found, the corresponding service may not be installed on your system. You do not need to install it solely to run the stop command.
After stopping the service, try connecting to the phone through the installer again. If you need to physically reconnect the phone, do so before the system is actively being flashed. After completing the entire procedure and disconnecting the Pixel, you can restart the service by running sudo systemctl start fwupd.service or simply restarting Linux. Do not use disable or mask as a standard step in this guide.
In a regular Chrome window, open the official GrapheneOS Web Installer. Verify that the website’s domain is grapheneos.org. This method does not require a separate executable file called “GrapheneOS Installer for Linux”: all the necessary controls are available directly on the webpage.
Keep only one installer tab open. If any other Android devices are connected to the computer, disconnect them before beginning the procedure to avoid selecting the wrong device. Make sure your backup is ready and that the Pixel is still in Fastboot Mode.
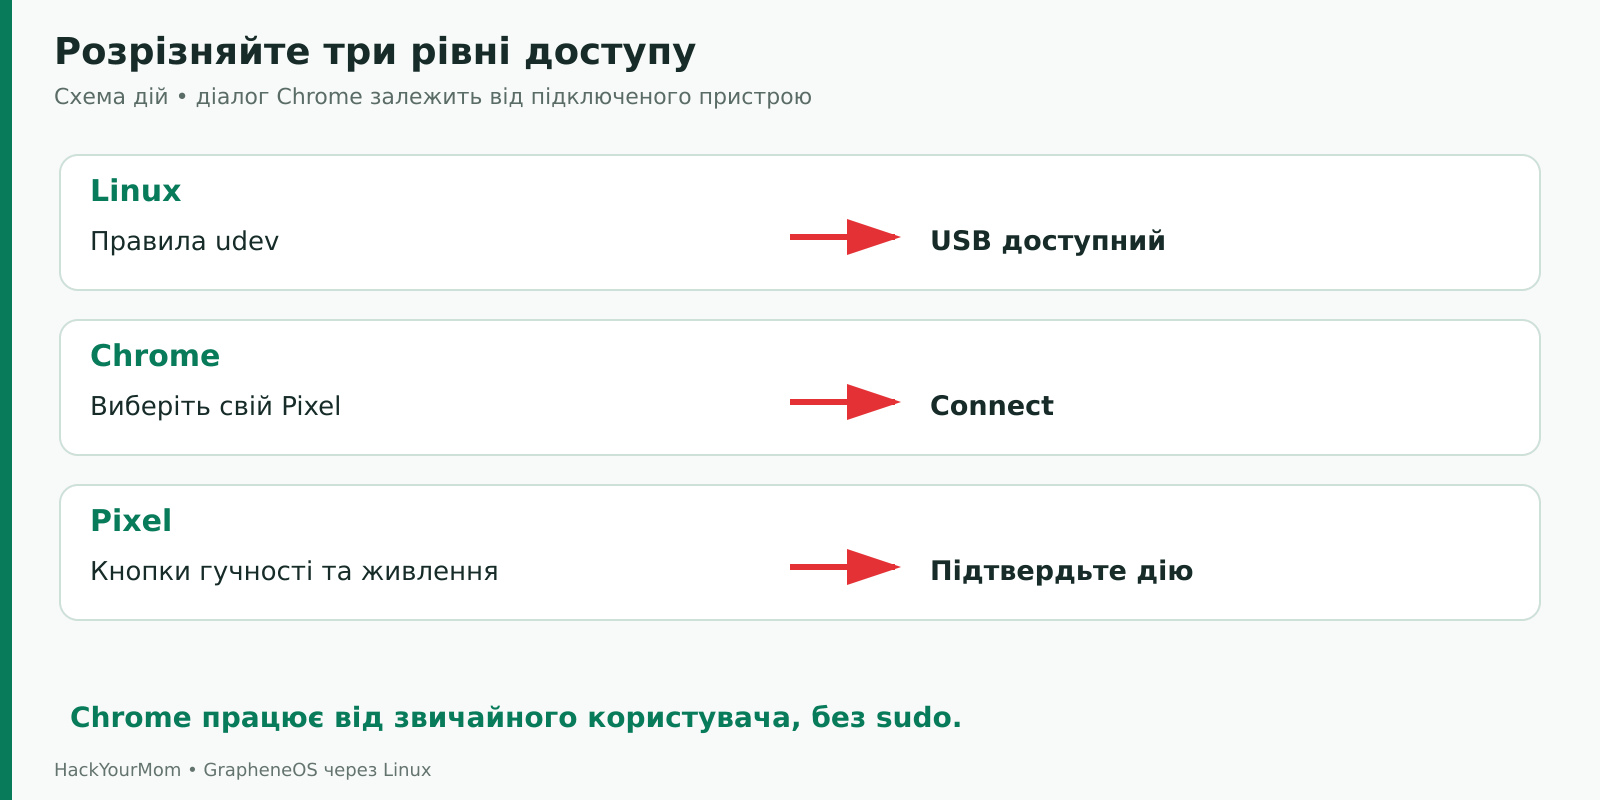
Under Unlocking the bootloader, click Unlock bootloader. If permission hasn’t already been granted, Chrome will open a USB device selection window. Highlight your Pixel and click Connect. The name may appear as your phone model or as an Android device in bootloader mode.
Don’t expect your Pixel to appear as a storage device in your file manager. Fastboot is not a way to browse your phone’s folders. If the Chrome window is blank or access is denied, go back to checking your cable, Fastboot, udev rules, and access conflicts. Clicking the following buttons will not fix this problem.
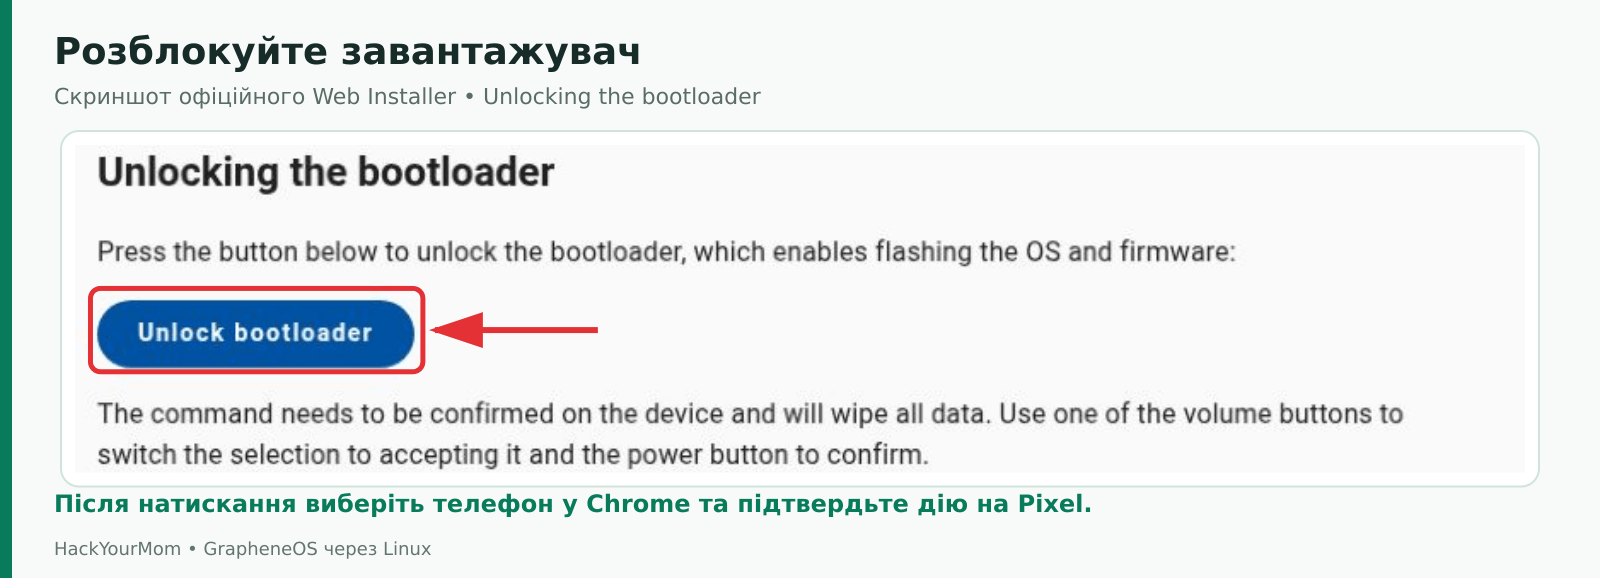
The Pixel will display a warning about the consequences of unlocking. Use the volume buttons to select Unlock the bootloader, then press the Power button to confirm. Carefully read the message shown on your device: the similarly worded Do not unlock the bootloader option cancels the process.
Once confirmed, all data will be erased. Do not try to tap the screen instead of using the physical buttons. The menu’s appearance may vary depending on the device model and bootloader version, but the meaning of the confirmation option remains the key factor.
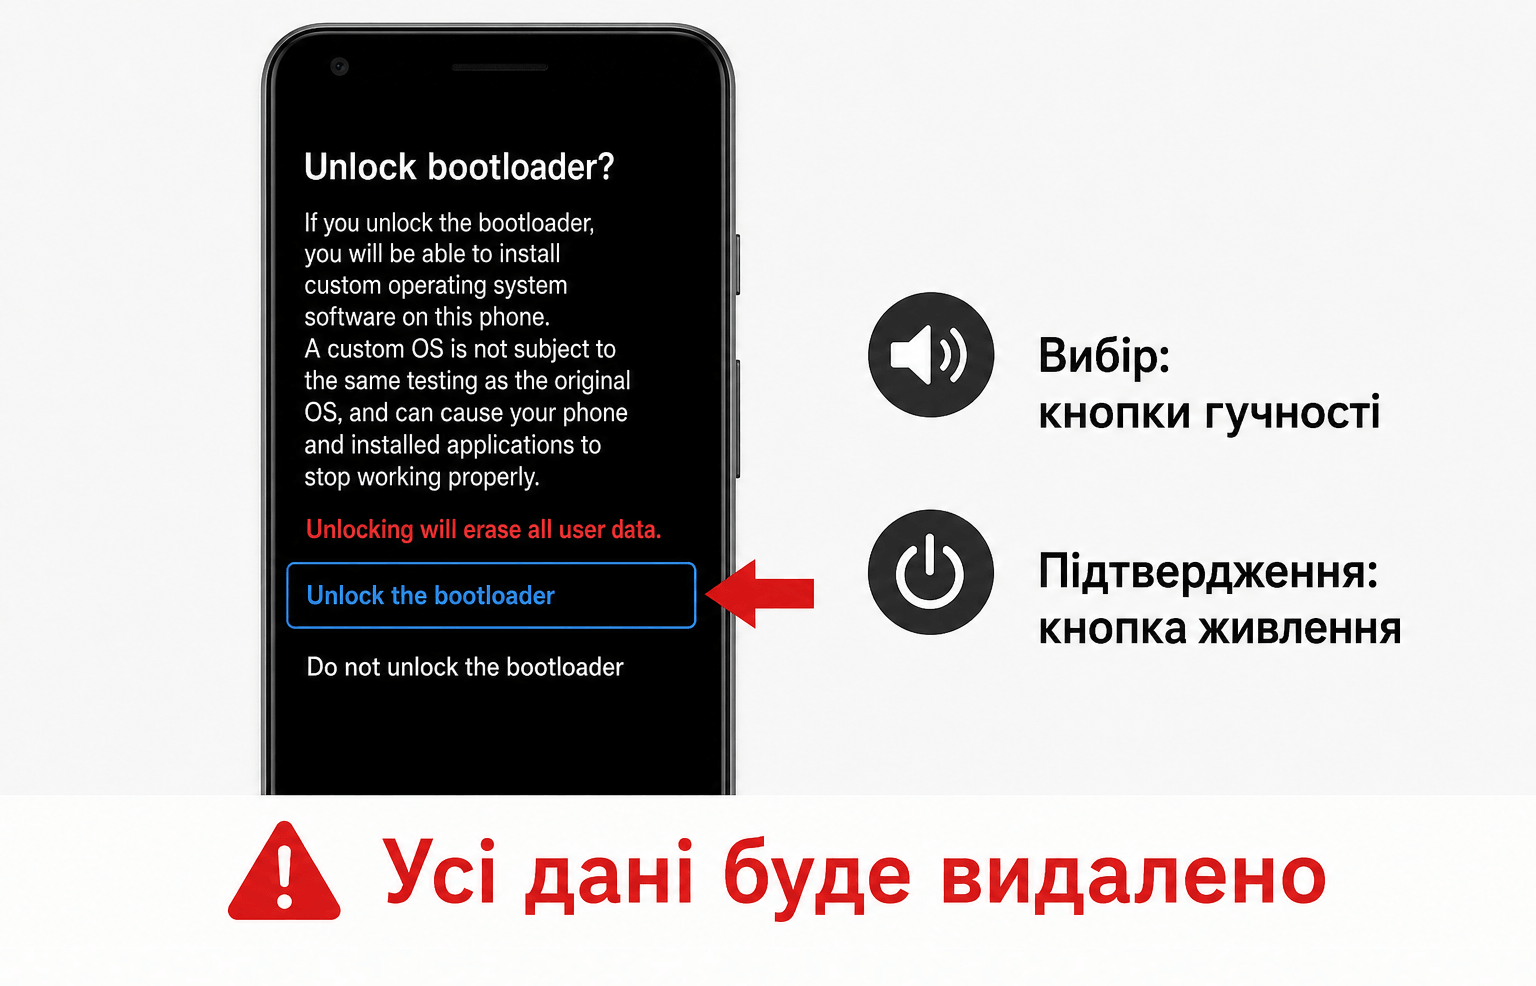
Wait for the operation to finish. If the phone exits Fastboot Mode, return it to that mode. Do not go through the stock Android setup again or restore a backup between unlocking the bootloader and flashing GrapheneOS.
On the same page, find Obtaining factory images and click Download release. The installer identifies the connected model and prepares the correct official image. If you see an unexpected device name or a device identification error, stop and verify that you selected the correct phone.
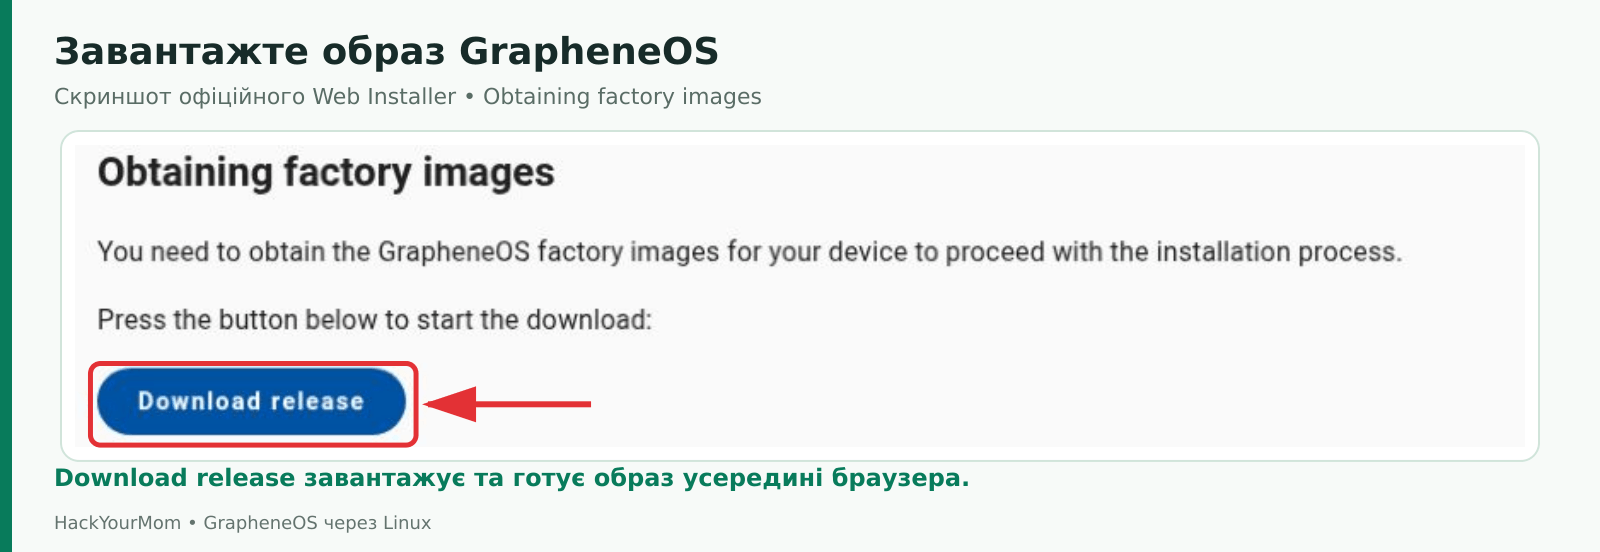
The image is prepared in the browser’s storage. You do not need to manually search for a ZIP file in the Downloads folder, extract it, or provide a file from another website. Do not refresh the page or clear its data during this process, as you may need to restart the preparation from the beginning.
A low storage quota message indicates that the storage available to the browser may be limited. Check the available disk space, make sure you are using a regular browser window, verify the browser package format, and disable Shields if you are using Brave. Browser storage and the total free disk space are related, but they are not always the same.
After the image has been prepared successfully, go to Flashing factory images and click Flash release. The installer will flash the operating system and firmware components to the phone. Keep the computer active, the browser tab open, and the cable connected throughout this stage.
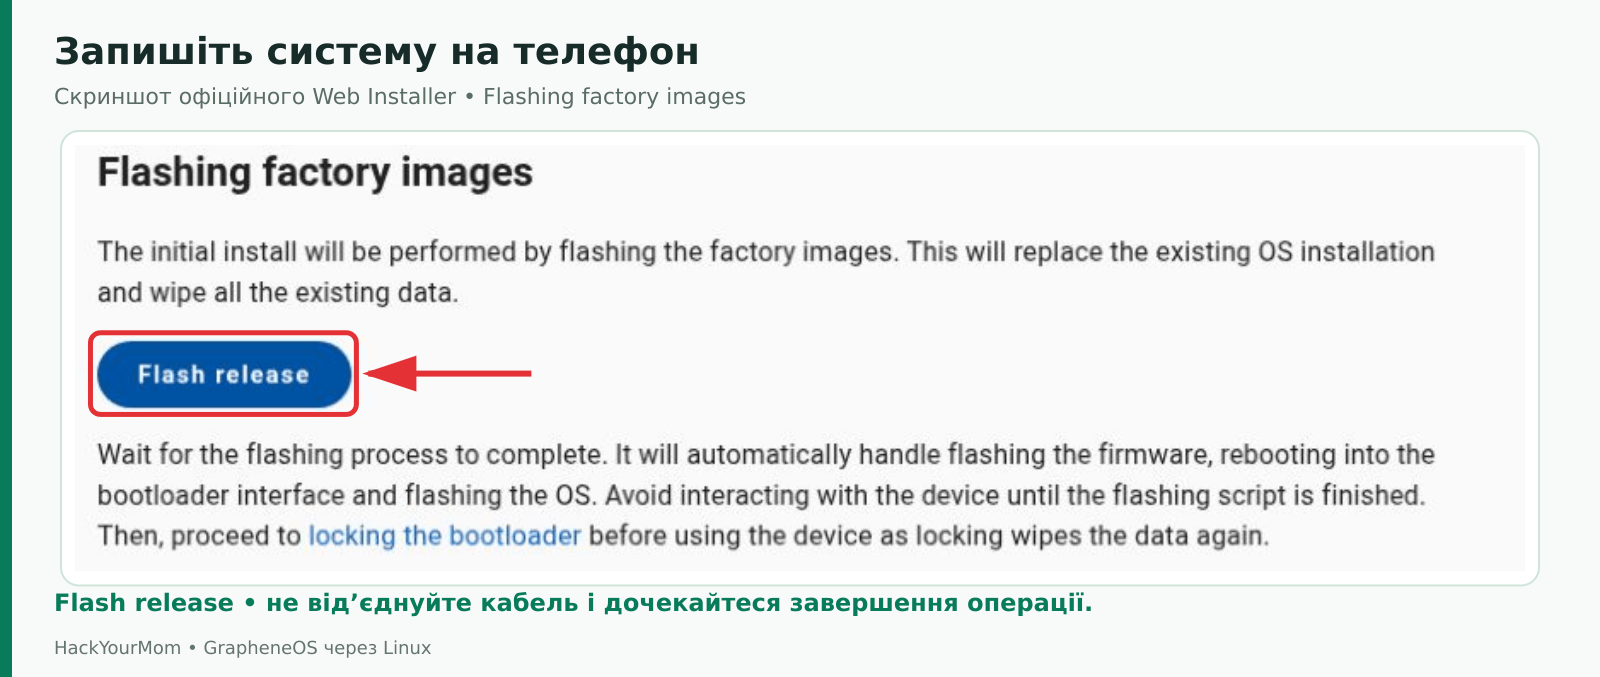
The Pixel may restart several times, and the appearance of its screen may change. Do not interfere with the process by randomly selecting Start or Recovery. A brief pause or the temporary disappearance of the device during a restart does not necessarily indicate a failure. Follow the messages displayed on the webpage.
If a Reconnect device prompt appears, click the corresponding button on the page and select the same Pixel again in Chrome. Follow the installer’s requested action first. The word reconnect does not mean that you should immediately unplug the cable. Do not physically disconnect and reconnect the phone at random while flashing is in progress.
Proceed to the next step only after the flashing process has completed successfully. If an error appears, save its exact text. Do not click Lock bootloader after a failed or incomplete flashing attempt. You must first determine the phone’s current state and complete the installation.
After Flash release has completed successfully, the phone should be in the bootloader interface. On the webpage, open Locking the bootloader and click Lock bootloader. This step restores verified boot protection for the installed operating system and prevents arbitrary flashing through Fastboot.
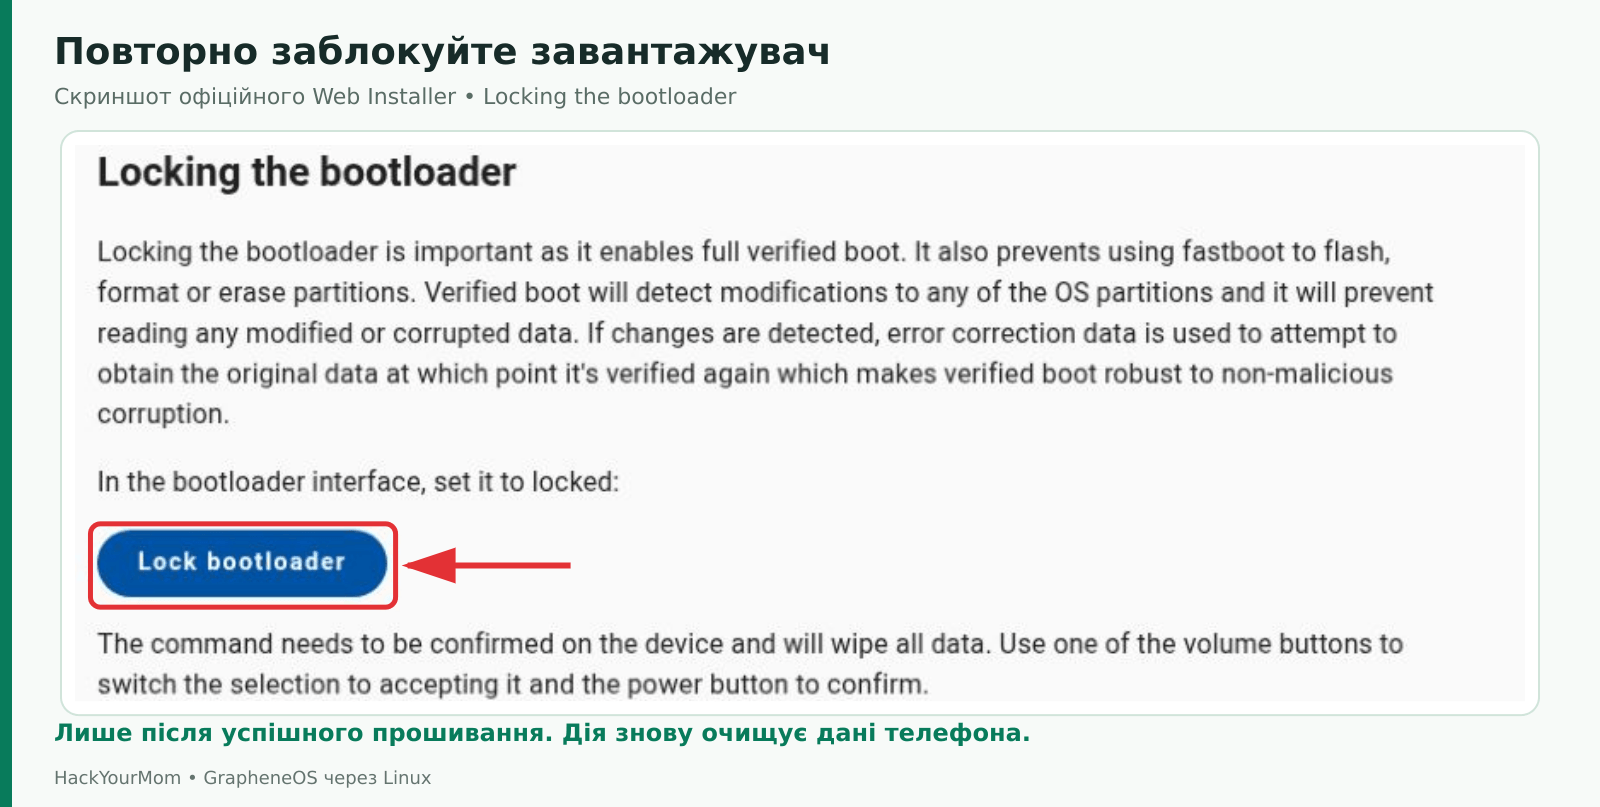
On your phone, select Lock the bootloader with the volume buttons and confirm with the power button. This operation again wipes user data. That is why personal files and accounts are restored after the whole process is complete.
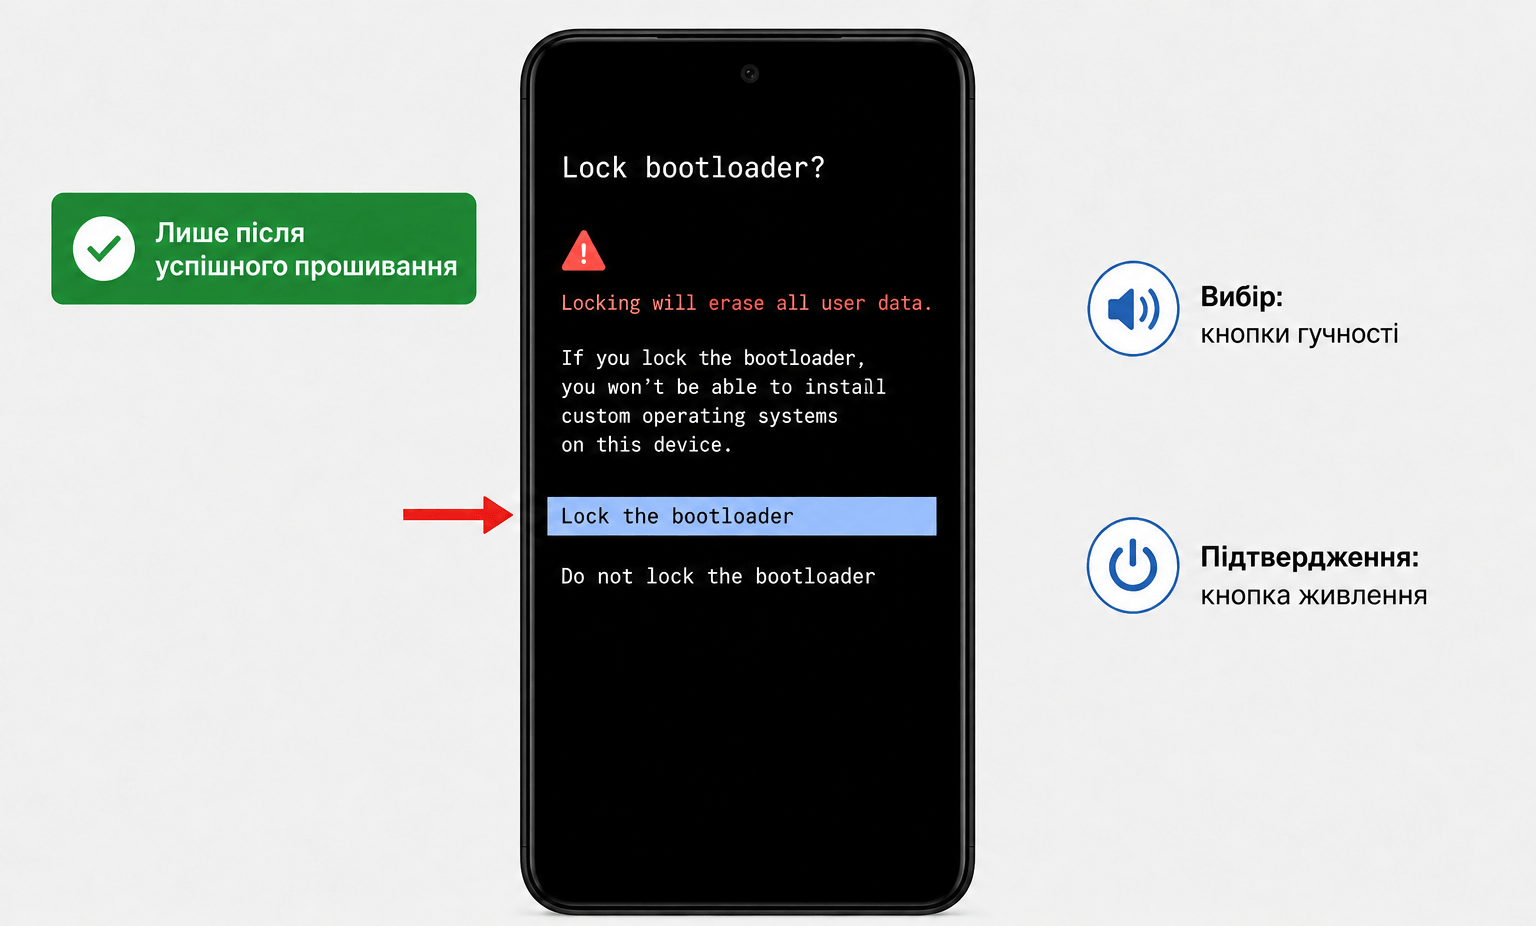
Wait for the process to finish. If the Pixel or the installer reports an error, do not assume that the bootloader was successfully locked simply because you clicked the button. Determine the cause before entering important account credentials into the new system.
In the Fastboot menu, select Start and press the Power button. This option is now required to boot the installed operating system. Wait for the initial setup wizard, select your language, connect to a network, and set a strong PIN or screen-lock password.
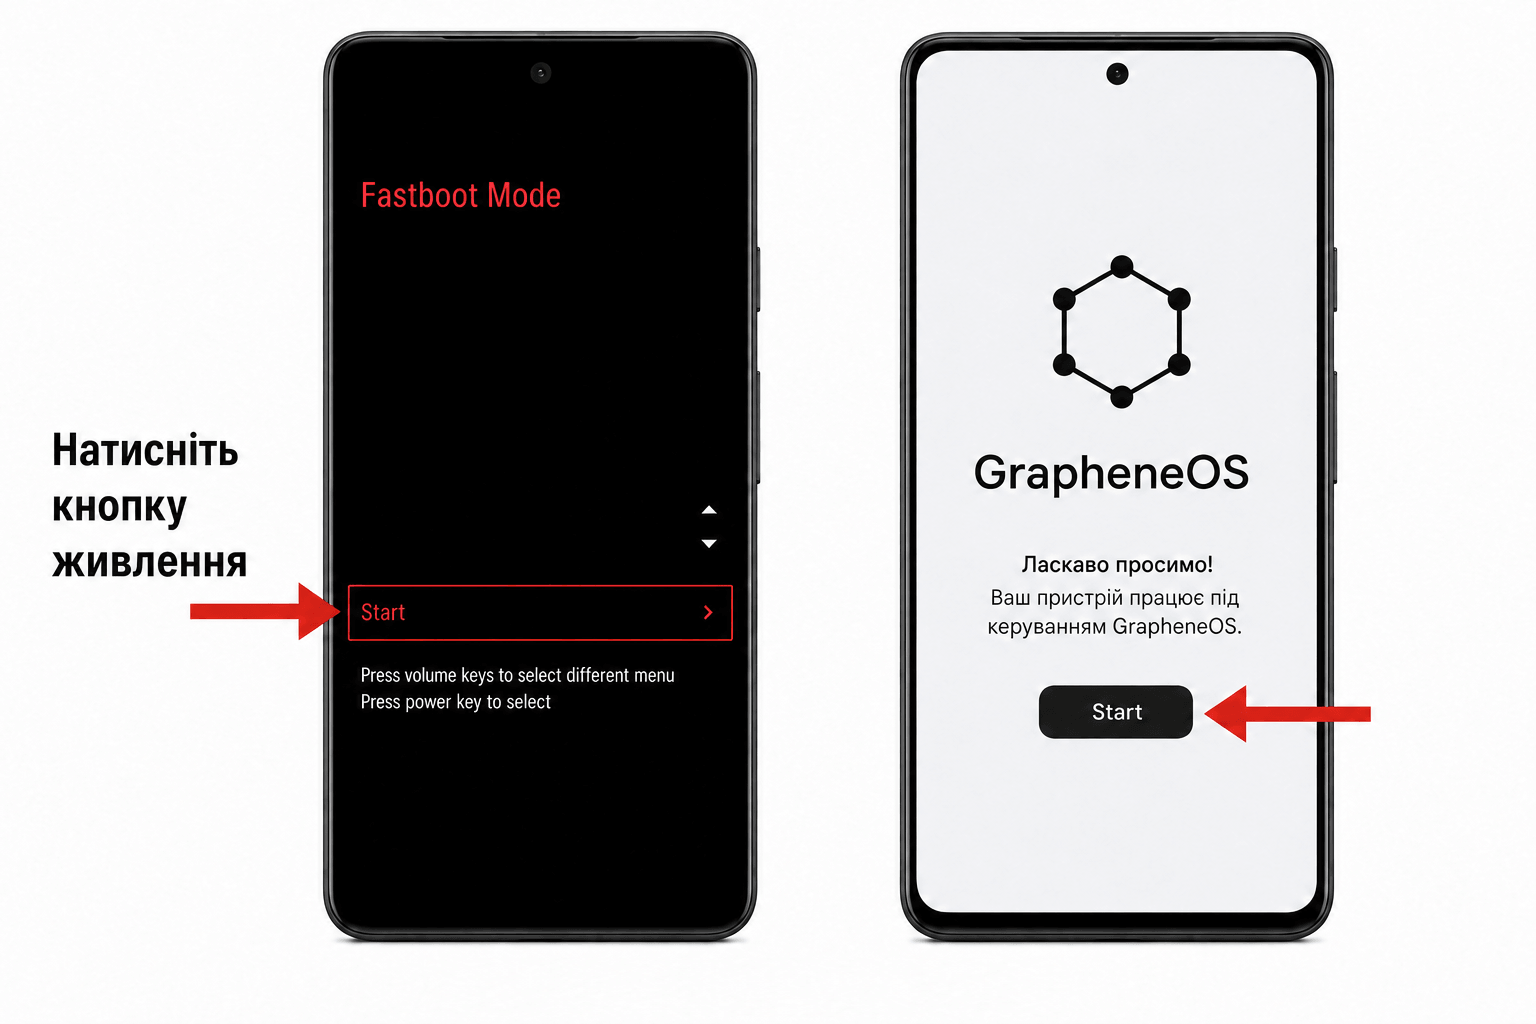
The final screen of the GrapheneOS setup wizard includes an option, selected by default, that disables OEM unlocking. Keep the recommended selection. If you later check Developer options, OEM unlocking should be disabled.
These are two separate actions: locking the bootloader is performed through the installer and the phone’s bootloader menu, while disabling OEM unlocking prevents the bootloader from being unlocked again without first granting permission in the operating system. One action does not replace the other. You do not need to unlock the bootloader again for regular GrapheneOS updates.
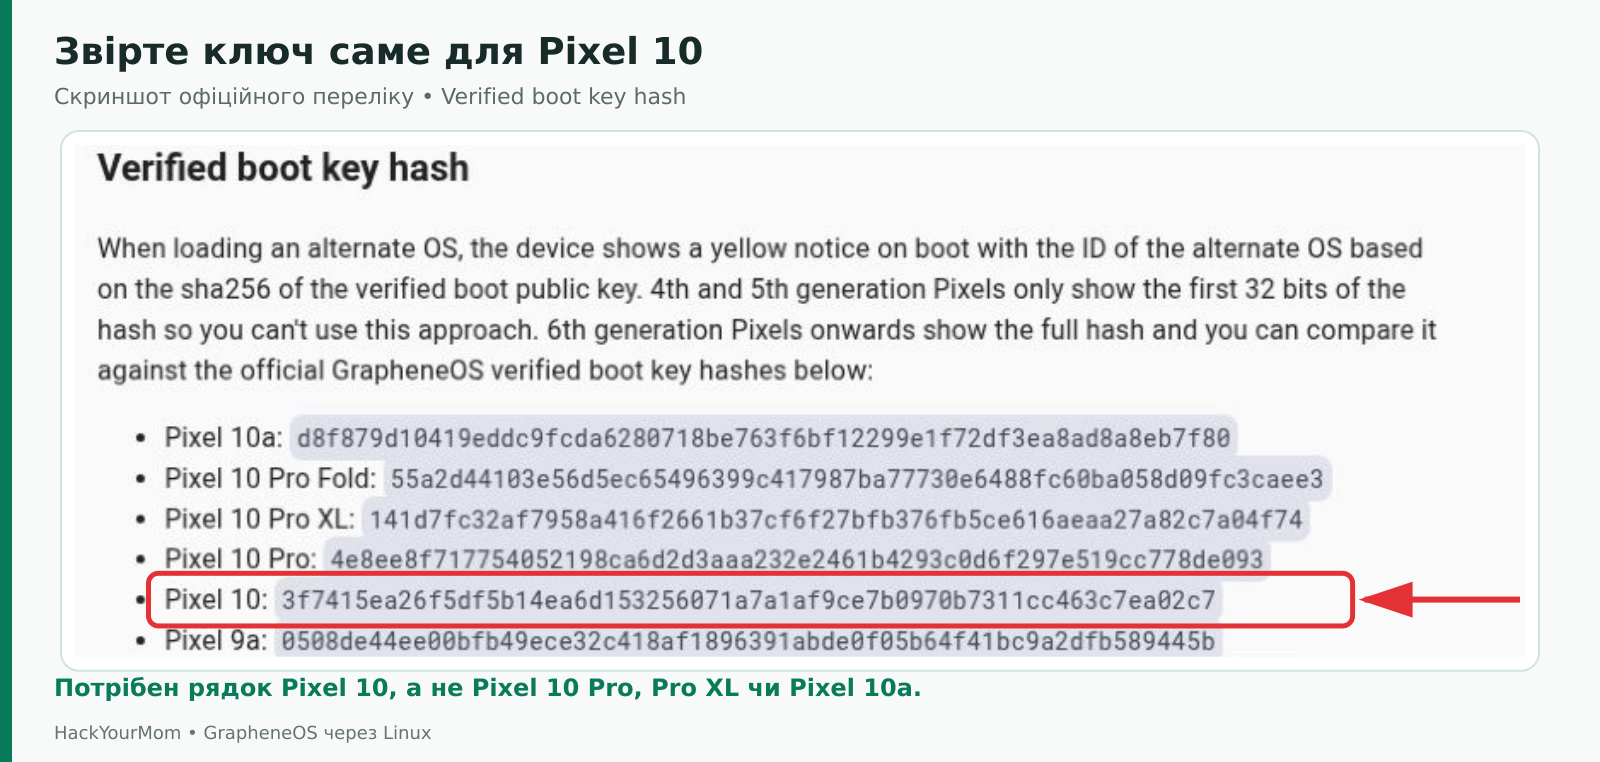
After installing an alternative operating system, the Pixel may display a yellow message containing a Verified Boot key identifier during startup. The yellow colour alone does not indicate that the device has been compromised. What matters is the content of the message, the bootloader status, and whether the displayed key matches the installed operating system.
Open the official list of Verified Boot key hashes, find the Pixel 10 entry, and compare the complete identifier with the one displayed on the phone. Do not use the key for the Pro, Pro XL, or 10a models, and do not compare only the first few characters. Always verify the value against the current official webpage rather than relying solely on an image included in the article.
For additional verification, you can use Auditor. It uses hardware-based attestation, and local verification with QR codes requires a second Android device. A remote integrity-monitoring service is also available. The procedure is described in the official Auditor guide. A standard green indicator displayed in an unrelated menu is not a substitute for this verification process.
If the key does not match or you are unsure whether the installation was completed correctly, postpone transferring your personal data. Save the exact text of the message and contact the official community for assistance with your specific situation.
GrapheneOS can operate without Google services. If you need applications that depend on Google Play services, open the built-in App Store on the Pixel, select Google Play services, and install the suggested components. According to the current GrapheneOS guide, this installs Google Play services and the Google Play Store as interdependent applications.
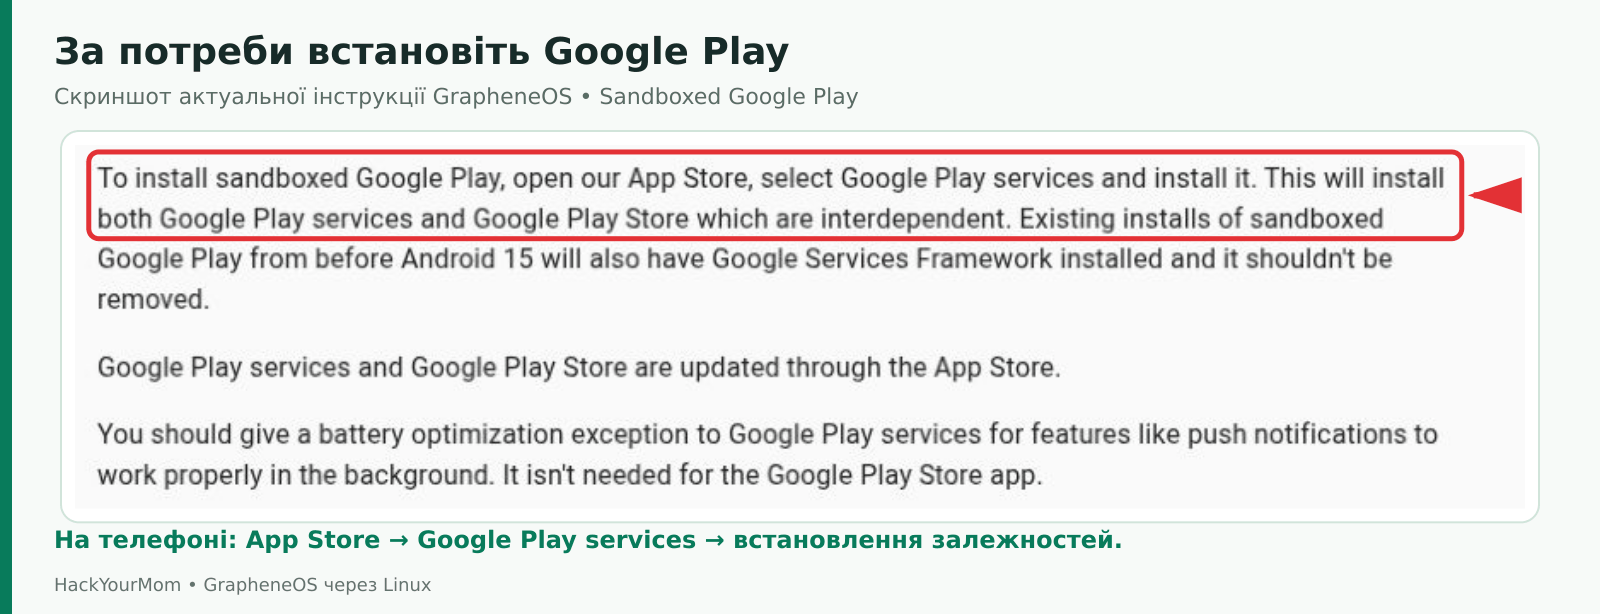
In older screenshots, the GrapheneOS app store may be called Apps. Follow the current documentation and install the components recommended by the store itself. For a new installation, you do not need to search for random APK files or manually follow outdated instructions involving three separate files.
Sandboxed Google Play runs as a set of regular sandboxed applications without privileged system access. Install these components in the profile where you intend to use applications that depend on them. For reliable push notifications, the documentation recommends allowing Google Play services to run without battery optimization restrictions. The Play Store itself does not require this exception.
Signing in to Google is required for features that depend on an account, including downloading applications through the Play Store. Simply installing Google services does not guarantee that every banking application or contactless payment service will work. Before switching completely, test the applications you need, as well as calls, messages, and mobile internet access.
Start by identifying the stage at which the problem occurred. An empty USB device list, a device access error, and a failure during flashing require different solutions. Save the exact error message, your Linux distribution name, browser version, and Pixel model.
Check that the phone displays Fastboot Mode, that the cable supports data transfer, and that the phone is connected directly to the computer. If the udev rules were installed after the phone was connected, reconnect the Pixel before beginning the flashing process. Make sure the browser was not installed through Snap or Flatpak and is not running in incognito mode.
For an additional check in Ubuntu, you can run lsusb. This command displays the USB devices detected by Linux. If the command is unavailable, it is provided by the usbutils package. The Pixel appearing in this list confirms only that it has been detected at the USB level. It does not confirm that the browser is configured correctly or that the phone is ready to be flashed.
Check that the USB rules package is installed, reconnect the phone, and make sure you are using a regular local graphical session. On a managed computer, access may be restricted by your organization’s policies. Do not randomly change general device permissions. Packages from different distributions may use different access rules and user groups, so consult the documentation for the specific package installed on your system.
Close other installer tabs, Android Studio, and any other applications that may be accessing the phone. Check for an fwupd conflict as described in Step 8. Reinstalling Chrome or downloading another image will not release a USB interface that is being used by another application.
Do not proceed to lock the bootloader. If the installer asks you to select the device again, follow that instruction. For any other error, save the log and contact the official GrapheneOS support channels. Before publishing the log, remove serial numbers and personal information.
The next step depends on the Pixel’s current state and which components have already been flashed. Do not run random fastboot erase commands or use an image intended for a different model. Do not restore personal data to the phone until the installation has been completed and verified.
Flash release completed successfully without any unresolved errors.
The bootloader has been relocked.
OEM unlocking is disabled after the initial setup.
The Verified Boot key has been compared with the value listed for your exact model.
A strong PIN or screen-lock password has been configured.
The required networks, calls, and applications are working correctly.
Automatic GrapheneOS updates remain enabled.
After disconnecting the phone, your usual Linux sleep settings have been restored, and
fwupdhas been restarted if it was temporarily stopped.
Keep your backups until all data has been transferred and verified. Future GrapheneOS updates are installed directly on the phone. You do not need to repeat the flashing process through Linux or connect the Pixel to a computer for every update.