09.09.2026
25 min
235



We walk you through preparing a Google Pixel with GrapheneOS for everyday use: updating the system, configuring screen lock, connectivity, apps, permissions, and backups. We explain when Google Play, separate profiles, and additional restrictions are needed, and how to make sure everything works properly after the changes.
GrapheneOS is already installed on the phone. Now you need to restore the features you need and decide what data apps will be allowed to access. This guide applies whether GrapheneOS was installed using Windows, macOS, or Linux: all further steps are performed directly on the Pixel. You may need a computer to transfer files, but its operating system does not affect how GrapheneOS is configured.
The main example in this guide is a standard Google Pixel 10. On other supported Pixel devices, most steps are similar, although the availability of certain hardware features and the names of some menu items may differ. Use the latest stable release. English menu names are provided alongside Ukrainian explanations to help you find the correct option even if the interface translation is incomplete.
How to read the illustrations. Images labeled “Action diagram” show the sequence of steps and the option you need to select rather than an exact representation of the screen. Actual screenshots from the official GrapheneOS guide are provided separately. This is a documentation-based guide compiled from publicly available sources, not a report based on physical testing of a Pixel device by the authors. If the location of a setting has changed, use the search function in Settings and search for its English name.
Start by confirming that the installation has been completed successfully, then check for updates, set up a screen lock, and verify connectivity. Next, install the apps you need and grant permissions gradually. Finish by setting up backups and checking that your important data can be restored. Google Play, additional users, Private Space, a VPN, and a dedicated wipe password are only necessary if they fit your specific needs.
GrapheneOS already comes with secure defaults. There is no need to disable every sensor, system connection, and background process at once. Doing so can make it difficult to understand why notifications, navigation, or calls have stopped working. Change one group of settings at a time, check the results, and only then move on to the next.
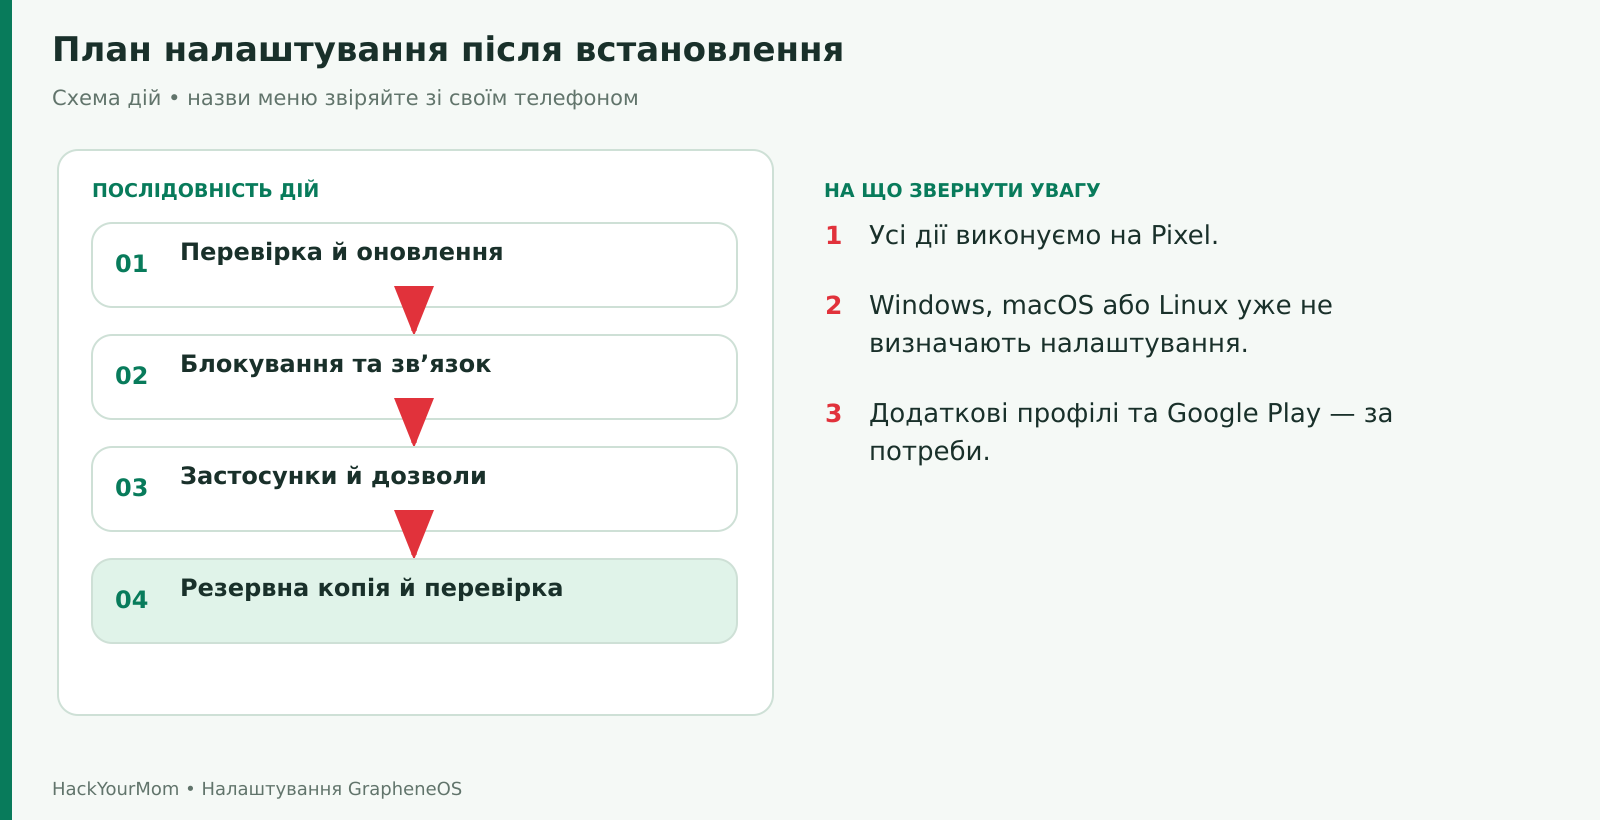
On the welcome screen, select your language and tap the button to begin. Connect to your own Wi-Fi network or another trusted Wi-Fi network. If the system offers to restore from an existing backup, choose this option only if you have both the backup itself and the recovery code. For a new setup, continue without restoring. If you have already completed the setup wizard, there is no need to reset the phone and run it again.
Set a PIN or password when prompted by the setup wizard. You can add fingerprints later. On the final screen, keep the default option that disables OEM unlocking. This does not reinstall or reflash the operating system. Instead, it prevents the bootloader from being unlocked again in the future unless OEM unlocking is explicitly enabled in the system settings.
If the setup wizard reports that the bootloader is unlocked, do not proceed with transferring personal data. Return to the final step of the installation guide you followed and verify that the GrapheneOS installation was completed successfully. Do not lock the bootloader after a failed or incomplete installation. The official documentation explains how to verify the bootloader state in the setup wizard.
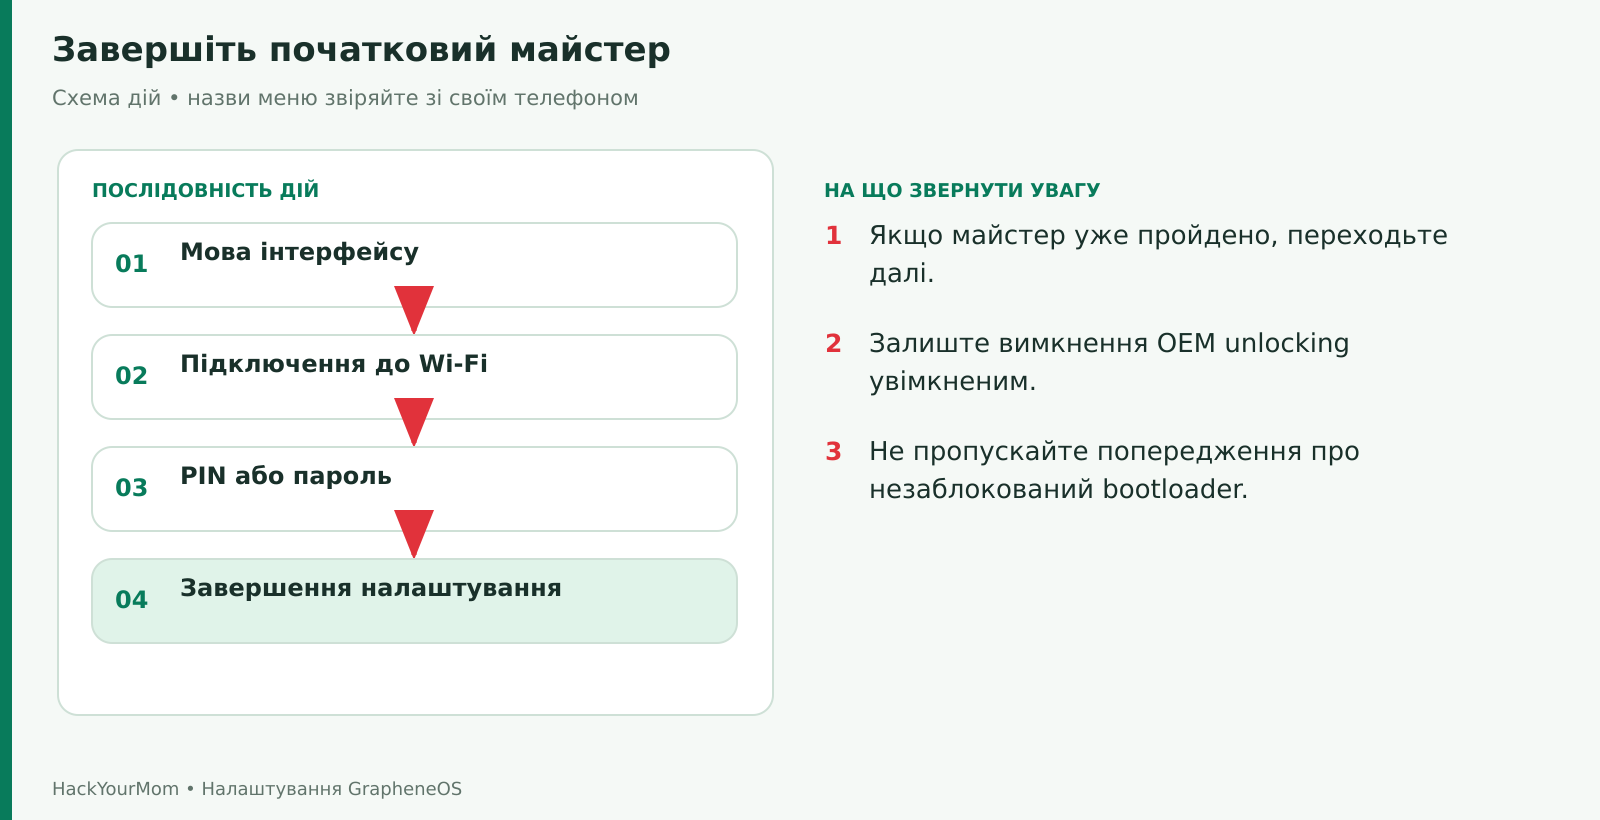
Check: You should see the home screen, the phone should accept your screen lock code, and there should be no warning that the bootloader is unlocked. The yellow Verified Boot message shown when starting an alternative OS is a different type of message; it should be verified using the system’s key rather than by the color alone.
Swipe up on the home screen to open the app list and find Settings. For quick access, you can also expand the Quick Settings panel and tap the gear icon. Use the search bar to enter the name of a feature, such as Auto reboot or Private DNS. After opening a result, check the full name of the settings screen, as similar terms can sometimes appear in different sections.
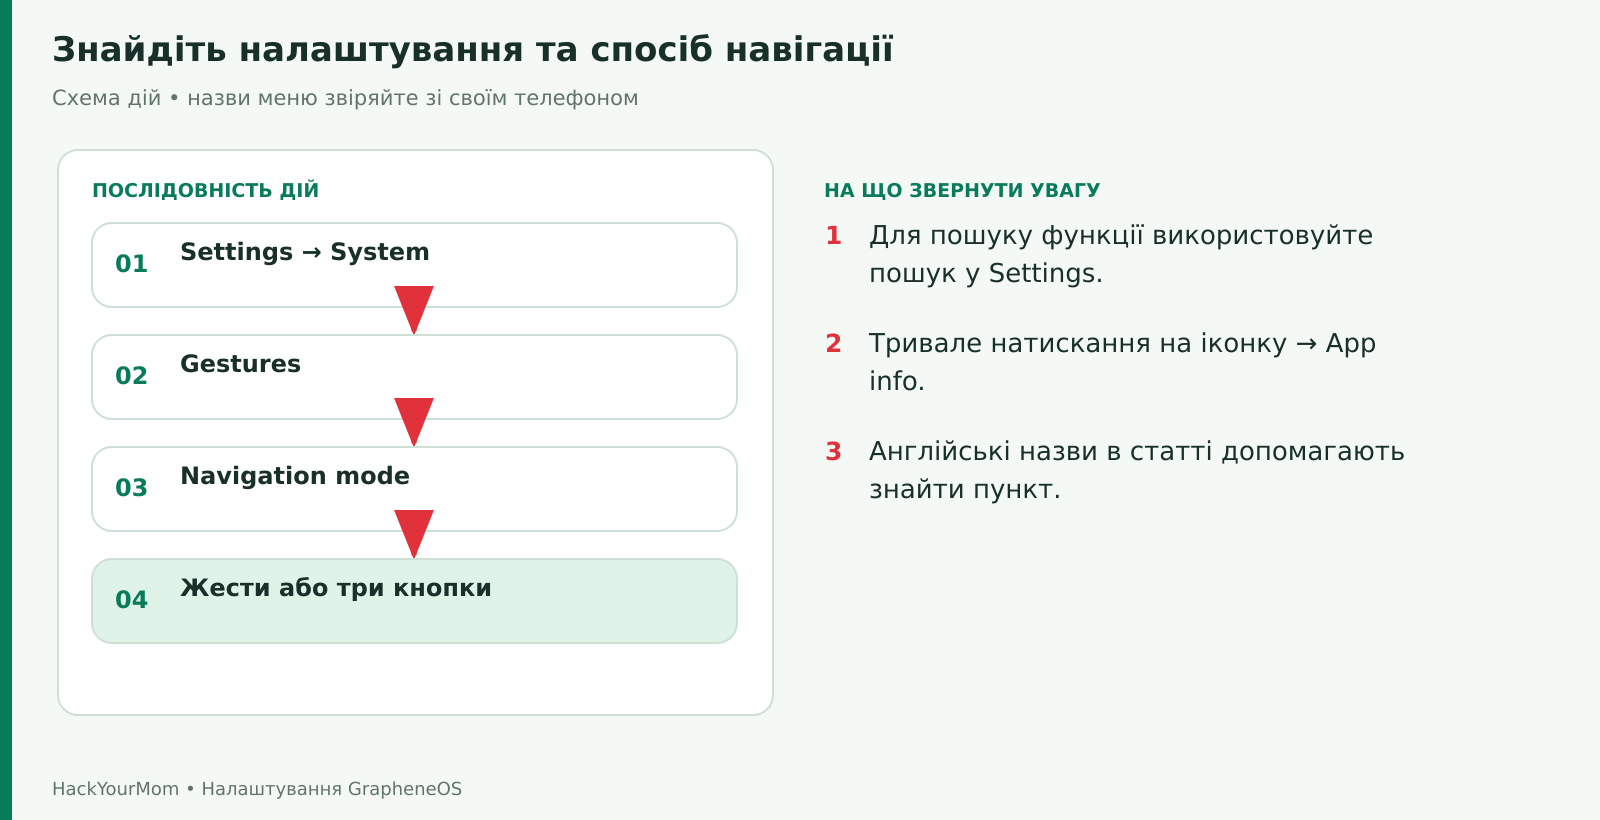
To change the navigation method, open Settings → System → Gestures → Navigation mode. Choose gesture navigation or three-button navigation. This is a matter of personal preference rather than a required security measure. The official guide explains both navigation methods.
With gesture navigation, a short swipe up from the bottom bar takes you to the home screen; swiping up and holding opens recent apps; swiping inward from either side of the screen takes you back. To quickly access settings for a specific app, press and hold its icon and open App info. We will use this shortcut for permissions, battery settings, and notifications.
Open Settings → System → System update and tap Check for updates. For your primary phone, keep Release channel → Stable selected. Beta is intended for users who want to participate in testing and is not required for this guide. If an update is available, wait for it to finish installing and restart the phone when prompted.
Under Permitted networks, choose which networks can be used to download updates. If your mobile data plan is limited, Unmetered is a good option, as it restricts downloads to networks that are not marked as metered. However, the update will then wait for a suitable connection. If you go for weeks without using Wi-Fi, overly restrictive network settings may delay important security fixes.
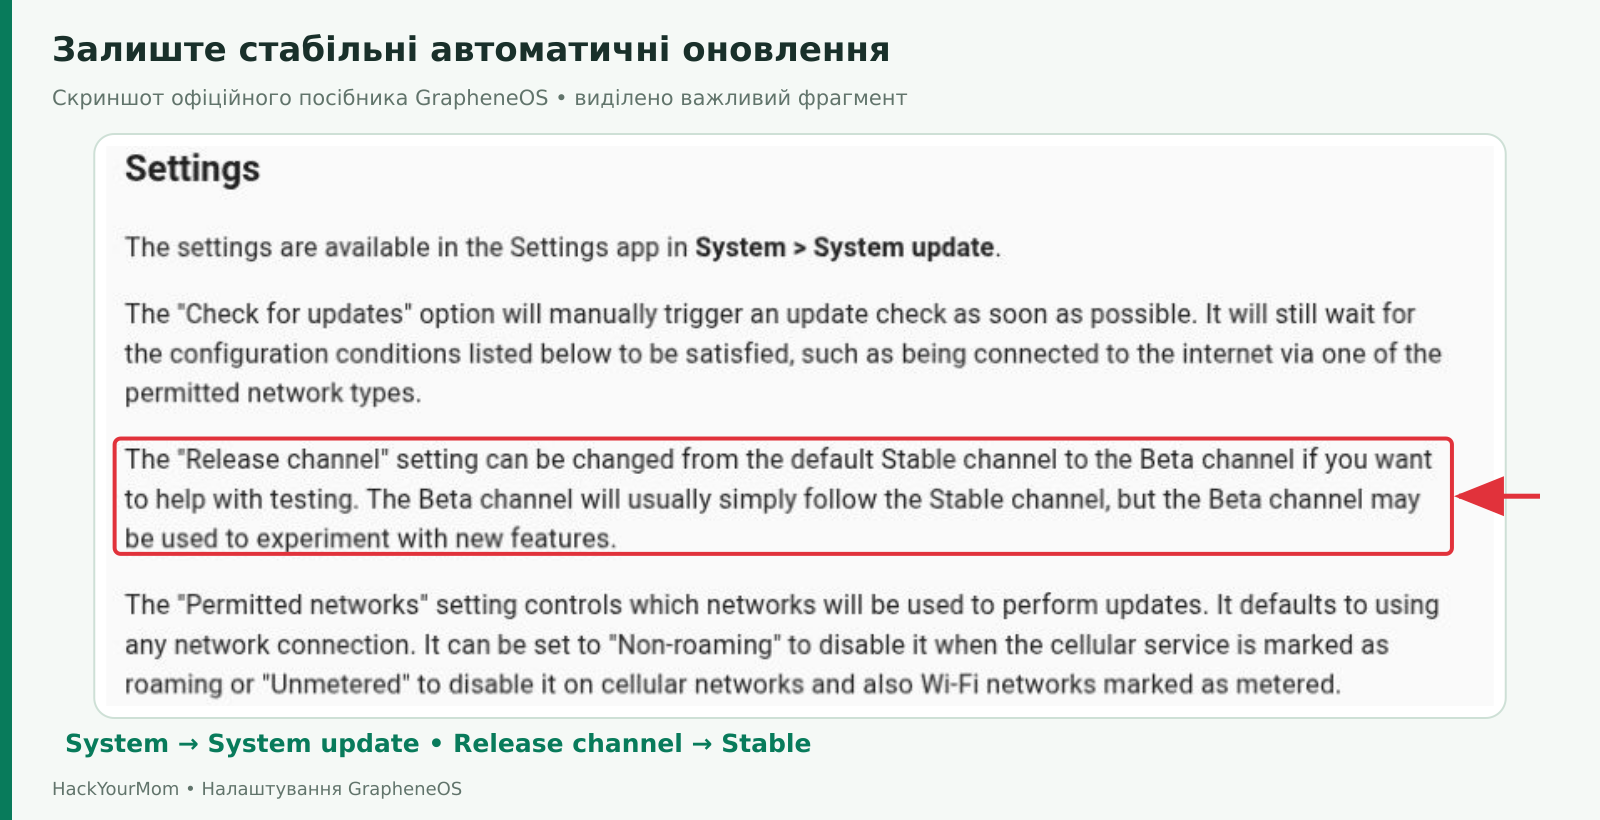
Automatic reboot in this section allows the phone to restart automatically after an update when the appropriate idle conditions are met. This is separate from the security-focused Auto reboot feature, which triggers after the phone has remained locked for an extended period. Do not confuse the two.
After updating the OS, open the built-in GrapheneOS App Store and install any available updates for its components, including Vanadium. This is the GrapheneOS app store on the phone and should not be confused with the Google Play Store. Keep automatic updates enabled and do not disable the System Updater system app. The update mechanism and available options are described in detail in the official section on updates.
Check: After restarting, the system update check should not show any pending updates, and the App Store should not show pending updates for important components. Do not rely solely on the Android security update date for comparison, as GrapheneOS may release its own changes between Android’s monthly security updates.
Open Settings → Security & privacy → Device unlock → Screen lock. If the section has a different name on your device, search for Screen lock in Settings. Confirm your current screen lock and choose PIN or Password. If you use a PIN, choose your own random combination of at least six digits. A longer random PIN or a long passphrase provides a greater security margin. Avoid using your date of birth, phone number, or repeating digits.
Memorize your primary screen lock before adding biometrics. After a restart, this is what you will need to unlock the phone for the first time. Your Google Account password does not replace your phone’s screen lock, and changing that password will not unlock encrypted local data. If you need to keep a backup copy of your screen lock code, store it securely somewhere other than on the Pixel itself.
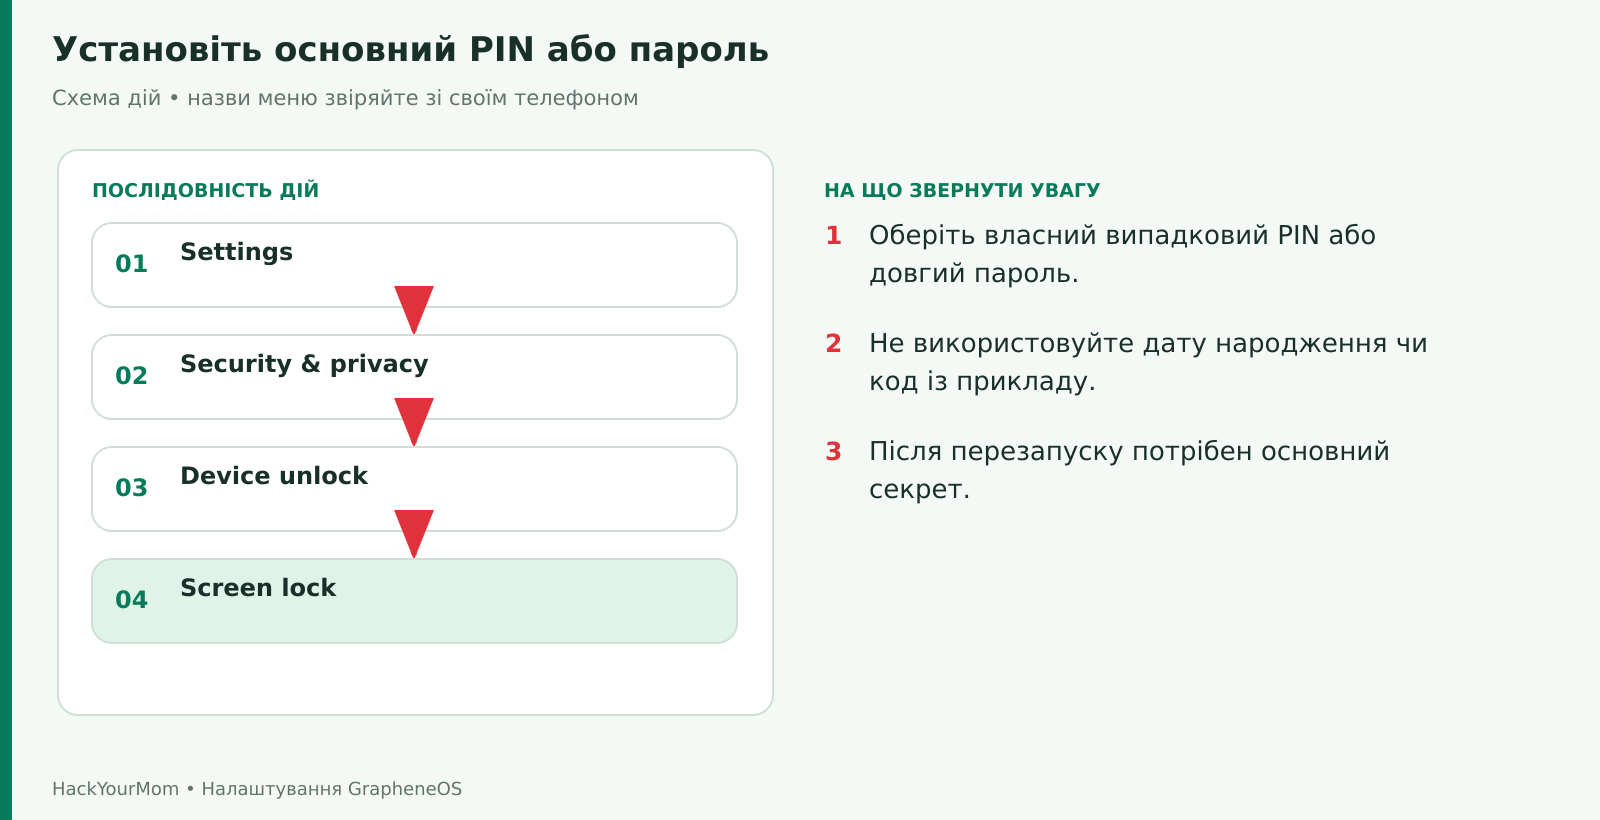
If needed, find PIN scrambling in the screen lock settings. This feature randomizes the positions of the digits on the keypad, making it harder for someone to observe where you tap. It can slow down PIN entry and does not make a weak PIN strong. GrapheneOS provides separate explanations of PIN scrambling and support for longer passwords.
Check: Lock the phone using the power button and unlock it twice with your primary screen lock. Do not deliberately make a series of incorrect attempts. This does not test the strength of your password and only causes delays.
Under Device unlock, open the fingerprint settings. Confirm your primary screen lock, add a fingerprint, and follow the on-screen instructions. Place different parts of your fingertip on the sensor rather than using the same position each time. After saving the fingerprint, test unlocking the phone while holding it the way you normally would. The type of fingerprint sensor and its behavior with a screen protector depend on the Pixel model.
Biometrics provide an additional way to unlock the device. GrapheneOS also supports Two-factor fingerprint unlock. After a successful fingerprint scan, you need to enter a separate PIN. This lets you combine a long primary password with a shorter confirmation PIN for everyday use. Find this option in the fingerprint settings or through Settings search, read the explanation, and create your own second PIN if this setup suits your needs.
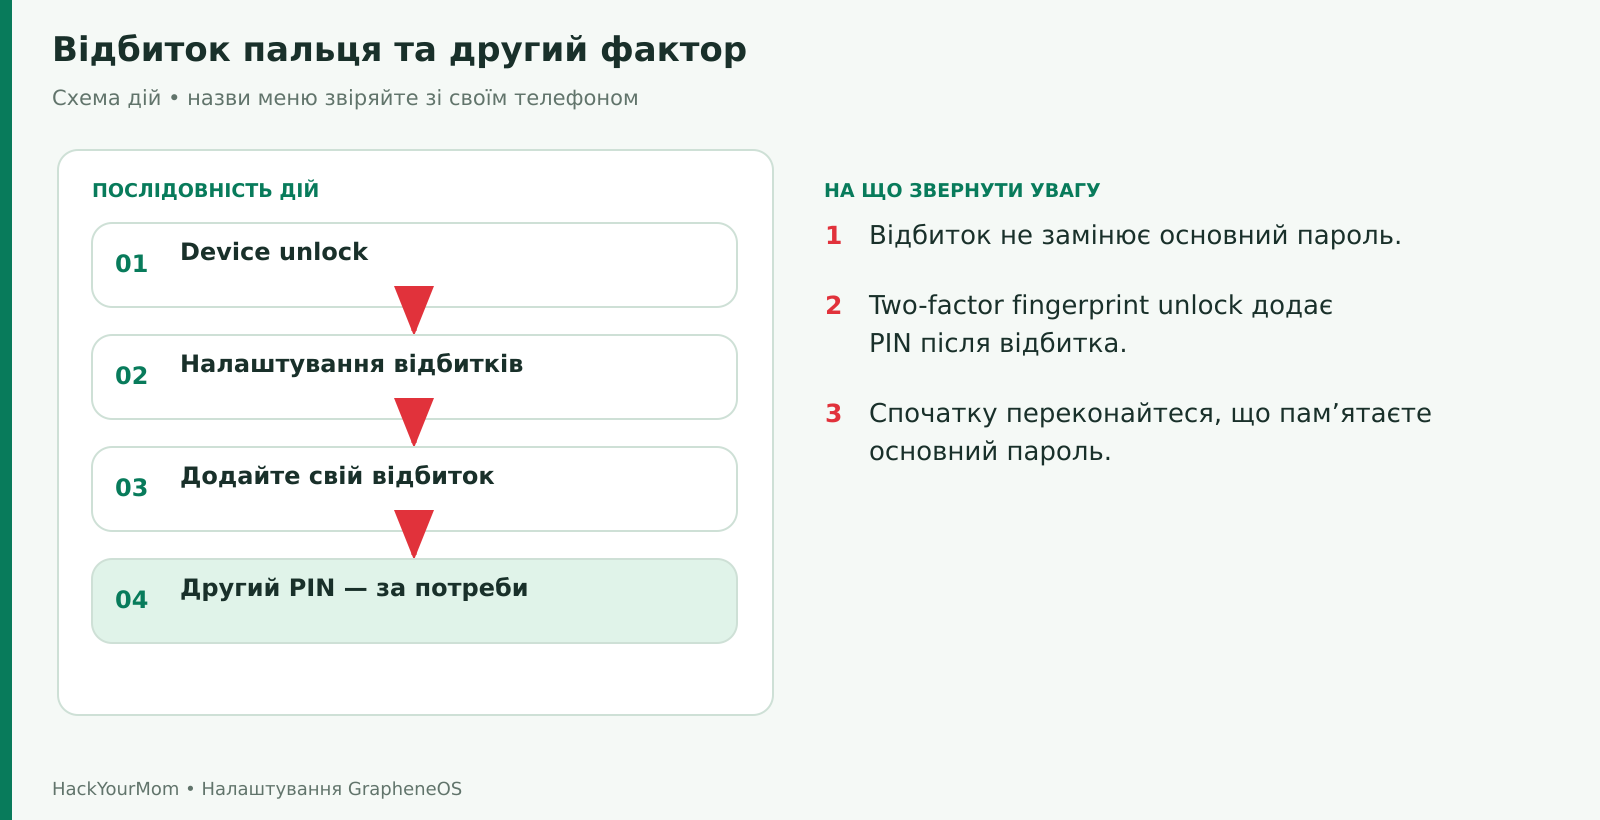
After restarting the phone, enter your primary password. Then lock the screen and test the “fingerprint plus second PIN” combination. Do not treat the second PIN as a recovery code. This behavior is explained in the official documentation for two-factor fingerprint unlock.
If you do not want to unlock the phone with your fingerprint, you can skip adding biometrics. GrapheneOS also allows registered fingerprints to be used for authentication within apps without using them to unlock the screen. The choice depends on your threat model and convenience. There is no need to enable every unlocking method at the same time.
Use Settings search to find Screen timeout and choose a short but practical time before the screen turns off, such as 30 seconds or one minute. Next, check the settings for locking the device after the screen turns off and for locking it with the power button, if these options are available near Screen lock. Turning off the display does not always mean the phone is locked immediately. An additional delay may leave the device accessible.
Under Settings → Notifications, find the lock screen notification settings. Disable sensitive notification content or hide these notifications entirely if even the app name or sender’s name is private to you. If needed, open App info for a specific messenger and review its individual notification categories.
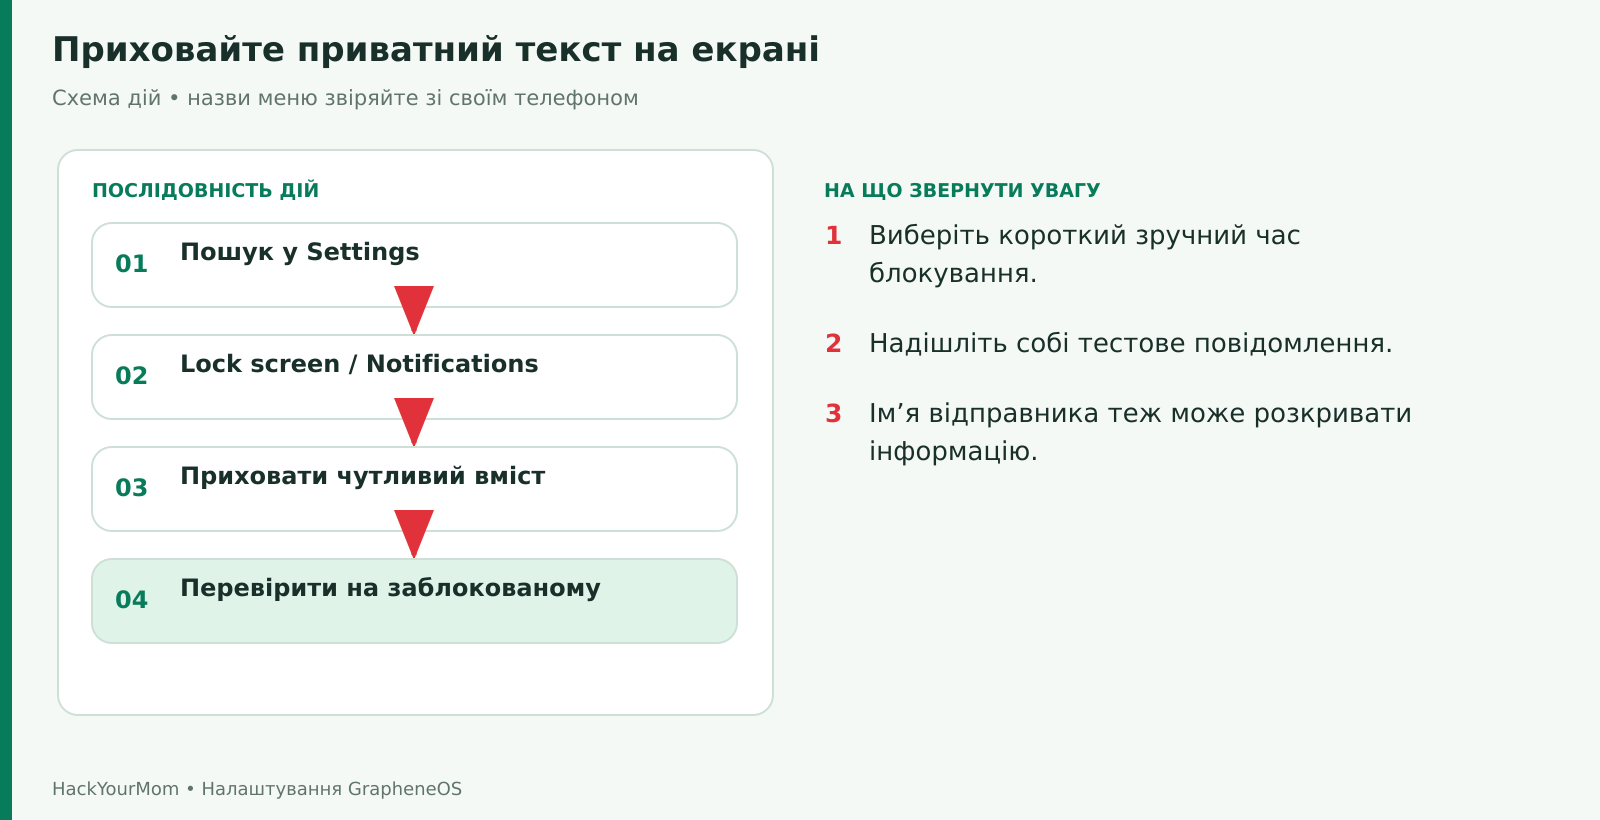
Ask someone to send you a regular test message, or send one from another device you own. Check the screen before unlocking the phone and see whether the message text, contact name, photo, or verification code is visible. Adjust what content is displayed rather than disabling all notifications unnecessarily. This way, you can still see that a new message has arrived while keeping unnecessary details hidden.
Search for Auto reboot in Settings. This option is part of GrapheneOS’s security features. According to the official documentation, the default interval is 18 hours without a successful unlock. You can leave the default value in place to start with. A shorter interval only makes sense if you understand how it may affect the phone’s availability.
After an automatic reboot, the main encrypted data remains inaccessible until you enter your primary screen lock for the first time. Apps that depend on this data may not work normally until the phone is unlocked. For this reason, setting a very short timer can be inconvenient overnight or when the phone is used infrequently.
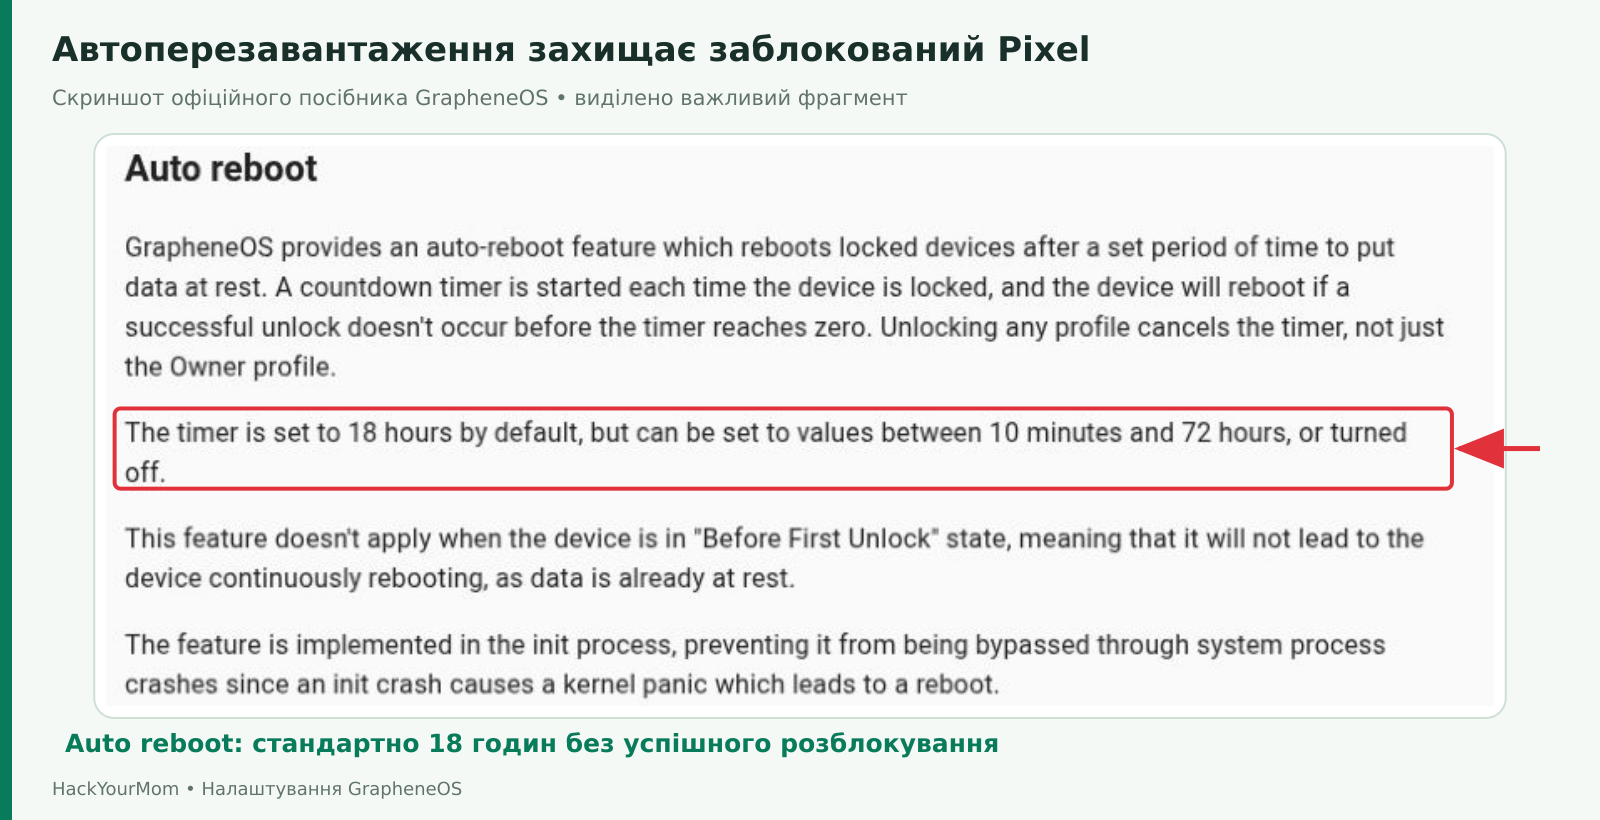
Auto reboot does not erase data and is not a factory reset. The countdown is reset by a successful unlock, including the successful unlocking of another profile. After the phone boots without being unlocked, it will not continue rebooting indefinitely based on this timer. For more details, see the Auto reboot documentation.
Search for USB-C port in Settings or open Security & privacy → Exploit protection. Some paths in the documentation are shortened to Security. The default mode is Charging-only when locked. It restricts new USB connections after the device is locked and disables data transfer once existing connections are terminated.
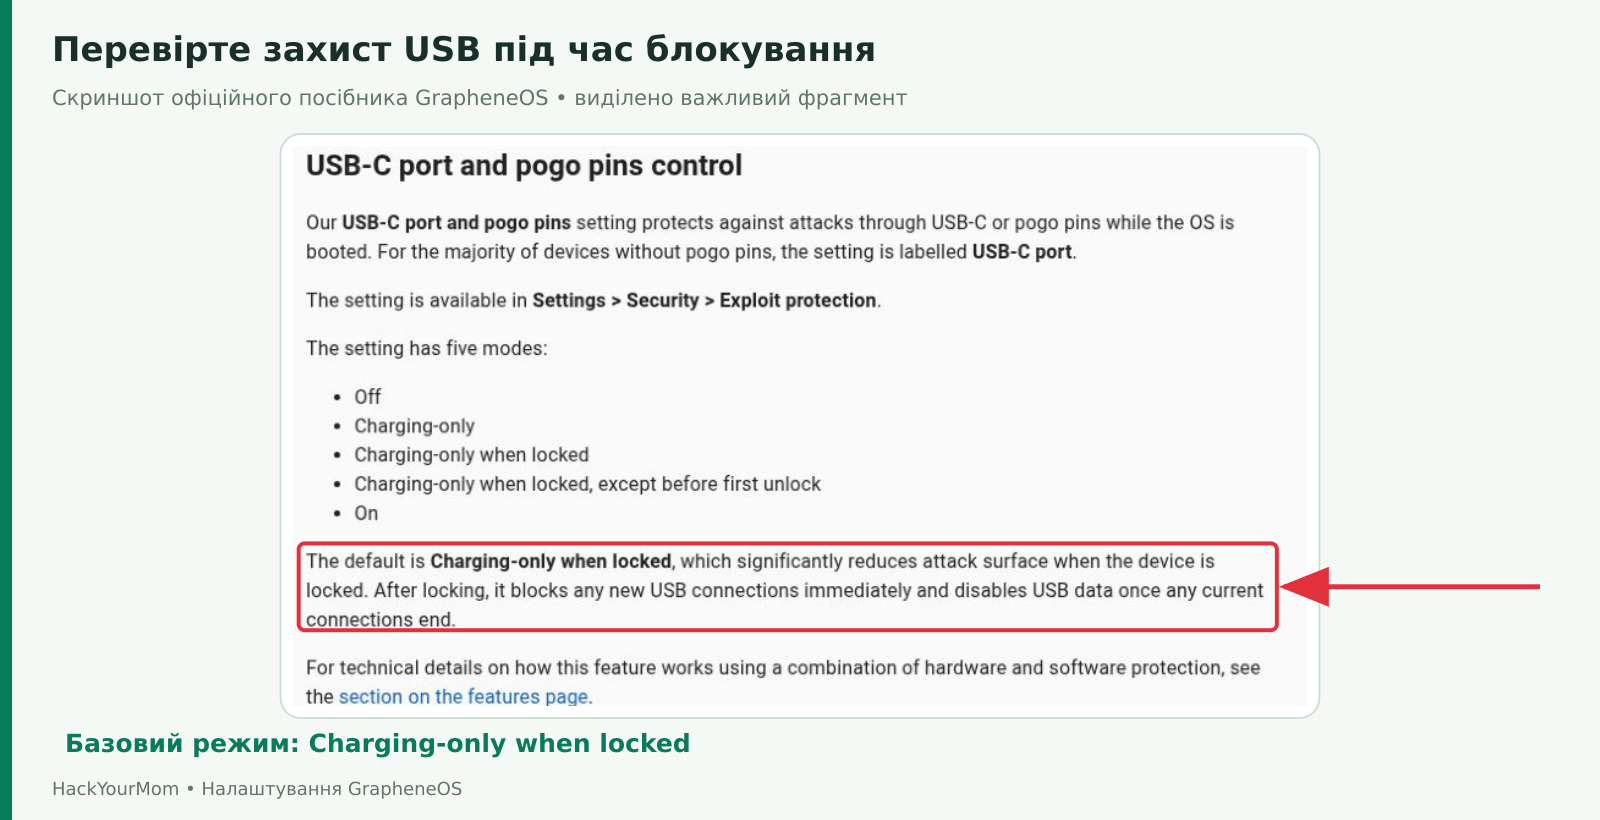
Do not switch the port to On just to copy photos. In most cases, you only need to unlock the phone, connect it to a trusted computer, and select File transfer from the USB notification. Keeping the port permanently set to Charging-only or Off may interfere with storage devices, audio devices, and other accessories, so choose these modes deliberately. A full list of available modes is provided in the USB protection documentation.
If you have enabled Developer options, make sure USB debugging is turned off when it is not required for a specific task. Regular file transfers, everyday GrapheneOS use, and automatic updates do not require ADB. Do not enable OEM unlocking for everyday use, and do not install root access to follow this guide.
In the Owner profile, Security & privacy → Device unlock → Duress Password opens a special mechanism for irreversible data wiping. Entering the configured duress PIN or password into the corresponding system prompt destroys the device’s data, including installed eSIMs. This is not a required step and is not another regular way to unlock the phone.
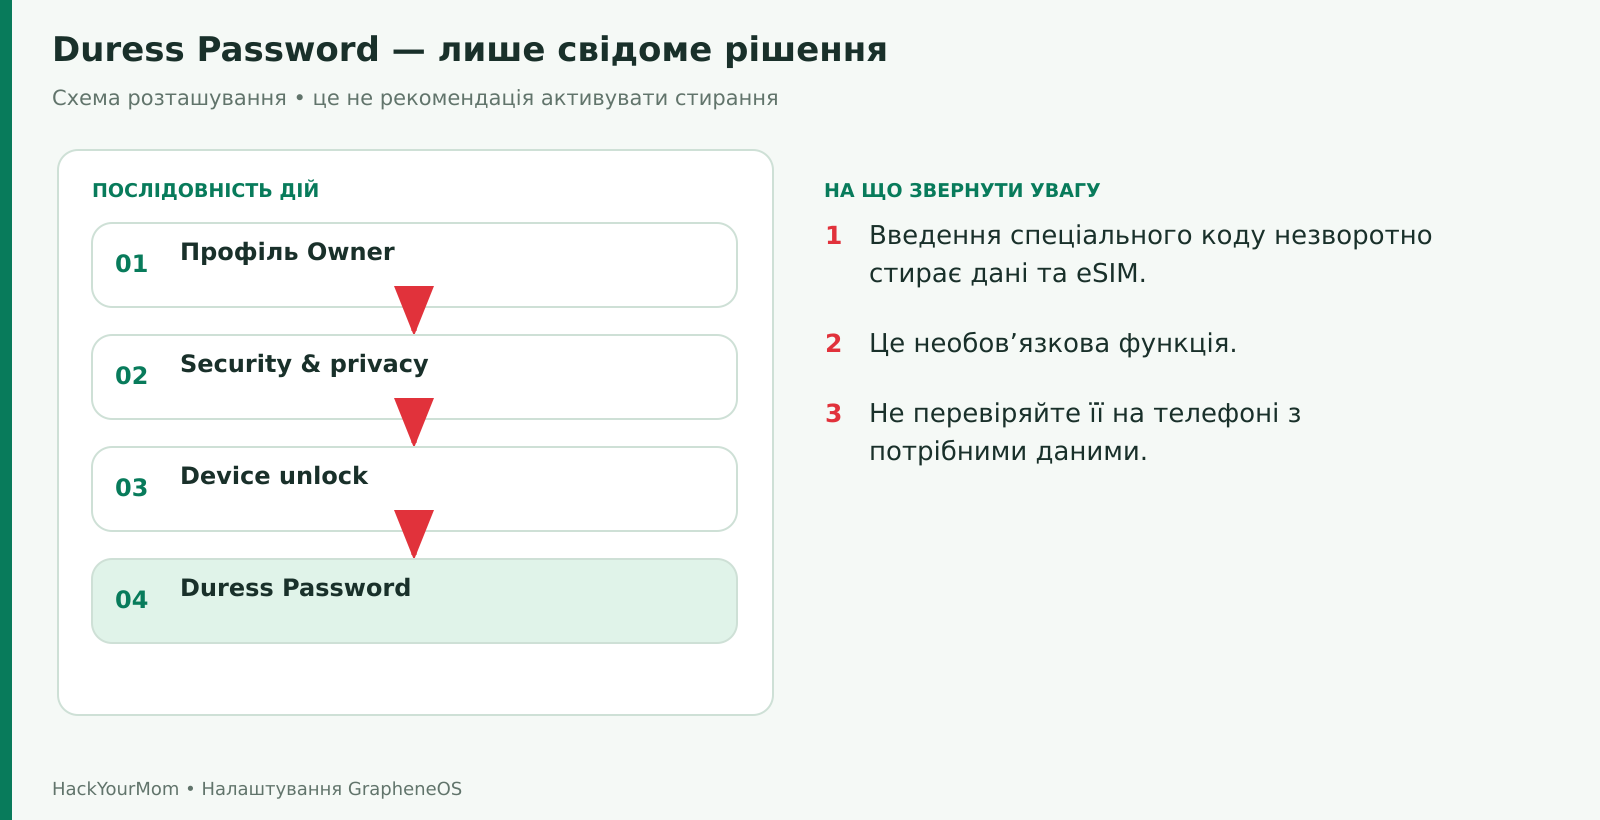
For the initial setup, leave it disabled unless you have a clear reason to use it. If you do need it, first make sure you have verified backups and read the official Duress PIN and Password documentation. Entering the configured duress code on the lock screen as a test will actually wipe the device. It is not a simulation.
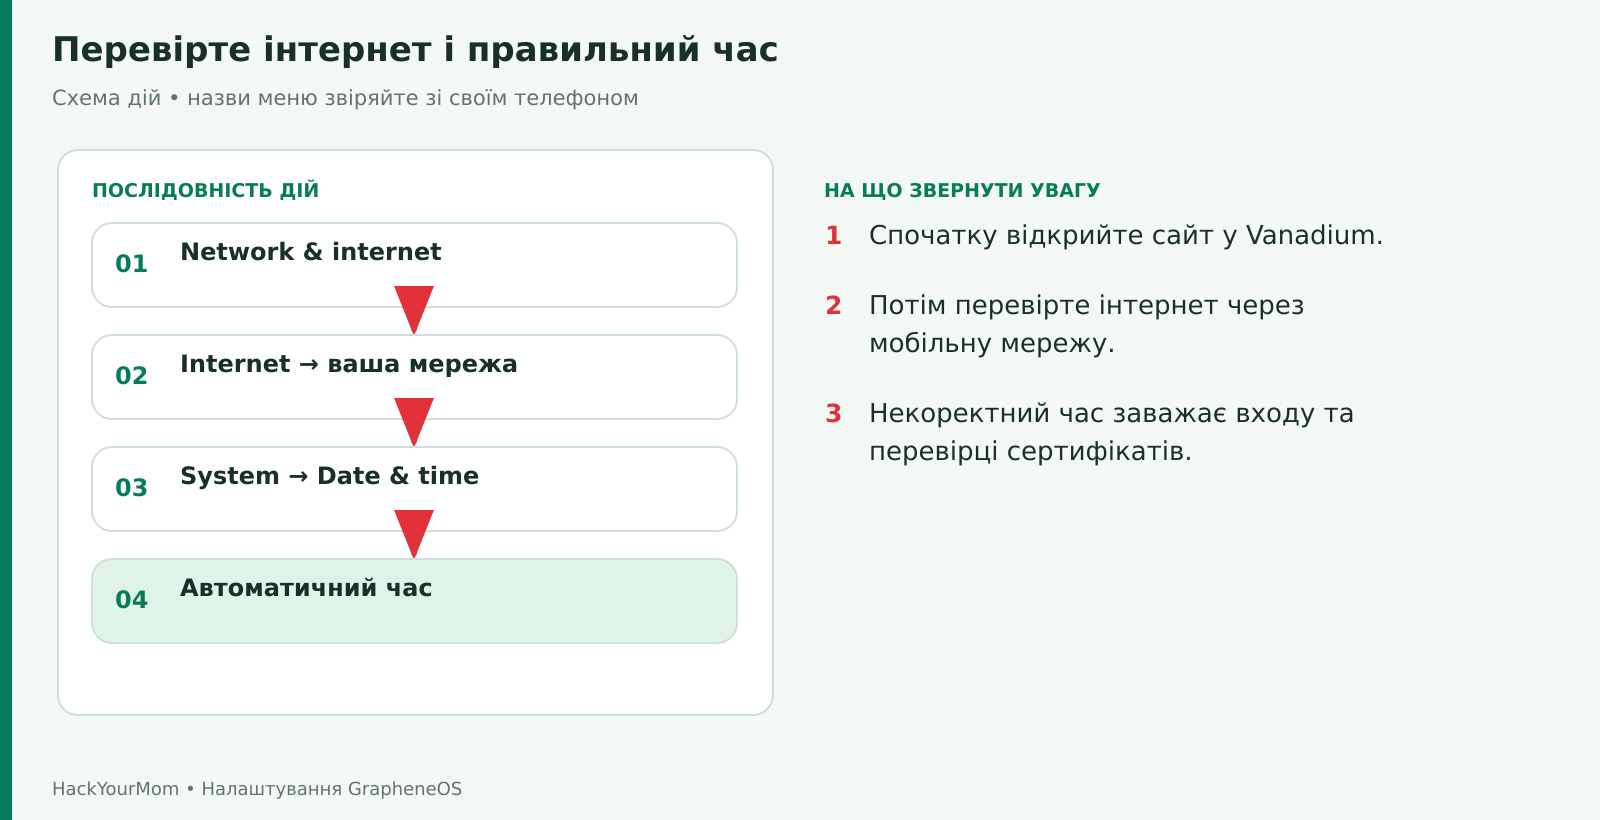
Open Settings → Network & internet → Internet, select your network, and enter its password. Check the connection in Vanadium by opening a regular website. Verify the network name carefully, as a similar name does not prove that it belongs to your router. On public Wi-Fi, an additional sign-in page may appear.
Under Settings → System → Date & time, keep automatic time enabled. The time zone can also be set automatically or configured manually if the network detects it incorrectly. An incorrect system time can affect certificates, sign-ins, and one-time codes, so do not disable time synchronization simply to reduce the number of system connections.
Insert the physical SIM card into the phone and check its status under Network & internet → SIMs. If you have multiple SIM cards, select the one you want to use for mobile data, calls, and SMS wherever the system provides that option. Then turn off Wi-Fi for a minute and test mobile data, an incoming and outgoing call, and a regular SMS. Do not use emergency numbers for testing.
To add an eSIM, first open Network & internet → eSIM support and enable eSIM management support. Then go to SIMs, choose the option to add or download an eSIM, and follow your carrier’s instructions, such as scanning the QR code they provide. Do not publish this QR code in screenshots for the article or in messages.
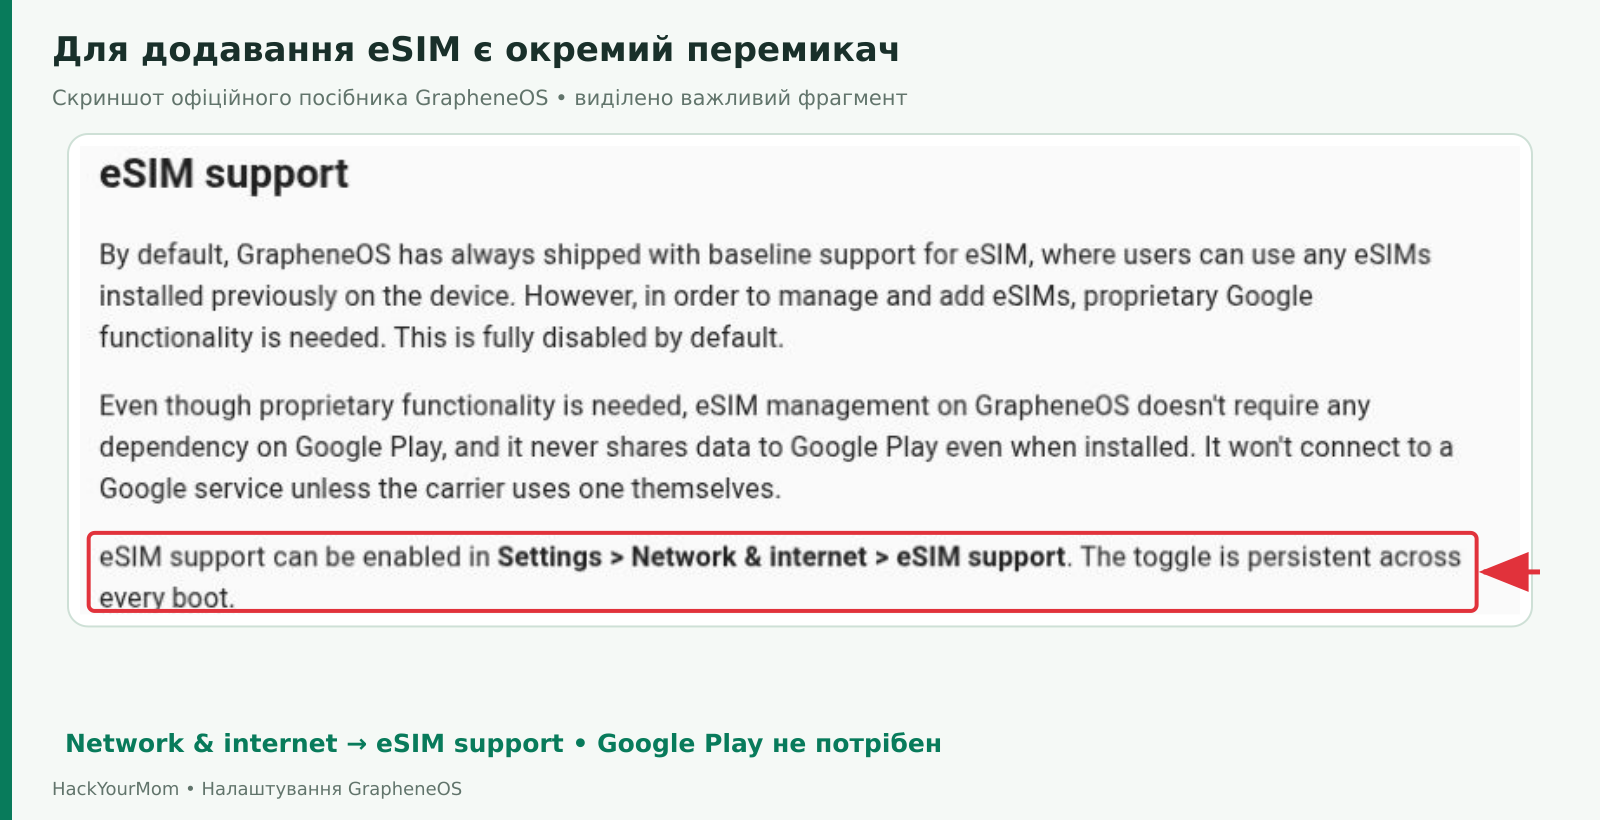
According to the eSIM documentation, the required management component is disabled by default but does not depend on Sandboxed Google Play. If your eSIM is protected by a SIM PIN, follow the recommendation to keep eSIM support enabled and store the PUK in a secure place. The SIM PIN and your screen lock code are separate credentials. Do not make repeated guesses if you have forgotten your SIM PIN.
If connectivity only works partially, check whether your carrier supports your device model, as well as VoLTE, APN settings, and the status of your mobile plan. Do not enable LTE-only mode or change carrier settings at random, as this may disable voice calls on some networks. Refer to the GrapheneOS section on carrier functionality and your carrier’s instructions.
For initial use, the Owner profile, the phone’s primary user, is enough. Installing apps in this profile does not give them administrator privileges or access to all your data. They remain protected by the standard app sandbox. There is no need to create multiple profiles simply because the option exists.
An additional user profile is useful if you want to separate a set of apps, accounts, and files. For example, you can use the main profile for everyday tasks and a second profile for specific services. Each profile has its own app data and permissions. If apps require Google Play, it must be installed in the same profile.
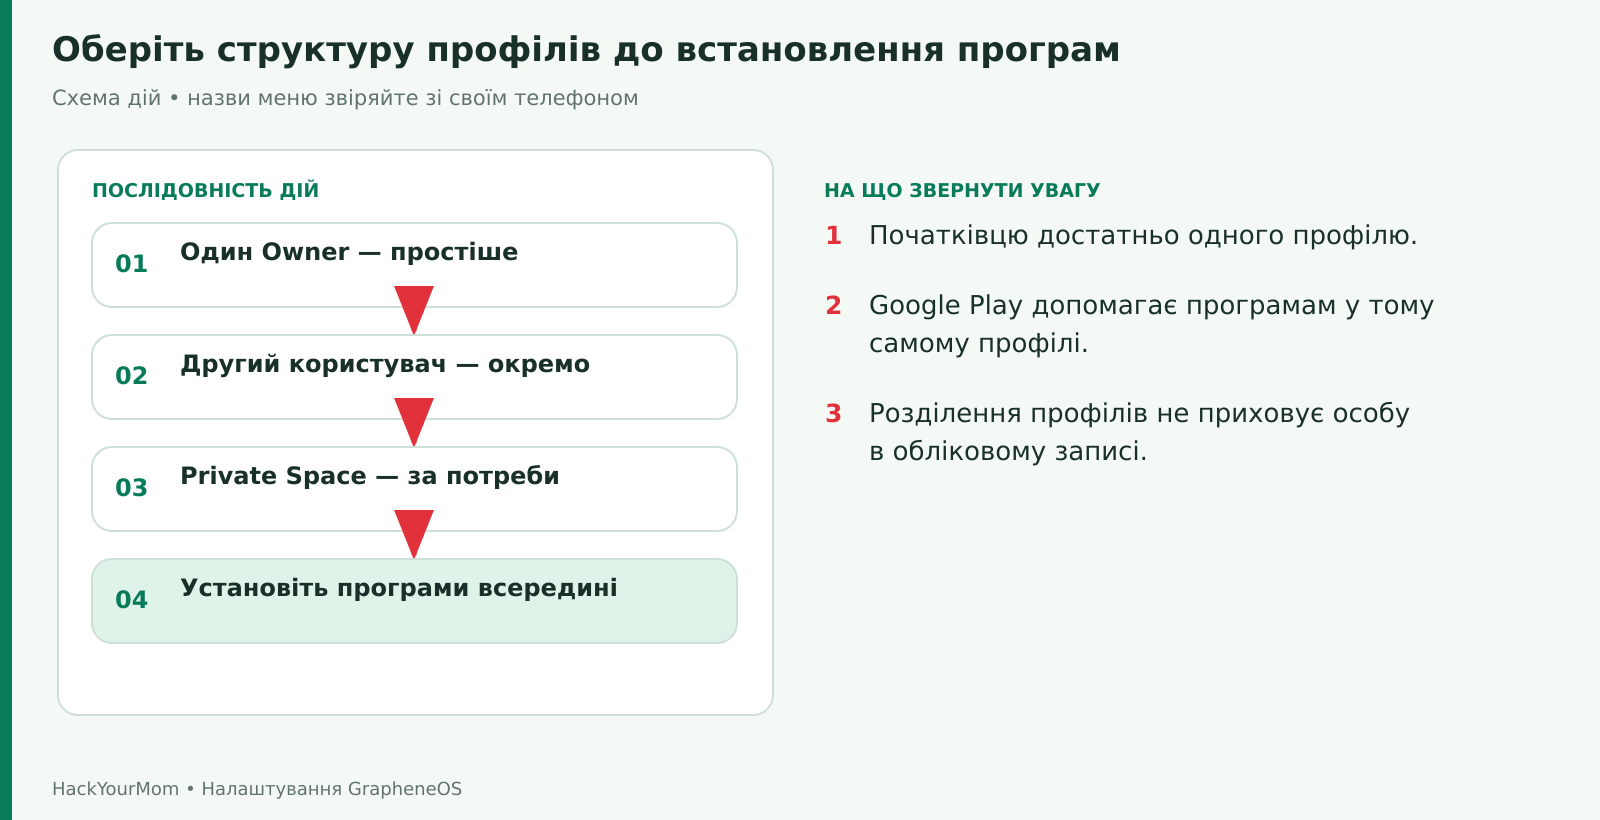
Signing in to the same online account in different profiles does not create a new identity for the service. Likewise, a profile does not hide the fact that the phone is connected to a mobile network. Its purpose is to separate local environments. The principles of this isolation are explained in the user profiles documentation.
In the Owner profile, open Settings → System → Multiple users. If necessary, enable support for multiple users, tap Add user, give the profile a clear name, and switch to the new user. Complete the initial setup for that user and set a separate screen lock. The profile name should not contain a password or any sensitive information.
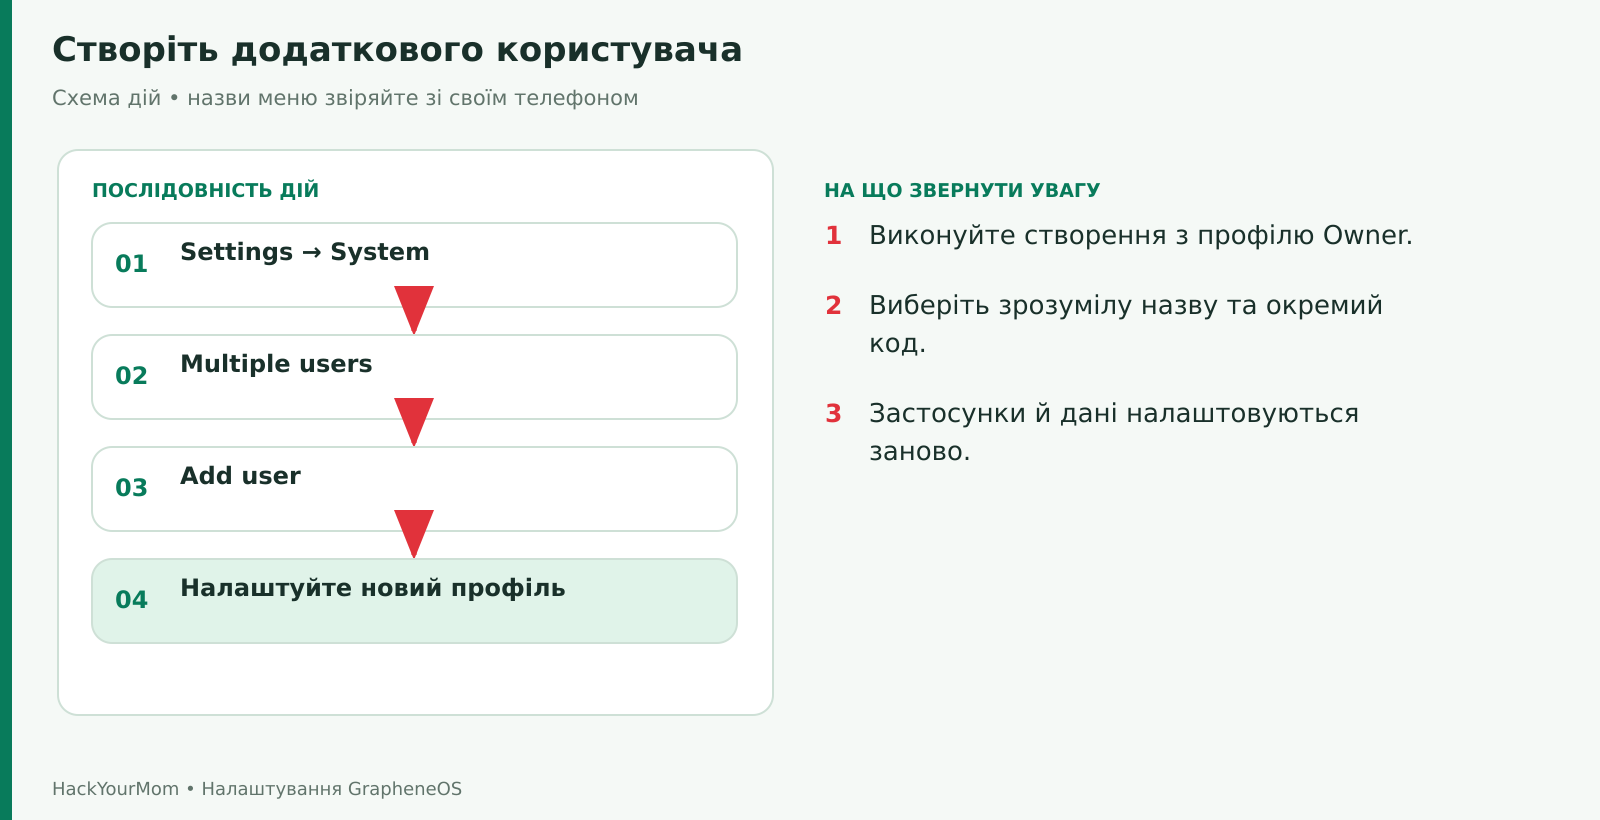
After creating the new user, open the list of apps in that profile. Install the apps you need, sign in to the required accounts, and review their permissions. The Install available apps feature, available in GrapheneOS user management, can help you use an already installed app package without downloading it again, but it does not transfer the app’s personal data between profiles.
Switch between users through the user menu in Quick Settings or Multiple users. Simply switching users may leave the previous user running in the background. End session stops that user’s session: apps stop running, and the encryption keys for that user are removed from the active state. This is a feature for secondary users, not a data-wiping command.
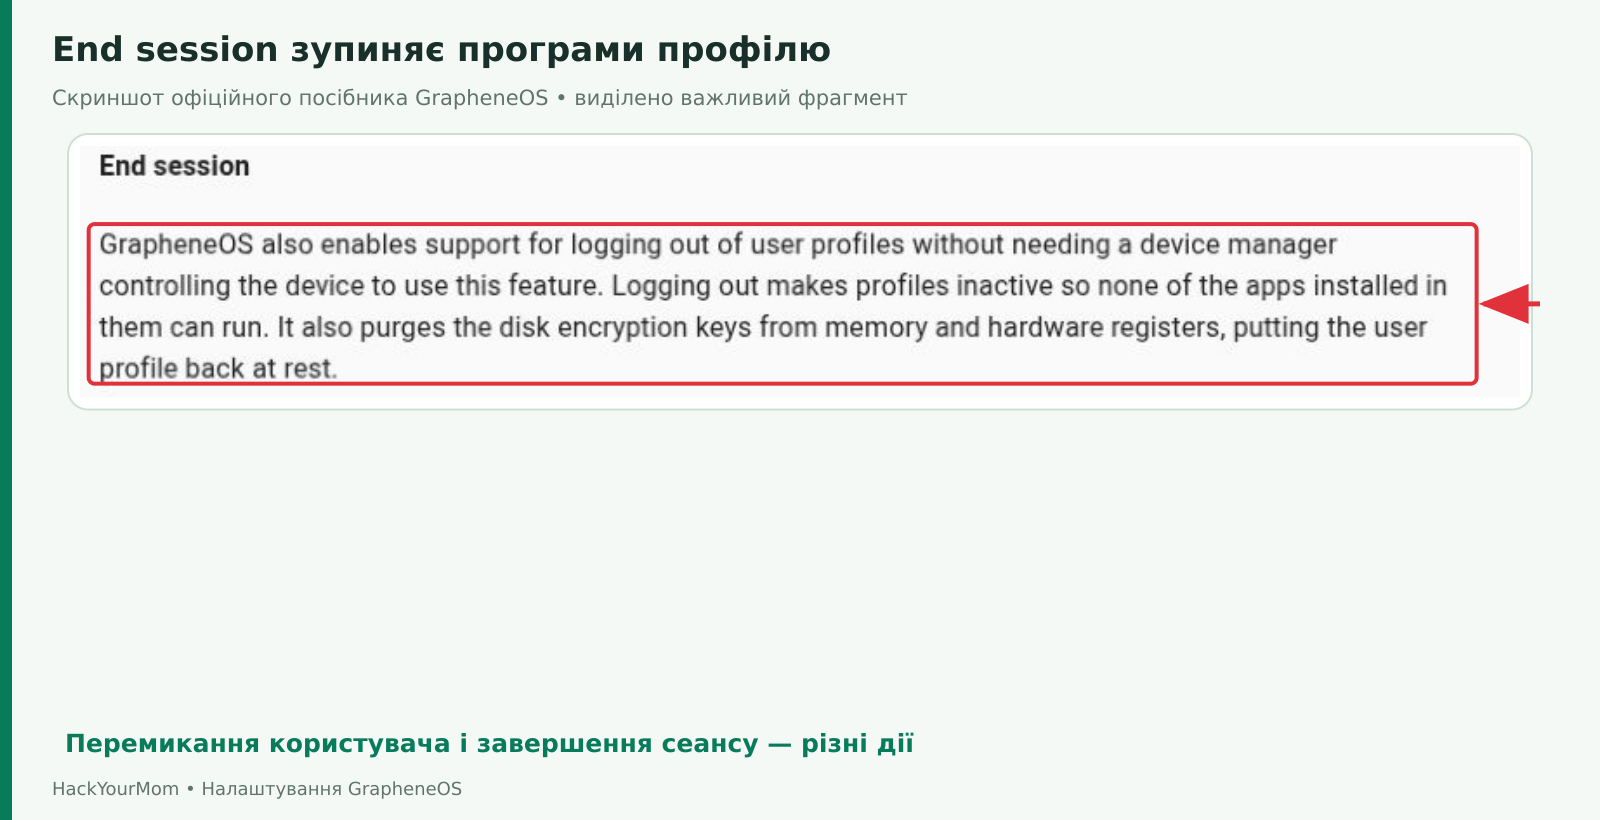
If you need notifications from another user profile, do not end its session, and check the settings for forwarding notifications between profiles. In GrapheneOS, this feature is not enabled automatically. After enabling it, check exactly what information is visible in the current user profile. Do not expect notifications to be forwarded from a profile that has already been stopped. The official description of End session and notifications explains this distinction.
Private Space is a separate app space within the main user profile. To create one, open Settings → Security & privacy → Private space, confirm your primary screen lock, select Set up, and configure a lock for the space. Install apps from within Private Space itself. A regular app shortcut outside the space does not automatically become private.
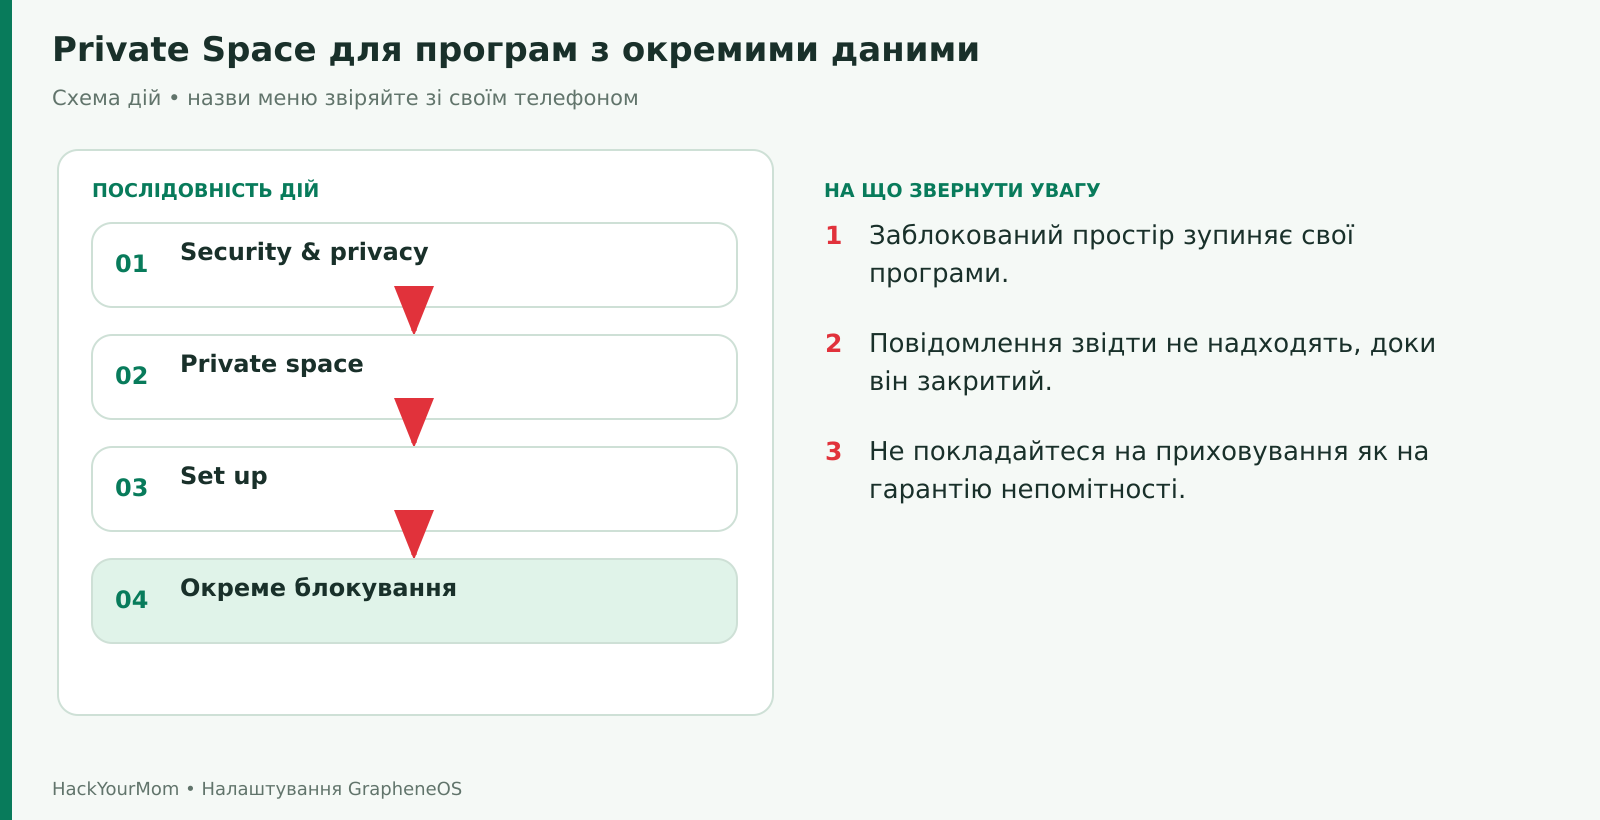
When Private Space is locked, its apps do not run in the background and do not show notifications. This makes it inconvenient for a messenger that needs to receive messages continuously or for an app that depends on continuous background monitoring. Simply hiding Private Space does not guarantee that its existence cannot be detected. The general concept is explained in the Android documentation for Private Space. Limitations specific to the standard Pixel software should not automatically be assumed to apply to all GrapheneOS builds.
If the apps you need work without Google Play, you can skip this step. If they depend on Play services, its push notifications, licensing, or Sign in with Google, install the official components through GrapheneOS. Do not replace this process with a random collection of APK files downloaded from the web.
First, switch to the profile where you plan to use the apps that depend on Google Play. Open the built-in GrapheneOS App Store, select Google Play services, and start the installation. The store will also install Google Play Store as a required dependency. Confirm the system installation prompts and wait for the process to finish.
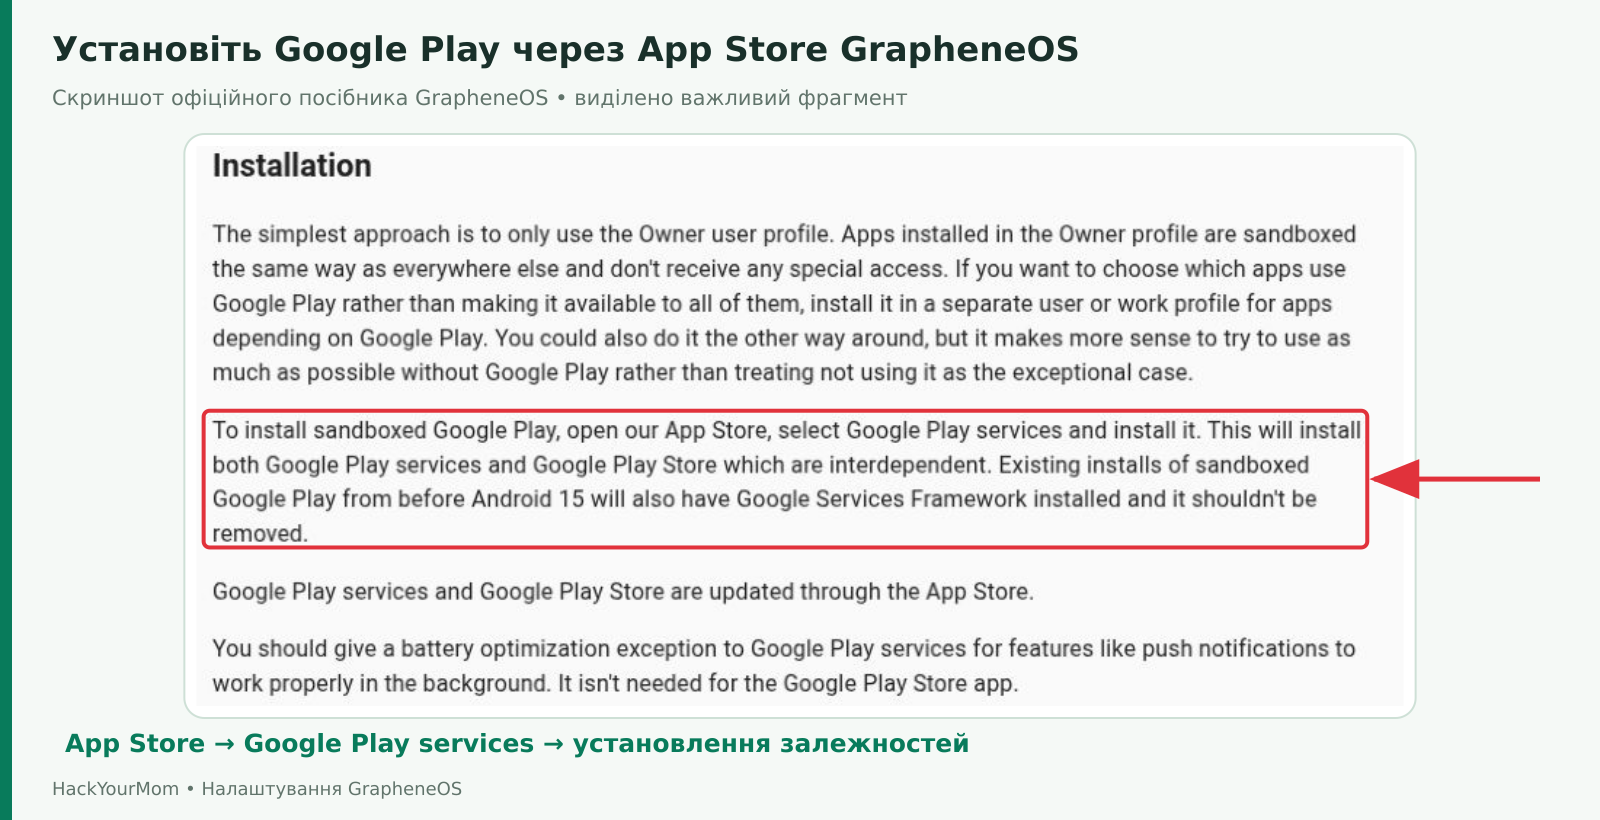
For a new installation, you do not need to manually look for a third component called Google Services Framework. The official guide specifically notes that it may still be present on older installations created before Android 15. There is also no need to remove it from those installations as part of this guide. Follow the dependencies offered by the current App Store.
On GrapheneOS, Play services runs as a regular sandboxed app. This does not mean there is no interaction with Google: apps can use its services, and signing in to a Google Account and using Google services creates the corresponding connections. Installing apps through the Play Store generally requires signing in to an account, but installing Play services itself does not automatically require you to sign in. For more details, see the official Sandboxed Google Play installation guide.
Open Settings → Apps → See all apps → Google Play services → App battery usage. Allow background activity and select the battery optimization mode without restrictions if the menu offers Unrestricted. In different versions, the same option may be available through an additional Allow background usage screen. Look for the setting that allows the component to run reliably in the background.
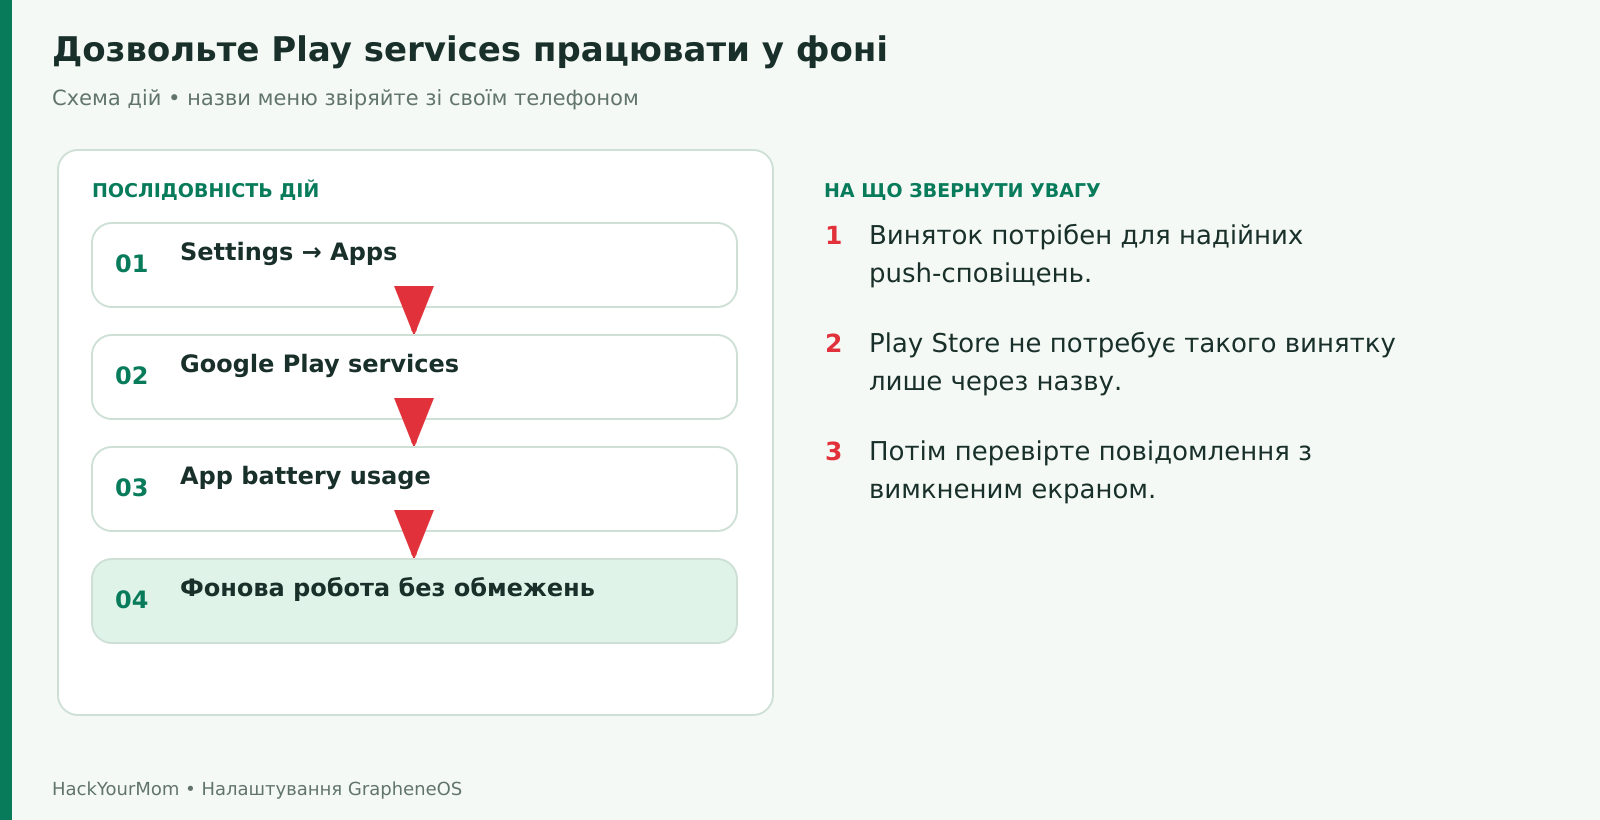
This is the GrapheneOS-recommended exception for reliable push notifications. The Google Play Store itself does not need this exception just to keep Play services working. Do not grant Play services access to contacts, SMS, and location all at once just to “make everything work.” Permissions should be granted based on the specific functionality you need.
Check: open a messenger that depends on Play services, allow notifications, then lock the screen and test whether a message is received. If the app was installed before Play services and does not detect it, first restart the app and the phone. Do not reinstall a messenger containing important data unless you have a backup created through the app itself.
Start with the essentials: communication apps, a password manager, navigation, necessary work tools, and banking apps. Before installing anything, verify the app name, developer, and app link from the service’s official website. A similar icon or the first result in a search does not prove that an app is genuine.
Keep the different app stores and sources separate. The GrapheneOS App Store distributes project components and supported packages, including Google Play. The Google Play Store installs and updates apps from its own catalog. An individual app downloaded from the developer’s official website may have its own update mechanism. Check how updates are handled before relying on the app for everyday use.
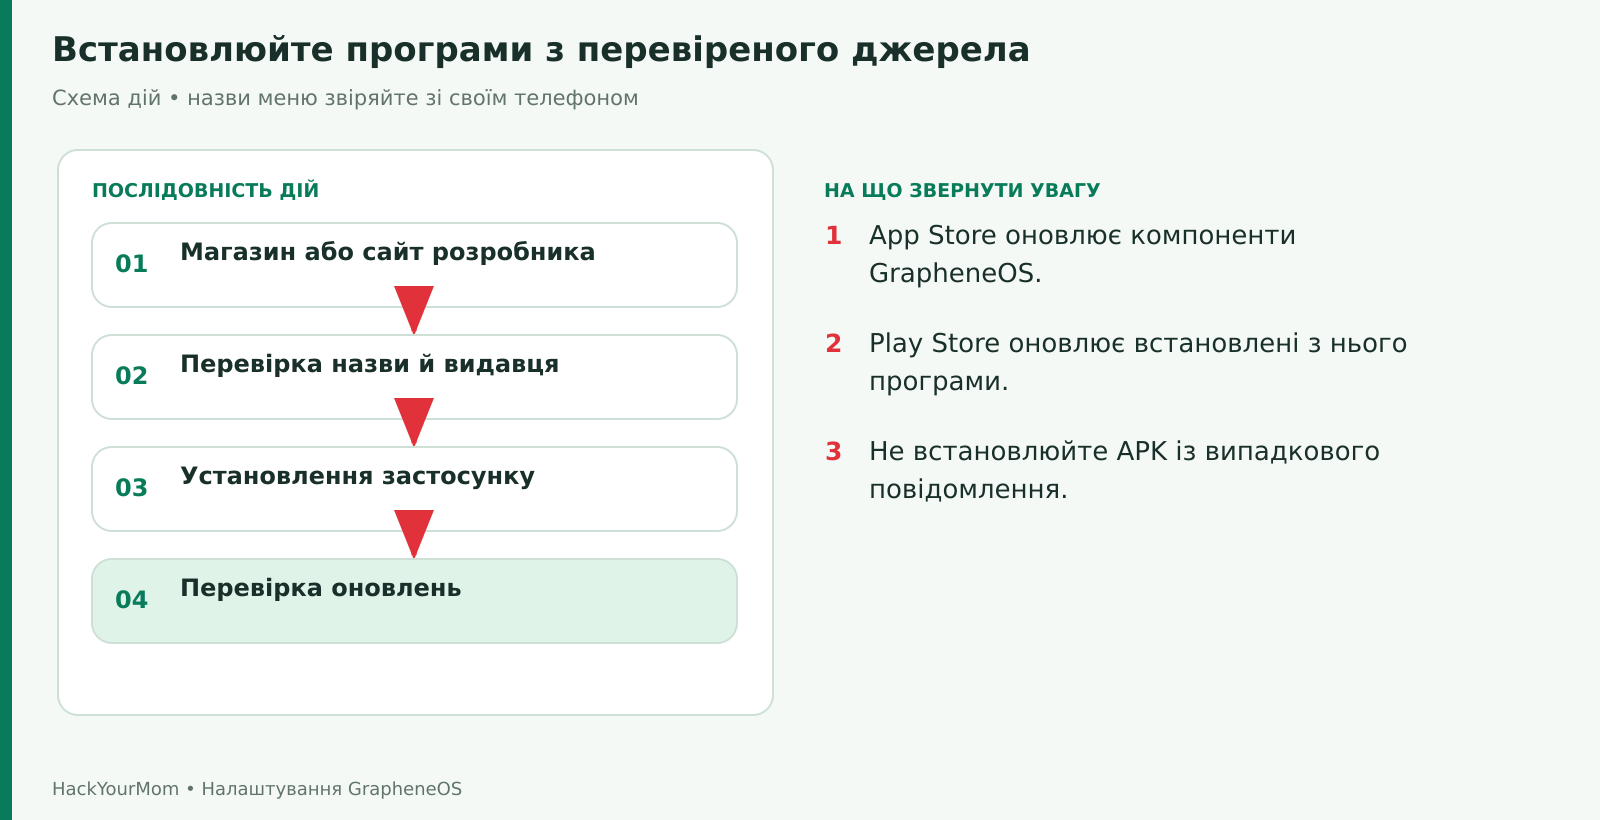
For an APK opened through a browser or file manager, Android may prompt you to allow installations from that source. You can manage this permission under Settings → Apps → Special app access → Install unknown apps → specific app. The permission applies to the individual installation source and is not a system-wide switch for the entire phone.
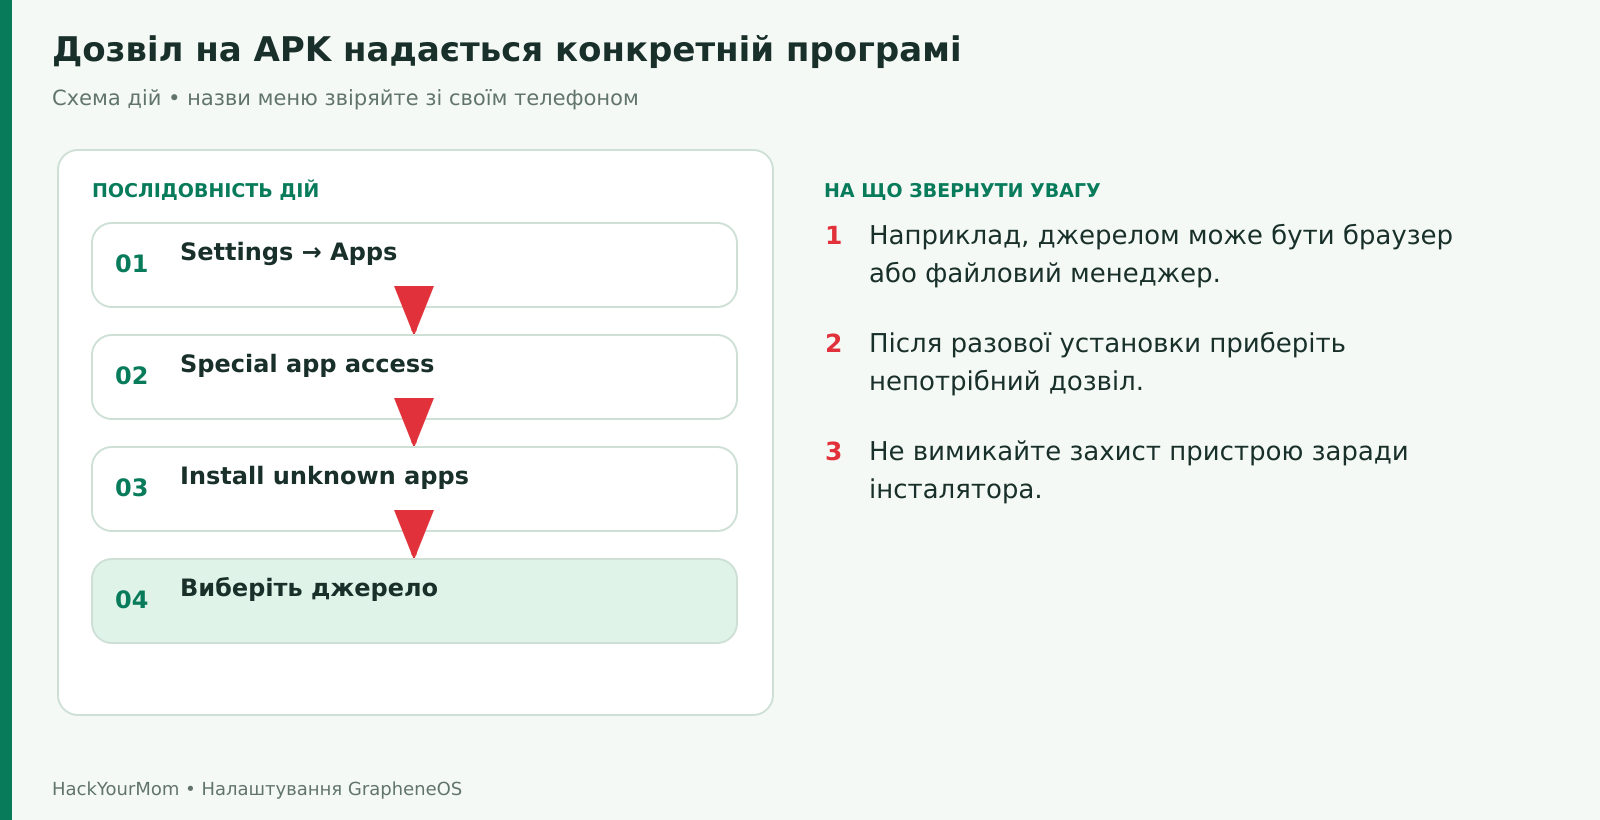
If you install an APK manually, download it from the developer’s verified website, read the installer prompts carefully, and check exactly which app it is installing or updating. Do not agree to root access, disabling system protections, or granting Accessibility permissions simply because an unknown installer asks you to. These actions are not generally required for normal app installation.
Press and hold the app icon, then open App info → Permissions. Alternatively, go to Settings → Apps → See all apps → app name → Permissions. Review both the allowed and denied permission categories. Camera, Microphone, Location, Contacts, Phone, SMS, and Nearby devices represent different types of access. Granting one permission does not grant the others.
When using a specific feature, grant only the access it actually needs. For example, a video call requires access to the camera and microphone, but simply viewing a text message does not by itself justify access to all your photos. Where available, use Allow only while using the app or Ask every time. If access is not needed, select Don’t allow. The general process is also described in the Android documentation on app permissions.
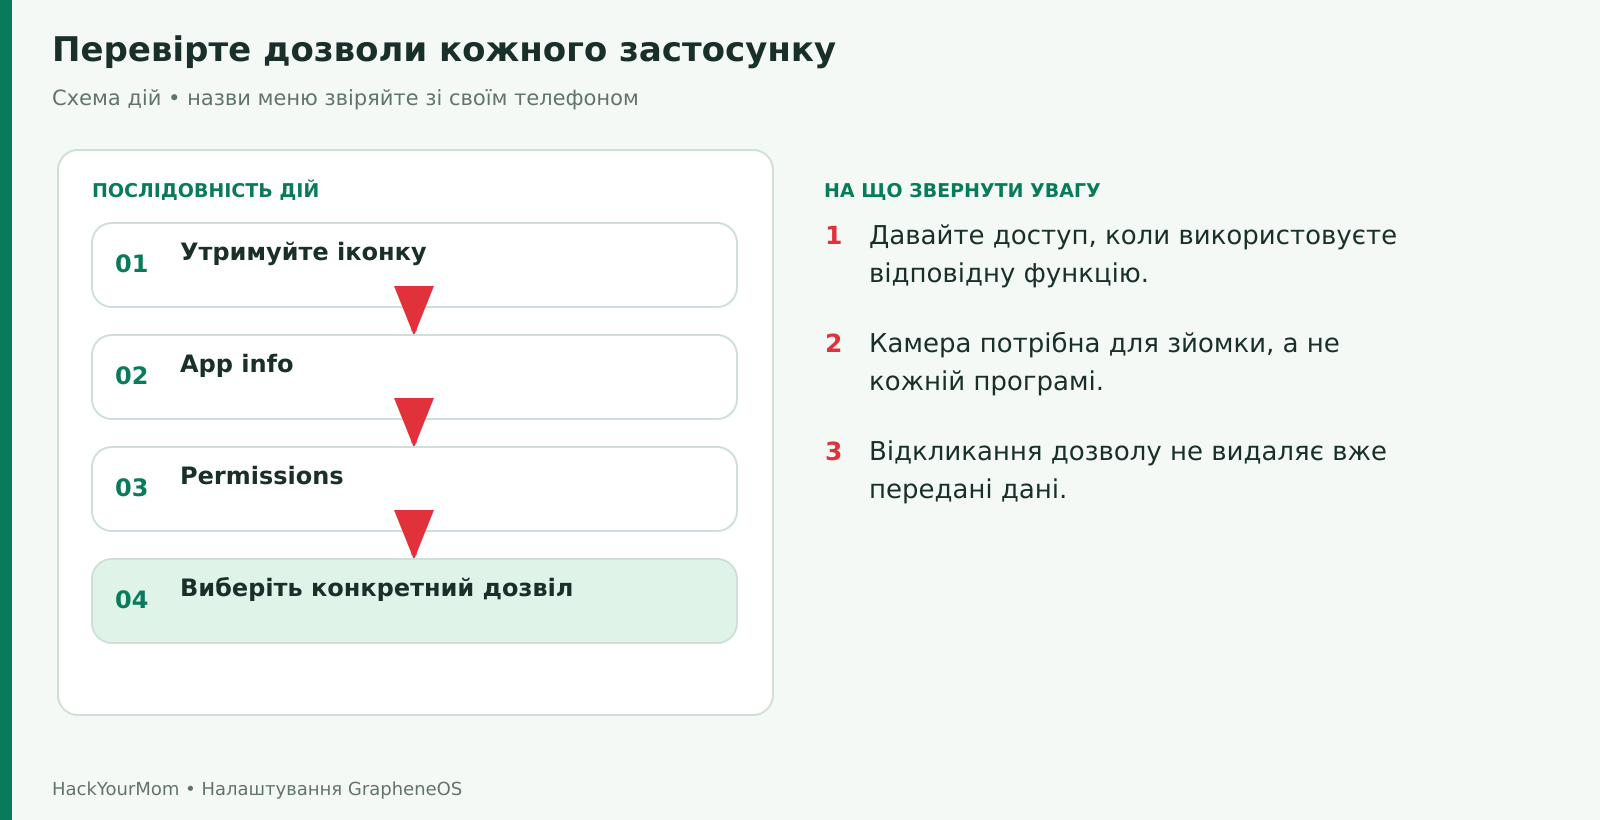
Also review Special app access separately. Notification access, Accessibility, device management, or the ability to display windows over other apps may be necessary for specialized tools, but they require a high level of trust. Do not grant these permissions automatically just to dismiss a persistent prompt.
Revoking a permission prevents further access through that particular mechanism. It does not delete information that the app has already copied to its own storage or uploaded to a server. After changing permissions, open the feature you need and check that you have not disabled any functionality you rely on.
Under App info → Permissions → Network, GrapheneOS allows you to block an app’s direct network access. This is useful for a genuinely offline tool that you do not want to synchronize, download, or send information. First, make sure any offline data you need has already been downloaded, then disable network access and test the app to make sure it still works as expected.
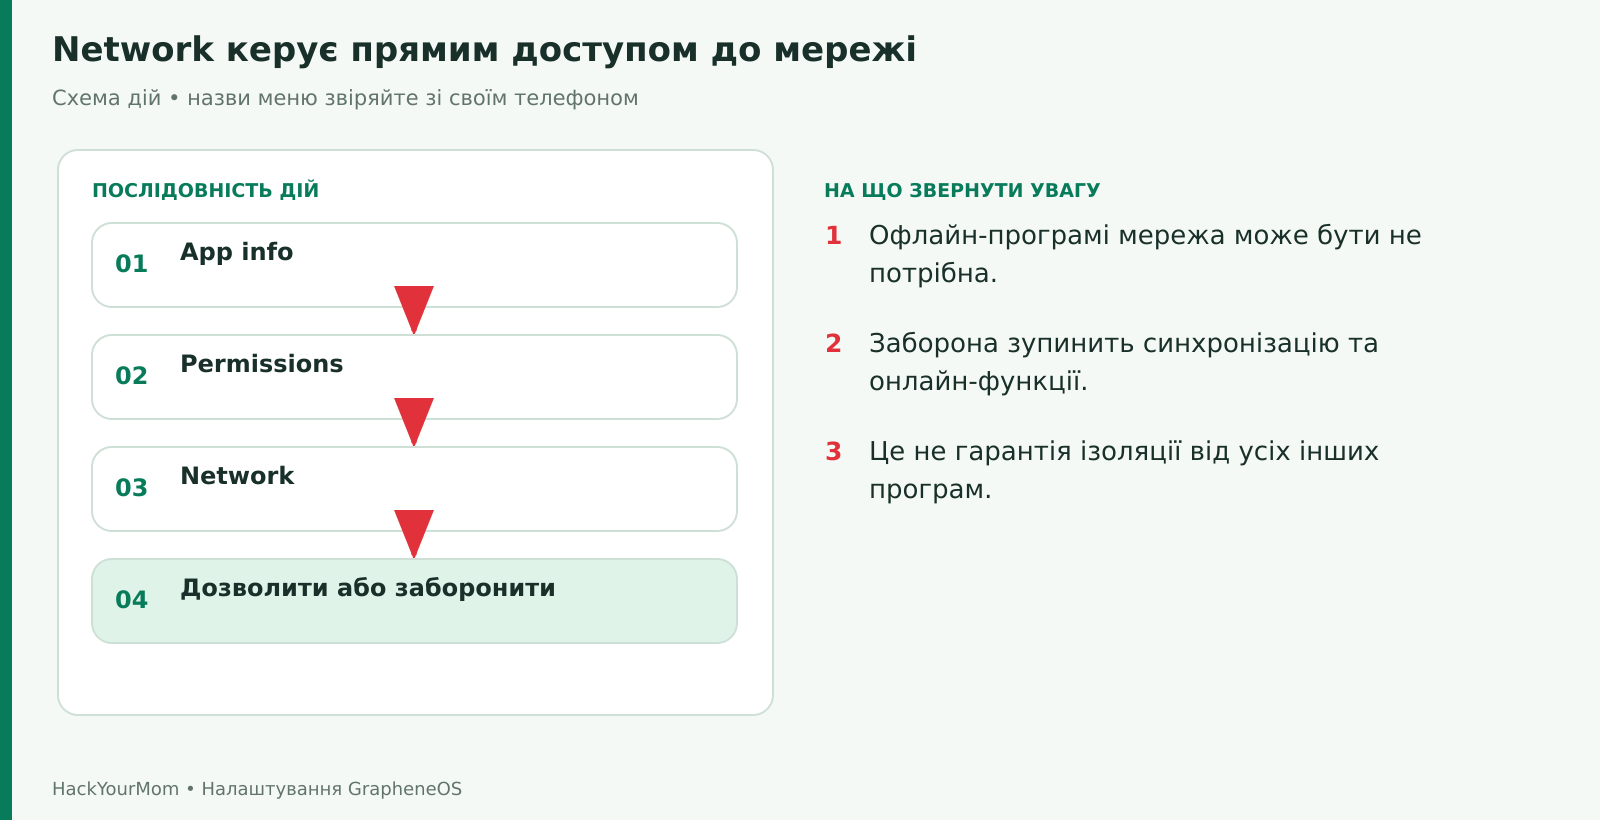
Do not disable Network for system components or messaging apps unless you understand the consequences. Also, do not treat it as a guarantee that an app can never transmit data by any means. Apps within the same profile can communicate with each other when both sides consent, and you can also transfer a file yourself through the Share menu. The purpose of this toggle is explained in the GrapheneOS section on Network permission.
Also check Sensors. This permission covers sensors such as the accelerometer and gyroscope. It is not a universal switch for the camera, microphone, or location, as those have separate permissions. For compatibility reasons, Sensors is generally allowed by default. Disabling it may interfere with the compass, motion-based features, and other functionality.
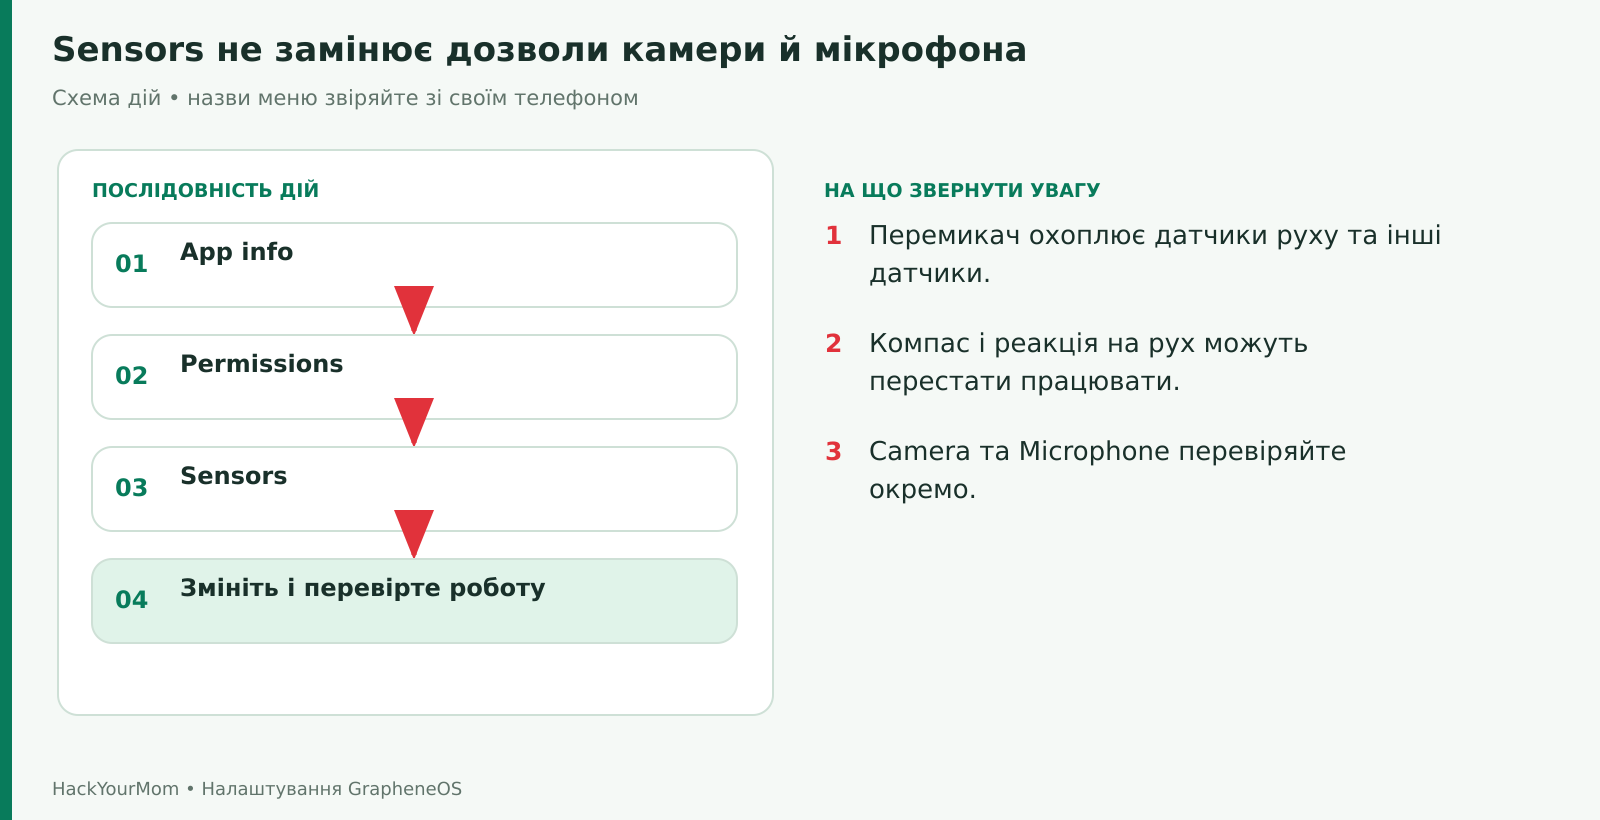
For the initial setup, change Sensors only for apps that clearly do not need sensor access, and then check how they behave. If you see a warning about blocked access, check which app triggered it. The official Sensors documentation explains what data an app receives when this permission is denied.
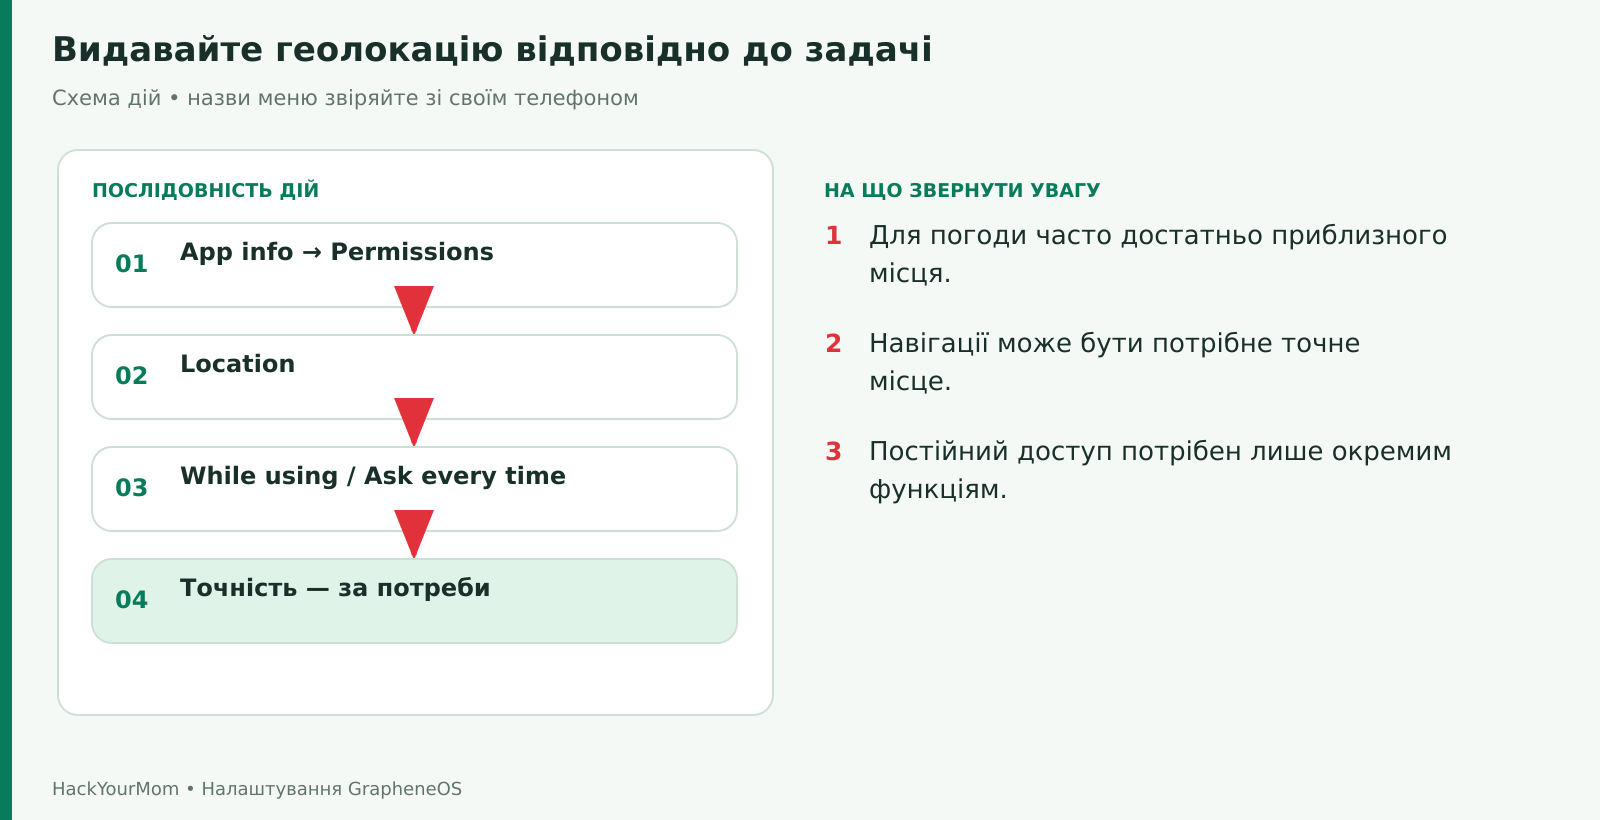
Open App info → Permissions → Location. For a weather app, approximate location or a manually selected city is often sufficient. Turn-by-turn navigation may require precise location. Choose the level of accuracy based on the app’s actual function rather than applying the same setting to every app.
Start by considering location access only while the app is in use. Allow all the time is necessary for certain background features, such as continuous location sharing, but do not grant it simply because an app repeatedly asks for it. If you enable such a feature, also check exactly who can see your location within the service itself.
Check: open the map, wait for it to determine your location, create a regular route, and test how it works with the screen locked if you plan to use voice navigation. The first satellite fix may take longer indoors. Waiting for a location fix by itself does not mean there is a problem with GrapheneOS.
First, check whether the app already opens the system photo or file picker. If you only need to attach a single document, selecting it through this interface is often enough without granting broad access to storage. Do not grant All files access just to attach a file once.
Storage Scopes is an additional GrapheneOS mechanism for apps that request storage permissions. It allows an app to behave as though the requested permissions have been granted while limiting its actual visibility into files belonging to other apps or the user. The app can still create its own files, so this is not a complete write-blocking mode.
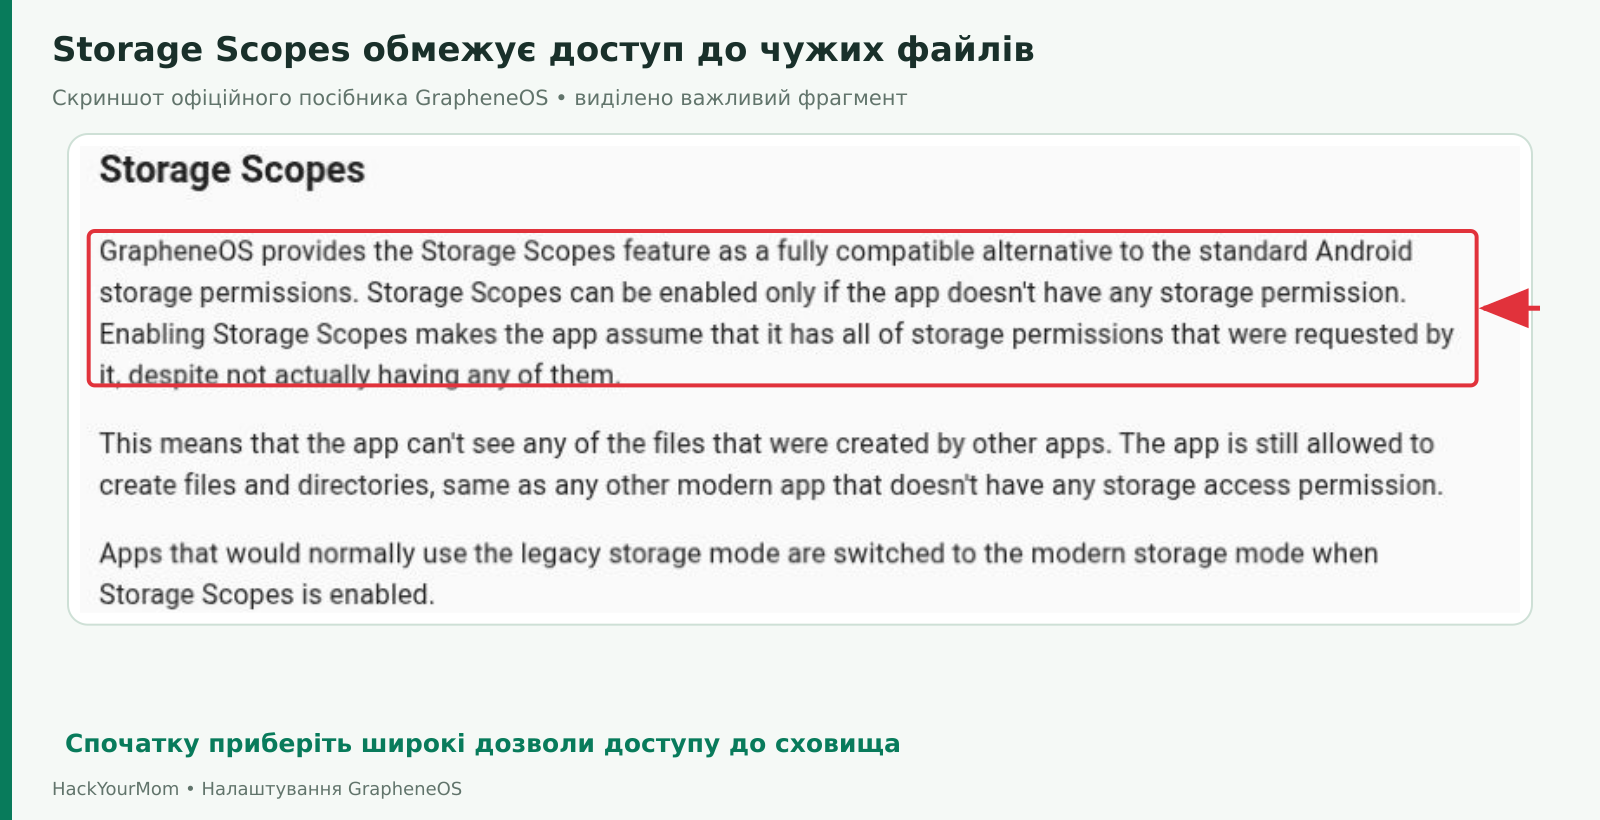
Open App info → Permissions and find Storage Scopes under the file or media access settings. First, remove any broad storage permissions that have already been granted. According to the official documentation, Storage Scopes can only be enabled when those permissions are not granted. Enable Storage Scopes, then add a specific file or folder through the system picker if needed.
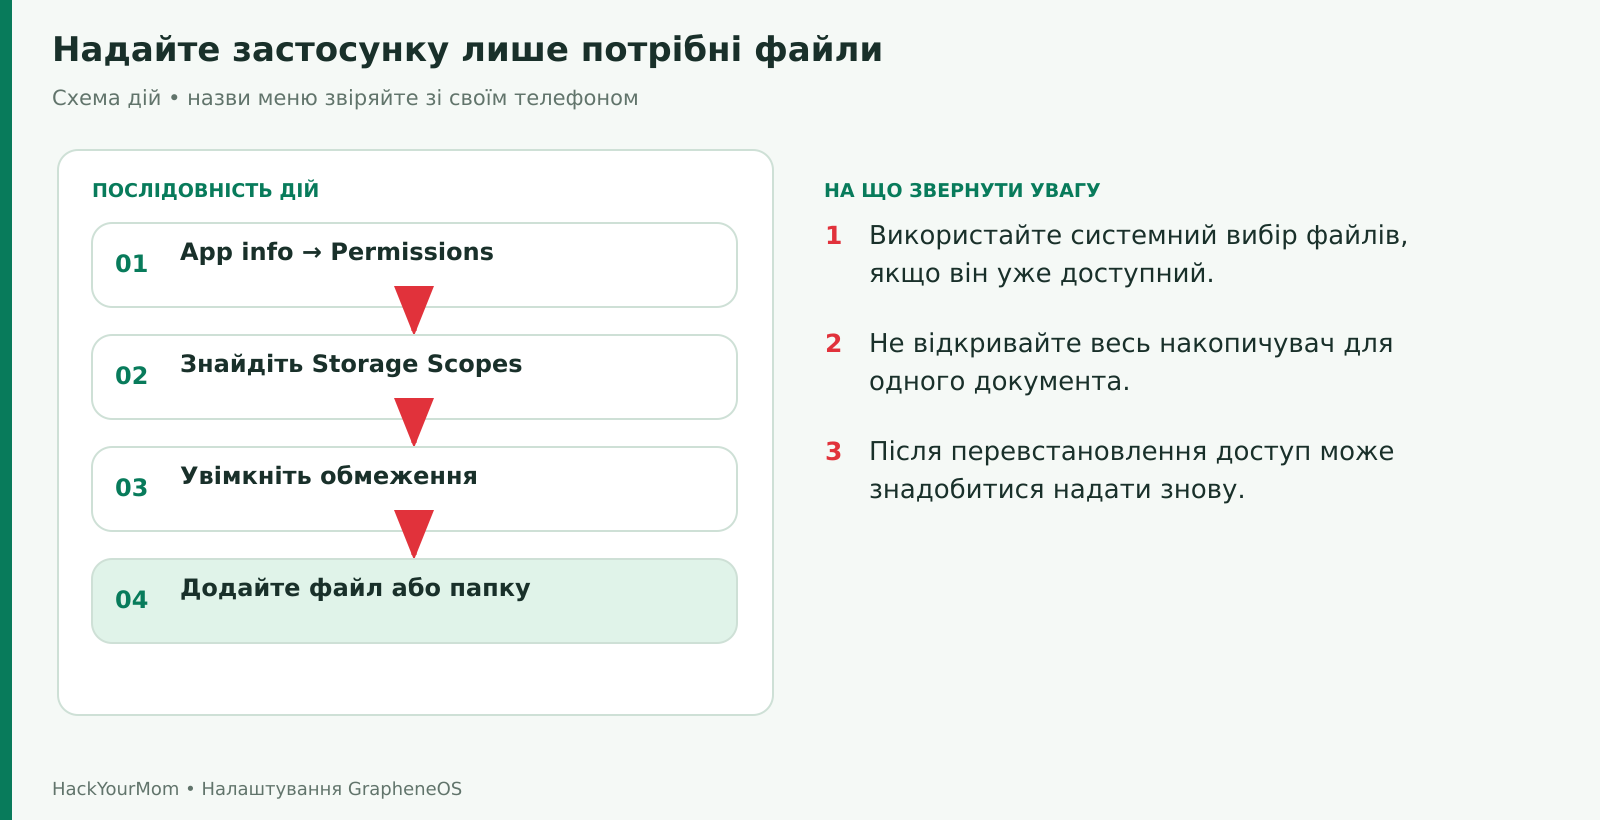
For example, you can give a music player access to your music folder without exposing the folder containing your documents. After configuring this, restart the player and check whether it can see the tracks you need. If the app does not request the relevant permissions and already uses the system file picker, Storage Scopes may be unavailable or unnecessary.
After uninstalling and reinstalling an app, it may lose access even to files it previously created itself. You can grant access to those files again through the file picker. Do not uninstall an app containing important data just to test this mechanism. These details are explained in the official Storage Scopes documentation.
The standard Contacts permission provides broader access to your address book. If an app only needs access to a few people, consider using Contact Scopes. Open App info → Permissions → Contacts, find the Contact Scopes alternative, and enable it instead of granting full access. The location of this additional option may vary between builds.
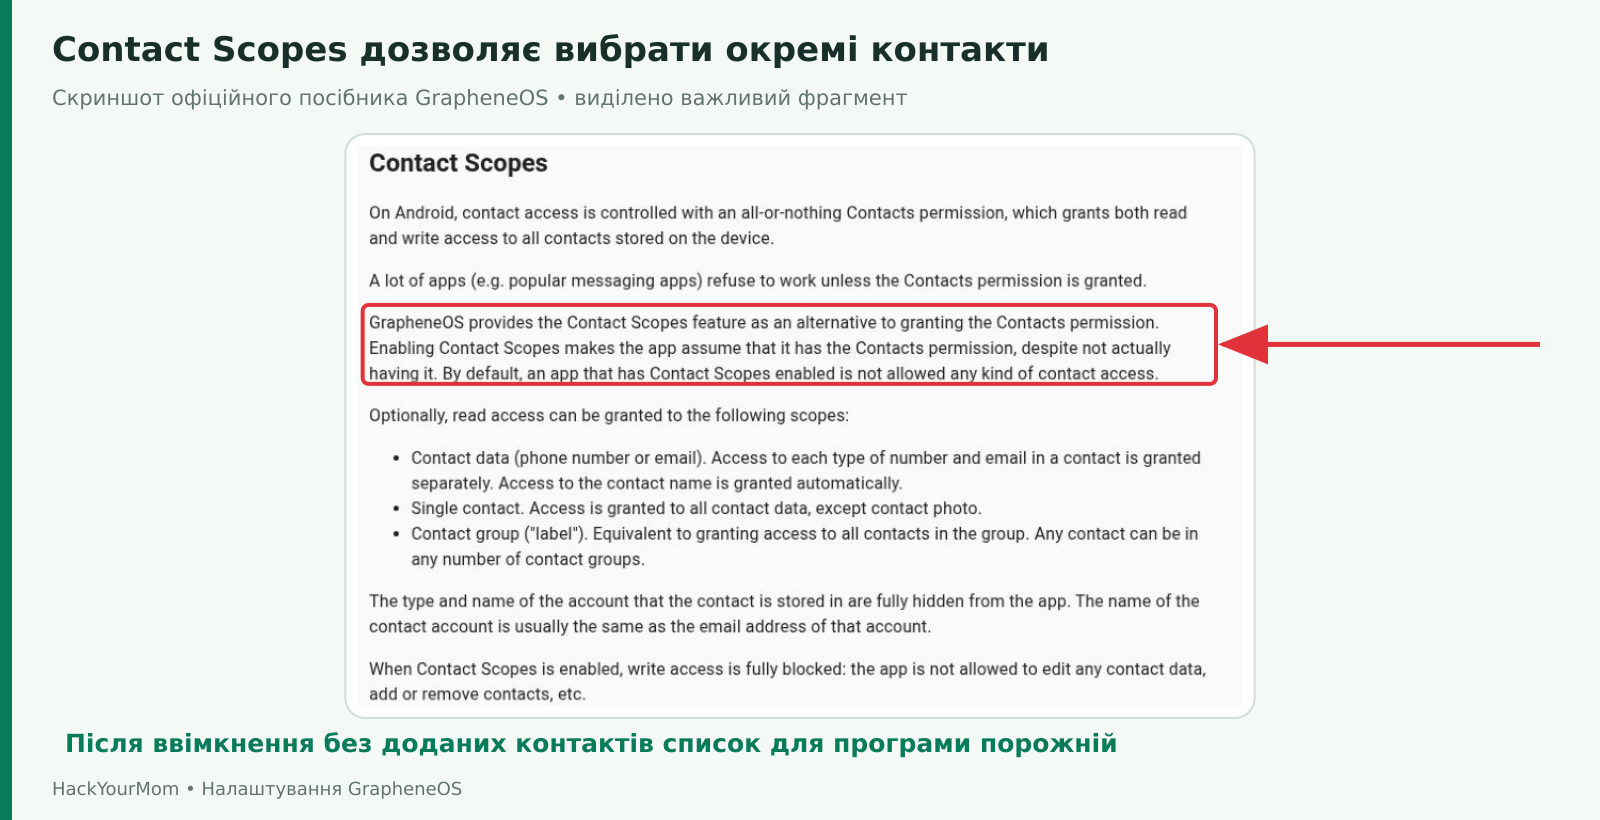
First, add the specific contact or a specific field, such as their phone number. You can also select a contact group. Return to the app and check if the person appears. If the list hasn’t updated, use the contact refresh function within the app or restart it.
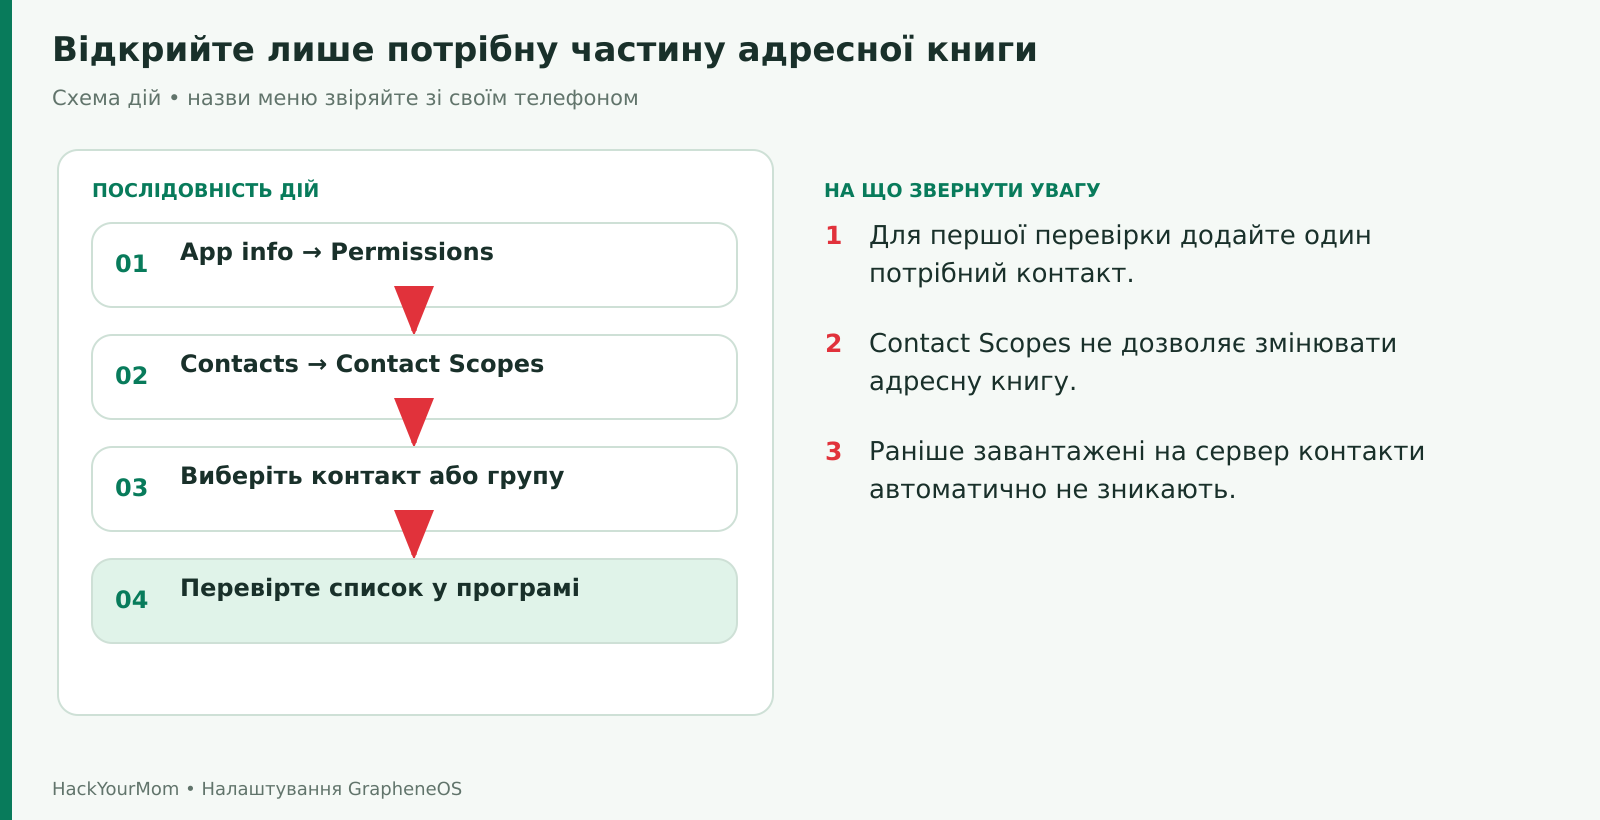
Contact Scopes provides controlled read access and does not allow an app to modify, add, or delete contacts. This may not be suitable for a full-featured address book editor, but it can be useful for a messenger. If an app has already uploaded your entire address book to its server, changing the local permission will not remove that data from the server. Check the app’s own settings for contact synchronization and deletion of uploaded contacts. The Contact Scopes documentation explains the available levels of contact selection.
Expand Quick Settings by swiping down twice from the top of the screen. Find Camera access and Microphone access. If one of these tiles is missing, open the Quick Settings editor and add it. These toggles temporarily restrict access for apps even when a specific app has already been granted the corresponding permission.
Turn off Camera access and open the camera app to see what message the system displays. Turn access back on and take a regular test photo. Test the microphone in the same way by making a short recording or calling another device you own. Do not leave the global microphone toggle disabled if you expect to receive a voice call.
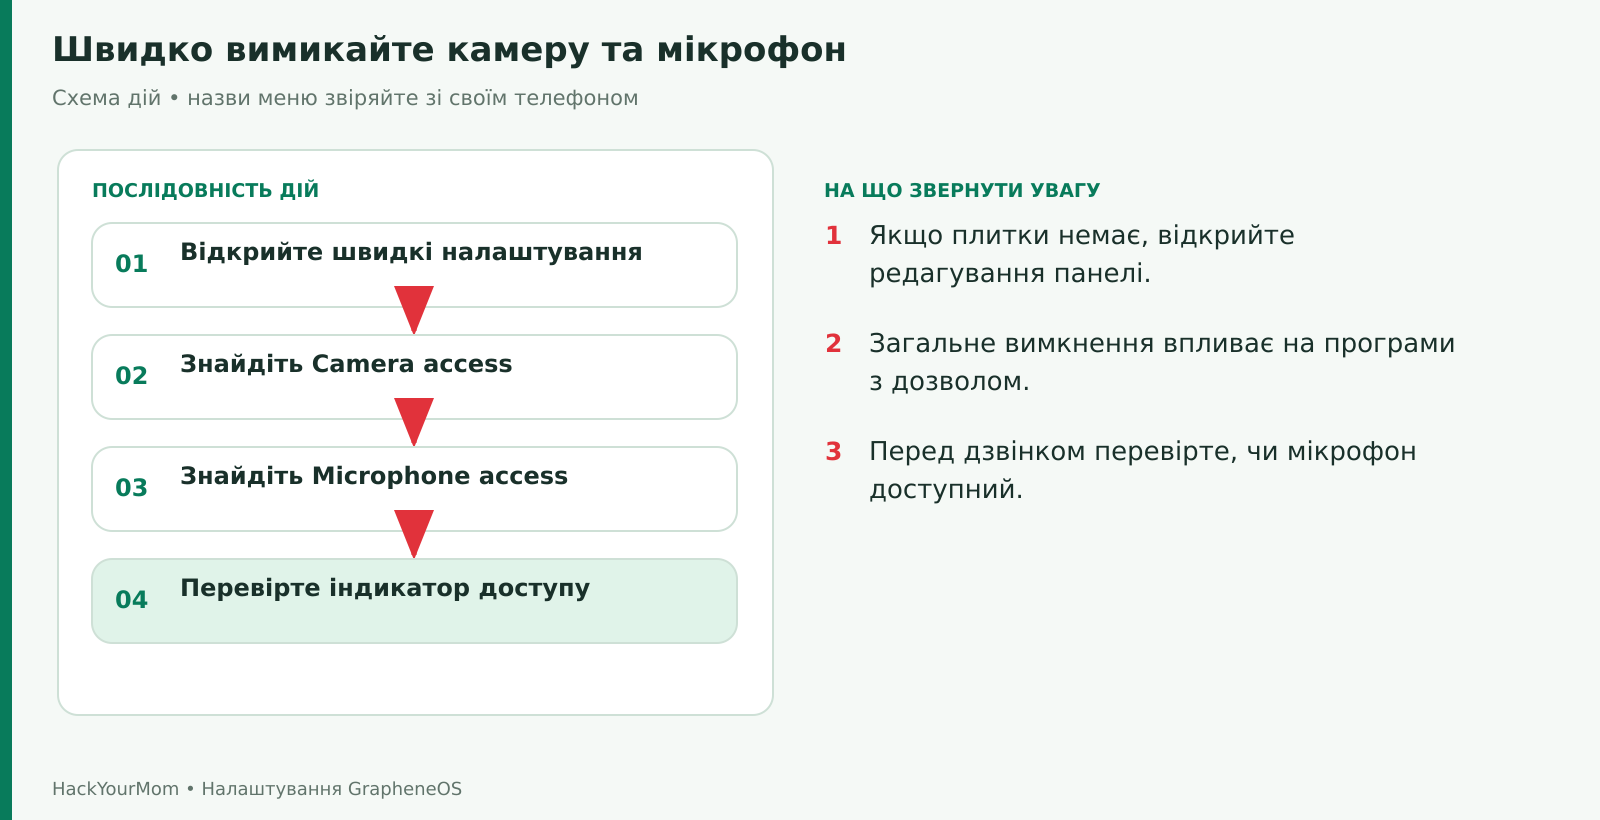
While taking photos, recording audio, or accessing location, watch for the privacy indicator. To review permission activity, find Privacy dashboard in Settings. This can help you identify which app accessed a resource, but the indicator itself does not explain why the app did so. Always consider the context: for example, a navigation app using location while providing directions is expected behavior.
In the built-in Camera app, do not enable location tagging if you do not need it. GrapheneOS documents its approach to removing photo metadata, but you should not assume the same guarantee applies to all videos, third-party camera apps, or images received from other people. Before publishing a sensitive photo, also check what is directly visible in the image itself.
Open Settings → Location → Location services → Network location. GrapheneOS provides its own optional network location integration, which uses Apple’s service either directly or through a GrapheneOS proxy. It can help determine your approximate location more quickly, especially indoors. Read the explanation shown on the screen and enable it only if you need it.
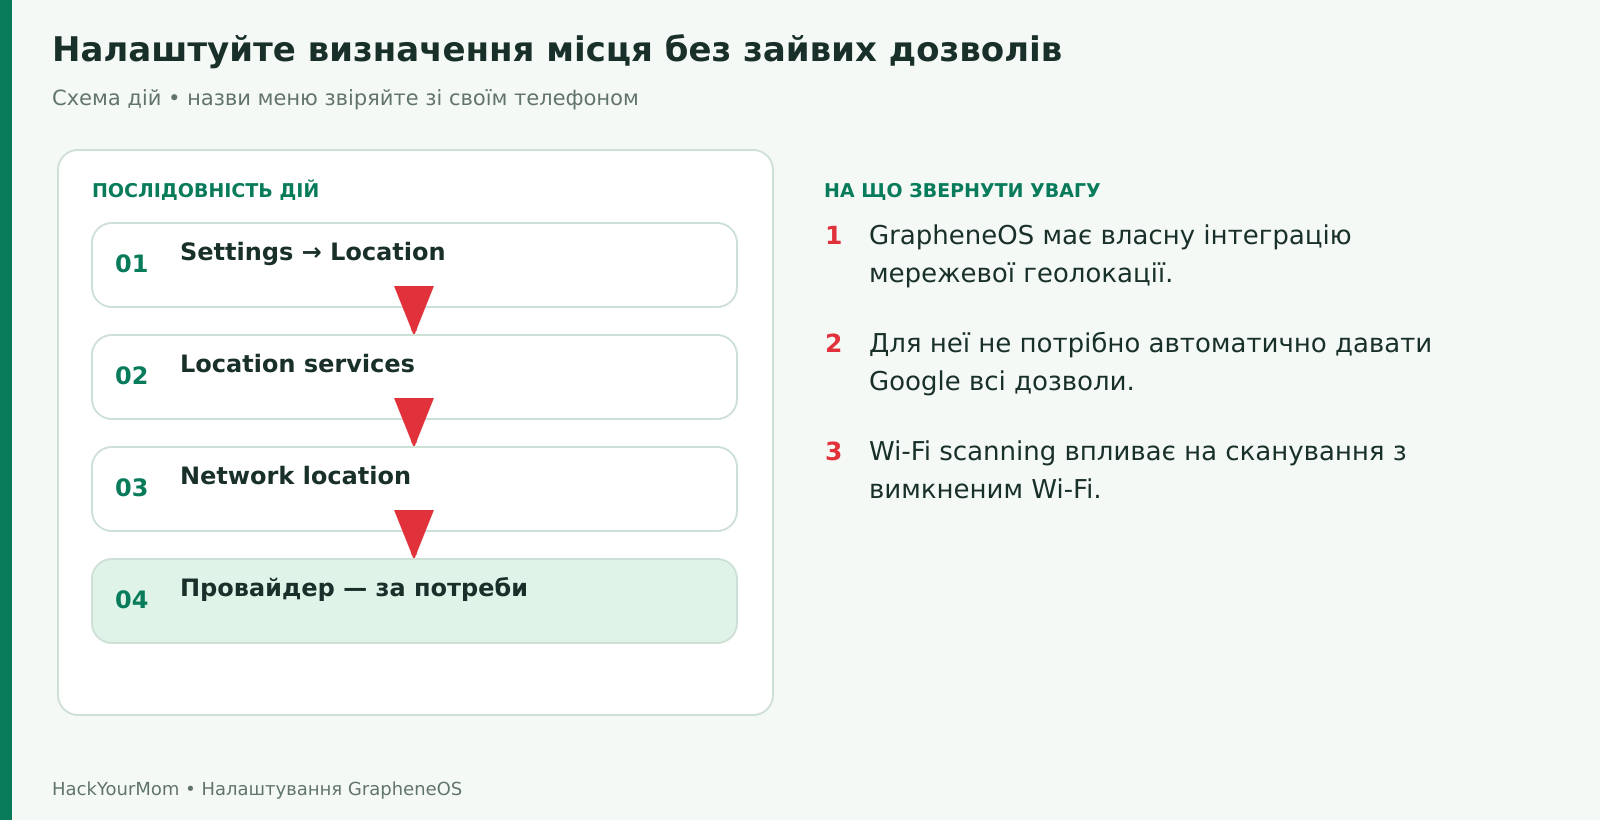
For the Wi-Fi component, Wi-Fi must be enabled or Wi-Fi scanning must be allowed. A less precise estimate based on the mobile network may also be used. The separate Wi-Fi scanning and Bluetooth scanning options allow the corresponding scanning to continue even when the main radio toggle is turned off. Do not enable them unless you need them, but do not expect the same location capabilities after disabling them.
For regular location requests from apps using Google Play APIs, GrapheneOS redirects these requests to the system implementation by default. Therefore, you do not need to automatically grant Google Play services permanent access to your location. Certain features, such as location sharing through Google Maps, have their own requirements. Refer to the Network location documentation and the Sandboxed Google Play configuration guide.
First, install the official app from your chosen VPN provider, sign in to your account, or import your own configuration according to the provider’s instructions. Approve the system prompt to create a VPN connection only for an app you recognize and trust. Connect to the VPN and check that regular websites load normally.
Next, open Settings → Network & internet → VPN, tap the settings for the relevant VPN, and enable Always-on VPN if needed. If you want to prevent any data from being transmitted outside the VPN, also enable Block connections without VPN. The second option means that if the VPN connection fails, internet access will be blocked. This is expected behavior.
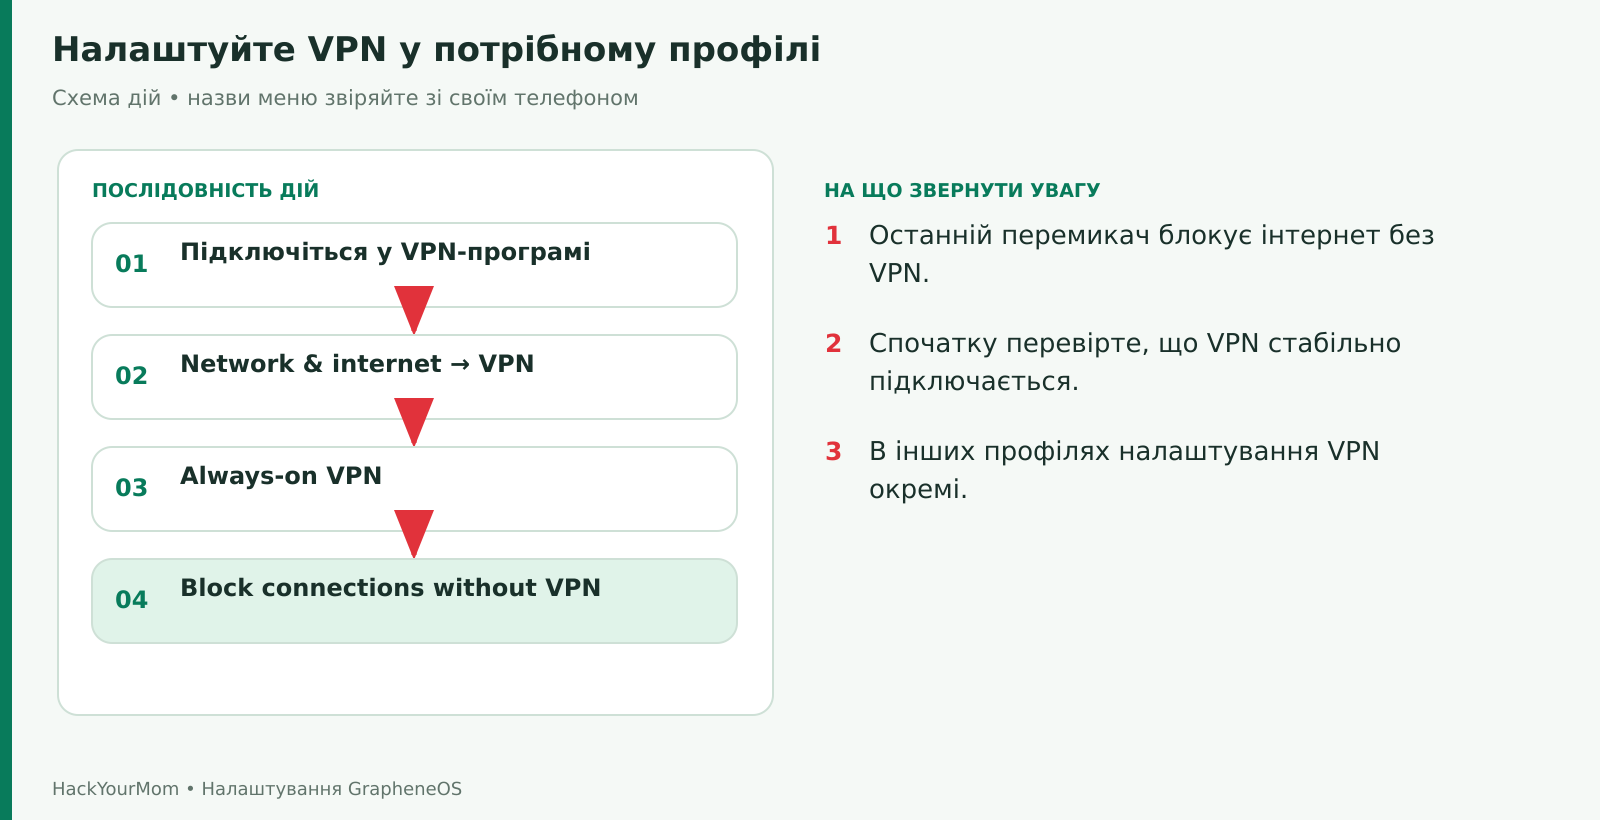
Check: stop the VPN through its app and verify that a new website does not load while connection blocking is enabled. Then reconnect the VPN and make sure internet access is restored. Some VPN apps reconnect very quickly on their own, so also check their actual connection status.
VPN settings are configured separately for different users, work profiles, and Private Space. Do not assume that a setting enabled in the Owner profile automatically applies to every other environment. Switch to the profile you need and check its VPN configuration separately. Within a single profile, only one VPN service can usually be active at a time. A local blocker that uses the VPN API may conflict with another VPN.
A VPN does not hide your identity from a service you are signed in to, nor does it prevent your mobile carrier from knowing that your SIM is connected to the network. It changes the route your network traffic takes, so the trustworthiness of the VPN provider and its configuration also matter. For more details, see the VPN FAQ and the VPN leak protection documentation.
If you do not have specific DNS requirements, you can leave the default mode enabled. To explicitly configure DNS-over-TLS, open Settings → Network & internet → Private DNS, select Private DNS provider hostname, enter the server hostname provided by your DNS provider, and save the setting.
This field requires a server domain name, not a URL beginning with https://, not the address of a management page, and not an arbitrary IP address. If you use a personalized filtering service, enter the exact value provided in your account. This guide does not provide a random “universal” server to copy because choosing a DNS server also means choosing who you trust with your DNS queries.
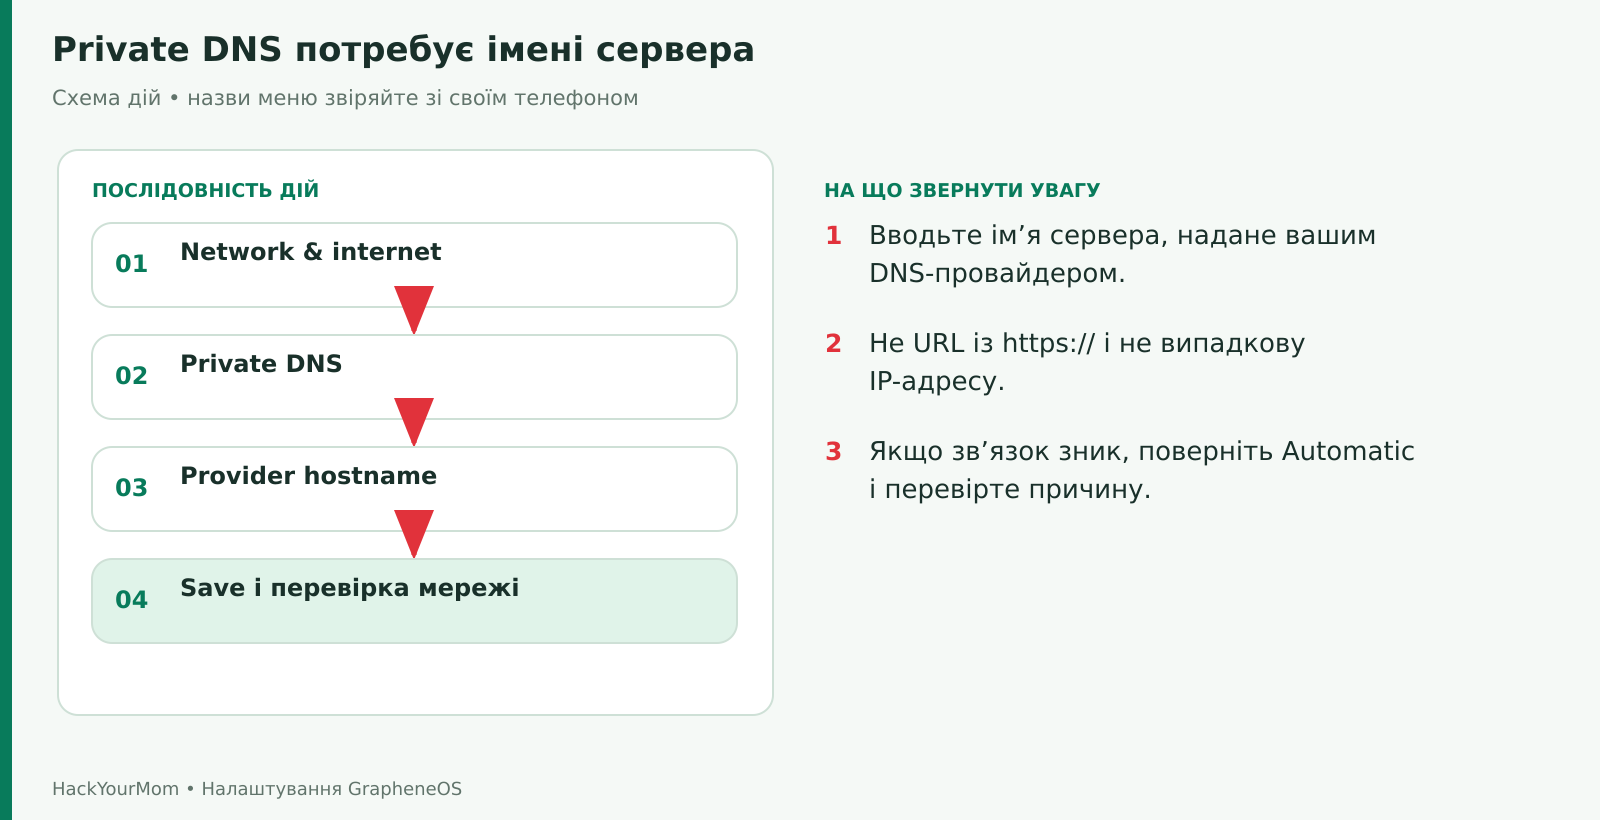
After saving the setting, test several websites over both Wi-Fi and the mobile network. If domain names stop resolving, switch back to Automatic, check that the hostname is correct, and verify that the server is available. If you are using an active VPN, also check its DNS policy, as behavior depends on the VPN client and network. Private DNS encrypts the corresponding DNS queries, but it is not a VPN and does not make all network traffic anonymous. The mechanism is explained in the GrapheneOS DNS FAQ.
Keep Vanadium installed and up to date through the App Store. It is more than just a browser: the project also provides the WebView component that many apps use to display web content. Changing your default browser is not a reason to disable the system WebView or leave it without updates.
Open Vanadium and review its site settings. Allow websites to access the camera, microphone, location, or notifications only when you intentionally use a feature that requires them. If you accidentally allowed notifications from an unknown website, find it in the browser’s permissions list and revoke access.
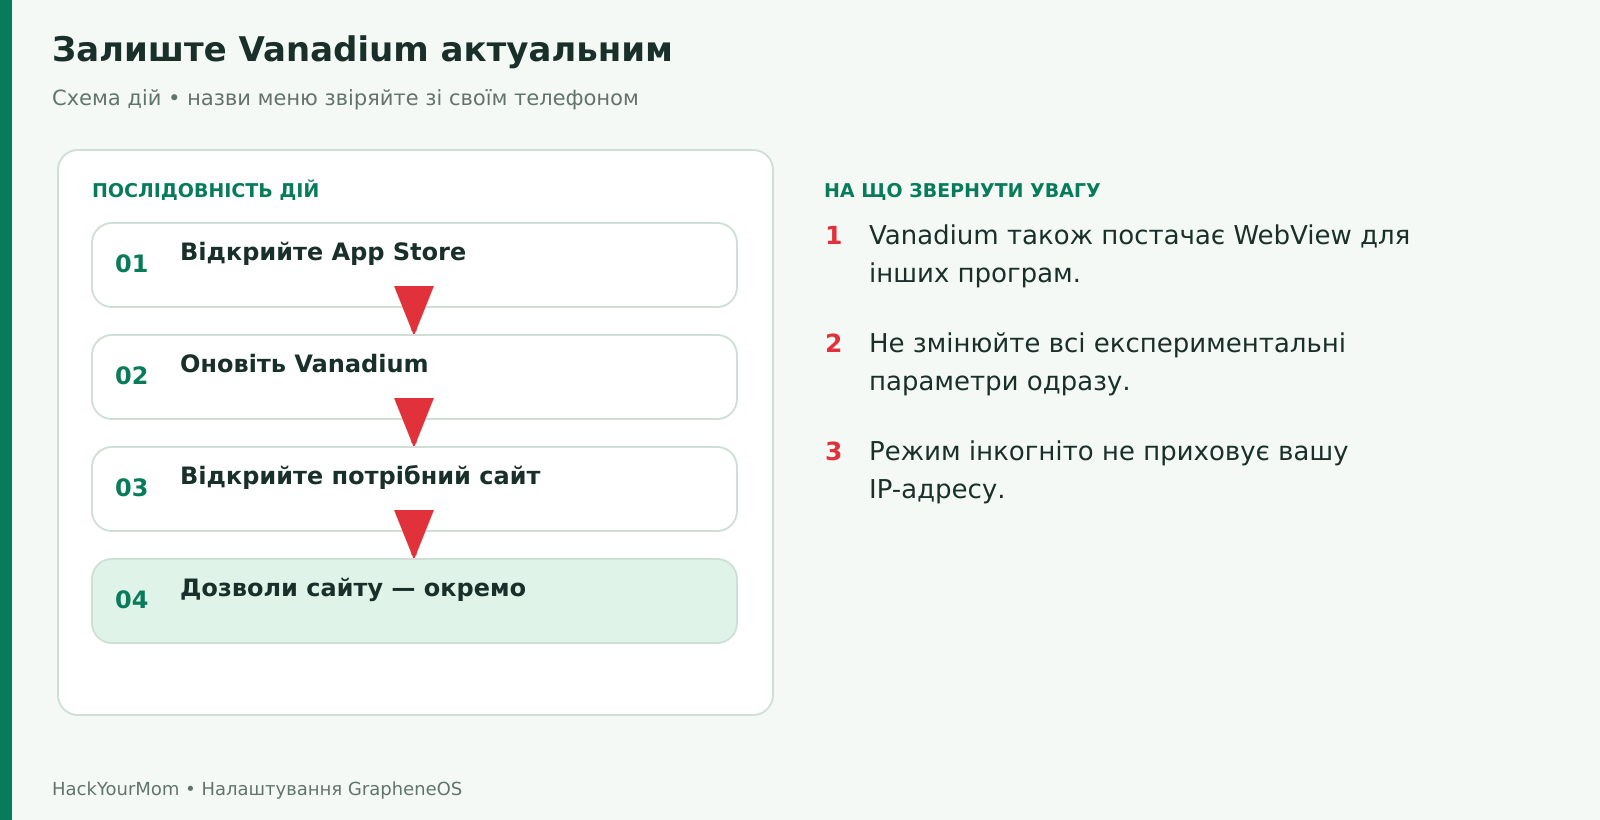
Do not change every experimental flag based on a third-party list. If a website does not work properly, first check for updates and review that site’s specific settings. Do not disable security protections globally just to make a single page work. The browser’s role is explained in the Vanadium section.
For everyday convenience, also choose your keyboard, input language, and password manager. Keyboard settings are usually located under Settings → System → Keyboard, while the autofill provider can be found by searching for Autofill or Passwords. An installed keyboard processes what you type, so make sure you trust its source. Configure your password manager so that you can access your backup data even without this Pixel.
For each important messenger, perform a quick test: open the app, make sure you are signed in to the correct account, lock the screen, and send a test message from another device. Repeat the test using mobile data. Simply receiving a message while the app is open does not confirm that background activity is working correctly.
If notifications are delayed, check the following conditions in this order:
Is the required user profile active, and is Private Space unlocked?
Are notifications enabled in App info, including the required notification category?
Is a mode enabled that silences notification sounds or prevents notifications from being displayed?
Is Network access allowed, and does the internet work with the current VPN and DNS configuration?
Is the required background activity or data transfer being restricted?
Is Play services installed in the same profile if the messenger uses its push notification mechanism?
Has Play services been given the required battery optimization exception?
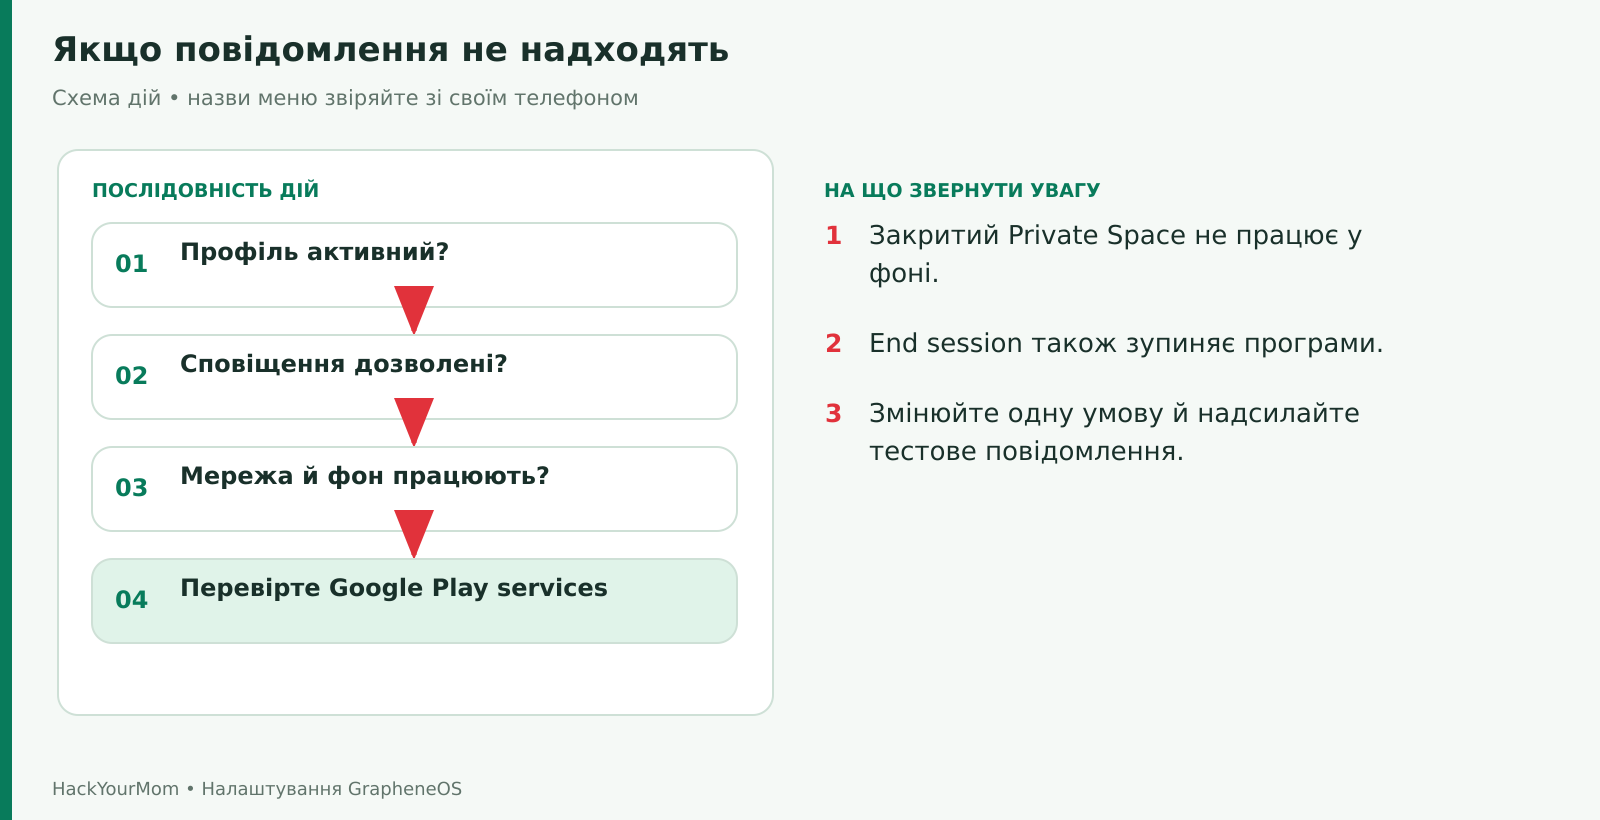
Do not immediately set every app to Unrestricted. This can increase battery usage and may hide the actual cause of the problem. Do not use Force stop on a messenger from which you expect to receive background notifications. If you have force-stopped it, open the app again before running another test.
After the initial setup and data restoration, increased battery usage may be caused by downloads, indexing, and synchronization. Evaluate battery statistics after these processes have finished. If one app continues to use an unusually large amount of power, check its specific activity and version rather than disabling system protections altogether.
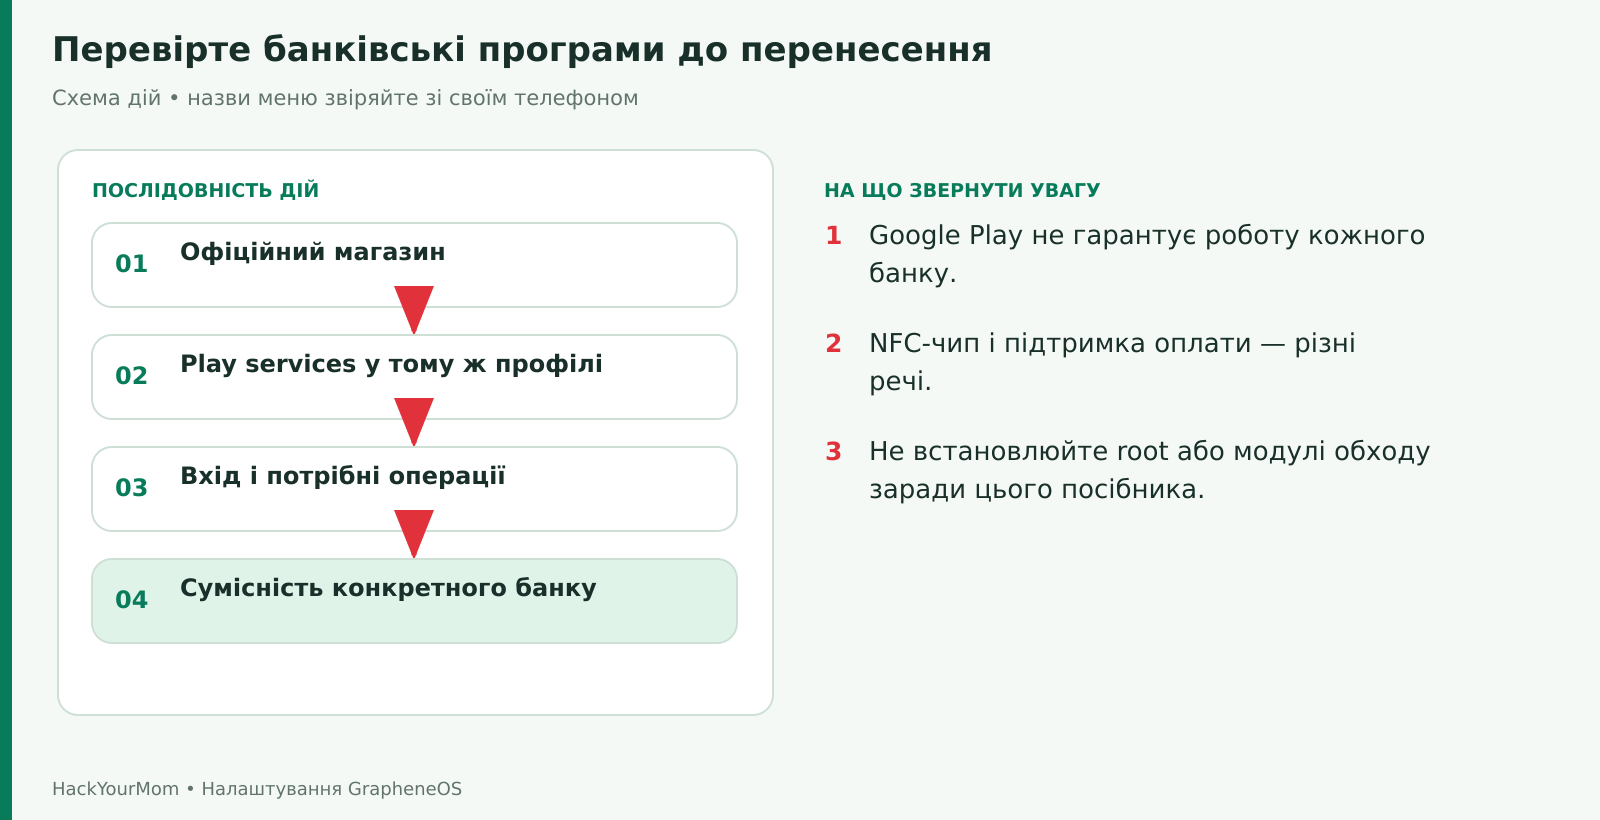
Install your banking app from an official source in the profile where you plan to use it. If it requires Play services, install them in the same environment. Test sign-in, verification prompts, and the features you need before giving up your backup method of accessing the bank.
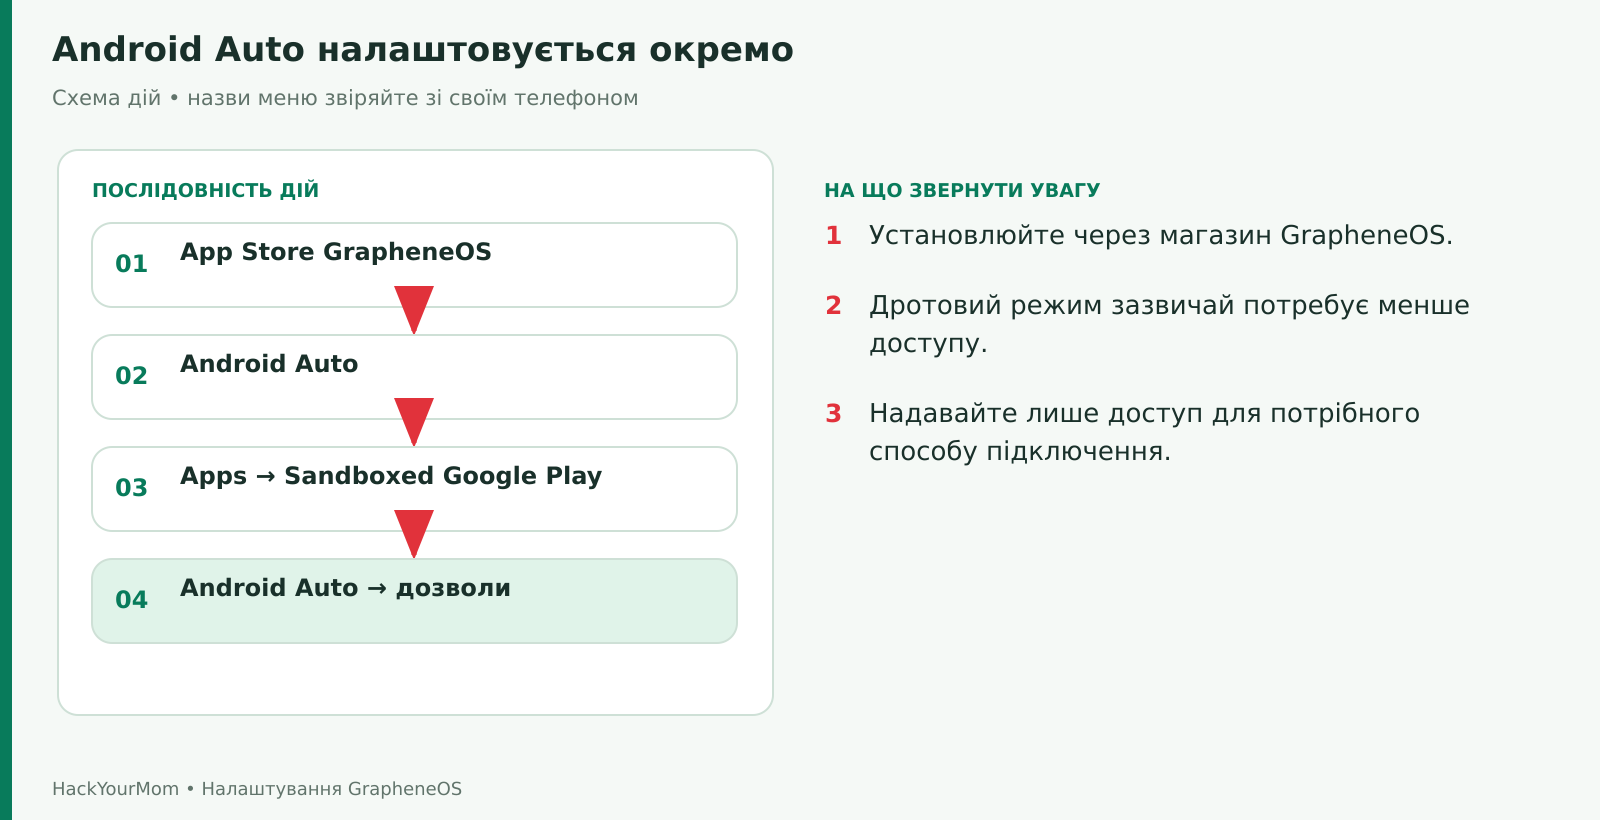
Perform the test while the vehicle is parked. Configure notification access separately if you want notifications to appear in the car. The apps you need must support Android Auto. GrapheneOS also states that they need to be installed from the Play Store to appear in the car interface. The complete setup process is described in the official Android Auto guide.
A backup needs to exist before you lose your phone, not after. GrapheneOS includes Seedvault integration for encrypted backups. Open Settings → System → Backup. If the option is located elsewhere, search for Backup in Settings. Enable backups and follow the initial setup instructions.
Choose an available storage location, such as a connected storage device or a compatible storage provider offered by your build. Do not treat a backup stored only in the internal storage of this Pixel as protection against losing the phone or completely wiping it. For that scenario, you need a backup stored outside the phone.
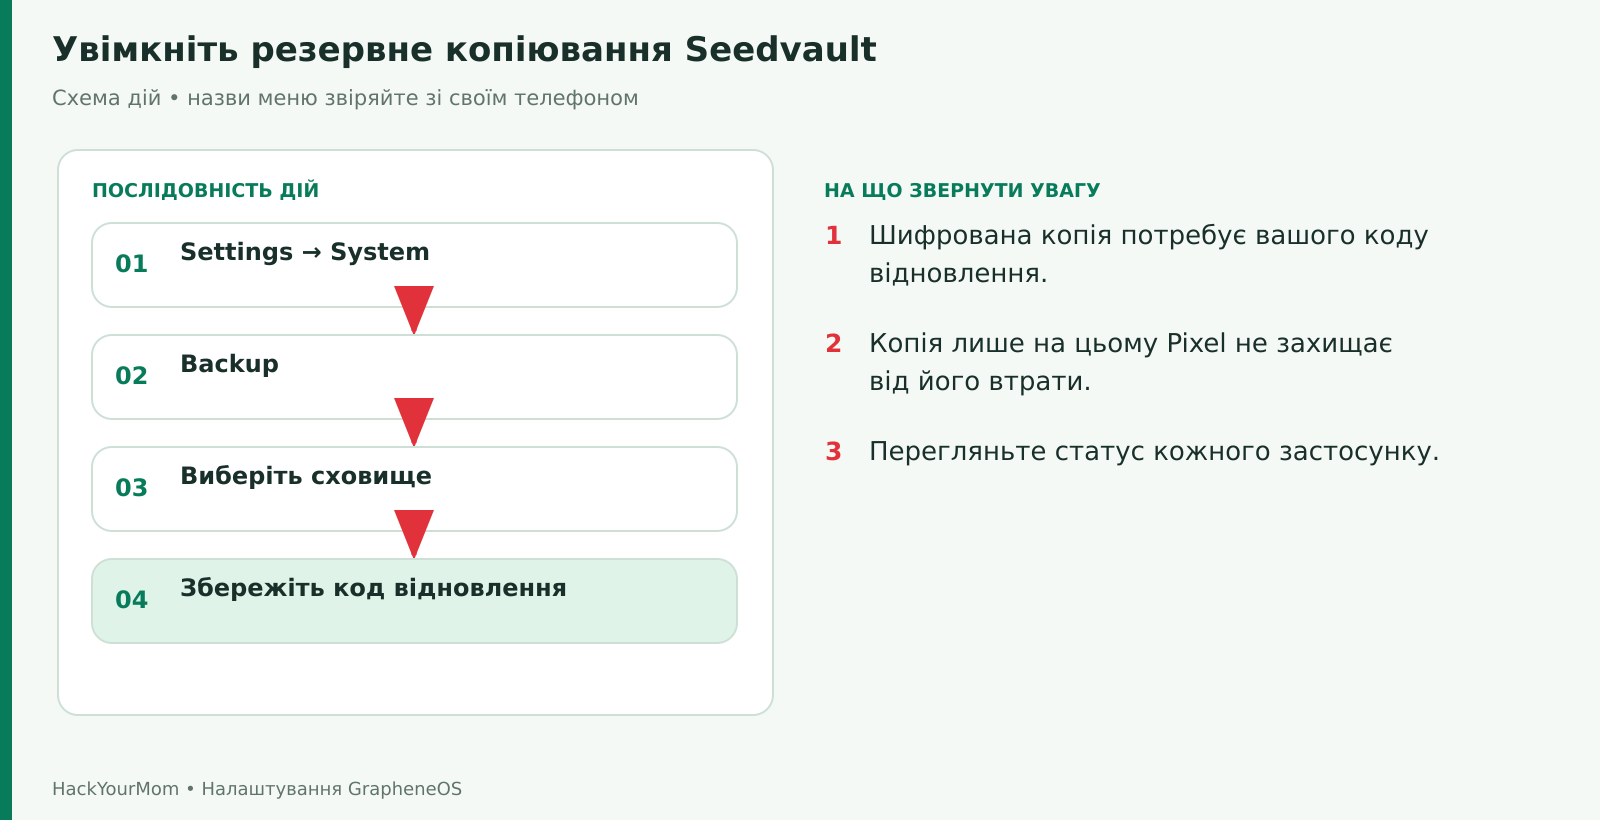
When Seedvault displays a recovery code or mnemonic phrase, write it down in the correct order and store it separately from the phone. Do not use someone else’s example recovery phrase, publish it in a screenshot, or keep the only copy in the gallery of the same Pixel. Complete the recovery phrase verification if the setup wizard offers it. An encrypted backup archive alone does not guarantee that you will be able to restore your data without the required recovery secret.
After selecting a storage location, start the backup using the available command on the screen and wait for it to finish. Review the list of apps and their statuses. A successful overall backup does not mean that all internal data from every app has been saved. Some data may be missing, an app may impose restrictions, or it may not provide certain data to the system backup mechanism. Check these cases separately.
GrapheneOS describes its current Seedvault integration. The Seedvault project itself explains that app data in a backup may be incomplete or missing. System backups should therefore be supplemented with separate exports from your most important apps.
Copy photos, videos, and documents to another storage device and open several files from that copy to make sure they are accessible.
If you use local contacts, export them from your contacts app as a VCF file and verify that the file can be imported on another device.
For calendars, check synchronization or export options within the app itself. Seeing events on the screen does not prove that they are stored outside the phone.
For messaging apps, use their own transfer or backup procedures. Secret or locally stored chat history may not be restored simply by signing in again.
For your password manager and 2FA app, check their secure export or synchronization options and save the backup codes for important accounts.
For eSIMs, save your carrier’s instructions for reactivation. Do not assume that a system backup will restore your mobile plan profile for you.
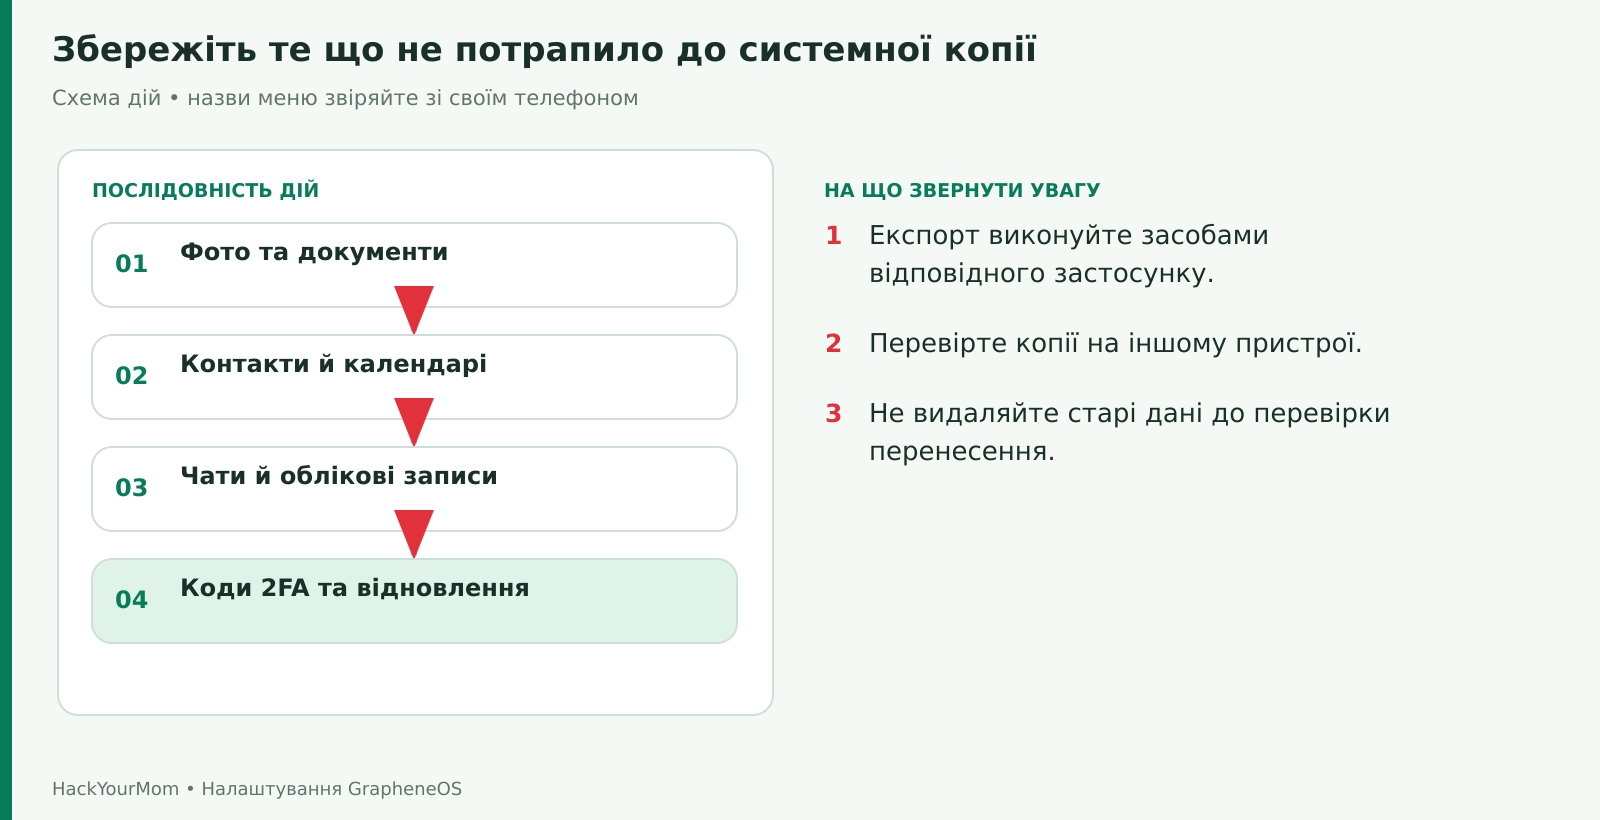
If you use multiple profiles, check backups separately in each one. Do not assume that a backup of the Owner profile includes all other environments. For Private Space, it is especially important to create separate exports from the apps you need rather than relying on automatic restoration of the entire space.
When manually copying files to a computer, unlock the phone and select File transfer from the USB notification. This provides access to the profile’s shared files; it does not create a complete backup of every app’s private data. When you are finished, return USB to its normal mode and disconnect the cable. The mechanism is explained in the GrapheneOS FAQ on file transfer.
Restore check: open some of the copied files on another device and verify that you can access your exports, synchronized data, and recovery codes. A full test restore of a system backup is better performed on a spare compatible device. Do not reset your only working Pixel just for testing, and do not delete old data until you have successfully verified the backup.
For additional verification, you can use Auditor. It is not required for the initial setup or everyday convenience, but it is a useful tool for hardware-backed attestation. For local verification, you need a second Android device with Auditor installed. A single phone cannot replace the two separate roles required for exchanging QR codes.
On the Pixel you want to verify, open Auditor and select Audited. On the second device, select Auditor. Then complete the two-way QR code exchange in the exact order shown by the apps. Review the verification result and confirm that it refers to the correct device and the expected operating system.
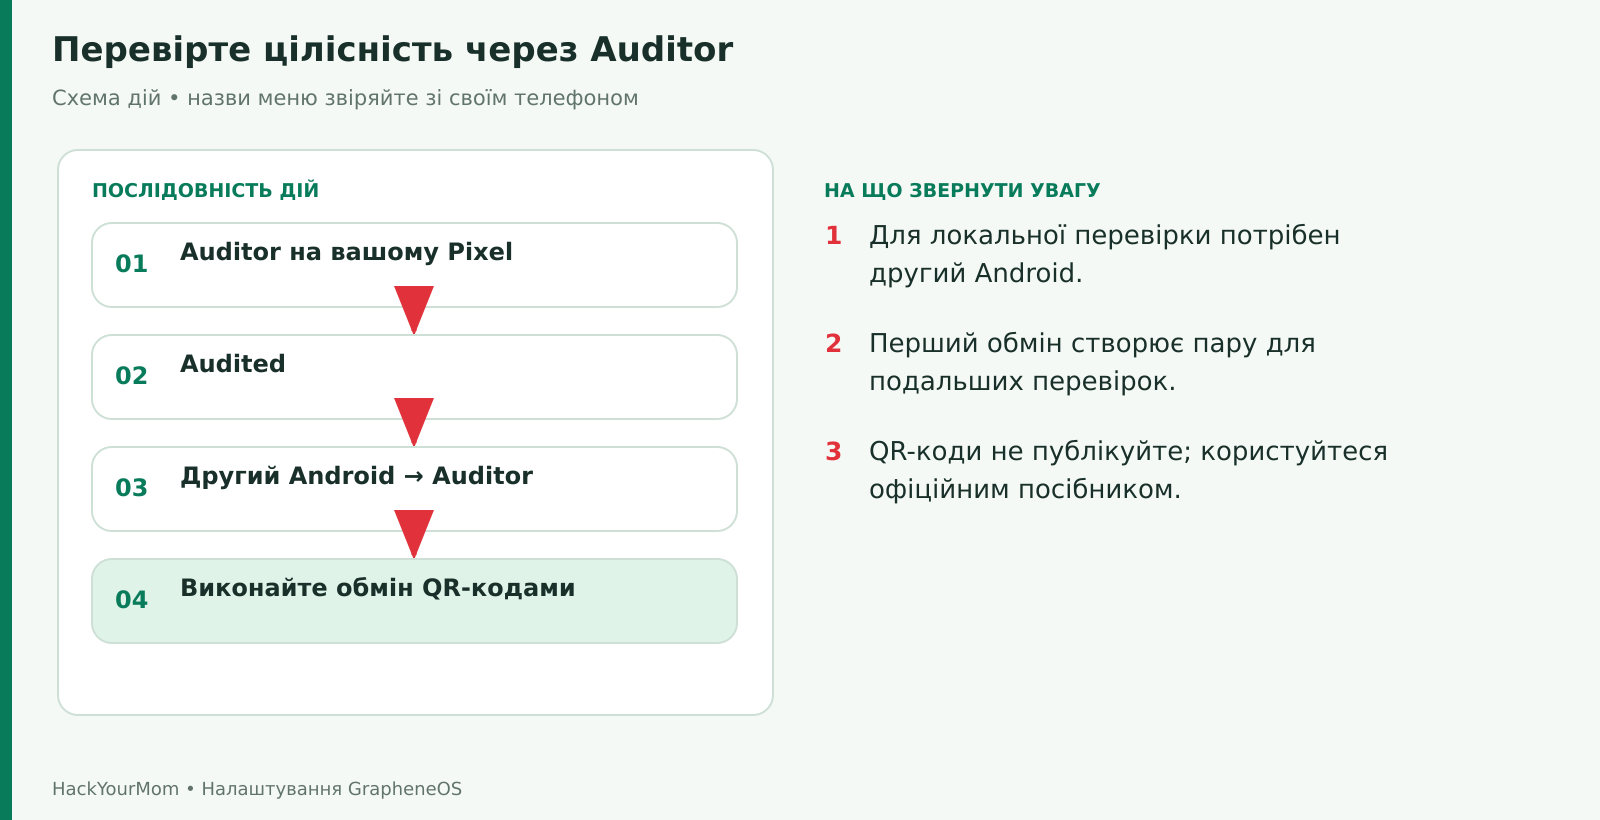
The first verification creates a pairing that is used for future comparisons, so maintaining the continuity of this pair is important. Do not delete it unnecessarily, and do not treat creating a new pair as a way to “fix” an unexplained mismatch. Auditor is not an antivirus tool that checks all your accounts and every file. Follow the procedure in the official attestation guide.
Restart the phone and unlock it using your primary PIN or password. Then test your fingerprint and second PIN if you configured them. This confirms that you are not relying on biometrics while forgetting your primary screen lock credential.
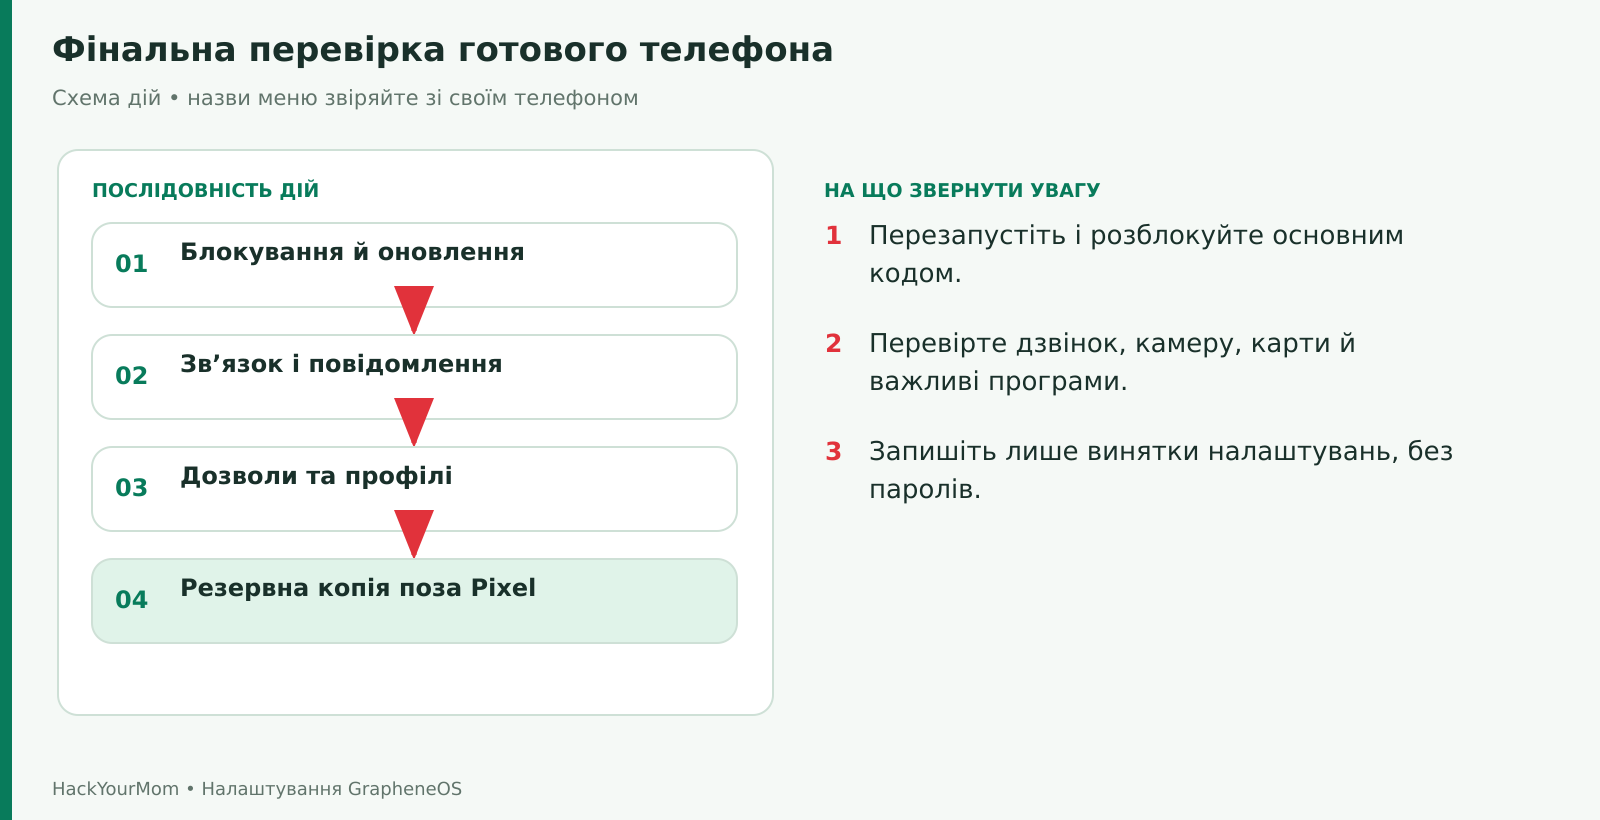
OS and App Store component updates are installed; the stable channel and automatic updates remain enabled.
The screen locks under the expected conditions and does not reveal unnecessary text from private messages.
Wi-Fi, mobile data, regular calls, and SMS work correctly.
Messaging apps receive notifications with the screen off in the required profile.
The camera, microphone, navigation, and Bluetooth accessories work in your normal use cases.
Important banking and work apps have been tested separately.
VPN and Private DNS, if configured, do not leave the phone without the expected network access.
All additional profiles have a clear purpose, and you understand when their apps are stopped.
Backups and recovery codes are accessible outside the Pixel, and important files from the backup can be opened.
Write down only the non-standard exceptions you had to make, such as allowing a specific app to run in the background or granting permanent location access for a particular feature. Do not include PINs, passwords, or recovery phrases in this list. Review these exceptions after major updates, as they may no longer be necessary.
Internet access is gone. Check whether Block connections without VPN is still enabled while the VPN is not working, whether the Private DNS hostname is correct, and whether Network access is allowed for the affected app. First, compare Wi-Fi and mobile data. Reverting one recently changed setting at a time can help identify the cause without performing a full reset.
An app cannot access files or contacts. Check whether the required items have been added to Storage Scopes or Contact Scopes. An empty list after enabling a restriction may be the expected result. Also make sure you are using the correct user profile.
Video calls do not work. Check the camera and microphone permissions under App info, as well as the global Camera access and Microphone access toggles. Then check the network connection, Bluetooth audio device, and audio source selected within the app.
The Pixel restarted on its own. Distinguish between a restart required to complete an update and a security Auto reboot. If unexplained restarts keep occurring, check the system version and crash reports. Do not disable all security features at once.
An app keeps crashing. Update the app and the system, reproduce the problem, and if necessary open Settings → Apps → app name → View logs. General logs are available under System → View logs. Remove personal information before sharing logs. Review their contents yourself rather than publishing the entire file without checking it first. The mechanism is explained in the GrapheneOS logging documentation.
For help, use the official GrapheneOS community channels. In your request, include the device model, build, version of the affected app, profile, and exact steps needed to reproduce the problem. Passwords, eSIM QR codes, and recovery secrets are not required.