29.04.2025
21 min
1178

In this part of the article, you will learn how the remote control of a quadcopter is arranged and what role it plays in flight. The material will help you understand how to use the remote control correctly, what you need to do before launching, and how to ensure reliable communication with the drone even at a long distance. Everything is presented in simple language, without spoilers, but with practical benefits for anyone who wants to fly a drone confidently.
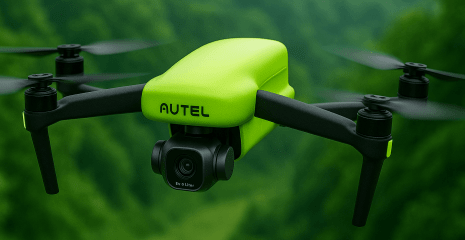
EVO Lite series quadcopters use the latest next-generation image transmission technology – Autel Skylink from Autel Robotics. It provides reliable communication with a high level of interference protection and supports simultaneous transmission and reception of signals at frequencies of 2.4 GHz, 5.2 GHz and 5.8 GHz.
The remote control allows you to fully control both the drone and the camera at a distance of up to 10 km (according to the FCC standard, in the absence of obstacles), and also transmits high-quality images in real time to a mobile device via the Autel Sky application.
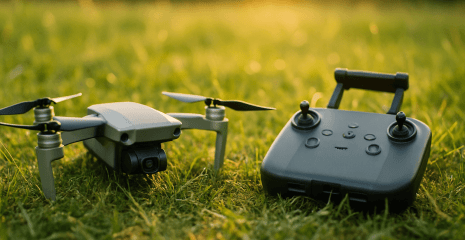
The design includes a telescopic stand that fixes the smartphone in a stable position during flight. The remote control is powered by a built-in 3930 mAh battery, which works up to 3.5 hours without recharging.
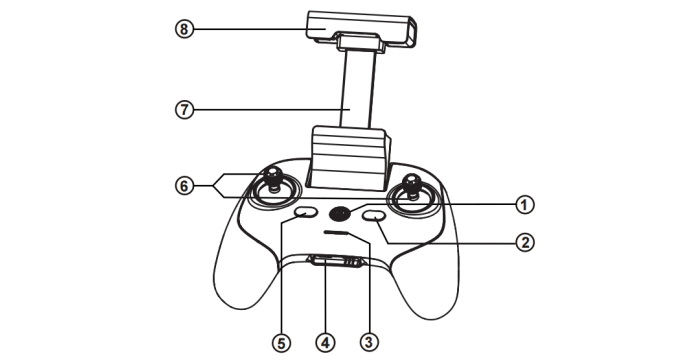
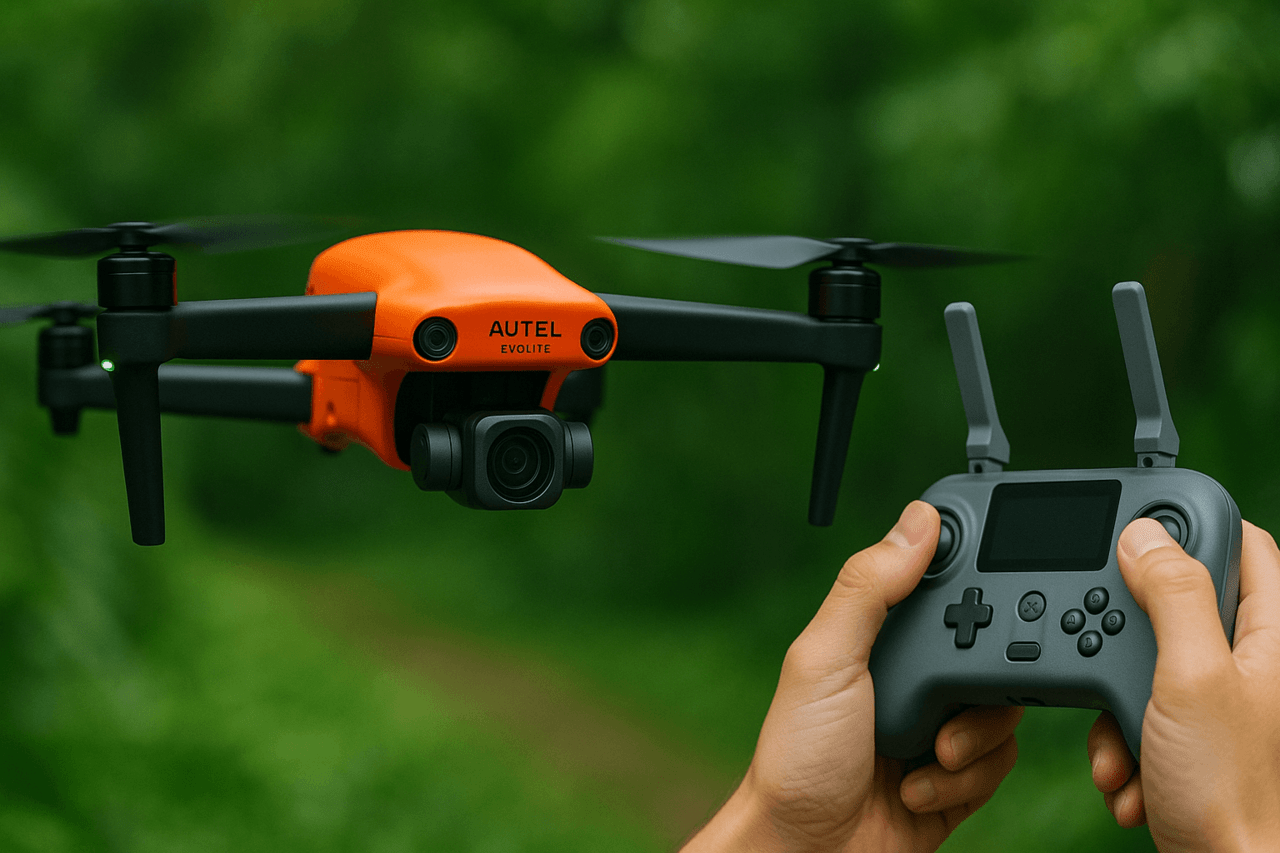
Power button. Pressing and holding the button for 2 seconds turns the remote controller on or off.
Pause button. Pauses the drone’s autonomous flight and keeps it in the air in place, or resumes the previous route.
Charge indicator. Shows the current battery level of the remote controller.
Charging port. Used to recharge the remote controller and adjust settings.
Return button. Commands the drone to automatically return to the takeoff point.
Control lever. Controls the direction of the quadcopter in space.
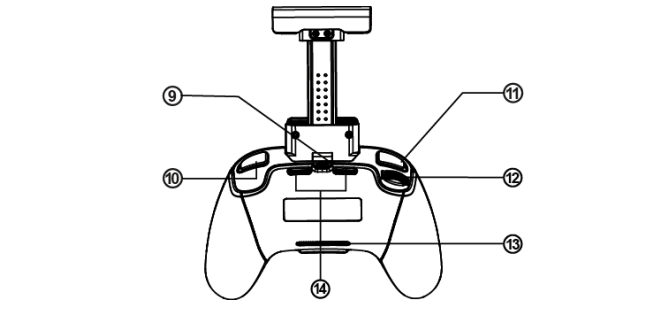
Smartphone holder. Securely fixes the mobile device with the ability to adjust the viewing angle.
Antenna. Provides communication at 2.4 GHz, 5.2 GHz and 5.8 GHz frequencies.
Smartphone connection interface. Allows you to connect a mobile device to the remote controller.
Photo/video button. Starts or stops taking photos or videos.
User button. Can be customized via Autel Sky app.
Gimbal tilt control. Controls the tilt angle of the camera on the gimbal.
Air intake. Helps cool the remote control during operation.
Air exhaust. Exhausts heated air to prevent the device from overheating.
Turning the remote control on and off.
Power on. To turn on the remote, press and hold the power button for 2 seconds. After that, a short beep will sound, confirming startup.
Power off. To turn off the remote, press and hold the same power button for 2 seconds – after the beep, the device turns off.
Importantly:
Before turning on the quadcopter, be sure to turn on the remote control first.
When turning off the equipment, turn off the quadcopter first, and only then the remote control.
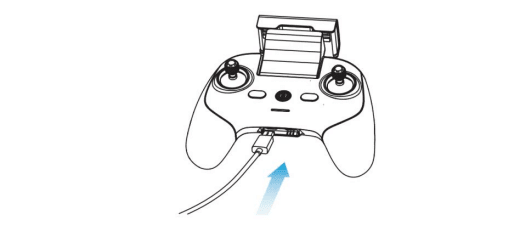
Connect the charging cable to the USB Type-C connector on the bottom of the remote. A full charge takes approximately 2 hours.
The power indicator changes to a waterfall light pattern while charging. When charging is complete, all four indicators will turn green and the device will beep twice.
After charging is complete, disconnect the charger from the remote.
The remote control supports modes 1, 2 and 3, which correspond to different piloting styles. This allows you to adapt the control to your personal preferences. Additionally, all settings can be changed via the Autel Sky app.
For those who are just starting out with the drone, it is recommended to use mode 2 – it is the most intuitive and convenient for beginners.
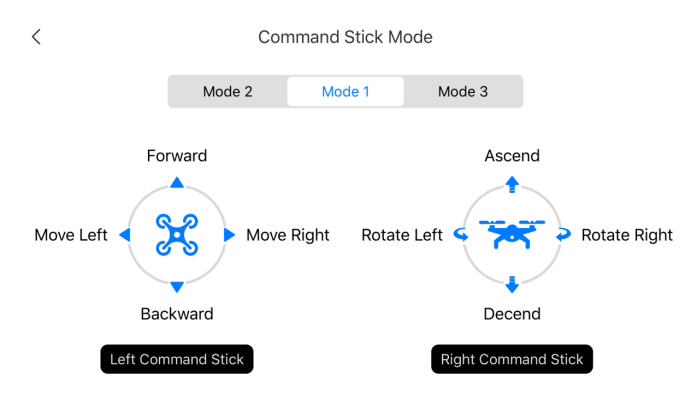
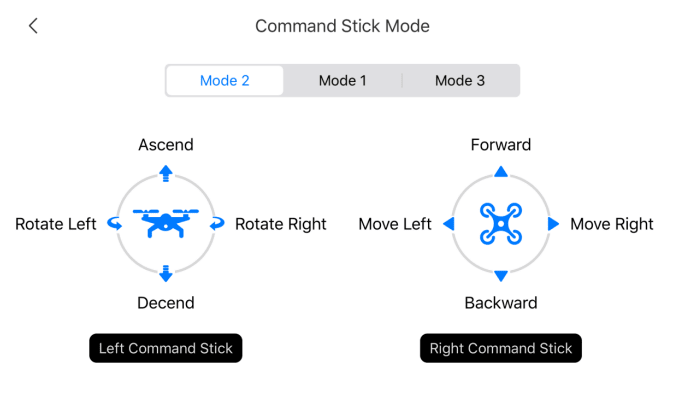
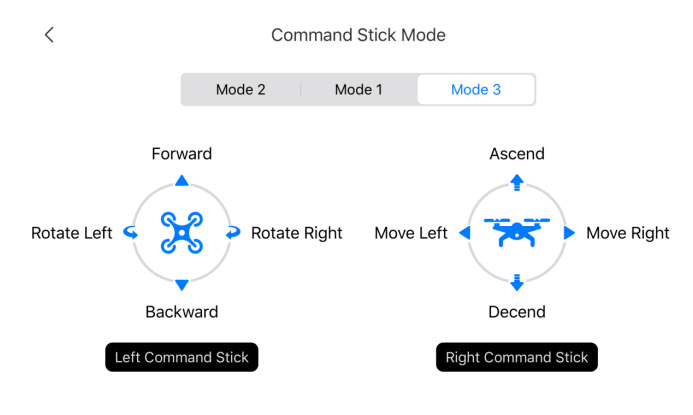
Important: By default, the remote control mode is set to US standards. You can change it in the app settings if necessary.
Photo/Video button — pressing it starts taking photos or starts/stops video recording.
Stabilizer tilt adjuster — is responsible for changing the camera tilt angle on the gimbal.
In cases where the remote control has fallen or the levers have started to work incorrectly (for example, the drone’s flight direction does not correspond to the commands), it is recommended to perform calibration. This allows you to restore control accuracy.
The calibration procedure is performed through the Autel Sky application:
Before starting the operation, turn off the power of the quadcopter.
Open the Autel Sky app, go to the settings section, select “Control”, then “Remote Controller Calibration”, and click “Start” to begin the process.
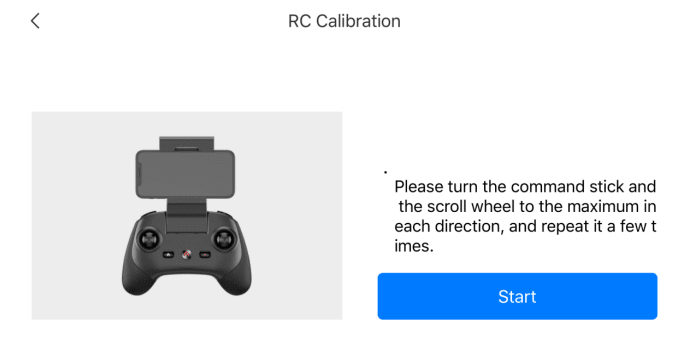
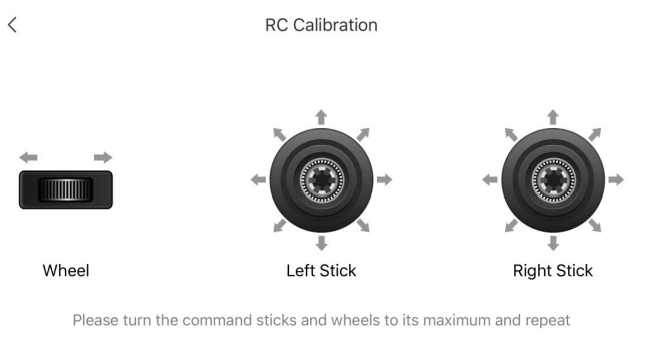
Move the left and right control sticks and turn the knob to the maximum mark in the direction of the arrow in the app. When the direction calibration is complete, the direction arrow will turn blue.
The remote controller is already paired with the quadcopter at the factory. However, if the device has been replaced or the pairing is lost, it must be re-paired. There are two ways.
Turn on the quadcopter and the remote controller. Then press the button on the quadcopter’s battery twice. The rear indicator light will start flashing quickly, indicating that the device is ready to pair.
Connect the remote controller to your smartphone, launch the Autel Sky app, open the “Personal Center” tab, and select “Connect New Quadcopter”. Follow the on-screen instructions.
After successful pairing, the LED indicator on the tail of the drone will light up for 5 seconds, then start flashing slowly. The app will automatically enter image transmission mode.
Turn on the quadcopter by double-clicking the button on the battery. The rear light will start to flash rapidly, indicating that it is ready to pair.
Press and hold the power and home buttons on the remote controller simultaneously for 3 seconds. The light on the remote controller will also start to flash rapidly, indicating that it is ready.
After pairing is complete, the light on the quadcopter will light up for 5 seconds and then change to a slow flashing mode.
Importantly:
The quadcopter should be within 0.5 meters of the remote control during frequency pairing.
If the new remote control is successfully paired with the drone, the previous remote control will be automatically disconnected.
If the smartphone is disconnected from the remote control during the pairing process, it must be reconnected within 60 seconds.
When controlling a quadcopter, it is very important to orient the remote control correctly relative to the drone. For the best signal quality, the antennas should be pointed flat towards the quadcopter, not at the end. Always try to keep the drone within line of sight and the recommended communication range to avoid signal loss and ensure stable image transmission.
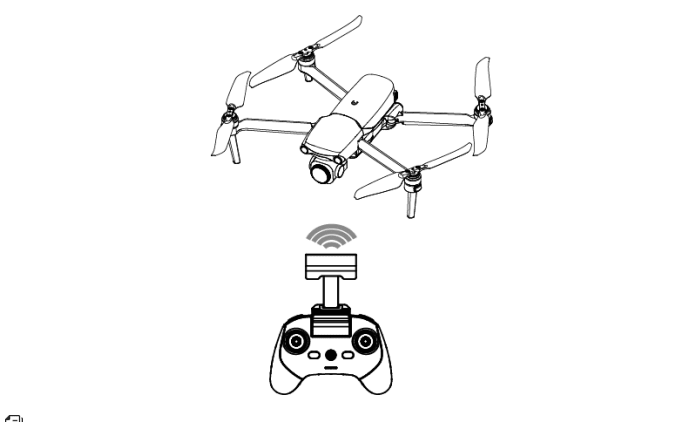
Note: For optimal image transmission, keep the remote control pointed at the quadcopter symbol on the orientation indicator.
The third chapter gives a complete overview of the functionality of the EVO Lite quadcopter remote control, which is a key element for precise and safe flight control. Thanks to Autel Skylink technology, intuitive interface, support for multiple modes and flexible settings, the user gets full control over the drone and camera even at a long distance.
Correctly turning on, charging, calibrating and pairing the remote control are not just technical formalities, but the key to stable communication, clear response to commands and high-quality shooting in any conditions. Following simple operating recommendations will help avoid mistakes and make each flight efficient and safe.