
07.05.2023
10 min
3412

Nmap is a powerful cybersecurity tool that helps you analyze networks and find vulnerabilities. If you’re new to Nmap, this article will be a real godsend for you. We’ll look at 10 useful features that will make your testing more efficient and faster.

Nmap Scripting Engine (NSE) is a powerful tool that significantly extends the standard functionality of Nmap through the use of custom scripts. These scripts, written in Lua, allow you to automate a variety of tasks related to both pentesting and information gathering (OSINT). With NSE, you can perform in-depth network analysis, check for vulnerabilities, and optimize security testing processes.
NSE scripts can be divided into several categories:
Discovery: Discovery of additional information about target systems, such as open ports, running services, and applications.
Safe: Safe scripts that do not interact directly with target systems, but only analyze the information received.
Intrusive: Intrusive scripts that can cause instability or crashes in target systems.
Vuln: Scripts that detect vulnerabilities in target systems. They help identify known vulnerabilities and configuration flaws.
Auth: Scripts for testing authentication and authorization. These scripts can be used to check password strength, detect weak configurations, and identify opportunities for brute force attacks.
Exploit: Scripts to exploit discovered vulnerabilities. These scripts are used to gain unauthorized access to target systems.
Malware: Scripts to detect and analyze malicious software.
To run NSE scripts, use the –script option when scanning with Nmap. For example, to run a script to detect vulnerabilities in web servers, you can use the following command:
nmap --script http-vuln* -p 80,443 <target>
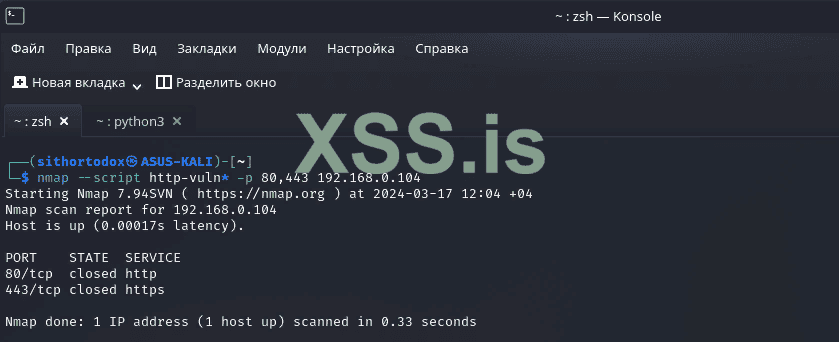
This command will execute all scripts with the prefix http-vuln, applying them to the target web server on ports 80 and 443.
To find servers using SMB (Server Message Block) and also check them for possible vulnerabilities, you can use the following command:
nmap --script smb-vuln* -p 139,445 <target>
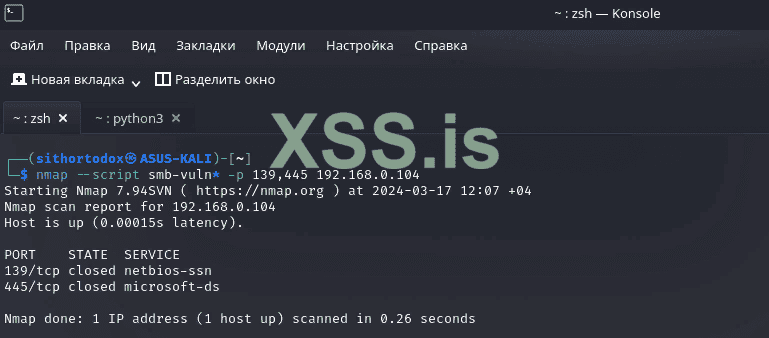
This command will run all scripts starting with the prefix smb-vuln against the target server on ports 139 and 445.
nmap --script ssl-heartbleed -p <port> <target>
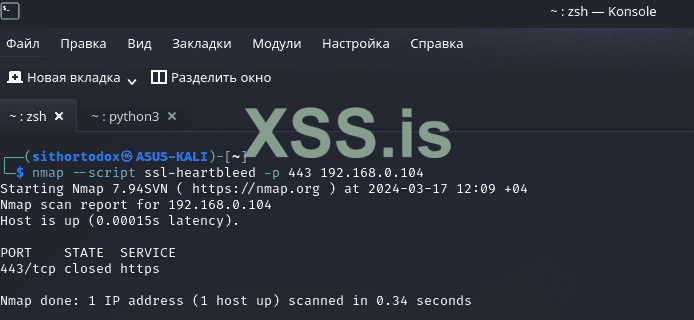
Here you need to specify the specific port on which the vulnerable service is running (usually 443 HTTPS).
Detecting web applications using WAF (Web Application Firewall): To detect web applications protected by WAF, you can use the following command:
nmap --script http-waf-* -p 80,443 <target>
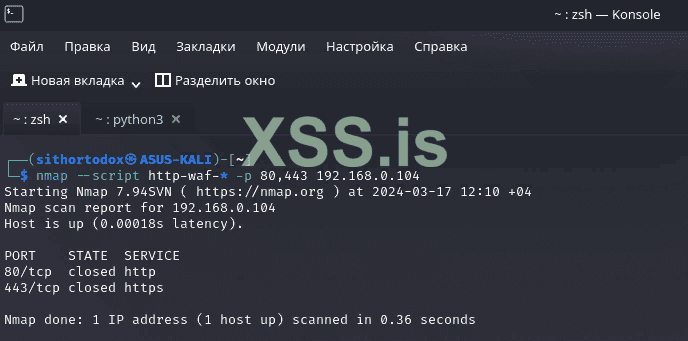
This command will run all scripts that start with the prefix http-waf against the target web server on ports 80 and 443.
nmap --script http-shellshock -p 80,443 <target>
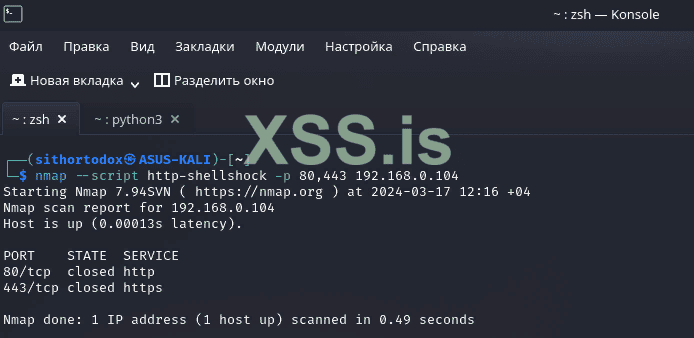
This command will run the http-shellshock script against the target web server on ports 80 and 443.
The Nmap Scripting Engine provides a flexible and powerful tool for automating and extending the functionality of Nmap, allowing you to effectively solve various IS-related tasks.
One of the most important features of Nmap is its ability to determine the operating system (OS) and its version on the target device. This information can be used to identify vulnerabilities, plan testing, and adapt attack strategies.
Nmap uses several methods to determine the operating system:
TCP/IP stack fingerprinting: Analyzes TCP/IP stack features, such as TTL values, TCP options, and other parameters. These features allow Nmap to make assumptions about the operating system type.
Port and protocol scanning: Analyzes open ports and running protocols that may be specific to certain operating systems.
Application version: Analyzes the versions of running applications and services that may indicate a specific operating system.
To determine the operating system using Nmap, you can use the following options:
-O: Enables operating system detection. This option can be used in conjunction with the -v option to increase the verbosity of the output.
–osscan-limit: Limits the operating system detection to only active hosts for which open ports have been detected. This reduces scan time and the number of false positives.
–osscan-guess: Shows the most likely operating system, even if the confidence level of the result is below the specified threshold.
Example of using Nmap to determine the operating system:
nmap -O -v --osscan-limit <target>
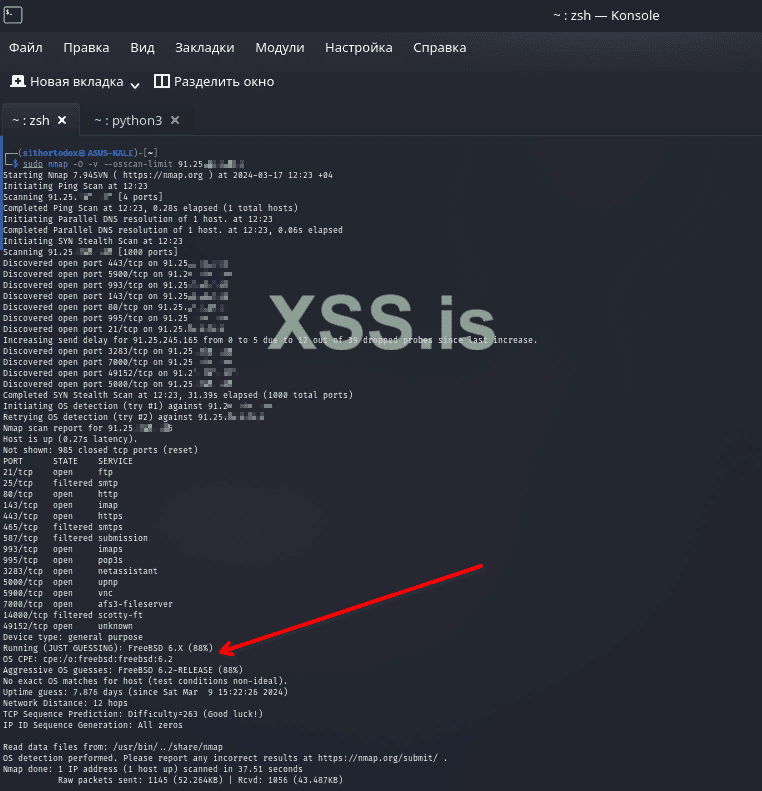
This command will run the scan with OS detection enabled, limit it to active hosts only, and increase the verbosity of the output.
You can use the –osscan-guess option to increase the accuracy of OS detection. This option displays the most likely OS, even if the confidence level of the result is lower than the specified threshold.
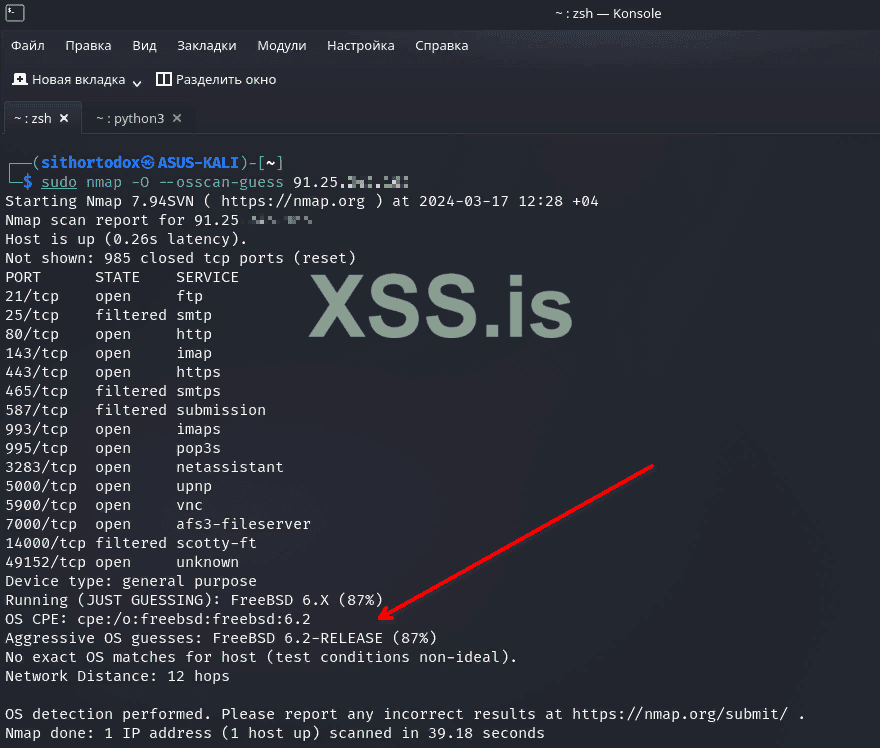
nmap -O --osscan-guess <target>
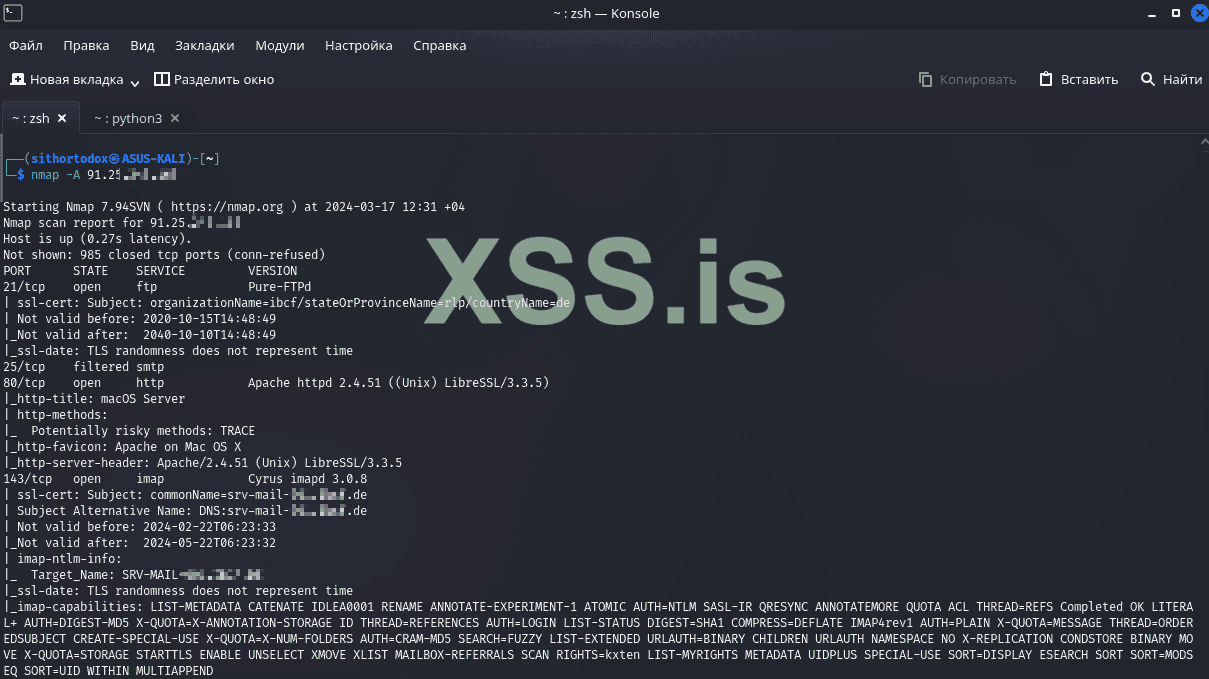
For more detailed information about the operating system, including the kernel version, you can use the -A option. This option includes determining the operating system, application versions, port scans, and service scans.
nmap -A <target>
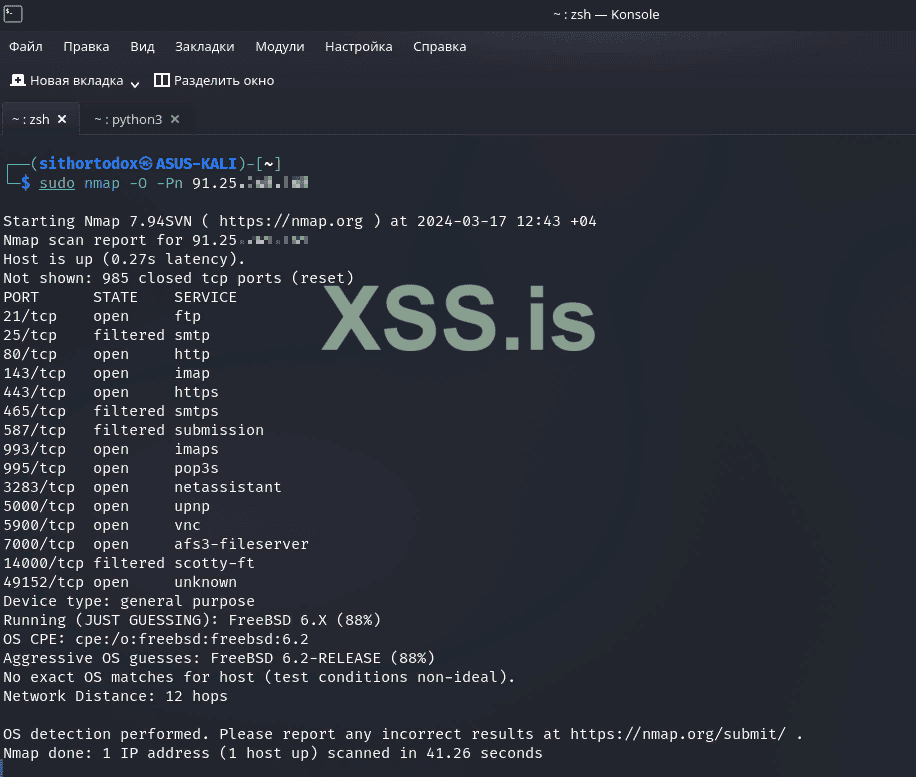
In some cases, you may need to determine the operating system without sending ICMP packets (ping). You can use the Pn option to do this.
nmap -O -Pn <target>
If you have already performed a port scan and saved the results to a file, you can use that file to determine the operating system without rescanning. To do this, you can use the –osscan-guess option in combination with the -iX option to read the scan results from an XML file.
nmap --osscan-guess -iX <scan_results.xml>
By default, Nmap uses an operating system signature database that contains information about many popular operating systems. However, if you want to use your own signature file, you can specify it with the –datadir option.
nmap -O --datadir=<custom_signature_file> <target>
These examples demonstrate the flexibility and power of Nmap when analyzing operating systems. Using various options and combinations, you can obtain accurate and detailed information about target systems, which is an important element of pentesting and OSINT.
One of the key features of Nmap is port scanning, which allows you to identify open ports and running services on a target device. When conducting a pentest or intelligence gathering (OSINT), it is important to remain discreet and avoid detection. To do this, Nmap provides several stealth port scanning methods that help minimize the risk of detection.
SYN scan (-sS): The SYN scan is one of the most popular methods of stealth port scanning. In this method, Nmap sends SYN packets to the target ports but does not complete the full TCP handshake. If the port is open, the target host will send a SYN-ACK packet, and Nmap will complete the scan by sending a RST packet. This scanning method is difficult to detect because it does not establish a full TCP connection.
Connect scan (-sT): The Connect scan is a more traditional port scanning method in which Nmap establishes a full TCP connection to the target port. This method is less stealthy than the SYN scan, but it can be more reliable when passing through firewalls and security measures.
ACK scan (-sA): The ACK scan is the most stealthy method of port scanning in which Nmap only sends ACK packets to the target ports. This method does not determine whether a port is open, but it can help detect filtering firewalls and security measures.
Examples of using Nmap’s hidden port scanning methods:
SYN scan: To perform a SYN scan, you can use the following command:
nmap -sS <target>
This command will perform a SYN scan of all 1000 most common ports on the target device.
Connect scan: To perform a Connect scan, you can use the following command:
nmap -sT <target>
This command will perform a Connect scan of all 1000 most common ports on the target device.
ACK scan: To perform an ACK scan, you can use the following command:
nmap -sA <target>
This command will perform an ACK scan of all 1000 most common ports on the target device. As you can see from the results, each method gives a unique conclusion.
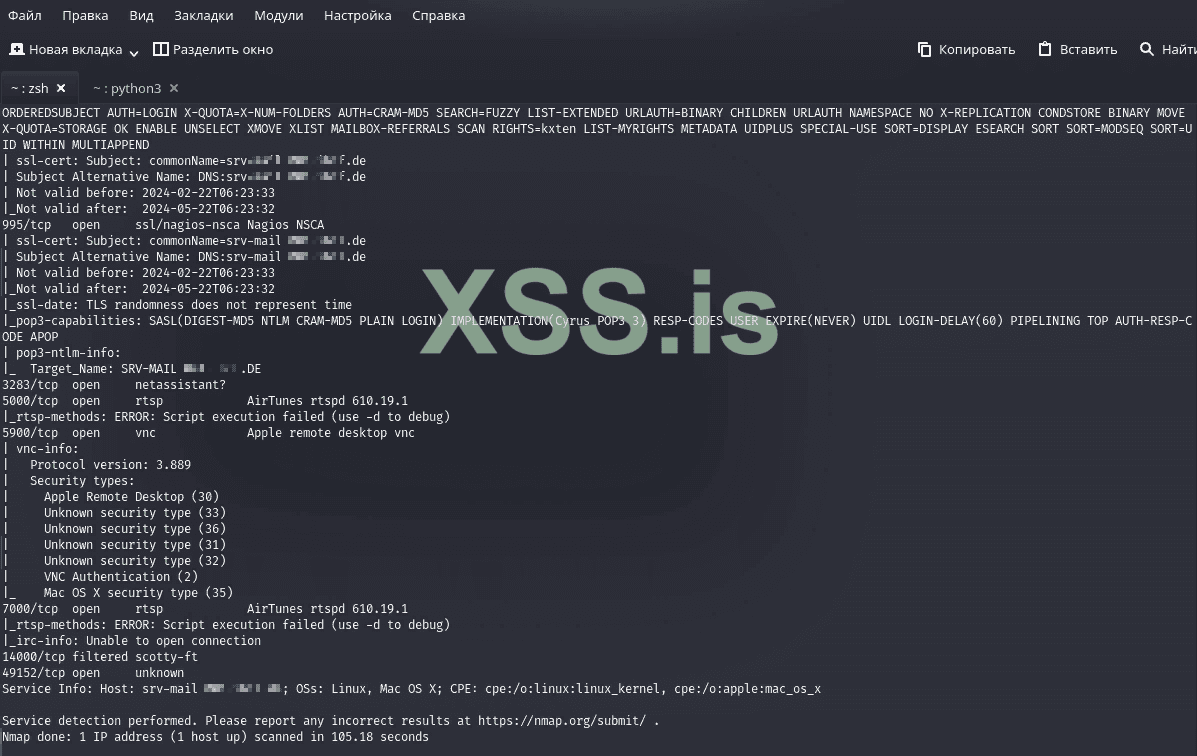
One of the important tasks during pentesting is to identify the versions of applications and services running on the target device. Knowing the exact versions can help identify vulnerabilities and plan further exploitation actions. Nmap provides a function to identify application versions using the -sV flag.
The -sV flag allows Nmap to scan for versions of applications and services running on open ports. In this case, Nmap sends specially crafted packets and analyzes the target device’s responses, trying to determine which services are running and their versions.
To scan program versions for all open ports, you can use the following command:
nmap -sV <target>
This command will scan the application versions for all open ports on the target device.
You can use the following command to scan application versions for a specific port:
nmap -sV -p <port> <target>
Replace <port> with the port number for which you want to scan for application versions.
You can use the following command to increase the accuracy of identifying application versions:
nmap -sV --version-all <target>
This command will list all possible versions of applications, not just the most likely one.
By default, Nmap uses a database of application signatures that contains information about many known applications and services. However, if you want to use your own signature file, you can specify it with the –datadir option.
nmap -sV --datadir=<custom_signature_file> <target>
Nmap is not only a powerful tool for network scanning and information gathering, but also a great tool for automating security testing. With flexible command-line options, scripting support, and integration with other tools, Nmap allows security professionals to automate many routine tasks and improve testing efficiency.
Below are several ways to automate security testing using Nmap:
Scripting to automate scans: The Nmap Scripting Engine (NSE) allows you to create your own Lua scripts to automate various tasks related to security testing. Scripts can be used to automatically detect vulnerabilities, perform custom tests, and gather additional information about target systems.
Integrating Nmap with other tools: Nmap can be integrated with other security testing tools, such as Metasploit, Nessus, and Burp Suite. This allows you to automate the testing process, combining the capabilities of different tools and obtaining a more complete picture of the security of target systems.
Automation using the cron utility: The cron utility in Unix-like operating systems allows you to schedule periodic execution of commands. Using cron, you can configure automatic network scans using Nmap at a specified time or with a certain frequency.
Using Zenmap to create graphical reports: Zenmap is a graphical shell of Nmap that provides a convenient interface for managing scans and visualizing results. Zenmap allows you to create graphical reports in HTML or XML format, which can be used to automate the documentation and presentation of test results.
Use the Nmap API to integrate with applications: Nmap provides an API for integration with applications in Python, Perl, Ruby, and others. This allows you to create your own applications to automate security testing using Nmap’s capabilities.
To configure automatic network scanning using cron, you need to add the following line to crontab:
0 0 * * * nmap -sS -sV -O -oA scan_result <target>
This command will scan ports, application versions, and operating system detection every day at midnight, saving the results to a file named scan_result.
To automatically detect vulnerabilities using Nmap, you can use the following command:
nmap --script vuln <target>
This command will execute vuln scripts to detect vulnerabilities on the target device.
You can create a bash script to automate scanning multiple targets, perform different types of scans, and save the results to files. Below is an example of such a script:
Bash:Копіювати в буфер обміну
#!/bin/bash


targets=("192.168.1.1" "192.168.1.100" "example.com")


for target in "${targets[@]}"
do
 echo "Scanning target: $target"
 nmap -sS -sV -O -oA "scan_results/$target" $target
done
This script scans ports, application versions, and operating system definitions for each target in the targets list and stores the results in files in the scan_results directory.
Nmap can be integrated with Metasploit to automate vulnerability discovery and exploitation. To do this, import Nmap scan results into Metasploit using the db_import command:
msfconsole
db_import /path/to/nmap/scan/results.xml
After importing the scan results, Metasploit automatically detects the vulnerability and suggests appropriate exploits.
Zenmap provides a graphical interface for managing scans and visualizing the results. You can create scan profiles with specified options and automatically run them for different purposes. To do this, you need to:
a. Create a new scan profile, specifying the required options and settings.
b. Save the profile.
c. Select the target host or network.
d. Select the saved scan profile and run it.
Nmap provides an API for integrating with programs in Python, Perl, Ruby, and others. For example, you can create a Python program to automatically scan your network and send you email notifications of vulnerabilities found. Here is an example of using the Nmap API in Python:
Python:Копіювати в буфер обміну
import nmap

nm = nmap.PortScanner()
nm.scan('192.168.1.1', '22-443')

for host in nm.all_hosts():

  print('Host : %s (%s)' % (host, nm[host].hostname()))

  print('State : %s' % nm[host].state())

  for proto in nm[host].all_protocols():

    print('Protocol : %s' % proto)

    lport = nm[host][proto].keys()

    for port in lport:

      print('port : %s\tstate : %s' % (port, nm[host][proto][port]['state']))
This script performs a port scan of 22-443 for host 192.168.1.1 and displays information about the open ports.
When conducting OSINT (Open Source Intelligence), it is often necessary to scan large ranges of IP addresses or networks to gather information about targets. However, in some cases, there may be certain restrictions, such as whitelisting IP addresses that should not be scanned.
Nmap provides the –exclude option to exclude specific IP addresses, ranges, or hosts from scanning. This allows security professionals to adhere to whitelisting requirements and improve OSINT efficiency by avoiding unnecessary scanning.
To exclude a specific IP address from scanning, you can use the following command:
nmap -sS -sV -O --exclude 192.168.1.100 192.168.1.0/24
This command performs a port scan, software version scan, and operating system detection for all hosts on the 192.168.1.0/24 network, except host 192.16.
You can use the following command to exclude a range of IP addresses from scanning:
nmap -sS -sV -O --exclude 192.168.1.100-200 192.168.1.0/24
This command scans all hosts on the 192.168.1.0/24 network, except for hosts with IP addresses from 192.168.1.100 to 1.8.
You can use the following command to exclude multiple IP addresses and ranges from scanning:
nmap -sS -sV -O --exclude 192.168.1.100,192.168.1.200,192.168.1.300-400 192.168.1.0/24
This command scans for all hosts on the 192.168.1.0/24 network, excluding hosts with IP addresses 192.168.1.1.2. 68.1.300 to 192.168.1.400.
If your whitelist contains a large number of IP addresses or ranges, you can create a file with this data and use it with the –exclude_file option:
nmap -sS -sV -O --exclude_file whitelist.txt 192.168.1.0/24
The whitelist.txt file should contain a list of IP addresses or ranges separated by spaces, newlines, or commas.
Virtual private networks (VPNs) are widely used by organizations to provide secure access to network resources and data transmission over public networks such as the Internet. Nmap can be used to discover and analyze VPN connections to identify potential vulnerabilities and improve security.
Nmap can be used to discover VPN servers on a network by scanning ports commonly used by VPN protocols such as PPTP (TCP 1723), L2TP (UDP 500, 1701, 4500), IPSec (UDP 501, 4 . You can use the following command to do this:
nmap -p 1723,500,1701,4500,1194 -sS -sV -O <target>
This command scans ports, software versions, and operating system for the specified ports associated with the VPN.
Nmap can also be used to analyze VPN clients connected to the network. This can be done by scanning for open ports and finding services associated with VPN clients. For example, you can use the following command to detect Cisco AnyConnect clients:
nmap -p 443 --script ssl-cert -sV <target>
This command scans port 443 (Cisco AnyConnect is used by default) and parses the SSL certificate to determine if the client is part of a VPN connection.
One of the key tasks when conducting pentesting or intelligence gathering (OSINT) is discovering hosts on a network. Nmap provides several scanning methods to discover active devices on a network, including ARP and DNS scans.
ARP scan allows you to quickly discover active hosts on a local network by sending ARP requests and analyzing the responses received. This method only works for devices connected to the same broadcast network and does not require sending packets to the target ports. To perform an ARP scan with Nmap, you can use the following command:
nmap -sP <target>
This command performs an ARP scan for the specified IP address range or network.
A DNS scan allows you to discover hosts on a network by resolving domain names and analyzing the resulting IP addresses. This method can be useful for discovering hosts that are not reachable through an ARP scan, or for obtaining additional information about devices on a network. To perform a DNS scan in Nmap, you can use the following command:
nmap -sL <target>
This command performs a DNS scan for a specified list of domains or network.
To get more complete information about hosts on your network, you can use a combined ARP and DNS scan. This method combines the results of an ARP and DNS scan, providing a more detailed picture of the network. To perform a combined ARP and DNS scan in Nmap, you can use the following command:
nmap -sn -n -PR -PE -PP -PM <target>
This command performs ARP (-PR), ICMP echo (-PE), ICMP timestamp (-PP), and ICMP netmask (-PM) scans to detect active hosts, and also disables domain name resolution (-n) and performs only port scans (-sn).
Intrusion Detection Systems (IDS) and Intrusion Prevention Systems (IPS) are important components of network security that can detect and prevent malicious activity, including port scanning and vulnerability exploitation. When conducting a pentest, you may need to bypass these systems to avoid detection and blocking.
Nmap provides several methods and options for bypassing IDS and IPS, including packet fragmentation, packet resequencing, packet delay, and other techniques. Here are some ways to use Nmap to bypass intrusion detection systems:
Packet fragmentation is the process of breaking network packets into smaller pieces to avoid detection by IDS. Nmap allows you to fragment packets using the -f (fragment into 8-byte fragments), -ff (fragment into 16-byte fragments), or –mtu <value> (set an arbitrary MTU value). For example:
nmap -sS -f <target>
This command performs a SYN scan (-sS) with fragmentation of packets into 8-byte fragments (-f) for the specified target.
Packet resequencing involves changing the order in which packets are sent to make it harder for IDSs to detect them. Nmap allows you to resequence packets using the –scan-delay <time> option, which sets a delay between packets, or –badsum, which sends packets with an incorrect checksum. For example:
nmap -sS --scan-delay 100ms <target>
This command performs a SYN scan (-sS) with a 100-millisecond delay between packets (–scan-delay 100ms) for the specified target.
Changing packet timeouts and retries can help avoid IDS detection by making traffic analysis more difficult. Nmap allows you to configure timeouts and retries using the –host-timeout <time>, –initial-rtt-timeout <time>, –max-retries <number>, and other options. For example:
nmap -sS --host-timeout 60s --max-retries 3 <target>
This command performs a SYN scan (-sS) with a host timeout of 60 seconds (–host-timeout 60s) and a maximum number of retries of 3 (–max-retries 3) for the specified target.
Decoys are fake targets that can be used to distract an IDS from its real target. Nmap allows the use of decoys with the -D <decoy1, decoy2, …> option. For example:
nmap -sS -D 192.168.1.100,192.168.1.101 <target>
This command performs a SYN scan (-sS) using two decoys (192.168.1.100 and 192.168.1.101) for the specified purpose.
Optimizing timing and performance when scanning with Nmap is an important aspect of pentesting and intelligence gathering (OSINT). Tuning timing and performance allows security professionals to improve scanning efficiency, reduce execution time, and avoid detection.
Nmap provides several options for tuning timing and performance, including timing level options, parallelism options, and more. Here are some ways to use Nmap to optimize scanning:
Nmap provides six timing levels (0 through 5) that you can use to adjust the speed and accuracy of the scan. Level 0 provides the fastest speed but the least accuracy, while level 5 provides the most accuracy but the least speed. You can use the -T <level> option to select a timing level. For example:
nmap -sS -T4 <target>
This command performs a SYN scan (-sS) with timing level 4 (aggressive) for the specified target.
Nmap allows you to configure the number of packets sent at a time using the –min-parallelism <number>, –max-parallelism <number>, and –host-timeout <time> options. For example:
nmap -sS --min-parallelism 10 --max-parallelism 50 <target>
This command performs a SYN scan (-sS) with a minimum parallelism of 10 packets (–min-parallelism 10) and a maximum parallelism of 50 packets (–max-parallelism 50) for the specified target.
Nmap allows you to configure the number of packet retries using the –max-retries <number> option. This can be useful for improving scanning accuracy on networks with high levels of interference or in the presence of IDS/IPS. For example:
nmap -sS --max-retries 3 <target>
This command performs a SYN scan (-sS) with a maximum number of retries of 3 (–max-retries 3) for the specified target.
Nmap allows you to configure timeouts using the options –initial-rtt-timeout <time>, –min-rtt-timeout <time>, –max-rtt-timeout <time>, –host-timeout <time>, and others. For example:
nmap -sS --initial-rtt-timeout 50ms --host-timeout 60s <target>
This command performs a SYN scan (-sS) with an initial RTT timeout of 50 milliseconds (-initial-rtt-timeout 50ms) and a host response timeout of 60 seconds (-host-timeout 60s) for the specified target.
Nmap is a powerful pentesting and OSINT tool that allows you to automate scanning, detect vulnerabilities, analyze operating systems, and bypass protection. Using NSE scripts, stealth scanning methods, and optimizing timing can significantly improve the efficiency of security testing. Integration with other tools and process automation make Nmap indispensable in the field of cybersecurity.