27.09.2025
10 min
685

PiKVM v2 is an affordable and flexible way to remotely control a server or personal computer at the BIOS level. Thanks to the KVM over IP capabilities, you get full control over the system, even if it is not booting. The device is based on Raspberry Pi, which makes it compact, budget-friendly and energy-efficient. By assembling PiKVM v2 yourself, you can get the functionality of expensive hardware solutions: real-time console viewing, keyboard and mouse emulation, booting from ISO images and monitoring the equipment status. This solution will be useful for system administrators, devops and anyone who wants to have constant access to their server without additional costs.
KVM over IP (Keyboard, Video, Mouse over IP) is a technology that allows you to remotely access and control a computer or server over a network connection. It allows you to work with the server or PC console as if you were right in front of it, regardless of your location.
Hardware. A KVM over IP is typically a standalone device that is installed on or integrated into a server. It connects to the server’s keyboard, video, and mouse ports.
Network Connection. The KVM over IP device is then connected to a network, which provides remote access to the server.
Software. The user accesses the server console remotely using specialized software provided by the KVM over IP device manufacturer. This software allows you to see the server’s screen, control keyboard and mouse input, and interact with the server as if you were working directly at it.
Security Features. KVM over IP solutions typically include security features such as encryption and authentication that provide secure remote access to the server.
Low-level access. KVM over IP provides low-level access to the server console, allowing you to work with it at the BIOS stage and during the boot process. This level of access is not available to software remote desktop solutions that work only in the operating system environment.
Operating system independence. Because KVM over IP operates at the hardware level, it is independent of the server operating system. This means that the administrator can manage and diagnose the server even if the OS is frozen or running with errors.
Out-of-band management (OOB management). KVM over IP supports out-of-band management, allowing administrators to connect to and manage the server even if the OS fails or the main network stack is unavailable. This is critical for diagnostics and maintenance.
Performance. KVM over IP devices can provide more stable operation in conditions of OS or driver failures compared to software solutions, since they operate at the hardware level. However, they are usually inferior to modern software solutions for remote desktop in terms of video quality and latency.
No need to install software. Since KVM over IP is a hardware solution, there is no need to install additional software on the server side, which simplifies use and further maintenance.
Hardware solutions overview
There are many KVM over IP devices on the market, but for personal use they have a number of disadvantages. Key ones are:
Cost: Commercial hardware KVM solutions typically have a higher initial cost compared to open-source alternatives, as they often include additional features and support services.
Non-free software: Most KVM switches designed for industrial use in critical infrastructure server and data centers come with proprietary, closed-source software.
Найкраще рішення для домашнього стенду/міні-серверного або віддаленого керування ПК — PiKVM: відкрите та недороге IP-KVM-рішення на базі одноплатного комп’ютера Raspberry Pi (ARM).
The PiKVM device supports many useful features for controlling a remote machine, such as:
drive emulation: allows you to connect a local *.iso file to a remote computer and thereby reinstall any OS remotely;
emulation of connecting/disconnecting USB devices;
ATX power management (optional; requires ATX module/board and connection to the power button/motherboard).
If you want to purchase a PiKVM device, there are two options:
order a ready-made device on the official website;
buy a supported Raspberry Pi board and the necessary components and assemble the device yourself.
Since delivery of ready-made PiKVM v2 is not available in some countries, the optimal solution is self-assembly. This DIY approach provides greater flexibility: it allows you to assemble the device for the necessary functions and select any components.
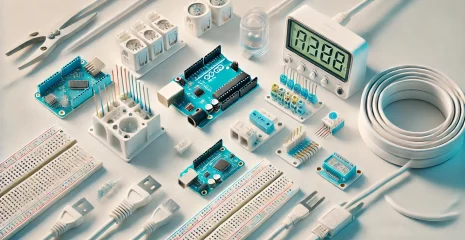
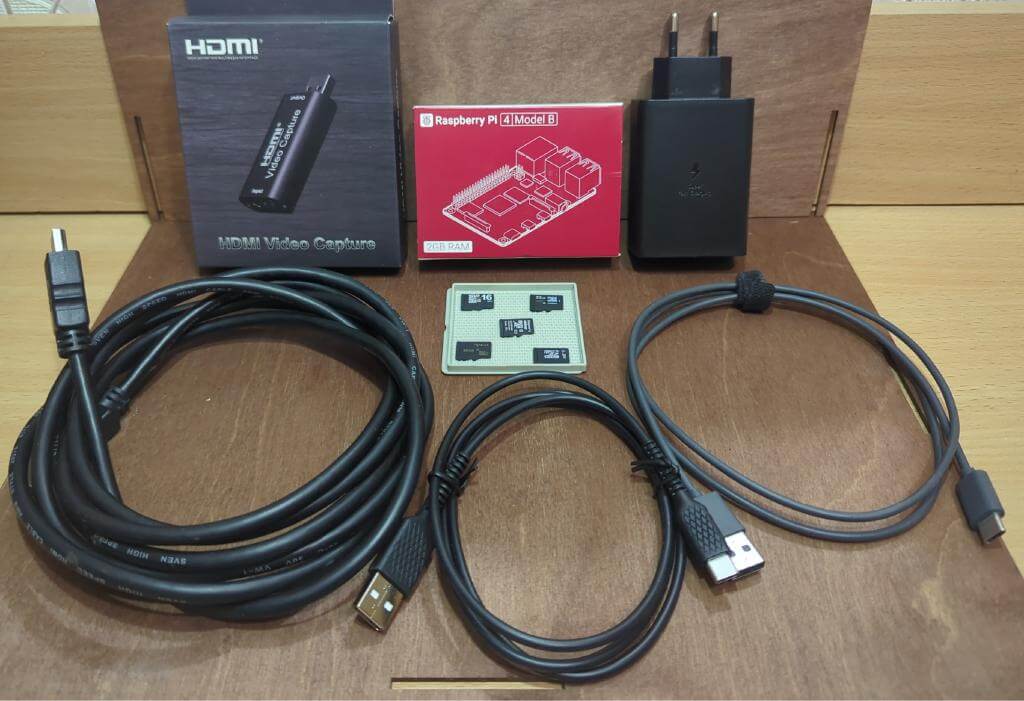
A study of the official PiKVM documentation shows that the PiKVM v2 version is the most suitable for DIY assembly. Despite the availability of the modern version of PiKVM v3, which is supplied as ready-made devices and has extended functionality, version v2 remains a reliable and popular choice for self-assembly. The following components are usually used to implement the project:
1 x Raspberry Pi 4 Model B with 2GB RAM
1 x 5.1V/3A power supply (official Raspberry Pi PSU or equivalent) + short low-impedance USB-C cable
1 x USB HDMI capture card (PiKVM compatible, e.g. on MS2109 chip)
1 x Kingston 32GB Class 10 SD card2 x USB-A → USB-C cables (for making a custom power cable)
1 x HDMI cable (male-male)
1 x 80mm fan (for active cooling)
To control a remote machine using our DIY-KVM, the computer must recognize the device as a USB-HID (Human Interface Device) – that is, as a regular keyboard or mouse (the computer keyboard and mouse are also HID devices).
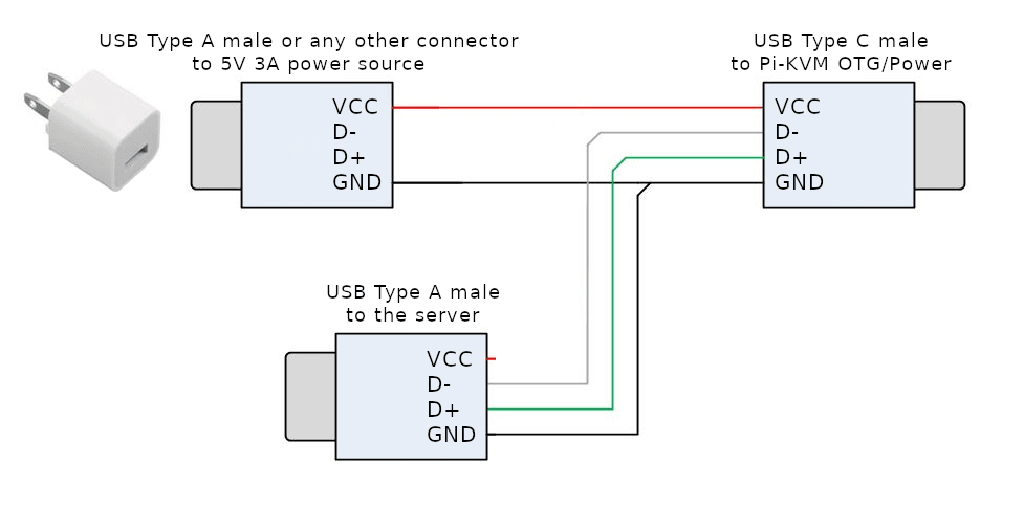
The problem with the Raspberry Pi 4 Model B board is that it has only one USB-C port that can work as a HID device, and this same port is used for power. To get around this limitation, you need to make a special cable that will simultaneously act as a USB device for the target host and receive external power from the adapter.
To make such a cable, you need 2 USB-A (male) → USB-C (male) cables. We recommend choosing high-quality cables, since the board requires power up to 3 A.
The assembly process includes the following steps:
Take the first cable and carefully strip the outer jacket. Leave the data wires (green and white) intact, and cut the +5V (red) and ground (black) wires.
Take the second cable and cut it completely off—only the USB-A part is needed.
Solder the +5V (red) wire from the second USB-A part to the +5V (red) wire from the USB-C part.
Solder all three ground (black) wires from all parts of the cable together.
Insulate all connections with heat shrink tubing (or good quality electrical tape if heat shrink is not available).
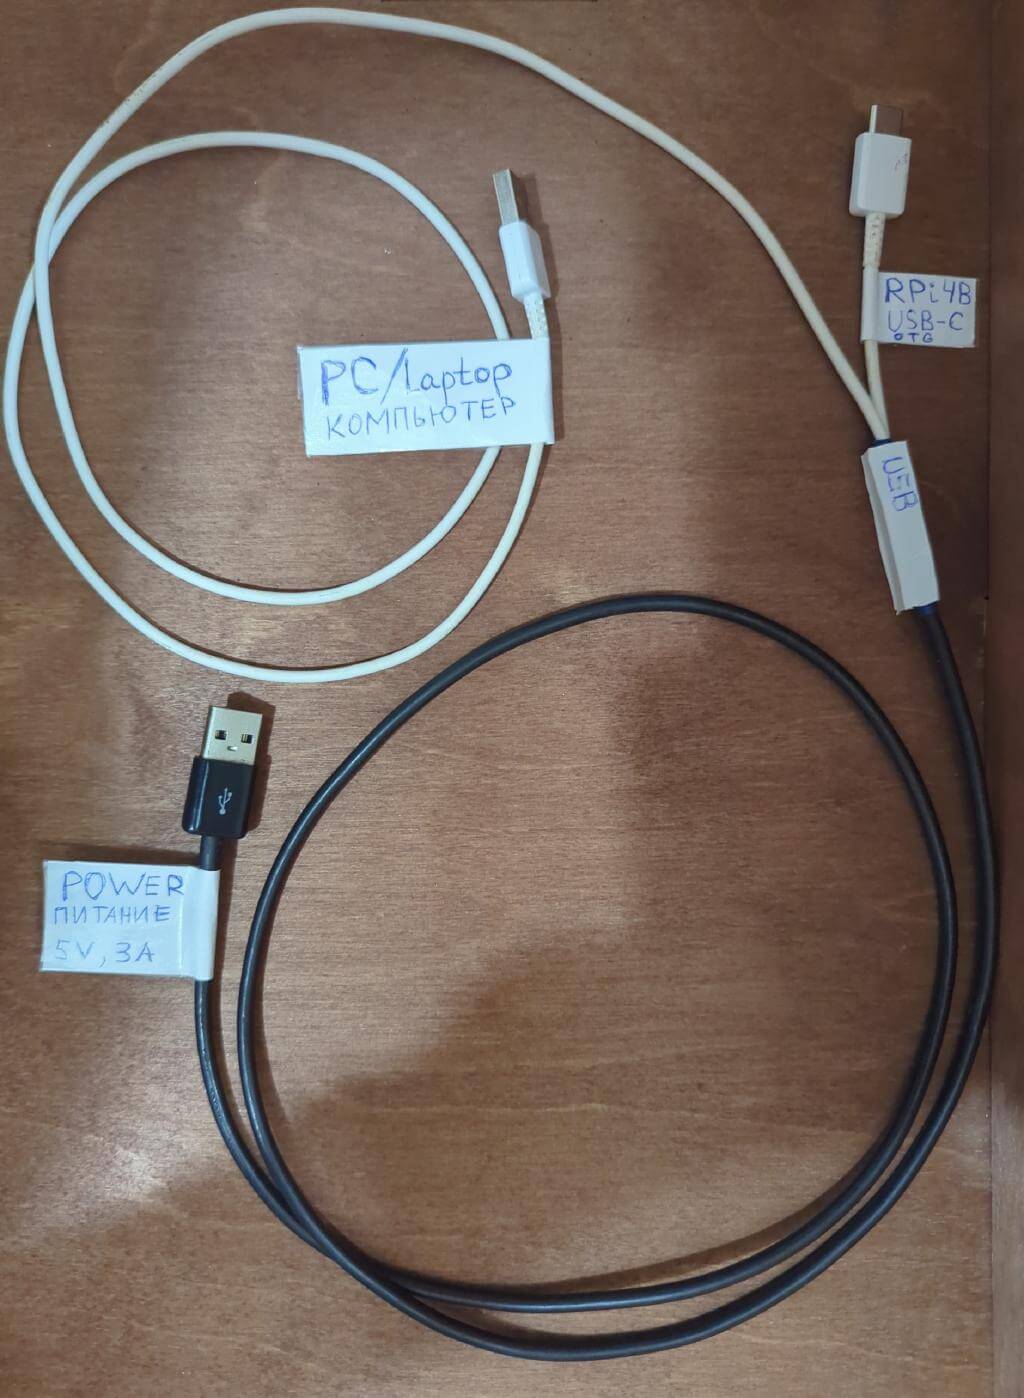
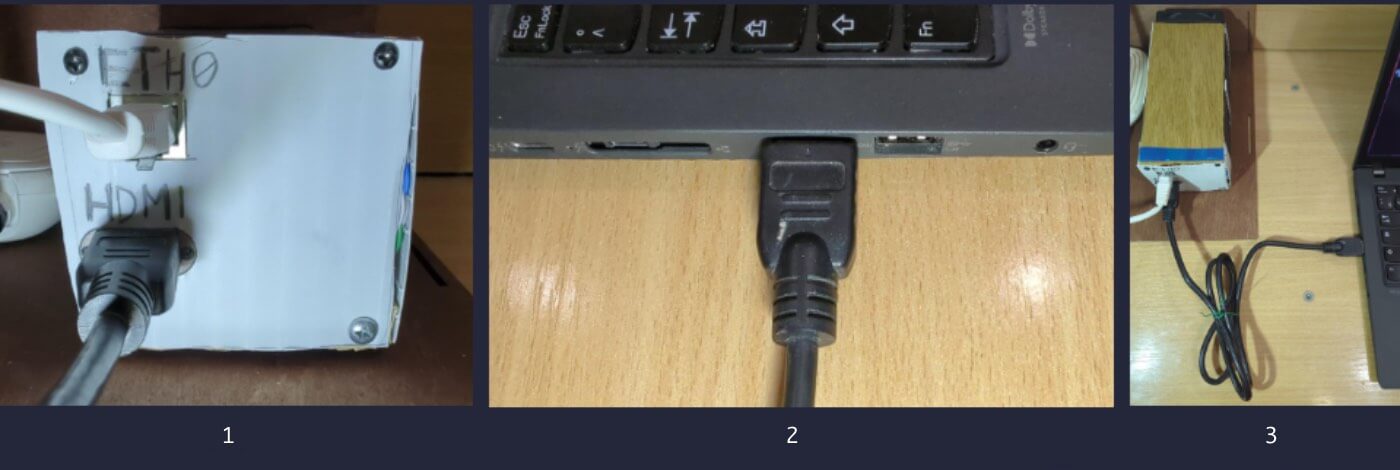
As a result, the USB-C connector connects to the Raspberry Pi board, the USB-A connector of the second cable (with power) – to the network adapter, and the USB-A connector of the first cable (with data lines) – to the PC you want to control. For clarity, the cable soldering diagram is shown below.
We also recommend a YouTube video from the developer of PiKVM, which shows the entire process of making such a cable.
The photo shows the assembled cable with labeled ends to avoid confusion when connecting. The black USB-A connector connects to the power adapter, the white USB-A connector connects to the computer, and the USB-C connector connects to the Raspberry Pi board.
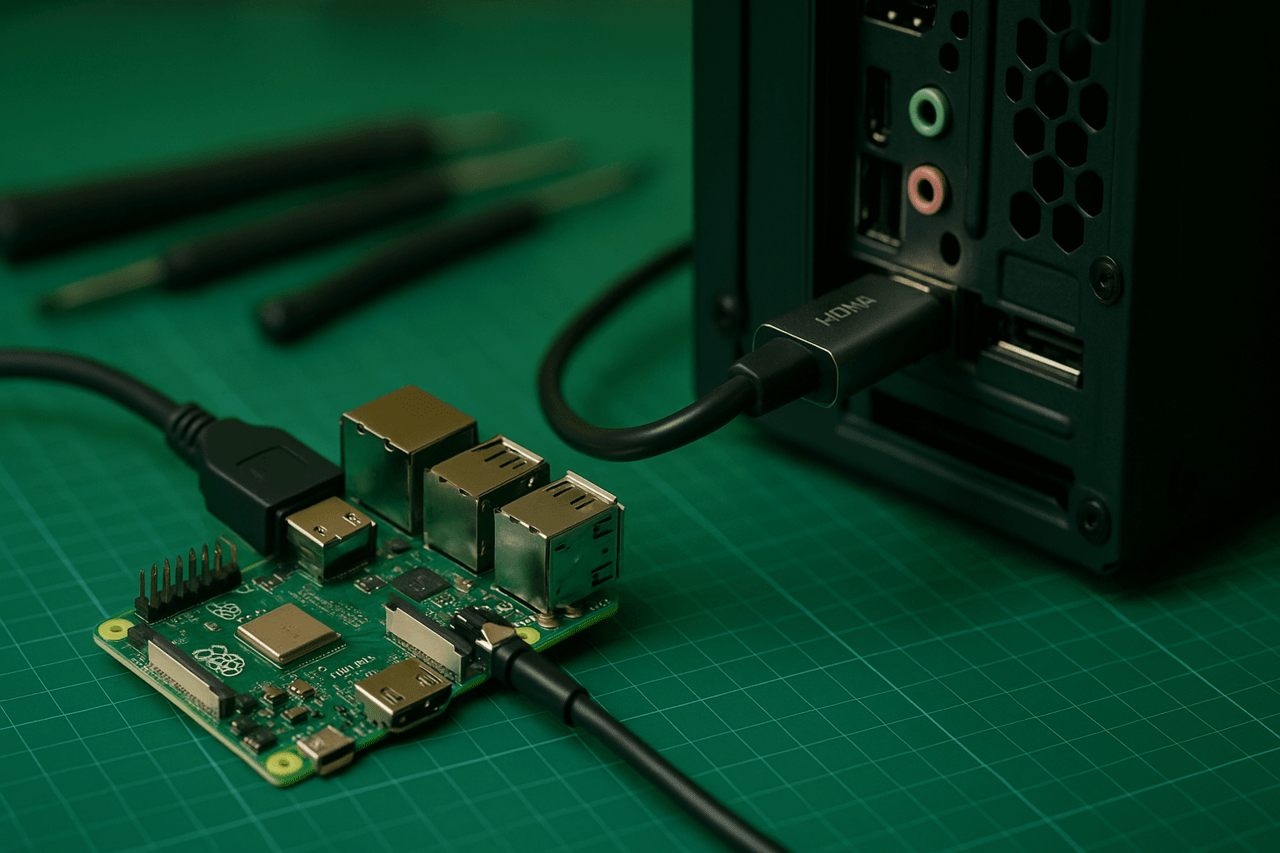
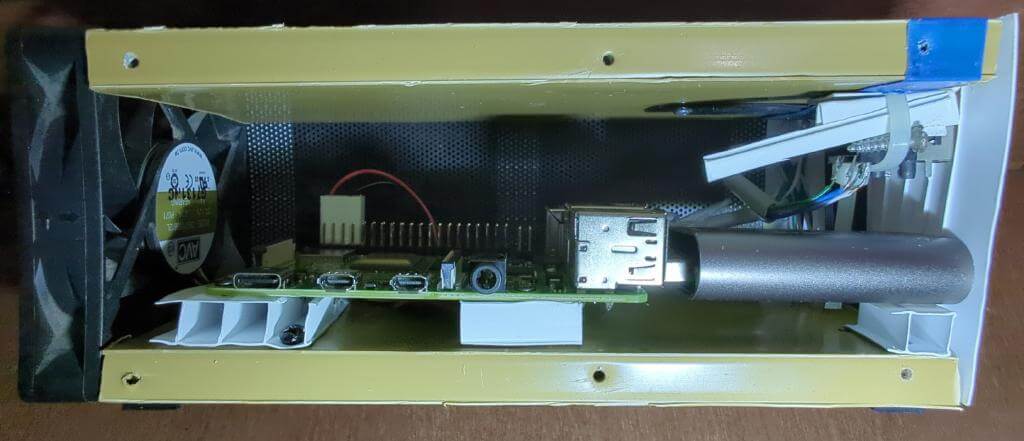
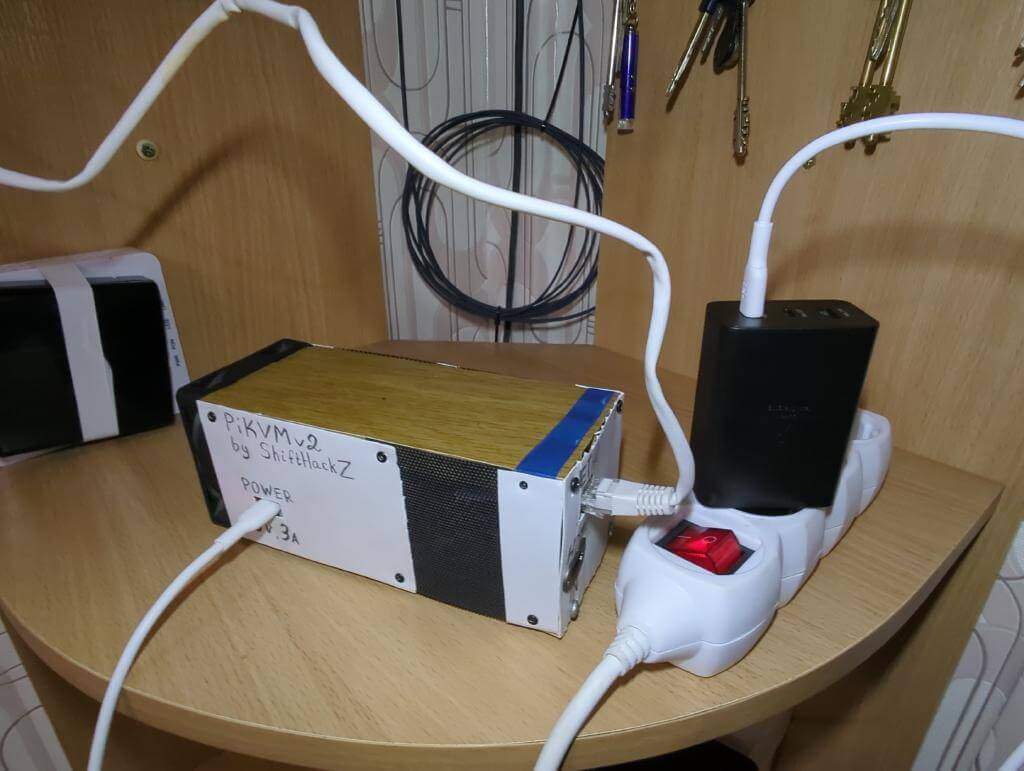
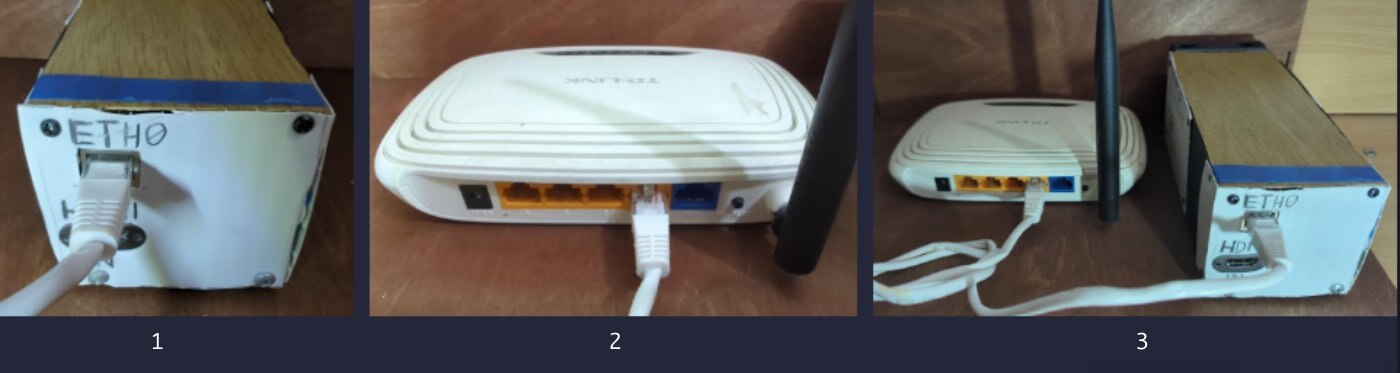
Among the components for assembly, an external HDMI video capture card is used, which must be connected to any USB 3.0 port of the Raspberry Pi (blue connectors), since they have equivalent bandwidth. Because of this, the official Raspberry Pi case is not always a good solution: it can be too expensive and inconvenient for frequent connections. The best option in such cases is to use a single homemade case that provides portability and a “plug-and-play” format – you only need to connect HDMI and USB cables to work with another PC.
It is known that Raspberry Pi boards are prone to overheating under extreme load on the CPU or during 24-hour operation. To avoid this, it is advisable to provide active cooling with an 80 mm fan. For compact assemblies, ready-made cases with radiators and fans of a smaller diameter (30–40 mm) are suitable, which are quite enough for the Raspberry Pi 4 under prolonged load.
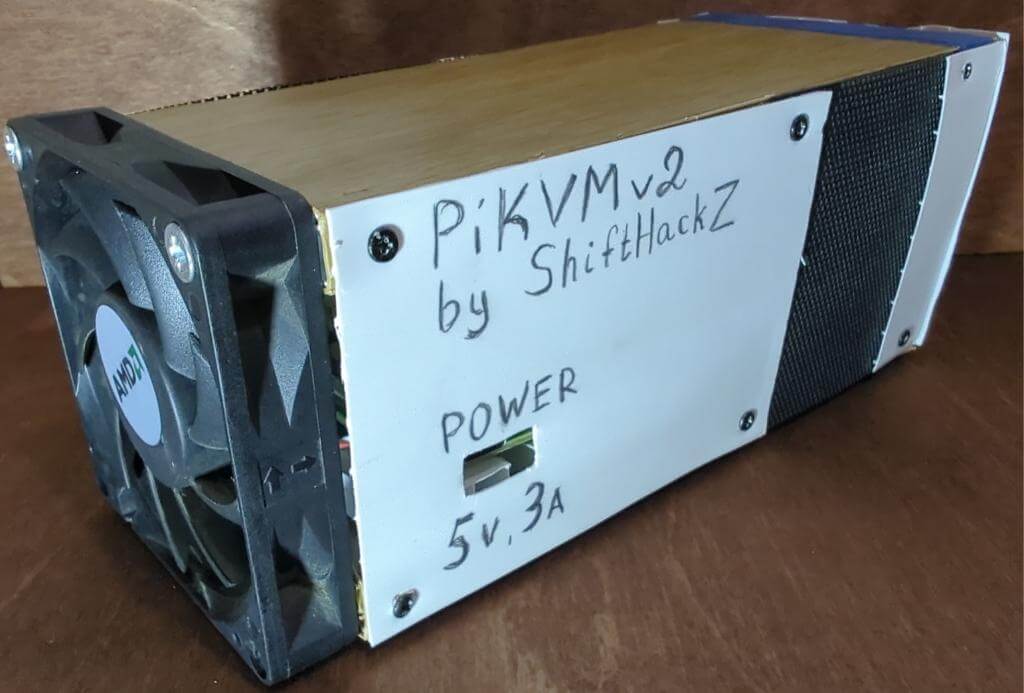
In the absence of a 3D printer to produce a factory-style case, a possible solution is to manually create a shell from available materials, such as old plastic panels. This approach allows you to achieve functionality even without specialized equipment.
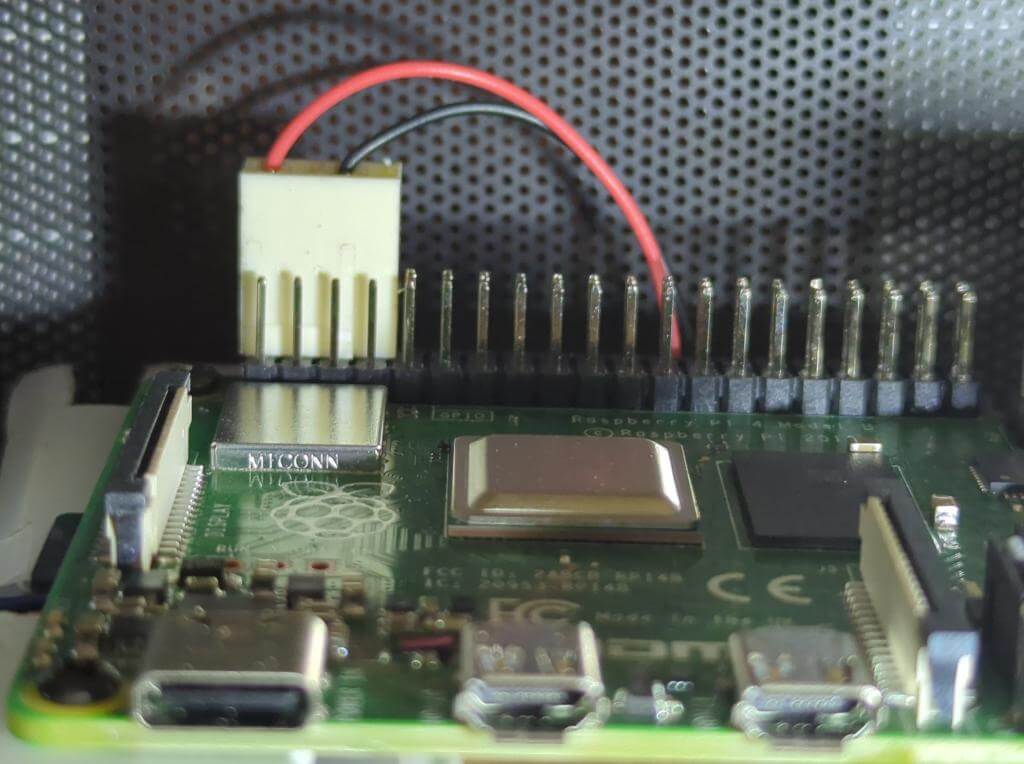
The fan is connected to the corresponding GPIO pins on the board. For power, pin #2 is usually used for +5V (red wire) and pin #6 for ground (black wire).
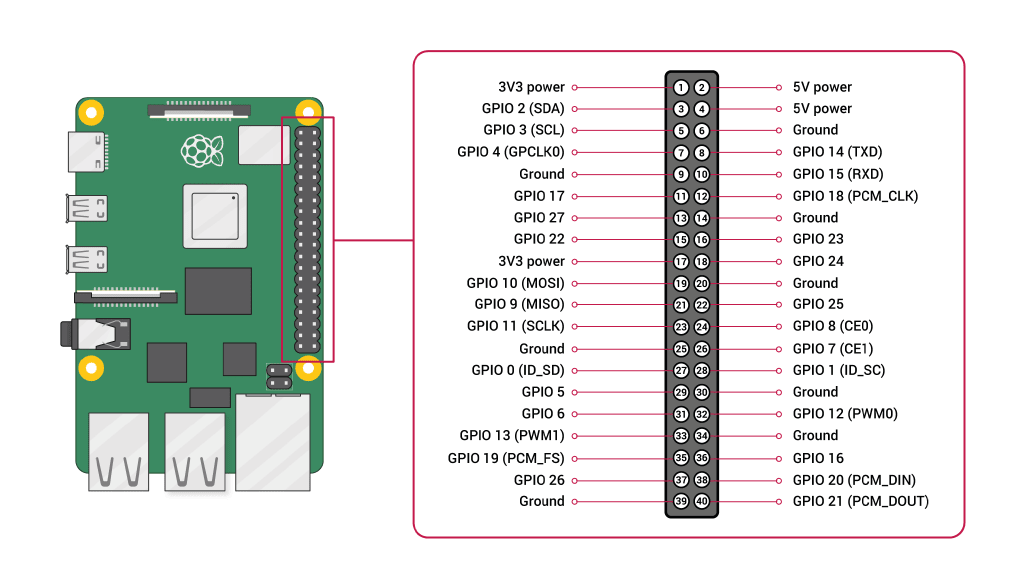
I used the stock fan connector, but I had to place the pins in it correctly.
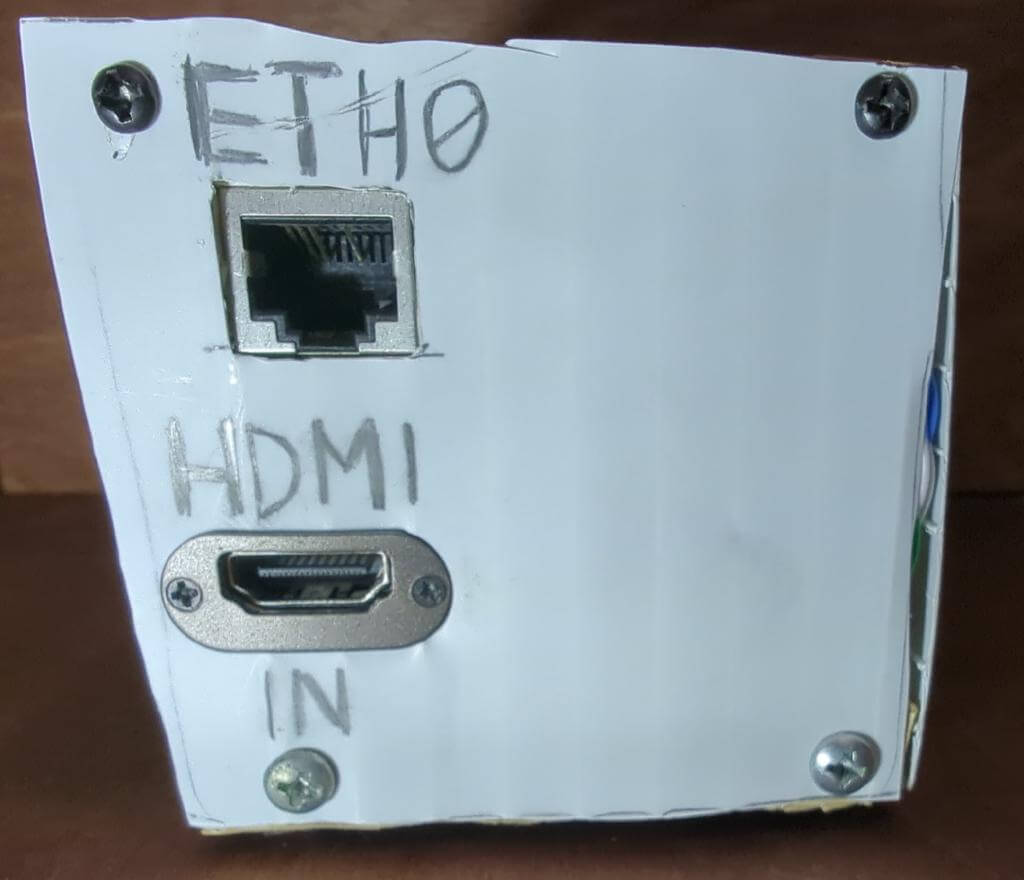
The side panel features an extended RJ-45 Ethernet connector, which connects internally to the Raspberry Pi’s standard port. This approach is chosen for convenience, as a wired connection provides a more stable stream with low latency compared to Wi-Fi. An extension cable was used to implement it, and the connector is installed next to the HDMI input.
In order for the Raspberry Pi to work as a hardware KVM device, it is necessary to burn the PiKVM OS image to an SD card.
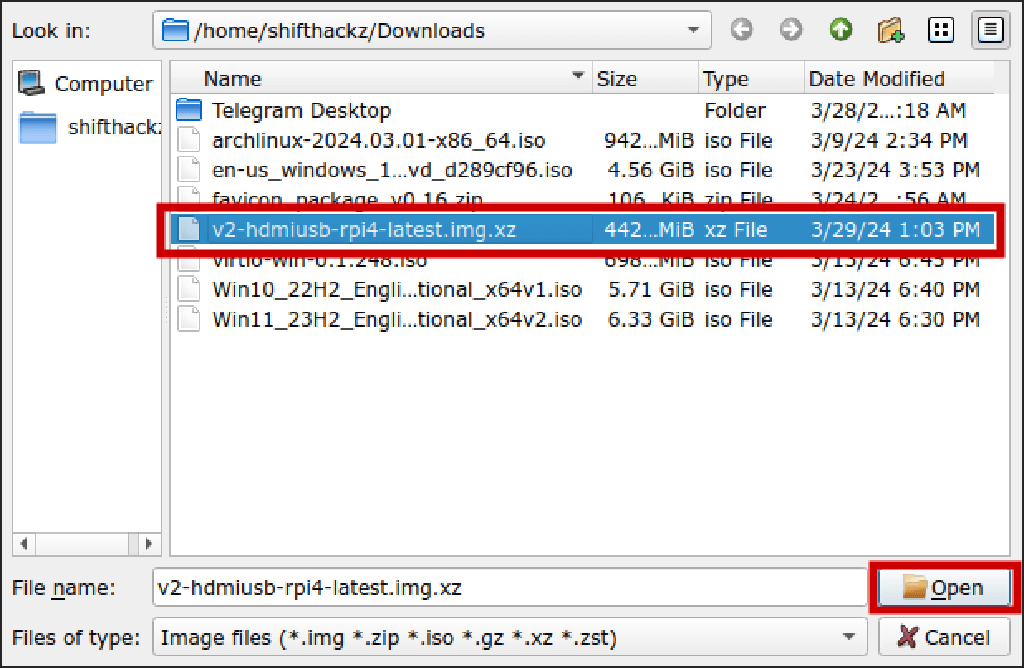
A suitable PiKVM OS image for a specific Raspberry Pi model can be found on the PiKVM Flashing OS page. For this, the image “DIY PiKVM V2 Platform, Raspberry Pi 4 for USB Dongle” was downloaded, as it matches my hardware (Raspberry Pi 4 Model B and USB HDMI capture card). For 2025, the serial line is focused on the PiKVM V4 (Mini/Plus); the DIY version of V2 remains supported. For a new build, refer to the current images and instructions on the official website.
To burn the image to an SD card, the Raspberry Pi Imager program is used. Since we will use Arch Linux, I installed it from the official rpi-imager package:
sudo pacman -S rpi-imager
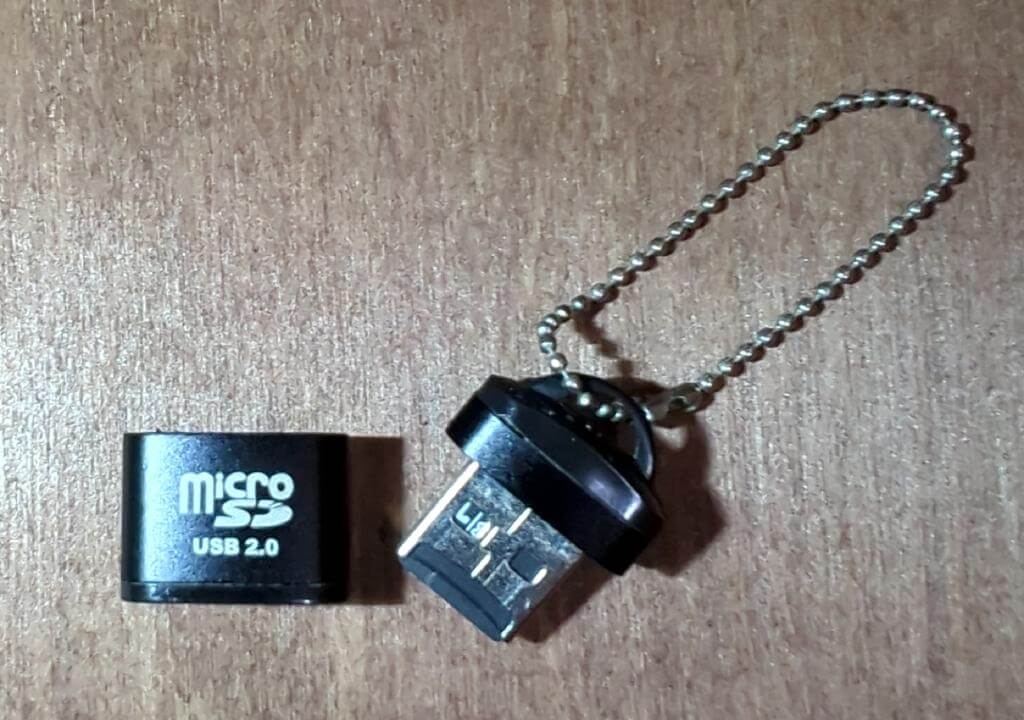
Next, you need to connect the SD card to your computer. If your device does not have a built-in card reader, you can use a microSD → USB-A adapter.
To burn a downloaded image, follow these steps:
1. Open Raspberry Pi Imager.
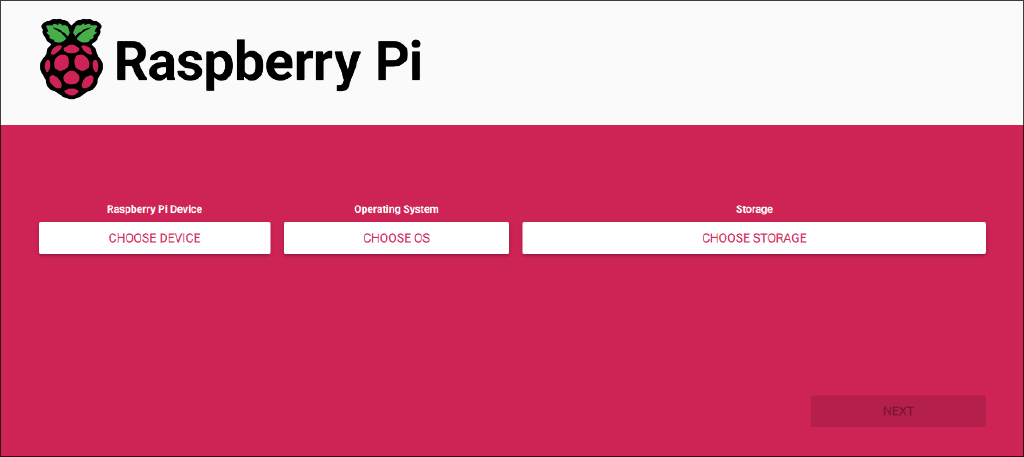
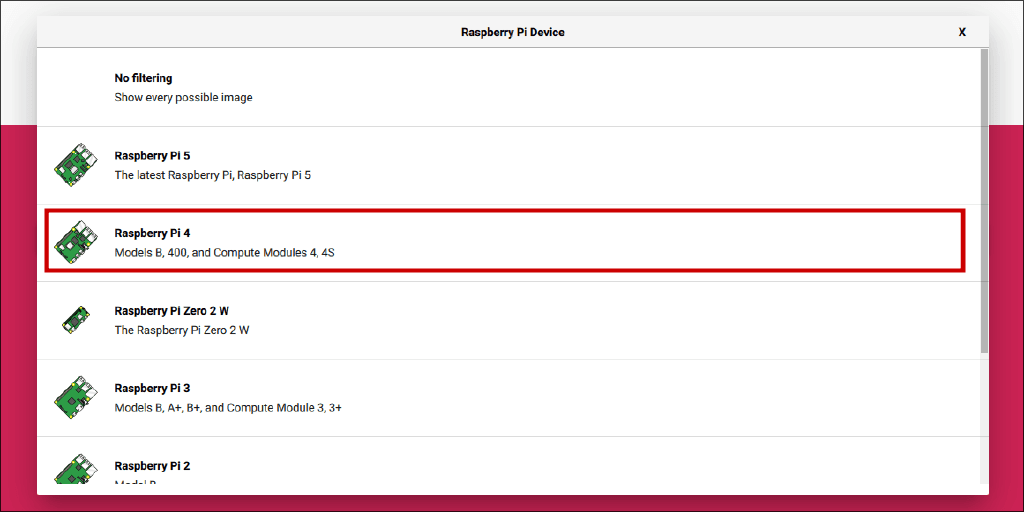
2. Click “Choose device” and select the Raspberry Pi board model. For example, Raspberry Pi 4 is suitable for this project.
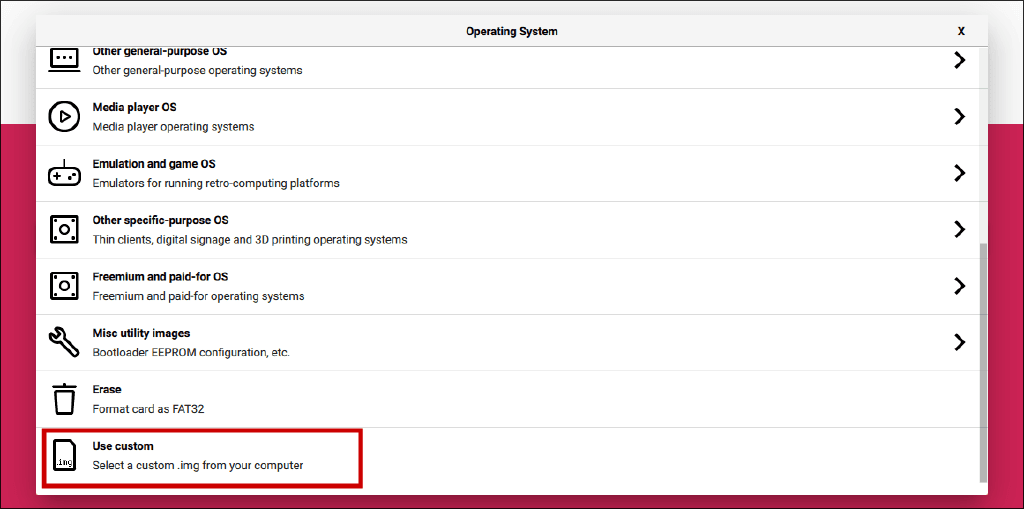
3. Click “Choose OS”, scroll down and select the “Use custom image” option. In the file dialog, specify the downloaded PiKVM image.
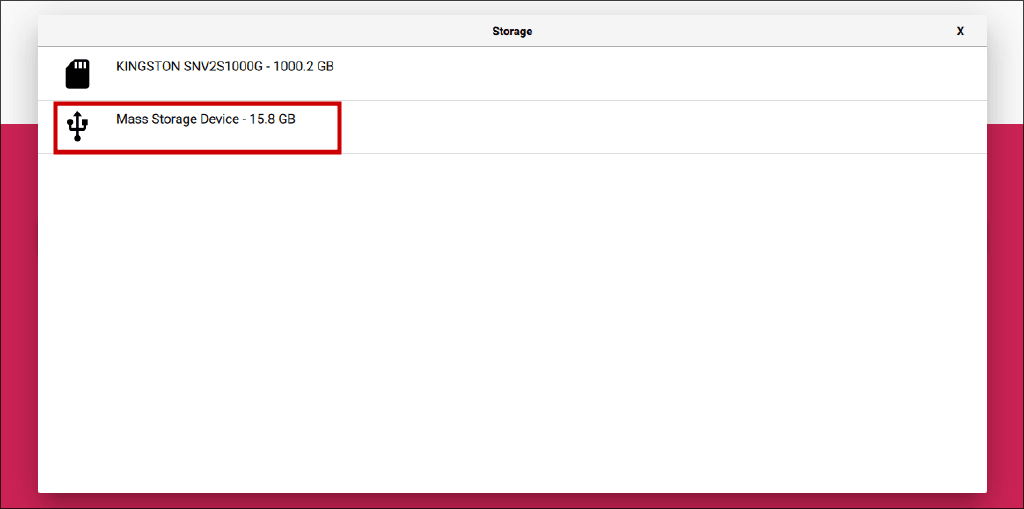
4. Click “Choose storage” and select the SD card. Be careful: RPI Imager will format the selected media.
5. Make sure all fields are filled in correctly, then click “next”.

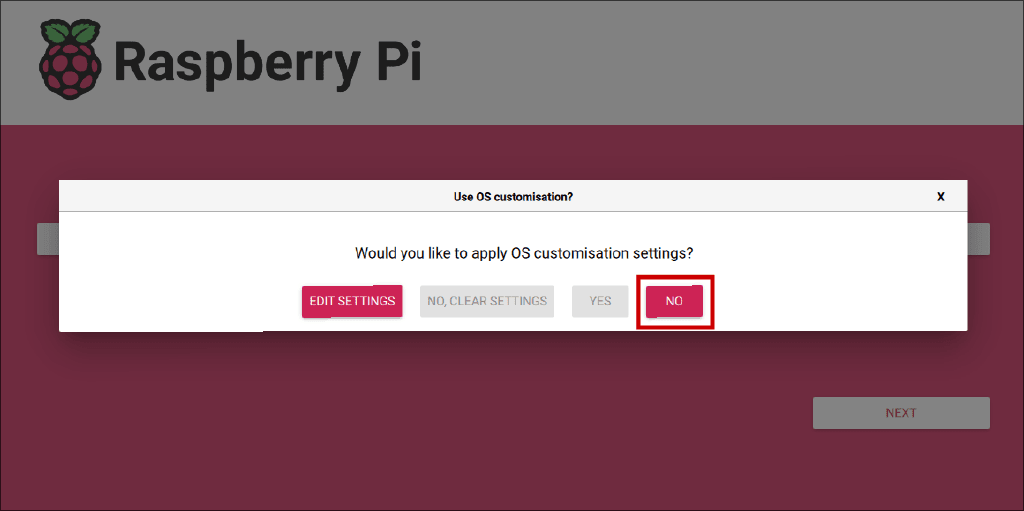
6. A window will appear asking you to configure the image parameters (OS customization). If you want, you can immediately enable SSH and set the hostname. If you do not need additional parameters, click “NO”.
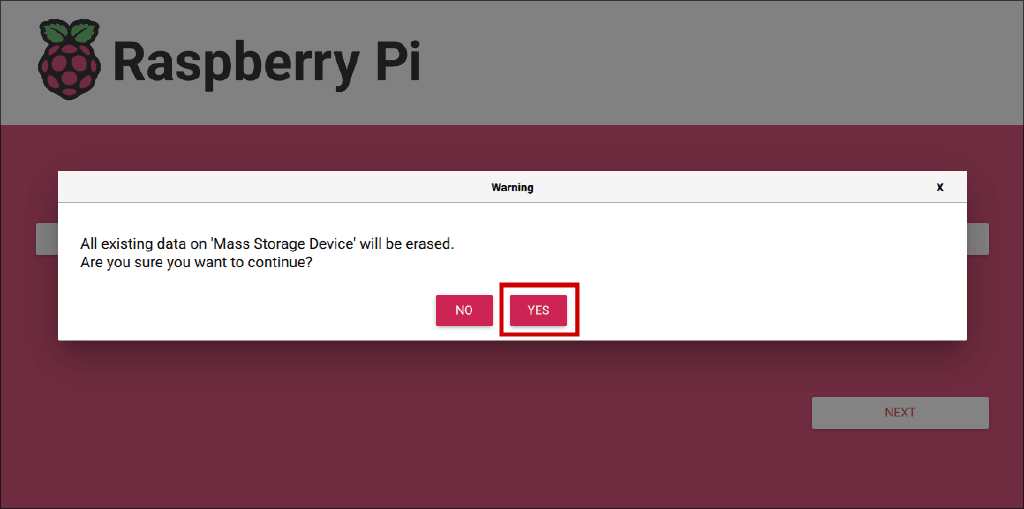
7. Confirm the burn process and wait for the RPI Imager to finish burning and validating the image.
It is best to use an Ethernet RJ-45 Internet connection, as it is more reliable and provides higher quality video streaming with less latency compared to Wi-Fi. However, if you plan to use the device as a portable device and connect it to different PCs or laptops, the possibility of an Ethernet connection may not be available. In such a situation, it is advisable to configure the Wi-Fi settings for the Mobile Hotspot on your smartphone in advance. This allows you to automatically use the built-in Wi-Fi adapter and connect to your smartphone when you boot the Raspberry Pi without an Ethernet cable.
1. Connect the SD card to your computer.
2. You will see that the SD card has several partitions. You need to open the first partition called “PIBOOT” (it is detected as a separate disk when the card is connected).
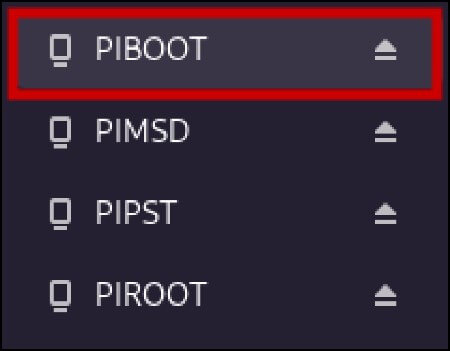
3. Find the pikvm.txt file in the root folder of the “PIBOOT” partition. If the file does not exist, create it manually; if the file already exists, do not delete anything: you need to add 2 parameters at the end.
4. Add 2 parameters to the end of the file. Replace the values in the example with your Wi-Fi credentials.
WIFI_ESSID=my_wifi_network
WIFI_PASSWD=the_most_secure_password_ever
5. Save the file. Then properly unmount the partition and remove the SD card. Insert the SD card into the board.
This is an important step: during the first run, PiKVM OS initializes the necessary settings and generates unique SSH keys and security certificates.
First Run Steps:
Insert the SD card with the PiKVM OS into the Raspberry Pi board.
Connect the Raspberry Pi board to the router using an RJ-45 Ethernet cable. During the first start-up, you can use both Ethernet and the pre-configured Wi-Fi. The main thing is to make sure that the selected network is available, otherwise the device will not connect.
Boot the Raspberry Pi board. To do this, connect a 5V3A power supply to the USB-C port.
4. Wait for the PiKVM OS to complete the initial initialization. This process can take up to 10 minutes.
IMPORTANT: Do not power down the Raspberry Pi board until the initial initialization is complete.
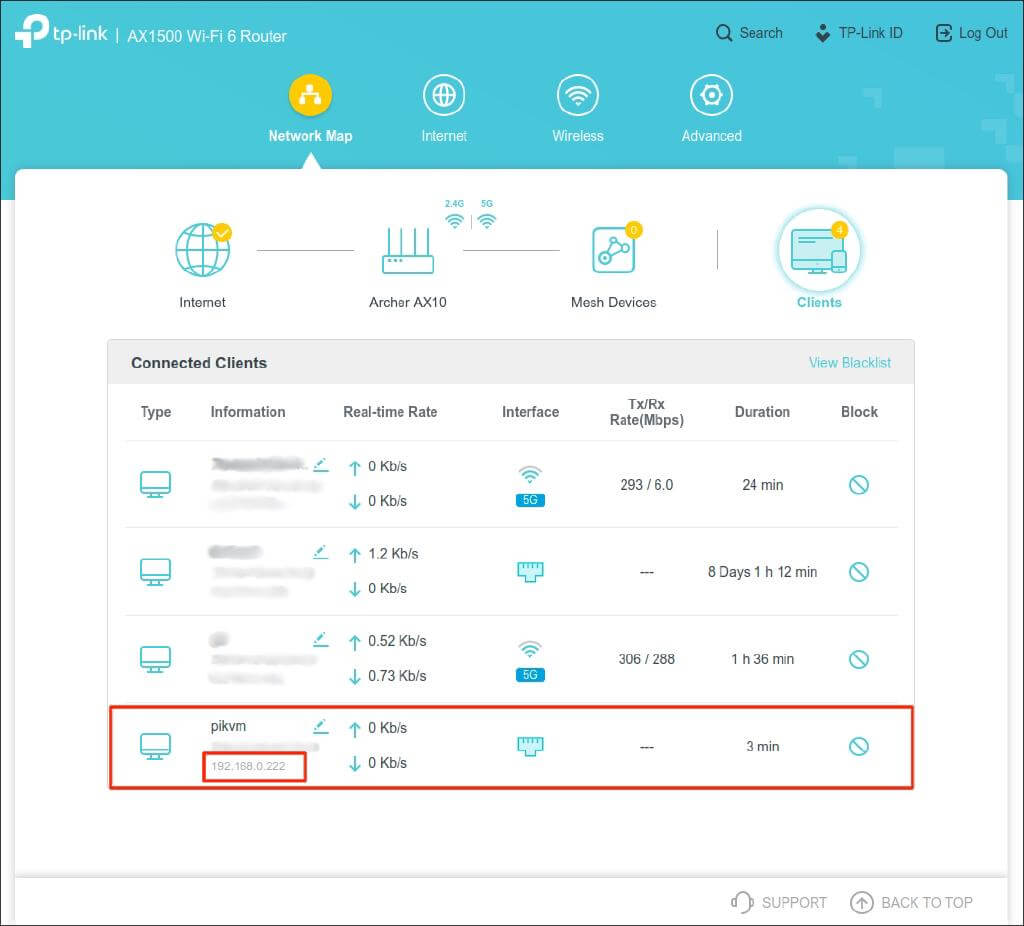
5. After the first boot, the PiKVM device will connect to the network and obtain a local IP address on your router’s local area network (LAN). To find out what IP address the PiKVM has received, go to the router’s administration panel and view the list of connected devices.
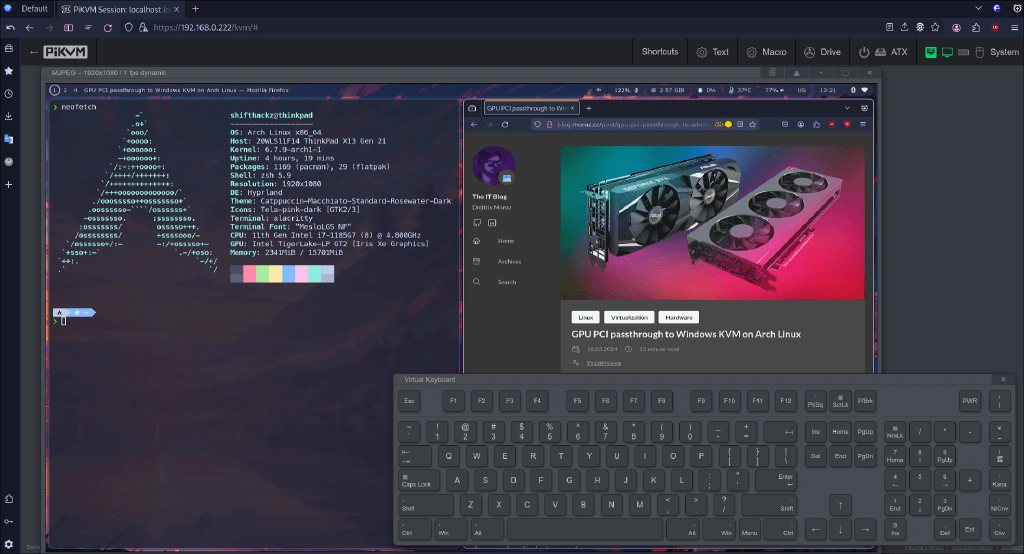
In the example above, the board has received an IP address of 192.168.0.222. In real-world conditions, the IP address may vary depending on the specific network.
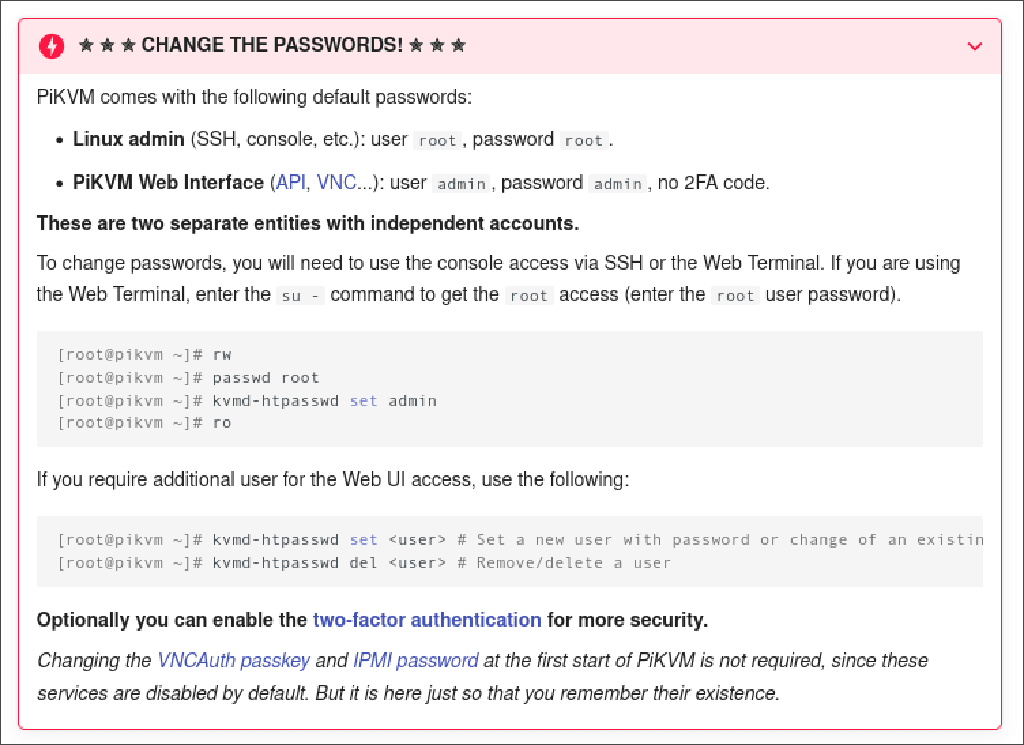
6. Next, you will need a computer or smartphone connected to the same local network as PiKVM. Open a browser and go to the address. By default, two accounts are available: for the web interface – admin/admin, for SSH/console – root/root. Change both passwords immediately; see the documentation for your PiKVM OS image. https://192.168.0.222
7. Change the default passwords to ensure device security. For a detailed description of this process, see the PiKVM documentation.
PiKVM OS is an open source operating system based on Arch Linux. It is important to update PiKVM OS regularly to receive security patches and new features. As with any Linux system, updates are done via the terminal – you can use either an ssh session or a terminal in the PiKVM web interface.
To update the OS, do the following:
Open a terminal in the PiKVM web interface. Or connect via ssh.
Log in as root (or use sudo if root is disabled).
Run rw, then pikvm-update (if missing – pacman -S pikvm-os-updater, then pikvm-update), when finished – ro; wait for the process to finish. Make sure that the PiKVM device does not lose power or internet connection during the update.
There are borderline scenarios where there is no access to the same local network as the PiKVM board — for example, the device is connected to a home server and there is no physical access to it, but remote access is needed. Given the portability of PiKVM, a possible solution is to use it by other users: just connect the device to your PC and home network, after which it becomes possible to organize a remote connection to this PC, in particular for performing tasks such as reinstalling the operating system.
Tailscale VPN – a free tool (for personal use) that solves the tasks described above. It helps you access PiKVM from the Internet.
Steps to set it up:
Open a terminal in the PiKVM web interface. Or connect via ssh.
Install the PiKVM build and start the service:
su -
rw
pacman -S tailscale-pikvm
systemctl enable --now tailscaled
tailscale up (при необходимости: tailscale up --authkey=…)
ro
3. A link will appear in the terminal; copy it and open it in your browser. Then log in to Tailscale VPN or sign up – and your PiKVM device will be tied to the account.
4. Install the Tailscale client on the system you plan to connect to (not on the PC you will control via PiKVM), and connect to the VPN. To do this, follow these instructions.
5. After configuring the client on the system, open the Tailscale Admin Page. If everything is done correctly, you will see your PiKVM device and the system from which the PiKVM is remotely connected.
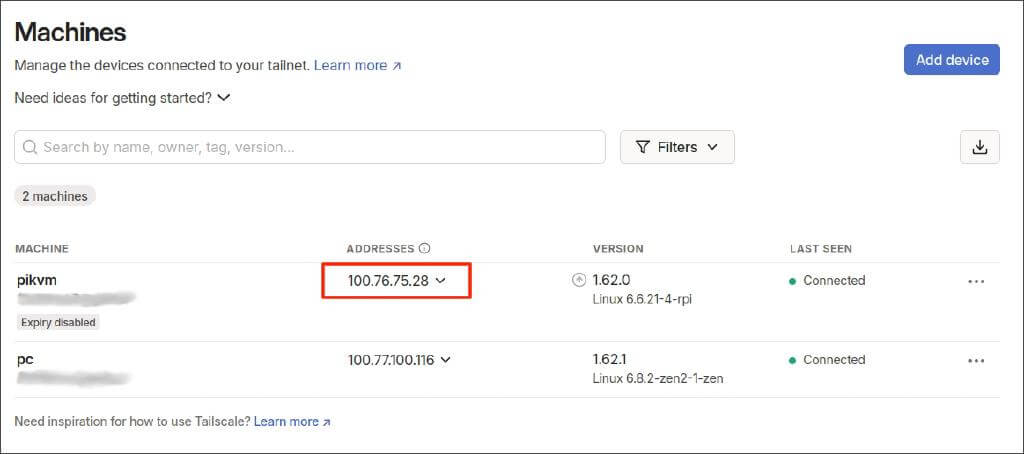
The screenshot above highlights an example of the IP address that should be used in a browser to remotely connect to PiKVM.
6. For persistent access, use an auth-key with the desired expiration date (or no expiration if allowed by security policy) and configure auto-key rotation in the Tailscale Admin Console.
Once setup is complete, the PiKVM device automatically connects to the VPN network at each boot. This allows remote access from anywhere as long as the laptop is connected to the same VPN network, providing full control of the PiKVM device.
This is a guide to using the PiKVM board as a portable device. To set up the connection you will need: PiKVM device, machine you want to control, custom power cable and adapter, RJ-45 Ethernet cable, HDMI cable.
1. Take an RJ-45 Ethernet cable and connect it to the PiKVM device and to your Wi-Fi router.
2. Connect the HDMI cable: one end to the HDMI input of the PiKVM device (via the capture card), the other to the HDMI output of the target machine.
3. Take a custom power cable and connect:
USB-C connector – to the PiKVM device.
Connect the USB-A connector labeled “PC/Laptop” to the target machine. This connection emulates a keyboard, mouse, and other USB devices, and can also be used for features like virtual booting from an ISO.
USB-A connector labeled “Power” – to the power adapter.
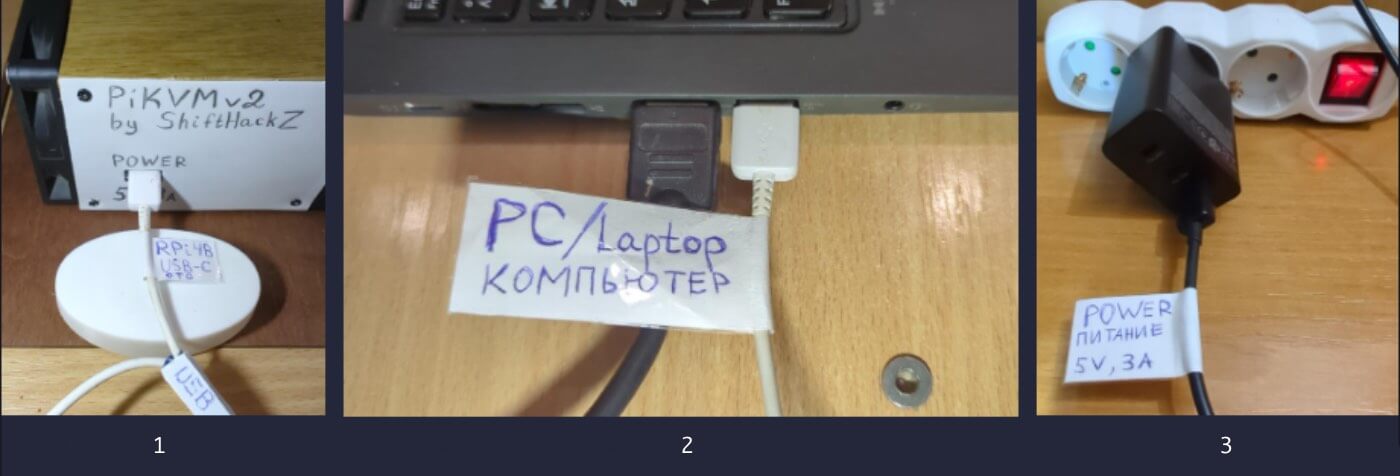
4. Plug the power adapter into the wall outlet. The PiKVM should boot up and connect to the network.
5. Turn on the machine you want to control.
After that, you will be able to connect to the PiKVM device and control your machine.
So, we managed to assemble a portable KVM over IP device that has useful features:
The device supports both Ethernet and Wi-Fi. For stable operation with low latency, a wired connection is recommended.
The device is fully remotely controlled via VPN.
The device is assembled in a unique homemade case and uses active cooling to prevent overheating, so it can operate 24/7 with sufficient cooling and stable power.