07.09.2023
3 min
1950

Reinstalling the Windows operating system is an effective method for solving problems related to slow performance, viruses or system crashes. This article provides a step-by-step guide for reinstallation, from preparation and backups to final setup after installation. This article will be useful for those who plan to reinstall Windows themselves to restore the system to its original state and improve the performance and stability of the computer. the computer

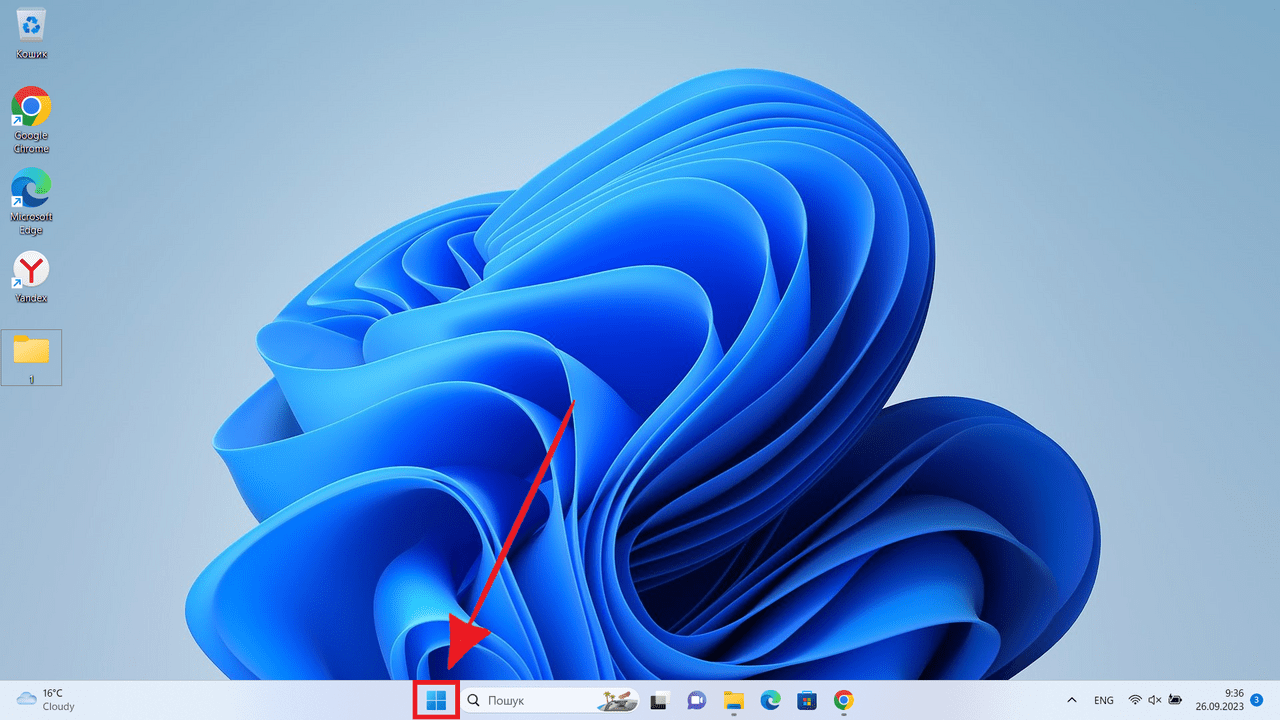
Go to the “Start Menu”

Click on the “Settings” icon
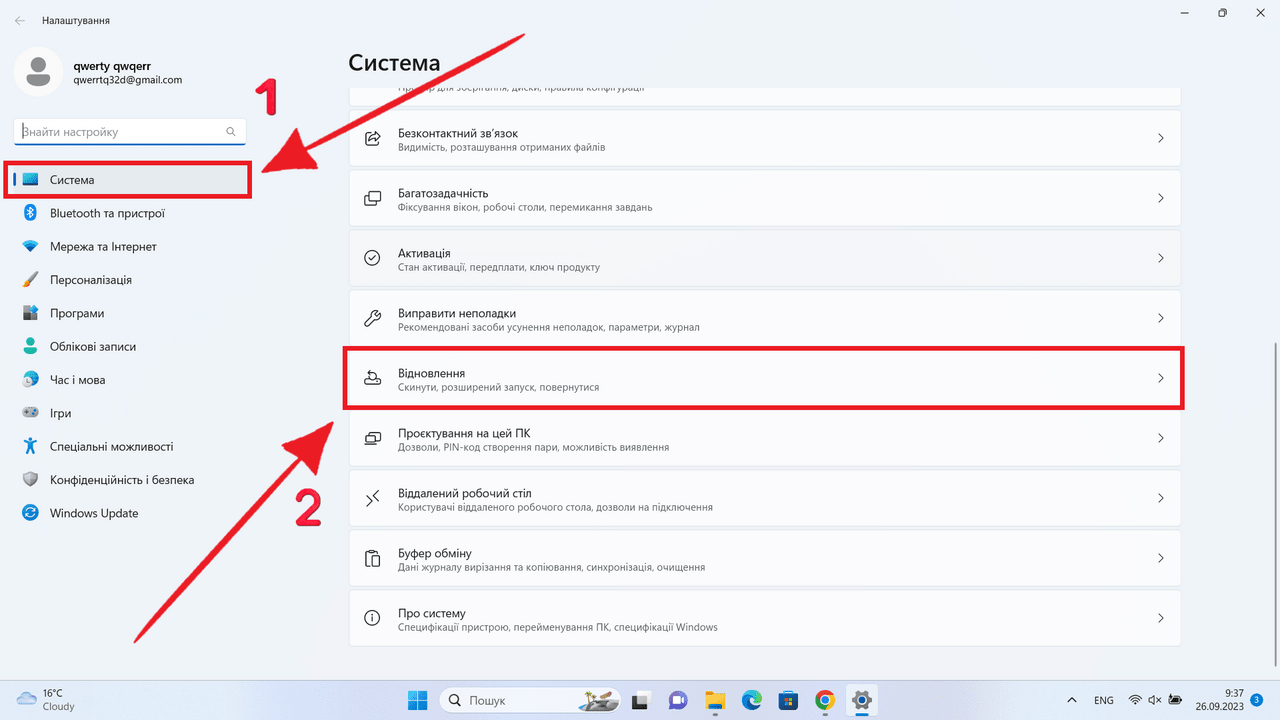
Go to the “System” section. In this section, click “Recovery”
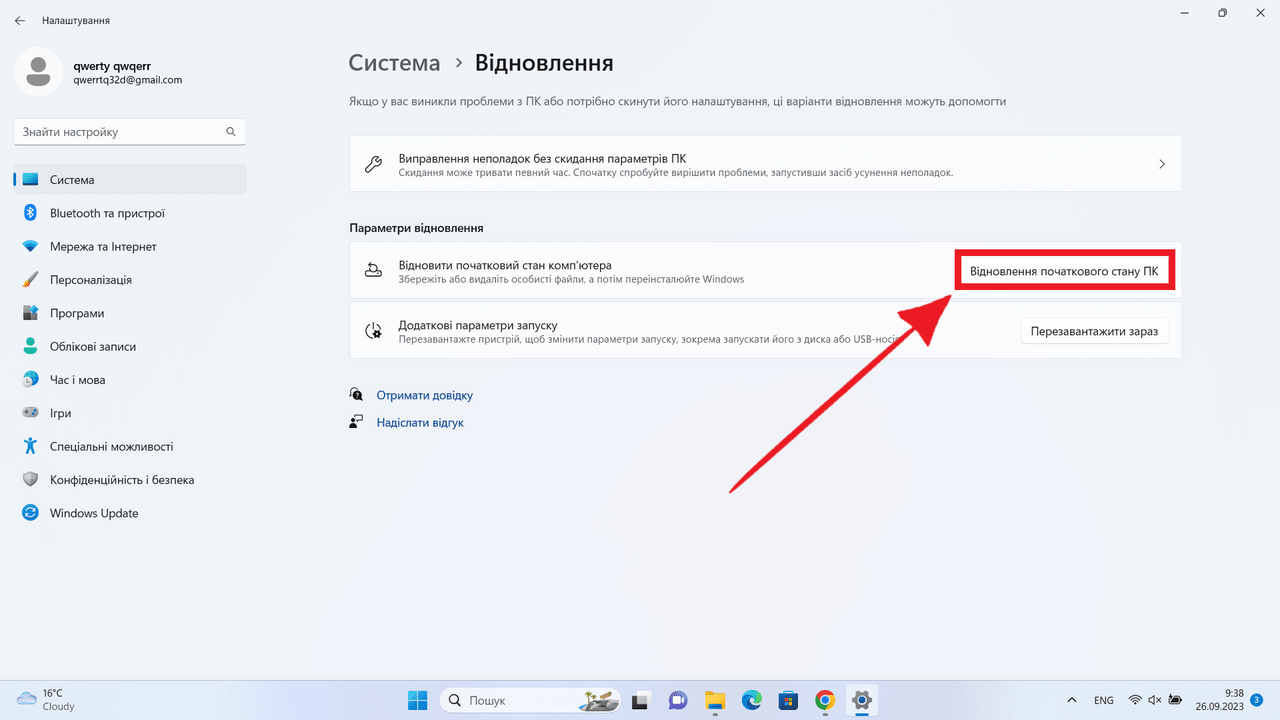
Click “Restore the initial state of the PC”
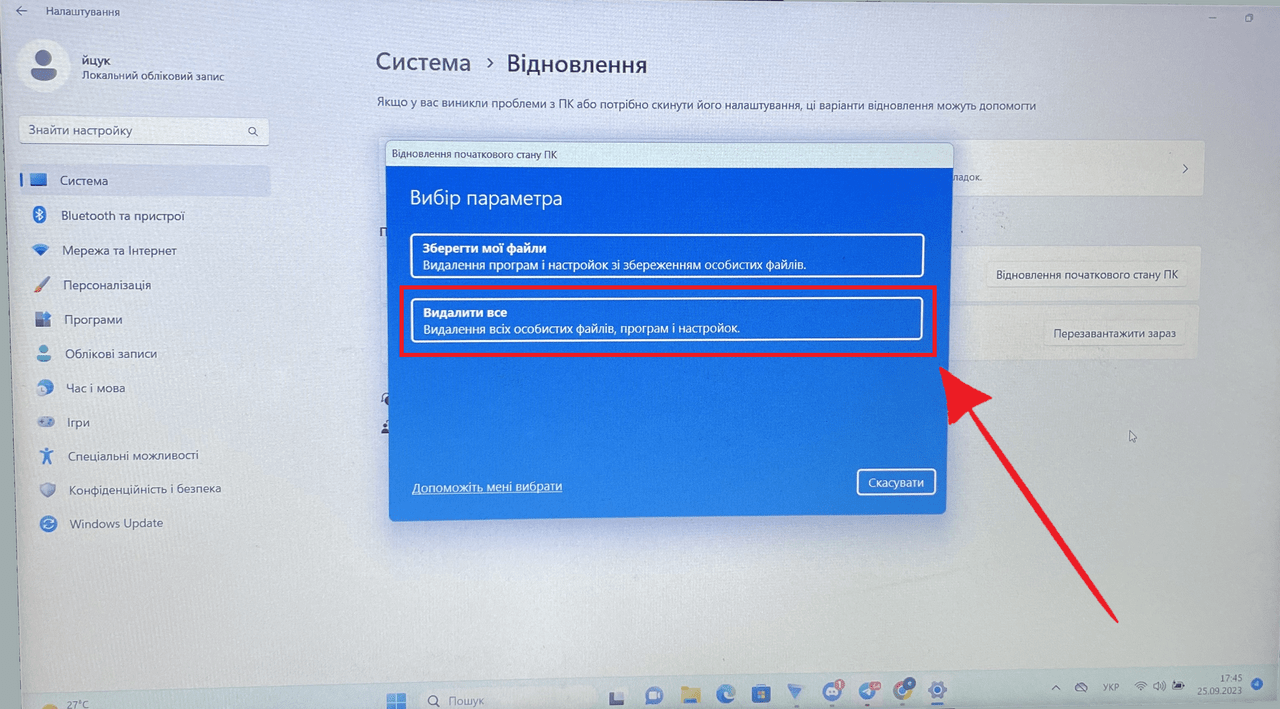
In our case, we choose to delete everything and we advise you to always choose this option, but sometimes you may need to save a number of files and then you choose another option and files. Further actions are similar
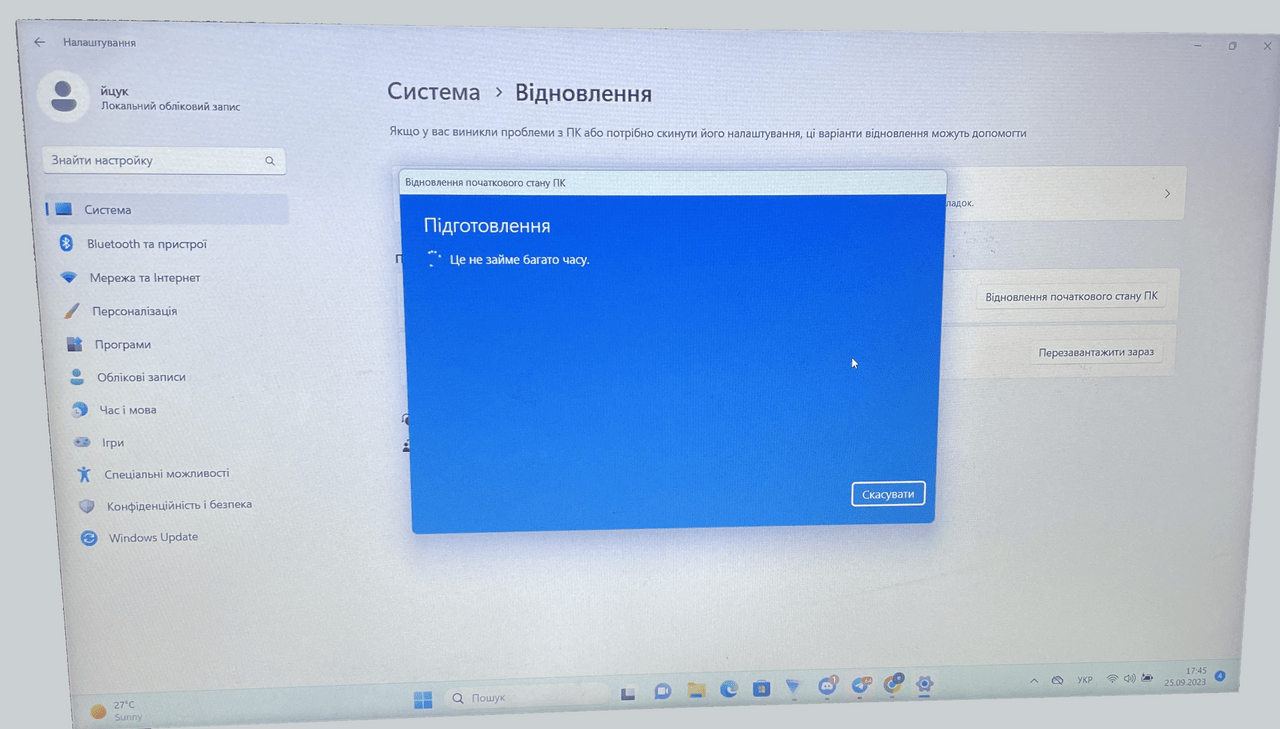
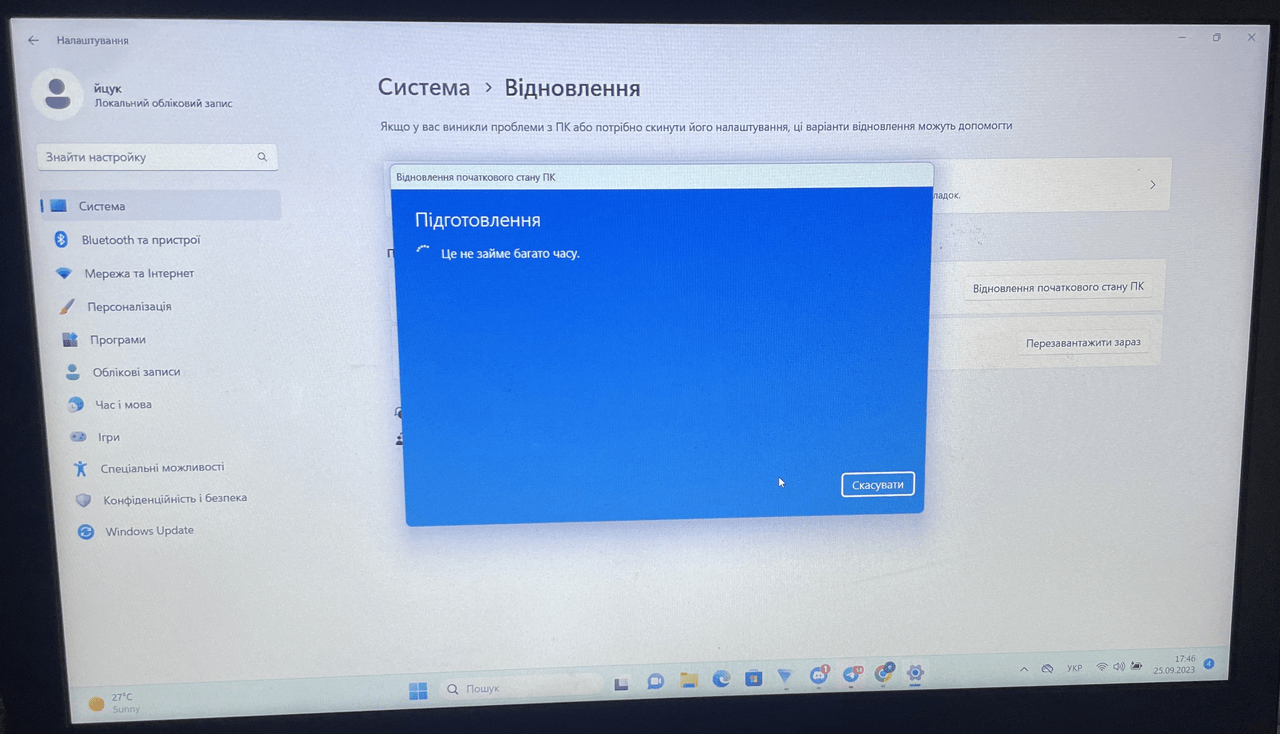
In this screenshot, we can see the preparation of our OS for removal. It will have to wait
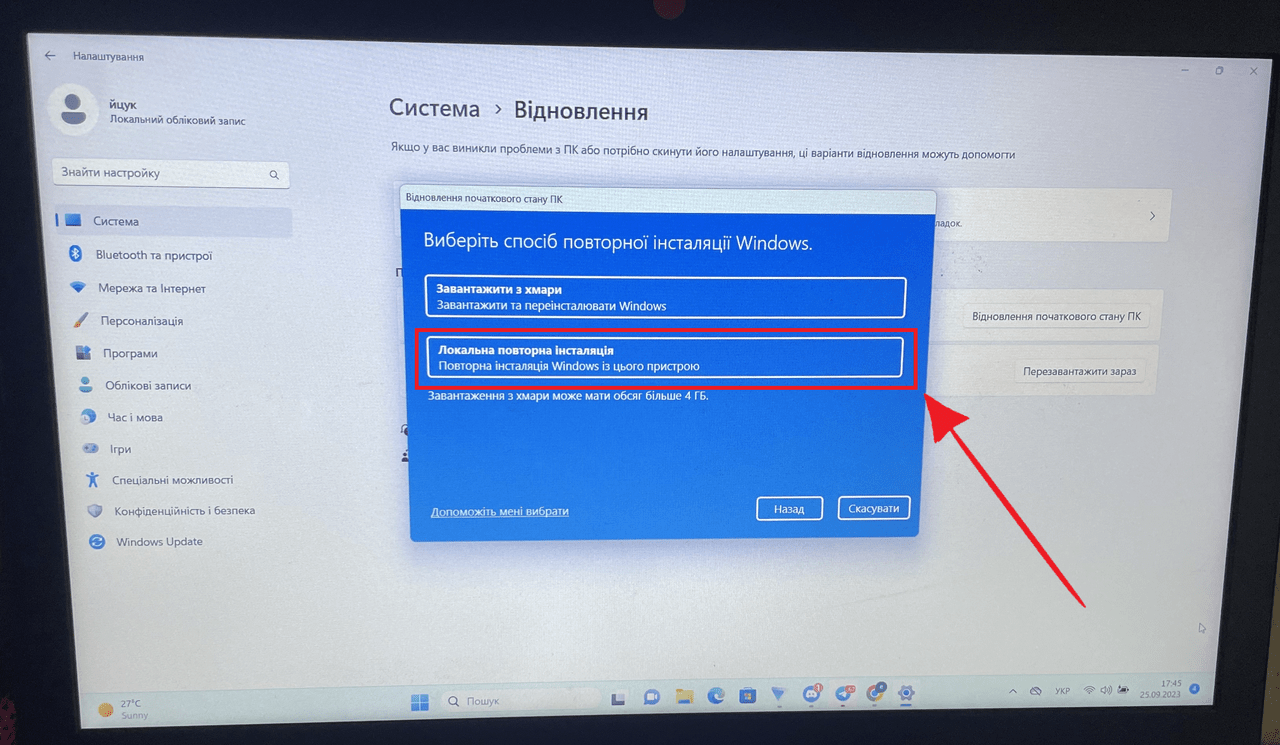
We choose the method of reinstalling Windows, as shown in the screenshot
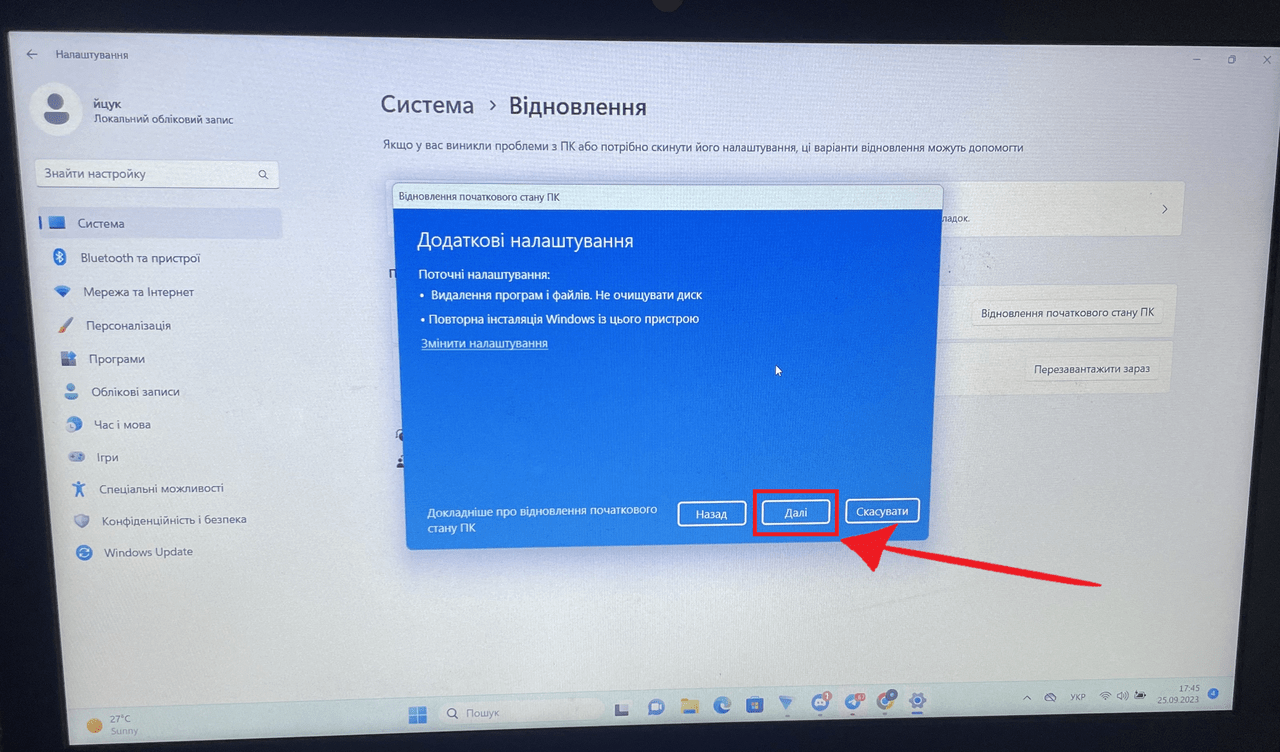
Click “Next”
Again, we are waiting for the preparation to be completed
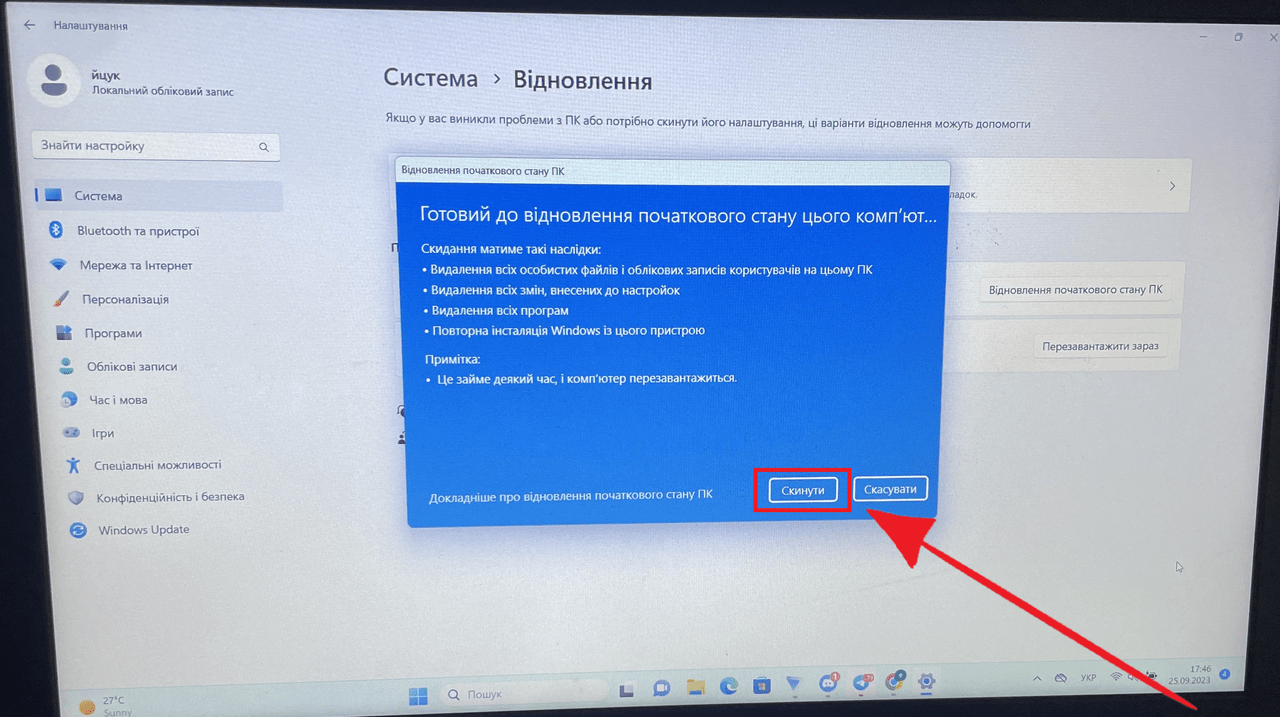
Click “Reset”
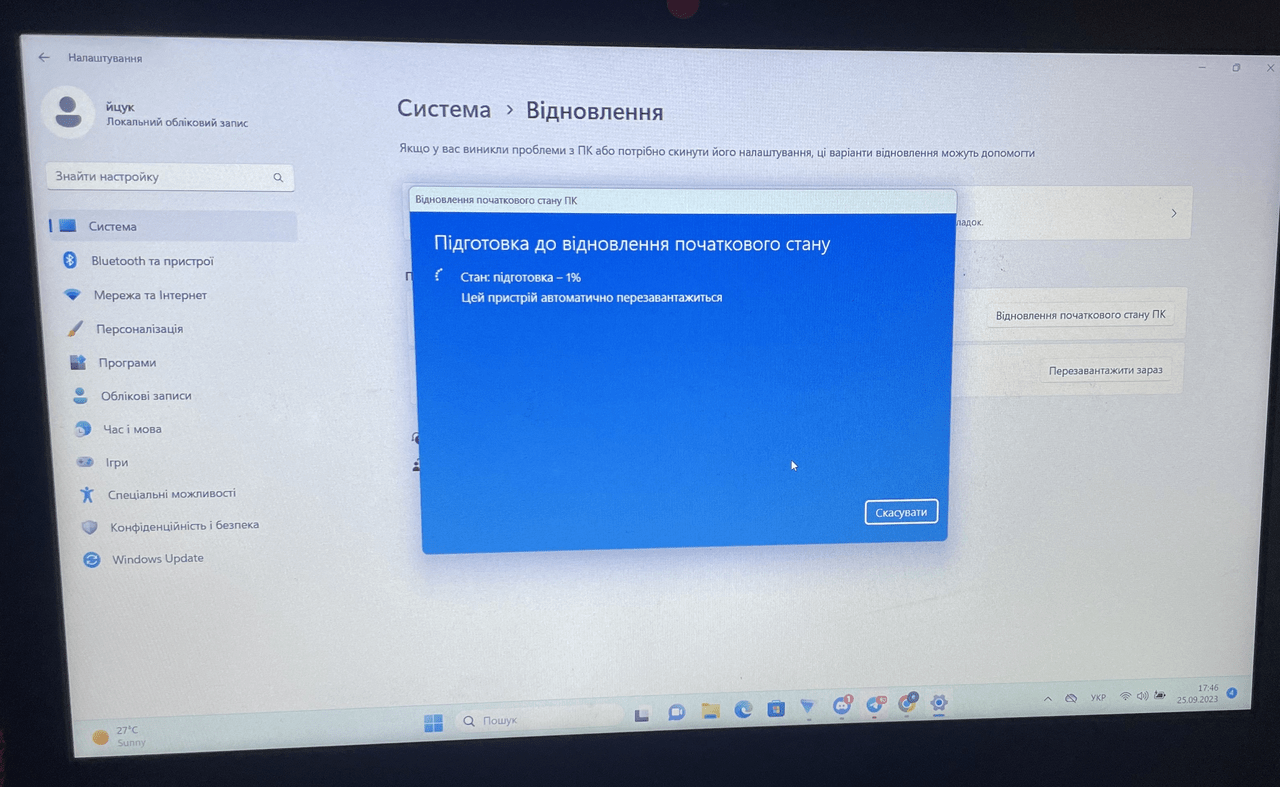
Preparation for factory reset is in progress, please wait, this device will reboot automatically after completion
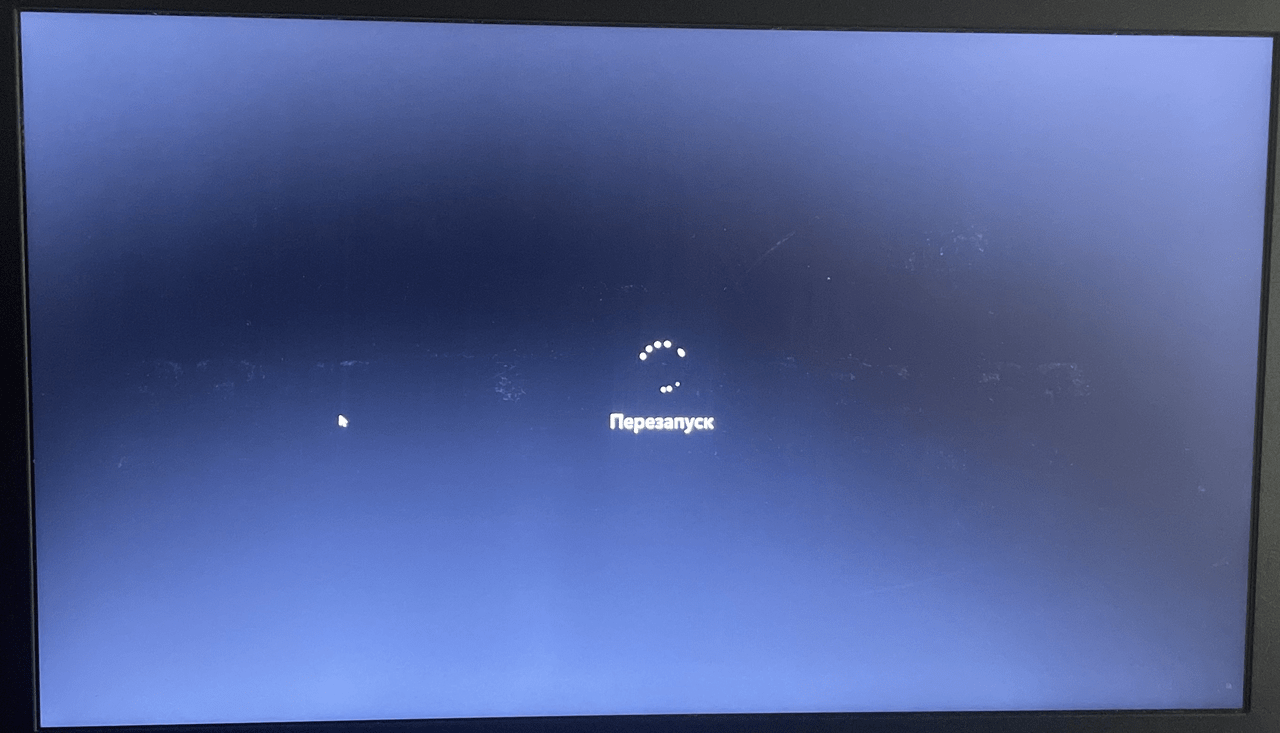
Restarting our PC is in progress

In this screenshot, we see a reset of this computer. We will have to wait a little while until the process is finished
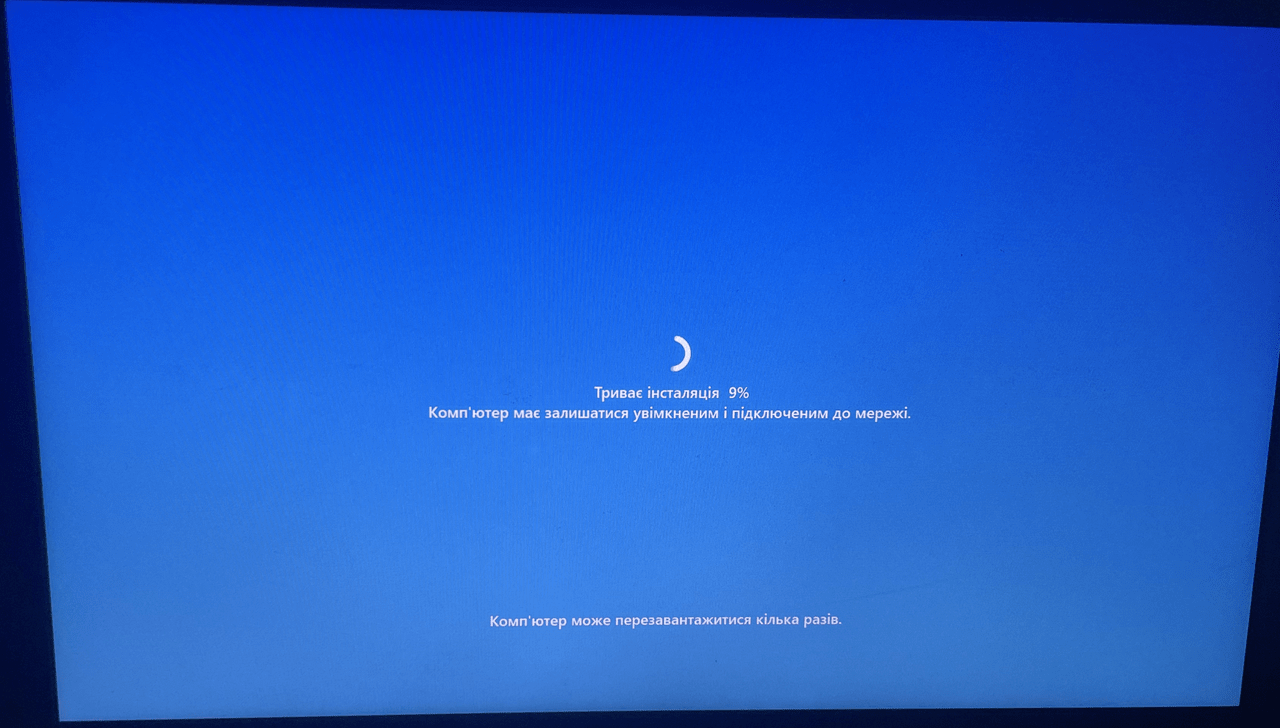
Installation is in progress. Most importantly, do not turn off your device
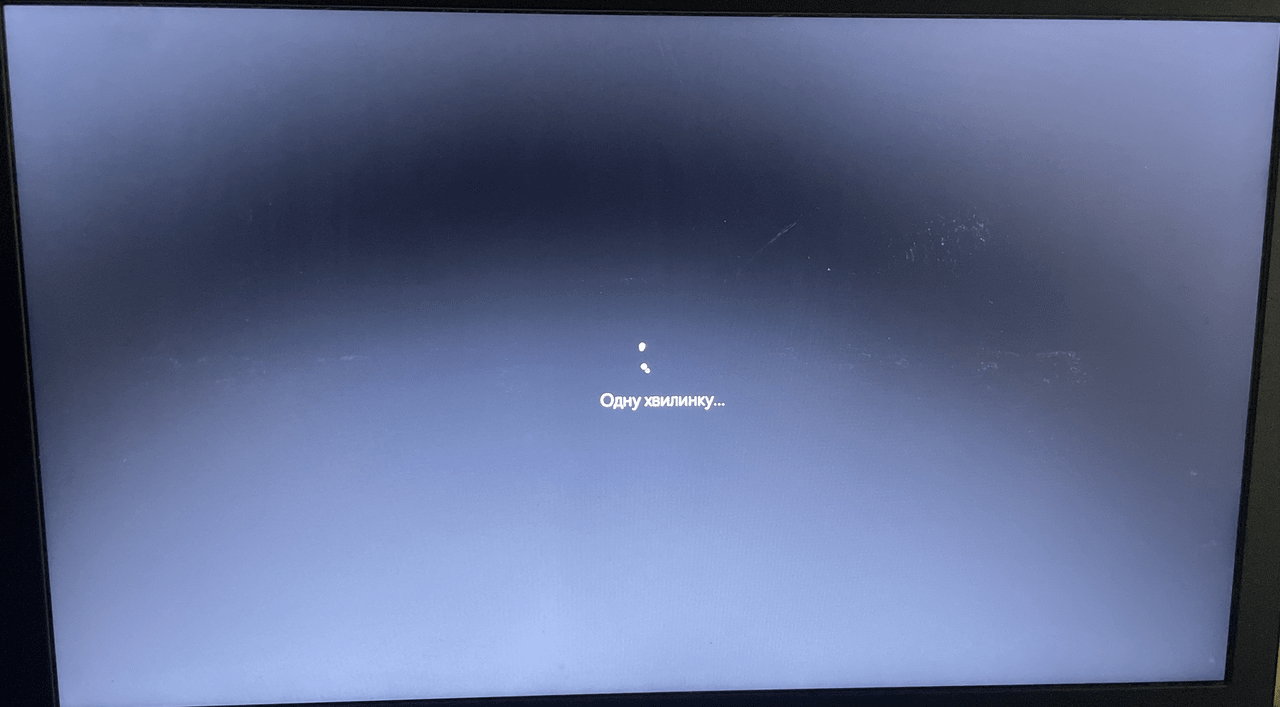
Almost everything is set, we are on the finish line
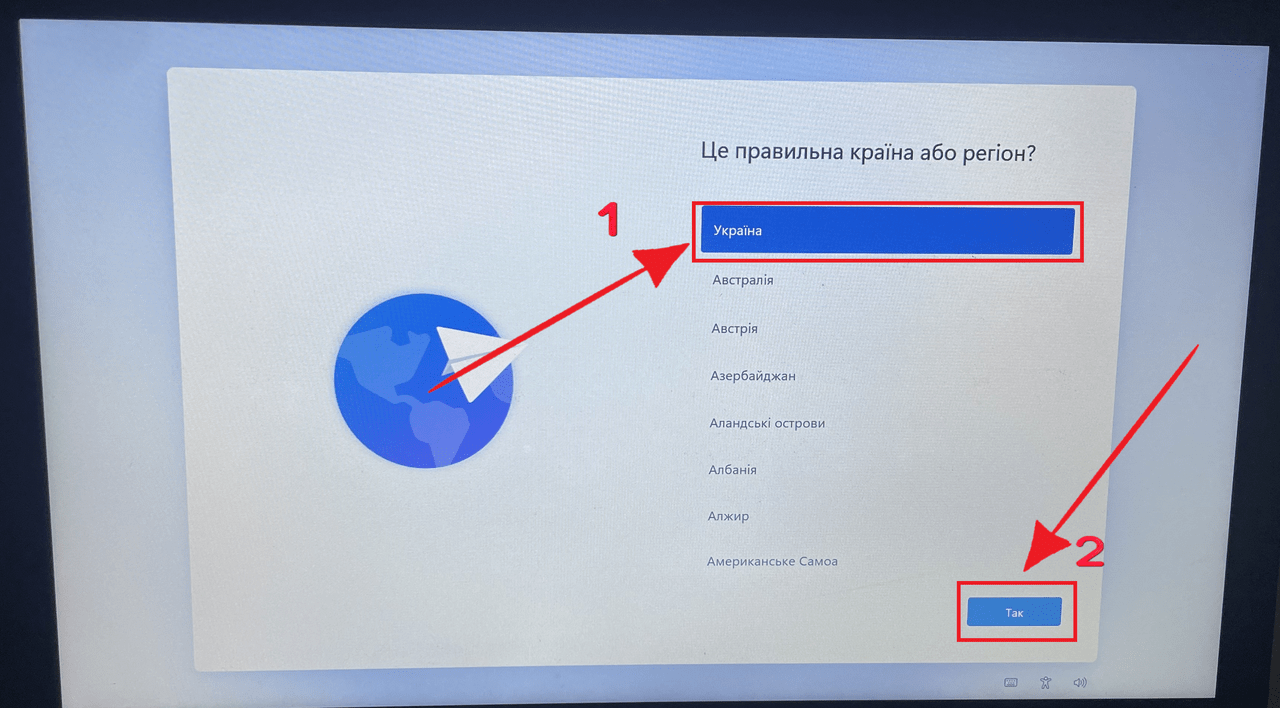
The installation is finished, select the country or region and click “Yes”
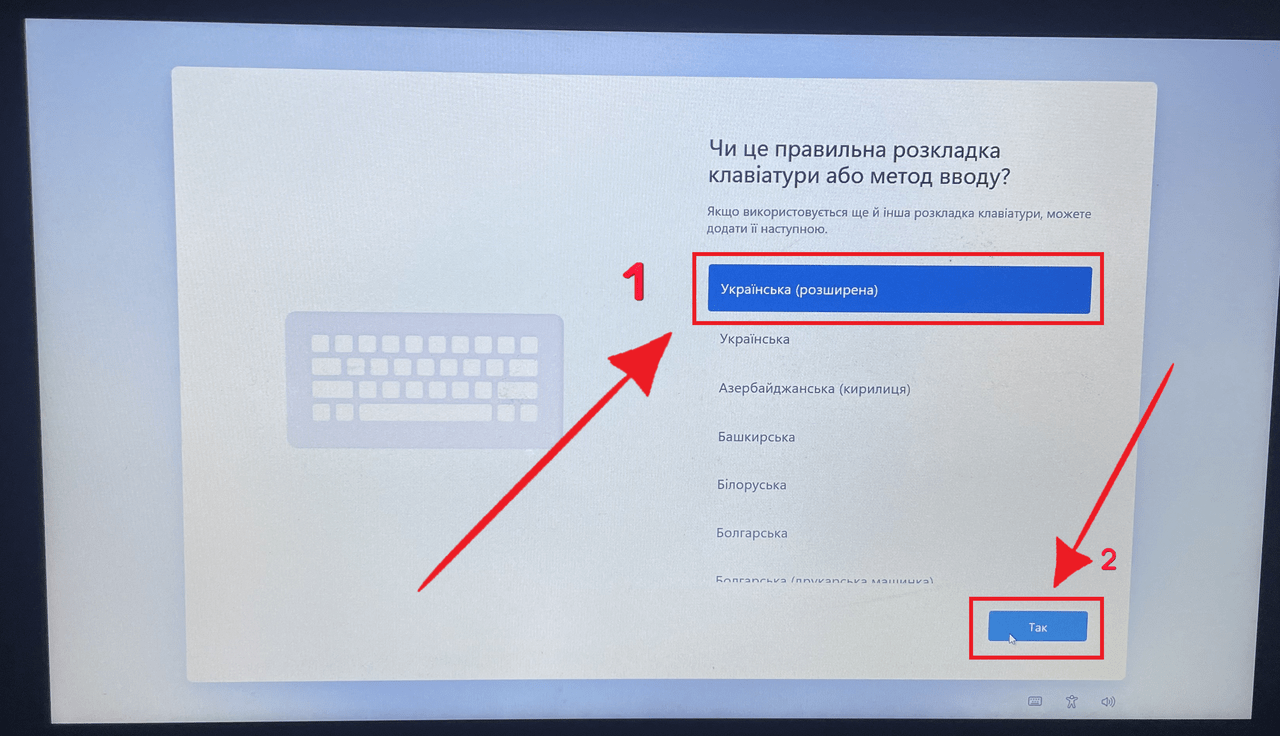
We choose the keyboard layout and move on

Click “Add layout”
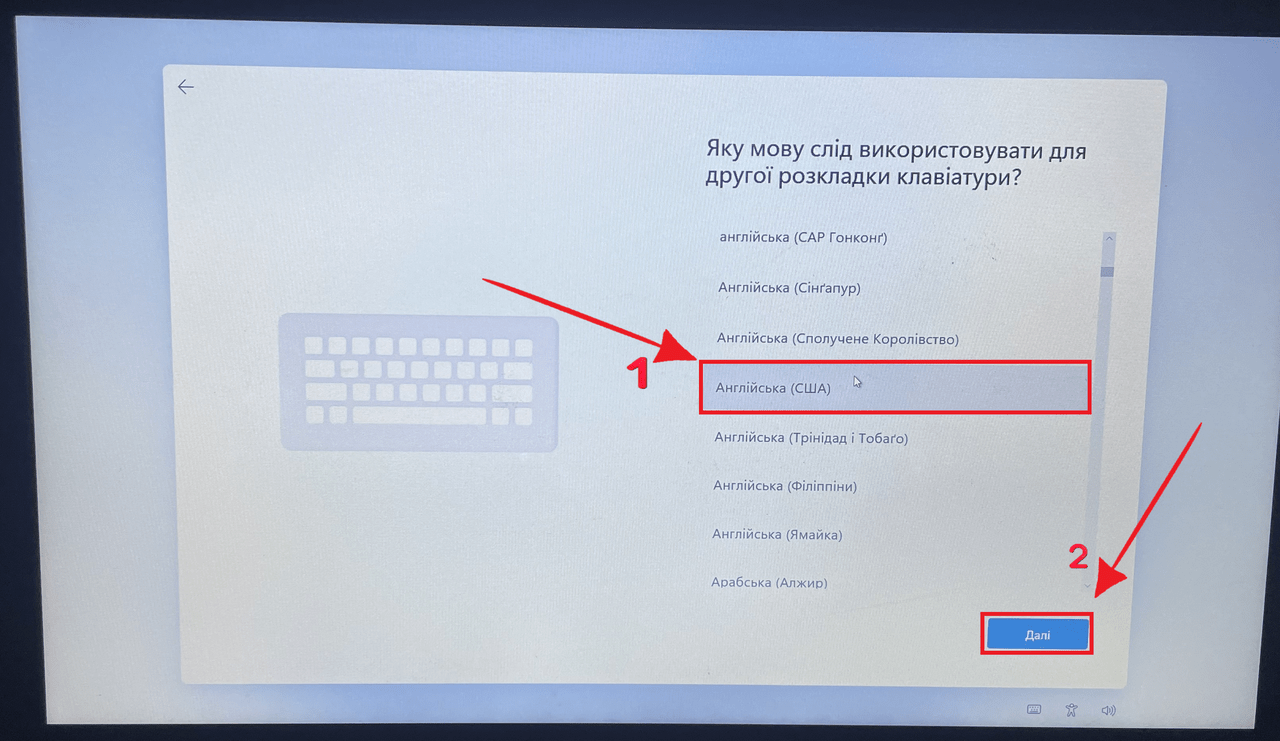
Choose the second keyboard layout and click “Next”
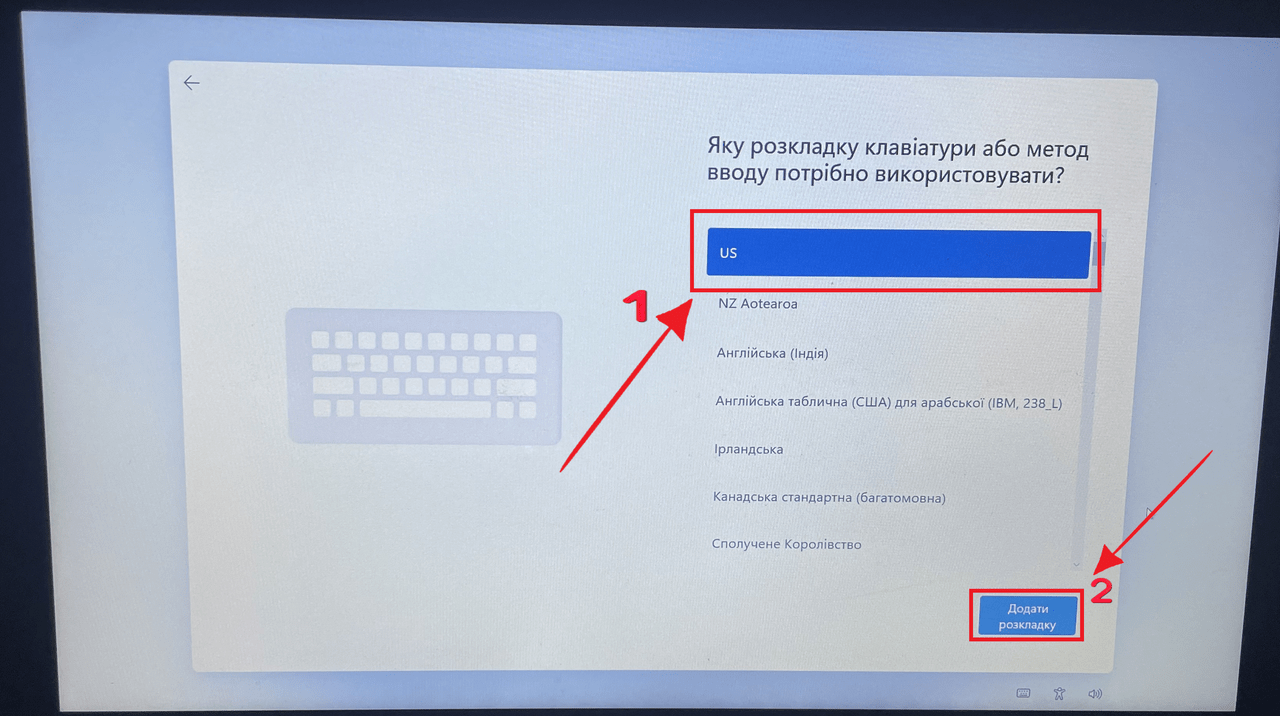
Select the US input method, then click add layout
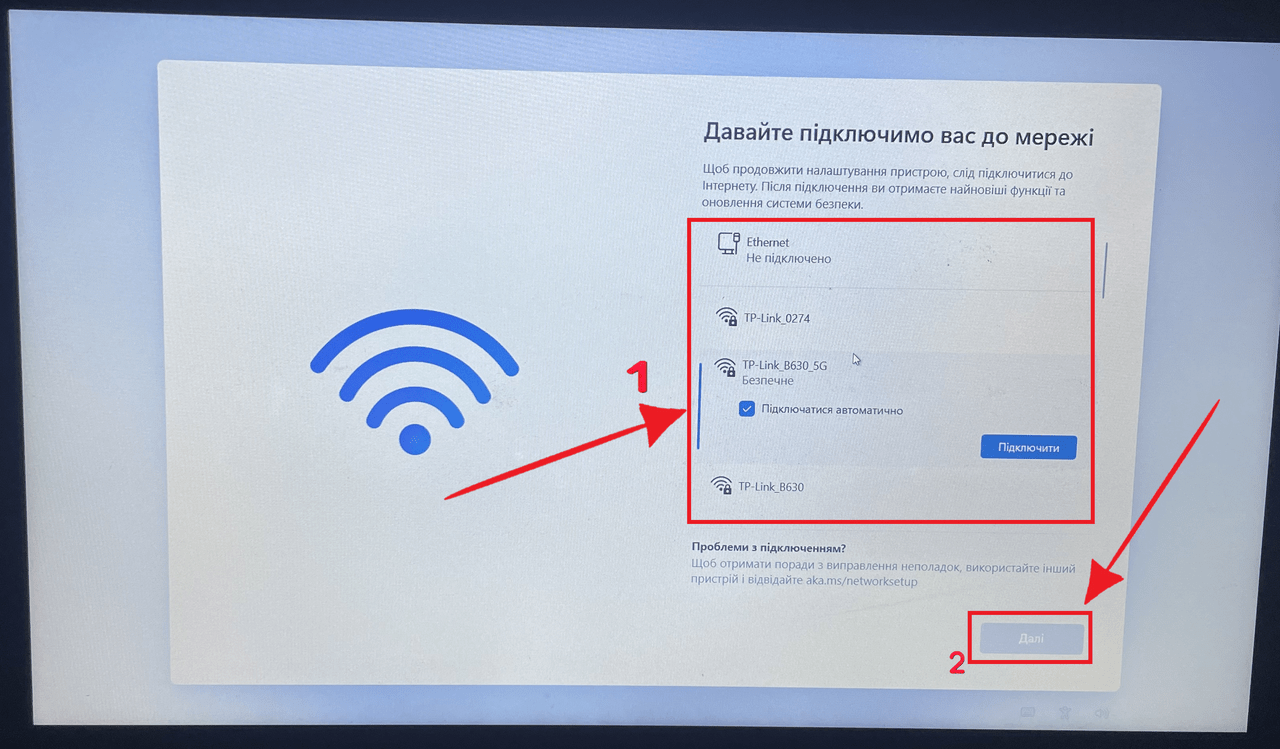
We connect our Windows to Wi-Fi
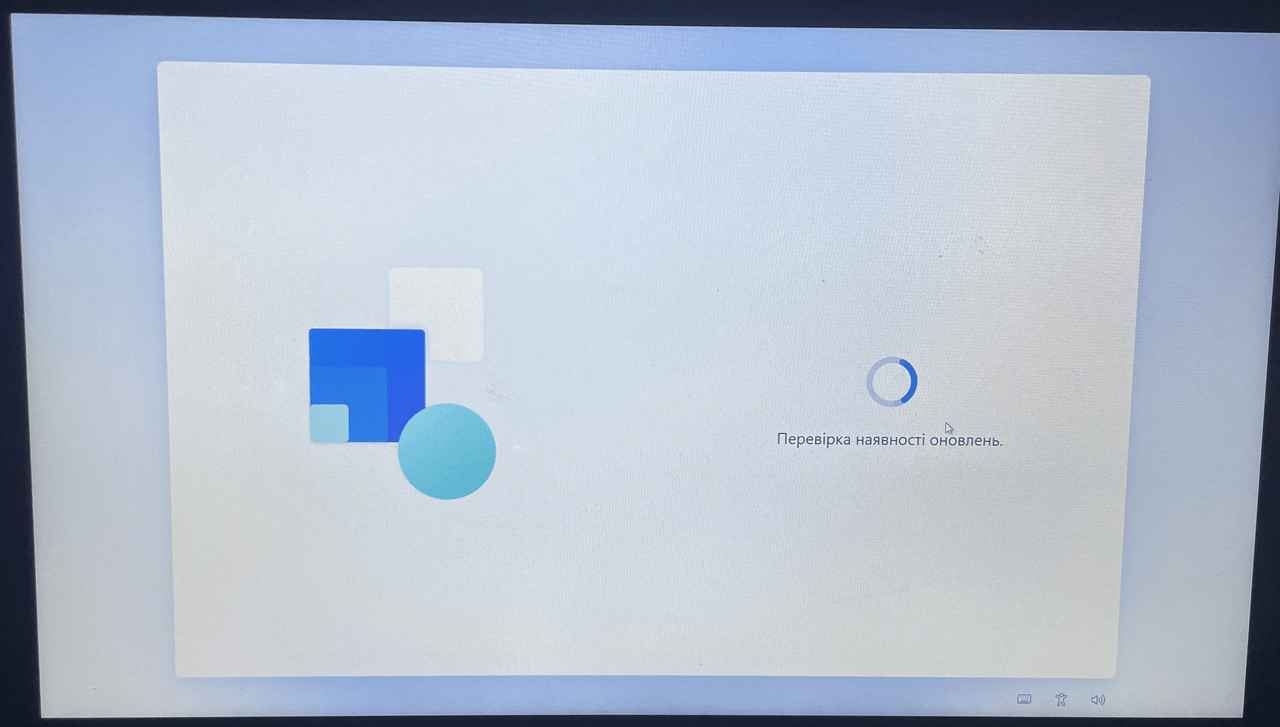
Wait until the system checks for updates
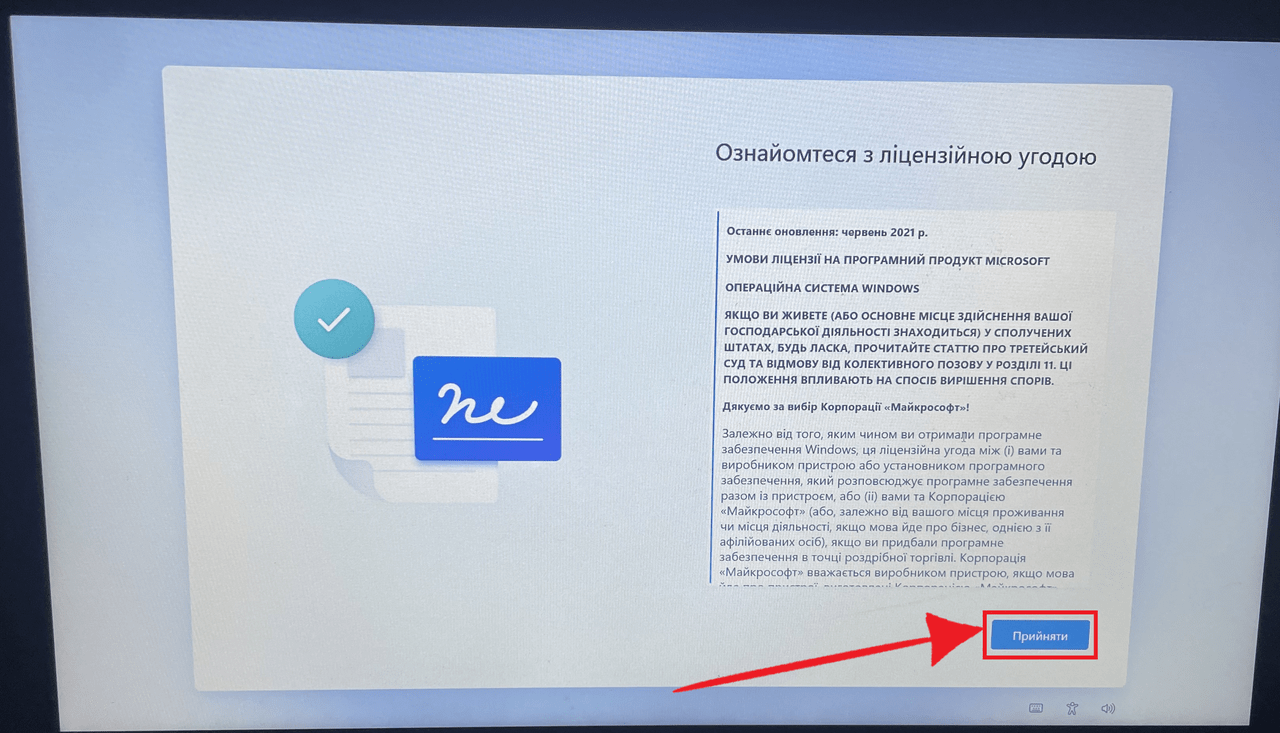
Click “Accept”
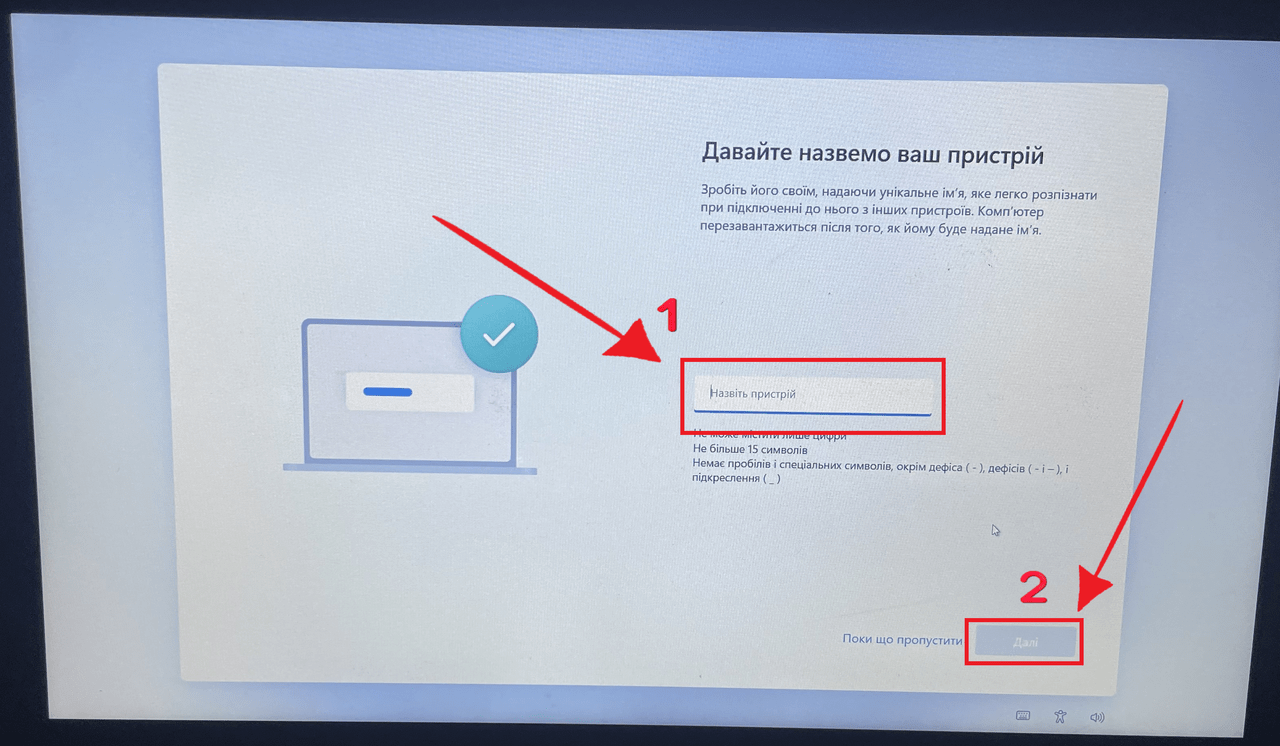
Here we need to come up with a name for our operating system
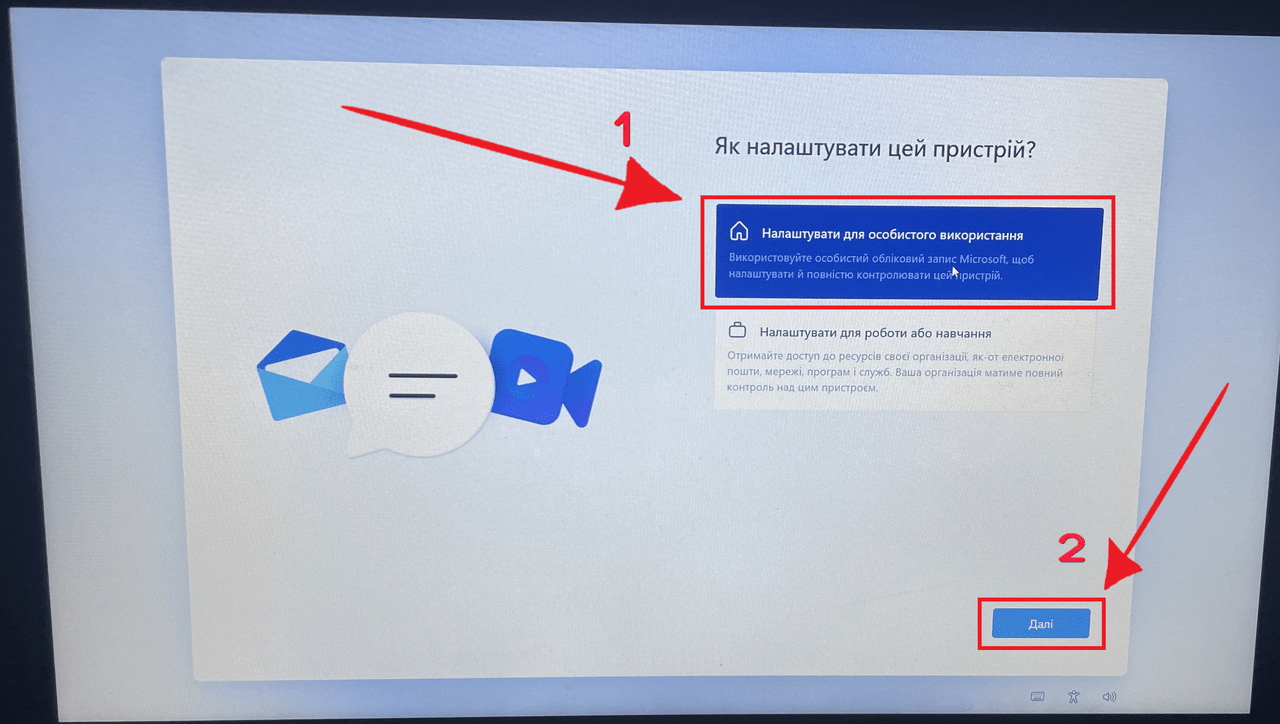
Click on the selected fragment as shown in the screenshot and click “Next”
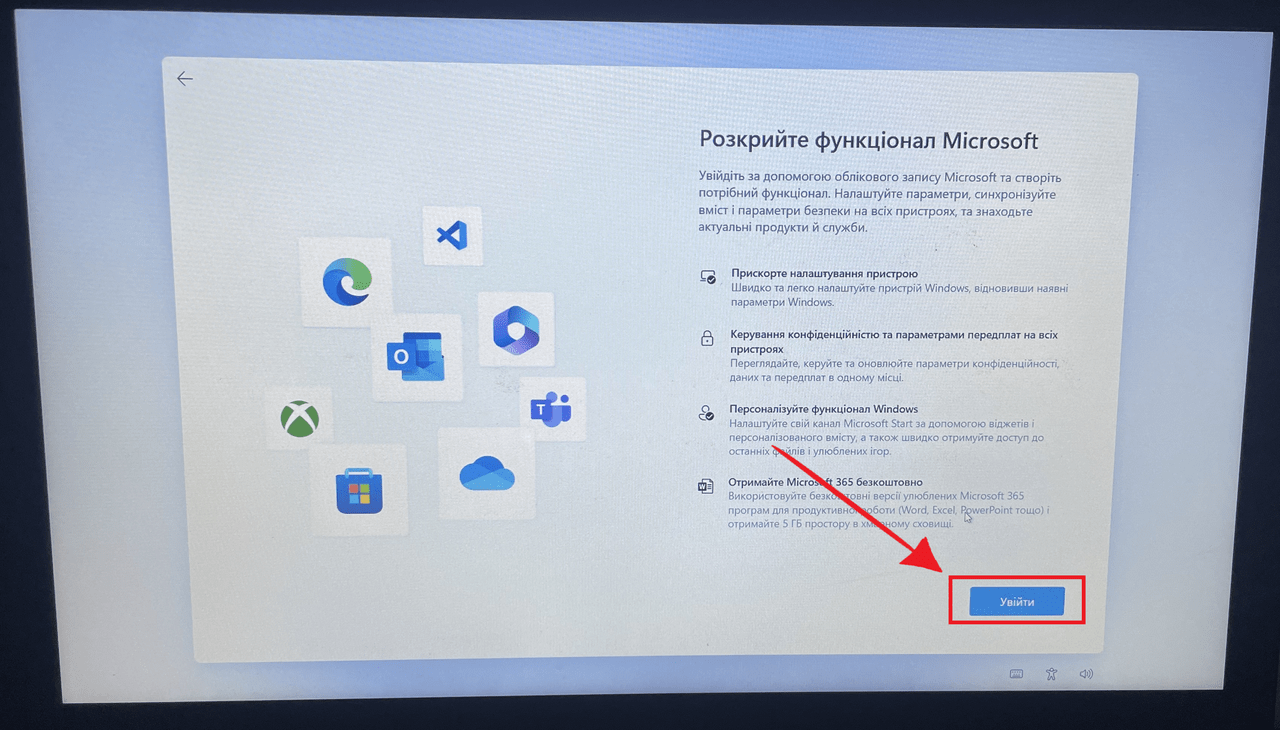
Click “Login”
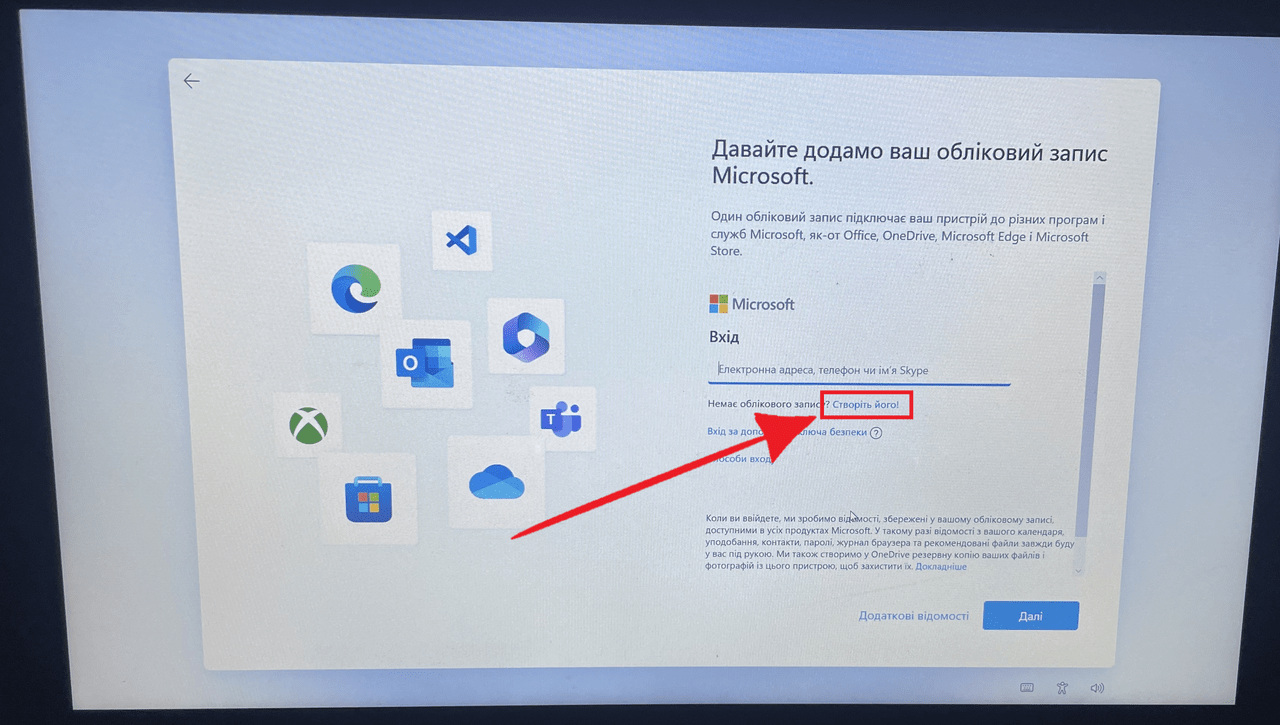
Click “Create it!”
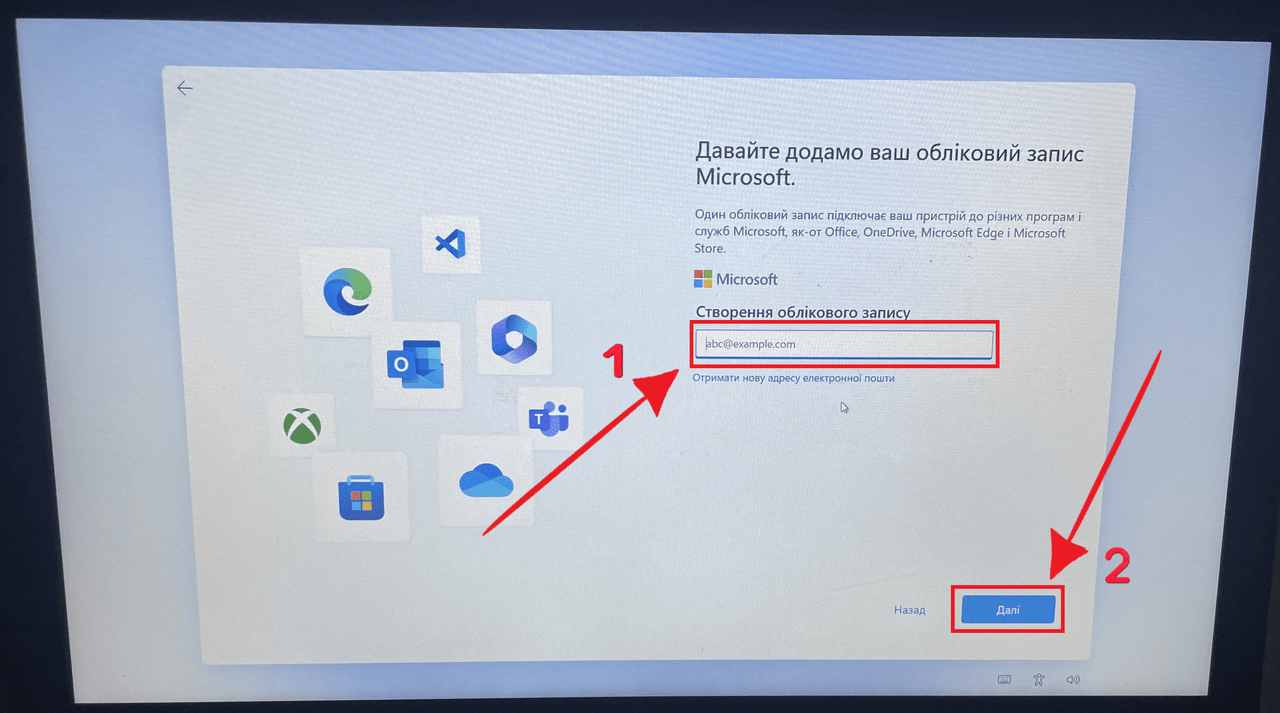
Create a Microsoft account and click “Next”
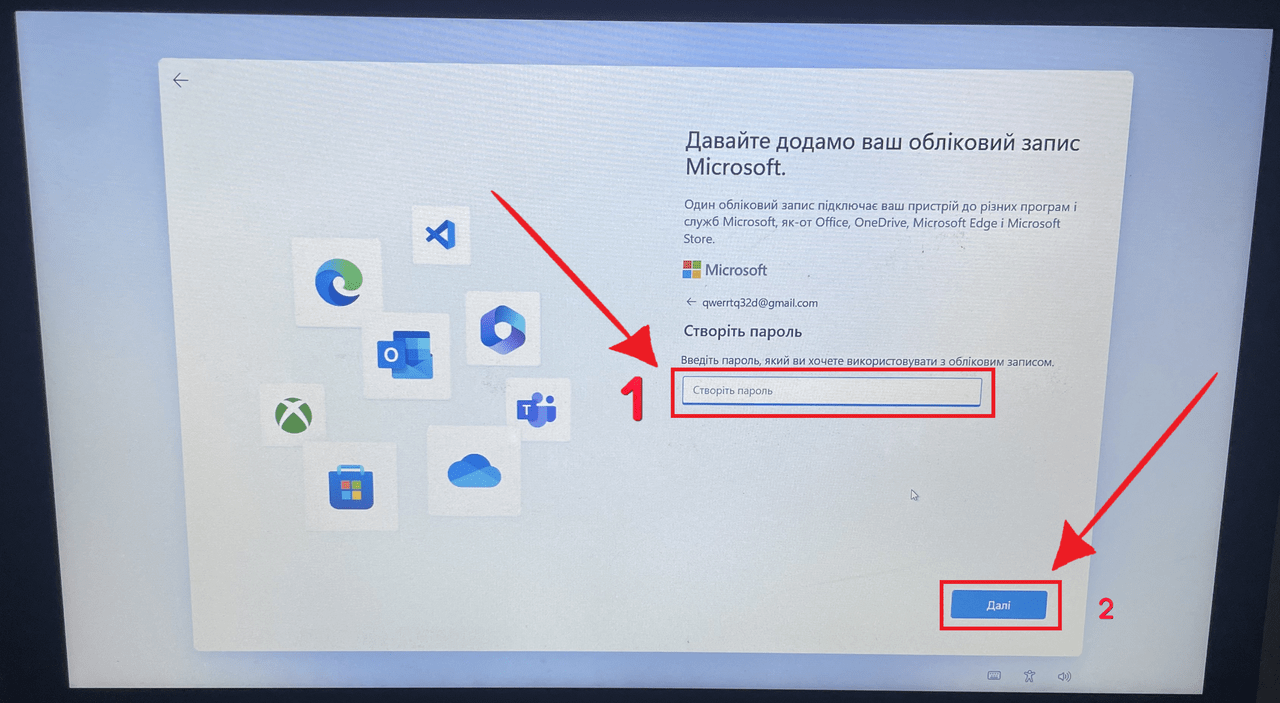
We create a password for our account
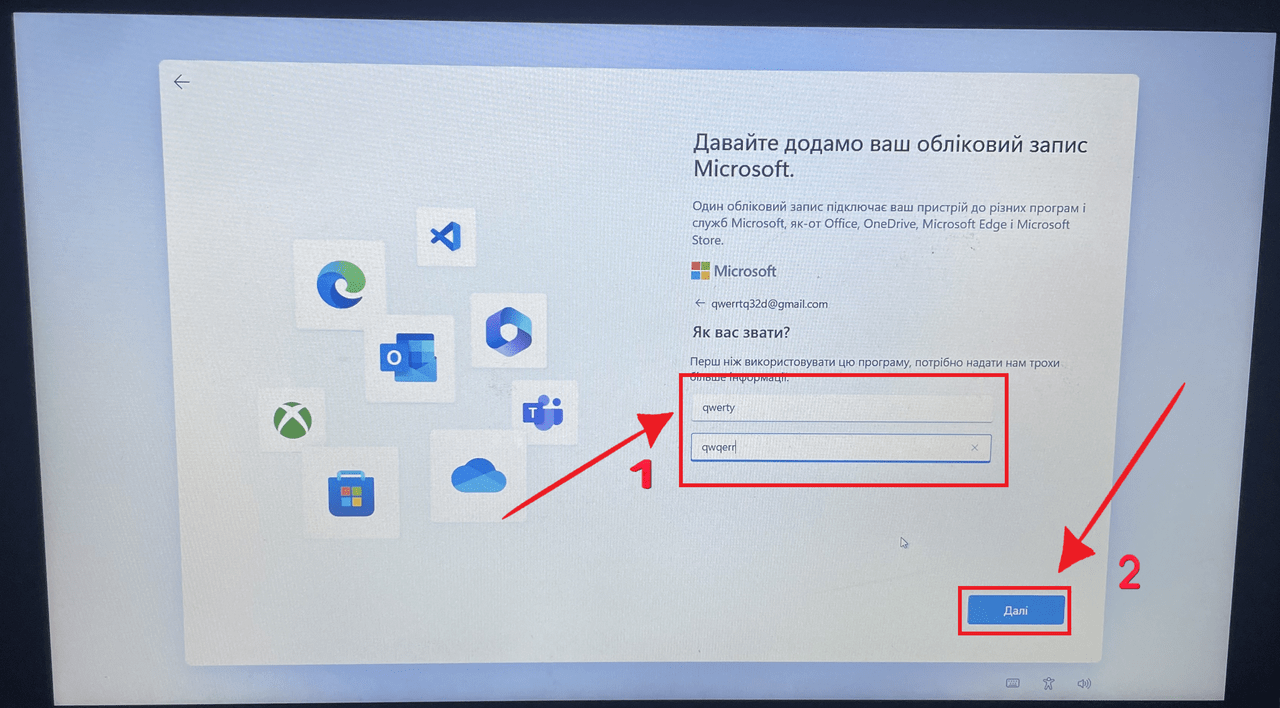
Come up with a name, then click “Next”
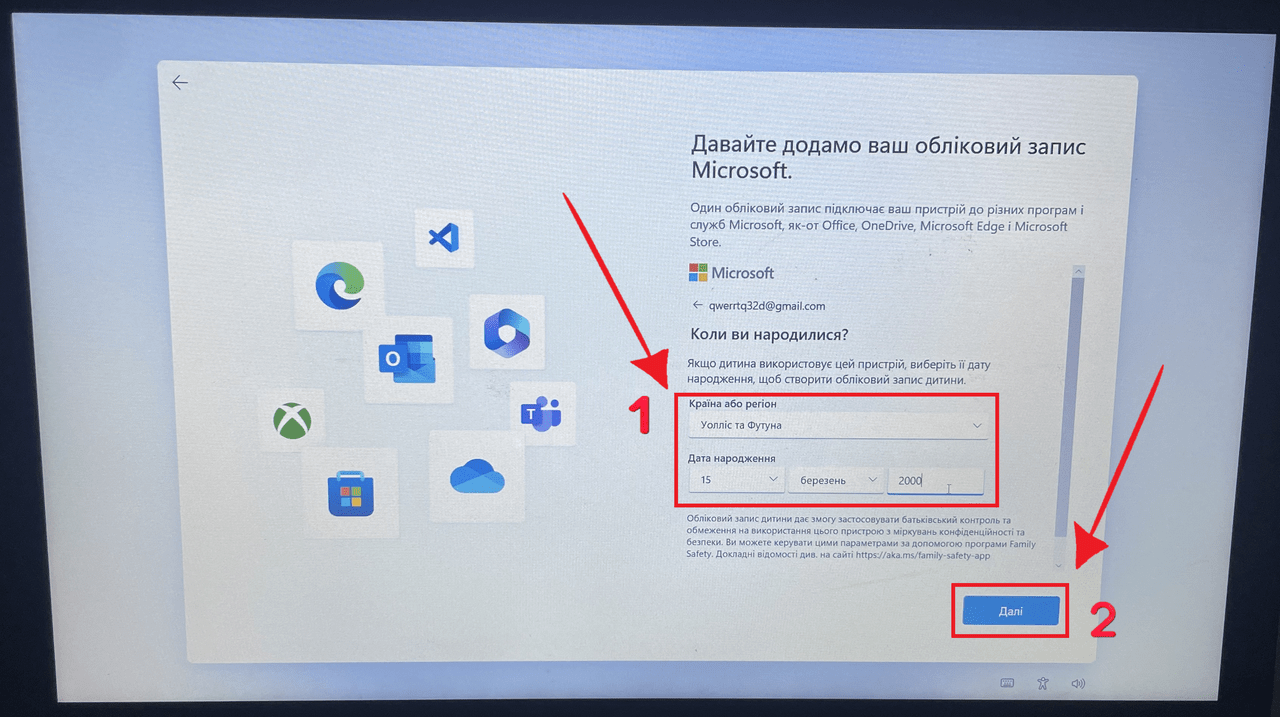
Choose a country or region and enter your date of birth
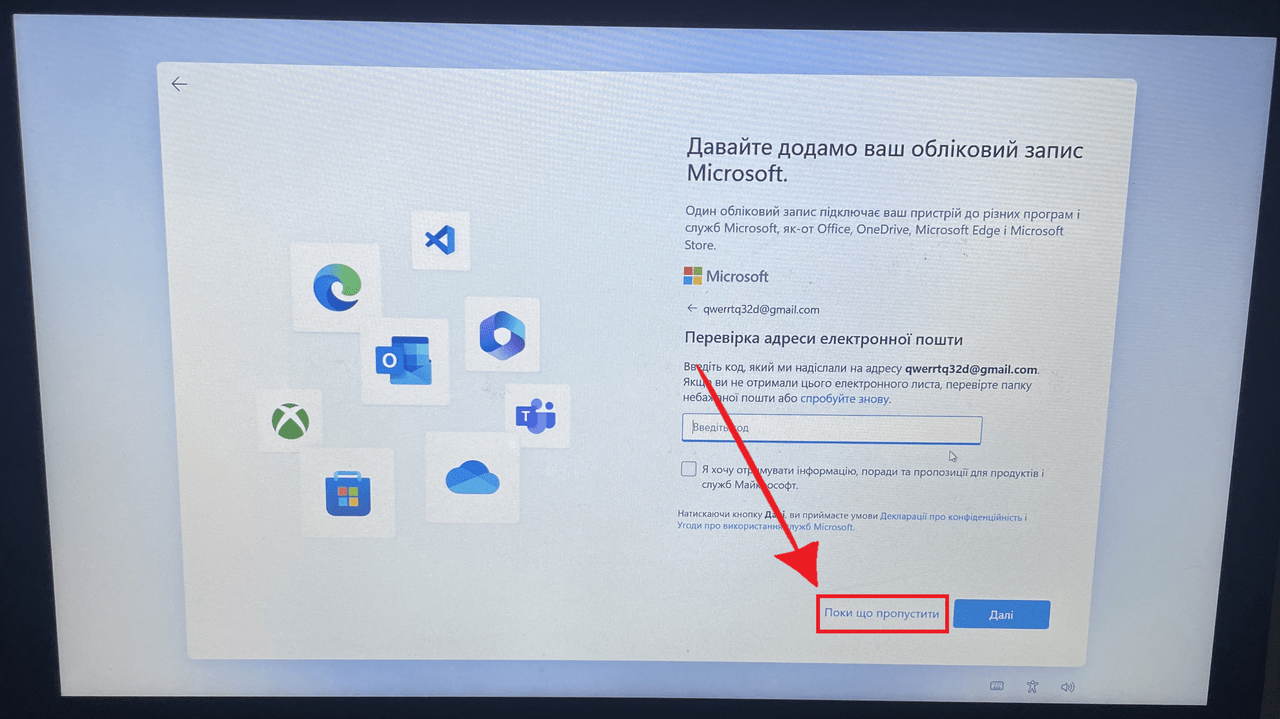
We can skip this step
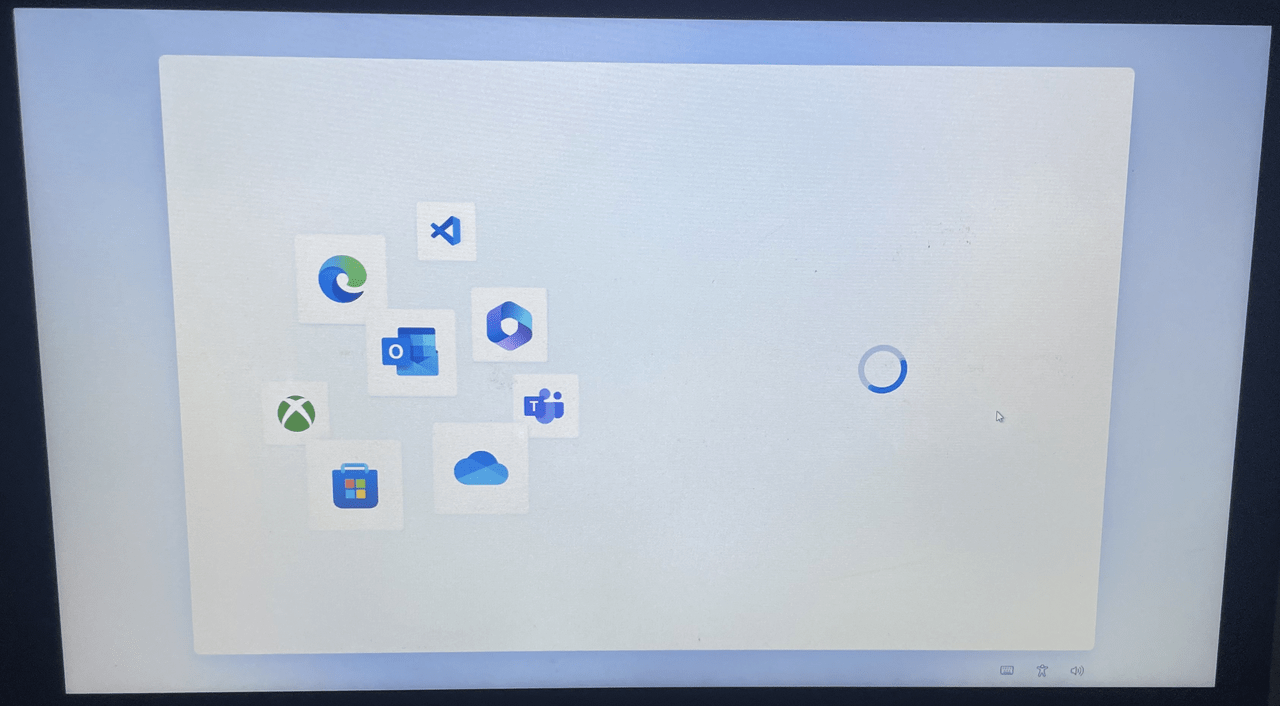
We are waiting for Windows to finish loading
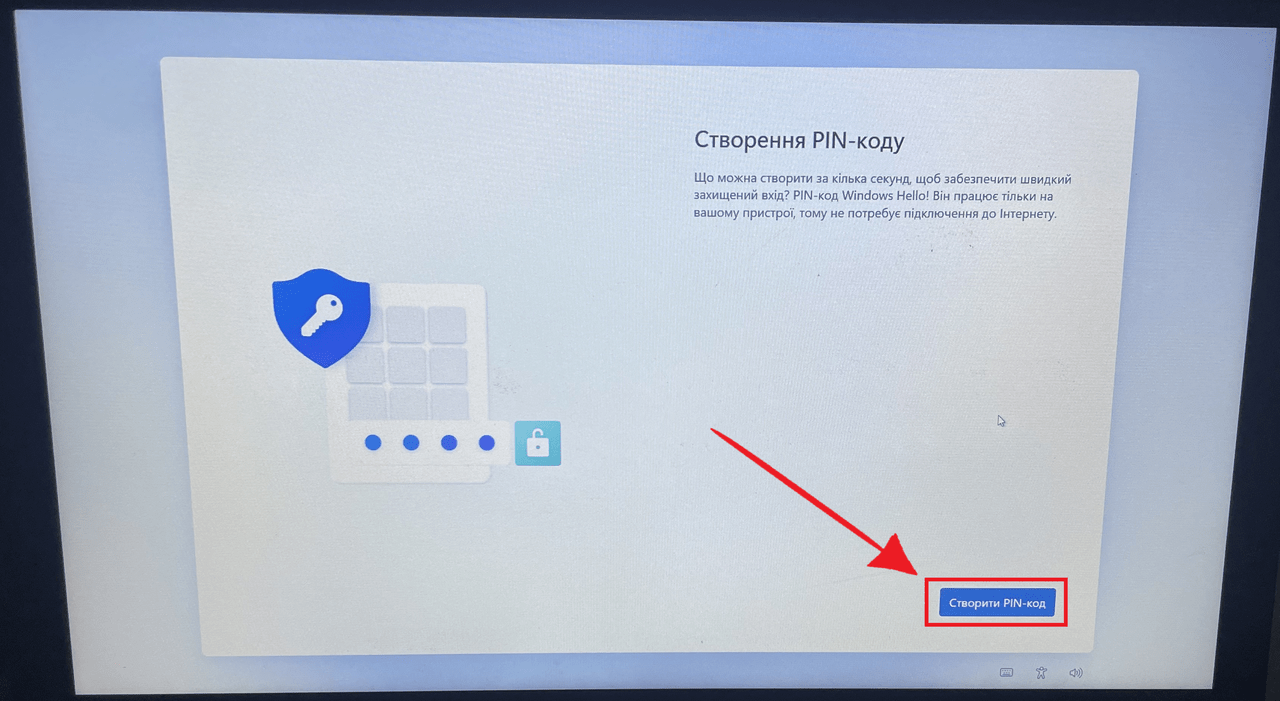
Click “Create PIN”
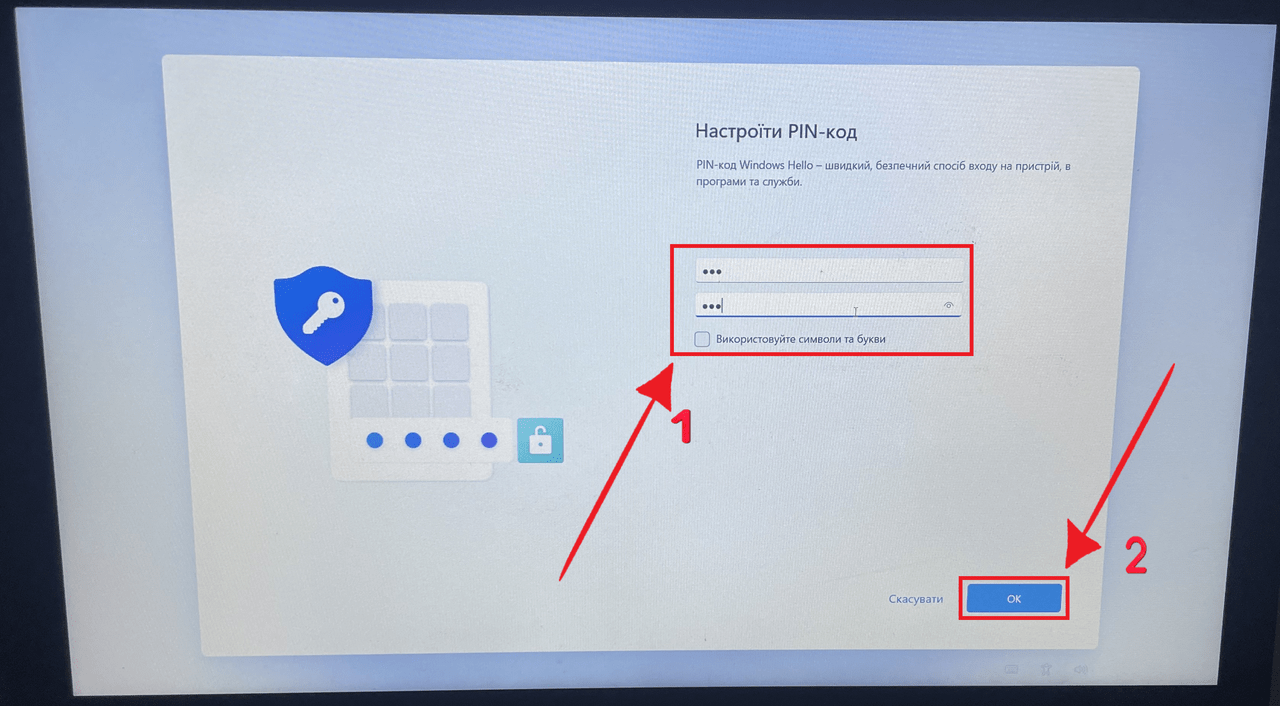
We come up with a pin code, enter it twice, it will be used every time Windows is turned on, after that click “OK”

We select privacy settings for our device
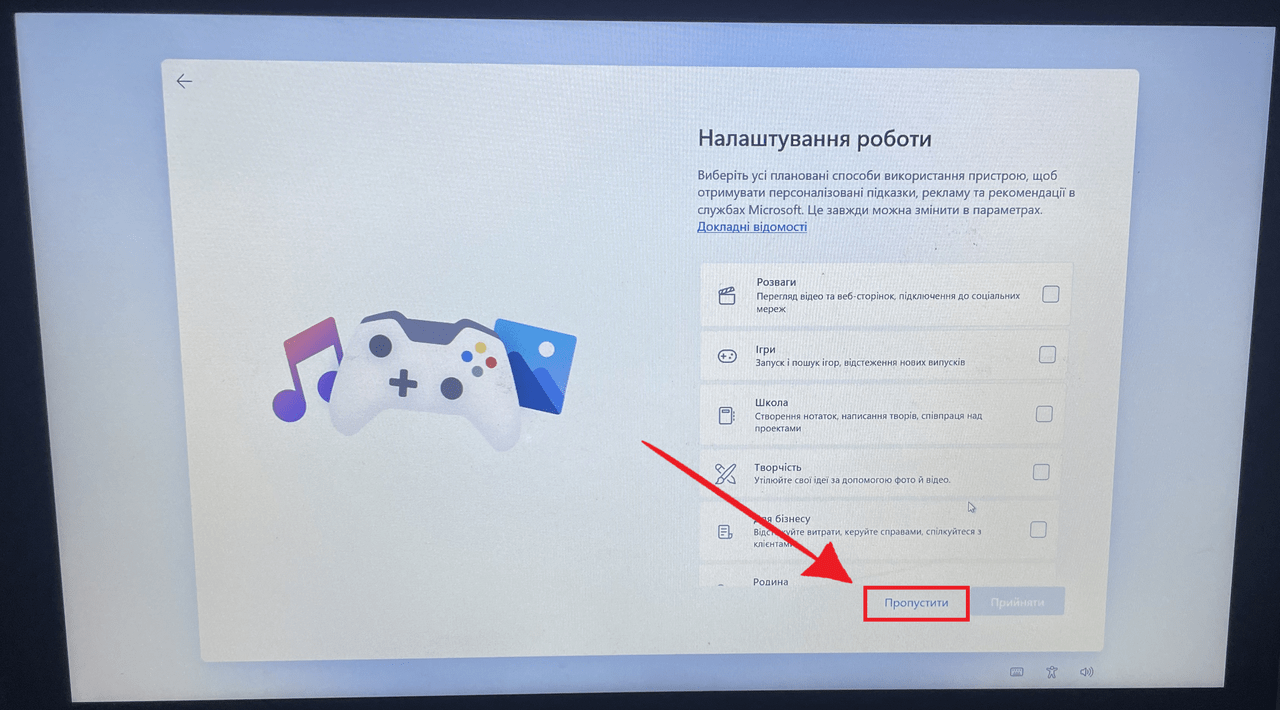
We can also skip this step
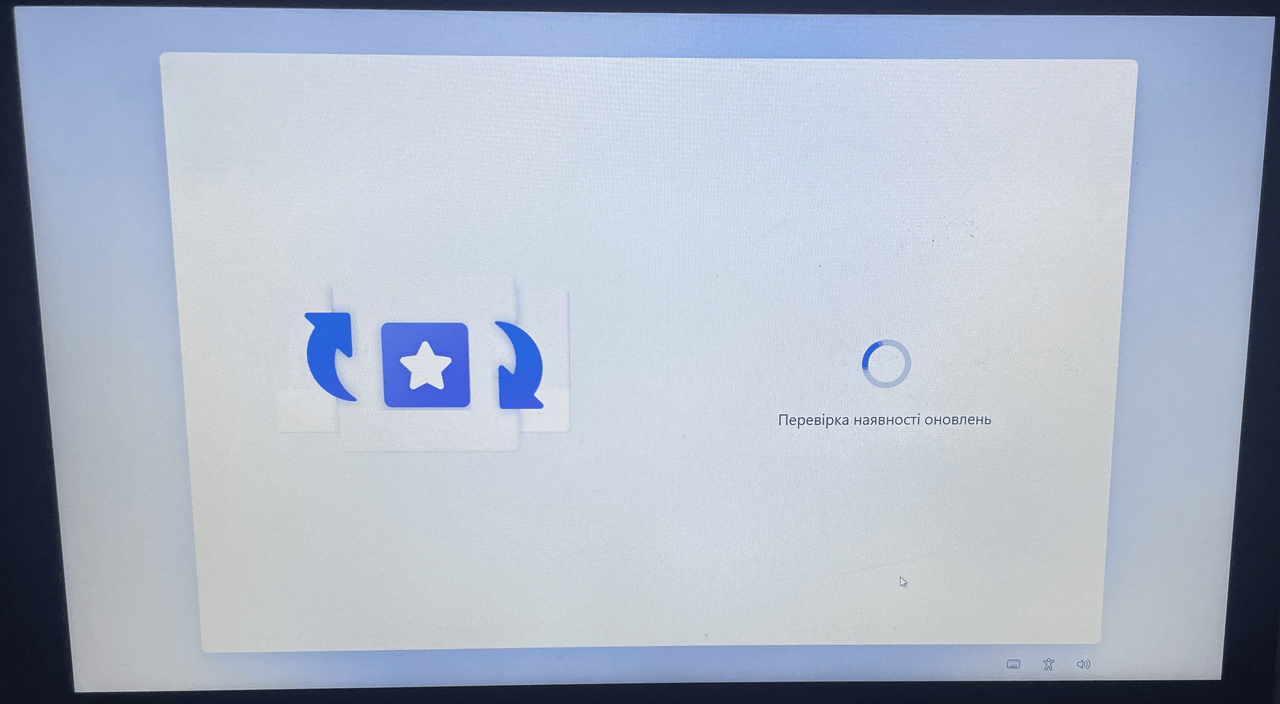
Congratulations, everything worked out for you. We reinstalled Windows. Checking for updates is in progress, after which you can use your updated Windows system