


13.05.2023
4 min
2030

It has been known for a long time and in 20 years has come a long way. Based on this fruitful system, global platforms have been created that are now needed everywhere. Debian is a system that combines the latest technologies with maximum efficiency. It is currently one of the most trusted and sophisticated Linux distributions, with the best package management system, large-scale community, high quality standard and responsible attitude to package testing. This is a free, high-quality Unix-compatible operating system with a full set of programs. Sometimes you may think that installing Debian is quite confusing and complicated. This is due to the fact that this system is for trained users, for those who like to learn everything new and interesting, who are not afraid of difficulties at first.

The most important thing is the correct installation. In this case, Debian allows you to create a system for yourself, rather than adapt to it yourself. Initially, it can be installed in the minimum configuration and at any convenient time to increase as needed. Thus, the user chooses the degree of freedom that suits him. Radical Open Source fans may not like it, but the interests of the majority are more important in this case. Debian is a powerful community-driven distribution. There is no company that manages the creation of Debian, maintains its infrastructure or manages the project. If you trust this agreement to keep the project free or consistent with your values, this may be the only reason to stick to Debian. Debian is not based on any other Linux distribution. This means that the software available in the Debian repositories was packaged specifically for Debian.
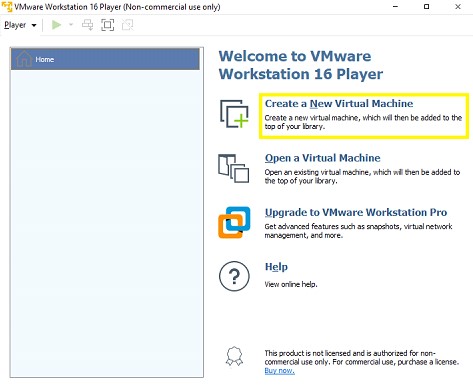
1. Launch VMware. In the window that you click on Create a New Virtual Machine.
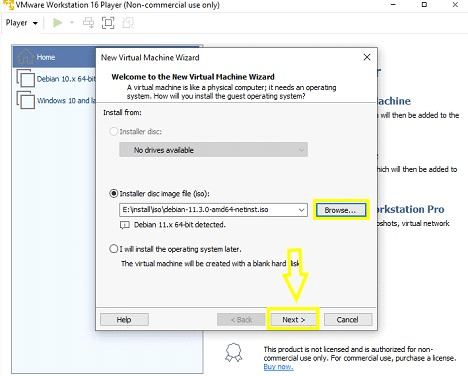
2. Click on Browse .. select the path to our .iso file with the distribution. It can be downloaded from the official website https://www.debian.org. Then click Next.
3. Here we are asked to rename the virtual machine and change the location where its files will be stored. If you plan to use several in the future, it is advisable to give them unique names so as not to get confused.
4. Attention! We need at least 20GB of disk space for the virtual machine to work properly. It is better to choose a disk in advance, which will be free. When you’re done, click Next again.
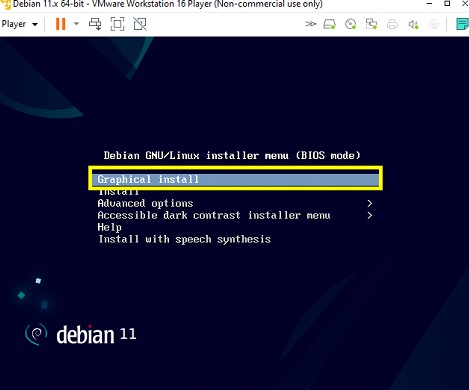
After launching, select using the Graphical Install keyboard.
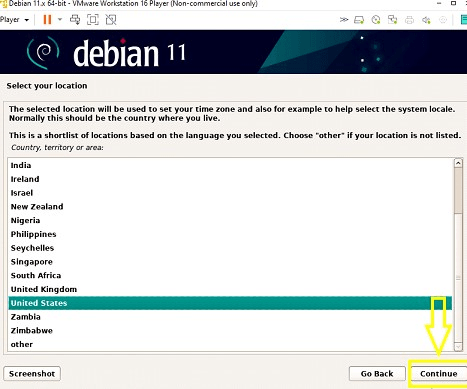
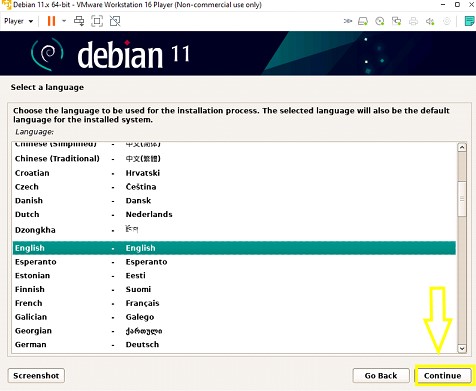
5. In the next window, select the language convenient for you and click Continue.
6. Depending on the language you choose, you will be offered a region to set the time zone and localize the system. (you can select another by clicking the other button)
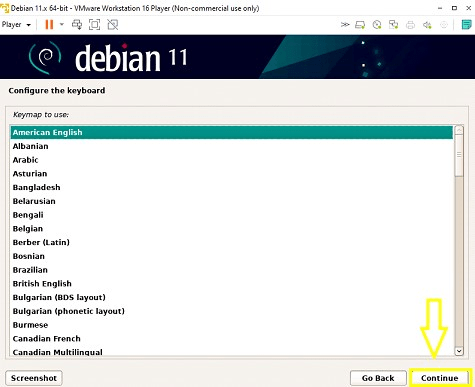
7. Select the keyboard layout and wait a while while the system adjusts itself.
8. Network settings. In our case, the computer is connected to the network by twisted pair directly. Further installation when connected via Wi-Fi or in the absence of a network may be slightly different. (In the case of Wi-Fi, it will ask you to connect, and if you don’t have a network, then why do we need Linux at all?;) But there is a small chance that your network device will have no drivers and will have to install them manually. With a very small probability on your network device drivers for Linux will be completely absent)
Select the host name and click Continue.
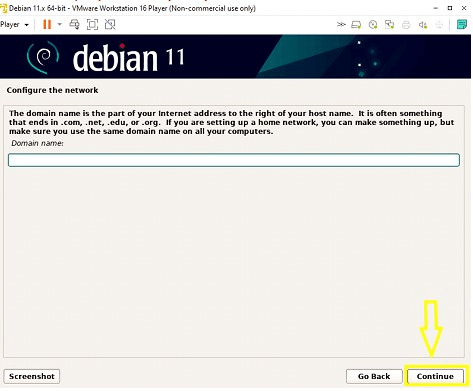
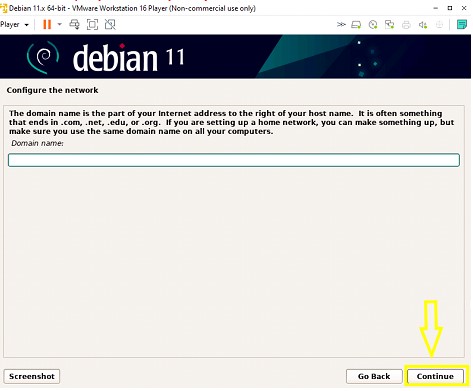
9. Domain name. Who knows what it is and why it is necessary – enter. Who doesn’t know, just skip and click on Continue.
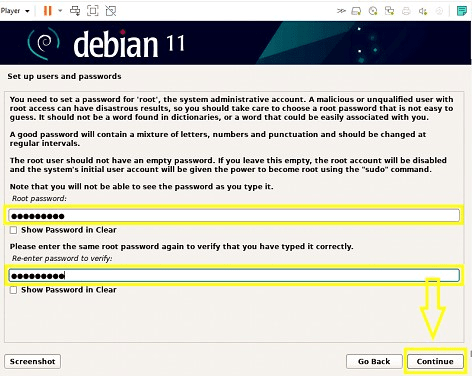
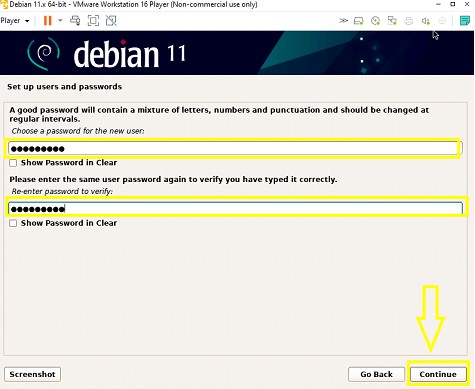
10. Enter the password twice and click on Continue.
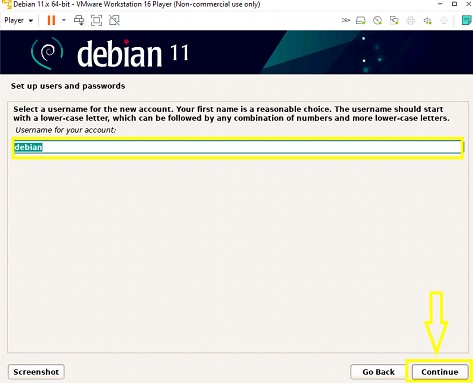
11. Enter the name of the administrator account. The main thing is not to forget that you have implemented, as in Windows you will not be prompted for it in the authorization window.
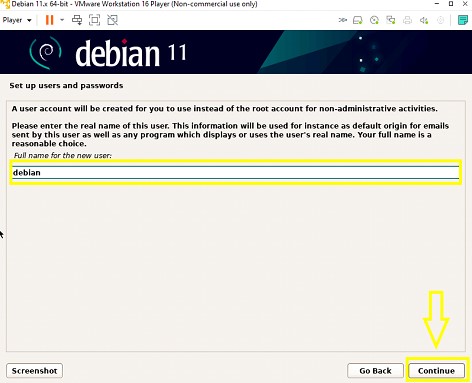
12. Please enter a real username. It will be used to send mail and more. You can enter anything.
13. And account password.
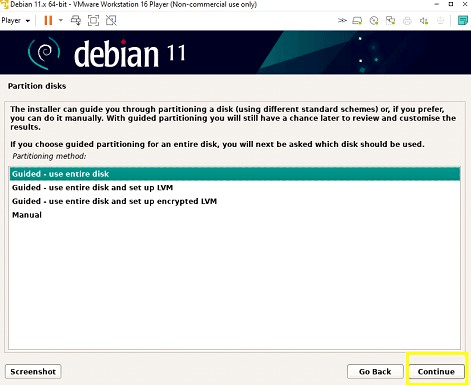
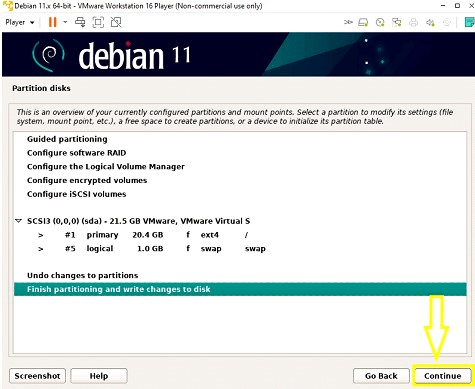
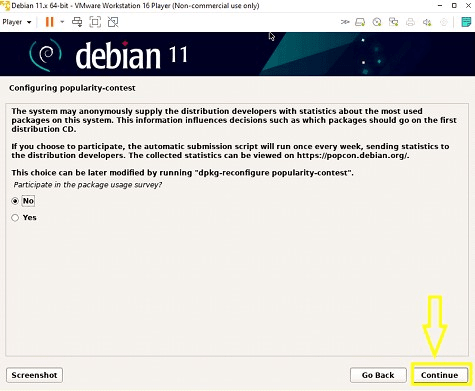
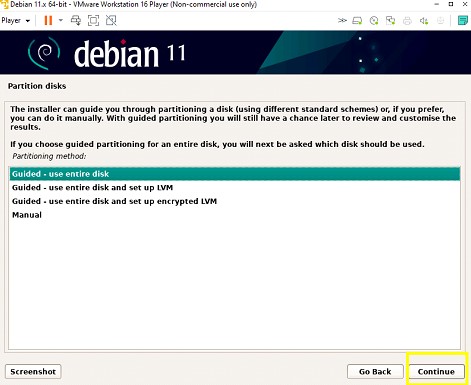
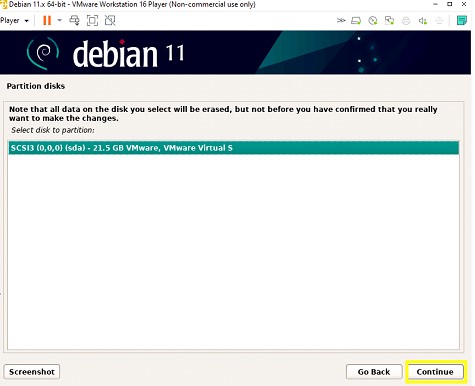
14. Disk markup. We leave everything in this menu as it is and press Continue. In the next 3 we do the same.
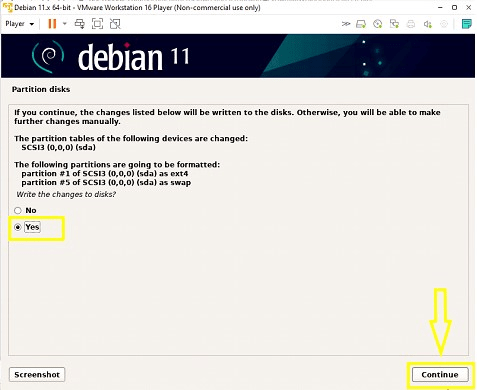
15. If you do not want to change anything in the previous sections of the disk partition, select Yes (consent to write changes to the disk) and click on Continue. It will take some time to save the changes to disk. You can safely brew tea for cookies.
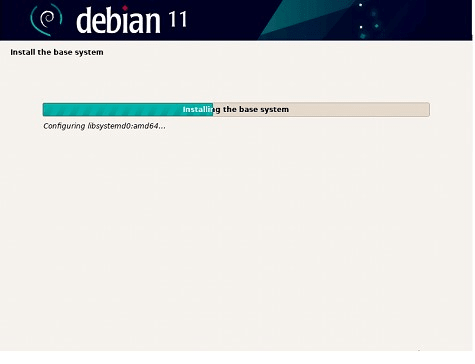
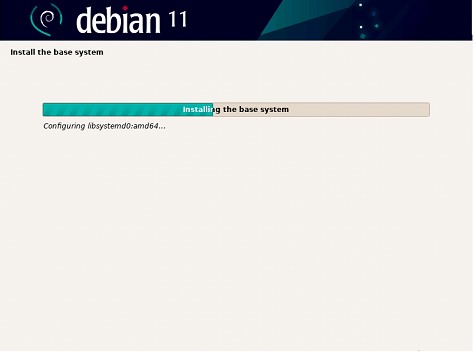
16. Installation of the system.
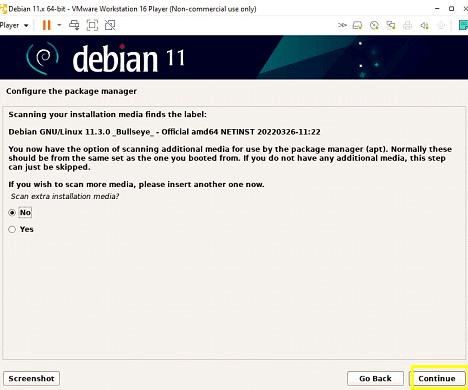
17. Leave the field blank.
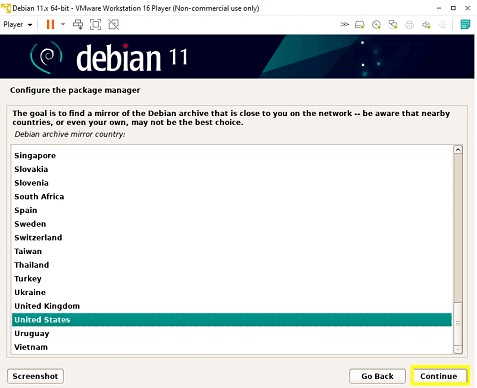
18. Let’s move on.
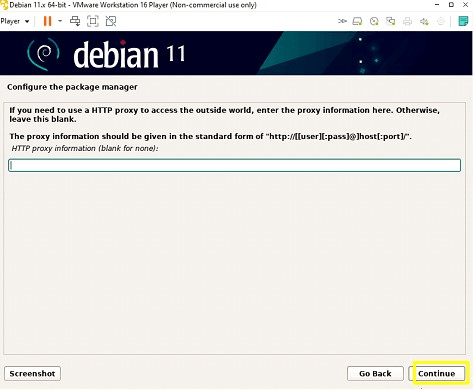
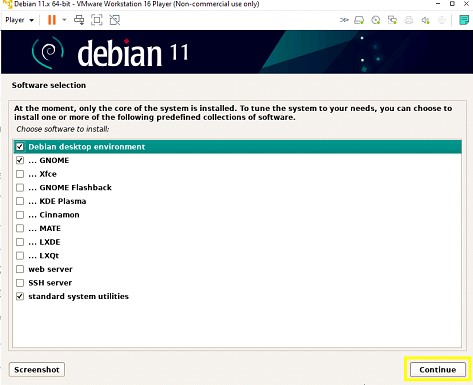
19. The next window with the selection of the OS shell and software set. I advise you to leave everything as it is and click on Continue.
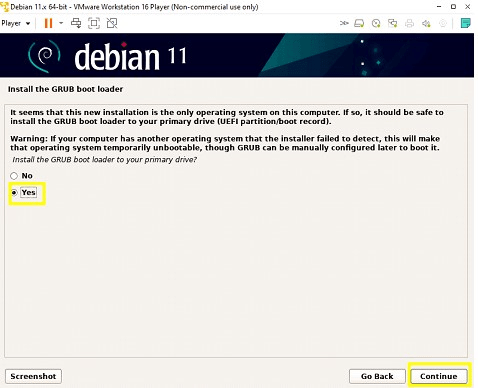
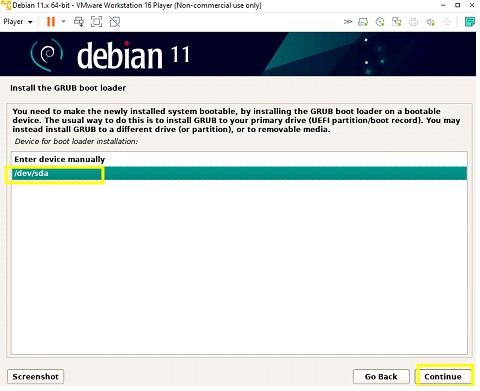
20. In this window we are asked whether to install the Gurub bootloader. Leave Yes and click Continue.
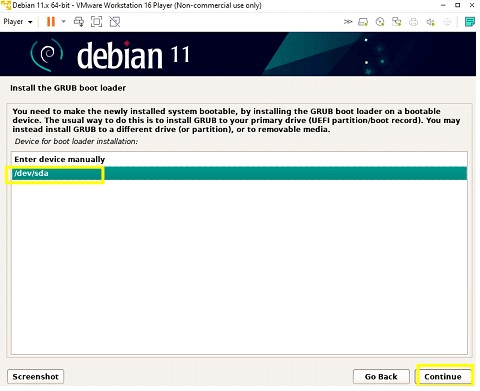
21. If you want to change the download location, you can do so in this window. if you don’t even know what a bootloader is, select the path / dev / sda / and click Continue.
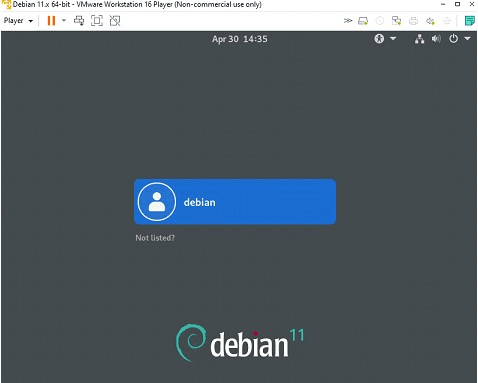
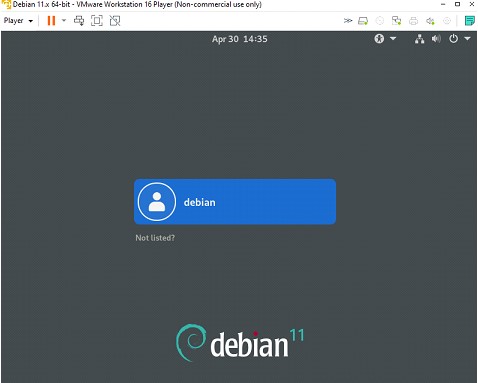
22. Congratulations! If everything was done correctly, then after rebooting the system you will see the authorization window to the system.


