
20.03.2024
14 min
3279

You will learn how to set up a lab environment for infrastructure administration on GNU/Linux using GNS3 and VirtualBox. It covers the installation and configuration of the necessary software on different operating systems and provides advice on configuring virtual machines and network settings for optimal learning.

Now that we know what the infrastructure should look like, let’s try to build it. And most importantly, let’s analyze the software part of it all. We will need many virtual machines and we will connect them using a virtual network. All this can be done in VirtualBox, but it will not be obvious. That’s why we need a program GNS3.

VirtualBox is used to run Linux virtualization, while GNS3 is responsible for networking and rendering. I warn you right away that GNS3 is a bit overloaded, and the recommended minimum RAM requirement is about 8 gigabytes. In fact, if your system uses little memory, you can get by with much less. I intend to build a large grid with a large number of virtual machines, but this is not necessary. For most thematic analyses, it is sufficient to run 3-4 virtual machines at the same time.
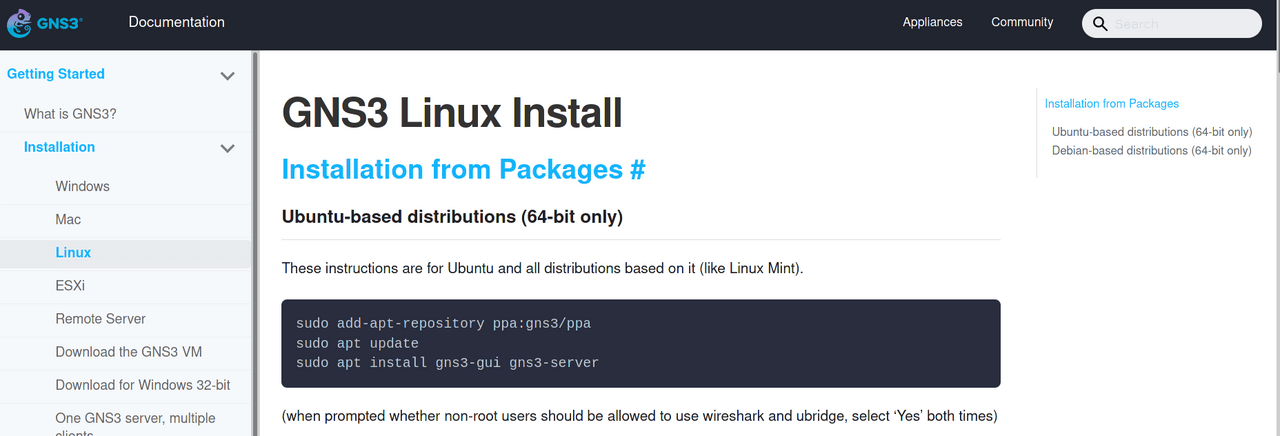
If you are using a GNU/Linux base system, you will need to add a repository, install some packages and add users to some groups – Ubuntu and Debian are described in the documentation on the official site, and other distributions are described in You can find articles on the Internet.
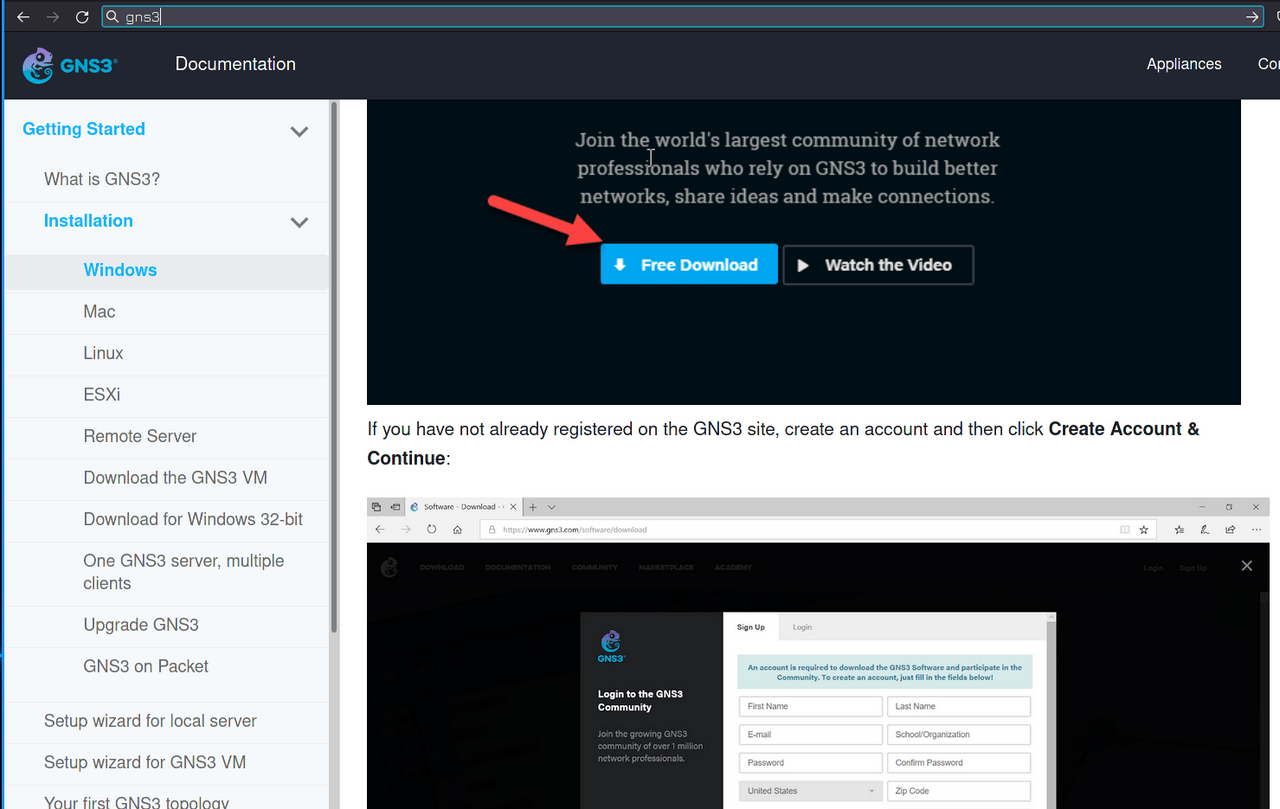
As for Windows, there is also an instruction in the official documentation, but there is a lot of extraneous information, so I will show it myself.
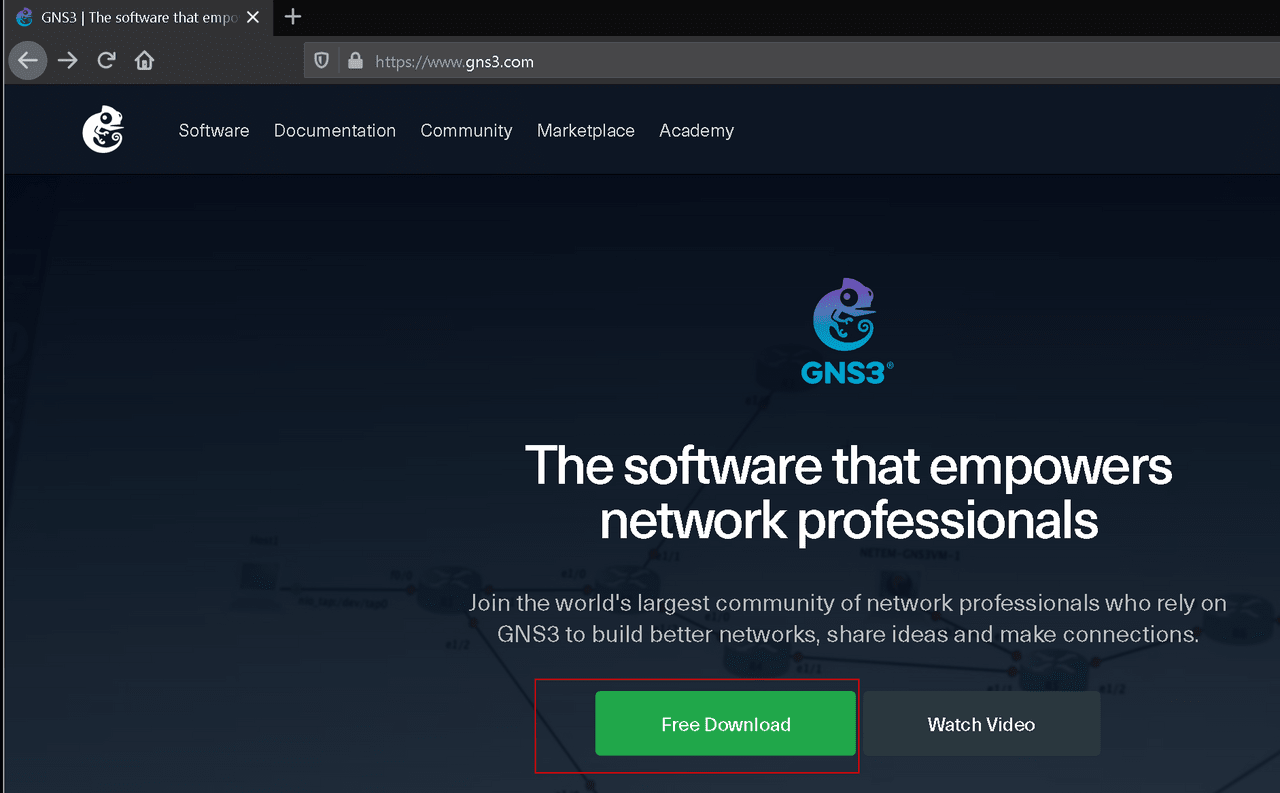
On the official GNS3 website, click Free Download, after which you will need to register to download.
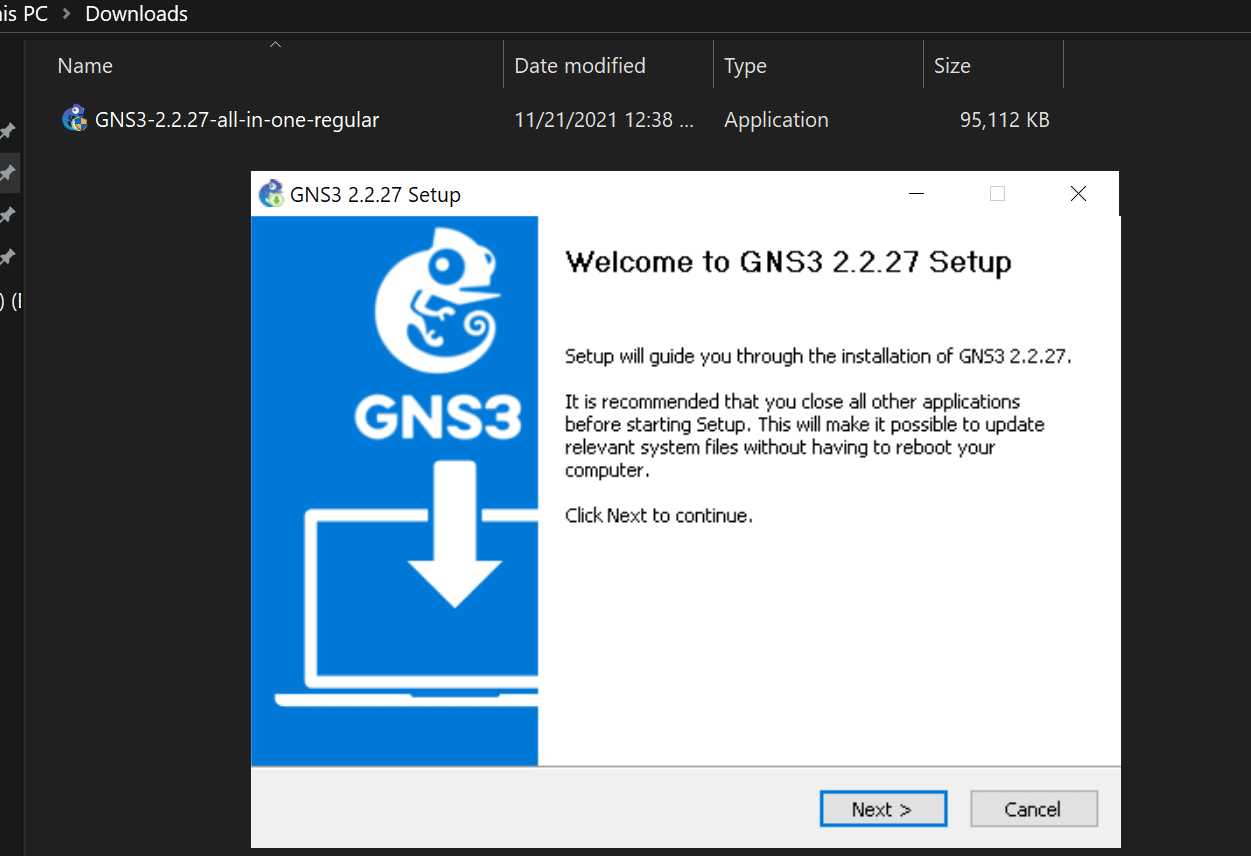
Next, run the installer, click Next, agree to the license and click “Next” again.
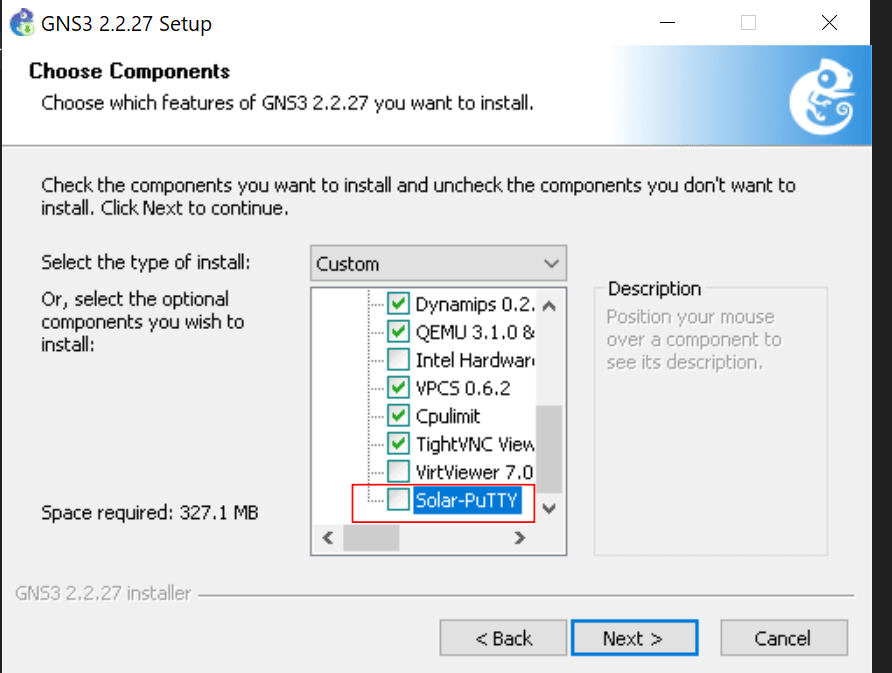
On the Select Components tab, expand Tools and uncheck Solar-Putty. This is an ssh client for connecting to hardware. Use another utility, MobaXterm. Then click Next.
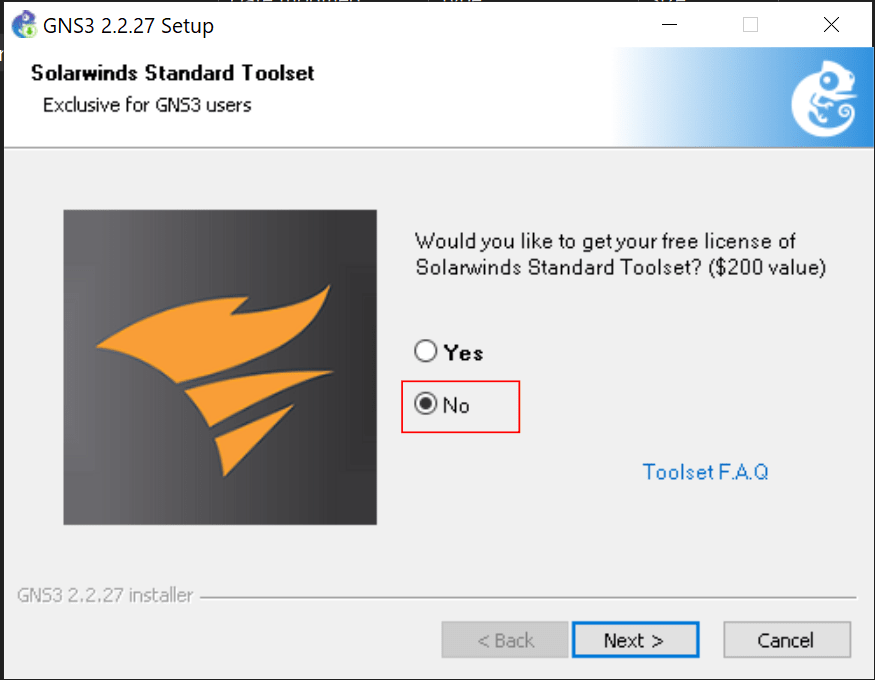
Until a window appears again offering a free license for SolarWinds Standard Toolset, a set of network monitoring utilities. This is not necessary, as we do our own network monitoring.
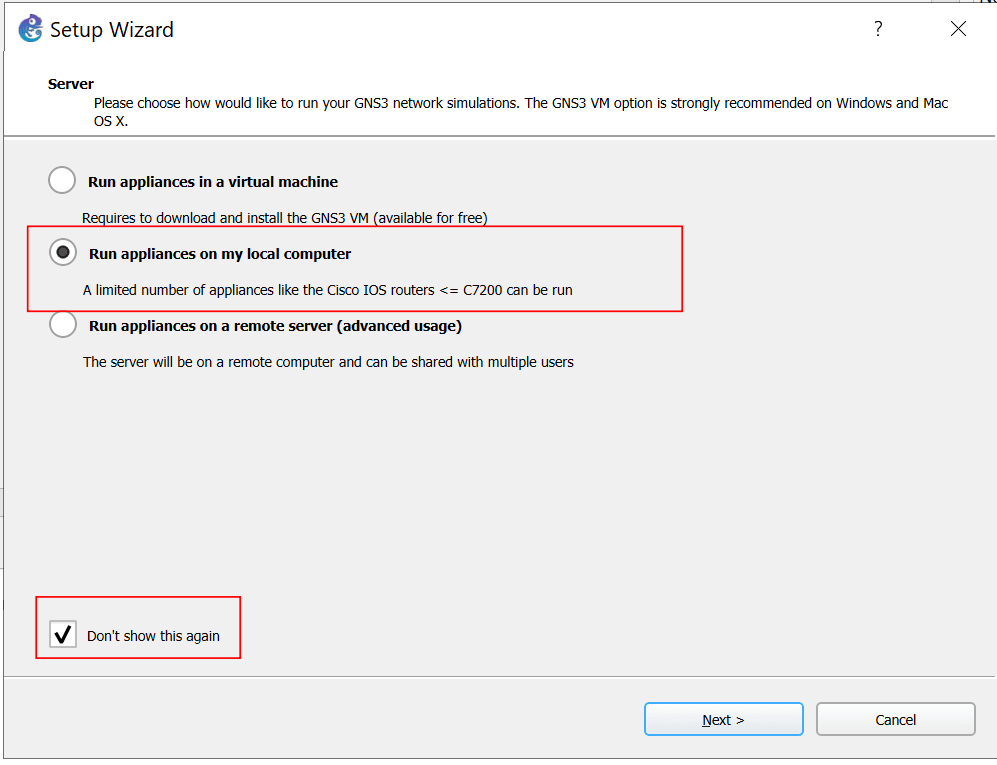
We will be greeted by a window with initial settings and will ask where we will run the virtual hardware. GNS3 has its own ready-made virtual machine with Linux, but we will still run all our systems through VirtualBox, and in order not to install an extra virtual machine, we select the second item and check “Do not show again”. Then Next, Next and finish.
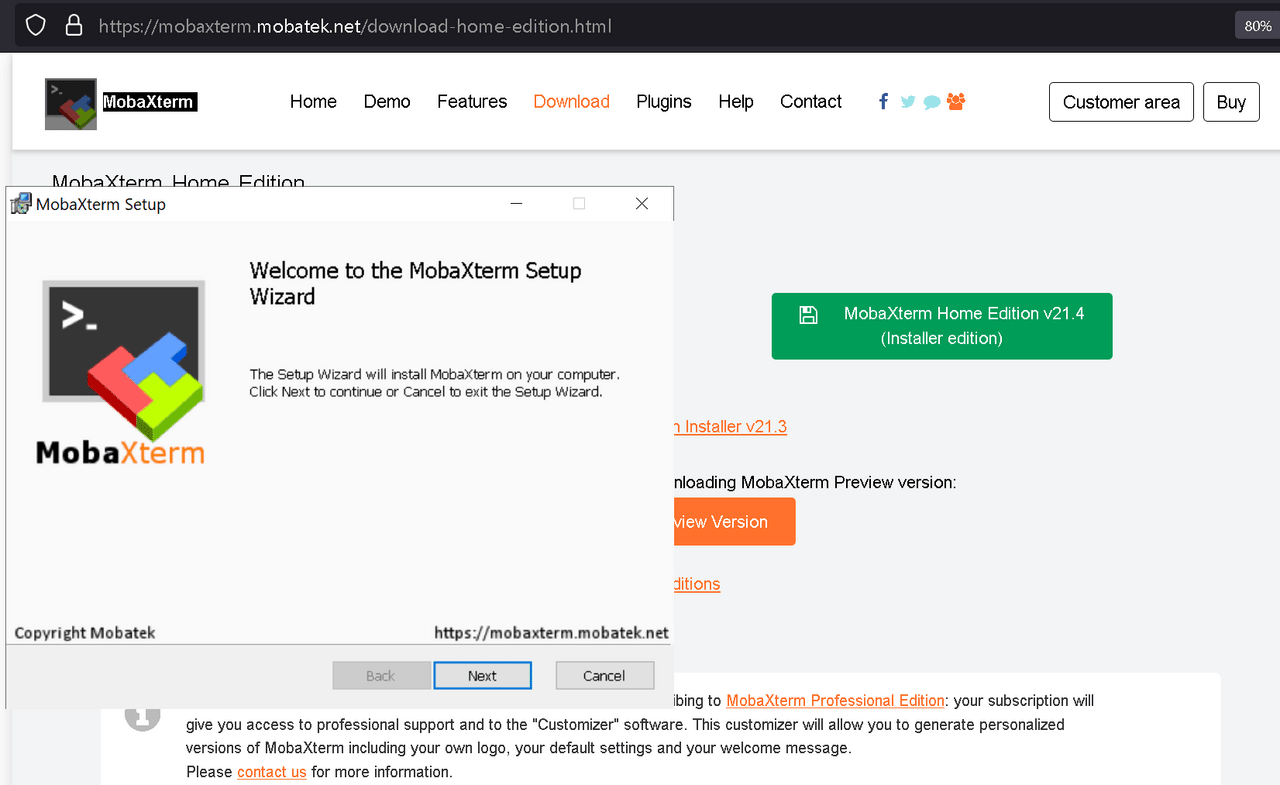
We also download and install MobaXterm. We will use it to connect to our SSH virtual machines. Installation is quite simple – just next next and that’s it.
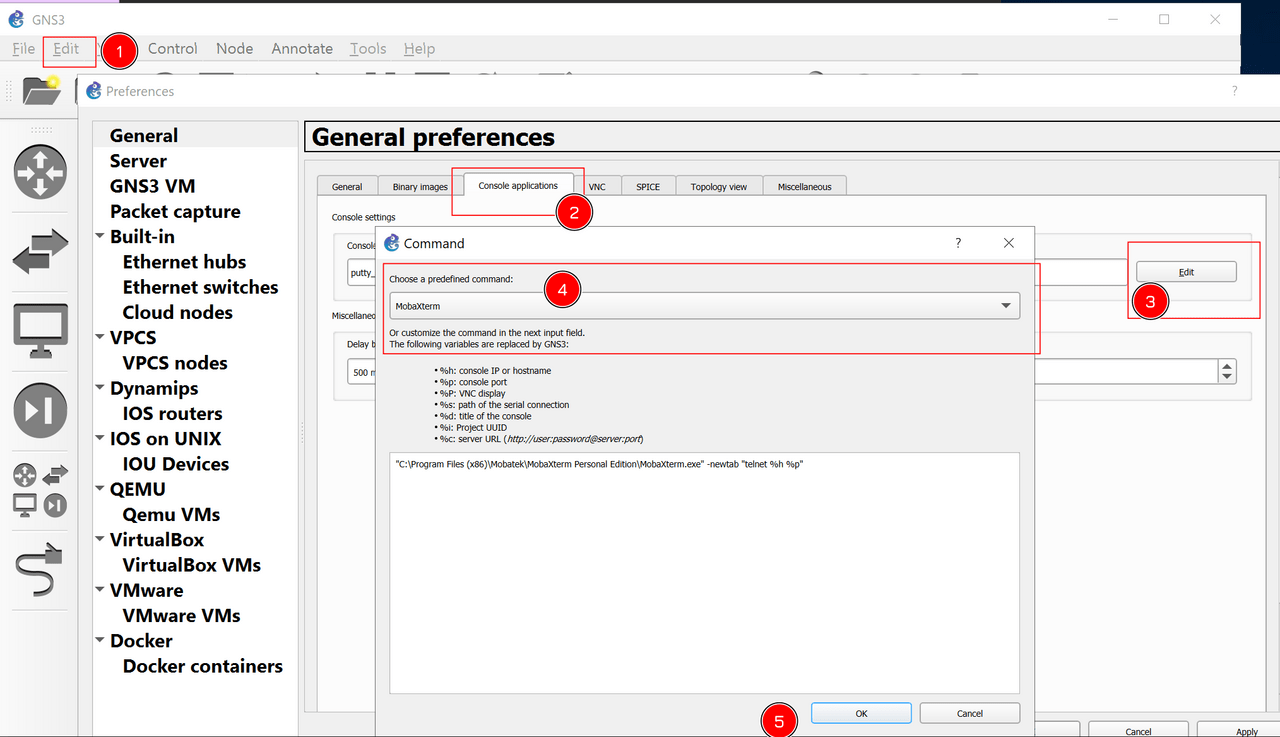
Then in GNS3 go to Edit – Preferences – General – Console Applications – Edit and select Mobaxterm. Then click OK and Apply.
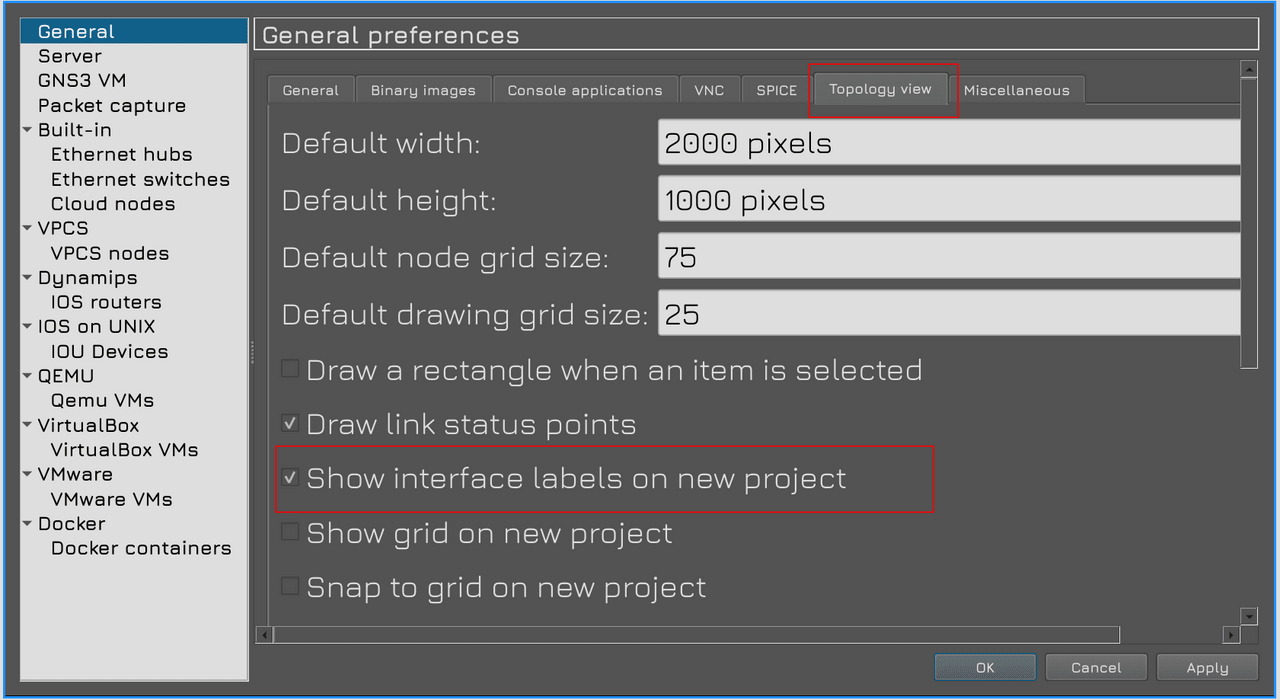
Also, in the Topology tab, check “Show interface labs on new project”. This will show us the names of the interfaces connected to the network, which will be useful in the future.
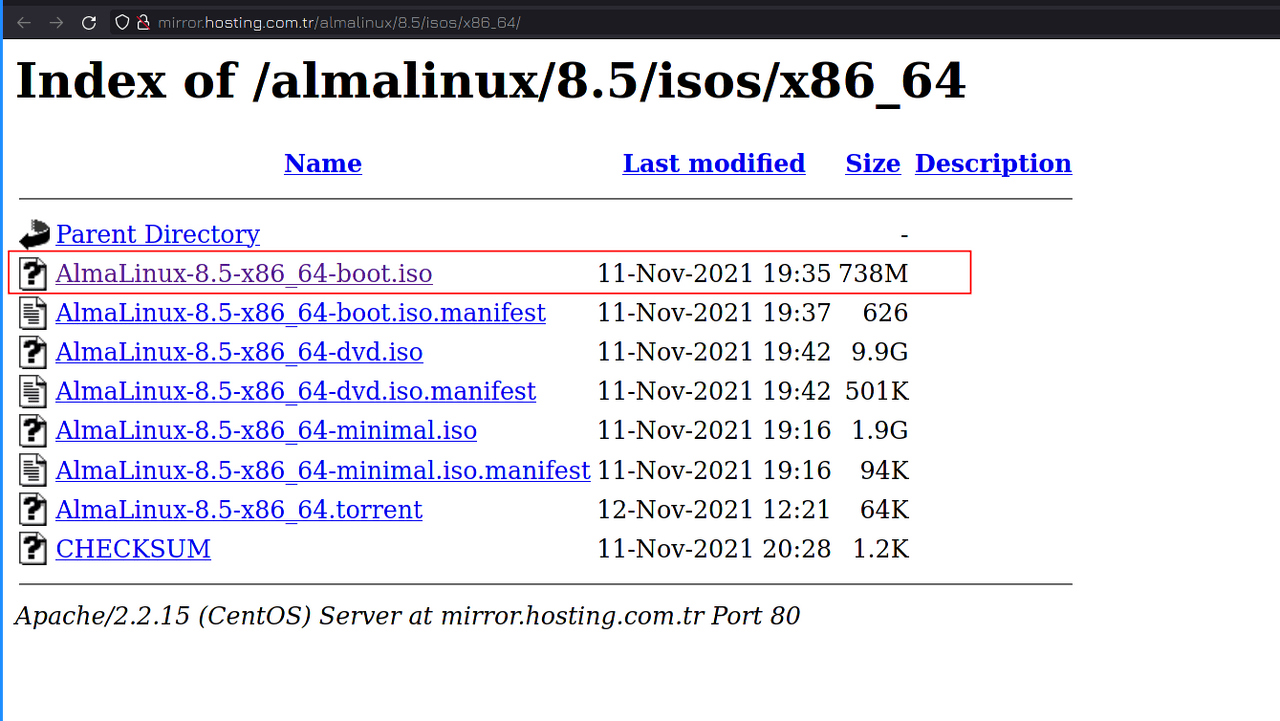
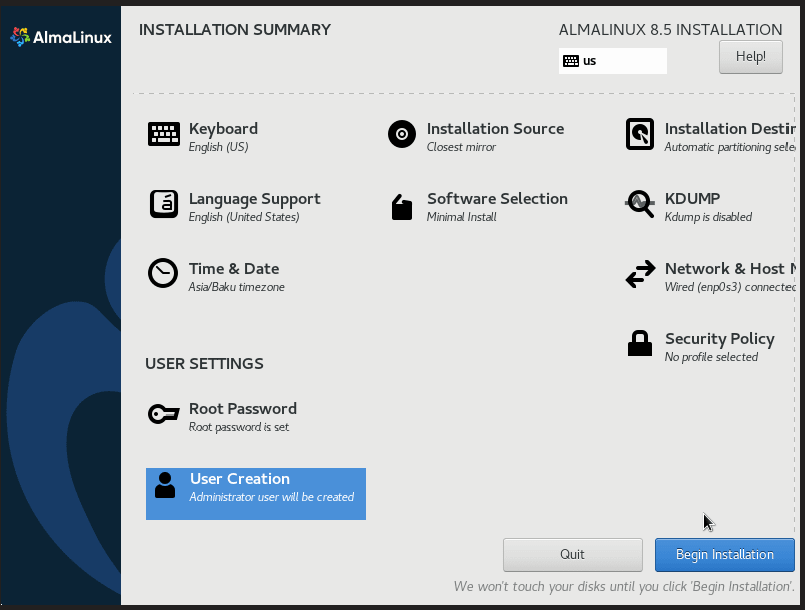
Also, due to the fact that we will often create and delete virtual machines, it will be inconvenient to constantly register them, so instead of RHEL we use AlmaLinux – this is one of the distributions that appeared to replace Centos. You can download it from the official website using the link. The architecture is x86_64, and take the latest version. I won’t break down the installation, it’s no different than a RHEL or Centos installation. You can use any other distribution, but preferably Alma to avoid confusion in package names and other small things.
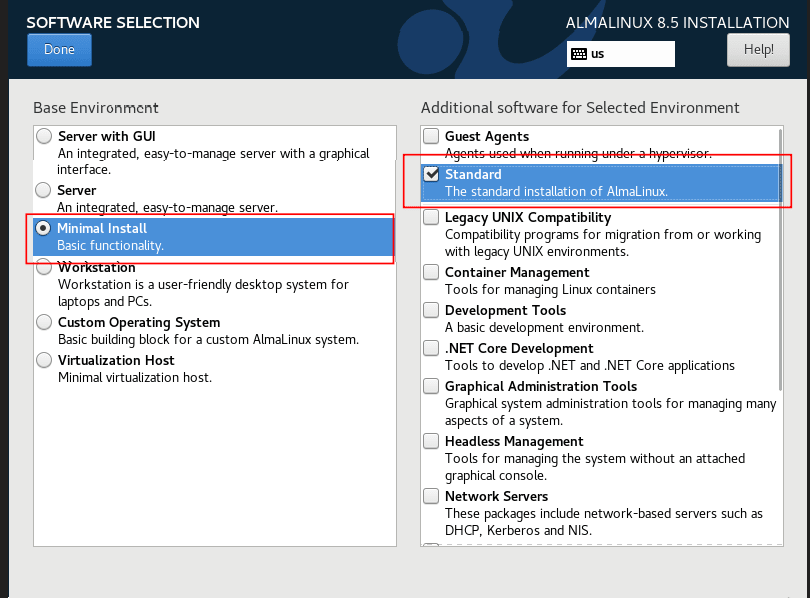
The virtual machine configuration is simply called “alma”. Allocate 1 GB of RAM and 16 GB of disk space for installation. Among the packages, choose the minimum installation with standard packages.
The rest is up to you.
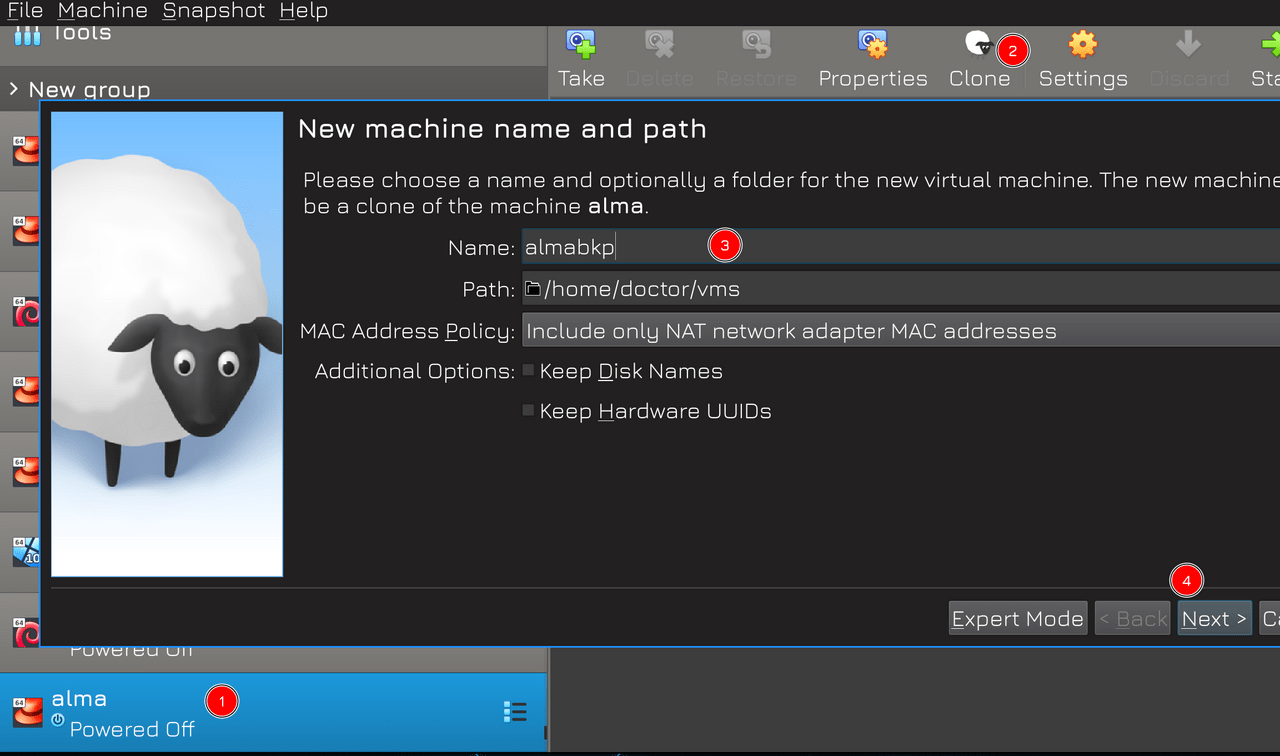
After creating the virtual machine, turn it off and clone it. This is necessary to quickly restore the virtual machine if something happens to it, as the behavior of GNS is somewhat variable and it is possible to accidentally break the connection between GNS3 and VirtualBox. So make a clone just in case.
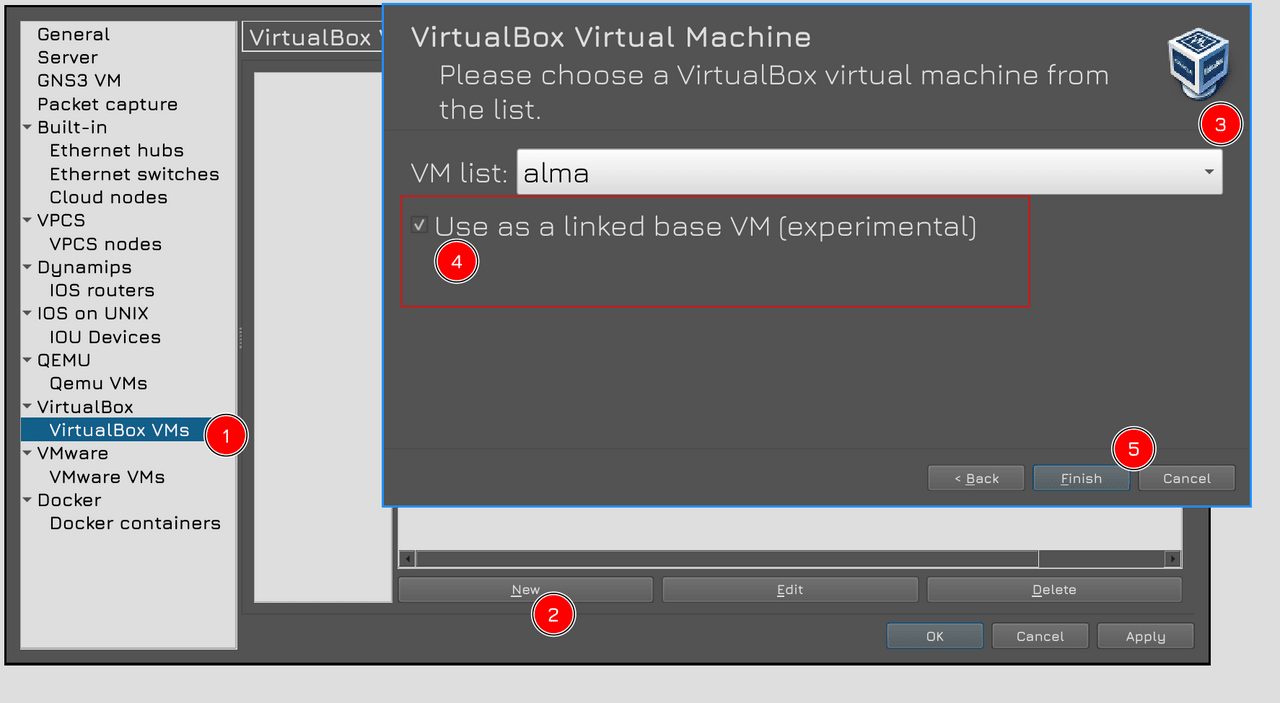
After creating the virtual machine, go back to the GNS settings: click “Create” in the “VirtualBox Virtual Machines” tab and select alma from the virtualization list Don’t forget to check the “Use as linked base virtual machine” box. You can now create a new virtual machine using this virtual machine as an image by simply dragging and dropping it.
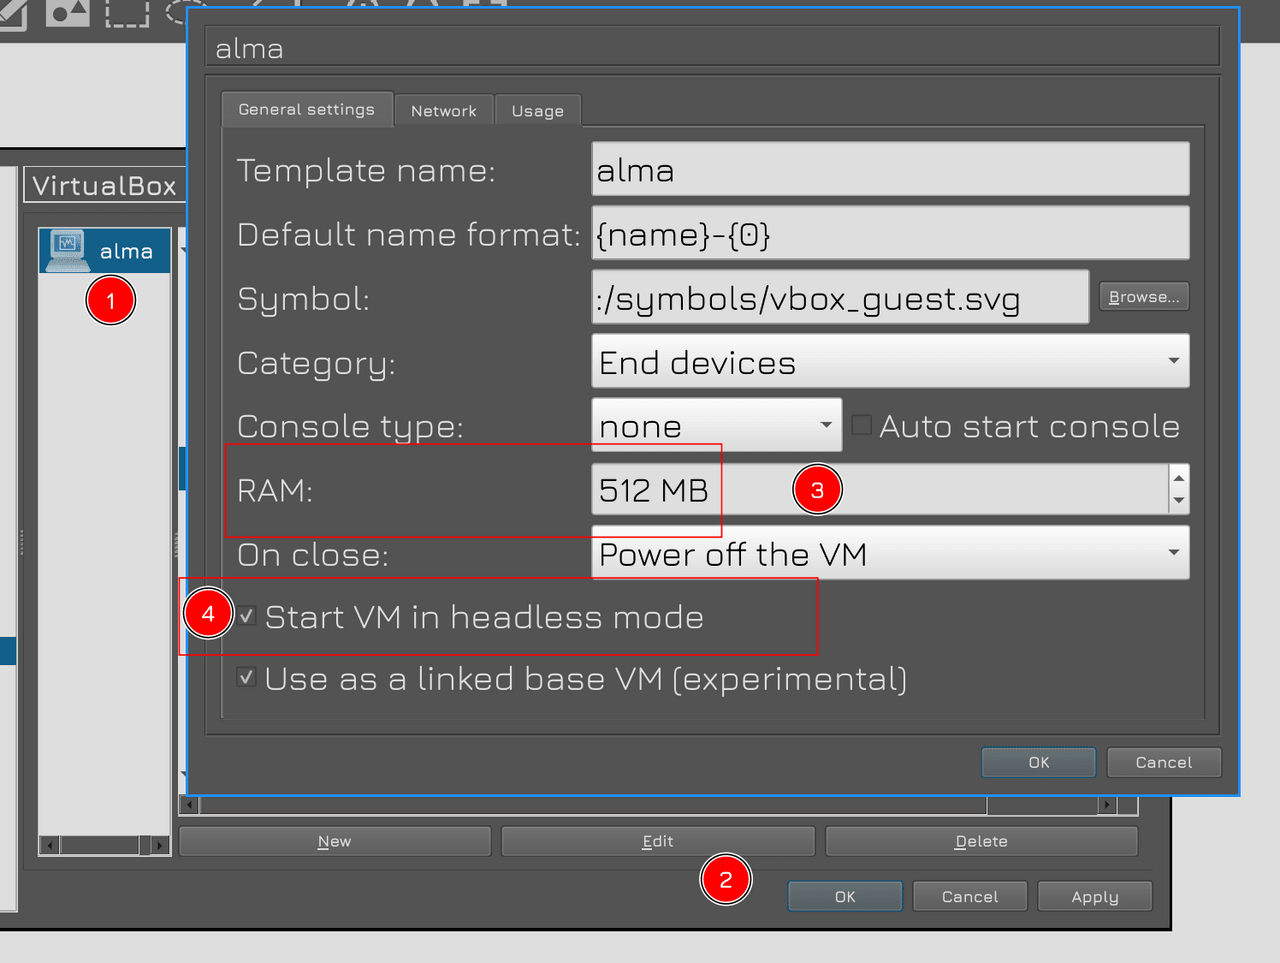
You will then see ALMA listed on the left. Click on it – Edit – change the amount of RAM to 512 MB and put a checkmark in front of the item “Start VM in headless mode”. This will allow you to start the virtual machine without displaying a new console window, because it will be connected via SSH.
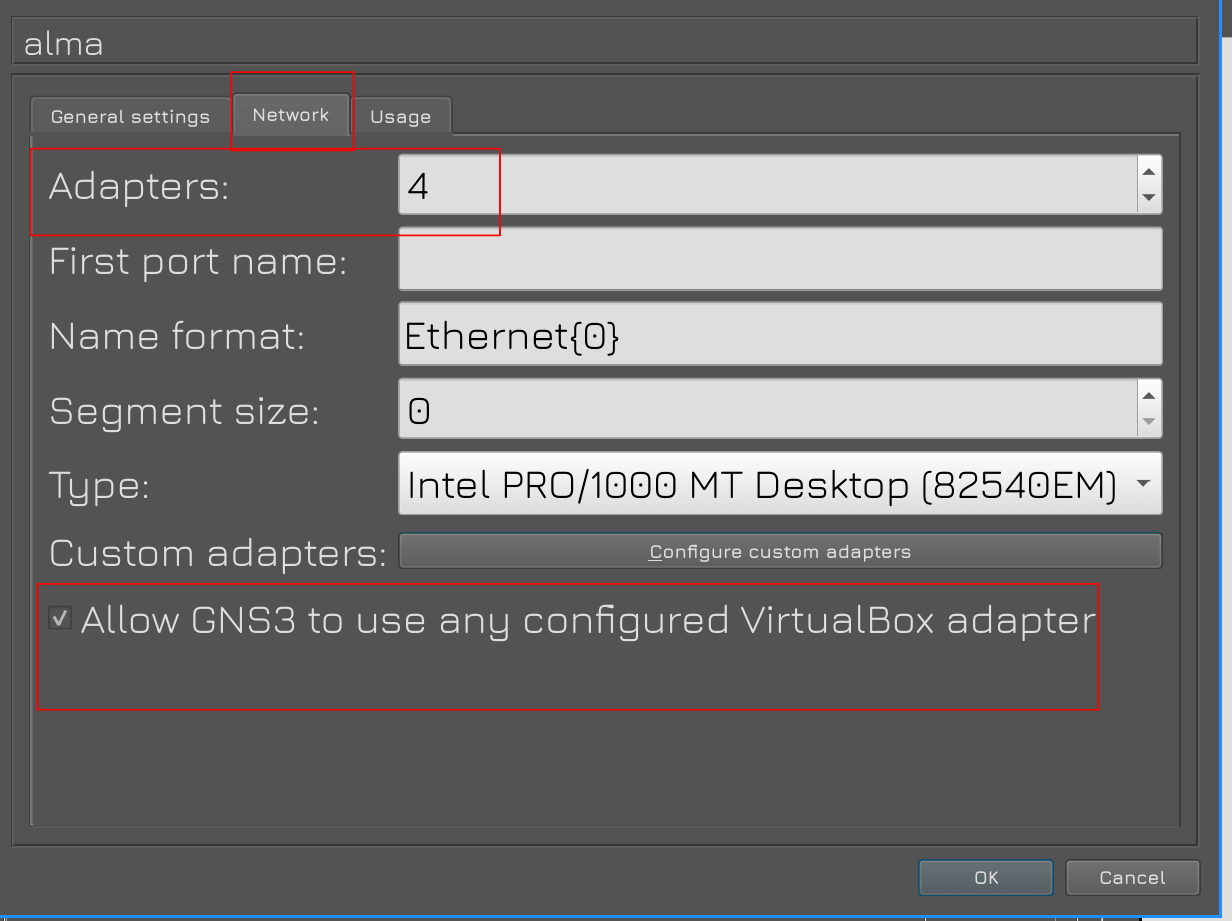
Then, in the Network tab, change the number of adapters to 4 and put a check mark at the bottom to allow GNS3 to manage the network adapters of the virtual box. Then press OK and Apply.
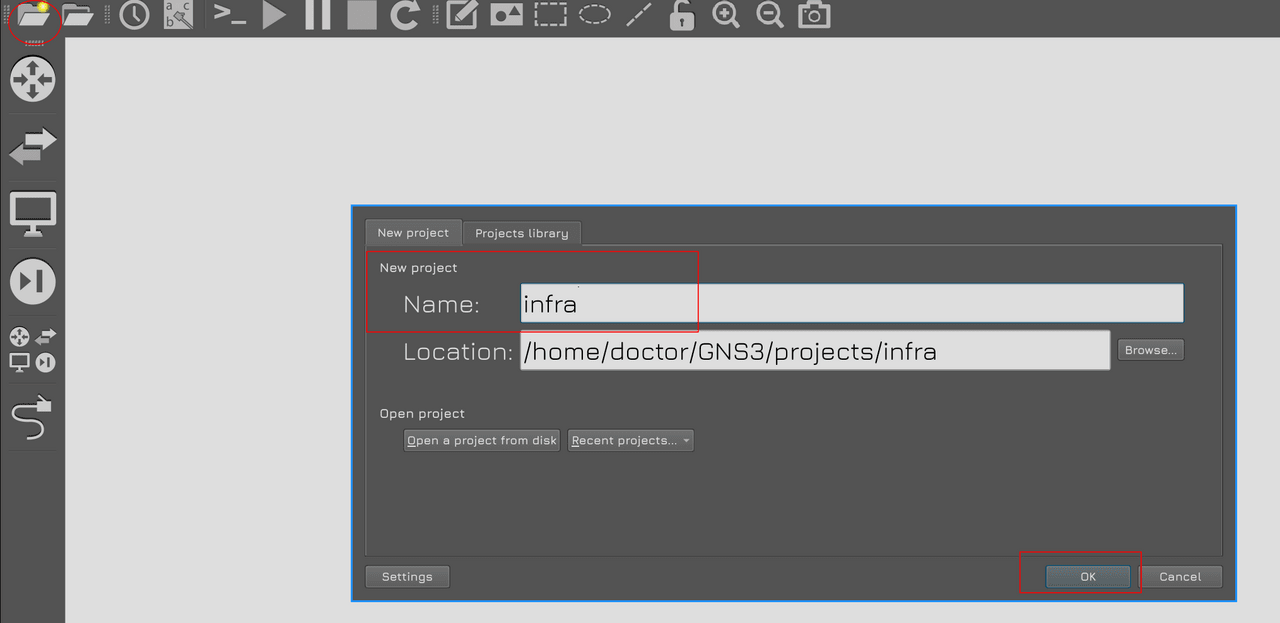
Close the settings window and click on the “New blank project” icon in the upper panel. In the window, give a name to our project, if necessary, select a directory and click OK.
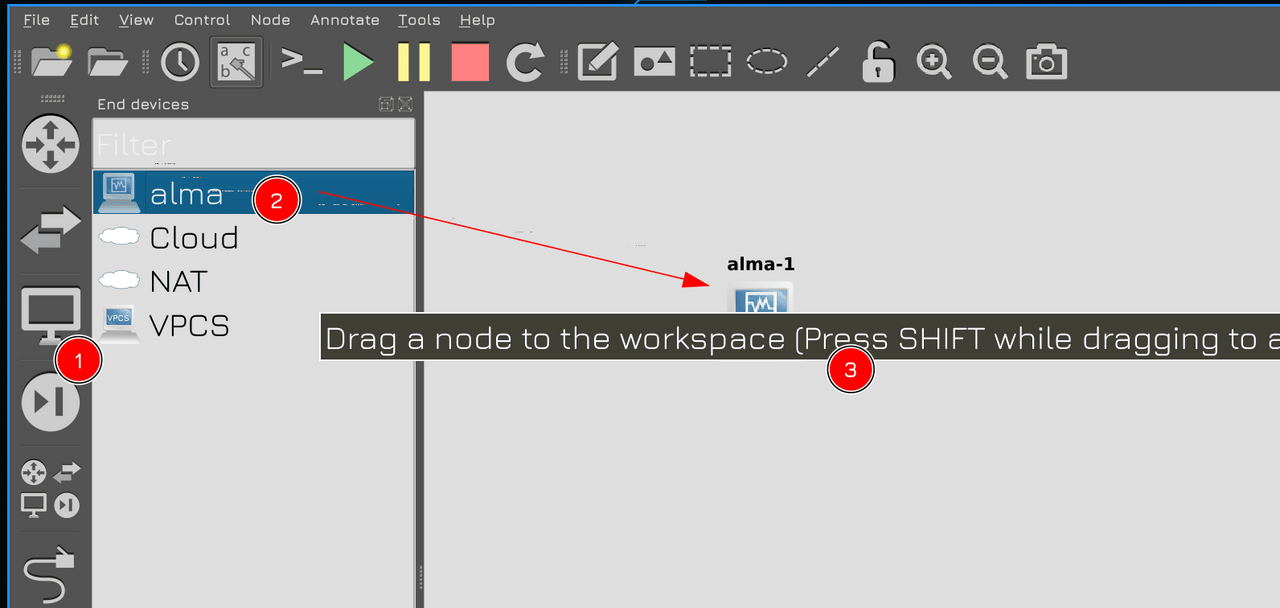
Then click on the monitor icon in the left panel – a panel with devices will open, including our alma. Let’s try to drag it to the central part.
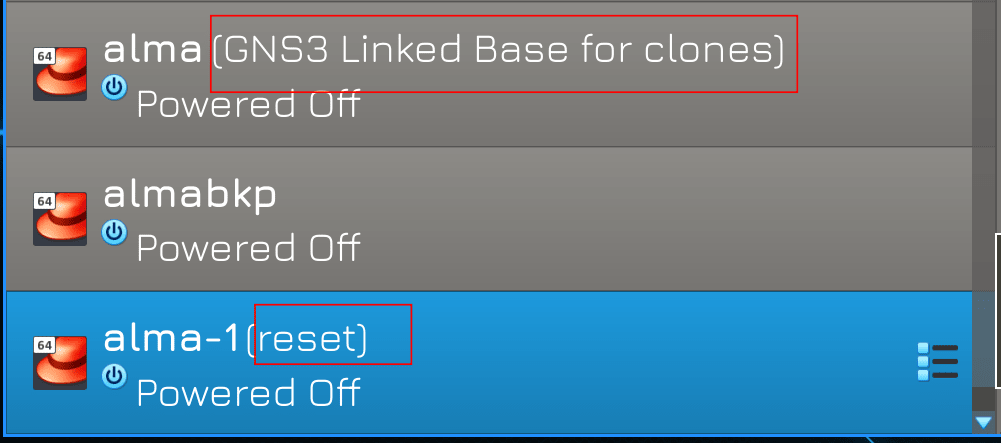
This will create a copy of the virtual machine, VirtualBox itself will see this virtual machine, and the names of these two virtual machines will be marked. do not touch these virtualizations in VirtualBox – do not remove or modify them. They are run by GNS and as I said, GNS is very fickle. If you accidentally delete the virtual machine or tamper with something in the virtual machine, the entire GNS project will stop working and you will have to do a lot of work to recover it. When you exit GNS, the virtualization of the project disappears from VirtualBox, and reappears when you start the project.
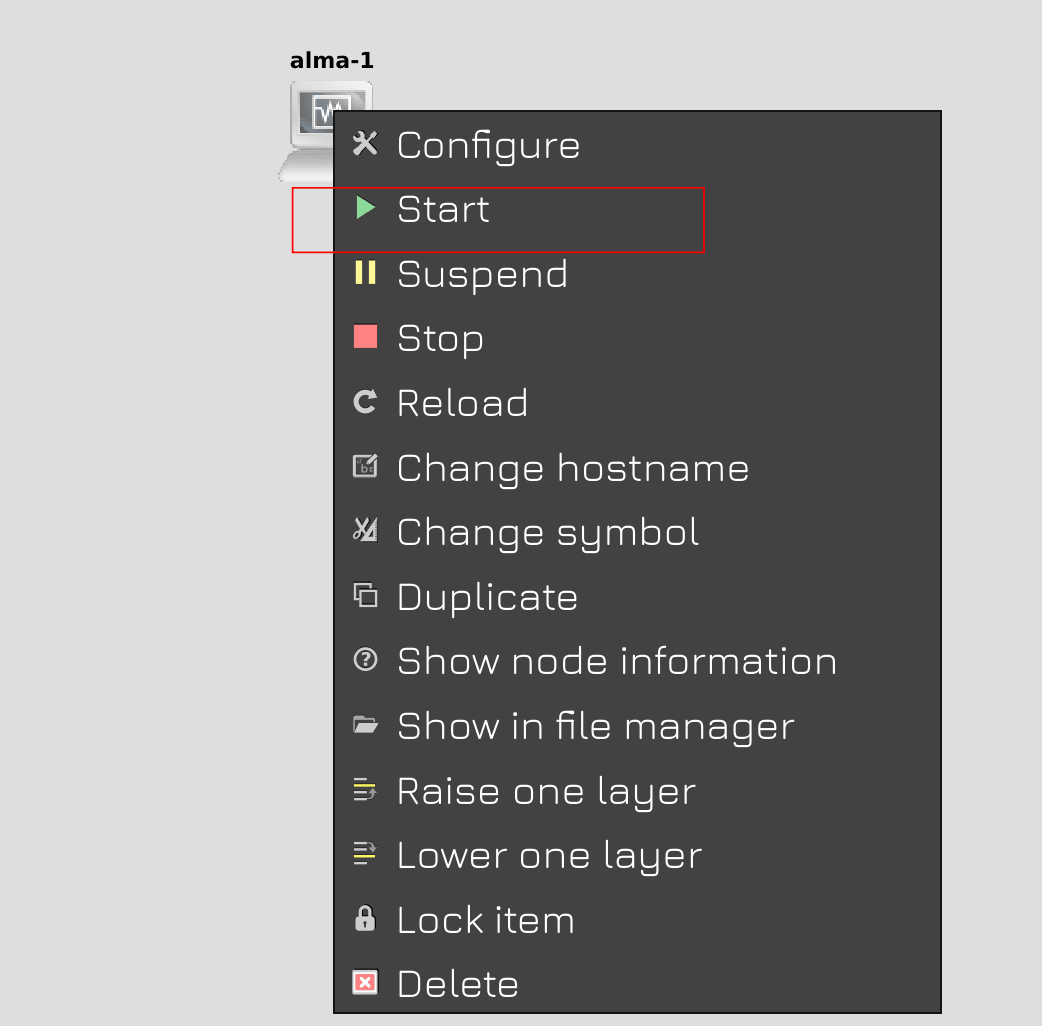
Now let’s try to start the virtual machine. To do this, in GNS, right-click on it and click Start.
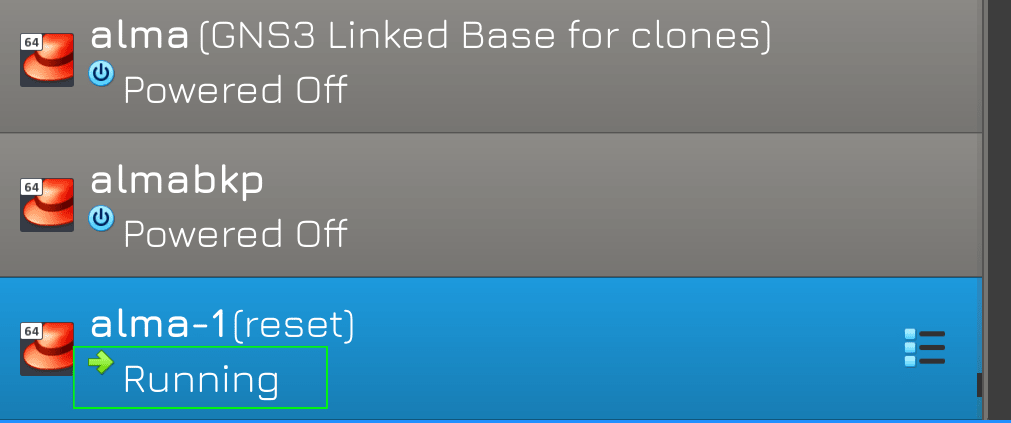
After that, you can see in the virtualbox that the virtual machine has started. So everything is okay.
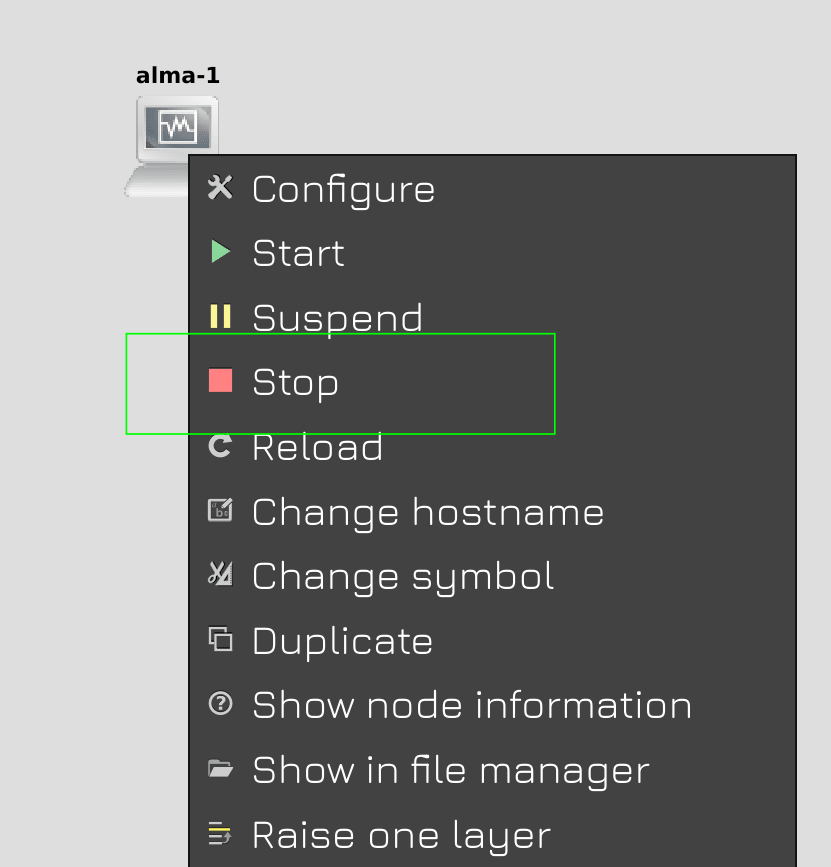
To turn off the virtual machine, again, right-click on the virtual machine in GNS and click Stop. Always shut down all virtual machines before exiting GNS.
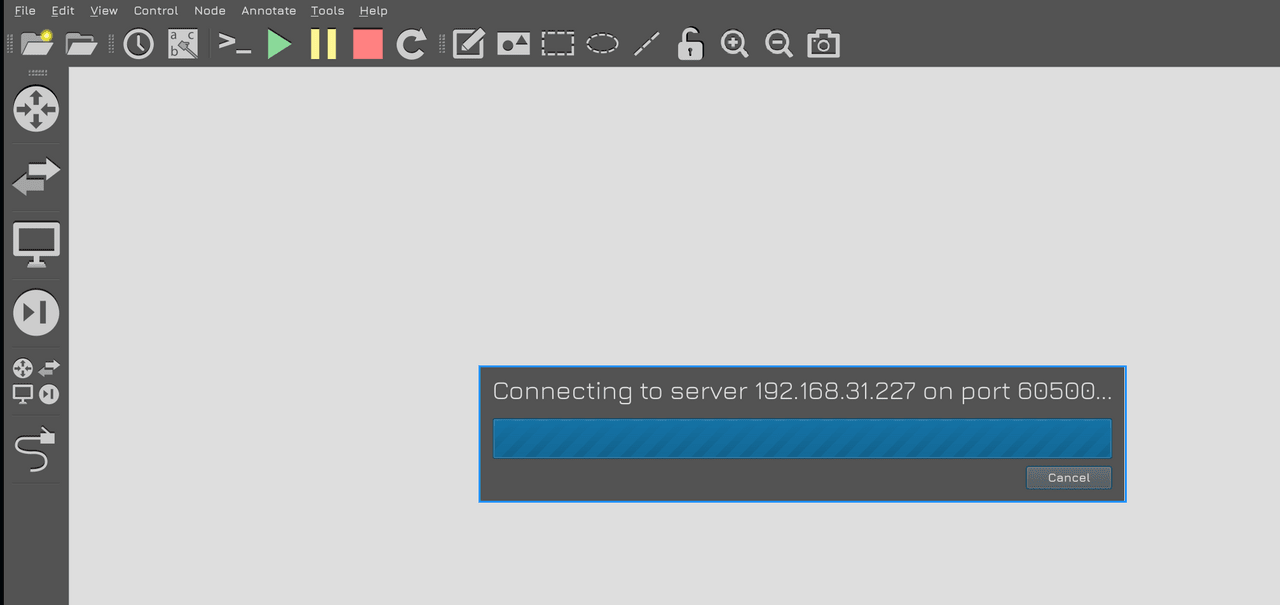
Then, when you start GNS, wait for the selected project window to appear. It may take some time, but it is better to wait.
There are other programs similar to GNS, other hypervisors, other ssh clients, other distributions. However, this is the binding I’ve been working with, and if you run into problems, I’ll be able to help you more easily with these tools.