01.07.2025
6 min
1380

Want to turn your smartphone into a real ethical hacking tool? In this article, you will learn how to install Kali NetHunter without root access on Android. We will take a detailed look at how to prepare the system via Termux, install NetHunter KeX, connect a VNC client and run a full Kali Linux environment without changing the kernel.
This is the easiest way to get a powerful pentest environment without the risk of losing the warranty or “hacking” your phone. Perfect for beginners, students and cybersecurity enthusiasts. Follow our instructions and your Android will become a real mobile cyber device.

If you are looking to run Kali on your smartphone without the risk of voiding your warranty due to rooting and the possibility of getting stuck in a bootloop or even bricked, this guide is for you.
This blog will show you a step-by-step process for installing Kali NetHunter without root access on a OnePlus 7 Pro smartphone running stock OxygenOS 10. Since a full-fledged workstation on your phone is not for everyone, this guide will demonstrate how to turn your Android device into a portable Kali workstation that you can connect to from your local computer via SSH or VNC.
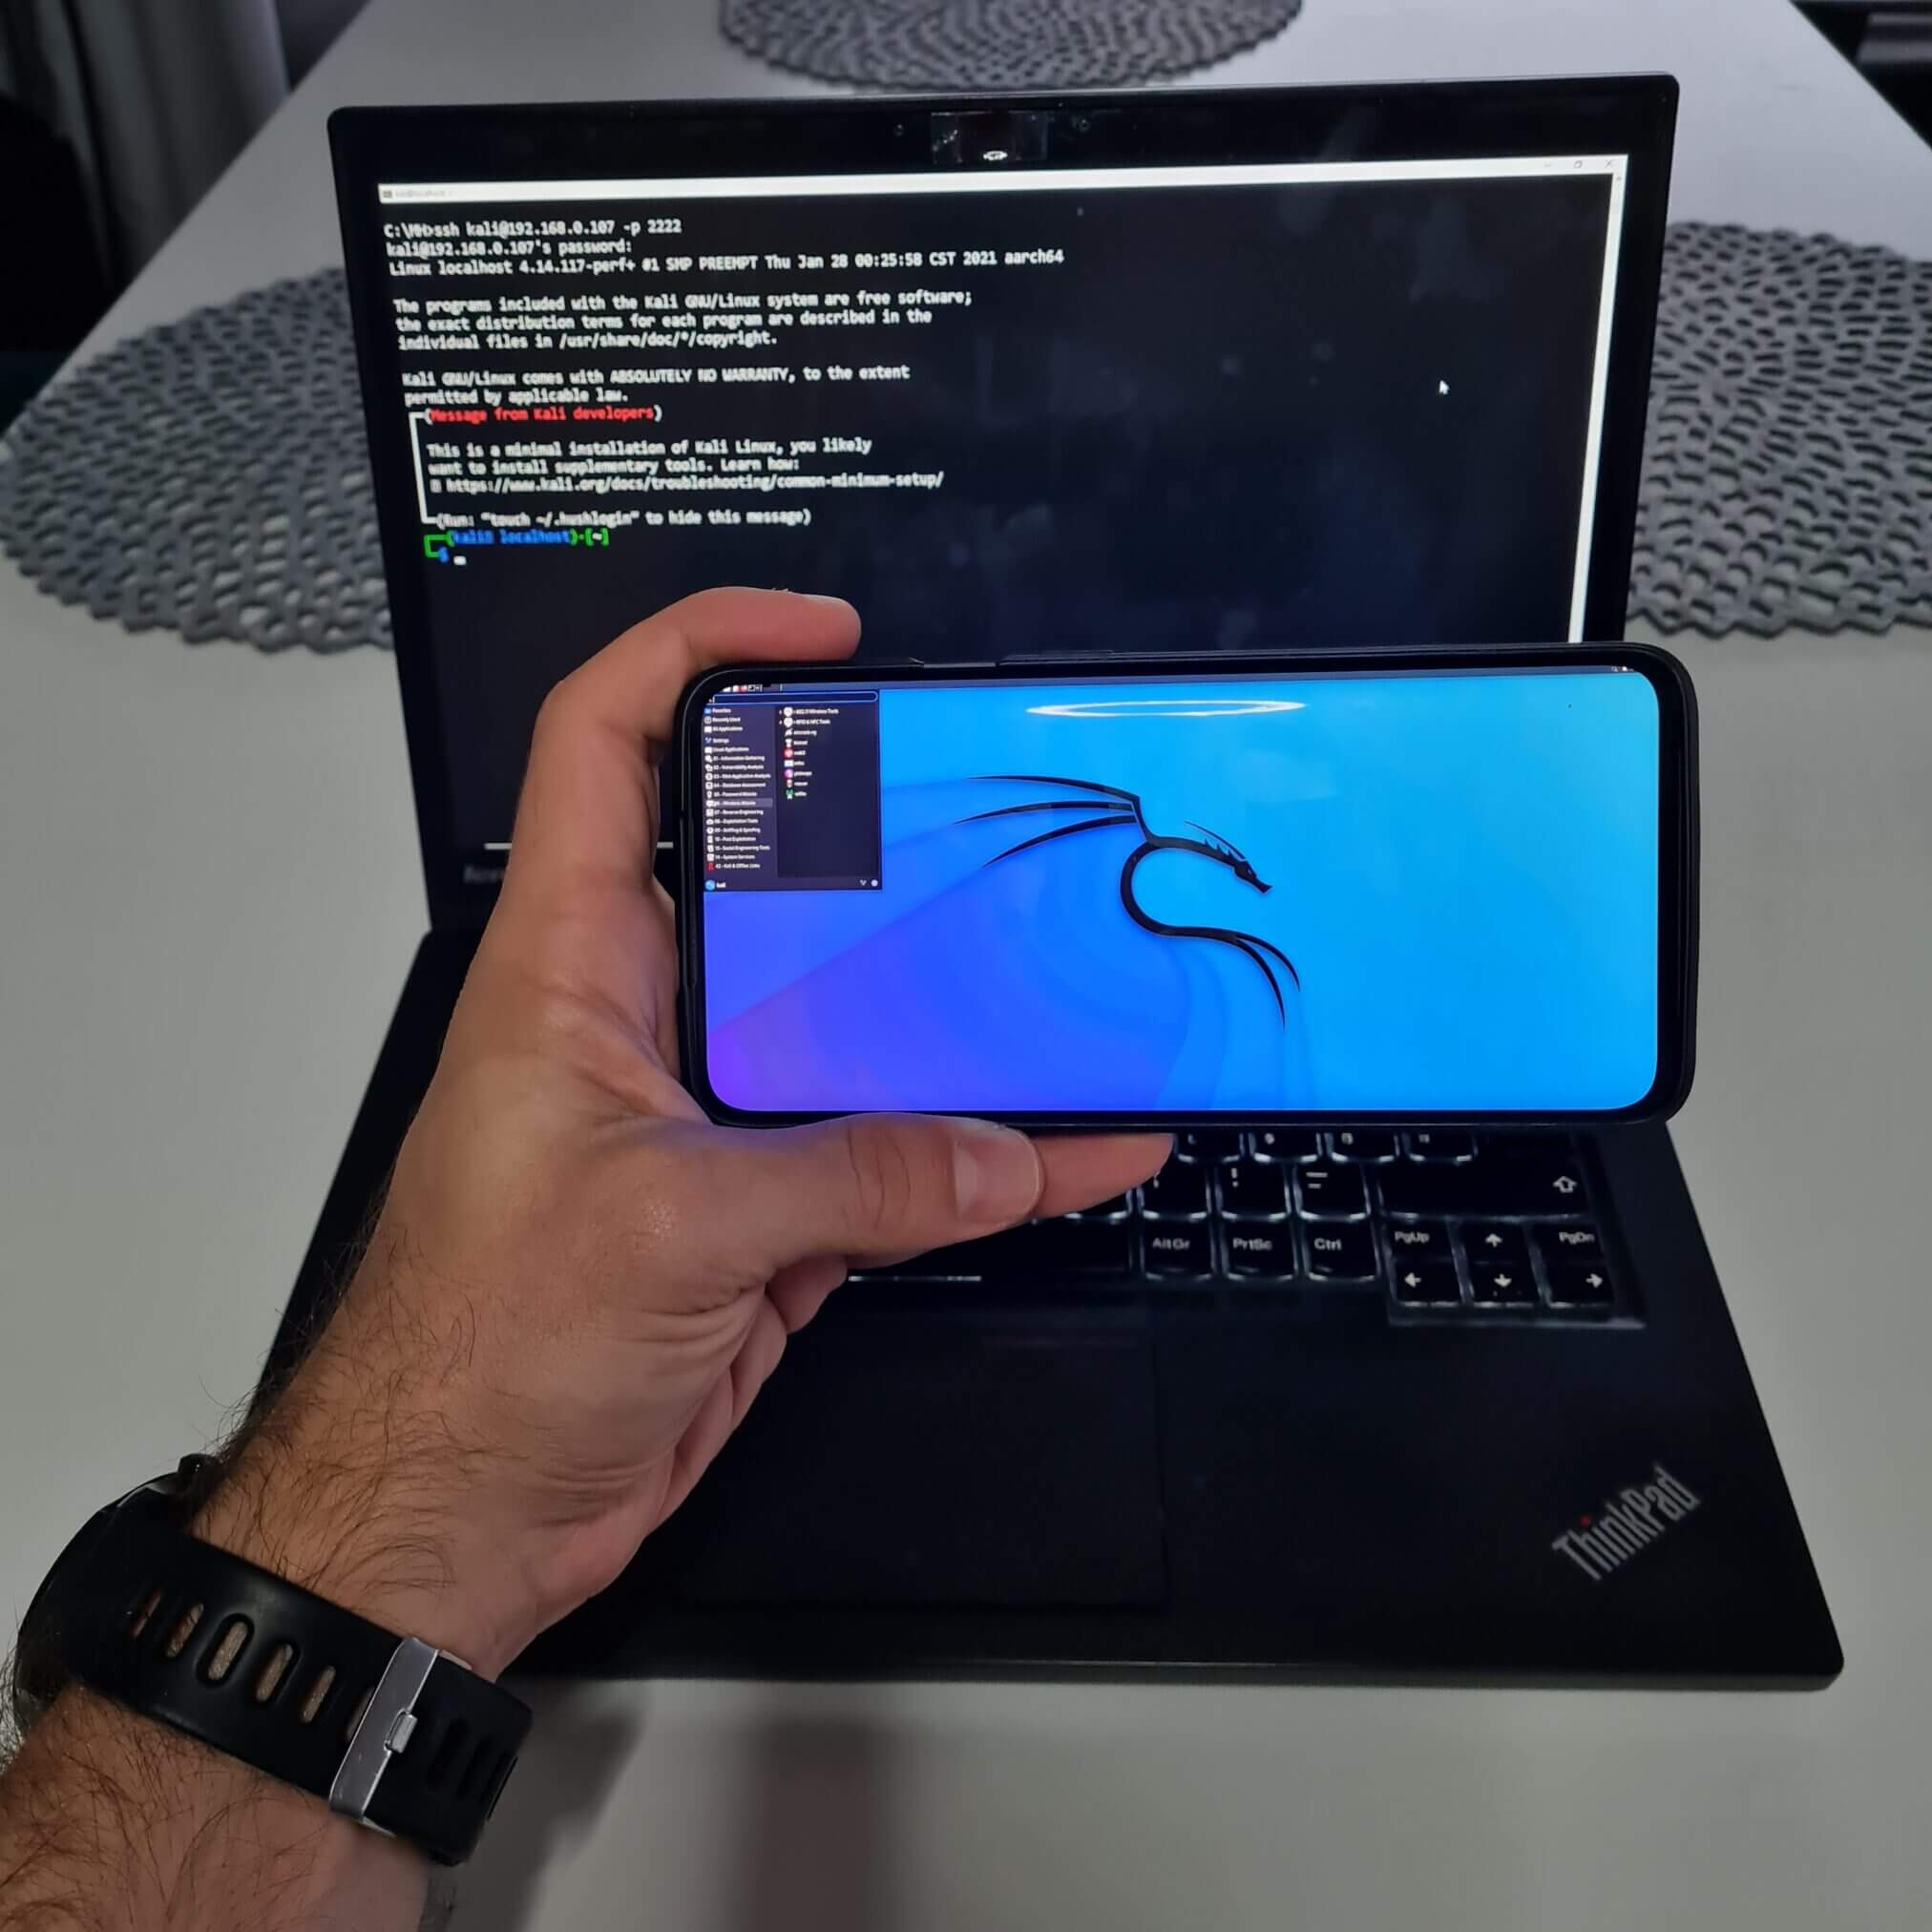
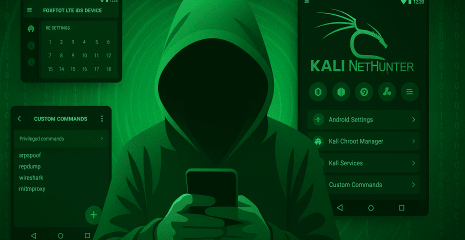
Figure 1. Portable Kali NetHunter runs on Android without root rights
The installation process is simple and shouldn’t surprise you with any problems if you follow these steps. I chose to download Termux from the NetHunter App Store. However, you can also download it directly з F-Droid або GitHub. It is important not to download it from Google Play, as the Termux builds on the Google Play Store are outdated and no longer supported.
From the NetHunter App Store website, download and install the NetHunter Store app.
Open the NetHunter Store app and install Termux and NetHunter KeX. (Termux from the Google Play Store is no longer supported).
Open the Termux app and enter these commands:
-~ termux-setup-storage
-~ pkg update
-~ pkg upgrade
-~ pkg install wget
-~ wget -O nh https://offs.ec/2MceZWr
-~ chmod +x nh
-~ ./nh
After running the downloaded nh script, it will load the rootfs (chroot) for your specific device architecture, verify its integrity, and unpack it.
The download and installation process took me about 25 minutes and 13 GB of space. However, if you want to save 1.7 GB, at the end of the installation you can press N to delete the downloaded rootfs file, so it is already unpacked and unusable by NetHunter. See Figure 2.
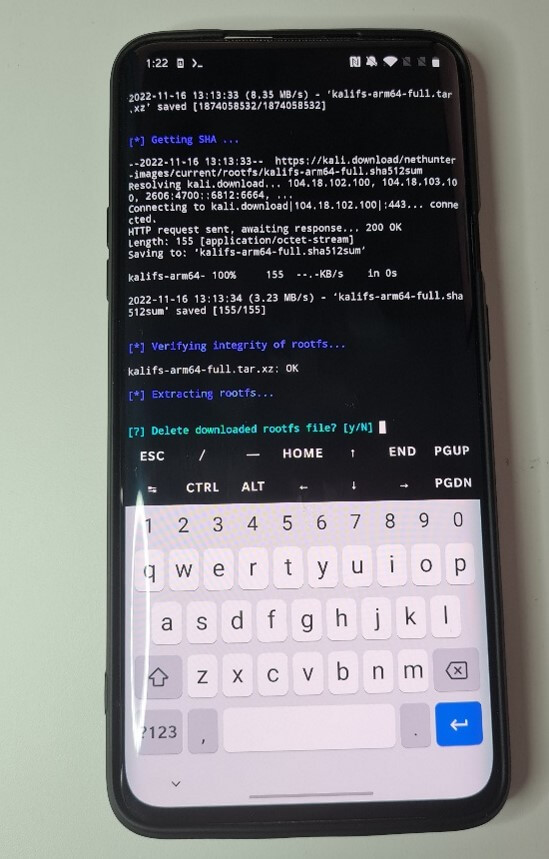
Figure 2. Before completing the installation, the user can delete the downloaded rootfs files to save space.
The size of the rootless NetHunter can be checked by getting the storage details of the Termux app, as seen in Figure 3.
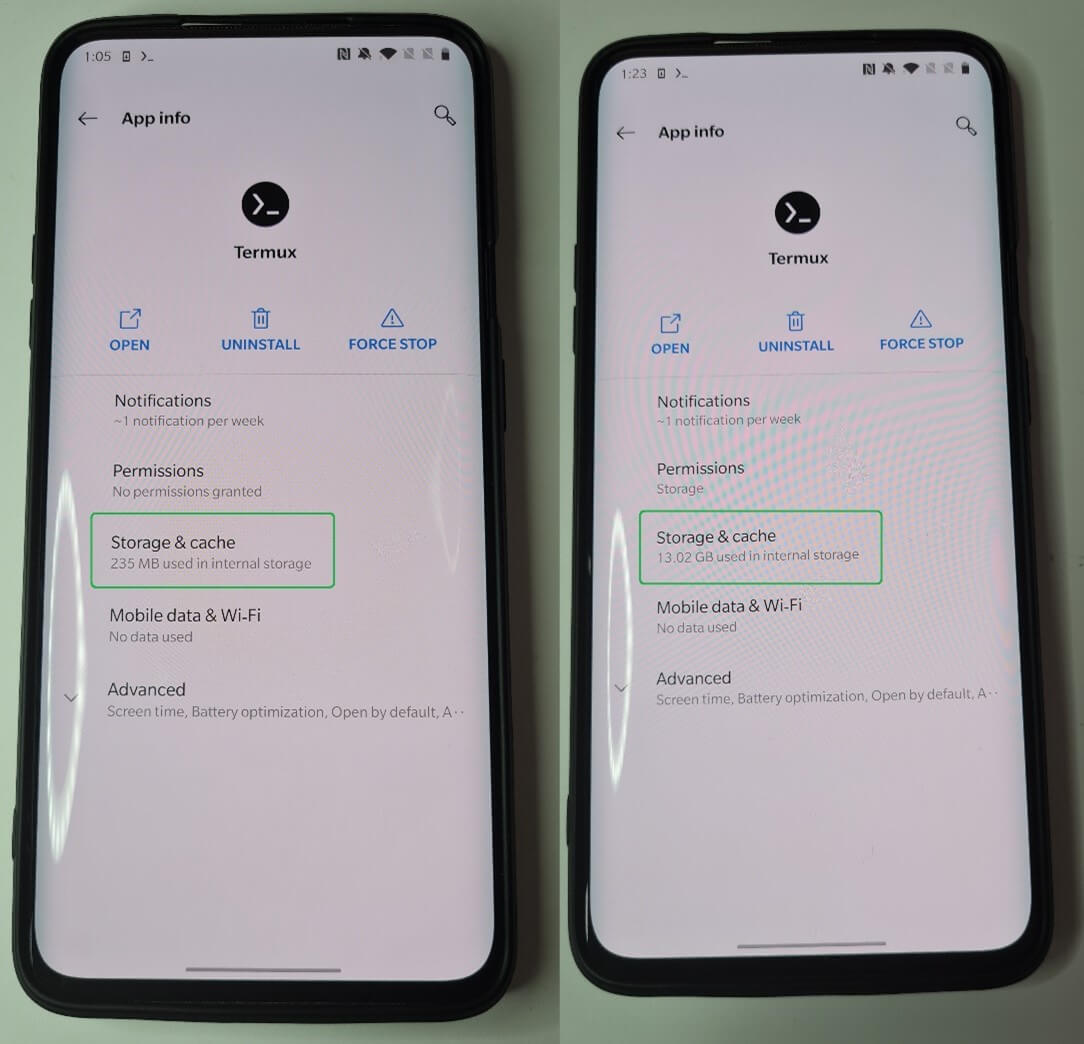
Figure 3. Size of rootless NetHunter as determined by Termux repository used before installation (left) after (right)
After successful installation, you will see an ASCII image of KALI with commands to get started.
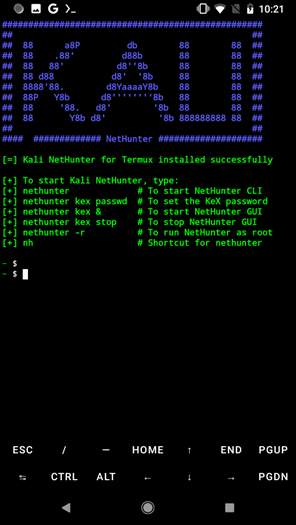
Figure 4. Kali NetHunter for Termux successfully installed
If you are comfortable with just the CLI, type nethunter or nh to launch the Kali command line. When we print the current working directory, it may appear that we are in the Android root directory, but Kali is running under Termux as a chroot, where all data is stored in the /data/data/com.termux/files/home/kali-arm64/home/kali directory. This allows the user to be root, as you can see in Figure 5.
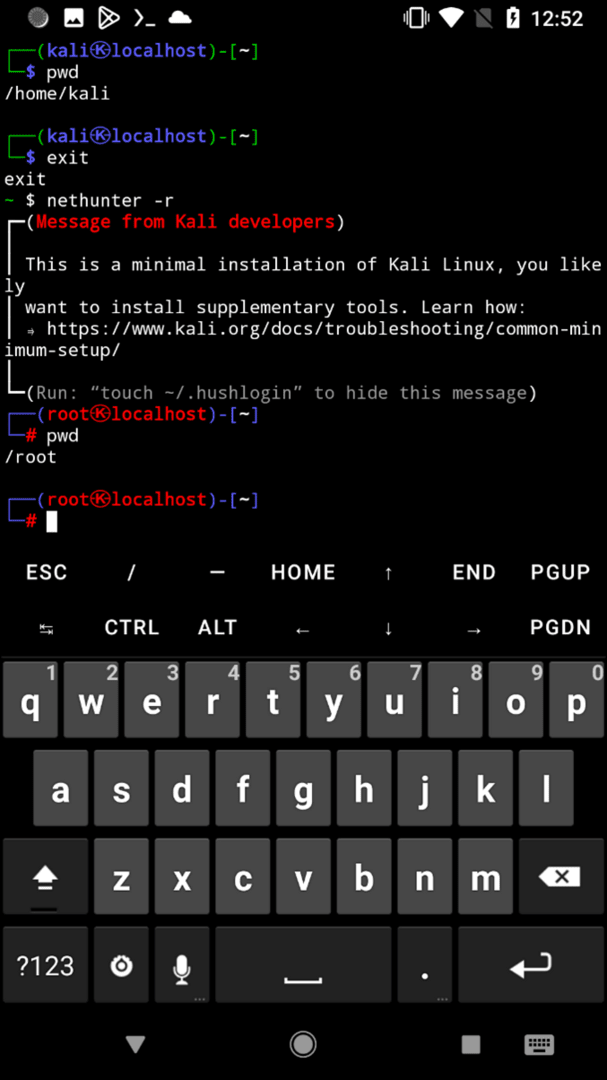
Figure 5. Running the command line as a user with root privileges
If you are already in the NetHunter console, I advise you to update the Kali packages using the command sudo apt update && sudo apt full-upgrade -y.
If you want to use the Kali NetHunter GUI, you first need to configure the KeX client with a password using the command nethunter kex passwd.
And start a session using nethunter kex &. This will start a VNC server that we can connect to using the NetHunter KeX client that we installed earlier using the password when configuring the KeX client, as seen in Figure 6.
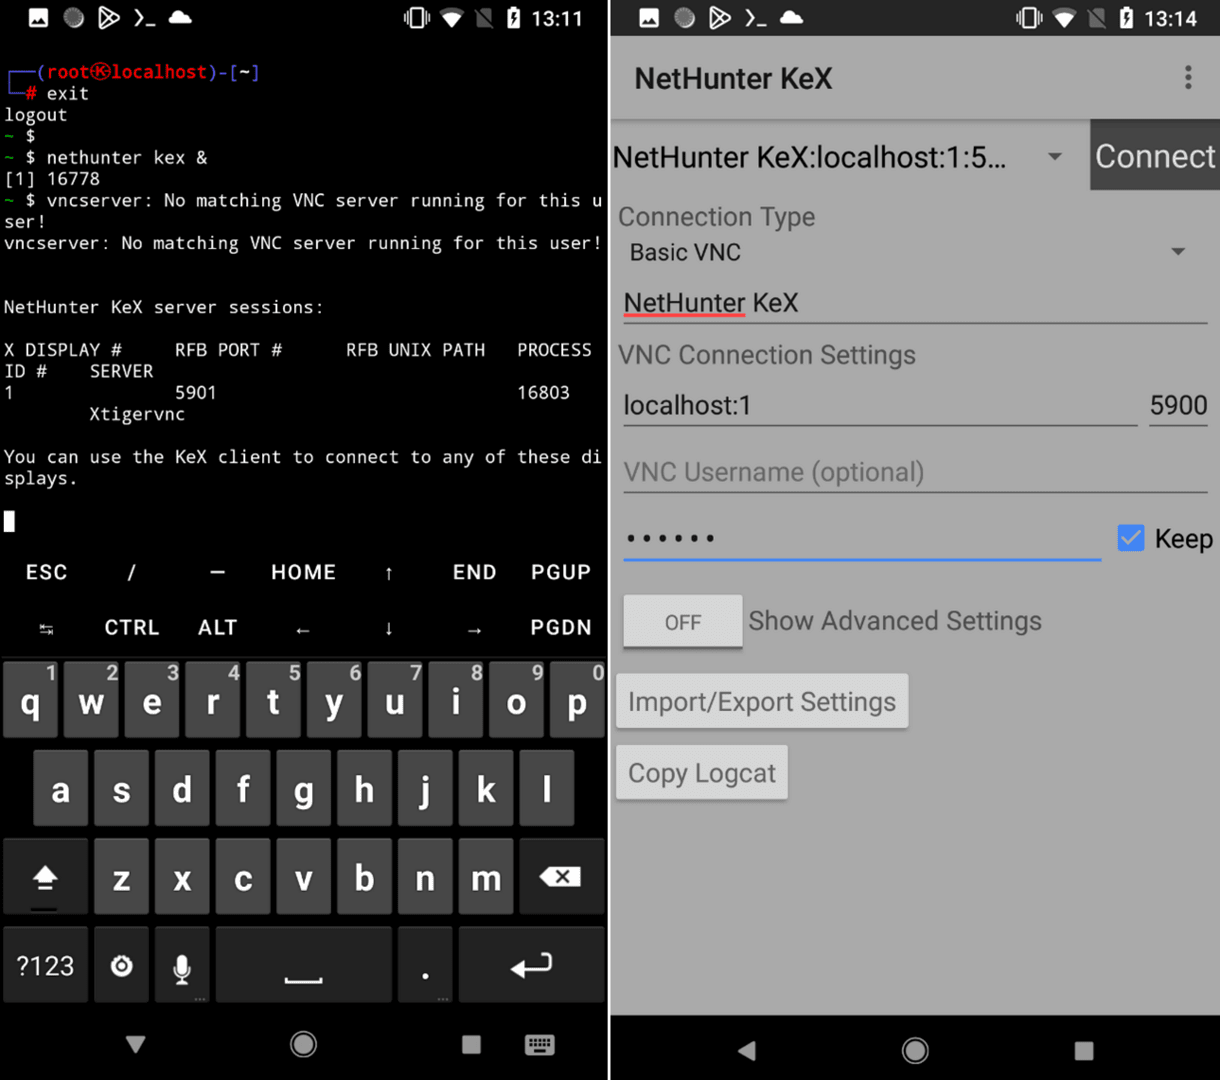
Figure 6. Starting the KeX server (left), to which we connect using the NetHunter KeX client (right)
You will now be able to interact with Kali NetHunter installed on your Android device for desktop use.
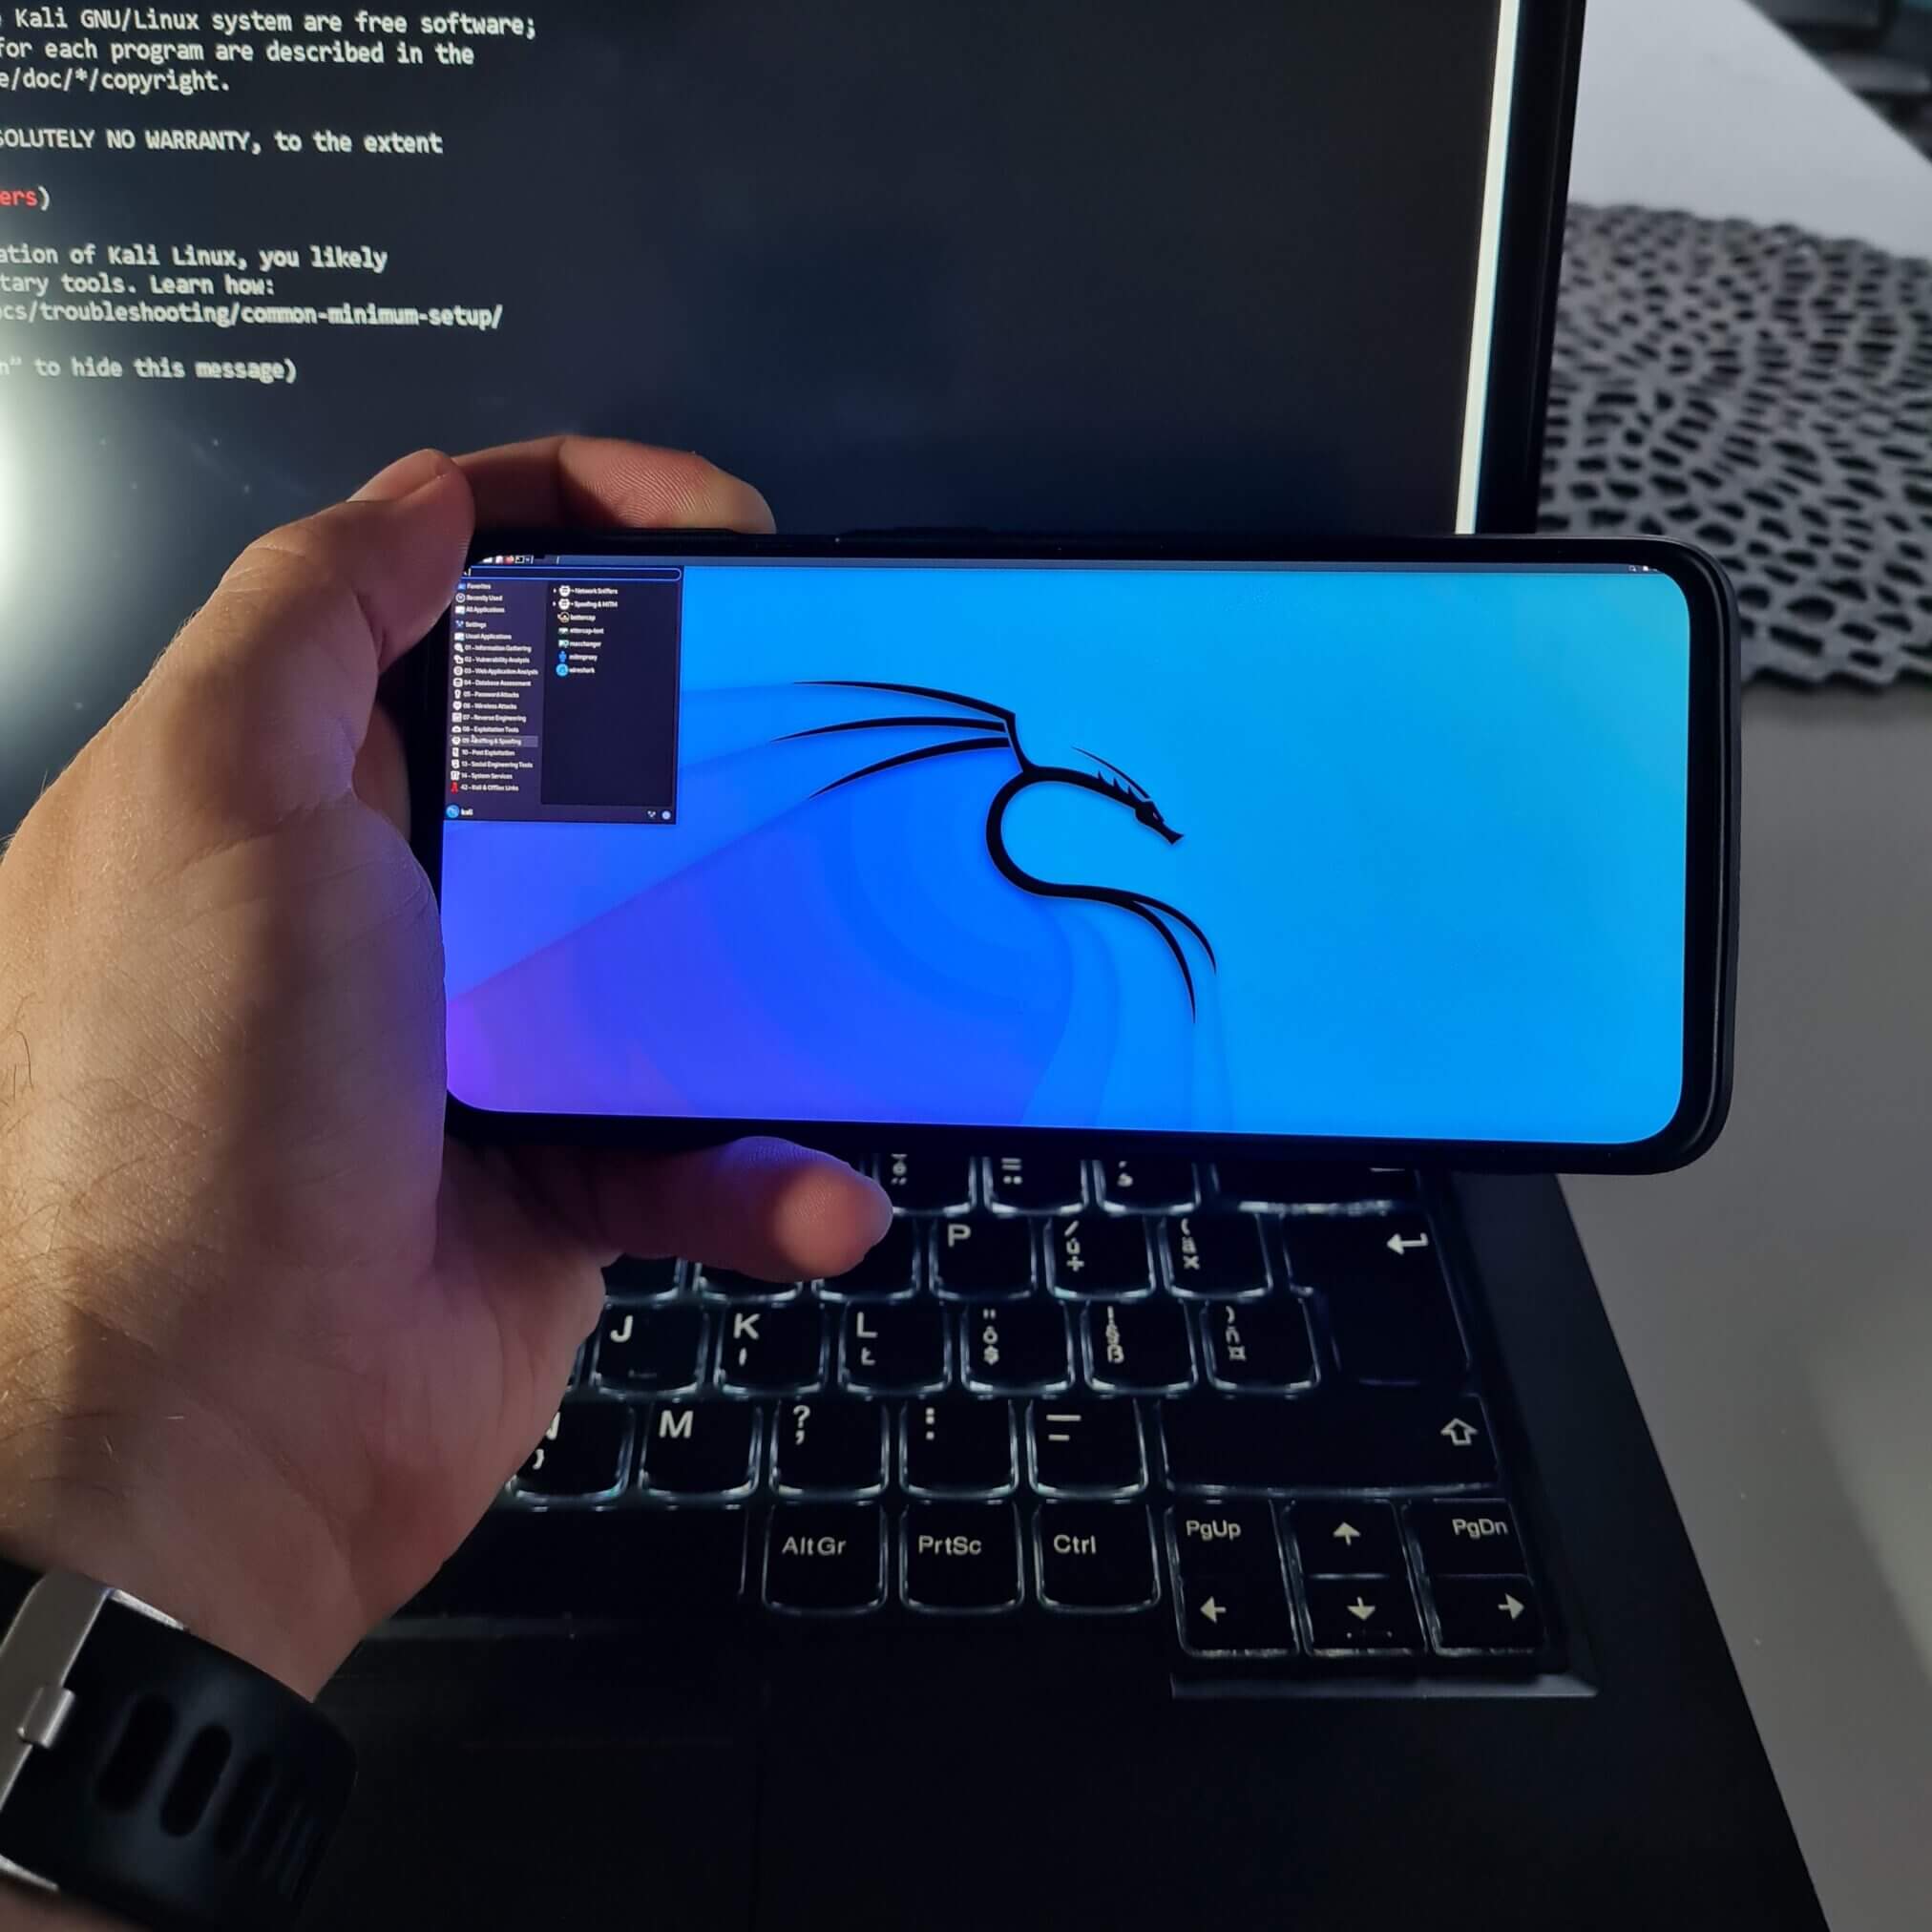
Figure 7. Kali NetHunter desktop interface on an Android smartphone
Let’s be honest, using the desktop version of Kali on a smartphone is not as convenient as using it on a computer. I would recommend connecting an external keyboard and mouse to improve the experience, but the screen may still be too small for some of you. Alternatively, you can mirror your screen over Wi-Fi or use a USB-C to HDMI cable if your device supports it.

Figure 8. The NetHunter portable workstation displays the screen on a monitor and is controlled by an external keyboard and mouse.
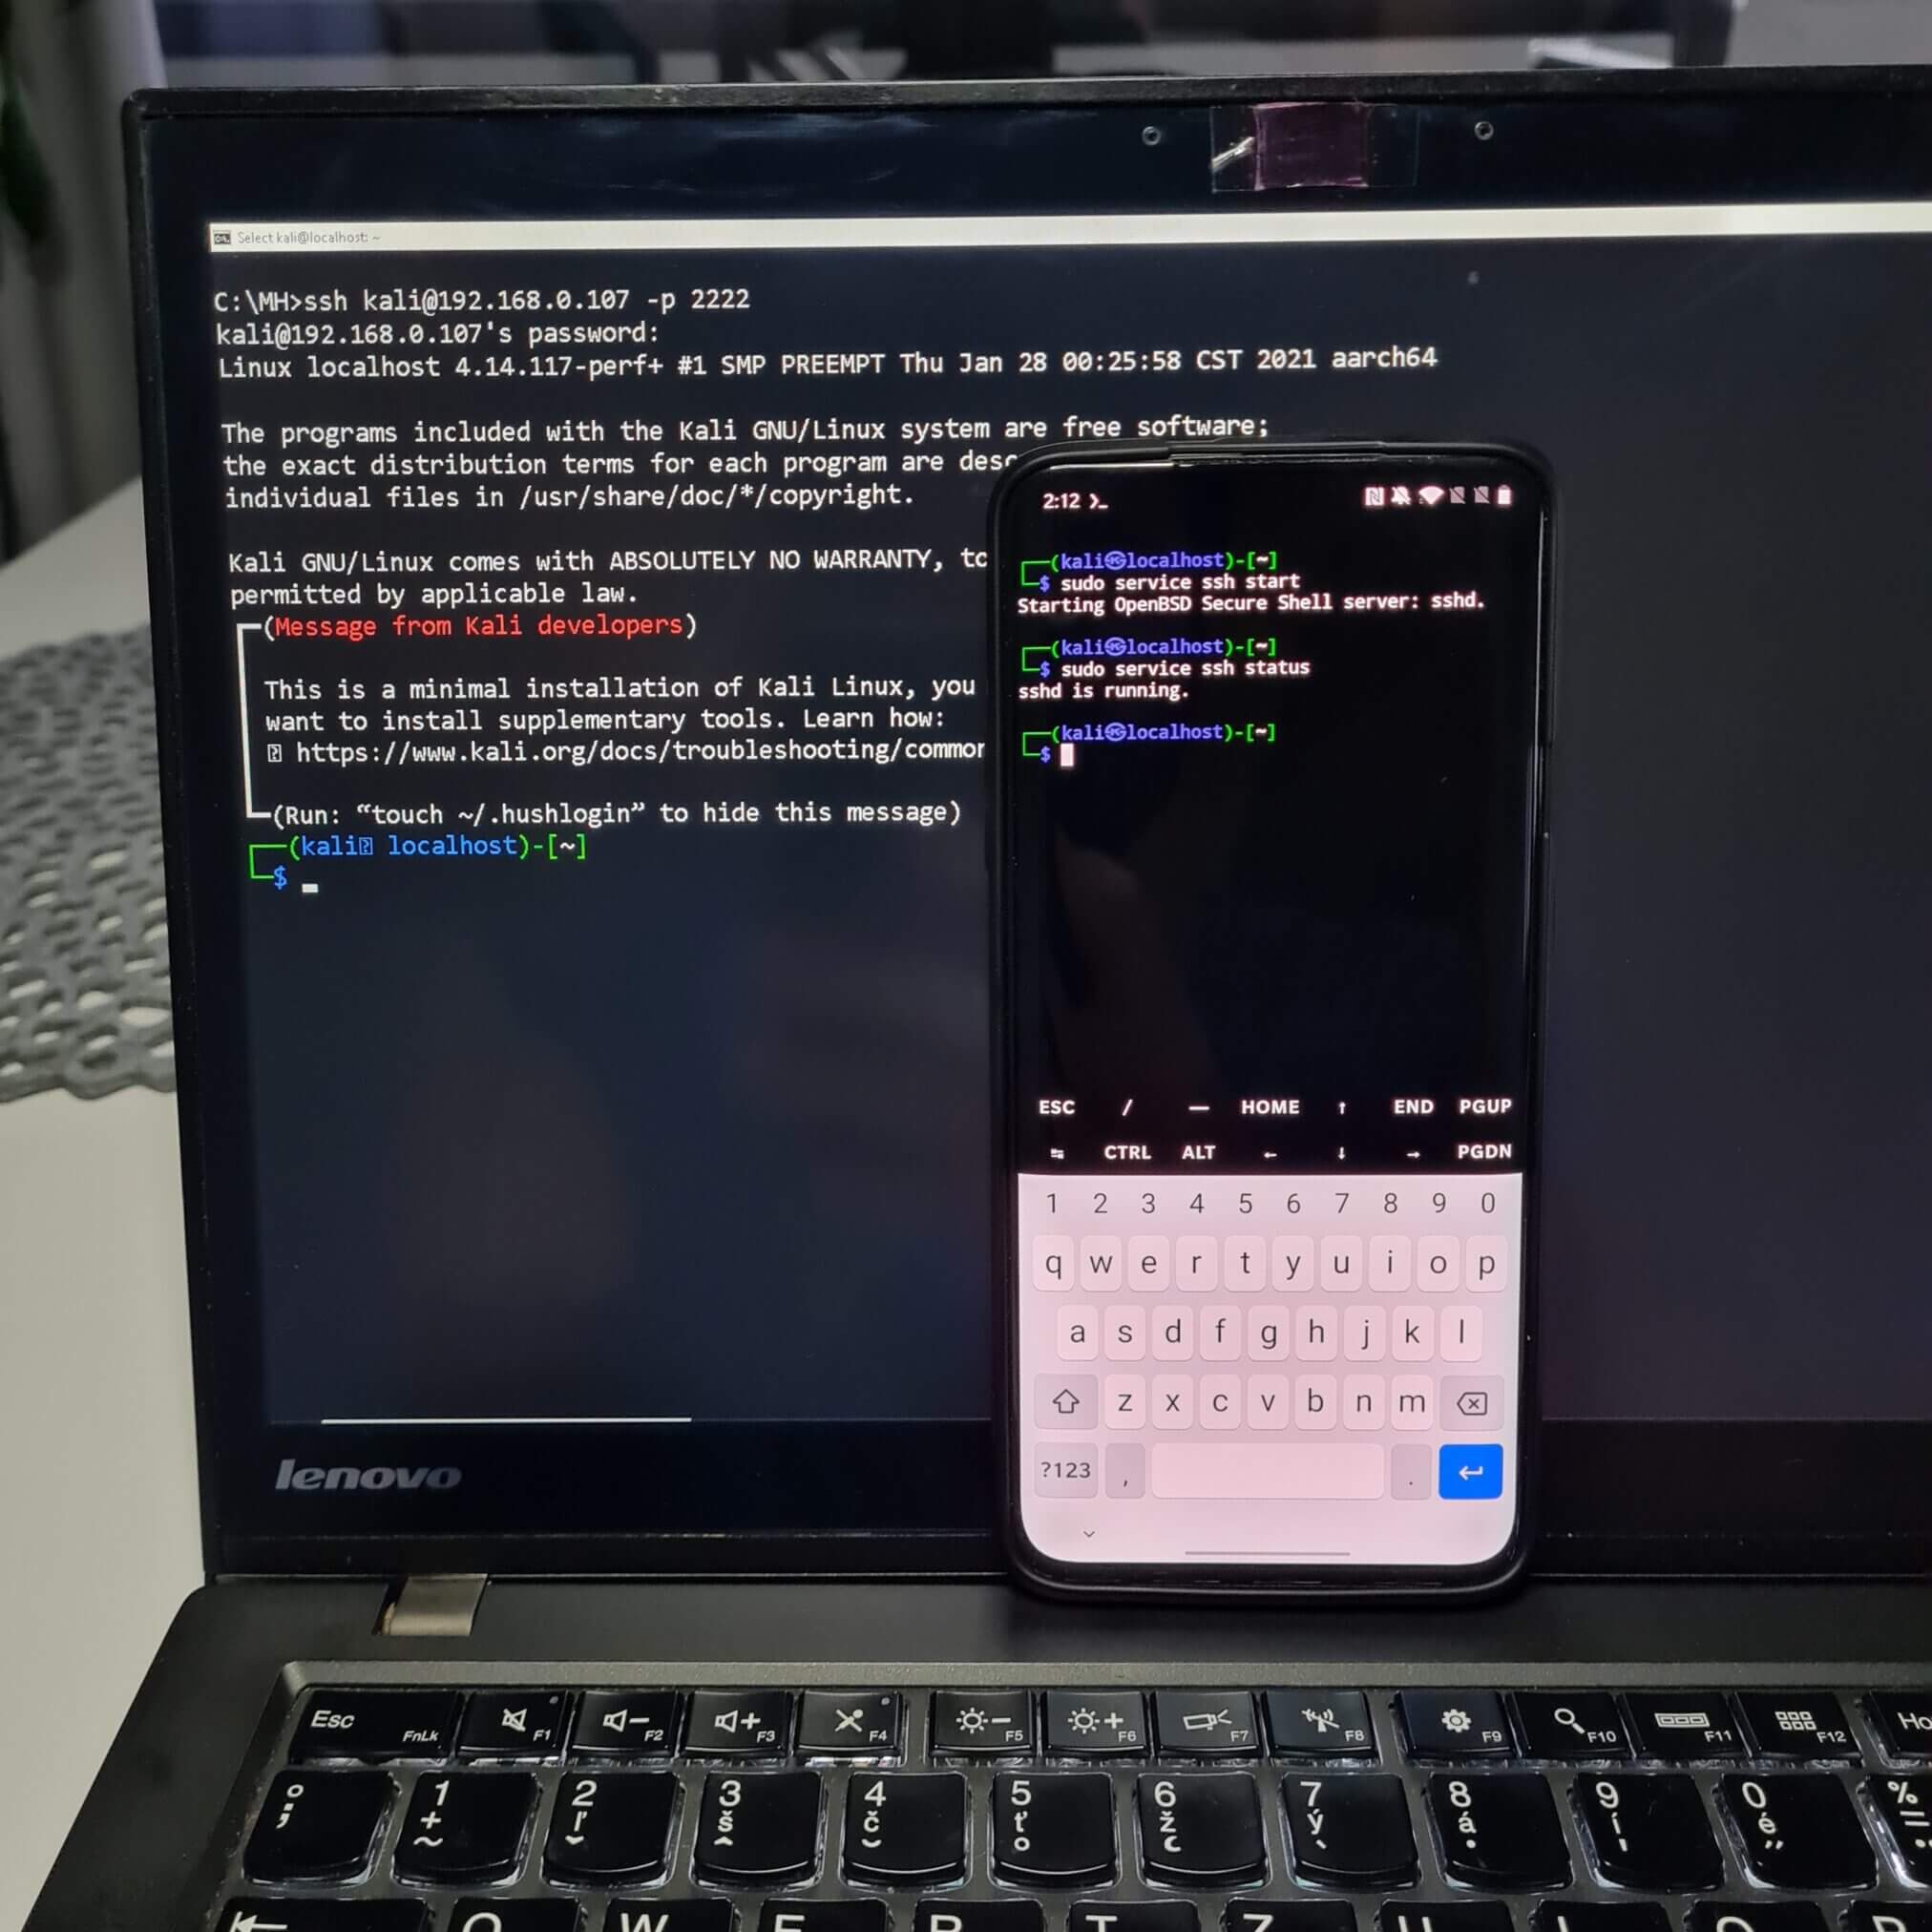
However, there is one huge advantage: we can connect to Kali NetHunter from any local computer without having to run a virtual machine. This means that your smartphone can be used as a portable Kali workstation, which can be connected to via SSH or using a VNC client with a graphical interface.
In the NetHunter terminal, we first need to enable SSH from the sshd configuration. I will edit this with nano with the command sudo nano /etc/ssh/sshd_config and uncomment the port on line 14, making sure PermitRootLogin yes is also enabled. It seemed that the default SSH port 22 was not available for connection; because of this, we need to use a different entry, for example 2222, as you can see in Figure 7.
Save the configuration file and start the SSH service with sudo service ssh start. You can check if the SSH service has started with sudo service ssh status. If we want to connect to our smartphone, we need to find out the IP address of our device with ifconfig.

From a computer, we can connect to this IP address via SSH using the command ssh kali@IP_OF_NETHUNTER -p 2222. The default username and password are kali, kali.
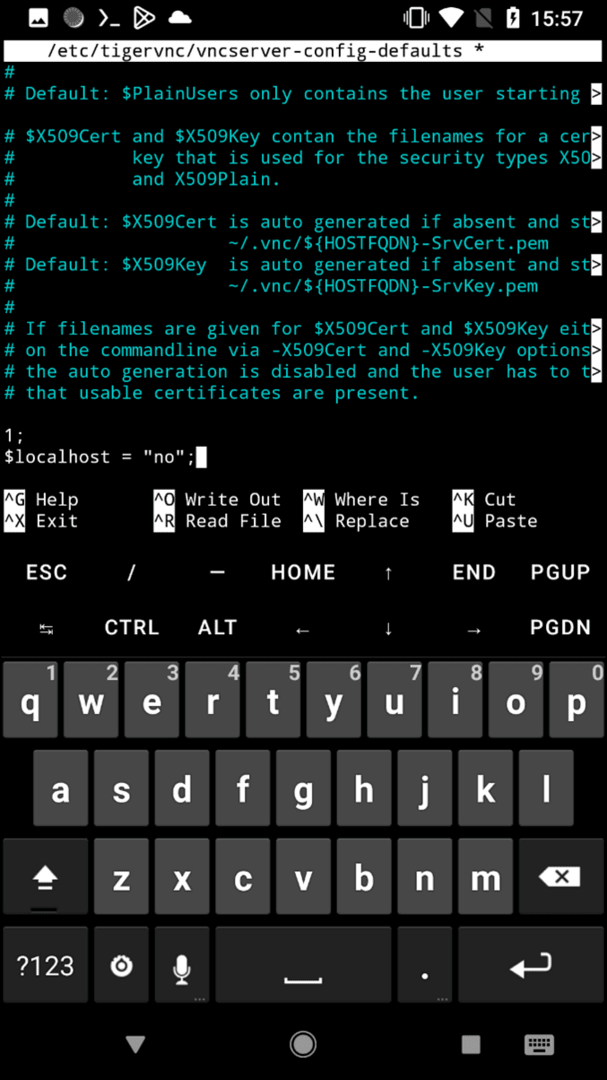
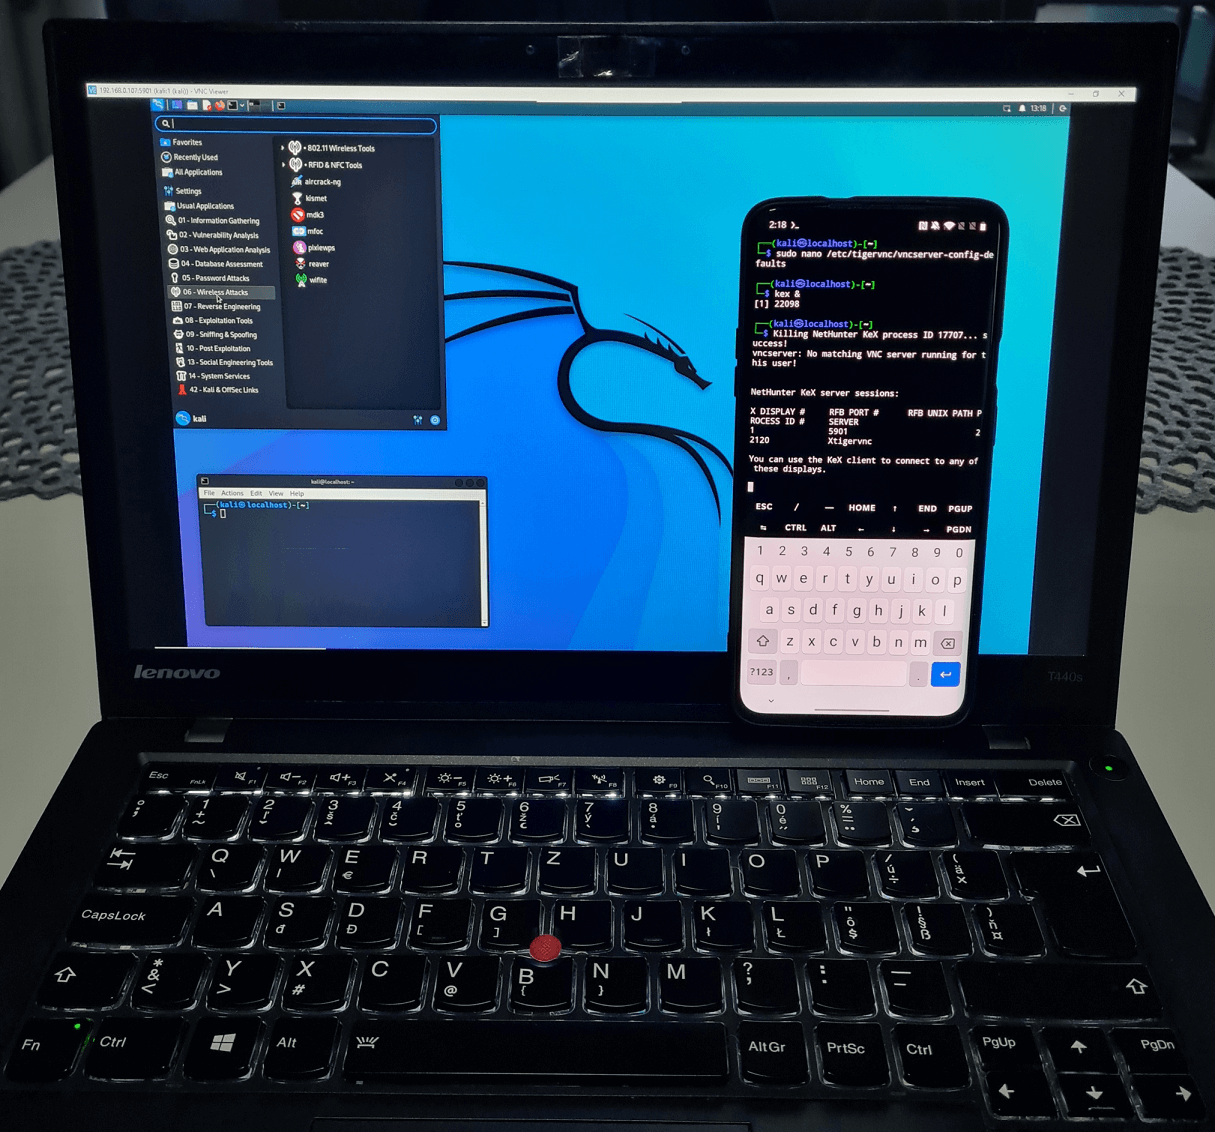
By default, the VNC configuration only allows local connections directly from the device. Therefore, we will need to change the VNC configuration again using the nano editor: sudo nano /etc/tigervnc/vncserver-config-defaults and add the line $localhost = ”no”; to the end of the file, as shown in Figure 11.
Using ifconfig, get the IP address of the Kali smartphone and start KeX using the kex command in the NetHunter command line interface.
On your computer, use a VNC client, I use VNC Viewer. In the client application to connect, enter the IP address of the Kali NetHunter device and the default port 5901. When prompted, enter the password you created earlier for the KeX server. If all goes well, you should be successfully connected to the full version of Kali running on your mobile device.
In this tutorial, we have covered installing the full version of Kali NetHunter chroot on an Android device without root access in the Termux app. This gives us the ability to use the Kali Linux CLI or GUI on a smartphone. Since NetHunter runs in the Termux context (no kernel driver support), we cannot execute HID, BadUSB, and wireless attack scenarios. Since using the GUI on a smartphone screen can be inconvenient, you can physically connect a keyboard and mouse or use an HDMI cable to display the screen on a computer. Without using any additional hardware, a user can connect to Kali NetHunter locally using SSH or VNC.