
01.07.2025
6 min
1379

Learn how to check Wi-Fi adapter compatibility in Kali NetHunter on Android and configure it to work in monitor, injection, and AP modes. The article covers key ways to diagnose the adapter, choose the right chipset, use an OTG cable, install driver modules, and test via the terminal. The instructions are suitable for OnePlus, Pixel, Nexus, and other rooted devices.

If you are interested in hacking Wi-Fi with NetHunter, you need a supported Wi-Fi adapter in your system that can support various wireless modes and features. In this blog post, we will explain what types of Wi-Fi adapters there are, how to check their compatibility and support, and what different Wi-Fi modes you can use for penetration testing.
First, it’s important to explain that Wi-Fi adapters can support several different modes that are used for different purposes in wireless penetration testing. Here are some of the most common modes and their purpose:
Client Mode: Also known as Managed Mode or Station Mode. This mode allows the adapter to function as a wireless client that can be used to connect to a wireless network and perform reconnaissance and other types of attacks.
Monitor Mode: This mode allows the adapter to listen to all wireless network traffic within range, regardless of whether the adapter is connected to the network or not. It is used to capture wireless network traffic and analyze it later.
Inject Mode: This mode allows the adapter to inject wireless network packets that can be used to perform various types of wireless attacks, such as deauthentication attacks that can be used to disconnect devices from the wireless network.
Access Point Mode: This mode allows the adapter to function as a wireless access point that can be used to create a rogue access point and perform man-in-the-middle attacks.
Ad-hoc Mode: This mode allows two or more wireless devices to connect directly to each other without the need for an access point. It is used to set up a peer-to-peer wireless network, which can be useful for penetration testing in situations where an access point is not available.
If you want to perform wireless attacks, you will need an OTG adapter and an external Wi-Fi adapter that supports the above modes, since not every Wi-Fi chipset can switch to monitoring mode or is capable of sending packets. In addition to the hardware, we will need a rooted Android smartphone flashed with a custom NetHunter kernel that includes driver support for external wireless adapters, and NetHunter itself. In the next section, we will explain how to enable these necessary modes.
In some cases, enabling monitoring and packet injection is even possible on the internal Wi-Fi adapter for devices like the Nexus 5 or OnePlus 7. Other devices may support this natively, but after flashing custom drivers, it can also work. If your device does not support the internal wireless adapter, you will need an external Wi-Fi adapter.
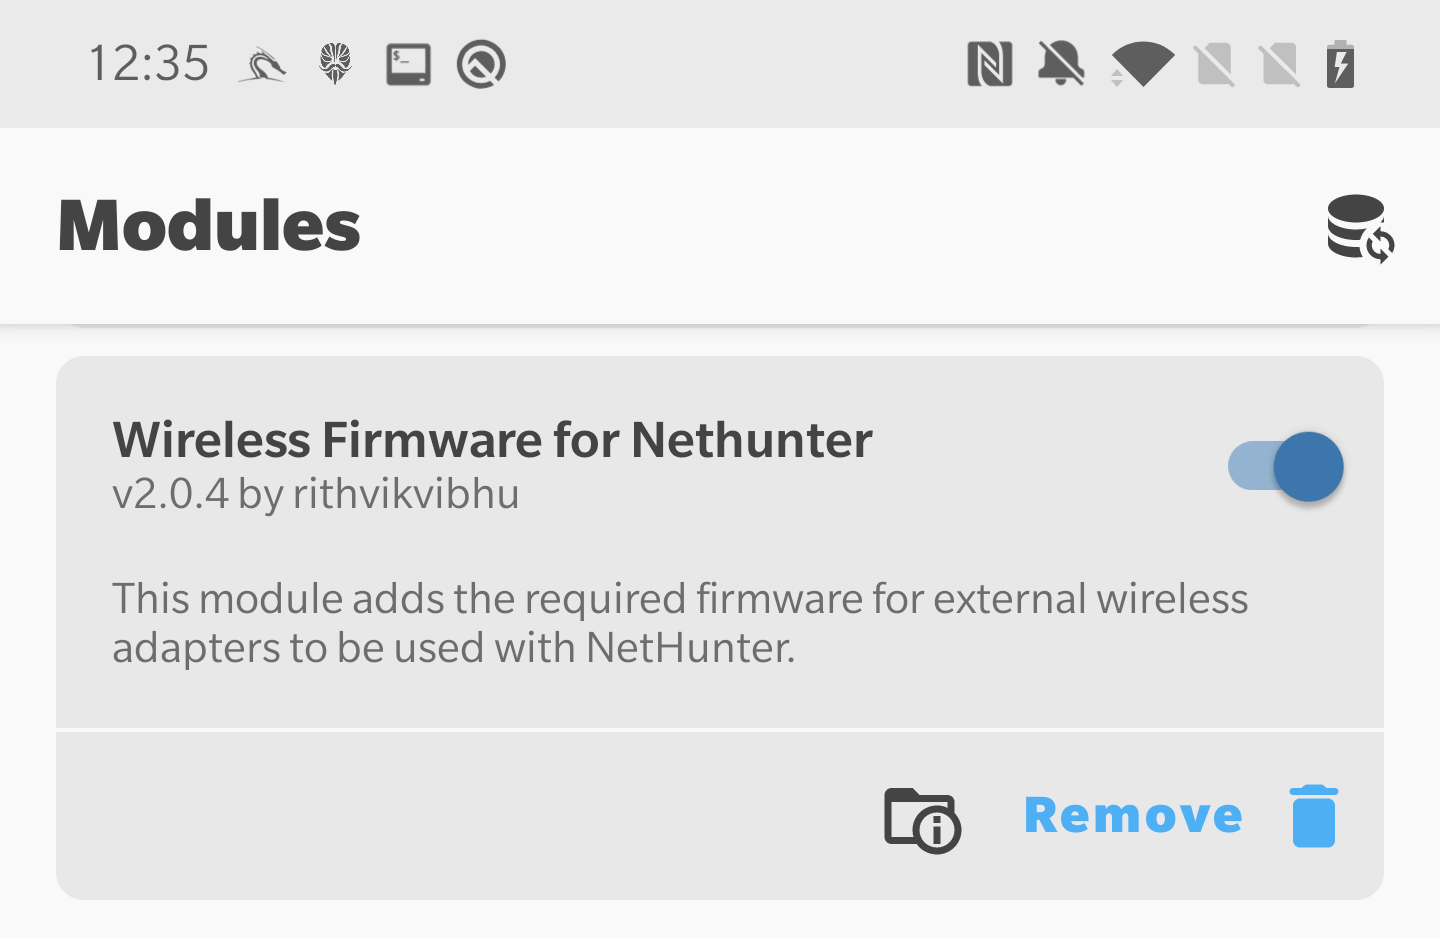
For the adapter to work properly, you need to root your device and install a custom kernel that includes these Wi-Fi drivers. Luckily for us, the NetHunter kernel images support the most popular adapters by default. Alternatively, if your adapter is still not recognized by the system properly, you can install the Wireless Firmware for Nethunter module available in Magisk, which supports various chipsets.
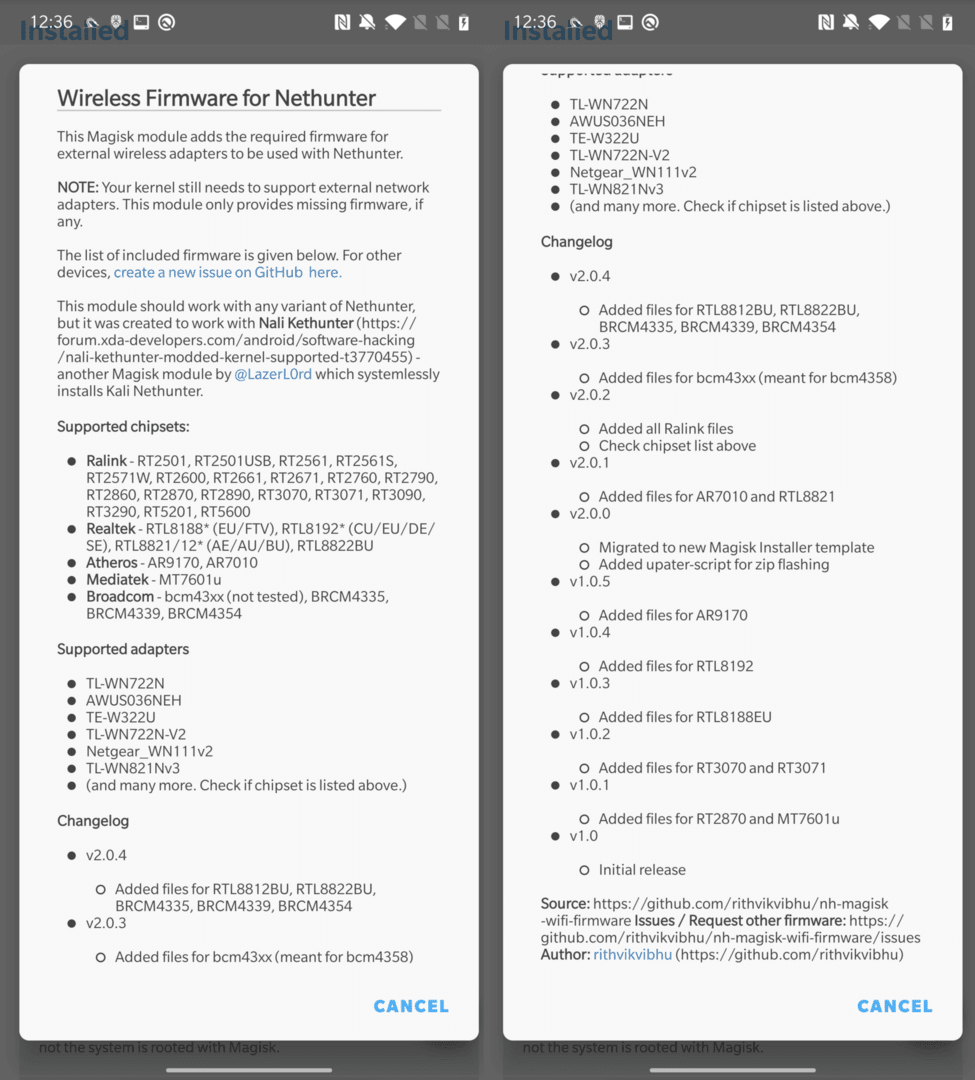
If your chipset is not listed, then I’m afraid you will either have to buy a supported one or find, compile, and install the firmware manually.
If you already have a Wi-Fi adapter at home and you don’t know its chipset name and Wi-Fi hacking support, this section will help you learn as much as possible about your external device. Connect the Wi-Fi adapter to your device using OTG. Open a terminal application such as NetHunter Terminal or Termux and use the lsusb command to display information about connected USB devices.
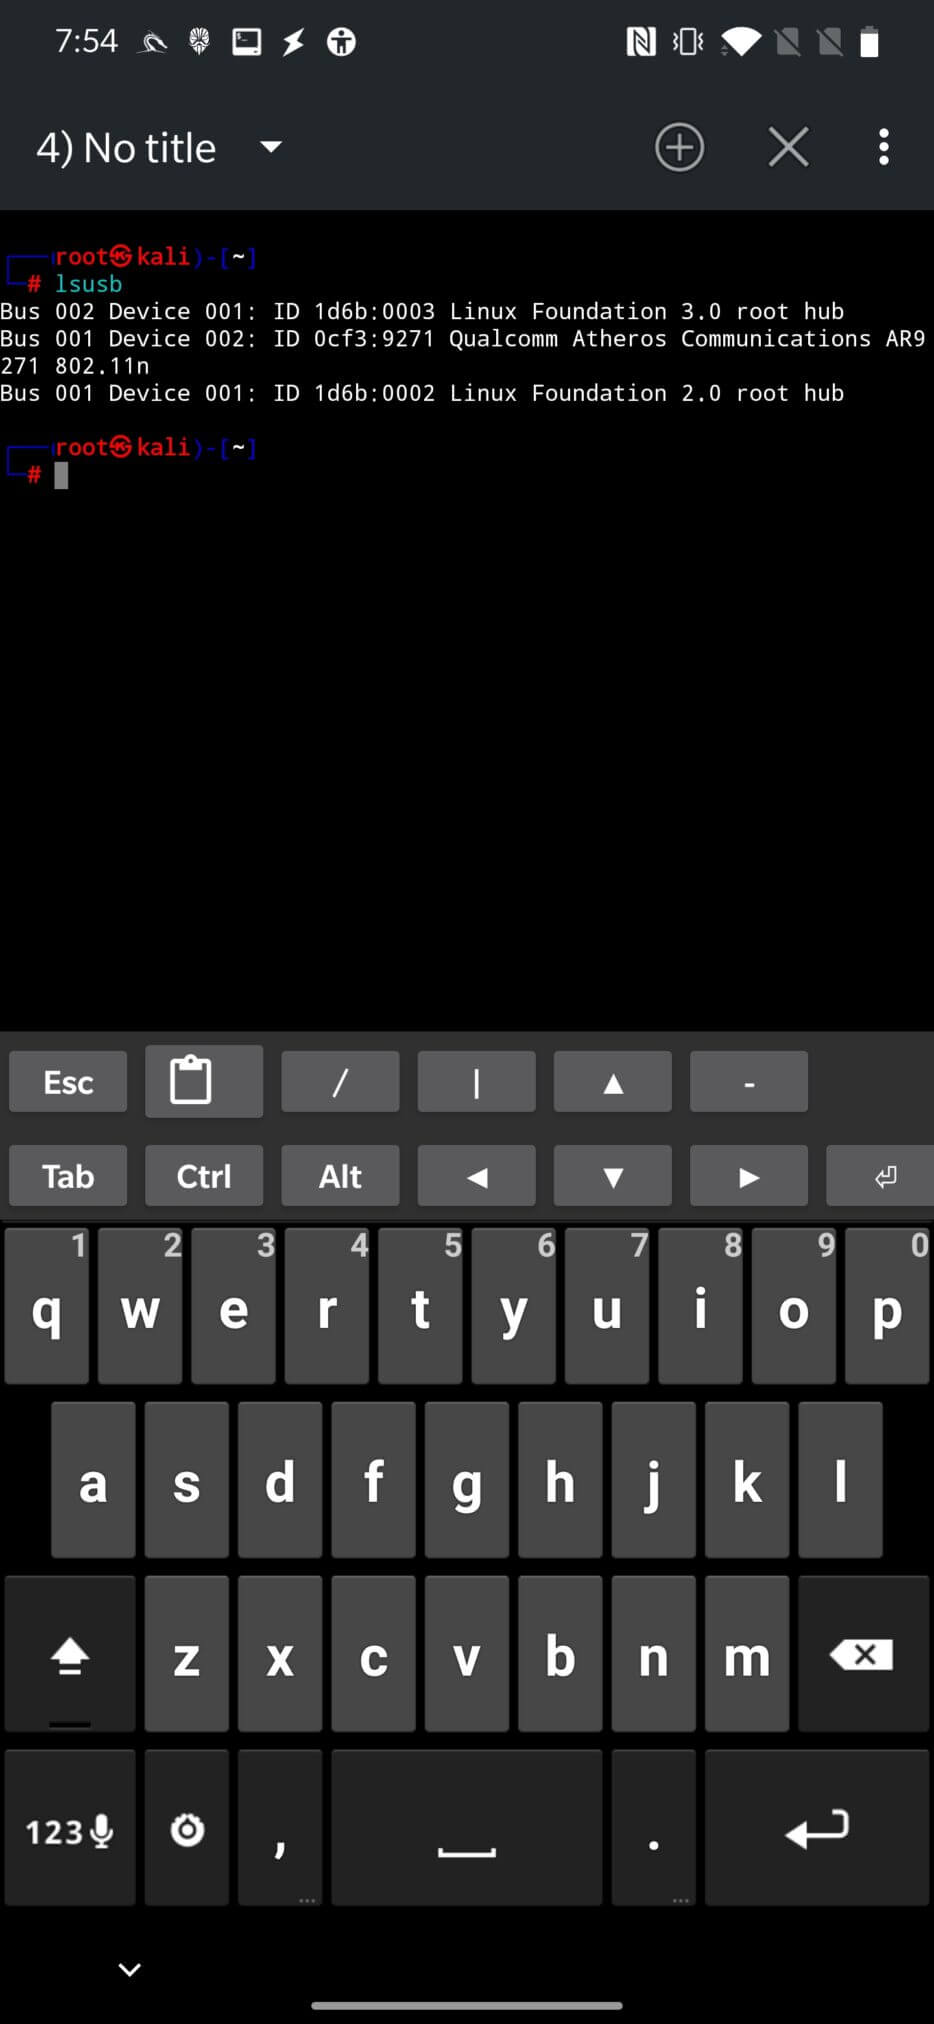
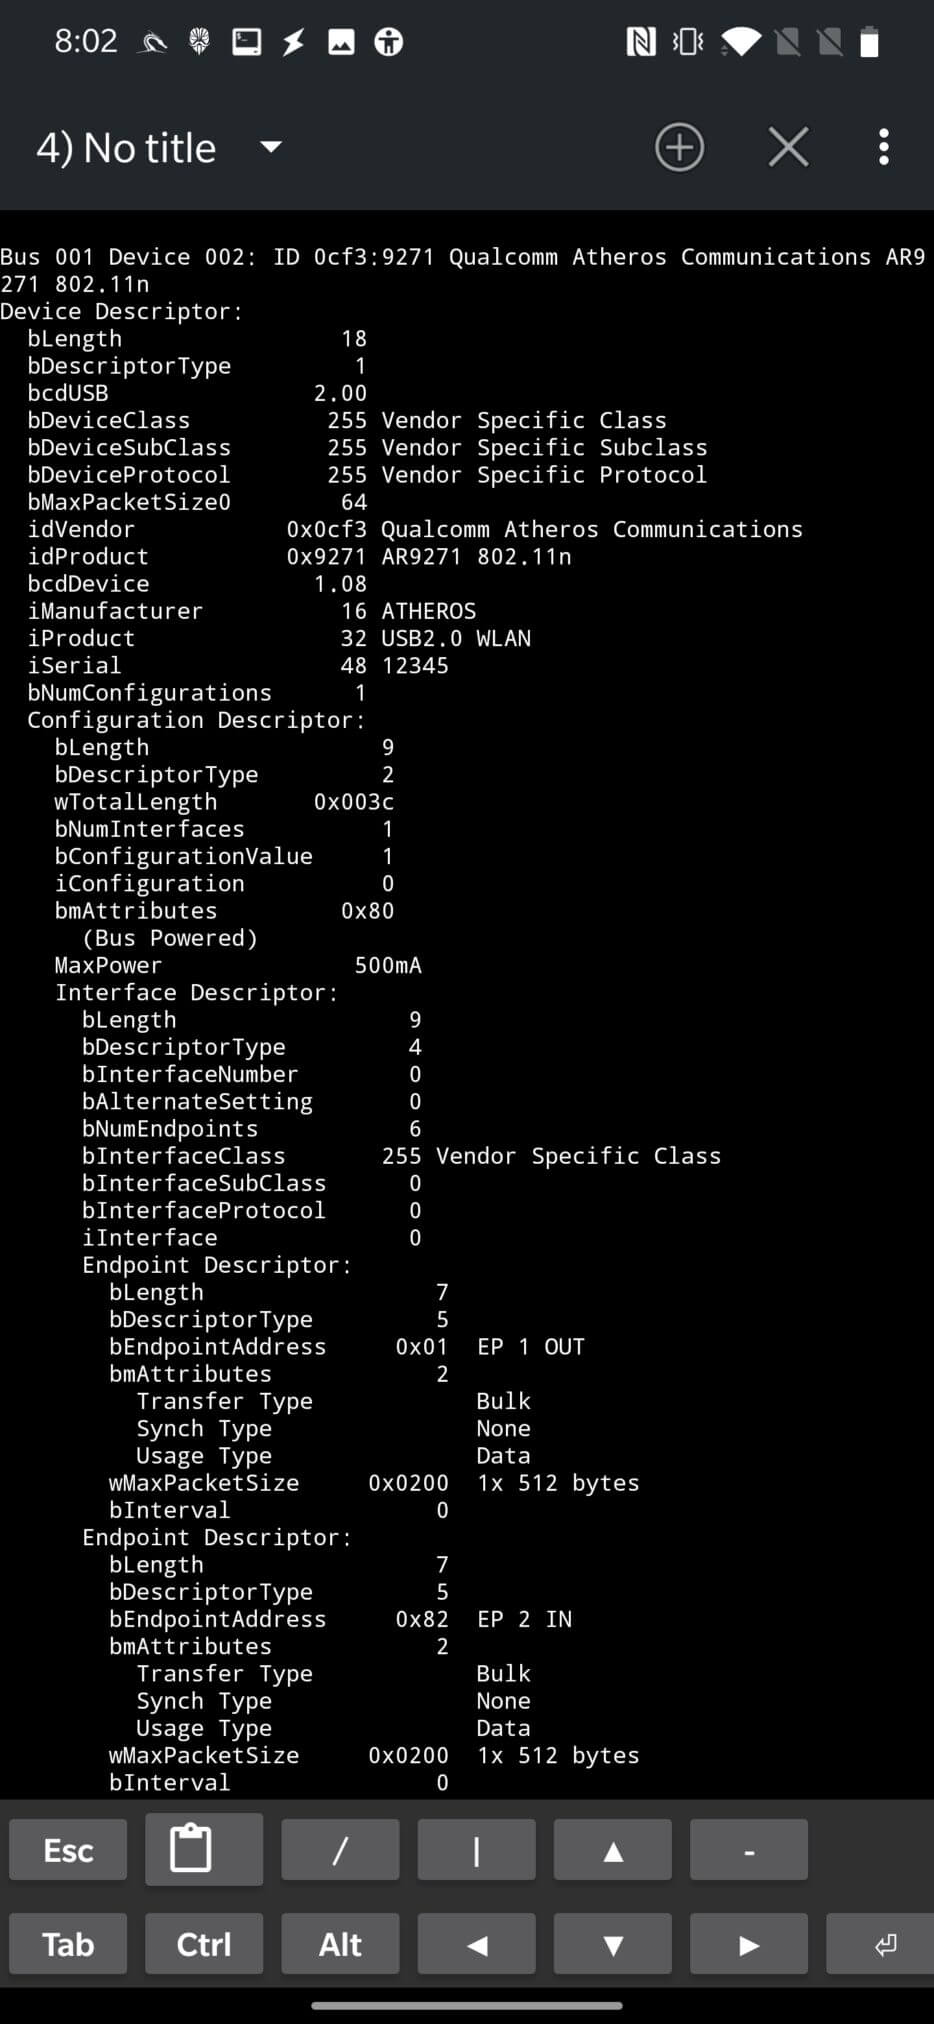
From the screenshot above, you can see that the lsusb command returns the name and chipset of the connected Wi-Fi adapter. To get detailed information, including a description, you can use an additional argument to vv , as shown in Figure 4.
Alternatively, you can use airmon-ng to get the chipset, driver name, and interface provided for it, as shown in Figure 5.
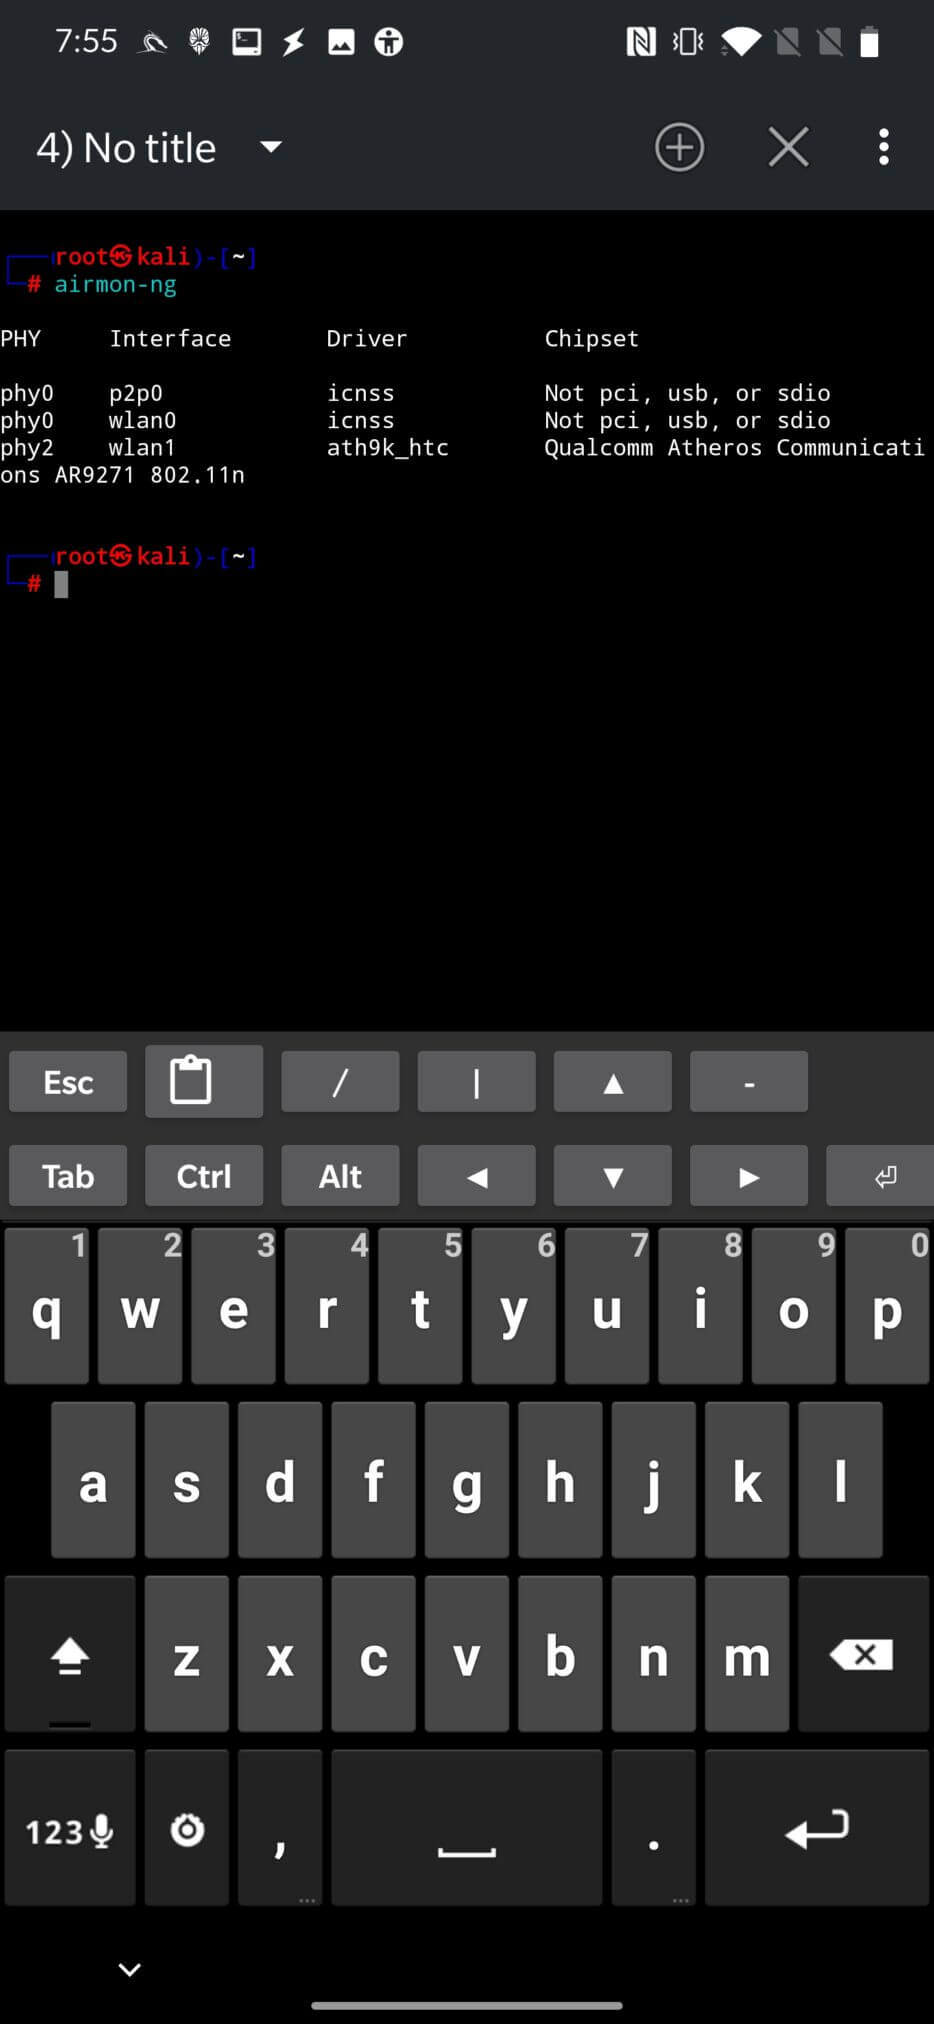
Once we know our hardware, we need to find out if it supports monitoring mode, wireless packet injection, and access point mode.
This can be an important step before purchasing a Wi-Fi adapter to find out if it supports all the required modes. A complete list of wireless adapters that support monitoring and packet injection modes that should be compatible with Kali Linux can be found at deviviki .
Additionally, you can check all supported modes of your adapter using the iw list command.
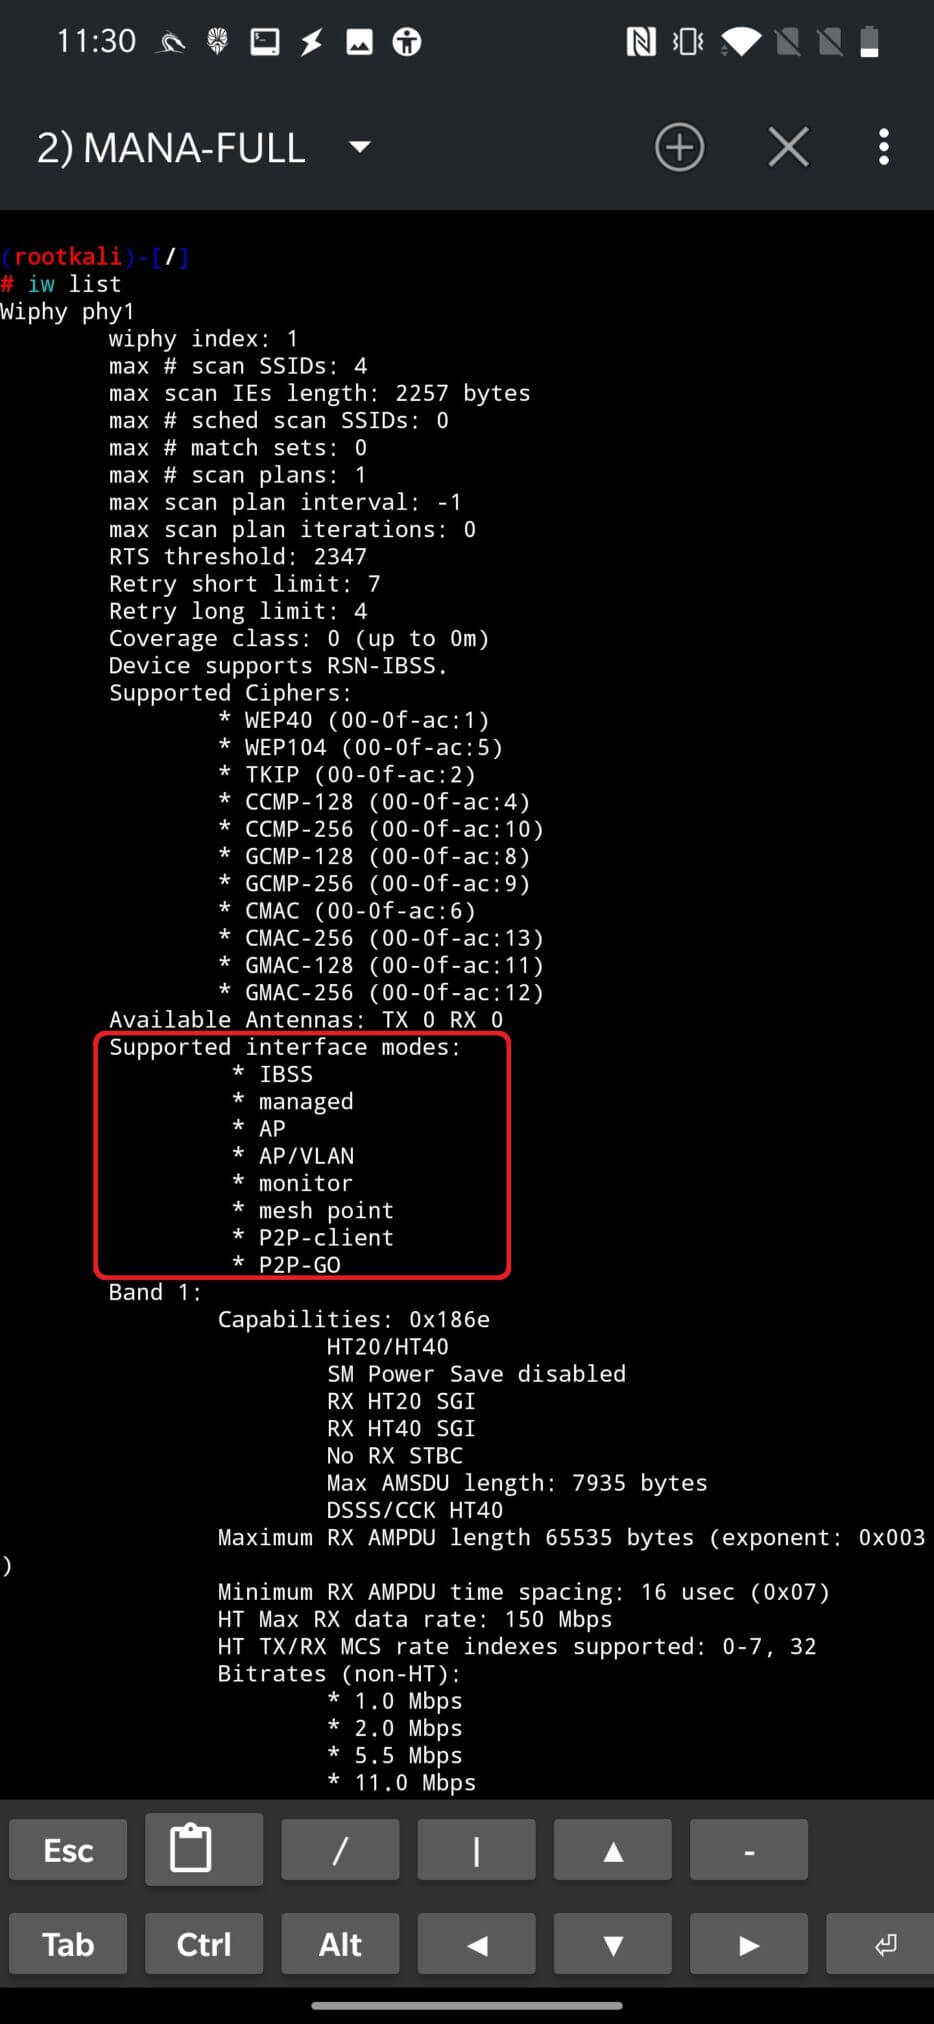
From the output above, which is important for us, we can say that it supports the creation of an access point (*AP) and the monitoring mode (*monitor). For more information about the supported interface modes, see the iw command mode documentation.
The output also contains information about the valid interface combinations, as you can see in Figure 7. From the screenshot below, you can see that my adapter supports only one interface combination. The number of combinations depends on the number of lines starting with “*”.
Explaining the above result, the adapter can have up to two network interfaces in managed P2P client mode, up to two interfaces in access point (AP), mesh point, P2P-go, and their total number cannot exceed two, where they must be on the same channel.
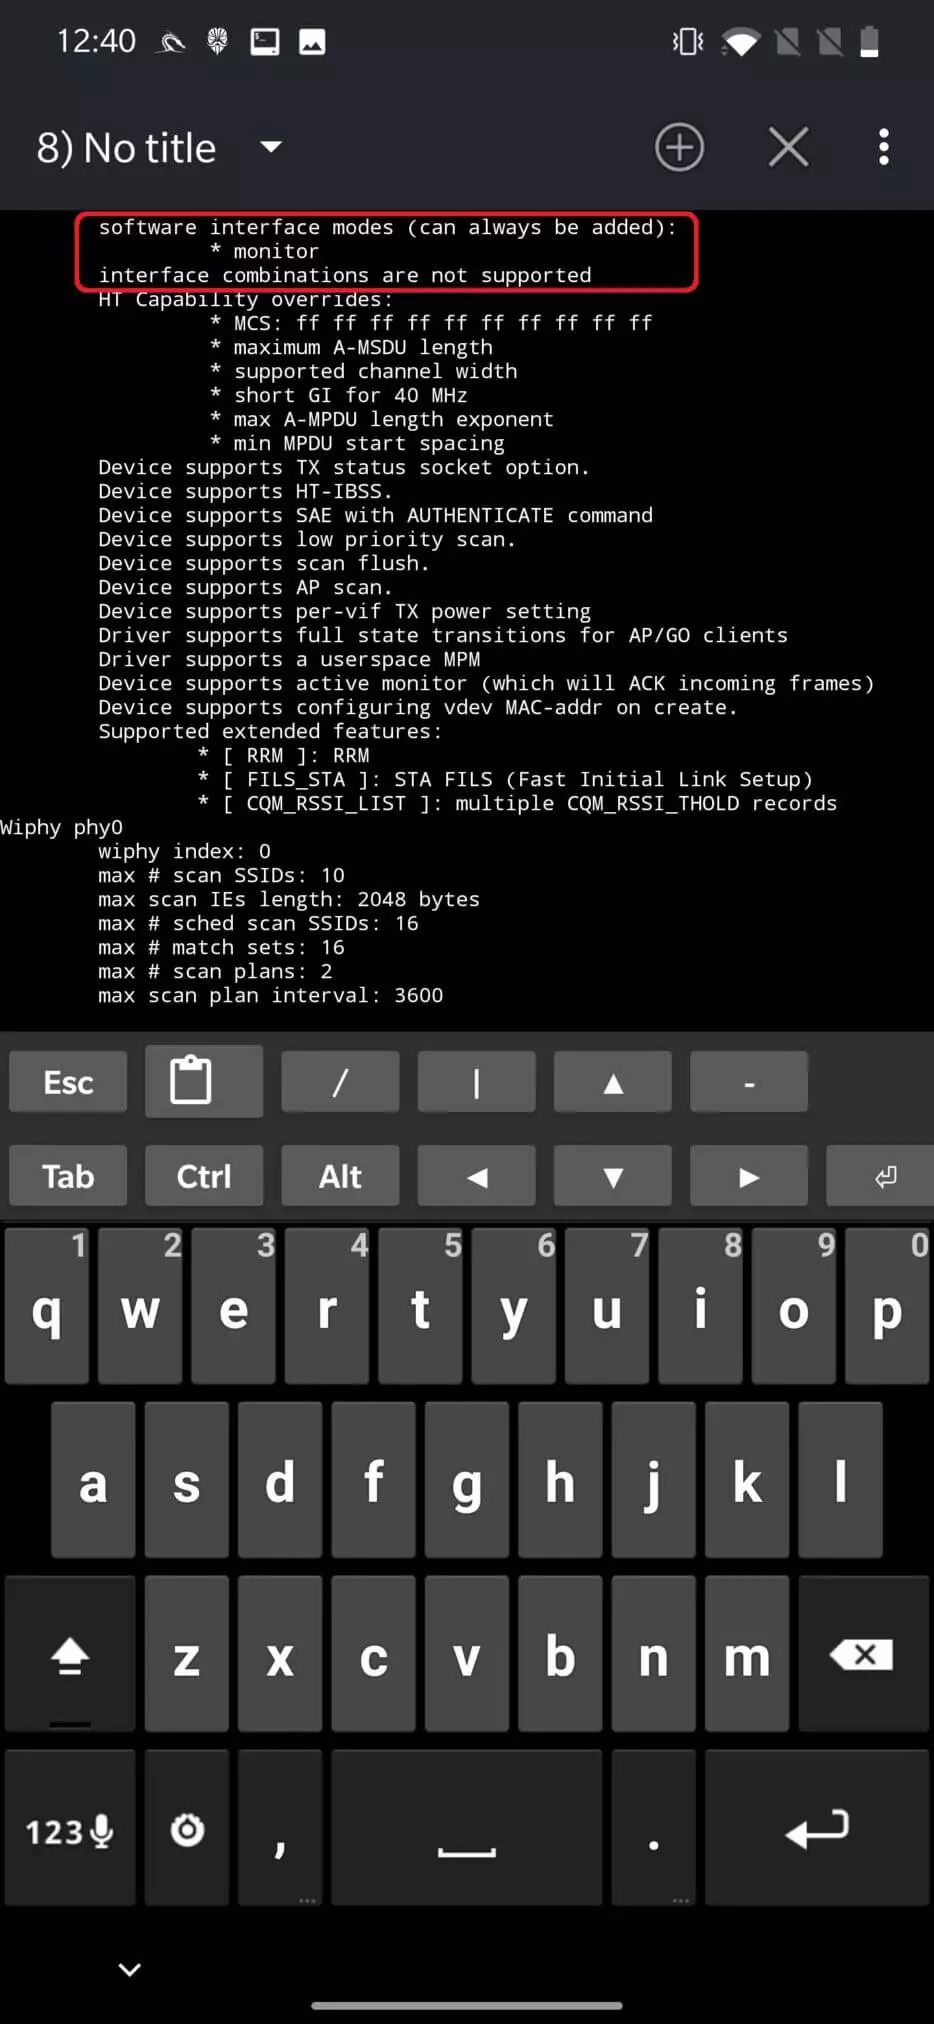
In the worst case, your adapter supports monitor mode (software interface modes), but does not support interface combinations, as seen in Figure 8.
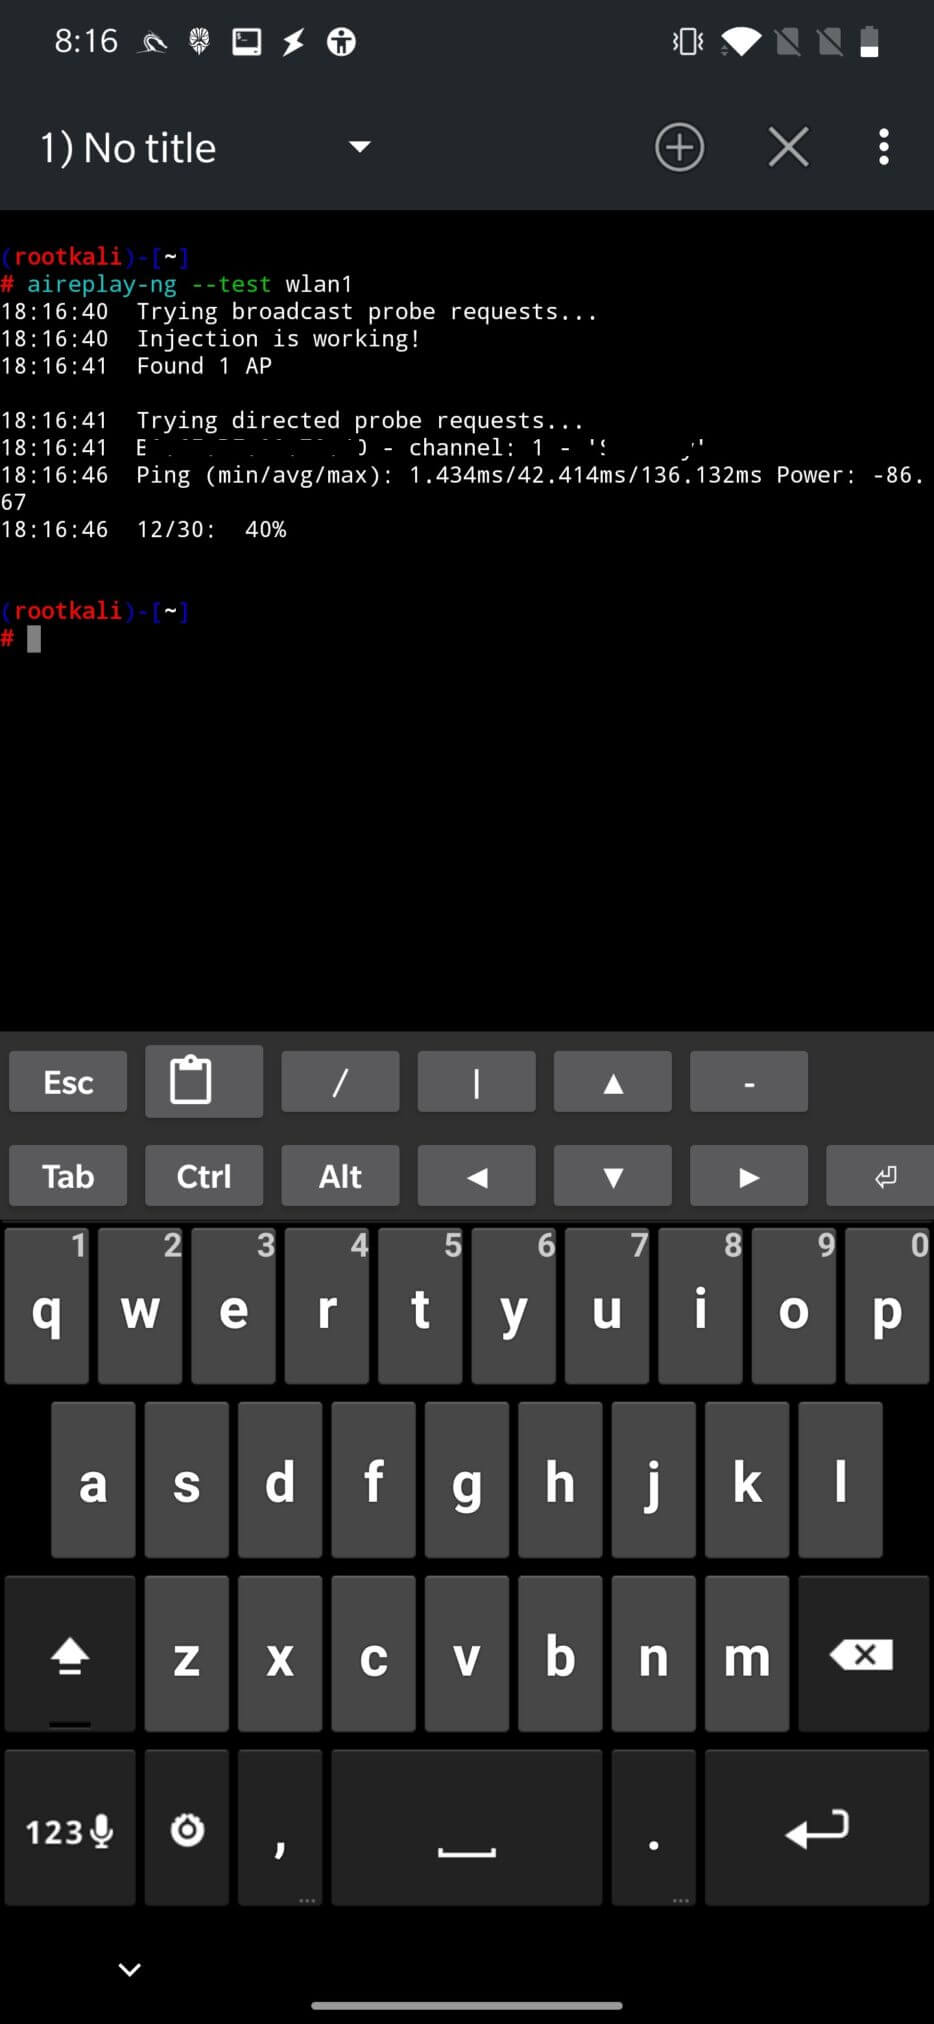
Using the aireplay-ng toolkit, we can test our wireless adapter to see if it supports packet injection, namely by using the aireplay-ng –test wlan1 command, where wlan1 is our external wireless interface. The successful result of the command can be seen in Figure 9.
You can start and stop monitoring mode for your external (wlan1) or internal (wlan0) Wi-Fi adapter directly from the “User Commands” menu in NetHunter, as seen in Figure 10.

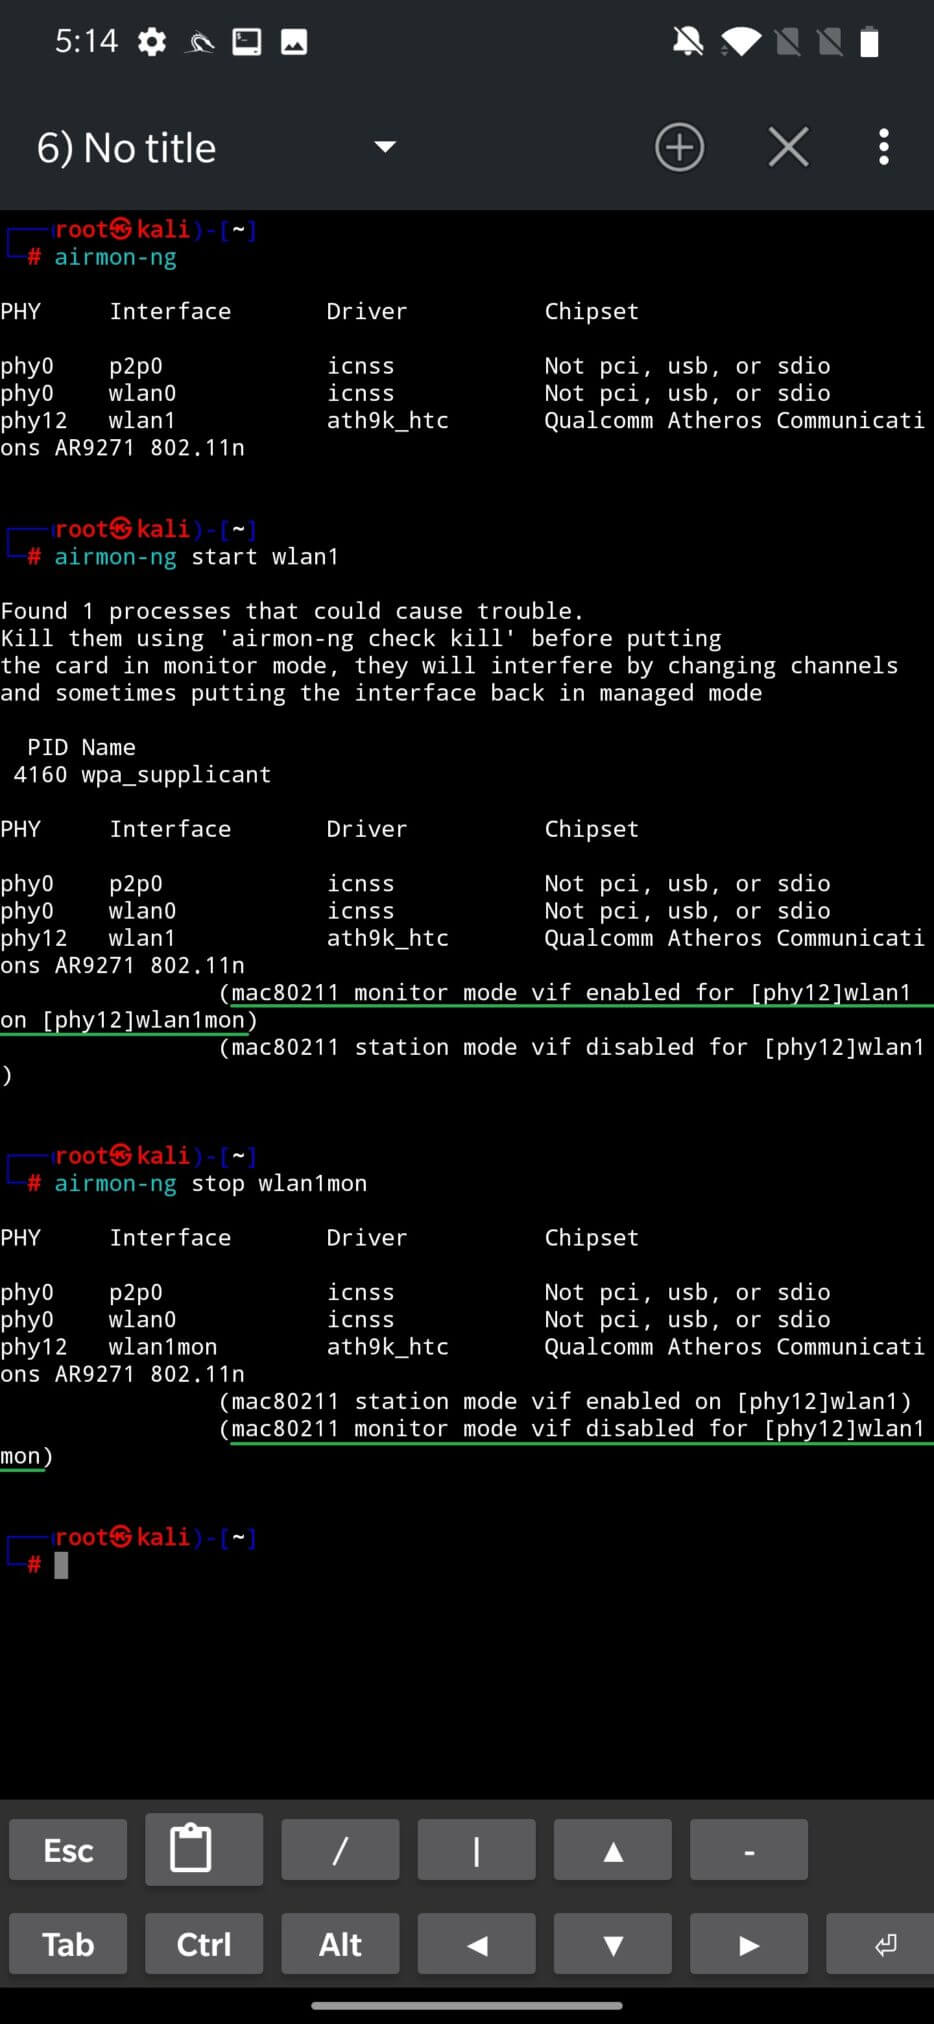
Alternatively, you can perform the same task using the NetHunter terminal. To start monitoring mode on the wlan1 interface, you can use the command airmon-ng start wlan1. To stop monitoring mode and return the adapter to client mode, use airmon-ng stop wlan1mon. Make sure that you disable the same interface that is in monitoring mode, as shown in Figure 11.
For some tools, such as Wi-Fi, you don’t need to worry about starting monitoring mode, the tools will take care of it themselves, but this topic will be discussed in another blog.
Buying an adapter that supports all modes will save you a lot of nerves.
To be more specific and even visual, here are two lists of wireless USB adapters, their pictures, chipset names, monitor and injection support, specifications, and for some even the maximum transmission power that can be set. Depending on the chipset name, you can find and buy them at your local store or online on Amazon, AliExpress, eBay, etc.
When choosing between adapters, I recommend choosing one based on their chipset and NetHunter kernel support. The official Kali documentation lists supported adapters with standard NetHunter kernel support.
We have covered the initial setup of an Android device before starting Wi-Fi hacking. In summary, your device should be rooted and ideally flashed with NetHunter with kernel support for the supported wireless chipsets.
Once your device is ready, you will need an OTG adapter to connect the Wi-Fi modem to your smartphone. If you already have adapters at home, you can simply determine which chipset they use and their support for monitoring mode, the ability to create an access point and the option to inject wireless packets.